Looking to add a splash of personality to your home without breaking the bank? Affordable accent wall ideas have gained immense popularity because they allow you to transform a space with minimal expense while making a big impact.
In this article, you’ll discover a variety of creative and budget-friendly ways to enhance your rooms. From bold paint choices to textured finishes and DIY projects, these ideas are perfect for anyone eager to refresh their space with style and flair—all without overspending.
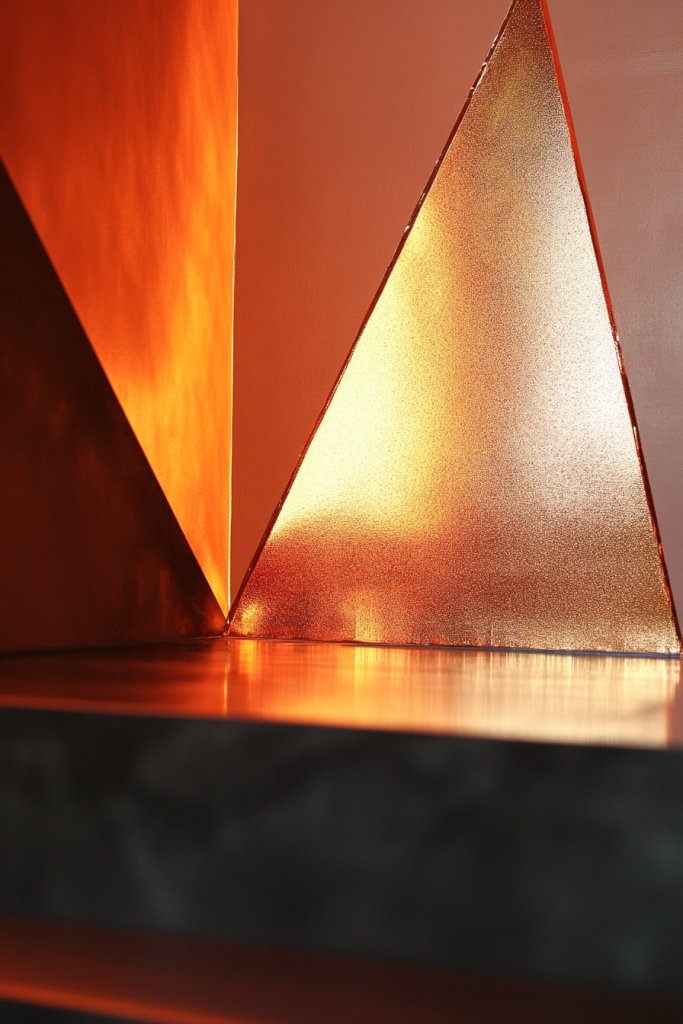
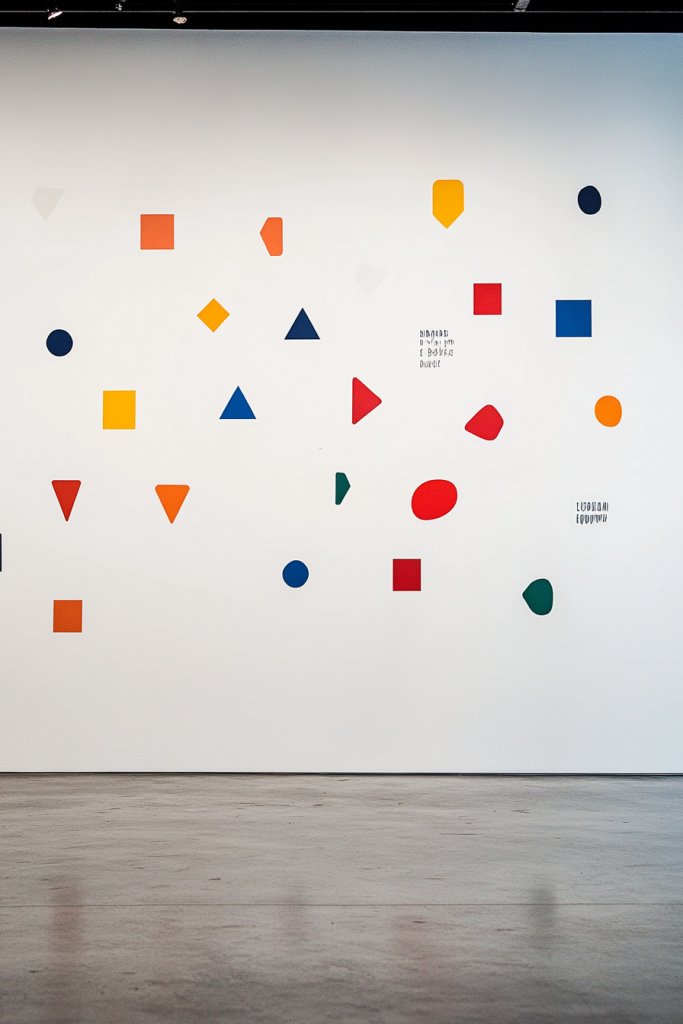
1. Painted Geometric Patterns for a Modern Touch
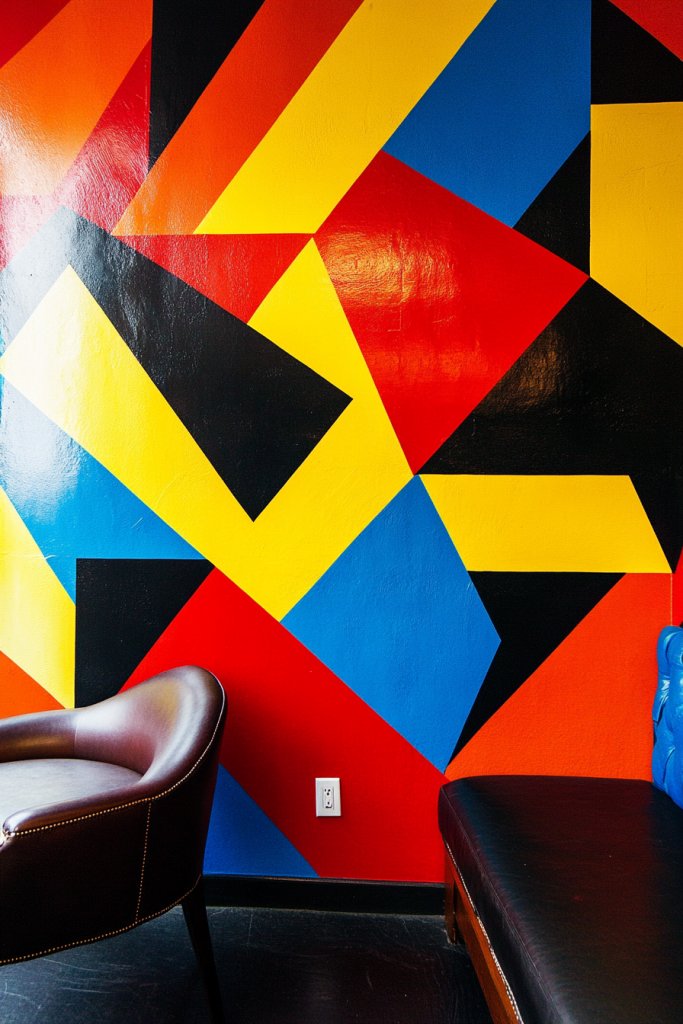
Ever tired of the same old plain walls? Looking for a quick way to add personality without breaking the bank? Geometric patterns can instantly elevate your space, giving it a fresh, modern vibe. It’s like wearing a statement accessory—simple but impactful. Who knew a few shapes and colors could transform an entire room?
Imagine crisp triangles and bold squares swirling across your wall in vibrant hues or subtle neutrals. The lines are sharp, the angles precise, creating an eye-catching mosaic. The texture varies as paint catches the light differently on each shape, adding a tactile dimension. It’s a visual feast that draws your eye and sparks conversation.
You can go big with oversized patterns or keep it delicate with tiny, intricate shapes. For a boho look, combine earthy tones with organic, uneven shapes. In a modern apartment, stick to monochrome or metallic shades for sleekness. Adjust the pattern’s complexity based on your room size—smaller for tiny spaces, bigger for larger walls.
Start by sketching your design or using painter’s tape to outline geometric shapes. Pick contrasting colors or shades of the same hue for depth. Use high-quality painter’s tape for clean lines and sharp edges. Apply two coats of paint if needed, and remove tape while the paint is still slightly wet for crisp borders. For a more polished look, consider stenciling different shapes with a stencil kit.
Add metallic or matte finishes to create different effects. Incorporate your favorite colors or match your decor palette for cohesion. Use contrasting textures—glossy paint on matte wall paint—for extra flair. Personal touches like adding a subtle shimmer or metallic accents can make your geometric wall uniquely yours.
Geometric patterns are versatile and timeless, fitting both minimal and maximal styles. They make your space look curated and contemporary without a hefty price tag. Once you master the technique, you’ll see how easily you can update your entire home’s look. Ready to turn your wall into a modern art piece?
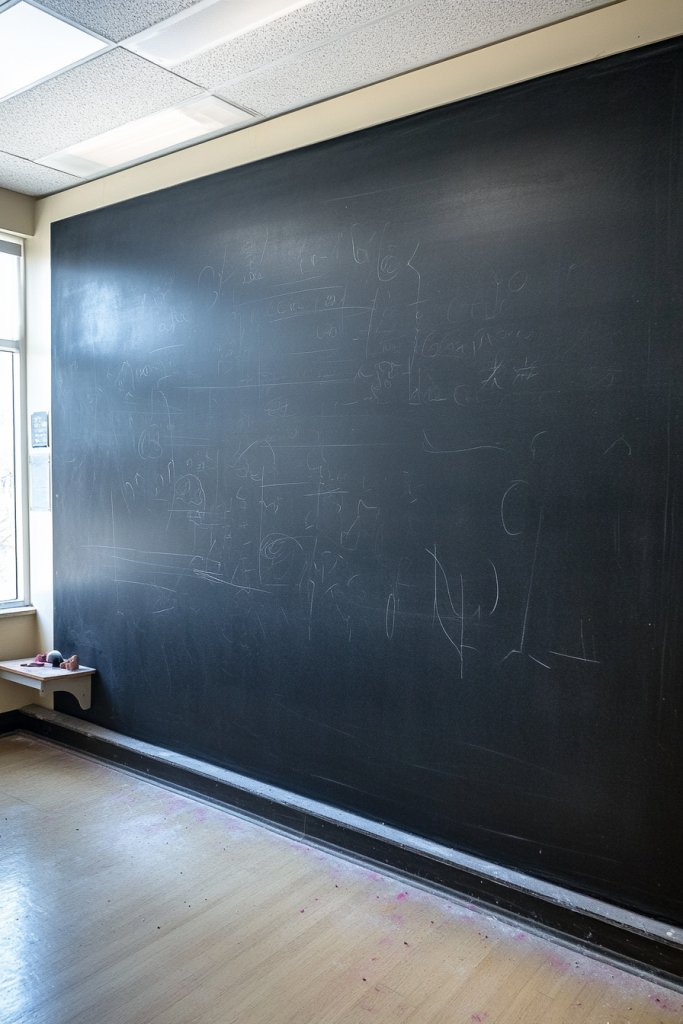
2. DIY Washable Chalkboard Wall for Functional Style
Ever wish your walls could double as a giant notepad? A chalkboard wall makes your space more interactive and fun, especially if you love doodling or need a handy spot for reminders. It’s the perfect mix of practicality and style, without the expense of buying a separate whiteboard. Plus, it adds a touch of quirky charm.
Picture a sleek black surface covering an entire section of your wall, ready to be scribbled on. Chalk dust softly settles, giving a nostalgic vibe. You can draw playful doodles, write daily affirmations, or even map out your next travel adventure. The surface is smooth, matte, and invites creativity, transforming your wall into a living canvas.
Choose a bold color like deep green or navy for a more subtle look, or stick with classic black for maximum contrast. You can make it a feature wall in your kitchen, home office, or kids’ playroom. Consider framing the chalkboard with decorative trim or painting a border for a finished look. This idea adapts well to both small areas and large expanses.
Start by cleaning the wall thoroughly to ensure paint adhesion. Apply a primer if necessary, then paint with chalkboard paint using a roller or brush, following the manufacturer’s instructions. Let it dry completely—usually 24 hours—before using chalk. To keep it washable, avoid oil-based chalk or markers. You can even add a coat of clear sealant for extra durability. Chalkboard paint is budget-friendly and easy to find at hardware stores.
Create themed sections, like a weekly menu or motivational quotes, with colorful chalks. Use different chalk textures—chalk markers add a sleek, vibrant look. Add decorative magnetic clips or small shelves for holding chalk and erasers. Personalize with stencils for neat lettering or shapes that match your decor style.
A chalkboard wall turns an ordinary space into an interactive hub. It encourages family communication, planning, or just plain fun. Once you see how easy it is to refresh, you’ll want to tackle more walls. It’s a creative upgrade that keeps your space lively and functional.
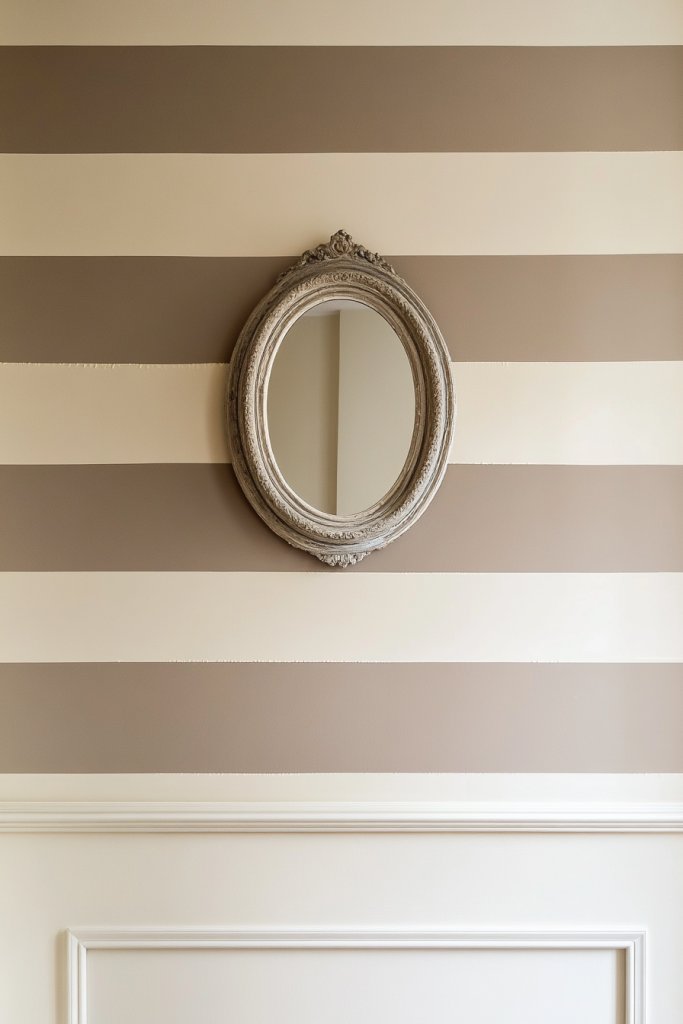
3. Striped Walls with Painter’s Tape for Classic Elegance
Looking for a simple way to add sophistication to your room? Stripes never go out of style and can make any wall appear taller or wider. Plus, it’s one of the easiest DIY projects with a big visual impact. Who doesn’t love a classic pattern that looks both fresh and timeless?
Imagine clean, crisp lines running horizontally or vertically across your wall. The alternating colors create a rhythmic pattern that guides your eye through the space. The texture of the paint, combined with the sharp tape lines, adds depth and dimension. It’s like wallpaper, but more customizable and less expensive.
Choose bold contrasting colors for a dramatic look or soft pastel shades for a subtle elegance. Vertical stripes can make ceilings seem higher, while horizontal stripes add width. For a modern touch, use metallic or matte finishes. You can even vary stripe widths—thin pinstripes or wide bands—to match your style.
Start by measuring your wall and marking where the stripes will go. Use painter’s tape to create your pattern, pressing down firmly to prevent bleeding. Paint each section carefully with a roller or brush, letting each coat dry before removing the tape. For sharp edges, use a small angled brush to touch up the lines. Multiple coats might be needed for vibrant colors.
Add a touch of shimmer with metallic paints or incorporate textured paints for a tactile effect. Layer different shades of the same color family for a subtle gradient. Use painter’s tape creatively to create unique stripe patterns or chevrons. Consider adding a glossy topcoat for extra sheen.
Striped walls add a polished, gallery-like feel to any room. They’re easy to update with new colors or widths over time, giving you flexibility. Once you master the technique, you can experiment with different patterns, making your home decor truly personalized. Ready to stripe your way to style?
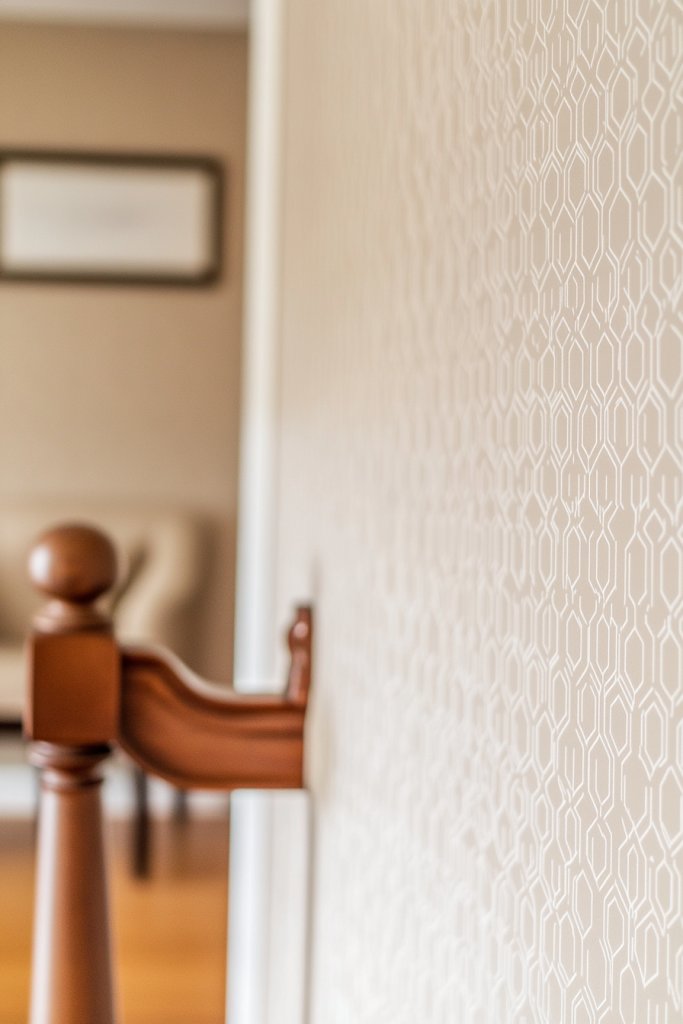
4. Peel-and-Stick Wallpaper for Instant Pattern and Texture
Want a quick makeover without the mess of traditional wallpaper? Peel-and-stick wallpaper offers an easy, damage-free way to add pattern and texture. It’s perfect for renters or anyone hesitant about permanent changes. Plus, it’s a fun weekend project that instantly upgrades your space.
Visualize a wall covered in modern geometric patterns, botanical prints, or textured designs that mimic fabric or stone. The self-adhesive backing means you can reposition and adjust until it’s just right. The patterns come alive with vibrant colors or subtle neutrals, transforming plain walls into visual focal points. It’s like wallpaper, but without the commitment.
Choose from a wide array of patterns to match your decor—think minimalistic, boho, or luxe styles. Use it as an accent wall or cover an entire room. For seasonal updates, swap out patterns or colors easily. Combine different prints or textures for a layered, eclectic look that reflects your personality.
Start by cleaning and leveling your wall surface. Carefully peel the backing and align the wallpaper with your markings. Smooth it out with a squeegee or plastic card to remove bubbles. If needed, trim excess with a sharp blade for clean edges. For best results, work slowly and from the center outward. No special tools required—just patience and a steady hand.
Add decorative molding or paint borders to frame your wallpaper. Mix patterns or colors for a custom mural effect. Use peel-and-stick decals to complement the design. For a playful touch, create a mural with multiple strips of different patterns, making your wall uniquely yours.
Peel-and-stick wallpaper makes decorating accessible and stress-free. It allows endless creativity without the fear of permanent mistakes. Once you see the dramatic change, you’ll feel empowered to experiment further. It’s a simple, affordable way to make a big impact.
5. Faux Brick or Stone Panel Wall for Industrial Charm
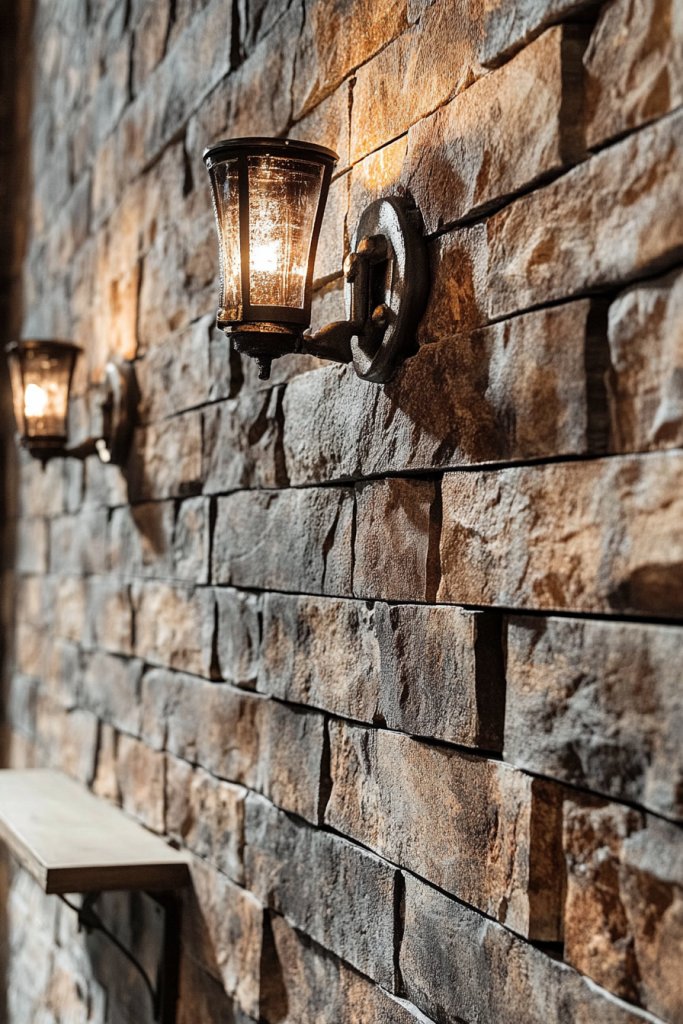
Dreaming of that rustic, industrial vibe but don’t want the expense or mess of real brick? Faux brick or stone panels deliver authentic texture and charm at a fraction of the cost. It’s a game-changer for transforming bland walls into focal points that scream character.
Picture weathered bricks or rugged stone attached seamlessly to your wall, creating a tactile surface. The rough textures catch light and shadow differently, adding depth. The color palette ranges from classic reds and grays to more modern monochromes. It’s like walking into a trendy loft without leaving your home.
Use it behind a sofa or fireplace for maximum impact. Mix with smooth paint or wood accents for contrast. For a more contemporary look, choose panels with sleek, uniform patterns. You can also paint or stain the panels to match your decor style or to age the look further.
Start by cleaning the wall thoroughly. Measure and cut panels to size with a saw or scissors. Use construction adhesive or interlocking systems to attach panels securely. Ensure even spacing and check alignment as you go. Finish with sealant or paint if desired to enhance durability or color. DIY installation is straightforward with basic tools.
Add metallic or matte finishes for a vintage or modern twist. Incorporate decorative shelves or lighting fixtures to highlight the texture. Mix different shades of gray or red for a layered, aged appearance. Personal touches like faux mortar lines can add realism.
Faux brick and stone panels are perfect for creating an edgy, cozy vibe without the hefty renovation costs. They’re durable and low maintenance, making them ideal for busy spaces. Once installed, you’ll feel like an interior designer—ready to tackle more bold ideas!
6. Ombre Paint Gradient for Subtle Sophistication
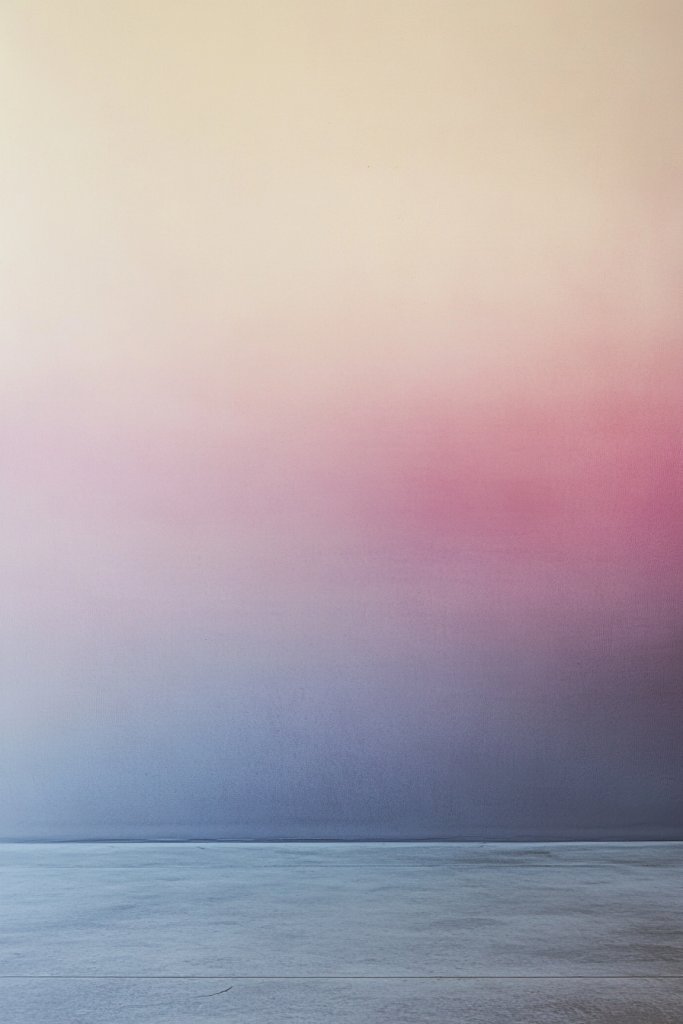
Looking for a wall that whispers elegance without loud patterns? An ombre gradient offers a soft, sophisticated transition of color that adds depth. It’s a subtle way to elevate your room’s ambiance while staying understated. Who says you need busy designs to make a statement?
Visualize a gentle shift from light to dark or one hue blending smoothly into another. The transition creates a calming, almost hypnotic effect that draws your gaze in. The texture remains flat, but the color variation gives a sense of movement and depth. It’s like a watercolor painting come to life on your wall.
Choose a monochrome palette for a minimalist look or go bold with contrasting colors for a dramatic effect. Use it in bedrooms for a restful vibe or in living rooms to add visual interest. For seasonal variation, switch to warmer tones in winter and cooler shades in summer. Play with the intensity of the gradient for different moods.
Start by choosing two or more shades within the same color family. Use a sponge, brush, or roller to blend the colors on the wall, working from one side to the other. Apply a primer if needed, then start with the lighter shade. Gradually add darker hues and blend seamlessly. Keep a wet edge to avoid harsh lines. Multiple thin coats work better than one thick layer.
Incorporate metallic or pearlized paints for a shimmering effect. Use stencils or masking tape to add subtle patterns or shapes within the gradient. Experiment with different blending techniques—wet-on-wet or dry brushing—to achieve unique textures. Personal touches like metallic accents can make the gradient pop.
An ombre wall adds understated elegance that complements various decor styles. It’s forgiving for beginners because perfect blending isn’t always necessary. Once you see the serene transition, you’ll want to try other color combinations. It’s a versatile, stylish choice for any home.
7. Stenciled Artistic Motifs for Custom Decor
Want to add a touch of artistry without hiring a professional? Stenciled motifs let you create custom designs that reflect your personality. Whether it’s floral, abstract, or geometric, stencils make wall art achievable for everyone. It’s a DIY project with a big artistic payoff.
Imagine a wall adorned with intricate patterns or bold shapes repeated or arranged in a unique layout. The crisp lines of the stencil contrast beautifully with a painted or textured background. The motifs can be subtle accents or the main feature, depending on your style. It’s like having a bespoke mural made by you.
Use classic patterns like damask or modern abstract shapes. Mix and match different motifs for eclectic appeal. For a softer look, choose softer colors and delicate designs; for a striking impact, go bold with dark shades or metallics. This technique adapts well to feature walls or entire rooms.
Pick a stencil design and secure it to the wall with painter’s tape or spray adhesive. Use a stencil brush or sponge to apply paint, dabbing gently to prevent bleeding. Remove the stencil carefully to avoid smudging. Layer multiple designs or colors for complexity. Practice on cardboard first to perfect your technique.
Add metallic or glow-in-the-dark paints for an extra wow factor. Incorporate your favorite symbols or initials for personal touches. Layer different stencils or overlap motifs for depth. Frame the design with decorative trim or paint borders for a polished look.
Stenciling is a fun way to express your creativity and customize your decor. Once you master the basic technique, you can create gallery-worthy walls. It’s affordable, easy to redo, and endlessly adaptable. Let your walls tell your story.
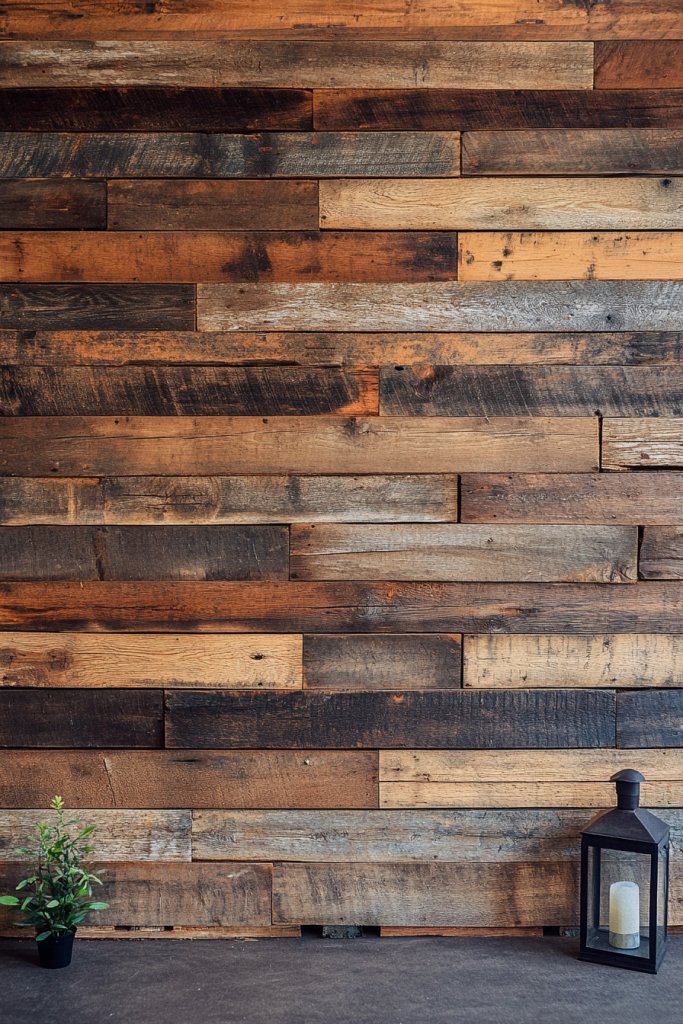
8. Reclaimed Wood Planks for Rustic Warmth
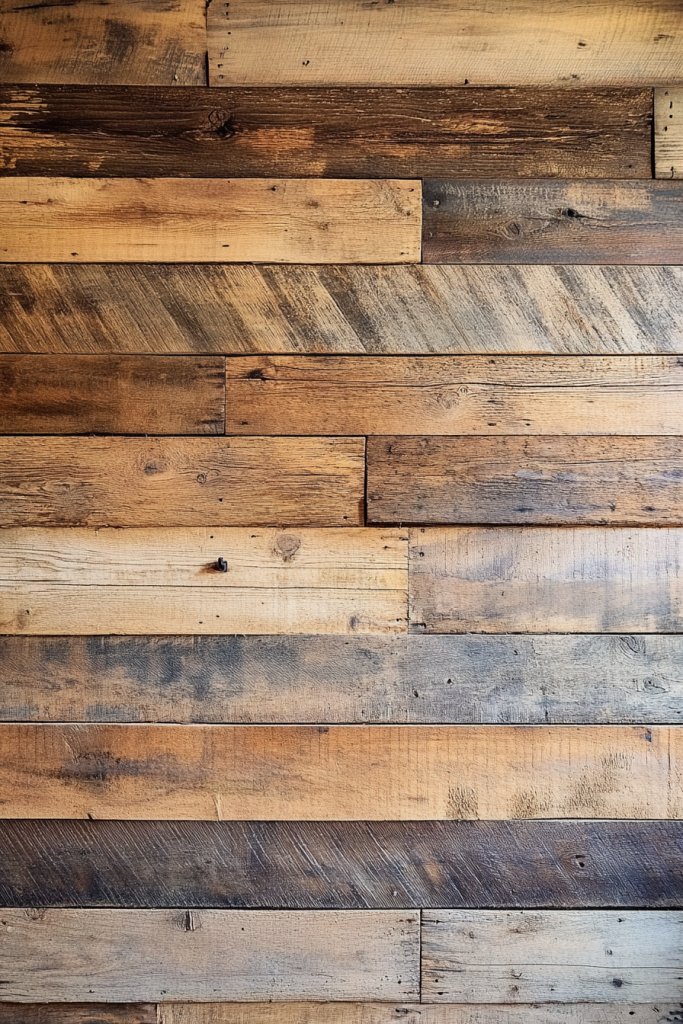
Craving that cozy, farmhouse feel? Reclaimed wood planks bring warmth and texture to any wall, transforming your space into a rustic haven. It’s eco-friendly and budget-conscious, especially if you repurpose old pallets or scrap wood. Who knew saving the planet could look so stylish?
Picture a wall layered with weathered, textured planks in various shades of brown, gray, or even painted for a distressed look. The rough grain and imperfections tell a story of history and character. When arranged horizontally or vertically, the planks create a tactile surface that invites touch and adds depth.
Use lighter wood for a Scandinavian vibe or dark, stained planks for a more dramatic look. Mix reclaimed wood with modern metal accents or sleek furniture for contrast. For a contemporary rustic look, keep the planks evenly spaced; for a more eclectic feel, stagger them irregularly. It suits many room types, from kitchens to bedrooms.
Start by sourcing reclaimed wood from salvage yards, or buy faux wood planks for easier installation. Clean and sand the wood to remove splinters and rough edges. Attach with nails, screws, or construction adhesive, making sure to stagger joints for a natural appearance. Seal with a clear protective finish if desired. For larger walls, consider a DIY frame or border for a polished look.
Stain or paint the wood in colors matching your decor. Add decorative elements like metal accents, hooks, or small shelves. Incorporate lighting fixtures that highlight the texture. Personal touches include painting some planks with patterns or initials to make it uniquely yours.
Reclaimed wood walls add authentic charm and warmth that instantly cozy up a space. They’re versatile, durable, and easy to customize. Once you see how simple it is to install, you’ll be inspired to experiment with different styles and finishes. Your home will feel more inviting and uniquely yours.
9. Vertical Line Pattern with Tape for Heightened Space
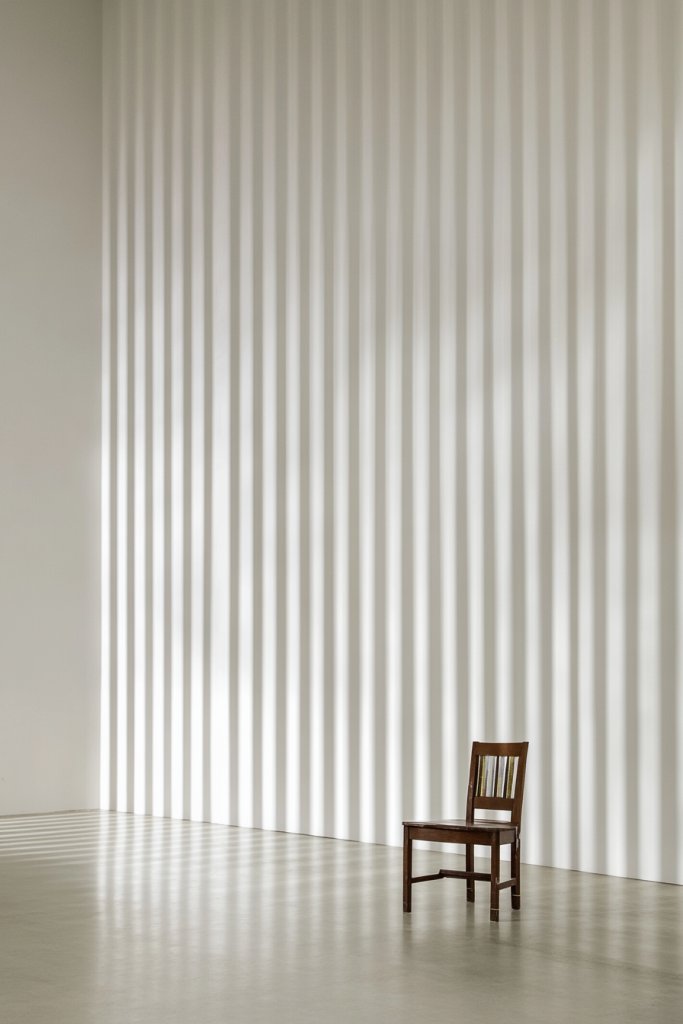
Struggling with a low ceiling or a small room that feels cramped? Vertical lines can create the illusion of height, making your space feel more open and airy. It’s a simple trick that packs a visual punch without any expensive renovations. Who knew a few lines could change your entire perception?
Imagine sleek, clean lines running from floor to ceiling, drawing your eye upward. The pattern elongates the wall and adds a sense of grandeur. Depending on your color choices, it can be subtle or bold—think tone-on-tone for understated elegance or contrasting colors for high impact. The lines create a rhythmic flow that guides your gaze.
Opt for narrow or wide stripes based on your taste. For a contemporary look, choose metallic or matte finishes. You can also experiment with different spacing—closer lines for a delicate effect or wider for a dramatic statement. Use this technique in hallways, bedrooms, or even bathrooms.
Begin by measuring and marking where the lines will go. Use painter’s tape to create straight, even lines, pressing down firmly. Apply paint with a roller or brush, then carefully remove the tape while the paint is still wet. Multiple coats may be necessary for vibrant colors or smooth finishes. Use a level to keep your lines perfectly straight.
Add a metallic or gloss topcoat to make the lines pop. Play with different colors for each stripe to create a rainbow effect or keep it monochrome for subtle elegance. Incorporate textured paints to add tactile interest. Personalize with small decorative elements along the lines, like metallic studs or painted patterns.
Vertical stripes are a timeless way to add height and style. They’re easy to update or change over time, making them a flexible decor choice. Once you see how much taller your space feels, you’ll be tempted to experiment with other pattern tricks. It’s a simple upgrade with impressive results.
10. Metallic Paint Accents for a Touch of Glam
Want to add a hint of luxury without overhauling your entire room? Metallic paint accents provide just enough shimmer to elevate your decor. It’s perfect for creating focal points that catch the light and add sophistication. Who says glamour has to be expensive or complicated?
Picture a wall or a section of wall coated in a reflective, metallic sheen—gold, silver, copper, or rose gold. The surface catches ambient light, creating a dynamic, ever-changing effect. It pairs beautifully with matte paints or textured backgrounds, adding depth and richness. It’s like a jewelry piece for your wall.
Use metallic paint for an entire accent wall or as subtle detailing—think borders, patterns, or geometric shapes. Combine with neutral tones for a luxe look or bold colors for drama. Metallic accents work well in bedrooms, living rooms, or even hallways. Experiment with different finishes—glossy, matte, or brushed for varied effects.
Apply a primer suitable for metallic paints for better adhesion. Use high-quality brushes or rollers for a smooth finish. Multiple thin coats will give a more even appearance, drying between coats. For intricate patterns, use painter’s tape or stencils. Finish with a clear topcoat for added durability, especially in high-traffic areas.
Mix metallic paints with matte or textured paints to create layered effects. Add decorative elements like metallic strips or shapes for a custom look. Incorporate lighting, such as wall sconces or uplights, to enhance shimmer. Personalize with contrasting colors or patterns that suit your style.
Metallic accents add a touch of glamour that’s surprisingly versatile. They can be subtle or bold, depending on your taste. Once you see how reflective surfaces brighten your space, you’ll be inspired to incorporate more metallic touches. It’s a simple way to make your home feel elegant and current.
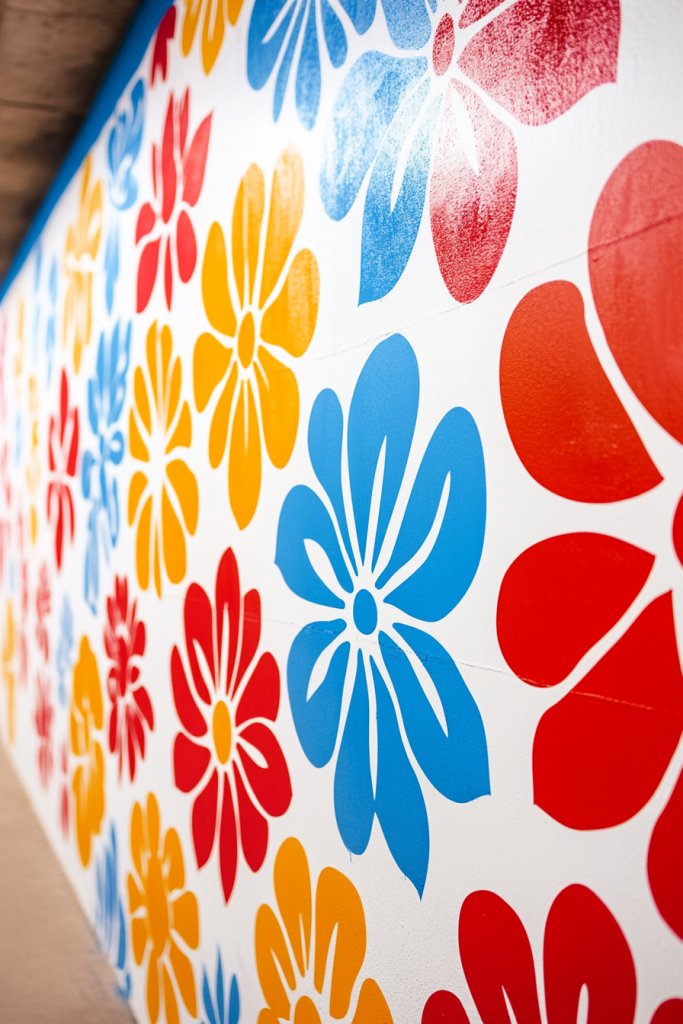
11. DIY Tape Art with Bold Color Blocks
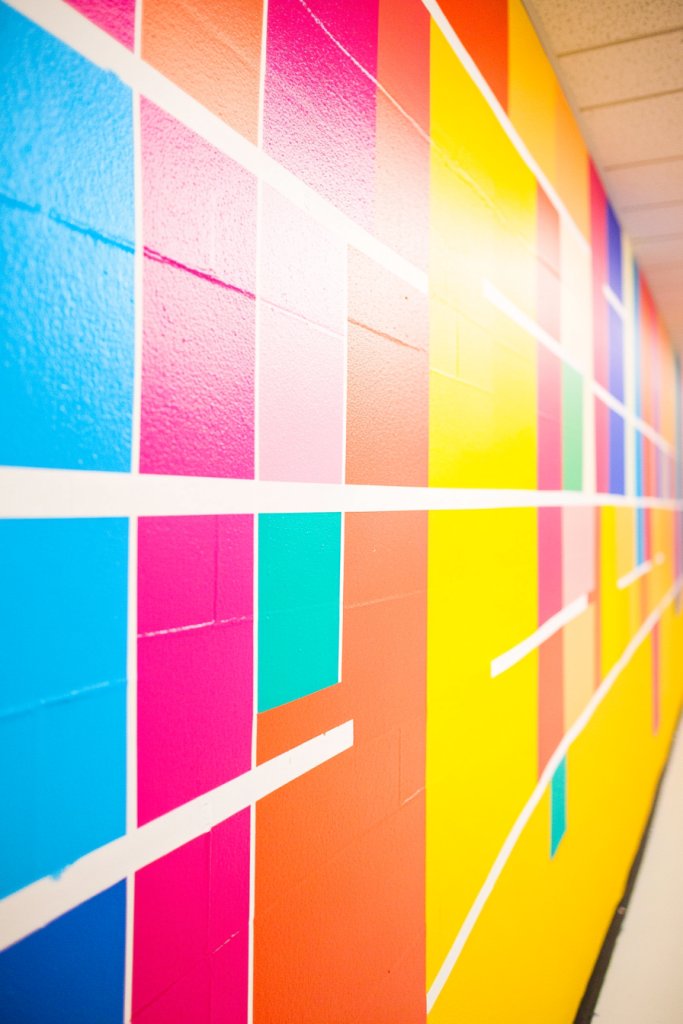
Craving a statement wall that’s fun and customizable? Bold color blocks created with painter’s tape allow you to experiment with color and shape without permanent commitment. It’s a playful way to add personality and modern flair. Plus, it’s budget-friendly and easy to change later.
Visualize large, vibrant rectangles or squares arranged in a grid or random pattern across your wall. The sharp edges of the tape define each block, creating a striking geometric composition. Bright colors like reds, blues, and yellows energize the space, making it lively and inviting. It’s a visual punch that commands attention.
Mix different colors within the same palette for a harmonious look or go wild with contrasting shades for maximum impact. Keep the shapes simple or try more complex arrangements with overlapping or irregular forms. This technique works well in living rooms, kids’ rooms, or creative spaces. Adjust the size of blocks based on your wall dimensions.
Start by sketching your design on paper or lightly marking the wall with a pencil. Use painter’s tape to outline each shape, pressing firmly for clean edges. Fill in each section with your chosen color using a roller or brush. Remove the tape while the paint is still wet for sharp lines. Clean your tools and touch up edges as needed.
Add metallic or glitter paints to some blocks for extra sparkle. Incorporate patterns or textures within the blocks, like stripes or dots, for variation. Use different finishes—matte, satin, or gloss—for contrast. Personalize with initials or symbols within certain blocks for a custom touch.
Color block art is bold and flexible, perfect for showcasing your personality. It’s easy to update with new colors or arrangements whenever you feel like a change. Once done, your wall becomes a vibrant focal point that reflects your creative spirit. Ready to make your statement?
12. Fabric or Tapestry Wall Panel for Soft Texture
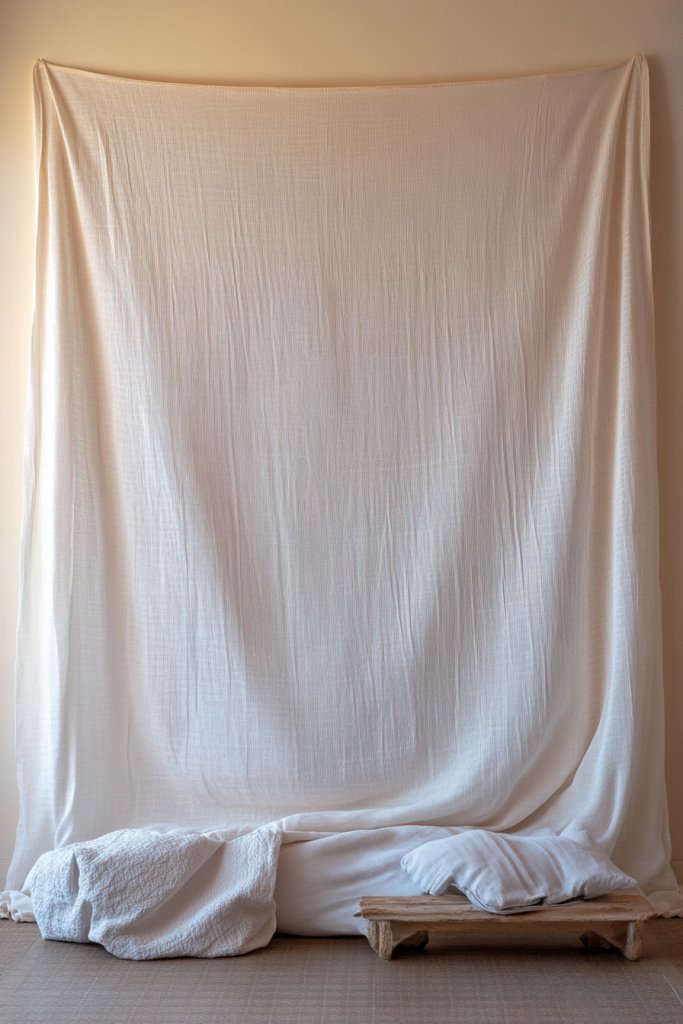
Looking to add warmth and softness to a room that feels a bit stark? Fabric panels or tapestries provide a cozy, inviting touch that’s easy to install. They soften hard surfaces and introduce rich textures and patterns. It’s like wrapping your wall in a comfy blanket—who wouldn’t want that?
Imagine a large, colorful textile hung seamlessly across a wall, adding layers of pattern and color. The fabric’s texture varies from smooth silk to chunky knit, creating visual interest and tactile appeal. It can serve as a statement piece or a subtle background. The softness of the material balances out sleek furniture and modern decor.
Choose fabrics matching your aesthetic—boho, rustic, or modern. Use natural fibers like linen or jute for a casual look, or velvet and silk for luxe appeal. Hang multiple layers for a textured, gallery feel or keep it simple with a single large piece. Change fabrics seasonally for fresh vibes.
Select a fabric or tapestry that complements your decor. Attach with removable hooks, adhesive strips, or a rod for easy swapping. Ensure the wall surface is clean and dry before hanging. Use a level to keep the piece straight. For larger panels, reinforce with a backing frame or additional hooks. Styling with a decorative rod adds a finished look.
Incorporate decorative trims or embroidery for a custom touch. Layer with string lights or add decorative pins to enhance texture. Mix different fabrics or patterns for an eclectic style. Personalize with embroidered initials or motifs that hold special meaning.
Fabric walls are versatile and forgiving—perfect for renters or those who love changing styles. They instantly add softness and personality, making your space more welcoming. Once you see how much cozier your room feels, you’ll be inspired to experiment further. It’s decor that truly feels like a hug.
13. Monochromatic Color Wash for a Subtle Texture Effect
Craving a wall that adds depth without overwhelming your decor? A monochromatic color wash provides a soft, textured look that’s subtle yet sophisticated. It’s perfect for creating a calm, cohesive atmosphere. Who knew a simple technique could add so much depth?
Imagine a wall painted with a gentle, uneven layer of color that reveals hints of the underlying paint or texture. The effect is like a watercolor or glazed finish, softening harsh lines and adding visual interest. The surface feels richer, more layered, without any bold patterns or shapes. It’s understated art for your walls.
Use different shades within the same color family for a layered look. For a more textured appearance, add a glaze or diluted paint to create uneven effects. It works well in bedrooms for a relaxing vibe or in living rooms to add warmth. Adjust the intensity based on your mood—lighter for airy spaces, darker for cozy corners.
Start with a base coat of the main color. Mix a glaze or diluted paint with water or medium, and apply with a sponge, rag, or brush in random, overlapping strokes. Wipe or blend areas for a seamless look. Let each layer dry before adding another for depth. Use a soft cloth to smooth out rough patches and achieve the desired texture.
Add metallic or pearlized topcoats for a subtle shimmer. Incorporate textured paints or plaster for more tactile effects. Use stencils or masking tape for added patterns if desired. Personalize with color combinations that evoke your mood or complement your decor palette.
A monochromatic wash is easy to redo or refresh, making it perfect for experimentation. It adds visual richness without clutter or fuss. Once you see how it softens and deepens your space, you’ll be inspired to try other subtle texturing techniques. It’s decor that whispers elegance.
14. Vinyl Decals or Stickers for Custom Designs
Want a personalized wall without painting or wallpapering? Removable vinyl decals and stickers offer endless customization options. They’re affordable, easy to apply, and perfect for adding quotes, shapes, or patterns. It’s a quick way to make your space feel uniquely yours.
Picture a wall decorated with sleek, modern decals—perhaps a quote, geometric shapes, or whimsical designs—that instantly catch the eye. The decals adhere smoothly, leaving no damage when removed. They add visual interest and can be positioned to create a scene or tell a story. The designs come in various styles, sizes, and colors.
Choose stickers that match your personality—minimalist, playful, or elegant. Mix and match multiple decals for a layered look. Use them to decorate a nursery, home office, or kitchen backsplash. Change the decals periodically for a fresh vibe or special occasions. They’re especially great for renters or temporary decor.
Start by cleaning the wall thoroughly. Carefully peel the backing and position the decal, using a squeegee or credit card to smooth out air bubbles. Adjust positioning before pressing firmly. For complex designs, use painter’s tape to mark placement. Remove backing slowly to prevent tearing or stretching. Seal edges with gentle pressure.
Create your own decals with printable adhesive sheets or customize purchased designs. Incorporate metallic or glitter accents for added sparkle. Use decals to frame photos or quotes, or to create visual stories. Personalize with your own words, symbols, or initials for a truly custom look.
Vinyl decals are a flexible, mess-free way to decorate. They’re perfect for experimenting with different themes or styles. Once you see your personalized design come to life, you’ll feel empowered to try even more creative ideas. It’s an easy upgrade that packs a punch.
15. DIY Paper or Cardboard Wall Art for Artistic Flair

Looking for a creative project that adds personality without major expense? Paper and cardboard wall art offers endless possibilities for artistic expression. It’s easy, customizable, and perfect for adding a handcrafted touch. Who knew cheap materials could look so sophisticated?
Imagine large geometric shapes, layered cutouts, or intricate paper sculptures mounted on your wall. The textures and shadows create depth, making the art lively and engaging. Bright colors or monochrome palettes can set different moods. It’s like having a mini art gallery in your own space.
Use colored construction paper, patterned scrapbook paper, or painted cardboard for variety. Mix shapes—triangles, circles, or abstract forms—for a dynamic look. For a minimalist aesthetic, stick to monochrome or subtle shades; for playful decor, go bold with contrasting colors. Change designs seasonally or for special occasions.
Cut shapes or designs from paper or cardboard using scissors or craft knives. Mount them with double-sided tape, poster putty, or removable hooks, depending on weight. Layer pieces for a collage effect or arrange to form a mural. Consider adding embellishments like glitter, stickers, or paint details. Reinforce larger pieces with cardboard backing for stability.
Personalize with hand-drawn details or printed images. Use metallic or neon paints for accents. Incorporate your initials, favorite quotes, or symbols. Frame or mat the pieces for a polished presentation. Combine with fabric or other textures for a mixed-media effect.
Paper and cardboard art is highly customizable and budget-friendly. It encourages you to experiment and develop your artistic skills. Seeing your unique creations on the wall boosts confidence and sparks further creativity. Your space will feel more personal and lively.
16. Upcycled Pallet or Crate Wall for Eco-Friendly Charm
Want to add rustic charm while being environmentally conscious? Upcycled pallets and crates are perfect for creating a warm, eco-friendly accent wall. They give new life to old wood and add texture and character to your space. It’s a win-win for style and sustainability.
Visualize a patchwork of weathered wood in varied tones arranged in a grid or staggered pattern. The rough textures, knots, and paint remnants tell stories of previous lives, adding authenticity. When lit properly, these surfaces cast subtle shadows that enhance their rustic appeal. It’s like bringing a piece of outdoor charm inside.
Use different sizes and shapes for a more eclectic look or keep uniform planks for a cleaner design. Stain or paint the wood in a color that complements your decor—whitewashed, distressed, or natural finishes work well. Incorporate metal accents or hooks for added functionality or visual interest. Suitable for kitchens, living rooms, or even bedrooms.
Source reclaimed pallets or crates from salvage yards or online marketplaces. Sand rough edges and splinters thoroughly. Attach with nails or screws directly to the wall, staggered or aligned. Seal or stain the wood for added protection and color consistency. For a polished look, frame the arrangement with trim or molding, or add a backing for stability.
Personalize with painted designs, initials, or patterns. Add small shelves or hooks for practicality. Mix with modern elements like metal piping or glass for contrast. Incorporate lighting, such as string lights or spotlights, to enhance texture and mood.
Pallet and crate walls are eco-conscious and highly customizable. They create a cozy, lived-in vibe that’s hard to replicate with manufactured materials. Once you see how simple it is to repurpose old wood, you’ll be motivated to explore even more sustainable decor ideas. Your space will feel warm, inviting, and uniquely yours.
17. Color Blocked Walls with Painter’s Tape for a Bold Statement
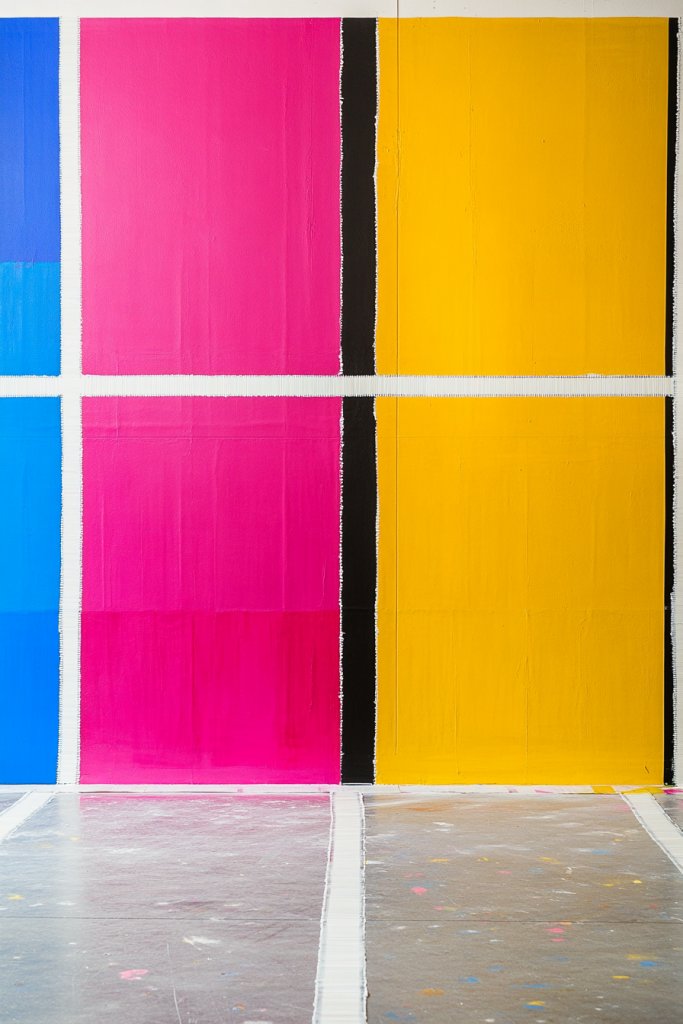
Craving a dramatic change that’s easy to do? Color blocking with painter’s tape creates a bold, modern statement without the need for wallpaper or extensive painting. It’s an eye-catching way to define spaces and add vibrant personality. Who says walls have to be boring?
Imagine large sections of different colors sharply divided by clean tape lines. The contrast creates a dynamic visual rhythm, making your room feel lively and energetic. The geometric shapes can be simple rectangles or more complex patterns, depending on your taste. The effect is striking and very contemporary.
Use vibrant colors for a fun, playful look or muted tones for a chic, subdued vibe. Play with asymmetry or create a grid pattern for a structured feel. Mix finishes—matte, gloss, or satin—to add texture. It works well in living rooms, bedrooms, or even bathrooms.
Measure and mark your design layout carefully. Use painter’s tape to create straight, crisp edges, pressing down firmly. Apply paint with a roller or brush inside each section, then remove the tape carefully before the paint dries completely. For sharp lines, use a small brush to tidy edges. Multiple coats may be necessary for vibrant colors.
Incorporate metallic or glitter paints for extra sparkle. Add decorative elements like contrasting trim or textured finishes within sections. Use different color combinations seasonally or to match your mood. Personalize with custom shapes or patterns that reflect your style.
Color blocking walls are bold and versatile, instantly transforming your space. They’re easy to update with new colors or patterns over time, making them a flexible decor choice. Once you see how vibrant your room becomes, you’ll be inspired to experiment more with geometric art. It’s a fun, impactful upgrade.
Conclusion
With a wide range of budget-friendly accent wall ideas, you have plenty of options to personalize your home and make a striking statement. Whether you choose a vibrant color, unique textures, or DIY art, these ideas empower you to transform your space effortlessly. Don’t wait—start experimenting today and turn your home into a reflection of your creativity and style!