A fresh, updated kitchen can transform your entire home, and you don’t need to break the bank to achieve it! Cheap kitchen countertop fixes are gaining popularity because they offer a budget-friendly way to breathe new life into tired or outdated surfaces without the hassle or expense of a full renovation.
In this article, you’ll find a variety of creative, easy-to-implement ideas that can instantly upgrade your countertops. From simple paint tricks to clever coverings, these tips will help you achieve a stunning kitchen look without draining your wallet, making it perfect for DIY enthusiasts and budget-conscious homeowners alike.
1. Apply Peel-and-Stick Vinyl Tiles for a Fresh, Patterned Look
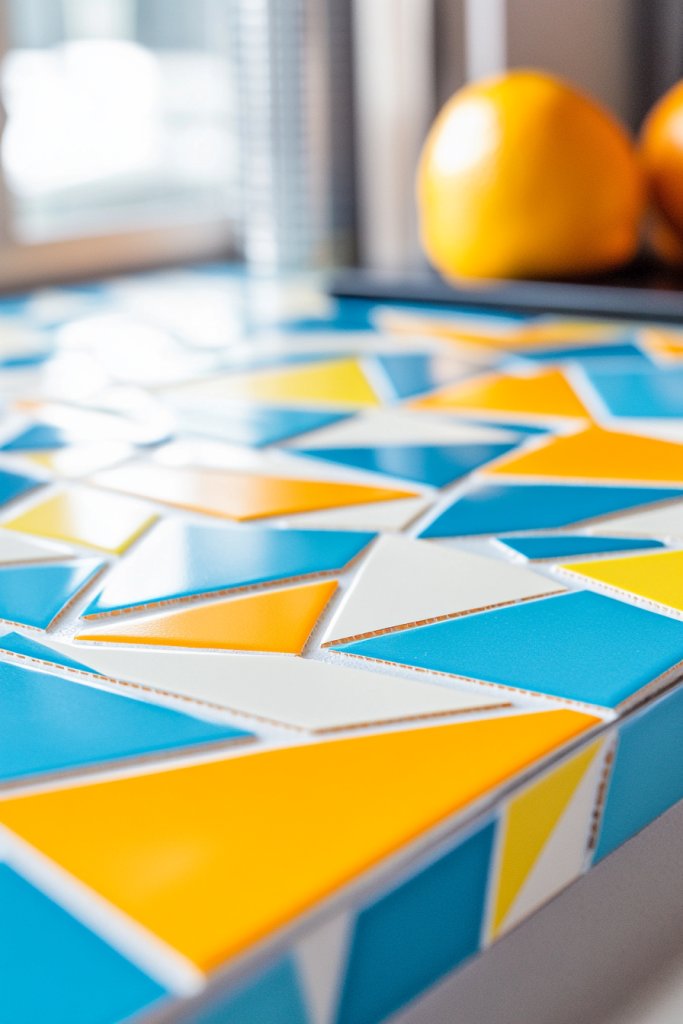
Ever wish your kitchen counters looked more vibrant without breaking the bank? Dull, outdated surfaces can make your entire space feel tired. But replacing countertops is costly and messy, which leaves many just accepting their boring surfaces. Luckily, peel-and-stick vinyl tiles offer an affordable way to refresh with style and ease.
Imagine peeling back a sticky backing and laying down a geometric pattern of colorful tiles. The textured surface adds depth, while the glossy finish catches the light beautifully. You can see a mosaic of bold colors and patterns transforming a plain counter into a statement piece, all in under an hour. The tiles sit flush, creating a seamless, modern look that invites admiration.
Choose from matte, glossy, or textured finishes to match your decor. Patterns range from subtle herringbone to lively chevron or floral motifs, fitting any style. Seasonal updates are easy—swap out patterns or colors to reflect holidays or trends. For small spaces, focus on accent sections; larger counters can handle full coverage in bold designs for maximum impact.
Start by cleaning your countertops thoroughly to remove grease and residue. Measure and cut tiles to fit the surface precisely, using a sharp utility knife. Peel off the backing carefully and press tiles firmly to avoid air bubbles. For uneven surfaces, apply a thin layer of adhesive primer beforehand. Use a smoothing tool to ensure tight adhesion, especially along edges and corners. No special tools are needed—just patience and a steady hand. Finish by sealing edges with a clear caulk if desired for extra durability.
Customize your tiles by mixing patterns or creating a border with contrasting colors. Consider adding a clear protective topcoat for spill resistance and longevity. Incorporate metallic or textured tiles to add dimension and tactile interest. You can also layer decals or stencils over the tiles for a personalized touch that reflects your style.
Peel-and-stick vinyl tiles make DIY upgrades accessible and fun, even for beginners. They instantly elevate your kitchen’s look and boost your confidence in tackling home projects. With so many options, you can create a truly unique space that feels tailor-made without the hefty price tag. Get ready for compliments and a renewed love for your kitchen!
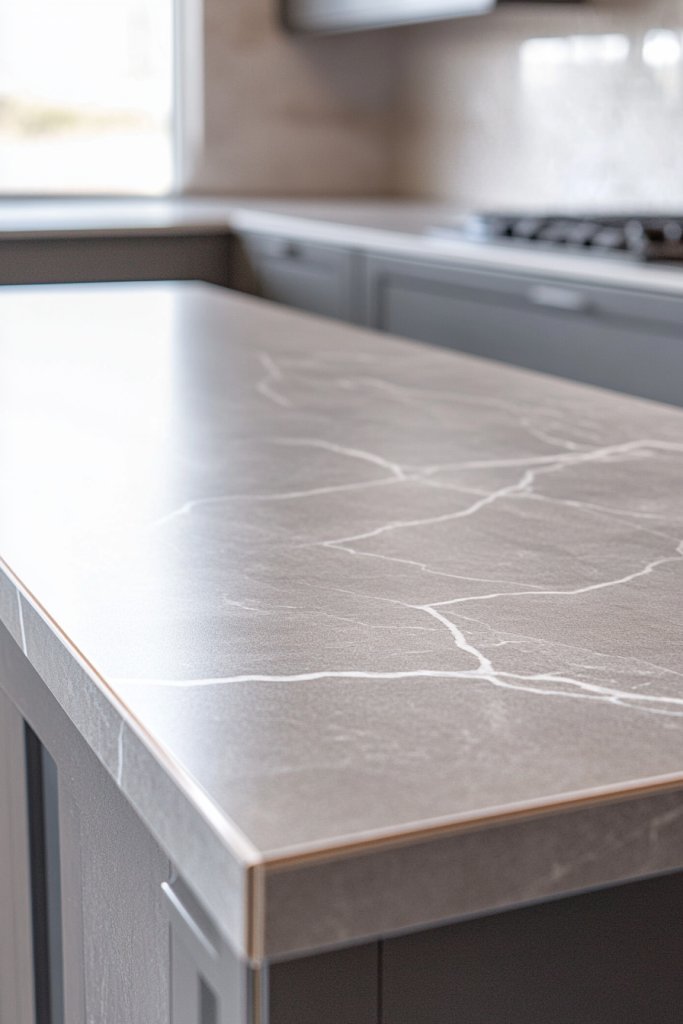
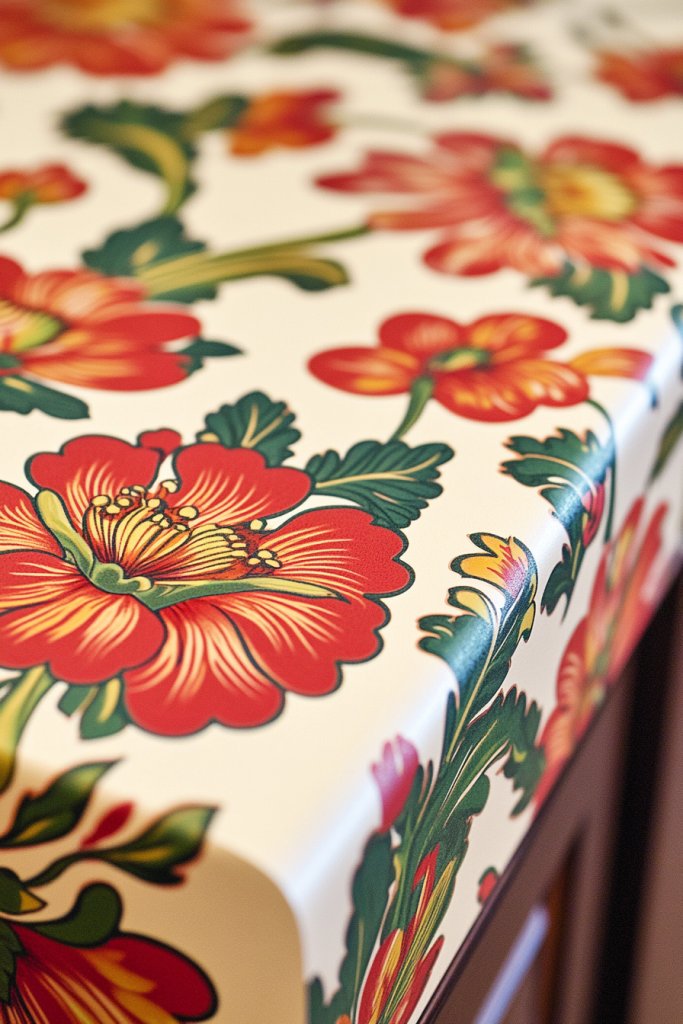
2. Use Contact Paper to Mimic Natural Stone or Marble Finishes
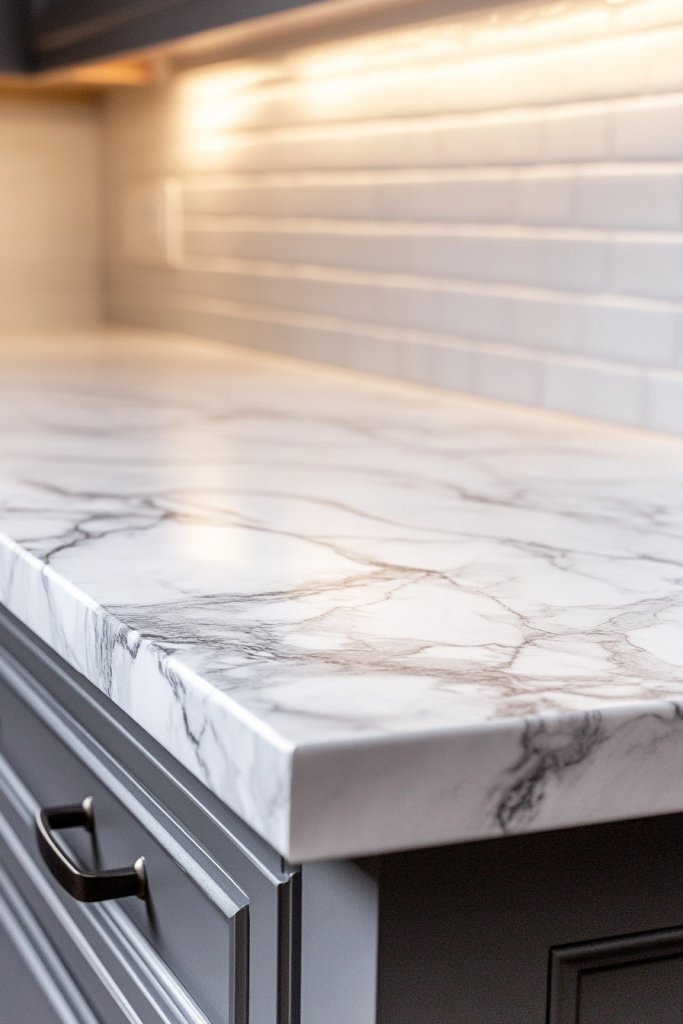
Are your countertops looking tired and outdated? Replacing stone or marble is expensive, and refinishing can be messy. But what if you could get that luxe look with something simple and budget-friendly? Contact paper offers an easy way to mimic high-end finishes without the cost or hassle.
Picture peeling back a roll of patterned contact paper and smoothing it over your existing surface. The design mimics natural stone or marble with intricate veining and rich colors. The surface feels smooth to the touch, with a glossy or matte finish depending on your choice. It instantly transforms a dull counter into a sophisticated surface that looks expensive and polished.
Select from realistic marble, limestone, or granite patterns. For a more subtle update, choose a soft neutral or light-colored stone. For bolder aesthetics, opt for dark marble or patterned designs. Seasonal or thematic variations—like holiday-themed or textured stone—are easily swapped out. This flexibility makes contact paper perfect for renters or those wanting frequent style changes.
Begin by cleaning your current countertop thoroughly to ensure smooth adhesion. Measure and cut the contact paper to fit, leaving a slight overhang on all sides. Peel back a small section of the backing and apply it gradually, smoothing out air bubbles with a squeegee or credit card. Pay special attention to edges and corners, pressing firmly to prevent peeling. For added durability, especially in high-use areas, seal the edges with a clear adhesive or Mod Podge. Keep in mind, choosing high-quality contact paper with a textured surface will yield the best results.
Layer clear acrylic sealer over the contact paper to enhance water resistance. Use decorative trims or edge banding to hide raw edges and give a finished look. Experiment with different patterns on different sections—like a marble backsplash combined with a wood-look counter. Incorporate small, decorative accents like metallic decals or painted borders for a personalized touch that elevates the style.
Using contact paper is a quick, inexpensive way to get a high-end look without the renovation mess. It’s perfect for trying out new styles or updating rental kitchens without permanent changes. Many users report satisfaction with the realistic appearance, feeling more confident in their DIY skills. With a little patience, you can achieve a polished, designer-inspired surface that impresses everyone.
3. Paint Your Countertops with Special Epoxy or Chalk Paint
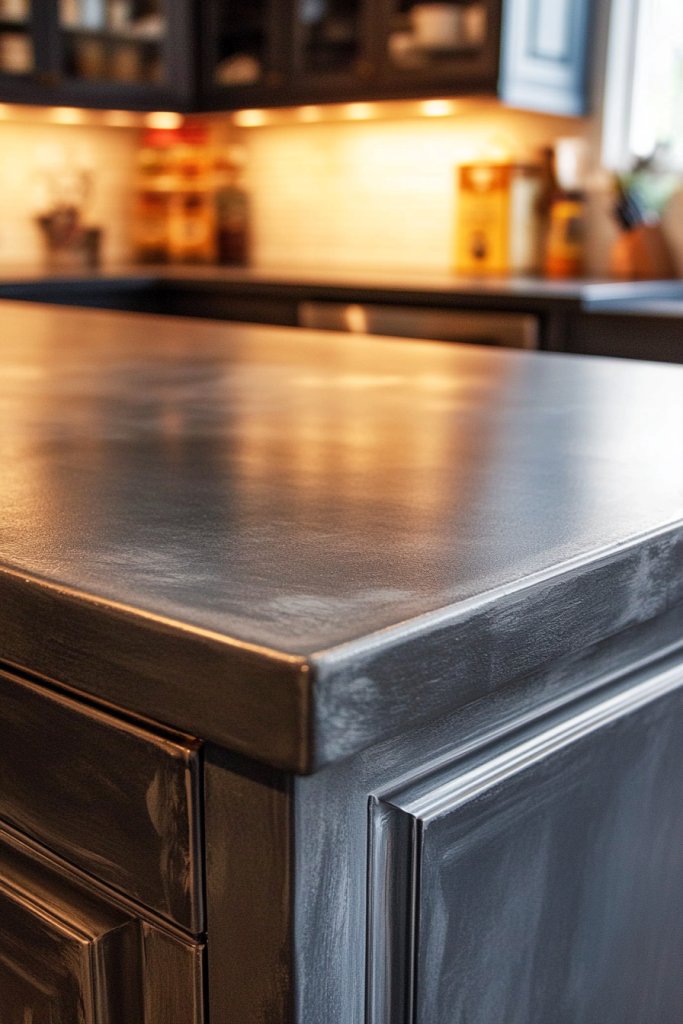
Tired of your boring, worn-out countertops but not ready for a costly replacement? Painting is a quick fix that can dramatically change your space. But standard paint often chips or wears quickly—so you need special countertop paint that’s durable and stylish. This way, you get a fresh look with minimal investment.
Visualize applying a smooth layer of chalk paint in a soft pastel or a bold hue, transforming your countertop’s appearance. When sealed properly with epoxy, it gains a glossy, hardened surface that resists scratches and stains. The finished result feels like a sleek, custom surface, with a matte or shiny finish depending on your preference. You can even add subtle faux veining or metallic accents to mimic real stone.
Choose from a variety of colors and finishes—matte, satin, or high-gloss—to match your decor. Consider adding stenciled patterns or metallic accents for extra flair. Seasonal color swaps are simple—think bright yellows in summer or deep reds in fall. For small areas or accents, use a contrasting color to create a unique focal point. The versatility makes painting ideal for both modern minimalists and eclectic enthusiasts.
Start with a thorough cleaning and sanding to prep the surface, removing any gloss or residue. Use painter’s tape to protect edges and surrounding areas. Mix epoxy according to manufacturer instructions and apply a thin, even coat over the painted surface with a roller or brush. Use a heat gun or a blow dryer to eliminate bubbles. Once cured, lightly sand with fine-grit paper and apply a second coat if needed. Finish with a clear topcoat for extra protection, following the epoxy’s curing time.
Incorporate custom designs using stencils or metallic powders mixed into the epoxy. Add textured elements like mica or glitter for a unique finish. Personalize your counters with monograms or decorative stripes. Regularly reapply a clear sealer to maintain the glossy look and resist everyday wear. These personalized touches turn a simple paint job into a statement piece.
Painting countertops is a cost-effective way to elevate your entire kitchen aesthetic. With proper prep and sealing, your DIY project can last years, giving you confidence in your creative skills. It’s a perfect solution for renters or anyone wanting a quick upgrade. Embrace the process, and enjoy your new, stylish surface that looks professionally done!
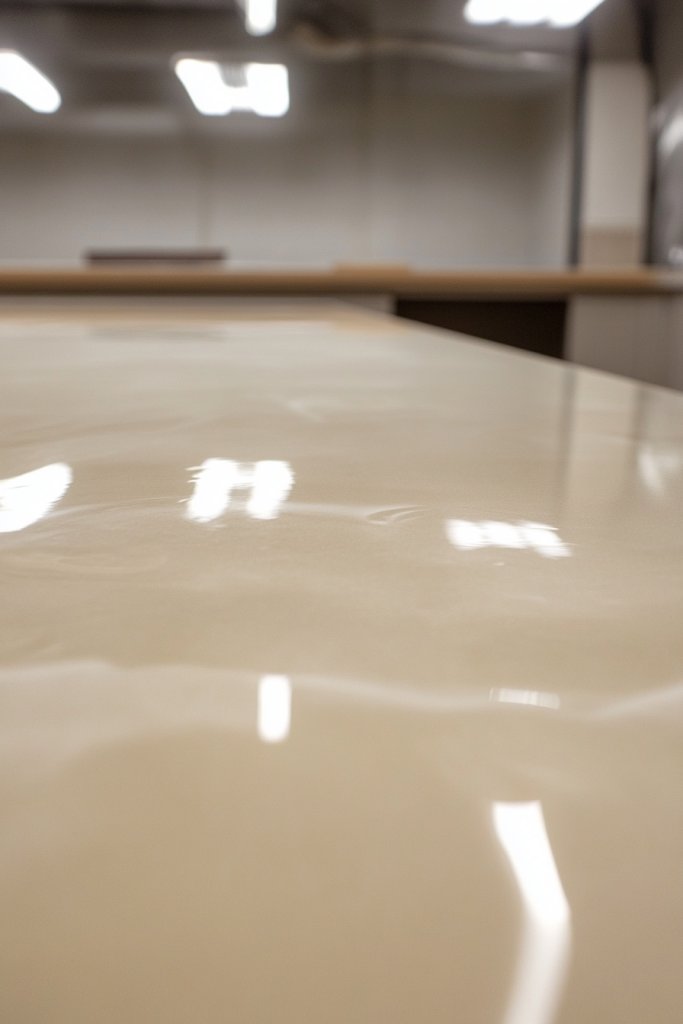
4. Add a Layer of Clear Resin Coating for a Glossy, Protective Surface
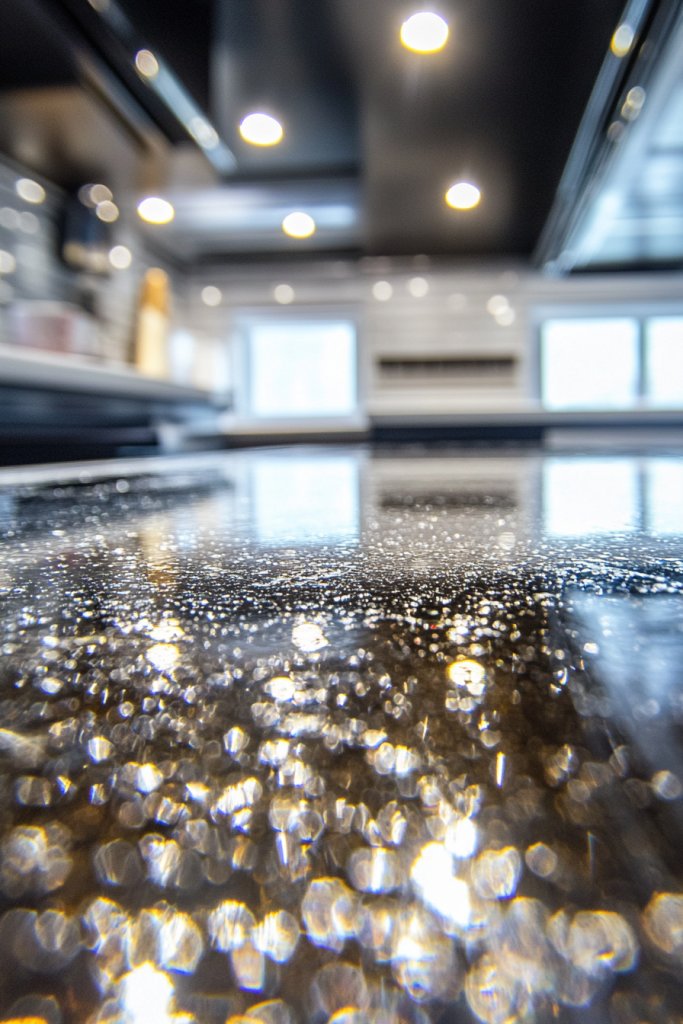
Are your countertops scratched, dull, or stained? Protecting your surface while enhancing its appearance sounds tricky, right? Enter clear resin coatings—a game-changer that provides a glossy, durable barrier. It’s perfect for sealing painted or laminate surfaces and giving them a high-end look.
Picture pouring a smooth, transparent resin over your countertop, creating a glass-like finish. The surface becomes shiny and reflective, amplifying any color or pattern underneath. The resin’s thickness adds a depth that mimics real glass or polished stone. When cured, it feels slick and smooth, transforming a plain surface into a statement of sophistication.
Choose from different resin types—epoxy or polyurethane—depending on your needs. Add pigments, metallic powders, or embedded objects for custom effects if desired. This coating works with painted, tiled, or laminate surfaces and can be tinted for subtle color effects. Seasonal or thematic accents can be embedded within the resin, making each project unique. For outdoor or high-moisture areas, select UV-resistant or waterproof formulas.
Begin with a clean, dust-free surface. Mask edges and surrounding areas with painter’s tape. Mix the resin components carefully, following manufacturer instructions, and pour it slowly onto the surface. Use a squeegee or brush to spread evenly, ensuring no air bubbles remain. Use a heat gun or torch to eliminate bubbles and promote smoothness. Allow curing time—often 24-72 hours—before using the surface. Multiple layers can be added for extra thickness or depth, with light sanding between coats.
Incorporate color flakes, embedded objects, or metallic powders into the resin for a custom look. Use contrasting pigments to create unique patterns or effects. Sealing with a UV-resistant topcoat prolongs the glossy finish and prevents yellowing. Regular cleaning with gentle products maintains the shine, and touch-ups are simple with extra resin layers. Personalize further by adding subtle color gradients or textured effects.
A resin coat elevates your countertop’s style and provides long-lasting protection. It’s a DIY-friendly project with professional results, boosting your confidence. Plus, it’s a versatile solution for both modern and rustic kitchens. Once cured, the surface resists scratches, stains, and heat—making it both beautiful and practical. Your upgraded space will make you proud to entertain and cook!
5. Install Affordable Laminate Sheets for a Modern Update
Feeling like your kitchen countertops are stuck in the past? Upgrading can be expensive, but laminate sheets offer an affordable, quick fix. Modern laminates mimic the look of stone, wood, or even concrete at a fraction of the cost. It’s a smart way to give your space a fresh, contemporary vibe without a renovation.
Imagine peeling a protective layer from a high-resolution laminate sheet and carefully laying it over your existing surface. The pattern resembles real marble veining or rich wood grain, adding warmth and texture. The smooth surface gleams under the kitchen lights, making your counters look sleek and new. The edges are crisply finished, creating a clean, modern aesthetic that elevates the entire room.
Choose from an array of textures—matte, semi-gloss, or high-gloss—to suit your style. Opt for natural stone looks for elegance or rustic wood for warmth. Seasonal updates can be achieved by swapping out laminate patterns—think bright colors for summer or deep tones for winter. For smaller areas like islands or backsplashes, patterned or textured laminates add visual interest without overwhelming the space.
Clear the existing counter and clean thoroughly. Measure carefully and cut the laminate sheets with a utility knife and straightedge. Apply a high-quality adhesive designed for laminate to the surface, then carefully lay the sheet, smoothing out air bubbles with a roller or squeegee. Trim excess with a router or sharp blade for perfect edges. Seal edges with edging tape or trim for a finished look. Allow the adhesive to cure fully before using.
Add decorative edge banding or molding for a polished appearance. Incorporate contrasting trims or painted accents to customize the look. For a textured finish, lightly sand the surface or add a matte topcoat. Personal touches like stenciled patterns or painted borders can make the laminate truly your own. Regular cleaning with gentle cleaners preserves the vibrant appearance.
Installing laminate sheets is a straightforward project that dramatically updates your kitchen. It’s perfect for DIYers seeking a professional look without the price tag. The durability and variety of designs mean your countertop will stay stylish for years. Once done, the satisfaction of transforming your space with your own hands boosts your confidence for future projects. Enjoy your newly modernized kitchen!
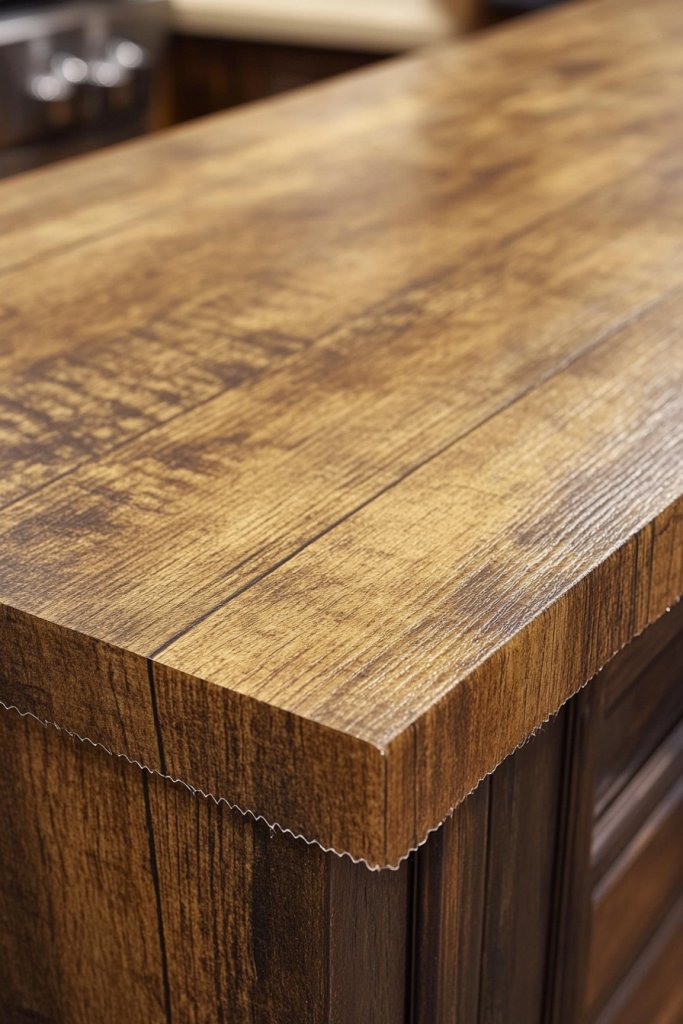
6. Use Adhesive Film to Create a Faux Wood or Concrete Effect
Craving the rustic charm of wood or the sleek vibe of concrete but dread the cost and mess of renovation? Adhesive films make it possible to fake these textures easily. It’s perfect for adding character without tearing out your existing counters. Plus, it’s quick, affordable, and reversible—ideal for renters or stubborn DIYers.
Visualize peeling a textured film and smoothly applying it over your counters. The surface looks and feels like real wood planks or raw concrete, with embossed grain or mottled patterns. The matte or semi-gloss finish mimics the tactile quality of natural materials. Under the light, the textured surface catches shadows, creating depth and authenticity that fools even the most discerning eye.
Select from various faux wood grains, planks, or concrete textures. For a coastal feel, opt for weathered driftwood patterns; for industrial chic, choose dark, mottled concrete. Seasonal or thematic variations include distressed finishes, painted effects, or metallic accents. Use in small sections or full surfaces depending on your style goals. Layer with other decor elements like distressed furniture or metal accents for a cohesive look.
Start with a clean, dry surface. Measure and cut the adhesive film to fit your countertop precisely. Peel back a small section of backing and carefully align the film, smoothing as you go to prevent bubbles. Use a squeegee or credit card to press firmly, especially along edges and corners. For textured films, apply gentle heat with a heat gun to activate adhesive and improve conformity. Seal edges with a clear adhesive or trim if necessary. Maintain the surface by wiping gently—abrasive cleaners are a no-go.
Add personalized touches by tinting or distressing the surface further with paint or wax finishes. Incorporate contrasting trims or decorative hardware to enhance the rustic or industrial vibe. Layering with a matte topcoat can increase durability and give a more authentic feel. For extra flair, embed subtle metallic or mica powders into the film before application. Keep the surface protected with regular gentle cleaning.
Faux adhesive films allow you to achieve high-end looks at a fraction of the cost. They’re an easy upgrade that doesn’t require special skills or tools. Your space gains instant personality, and the confidence to experiment grows with each successful project. This versatile solution proves that style doesn’t have to be expensive or complicated—just creative!
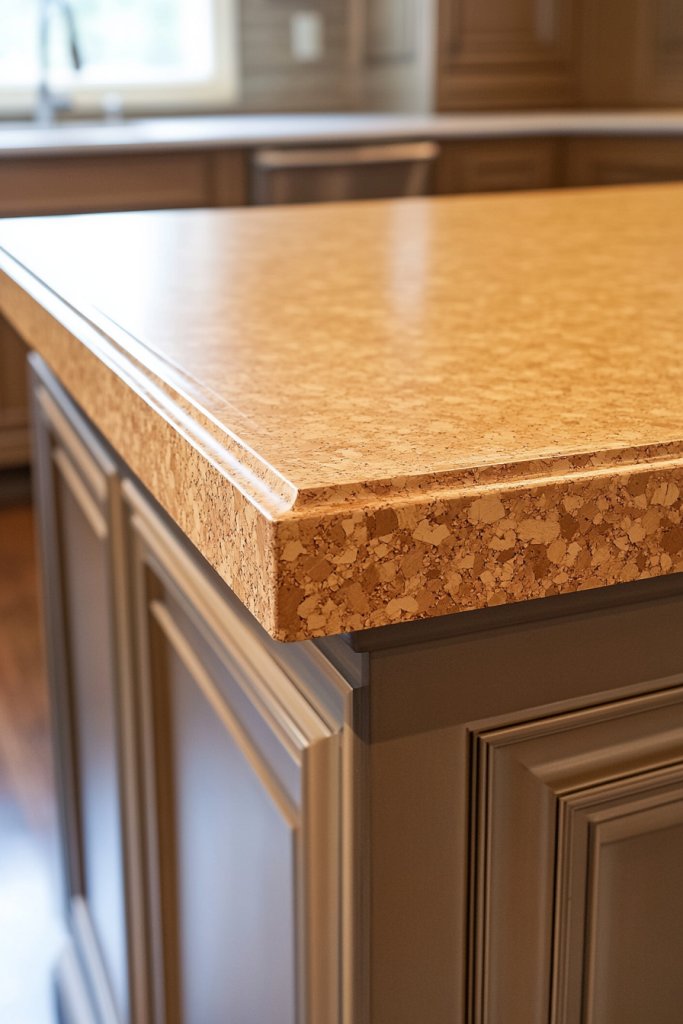
7. Incorporate a Stylish Layer of Cork or Vinyl Plank Over Existing Surface
Looking for a warm, textured alternative to traditional countertops? Cork or vinyl planks offer a cozy, stylish upgrade that’s easy on the wallet. They add tactile interest and natural warmth, making your kitchen more inviting. Best of all, installation is straightforward and reversible, perfect for DIY enthusiasts.
Imagine laying down cork tiles with their soft, grainy surface, adding a natural warmth to your space. Or envision sleek vinyl planks mimicking hardwood, with a smooth, durable finish. The textured surface catches the light differently, creating a layered, inviting look. The planks are seamlessly aligned, giving a cohesive, modern aesthetic that transforms your counters into a focal point of comfort and style.
Choose from cork for a rustic, eco-friendly vibe or vinyl with realistic wood or stone patterns for a contemporary look. Seasonal style updates can involve changing planks or adding decorative borders. Different finishes—matte or semi-gloss—alter the visual impact. For small areas, use accent strips or inlays to add detail. The key is mixing textures and patterns that complement your overall decor.
Start by cleaning and leveling your existing surface. Cut the cork or vinyl planks to size with a utility knife, ensuring tight fits. Use a strong adhesive or double-sided tape to secure each piece, pressing firmly to prevent air pockets. For a more permanent finish, apply a clear sealant or adhesive as recommended by the manufacturer. Use a roller or squeegee to smooth out the surface, especially along edges. Finish by sealing the perimeter with a trim or edge banding for a clean look. Regular maintenance involves gentle cleaning—avoid harsh abrasives that can damage the surface.
Layer with decorative trims, painted borders, or inlays to add personal flair. Incorporate contrasting colors or textures in small accents for visual interest. Seal the surface with a protective coating to extend lifespan. Consider embedding small decorative elements or textured paints into the cork or vinyl for a unique look. These small touches make your countertop both functional and a true expression of style.
Adding cork or vinyl planks is an affordable way to create a warm, inviting kitchen vibe. It’s a DIY-friendly project that yields high-impact results, boosting your confidence. The textured surface feels good under the hand and adds a natural element to your decor. Once completed, you’ll enjoy a space that’s both stylish and cozy, all within your budget. Go ahead—transform your kitchen into a welcoming haven!
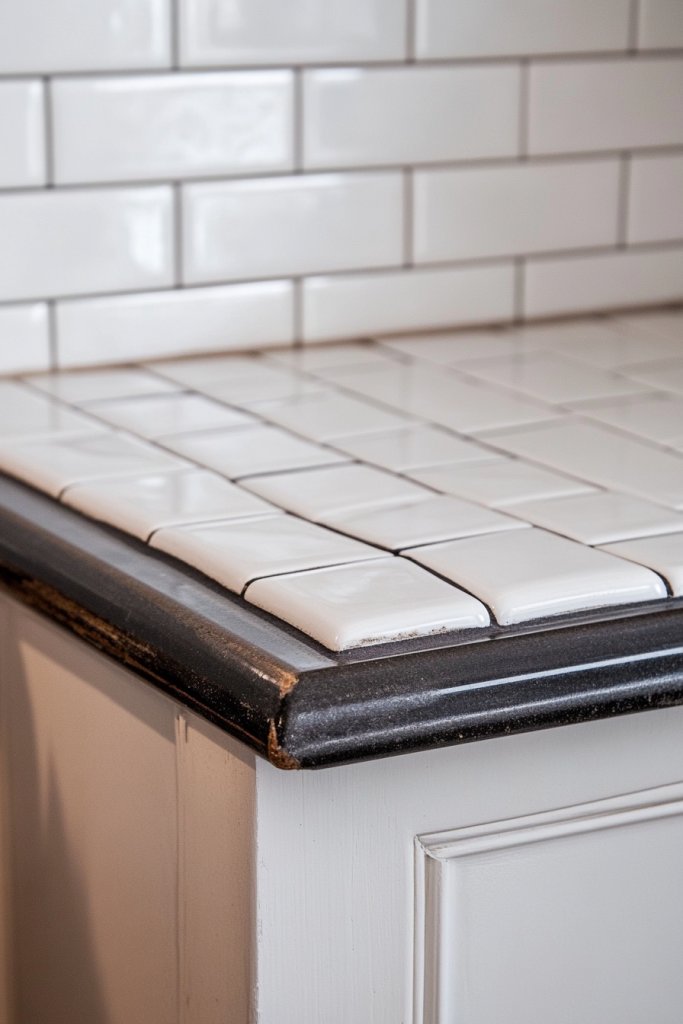
8. Add a DIY Tile Backsplash to Cover Worn Counter Edges
Are your counter edges chipped or looking worn out? A simple DIY tile backsplash can hide imperfections and add a splash of style. It’s an easy upgrade that protects your countertop from further damage and elevates your kitchen’s aesthetic. Plus, it’s budget-friendly and achievable with basic tools.
Visualize installing small ceramic or glass tiles along the edge of your counter, creating a vibrant or subtle border. The tiles catch the light with their glossy surfaces, adding sparkle and depth. The grout lines define the pattern, giving a handcrafted, artisan feel. When finished, the tile edge looks intentional and polished, transforming a neglected area into a focal point of design.
Choose classic white subway tiles for a timeless look or colorful mosaic tiles for a bold statement. For a rustic vibe, opt for textured or handmade tiles. Seasonal or thematic color schemes—like reds and greens for holidays—are easy to swap in for ongoing freshness. Small mosaic patterns or geometric designs work well for accent areas, while larger tiles suit full edges.
Start by cleaning and drying the area thoroughly. Plan your pattern and lay out tiles before adhering. Mix thin-set mortar or tile adhesive according to instructions. Use a notched trowel to spread adhesive evenly, then press tiles firmly into place, leaving consistent grout gaps. Use spacers for even spacing and a level to keep tiles straight. Allow the adhesive to set before grouting. Once cured, apply grout with a rubber float, then wipe excess with a damp sponge. Seal grout for water resistance and easy cleaning.
Decorate with contrasting grout colors or metallic accents to add flair. Incorporate decorative trims or mosaic inserts for visual interest. Seal the grout regularly to prevent staining. For extra durability, consider adding a clear sealant over the tiles. Personal touches like painted patterns or themed mosaics can turn a simple backsplash into a custom feature.
A DIY tile border is an affordable way to upgrade your kitchen with a personal touch. It’s manageable for beginners and yields professional-looking results. The project boosts confidence in your crafting skills and inspires further home upgrades. Plus, every time you see the tiled edge, you’ll feel proud of your creative achievement. Transform your space one tile at a time!
9. Use Chalkboard Paint for a Functional and Decorative Surface
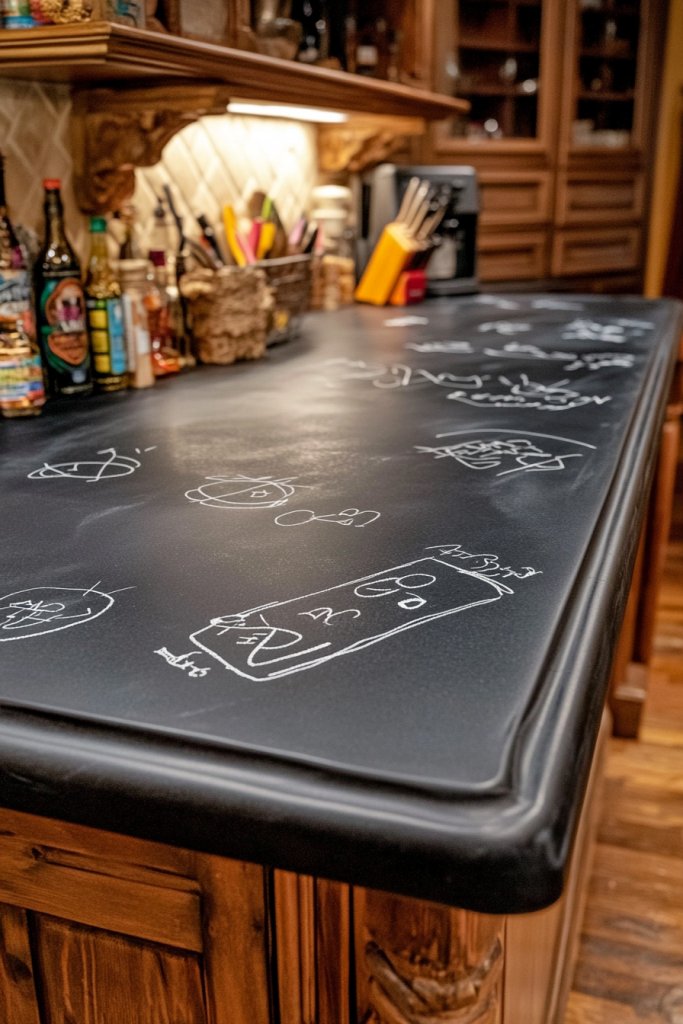
Ever wish your kitchen could do double duty? Chalkboard paint turns part of your countertop into a functional space for notes, recipes, or doodles. It’s a fun, interactive way to personalize your kitchen and keep things organized. Plus, it’s an inexpensive DIY project that adds a playful vibe.
Imagine applying matte black or colored chalkboard paint along a section of your counter. The surface becomes smooth and writable, with a velvety texture that invites notes or sketches. When finished, it blends seamlessly with other surfaces, offering a contrast that draws the eye. Chalk dust adds a casual, artsy touch, turning your countertop into a dynamic canvas.
Choose from classic black for a sleek look or bright colors for a whimsical touch. You can create sections for meal planning, grocery lists, or kids’ art. Seasonal themes—like pumpkin or snowflakes—can be drawn temporarily for festivities. Use decorative borders or stencils to add visual interest. Combining chalkboard with magnetic paint offers even more functionality.
Start with a clean, dry surface free of grease. Use painter’s tape to define the area. Apply a primer if needed, then brush or roll on chalkboard paint in thin, even coats. Allow each coat to dry fully before applying the next. After curing, condition the surface with chalk by rubbing it all over and erasing. Regularly clean with a damp cloth to keep the surface ready for use. Reapply paint after several years for a fresh look.
Add decorative borders or stencils to frame your writing area. Incorporate magnetic strips or clips for holding notes and reminders. Personalize with themed chalk designs for holidays or special occasions. Use colored chalk for highlighting or creating artistic borders. This surface invites creativity and adds a functional, fun element to your kitchen.
A chalkboard-painted surface is a playful upgrade that makes your kitchen more interactive. It encourages family participation and organization while showcasing your creative side. It’s a low-cost, high-reward project that can be refreshed easily. Once finished, it’s a daily reminder that home improvement can be simple and enjoyable.
10. Create a Faux Marble Effect with Stenciling and Paint
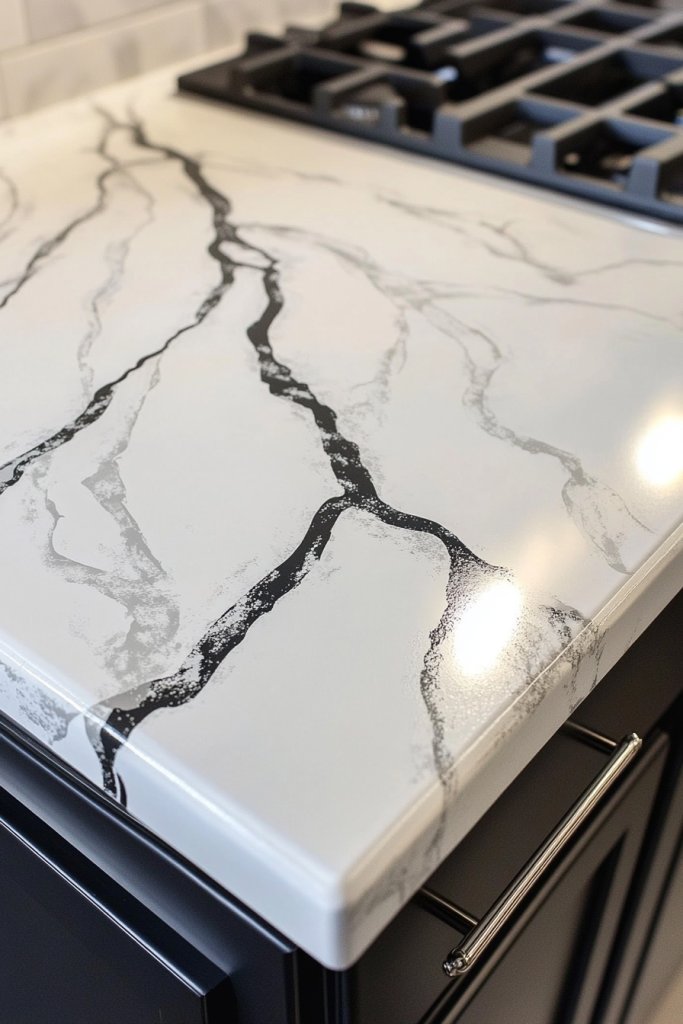
Craving the elegance of marble but not the hefty price tag or maintenance? Faux marble using stencils and paint offers a stunning solution. It’s a creative way to add luxury to your space with minimal expense. Plus, it’s customizable—perfect for expressing your personal style.
Picture laying down a base coat of a neutral color—like soft gray or beige. Then, using a marble stencil, you apply veining with darker shades, creating natural-looking patterns. The textured strokes mimic the striations of real marble, giving depth and realism. When finished, the surface looks polished and sophisticated, with a glossy topcoat enhancing the effect.
Choose from different marble color palettes—classic white with gray veins, black with gold accents, or bold colored veining. For a more dramatic look, add metallic or iridescent paints for shimmer. Seasonal or themed variations include subtle pastel veining or brighter hues for a playful twist. Use multiple layers and blending techniques for a more authentic appearance.
Start by cleaning and priming your surface. Use painter’s tape to mark off the area. Apply a base coat of paint and let dry. Use a stencil with a sponge or brush to dab on darker veins, varying the strokes for a natural look. Blend edges gently with a dry brush. Seal the entire surface with a clear, high-gloss topcoat for durability and shine. Multiple coats of sealant improve longevity.
Add gold or metallic accents along the veins for a luxe touch. Incorporate subtle color gradations or additional veining for depth. Use a matte or semi-gloss finish depending on your desired look. Personalize further with hand-painted borders or decorative motifs that complement your decor. Regularly reapply a protective topcoat to maintain the effect.
Faux marble painting is an accessible way to bring high-end style into your home. It’s a satisfying project that yields dramatic, professional-looking results. Once completed, your space radiates elegance, boosting your confidence in DIY craftsmanship. With a little practice, you can create stunning surfaces that rival real marble—without the cost or upkeep.
11. Attach Decorative Trim or Edge Banding to Cover Damaged Counter Edges
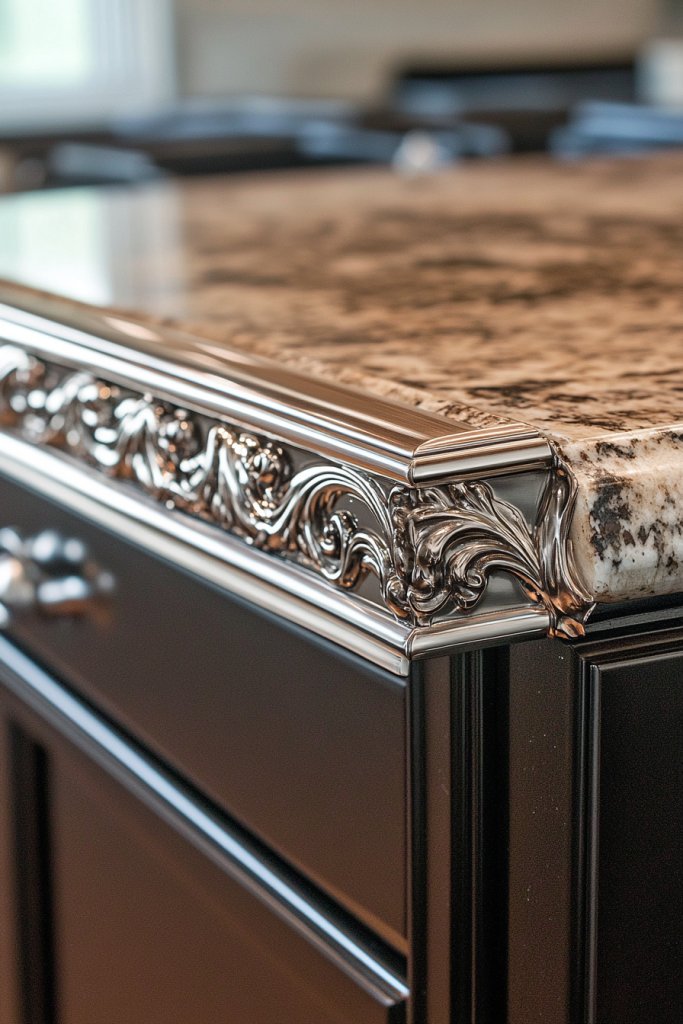
Worn, chipped, or uneven counter edges can ruin an otherwise nice kitchen look. Covering these imperfections with decorative trim or edge banding is a simple fix that adds a polished finish. It’s an inexpensive way to hide flaws and instantly elevate your space. Plus, it’s easy enough for DIYers to handle without special skills.
Visualize attaching a sleek, decorative molding along your counter’s edge, instantly hiding damage and imperfections. The trim can be painted to match your cabinets or left natural for contrast. It creates a clean, defined line that frames your countertops beautifully. The textured or smooth surface of the trim adds a tactile element, making the transition from counter to wall seamless and stylish.
Choose from various materials—wood, vinyl, or metal—to match your decor. For rustic charm, opt for distressed wood or aged metal; for modern minimalism, smooth acrylic or lacquered trims work well. Seasonal or thematic options include painted or stained finishes to suit holidays or themes. Use decorative trims as accents or full-length banding depending on the severity of damage.
Measure the length of your counter edges carefully. Cut the trim to size, using a saw or utility knife. Sand rough edges for a clean fit. Attach with strong adhesive or small nails, ensuring each piece is aligned perfectly. Fill nail holes with wood filler if needed, then paint or stain to match your decor. Seal with a clear topcoat for added durability. Regular checks prevent peeling or damage.
Add decorative paint or stencils to customize the trim further. Incorporate metallic or contrasting colors for a striking effect. Combine with other decorative elements like corner rosettes or end caps. For a cohesive look, match the trim color with cabinet hardware or wall accents. Regular touch-ups keep it looking fresh and stylish.
Attaching decorative trim is a quick way to conceal imperfections and add design detail. It boosts your confidence in tackling small repairs with style. The project is simple enough for beginners and offers an instant upgrade. Your kitchen will look more finished, polished, and ready for hosting or family dinners!
12. Repurpose Reclaimed Wood as a Rustic Countertop Cover
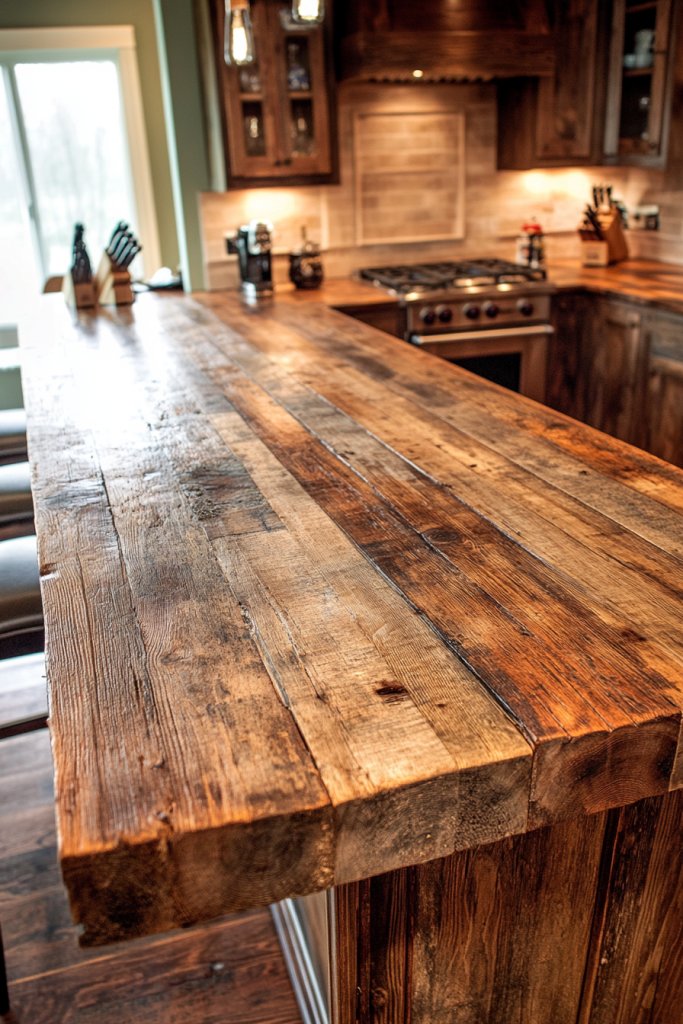
Craving a warm, rustic vibe but on a tight budget? Reclaimed wood offers a charming, eco-friendly solution that’s both stylish and sustainable. It adds character and texture, making your kitchen feel cozy and inviting. Plus, repurposing old wood keeps costs low while giving new life to vintage materials.
Picture large, rough-hewn wood planks layered to form a rustic countertop, their natural knots and grain adding visual interest. The surface feels warm and tactile, with an uneven but charming finish. The aged patina and weathered look evoke a farmhouse or cottage aesthetic. When paired with vintage hardware or distressed paint, the overall effect is authentic and welcoming.
Opt for wide, thick planks for a substantial look or narrower strips for a more refined appearance. Seal the wood with food-safe oil or polyurethane to protect against spills. Seasonal accents include adding a layer of painted or stained designs or distressing the surface further. Mix reclaimed wood with modern elements like sleek hardware or concrete accents for contrast. It’s adaptable to various decor themes, from shabby chic to industrial.
Start by selecting reclaimed wood that’s free of rot and pests. Clean and sand the surface thoroughly. Cut to size and join pieces using wood glue or screws, ensuring stability. Seal the surface with multiple coats of oil or polyurethane, sanding lightly between coats. Install on top of a sturdy base or directly onto cabinetry, depending on your project scope. Consider adding a protective edge or trim for a clean finish. Regular maintenance involves cleaning with gentle products and occasional re-oiling.
Customize by staining or painting sections for contrast or pattern. Attach decorative hardware or metal accents for a rugged look. Embellish with carved or engraved details, or incorporate inlays for extra flair. Use contrasting sealers or waxes to highlight grain and texture. Personal touches like stenciled patterns or family monograms can make it uniquely yours.
Repurposing reclaimed wood is both eco-conscious and budget-smart, providing a distinctive focal point. It’s a project that combines craftsmanship with creativity, boosting your DIY confidence. The natural beauty and warmth of wood create a welcoming kitchen environment. With patience and care, you can craft a stunning, rustic surface that’s full of character and history.
13. Use Adhesive Wallpaper to Add Colorful or Patterned Accents
Want to add a splash of personality to your kitchen without a full overhaul? Adhesive wallpaper is a simple way to introduce color or patterns in a flash. It’s perfect for creating accents, hiding imperfections, or updating dated surfaces on a budget. Plus, it’s removable, so you can change your mind anytime.
Imagine peeling off a strip of floral or geometric wallpaper and smoothing it onto your counter edge or backsplash. The textured pattern instantly brightens the space, adding visual interest and depth. When finished, it looks like a designer touch—clean lines, vibrant colors, and bold prints. The surface feels lively and dynamic, elevating the overall aesthetic with minimal effort.
Choose from bold, modern patterns or subtle, tonal designs depending on your style. Use bright colors for a playful, energetic vibe or muted tones for understated elegance. Seasonal or holiday-themed wallpaper adds a fun, temporary twist. Combining different patterns or creating a patchwork effect can personalize your space further. It’s versatile enough for small accents or larger sections.
Start with a clean, dry surface. Measure and cut wallpaper strips with a slight overlap. Peel the backing gradually and align the pattern carefully. Smooth the adhesive with a squeegee or roller to remove air bubbles and wrinkles. Pay special attention to corners and edges for a seamless look. Trim excess with a craft knife. For durability, seal with a clear topcoat or apply a layer of clear laminate. Regular gentle cleaning keeps it looking fresh.
Layer with decorative trims or borders for a finished look. Incorporate contrasting colors or patterns to create focal points. Use stencils or paint to add custom motifs over the wallpaper for a one-of-a-kind design. You can also combine with other DIY projects like painted borders or decals. Protect the surface with a clear sealant for longer-lasting color and adhesion.
Adhesive wallpaper is a quick, fun way to refresh your kitchen’s look without commitment. It encourages creativity and experimentation, boosting your confidence in DIY projects. The vibrant or subtle accents reflect your personality and style. Once you see how easy it is, you’ll feel inspired to try more upgrades—your space can truly be your canvas.
14. Insert a Layer of Self-Adhesive Quartz or Granite Sheets for a Luxe Look
Dreaming of a high-end kitchen but daunted by the price? Self-adhesive quartz or granite sheets give you that luxe stone appearance without the hefty cost. They’re perfect for quick upgrades or accent pieces, making your space look polished and expensive in a snap. No heavy lifting required.
Visualize peeling a sticky-backed stone sheet and smoothly applying it over your existing countertop. The surface resembles real quartz or granite with detailed veining and shimmering flecks. The glossy finish catches the light, giving a sleek, sophisticated look. It’s like installing a real stone surface—just easier and more affordable—transforming your kitchen into a designer space.
Select from various colors and patterns—classic white and black, or bold, colorful veining. For a contemporary look, choose sheets with reflective or shimmering particles. Seasonal options include warm earth tones for fall or icy whites for winter. For small areas, cut and piece sheets for a mosaic effect. Layering with complementary textures enhances visual depth.
Prepare your surface by cleaning and leveling. Measure and cut sheets carefully with a utility knife. Peel back the adhesive backing and align the sheet, smoothing out air bubbles with a squeegee. Use a heat gun to help conform the material around curves or edges. Overlap sheets for larger projects and trim excess neatly. Seal with a clear, protective coating if recommended to boost longevity. Regular cleaning maintains the glossy appearance.
Add contrasting or metallic accents within the sheets for extra flair. Incorporate custom shapes or borders for a tailored look. Use a fine brush to add painted details or highlights. Combining with other materials, like wood or metal, creates a layered, curated aesthetic. Periodic re-sealing keeps the surface looking fresh and protected.
Applying self-adhesive stone sheets is a smart DIY hack for a luxe upgrade. It’s a quick, affordable project that delivers stunning results, inspiring confidence. The durable, glossy surface elevates your kitchen instantly. Once completed, you’ll enjoy a high-end look that rivals professional installations—without the stress.
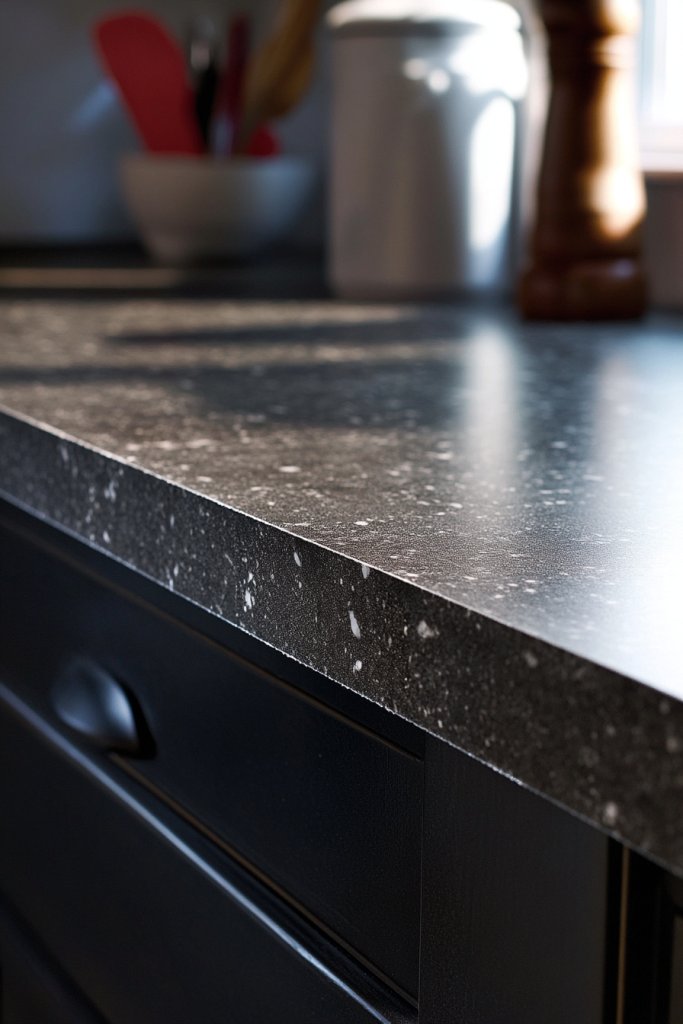
15. Place a Protective Masonry or Concrete Overlay for an Industrial Feel
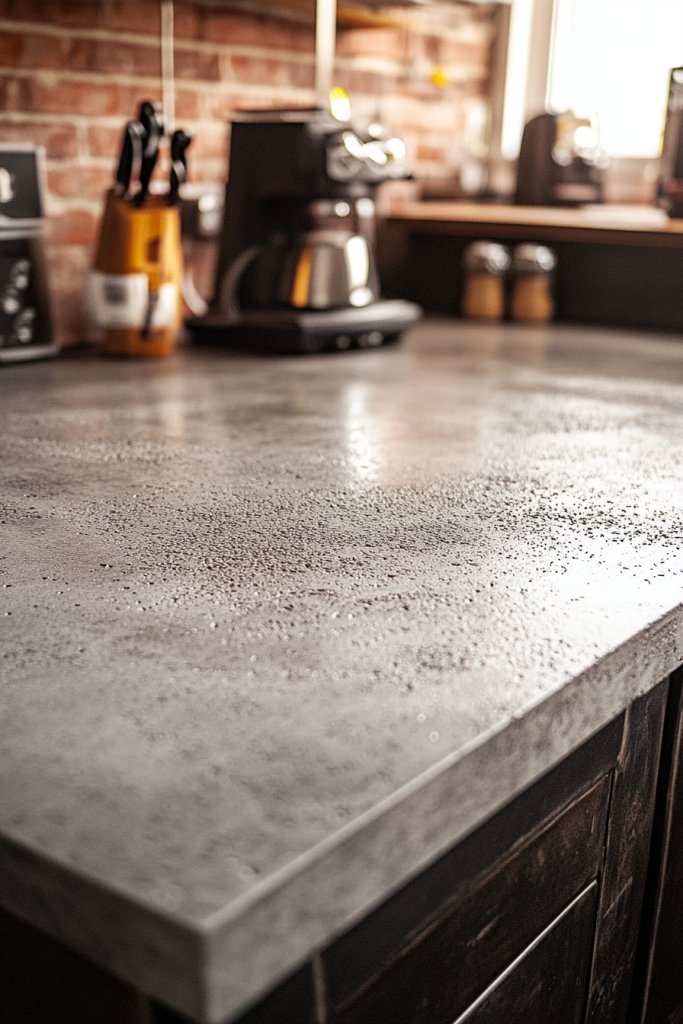
Want an edgy, industrial look that’s durable and easy to maintain? Masonry or concrete overlays turn ordinary surfaces into modern masterpieces. They add texture and character, transforming your kitchen into a sleek, urban space. Best of all, they’re more budget-friendly than full-scale renovations.
Picture applying a thin layer of concrete or masonry mix over your existing counter, creating a matte, textured surface. The overlay’s mottled, rough texture adds depth, with subtle color variations that mimic real concrete. When sealed, it feels cool and sturdy under your hand. The raw, industrial aesthetic pairs well with metal fixtures and minimalist decor, giving your kitchen a bold, contemporary edge.
Choose from natural gray, tinted, or stained overlays for different moods—warm and earthy or sleek and cool. Incorporate decorative aggregates or pigments for custom effects. Seasonal updates could involve adding colored accents or textured patterns. Use overlays on islands, backsplashes, or entire countertops for a cohesive look. Mix with reclaimed wood or metal for an eclectic industrial vibe.
Start by cleaning and priming your surface thoroughly. Mix the overlay material according to manufacturer instructions. Apply with a trowel, spreading evenly and working into corners and edges. Use a float to texture or smooth the surface, depending on desired look. Allow curing time—usually 24-48 hours—before sealing with a penetrating or coating sealant. For a polished finish, buff with a high-speed buffer after curing. Regular sealing preserves the look and prevents stains.
Add color through staining or tinting during application. Incorporate embedded decorative stones or glass for extra flair. Use contrasting sealers or waxes to highlight textures. Personalize with stamped patterns or geometric designs. Complement with industrial-style fixtures and lighting for a cohesive, modern aesthetic.
A masonry or concrete overlay offers a durable, stylish upgrade that’s achievable with DIY skills. It’s a statement of modern elegance that elevates your space. The textured surface feels substantial and unique, boosting your confidence in tackling industrial-inspired projects. Once finished, your kitchen exudes a bold, contemporary vibe that can’t be ignored.
16. Create a Mosaic Pattern with Broken Tile Pieces or Glass Shards
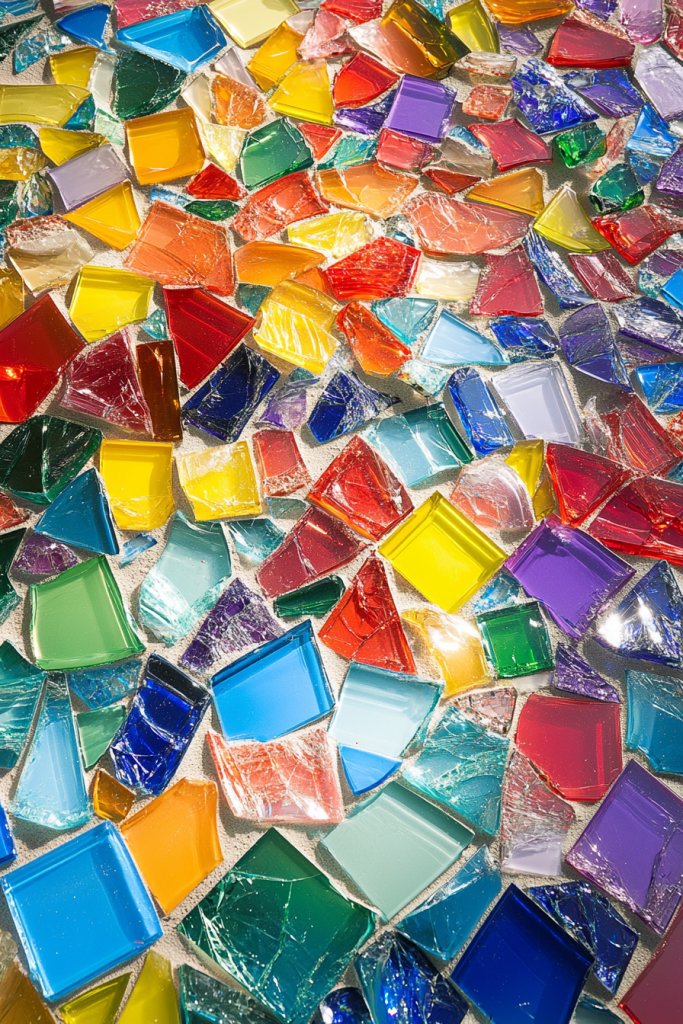
Looking for a truly unique, artistic touch for your countertops? Creating a mosaic with broken tile pieces or glass shards turns a plain surface into a work of art. It allows you to recycle and repurpose materials, making your space eco-friendly and totally personalized. Plus, it’s a fun project that sparks your creative side.
Imagine arranging colorful broken tiles or glass fragments into a vibrant, intricate pattern. The uneven edges and varied textures add depth and dimension, catching light and creating a dazzling effect. When sealed, the surface becomes smooth yet visually complex, resembling a handcrafted masterpiece. The mosaic becomes a conversation piece, reflecting your style and artistic flair.
Use a color palette that complements your decor—bright blues and yellows for a playful look, or muted earth tones for subtle elegance. Incorporate metallic or iridescent shards for shimmer. Pattern options range from geometric grids to freeform abstract designs. Seasonal themes or personal motifs can be integrated for added meaning. Small inlays or borders enhance the overall composition.
Start by cleaning and preparing your surface. Arrange your tile or glass pieces into a pattern before gluing. Use a strong adhesive suitable for ceramics or glass, applying with a small spatula or toothpick. Press each piece firmly into place, leaving slight gaps for grout. Once adhesive cures, mix grout and fill the gaps thoroughly. Clean excess grout with a damp sponge, then seal with a clear, durable finish. Regular maintenance involves gentle cleaning to preserve the mosaic’s vibrancy.
Add metallic or glow-in-the-dark shards for extra impact. Personalize with initials, symbols, or custom motifs embedded within the mosaic. Use colored grout or paint to highlight specific areas. Incorporate textured elements like stones or shells for tactile interest. Protective sealing maintains the design’s brilliance over time, making your mosaic a lasting centerpiece.
Creating a mosaic is a rewarding way to express your creativity and craft a one-of-a-kind surface. It boosts your confidence in handling small, detailed projects. The end result is a stunning, personalized countertop that showcases your artistic talents. Every glance at your mosaic will remind you that DIY projects can be both beautiful and meaningful.
17. Use Heat-Resistant Silicone or Resin Coats for Easy Maintenance
Are your countertops prone to stains, scratches, or heat damage? Flexible, heat-resistant silicone or resin coatings can give your surface a protective, easy-to-clean layer. They’re perfect for busy kitchens where durability matters. Plus, they enhance the look with a sleek, smooth finish that’s simple to maintain.
Imagine pouring or spreading a clear, glossy silicone or resin over your countertop. The surface becomes uniformly smooth, with a subtle sheen that reflects light beautifully. The coating fills in minor scratches and imperfections, creating a flawless, uniform appearance. When cured, it feels slick and resilient, ready to withstand everyday use without staining or damage.
Choose from different finishes—glossy, matte, or satin—to match your decor. The coatings work well over painted, laminated, or even tiled surfaces, providing extra protection. They can be tinted with pigments for subtle color accents or left clear for a minimalist look. Seasonal or thematic touches can be added via embedded decorative elements before curing. This approach adapts easily to various surface types and design preferences.
Clean and dry the surface thoroughly. Mix the resin or silicone according to manufacturer instructions. Pour or spread it evenly using a squeegee or brush, ensuring coverage of all areas. Use a heat gun to remove bubbles and improve surface smoothness. Allow curing time—often 24-48 hours—before use. Multiple coats may be applied for extra thickness or protection, with light sanding between layers. Proper ventilation during curing is recommended for safety and best results.
Add decorative elements like metallic flakes or colored pigments into the coating for a customized effect. Use contrasting layers or textured finishes to create visual depth. Regular cleaning with gentle, non-abrasive cleaners maintains the glossy surface. Recoat periodically to refresh the protective layer and keep your countertop looking pristine. The flexible nature of these coatings allows for creative customization.
Using heat-resistant silicone or resin coatings is a smart DIY upgrade that combines functionality with style. It’s a straightforward process, providing long-lasting protection while boosting your confidence in handling advanced finishes. Your surface will resist daily wear, stains, and heat, making it both practical and beautiful. With this upgrade, your kitchen will look newer and stay easier to care for over time.
18. Incorporate Decorative Stickers or Decals for Instant Style Updates
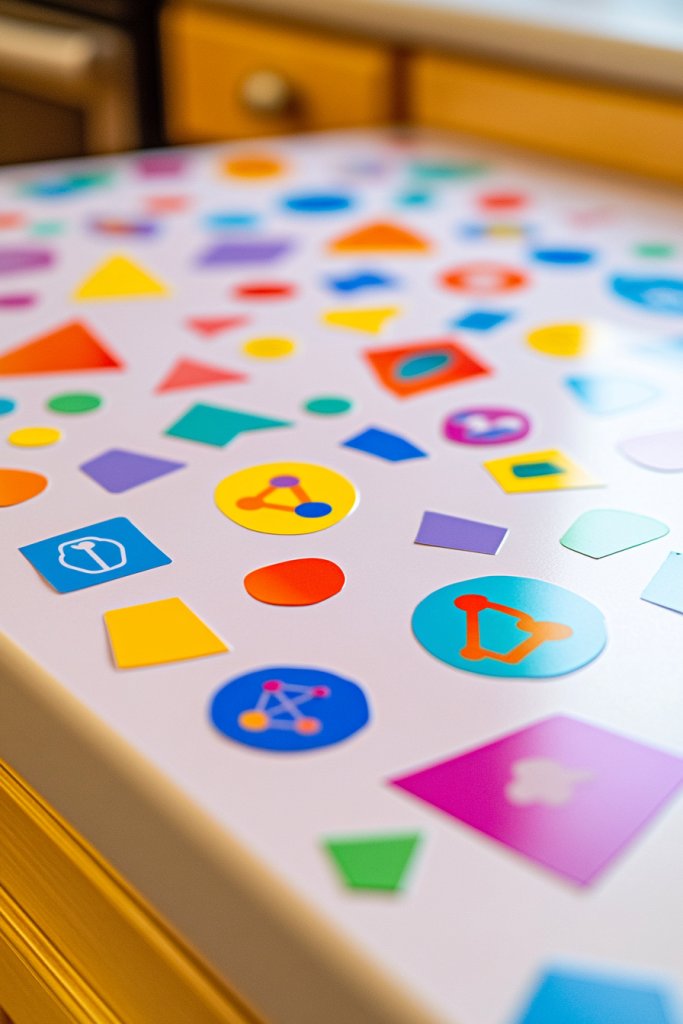
Want a quick, fun way to customize your kitchen without a full redo? Decorative stickers or decals offer an inexpensive and removable solution. They let you experiment with patterns, themes, or seasonal accents. It’s perfect for renters or anyone who loves changing up their decor frequently.
Imagine peeling a themed decal—like geometric patterns, floral motifs, or whimsical designs—and applying it onto your counter surface. The stickers conform easily, adding instant personality and color. When finished, the surface looks fresh and playful, with a modern or quirky vibe depending on your choice. The adhesive is strong enough to last but removable without residue, making it versatile.
Use themed decals for holidays, birthdays, or seasons—think snowflakes for winter or flowers for spring. Mix and match patterns for a layered, eclectic look. For a more subtle upgrade, opt for transparent or metallic decals that add shimmer without overwhelming. Combine with other DIY techniques like painted borders or stencil art for a cohesive design. The possibilities are endless.
Clean and dry your surface thoroughly. Choose decals with adhesive suitable for your material—vinyl works well on most surfaces. Position and peel back a small section of backing, pressing firmly to avoid bubbles. Smooth with a squeegee or credit card. For curved or uneven areas, gently stretch or trim decals for a perfect fit. Seal with a clear, protective spray if desired. Regular gentle cleaning preserves the decals and prevents peeling.
Create custom decals or stickers using printable adhesive paper or order personalized designs online. Layer decals with paint or other embellishments for a multi-dimensional look. Use metallic or holographic decals for extra shimmer. Incorporate your favorite quotes or icons to make the space uniquely yours. Regular updates keep your kitchen fresh and reflective of your evolving style.
Decorative stickers and decals are a simple, playful way to personalize your kitchen instantly. They boost your confidence in DIY projects by showing how small changes can make a big difference. The removable feature allows you to experiment without commitment. Your space will feel more lively, personalized, and fun—perfect for expressing your personality.
19. Add a Layer of Durable Protective Film for Scratch and Stain Resistance
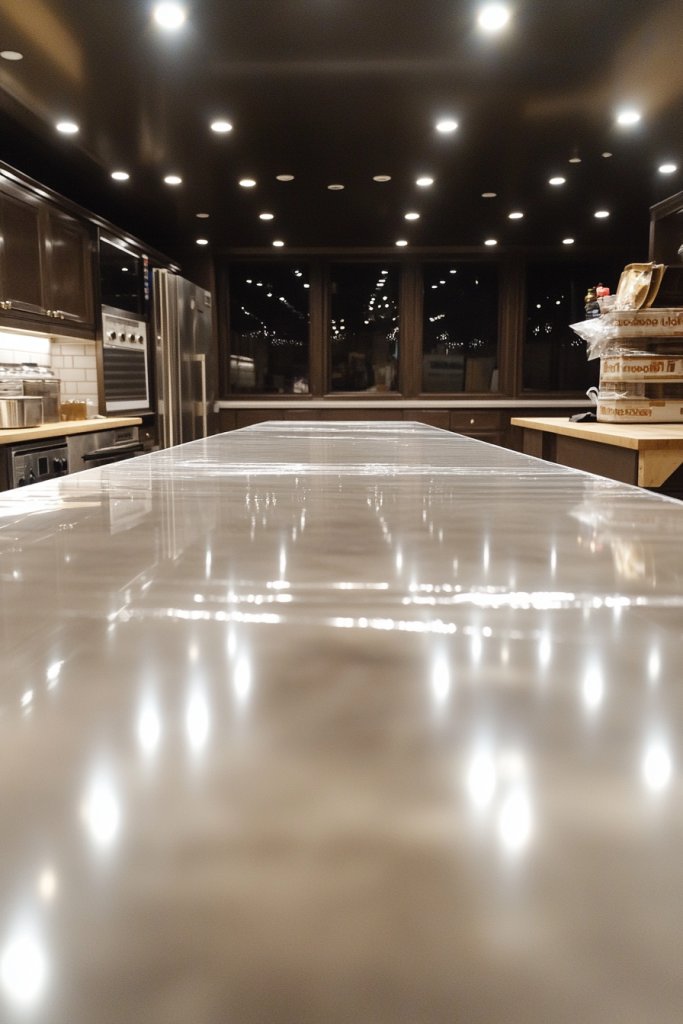
Sick of scratching or staining your countertops after just a few months? A clear protective film offers an invisible shield that guards against daily wear and tear. It’s an easy way to extend the life of your surface while maintaining its fresh appearance. Best of all, it’s removable, making it ideal for renters or temporary fixes.
Imagine applying a transparent film that clings tightly to your countertop, almost like a second skin. The surface remains smooth and glossy, with a slight tactile feel. When finished, it’s virtually invisible, protecting from scratches, stains, and heat marks. The film resists spills and marks, keeping your surface looking pristine without altering the appearance.
Select from different thicknesses and finishes—matte, semi-gloss, or high-gloss—to suit your aesthetic. Use on laminate, painted, or stone surfaces for added protection. Seasonal or thematic variations include textured films that mimic leather or fabric patterns. For high-traffic areas, choose thicker or reinforced options. Layer with other protective coatings or sealants for enhanced durability.
Clean the surface thoroughly to remove grease and dust. Measure and cut the film with a sharp utility knife, leaving a slight overhang. Peel back the backing gradually and apply, smoothing with a squeegee to eliminate air bubbles. Use a heat gun to conform the film around curves or edges. Trim excess carefully for a clean finish. Press down along edges and seams for a secure seal. Regular cleaning with non-abrasive cloths preserves the protective layer.
Add custom printed designs under the film for personalized aesthetics—like monograms or patterns. Use multiple layers for extra protection in high-use zones. Reapply or replace the film as needed to maintain clarity and effectiveness. For a matte finish, lightly buff the surface after installation. This transparent shield helps your countertops stay beautiful longer and resists the rigors of daily cooking.
A protective film is an easy, no-fuss upgrade that preserves your investment. It’s a smart DIY project that prolongs the life of your counters and boosts your confidence in maintenance. The invisible barrier provides peace of mind, and replacing it is simple when needed. Your kitchen will stay looking fresh and new, with minimal effort involved.
Conclusion
With a diverse range of affordable countertop fixes explored here, you have plenty of options to give your kitchen a fresh, new look. Whether you opt for paint, coverings, or clever repairs, these ideas are simple enough to try yourself and can make a big impact. Don’t wait—start experimenting today and turn your kitchen into a space you love without overspending!