Ever wish you could give your home a stylish upgrade without spending hours or breaking the bank? Quick DIY home decor ideas are the perfect solution, offering simple yet impactful ways to refresh your space in no time. They’re popular because they combine creativity, affordability, and immediate results, making home styling accessible for everyone.
In this article, you’ll find a variety of fun and easy ideas to personalize your home — from crafty wall art to clever furniture hacks. Get ready to be inspired by simple projects that can transform any room and bring your unique style to life with minimal effort and maximum flair.
1. Transform Old Glass Jars into Elegant Candle Holders

Ever find yourself stuck with a bunch of empty glass jars after sauce or jam? Instead of tossing them, why not turn these everyday items into charming candle holders? It’s a simple way to add cozy ambiance without spending a dime. Plus, it makes your space feel more personalized and eco-friendly.
Picture a row of vintage jars painted in soft pastel shades, glowing softly with flickering candle flames. The textured glass catches the light, casting warm patterns onto nearby surfaces. Some jars are decorated with twine or lace, giving a rustic yet elegant vibe. These DIY holders sit atop your shelf, radiating a gentle, inviting glow.
You can customize jars with metallic paints for a sleek modern look or add motifs for a boho touch. Experiment with different sizes and shapes to suit your decor style. For seasonal flair, incorporate holiday-themed ribbons or stencils. Stack them on a tray for a rustic centerpiece or spread them along a windowsill for a subtle glow.
Gather clear glass jars, paint, brushes, and decorative accessories like twine or stickers. Clean the jars thoroughly and dry them well. Use spray paint or brush on your preferred colors—metallics work great for a chic look. After drying, insert tea lights or small candles. For extra flair, add decorative elements like beads or dried flowers around the rim.
Personalize jars by etching initials or patterns with stencils and paint. Wrap the necks in colorful string or add a small charm for a playful touch. Use different candle types—LED candles for safety or scented candles for aromatherapy. Switch up decorations seasonally to keep your decor fresh and fun.
This project is a no-brainer and instantly elevates your space. It’s perfect for beginners and adds a warm, inviting glow that everyone will notice. Ready to recycle and reimagine? Your home will thank you for the cozy upgrade!
2. Create a Rustic Wooden Wall Shelf with Reclaimed Wood

Tired of cluttered surfaces and flimsy storage options? A rustic wooden wall shelf made from reclaimed wood can solve that problem while adding a charming farmhouse touch. It’s a quick upgrade that makes your space look intentional and warm.
Imagine a sturdy, weathered plank of wood mounted on your wall, topped with potted herbs, vintage books, or decorative ceramics. The rough texture of the reclaimed wood contrasts beautifully with smooth ceramics and lush textiles nearby. The shelf’s natural imperfections tell a story of sustainability and craftsmanship, creating a cozy, lived-in vibe.
You can tailor the length and thickness of the shelf to suit your space. For a more modern look, paint or whitewash the wood before installation. For a boho feel, pair it with hanging macramé plant holders or layered textiles beneath it. Use it in kitchens, bedrooms, or entryways—its versatility suits every corner.
Start by sourcing reclaimed wood from local salvage yards or online marketplaces. Sand it lightly to remove splinters, then seal it with a clear protective finish if desired. Mount sturdy brackets or cleats to the wall, ensuring they can support your intended items. Position the shelf at eye level for easy access and aesthetic balance. Secure the wood onto the brackets tightly.
Add a personal touch by staining or painting the wood in your favorite hue. Decorate the shelf with small framed quotes, vintage collectibles, or seasonal decorations. Layering items of different heights and textures enhances visual interest. Change the display periodically to keep the look fresh and aligned with your style.
This DIY shelf combines sustainability with style, making it a rewarding project. It instantly transforms blank walls into focal points that showcase your personality. Once installed, it’s a durable, functional piece that will serve your home for years to come.
3. Make Geometric Wall Art with Painter’s Tape and Acrylics

Looking to add a bold, modern touch to your walls without breaking the bank? Geometric wall art crafted with painter’s tape and acrylics is an easy way to create eye-catching decor. It’s perfect for those who want a custom piece but lack artistic skills.
Visualize a canvas with crisp triangles, squares, and lines in contrasting colors—black, white, bold reds, and blues. Tape creates sharp edges, while vibrant acrylic paints fill in the shapes. The finished piece looks sophisticated yet fresh, perfect for a gallery wall or focal point.
Choose colors that complement your existing palette or go for a monochrome look for understated elegance. Experiment with different shapes and sizes for a dynamic effect. For a seasonal update, swap out colors or add metallic accents. This technique works well on canvas, wood panels, or even directly on walls.
Start by sketching your design lightly with a pencil. Use painter’s tape to outline your shapes precisely, pressing down edges firmly to prevent bleed-through. Paint inside the taped areas with acrylics, applying multiple coats if needed. Once dry, carefully remove the tape to reveal sharp, clean lines. Seal with a matte or gloss varnish for durability.
Add metallic or glitter accents for extra flair. Mix in your favorite colors to match seasonal decor or personal tastes. Create a series of smaller pieces for a cohesive gallery wall or large statement art for a focal point. Incorporate textured paints or metallics for a more luxurious feel.
This project proves you don’t need to be a professional artist to make stunning wall art. It’s a fun, customizable activity that instantly upgrades your space. Plus, it’s so budget-friendly that you’ll want to make multiple pieces—imagine the possibilities!
4. Craft a Colorful Fabric-covered Bulletin Board
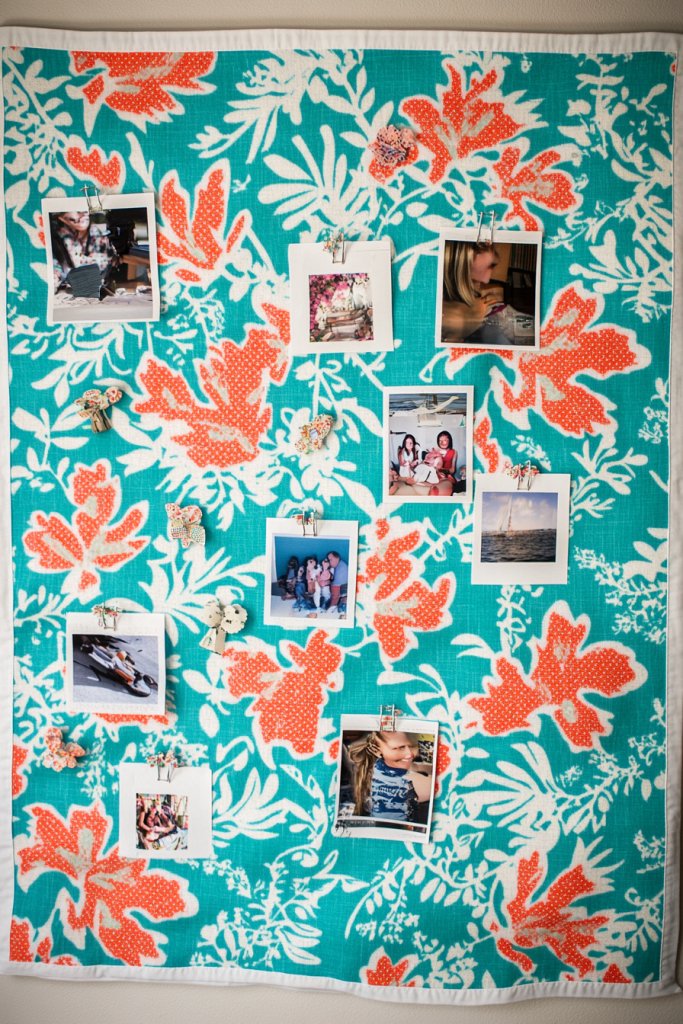
Struggling to keep track of notes, reminders, or inspirational quotes? A fabric-covered bulletin board is both functional and stylish. It transforms a mundane corkboard into a vibrant focal point that keeps you organized with flair.
Imagine a large corkboard wrapped in a bright, textured fabric—perhaps a soft velvet or fun floral print. Pins hold memos, photos, and sketches, while the fabric background adds depth and color. It hangs above a desk or in a kitchen, instantly making the space more lively and inviting.
Choose fabrics based on your room’s color scheme or seasonal themes. Use contrasting piping or decorative trim to add a polished look. For a minimalist style, opt for neutral tones and sleek frames. You can also layer with clips or hooks to add extra organizational options.
Start by selecting a corkboard slightly larger than your intended display area. Cut your fabric slightly larger than the board, then stretch it tightly around the edges and secure with a staple gun or hot glue at the back. Wrap corners neatly for a clean finish. Add decorative elements like ribbons or tags if desired.
Personalize by adding fabric with patterns or textures that reflect your personality. Attach small decorative pins, or paint some wooden accents to complement the fabric. Incorporate a few small baskets or pockets for extra storage. Change the fabric seasonally for a fresh look.
This project is quick and easy, perfect for beginners. It turns everyday organization into a cheerful decor feature. With just a few tools and some fabric, you create a personalized space that motivates and inspires you daily.
5. Assemble a DIY Macramé Plant Hanger for a Boho Vibe

Want to add a touch of boho charm without cluttering your space with actual plants? A DIY macramé plant hanger is a fun, creative way to bring texture and style into any room. It’s a trendy decor piece that’s surprisingly simple to craft.
Picture a knotted cord in earthy tones hanging from your ceiling, holding a decorative pot. The intricate knots and tassels create a textured focal point, contrasting beautifully with modern furniture. Even without greenery, it adds warmth and visual interest, especially against neutral walls.
Choose different cord colors or thicknesses for varied effects. Add beads or charms to customize further. Hang multiple hangers at different heights for a layered look or incorporate decorative weights at the ends. It suits both small accent corners and larger, open areas.
Gather macramé cord, a ring or hook for hanging, and optional decorative beads. Learn basic knots like square, half hitch, and spiral. Measure and cut cords to desired lengths, then knot in patterns of your choice. Attach the loop at the top for hanging, and place your pot securely inside. Adjust spacing and tension for evenness.
Customize by using vibrant or metallic cords for a modern twist. Incorporate charms or tassels for extra flair. Use different knot patterns for unique textures. Change the hanging height seasonally or to match your ceiling height.
This project is accessible for beginners and adds a cozy, artistic vibe. It’s a great way to showcase your personal style and add visual interest without much effort. Once you see how easy it is, you might want to make a few for different rooms!
6. Decorate Plain Throw Pillows with Fabric Paint or Stencils
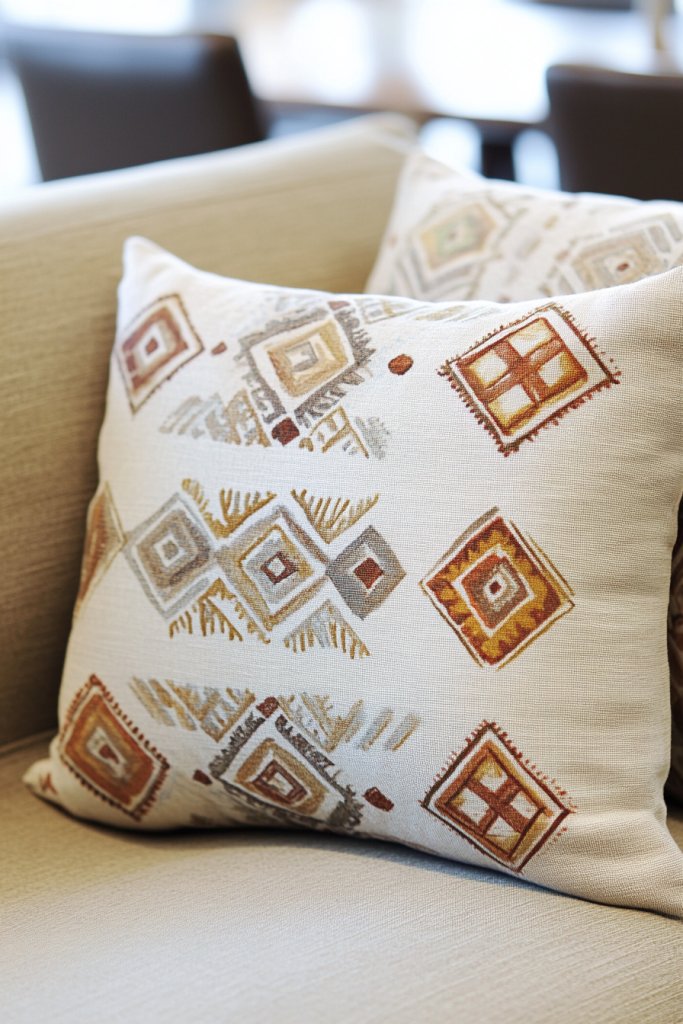
Tired of boring throw pillows that don’t match your decor? Personalizing plain cushions with fabric paint or stencils lets you create one-of-a-kind accents. It’s an affordable way to refresh your space and showcase your creativity.
Envision a neutral pillow transformed with bold geometric shapes or floral motifs in vibrant hues. The textured fabric acts as a canvas, while painted or stenciled designs add personality. These pillows sit on a sofa or bed, becoming focal points that reflect your style.
Choose stencils with patterns that suit your decor—boho, modern, or vintage. Mix and match colors for a layered look or keep it monochrome for sophistication. Use fabric markers for detailed designs or sponge brushes for larger shapes. Coordinate your pillow designs with other textiles in the room.
Lay the pillow flat on a protected surface and sketch your design lightly with pencil. Use fabric paint and stencils to fill in your pattern, applying multiple thin coats for even coverage. Let dry completely before handling or fluffing. For best results, heat-set the paint according to instructions. Wash gently to preserve your artwork.
Add embellishments like sequins, beads, or embroidery for extra texture. Use metallic or glitter paints for a luxe effect. Incorporate initials or quotes for a personal touch. Switch designs seasonally or for special occasions to keep your decor fresh.
This DIY project is perfect for beginners and adds a custom touch to your living space. It’s a fun way to experiment with colors and patterns, making your home feel uniquely yours. Plus, the satisfaction of creating something yourself boosts confidence in your decorating skills.
7. Create a Statement Mirror Frame Using Washi Tape or Decoupage
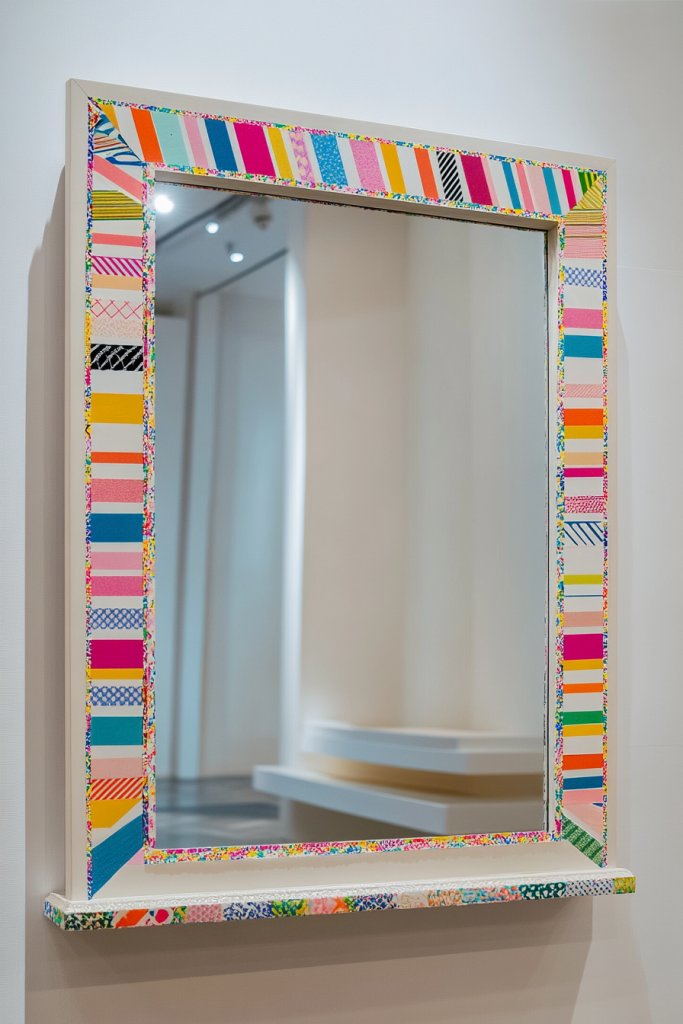
Feeling like your mirror could use a boost of personality? A plain mirror frame can be transformed into a statement piece with some creative tricks. Washi tape or decoupage techniques are quick, affordable ways to add color and style.
Imagine a mirror framed with vibrant washi tape in geometric patterns or metallic finishes. Alternatively, decorative paper or fabric can be glued onto the frame, creating a textured, layered effect. The result is a fun, personalized accent that elevates your entire room’s look.
Use washi tape in contrasting colors for a modern look or in metallic shades for glam. Decoupage with patterned paper or vintage book pages adds a shabby chic vibe. Mix and match styles to fit your decor—boho, eclectic, or minimalist. Change the look seasonally or whenever your mood strikes.
Remove any existing frame trim and clean the surface thoroughly. Measure and cut washi tape or decorative paper to fit. Apply in sections, smoothing out bubbles as you go. For decoupage, brush a thin layer of glue or Mod Podge on the surface, place your paper, then seal with an additional layer. Reattach or secure the frame if necessary.
Add metallic or glitter accents for extra sparkle. Incorporate monograms, quotes, or small decorative elements using additional craft supplies. Use contrasting colors for a bold statement or subtle tones for understated elegance. It’s a fantastic way to match your mirror to your decor theme.
This project transforms a simple mirror into a focal point with minimal effort. It’s ideal for DIY novices looking for quick decor upgrades. Once done, your space gains a fresh, stylish vibe that’s entirely your own.
8. Build a Simple Ladder Shelf from Wooden Pallets
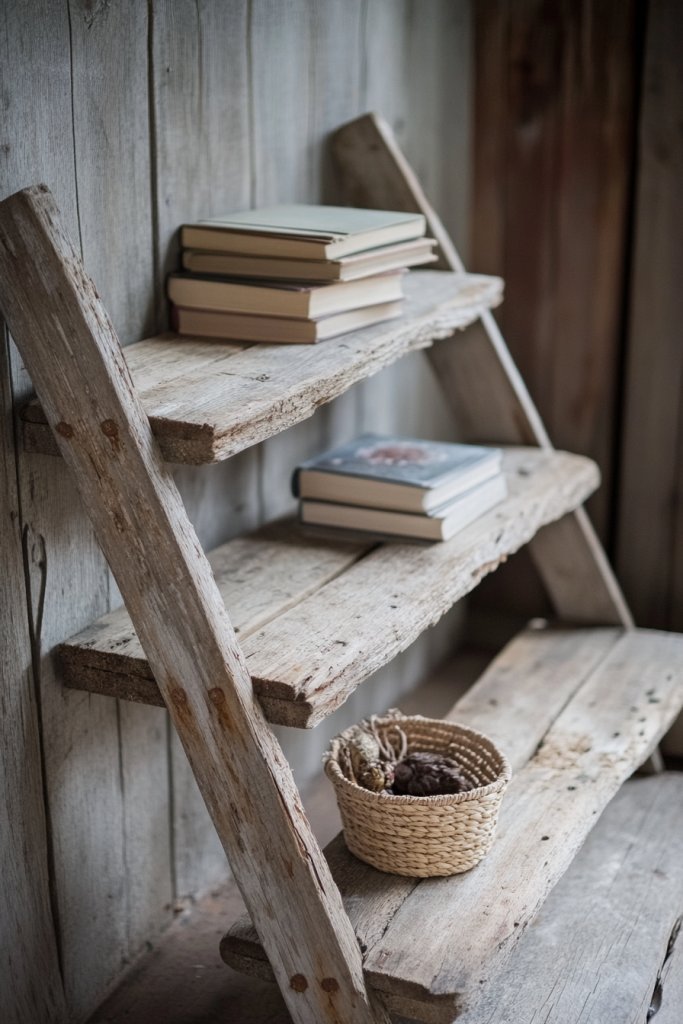
Cluttered corners and limited storage? Building a ladder shelf from pallets is an easy way to add vertical storage without breaking the bank. It’s a DIY project that combines practicality with rustic charm. Plus, it’s a fun way to upcycle old wood.
Picture a weathered wooden pallet cut into steps, leaning against your wall. Decorated with books, baskets, and small decorative objects, it creates a layered, textured look. The natural wood grain adds warmth, while the open design keeps the space feeling airy and open.
Sand and stain the wood for a polished look or leave it natural for a rustic feel. Adjust the number of steps depending on your storage needs. Use it in living rooms, bedrooms, or bathrooms—its versatility suits any space. Enhance with decorative baskets or seasonal accents.
Start by sourcing pallets from local stores or online. Disassemble and sand the wood thoroughly, then cut into steps of your desired height. Stack and secure each step with screws or nails, ensuring stability. Lean the structure against the wall, securing it with brackets if needed. Finish with a protective sealant.
Paint or stain the wood in your favorite color for a custom look. Decorate with fairy lights or add hooks on the sides for hanging small items. Incorporate decorative elements like stencil patterns or monograms. Change the arrangement seasonally for fresh appeal.
This project blends utility with style, proving that simple materials can create impressive decor. It’s perfect for DIY beginners and offers a functional, attractive storage solution. Once complete, it’s a proud addition to your home that reflects your creative spirit.
9. Make a Color-blocked Photo Display with Clothespins and Paint
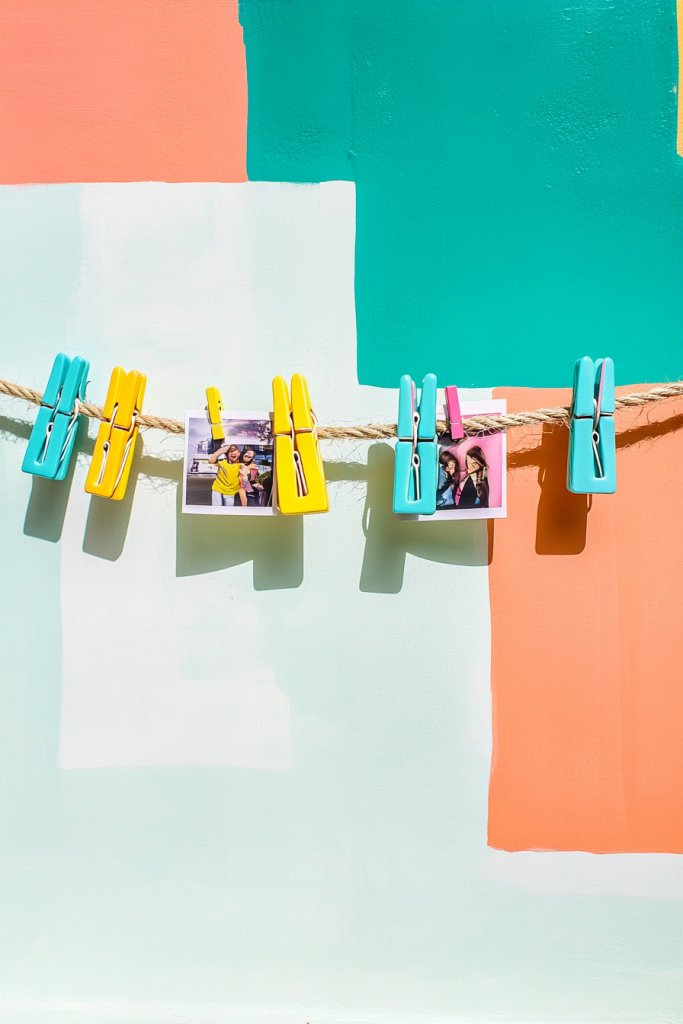
Ever wish you could showcase your favorite photos in a fun, colorful way? A color-blocked photo display using painted clothespins and string is a playful, customizable solution. It’s perfect for making memories stand out in your home.
Imagine a bright wall with a string of twine or wire, held in place by painted clothespins in coordinating colors. Photos and artwork hang at different heights, creating a lively, dynamic gallery. The painted clothespins add a pop of color and personality to your space.
Use different colors for each clothespin or stick to a monochromatic palette. Change out photos seasonally or for special occasions. Incorporate decorative elements like small flags or washi tape to add more visual interest. Adjust the height and spacing to suit your space.
Paint wooden clothespins in your chosen hues and let dry fully. String a sturdy cord or wire across your wall, securing it with hooks or nails. Use the painted clothespins to clip photos, postcards, or small artworks. For added design, paint the string or add decorative knots at the ends. Keep the display neat and balanced.
Create themed displays such as pastel colors for spring or metallics for holidays. Mix in small decorative tags or labels for a scrapbook effect. Change the photos regularly to keep your space lively. Use different textures or shapes of clips for extra flair.
This project is super simple but makes a big impact. It allows you to display your memories creatively and colorfully. Once you see your personalized gallery come together, you’ll feel inspired to try more DIY home decor ideas!
10. Design DIY Painted Floor Tiles with Stencils
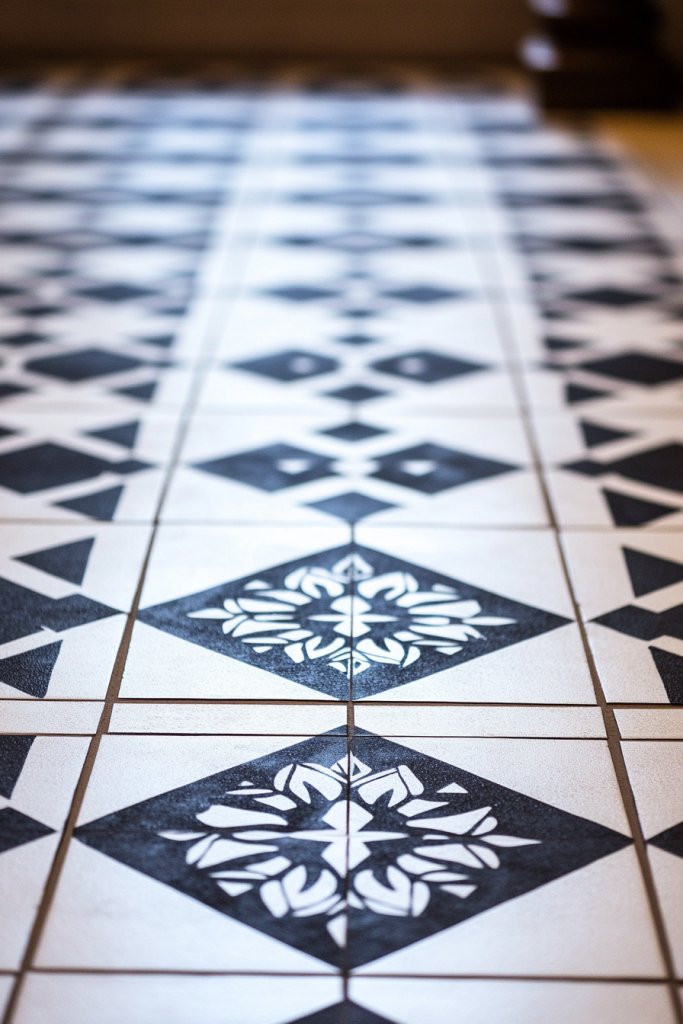
Want to elevate your plain flooring without a costly remodel? Painting patterned designs on floor tiles with stencils is a clever, budget-friendly trick. It creates a custom look that transforms your space instantly.
Visualize a neutral tiled floor with intricate white or metallic patterns painted using stencils. The design adds depth and visual interest, making the room feel more luxurious. The pattern repeats seamlessly, creating a cohesive, stylish look that’s uniquely yours.
Choose bold geometric patterns or delicate motifs depending on your decor style. Use contrasting colors for a dramatic effect or tonal shades for subtle sophistication. Apply the designs in entryways, kitchens, or bathrooms for a statement upgrade.
Clean and dry your tiles thoroughly. Position your stencil securely with painter’s tape to prevent slipping. Use a foam or brush applicator to dab paint within the stencil, applying multiple thin coats for opacity. Carefully remove the stencil before the paint dries fully to avoid smudges. Seal the design with a clear, matte finish for durability.
Mix custom colors to match your decor palette. Incorporate metallic or glitter paints for a luxe touch. Repeat patterns in different areas for a cohesive look or create an accent feature in a specific zone. Refresh or update your design periodically.
This DIY project is perfect for those wanting a high-impact upgrade with minimal effort. It’s a creative way to add personality and style to your floors. Once completed, your space will feel more custom-made and stylish—your friends will be impressed!
11. Assemble an Upcycled Crate Coffee Table with a Glass Top
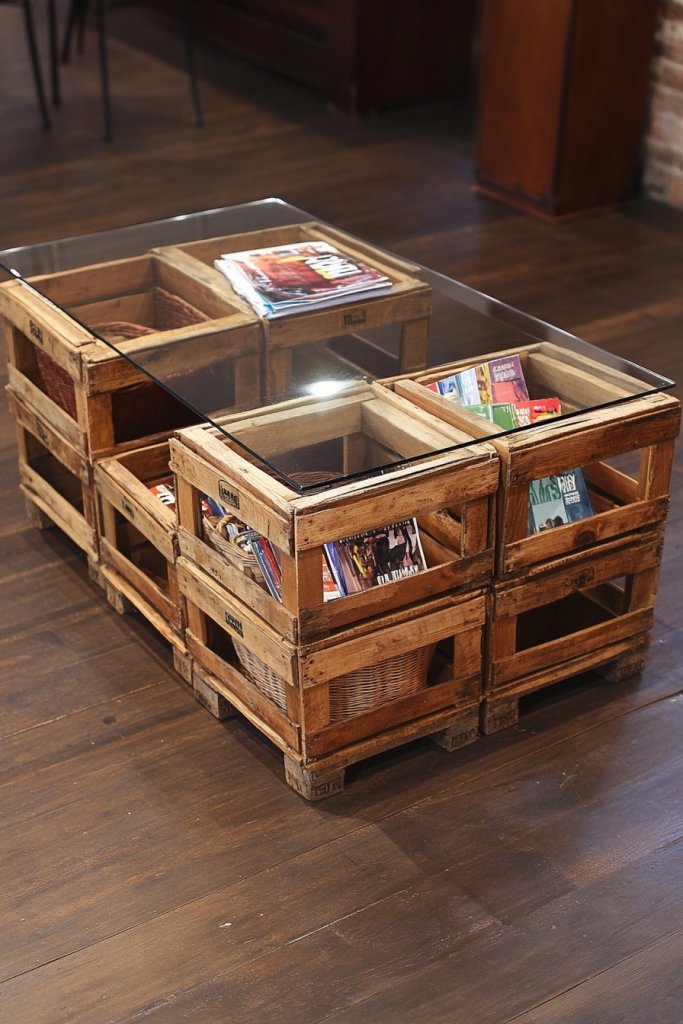
Looking for a unique, affordable coffee table that also offers storage? Upcycling wooden crates into a table is a fun project that combines practicality with rustic charm. It’s perfect for those who love DIY and eco-friendly ideas.
Imagine stacking vintage wooden crates of different sizes, secured together, with a sleek glass top resting on top. The open sides reveal storage for magazines, throws, or decorative baskets. The combination of raw wood and glass creates a modern yet cozy vibe.
Paint or stain the crates for a coordinated look or leave them natural for a more rustic feel. Change the layout to suit your space—stacked or side-by-side. Decorate with books, candles, or textiles on top to personalize it further. Use different crate styles for an eclectic mix.
Source sturdy wooden crates from thrift stores or online. Clean, sand, and paint or stain as desired. Secure the crates together with heavy-duty brackets or screws underneath for stability. Cut a piece of tempered glass to fit on top, securing it with small rubber pads or clips if necessary. Place your new table in the living room.
Add decorative touches like stenciled patterns or labels on the crates. Incorporate a fabric lining inside for a softer look. Change the arrangement or add wheels for mobility. Use the space underneath for additional storage or display.
This upcycled crate table combines style with sustainability, proving that DIY doesn’t have to be complicated. It’s a conversation starter and a practical piece that shows your creative personality. Once finished, it’s a stylish centerpiece with a story.
12. Decorate Plain Vases with Washi Tape for Instant Style

Want to add a splash of color and personality to your decor without buying new vases? Decorating plain glass or ceramic vases with washi tape is a quick, fun way to personalize your space. It’s a low-cost project with big visual impact.
Imagine a clear vase wrapped with vibrant floral or geometric washi tape, sitting on a shelf or table. The tape’s patterns add visual interest and can easily be swapped out for different seasons or moods. The simple act of wrapping transforms a basic vase into a statement piece.
Use contrasting or coordinating tapes to match your color scheme. Layer different patterns or widths for a textured look. Combine with other decorative elements like ribbons or charms for extra flair. Change the look seasonally or when you feel like a refresh.
Clean the vase thoroughly to remove any dust or grease. Cut strips of washi tape slightly longer than the vase’s circumference. Carefully apply, smoothing out bubbles as you go. For a more polished look, align patterns precisely or create diagonal or chevron designs. Seal with a clear spray for durability if desired.
Add painted or metallic accents to parts of the tape for a luxe effect. Personalize with initials or small drawings. Fill the vase with faux flowers, fairy lights, or decorative stones—just avoid real greenery if you want to keep it simple. Swap out tapes to match seasons or decor updates.
This project is approachable for all skill levels and instantly elevates plain decor. It’s a creative way to refresh your space on a budget. Once you see how easy and effective it is, you’ll want to experiment with other DIY decor tricks!
13. Create a DIY Woven Wall Hanging from Yarn and Driftwood
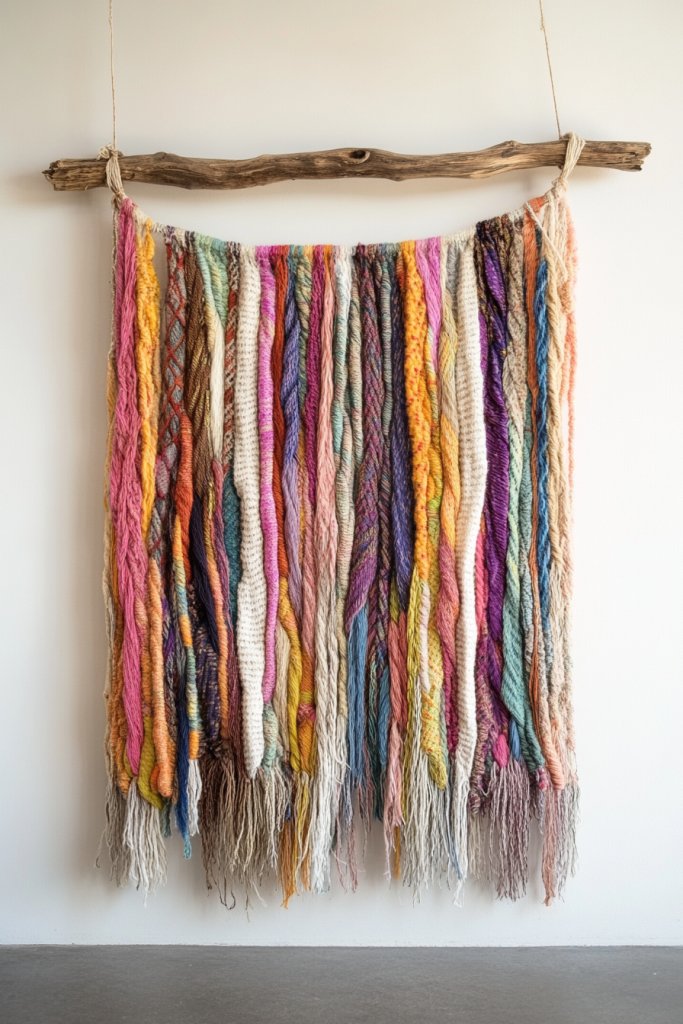
Craving a cozy, textured focal point on your wall? A woven wall hanging made from yarn and driftwood adds boho charm and warmth. It’s a fantastic project for those wanting a handcrafted touch that’s both stylish and affordable.
Picture a large, soft textile with colorful yarn strands woven into a pattern, hanging from a natural driftwood rod. The mix of textures creates a layered, tactile look that invites touch. It drapes beautifully over a blank wall, transforming the space into a cozy retreat.
Use different yarn textures—smooth, fuzzy, or metallic—for varied effects. Incorporate beads or feathers for extra dimension. Change colors seasonally or match your decor palette. Hang it in the living room, bedroom, or entryway for an instant style upgrade.
Cut strands of yarn in various lengths, attaching them to a horizontal rod with knots or clips. Create pattern variations by weaving or knotting sections for texture. Attach the yarn strands securely to the driftwood using a lark’s head knot or similar. Trim uneven edges for a polished look. Hang using a durable cord.
Personalize with different yarn colors, adding metallic or glitter accents. Incorporate small charms or beads into the weave. Change the pattern or color scheme to reflect seasons or moods. It’s a versatile piece that grows with your style.
This project combines craft and decor, proving you can make art with simple materials. It’s a satisfying way to introduce texture and color into your home. Once you see the impact, you’ll be inspired to create more handmade decor pieces.
14. Personalize Plain Lampshades with Paint or Decals
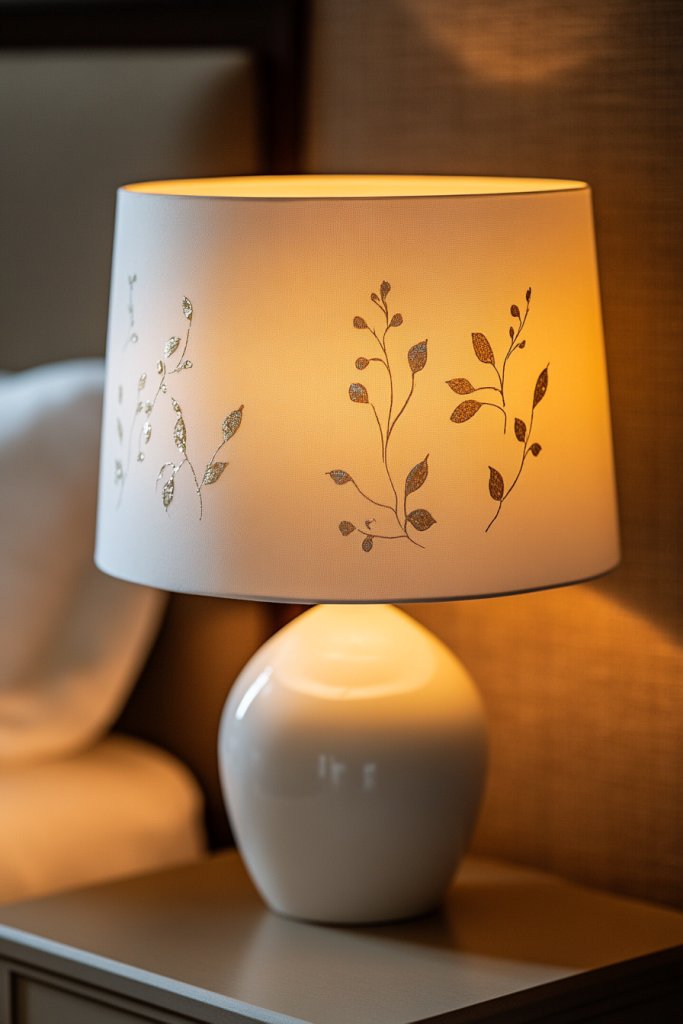
Bored of your existing lampshades but don’t want to replace them? Personalizing them with paint or decals is an easy way to refresh your lighting and add a unique touch to your decor. It’s a quick DIY hack with big style payoff.
Imagine a neutral fabric shade decorated with delicate hand-painted floral patterns or bold geometric shapes. The design complements your room’s color palette and style, turning a plain fixture into a focal point. When lit, the shade casts beautiful patterns and colors across the room.
Use stencils, painter’s tape, or freehand painting depending on your skill level. Opt for metallic or glow-in-the-dark paints for an extra special effect. For a sleek look, keep designs minimal; for a playful vibe, go for bright colors and quirky patterns. Mix and match with other decor elements.
Remove the lampshade and clean its surface thoroughly. Sketch your design lightly with pencil or chalk. Use fabric paints or spray paints compatible with your shade material—apply multiple thin coats. For decals, cut out your design, peel off backing, and stick carefully. Let everything dry completely before reassembling.
Add metallic accents or glitter for shimmer. Incorporate initials, quotes, or small motifs for a personal touch. Change the pattern seasonally or for special occasions. Keep a stash of different designs to swap out whenever you want a fresh look.
This simple project boosts your confidence in DIY decorating. It’s a fantastic way to upgrade your lighting without buying new fixtures. Personal touches make your space feel more curated and uniquely yours.
15. Make an Abstract Art Canvas Using Sponges and Bold Colors
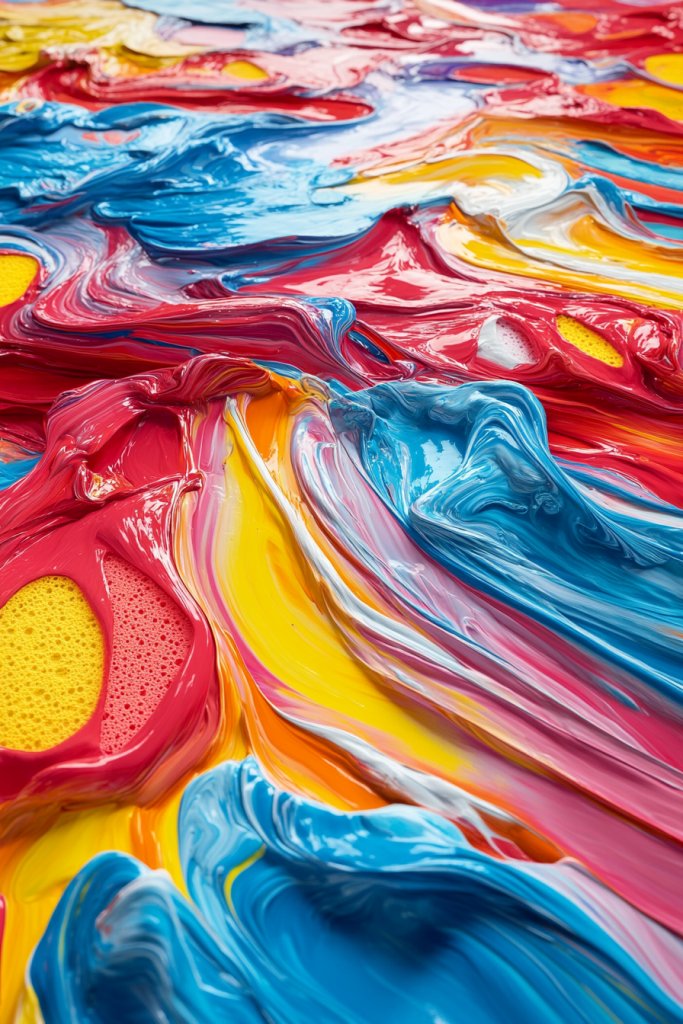
Looking for a statement piece for your wall that’s modern and expressive? Creating an abstract art canvas with household sponges and bold colors is an accessible way to add contemporary flair. It’s a fun project that results in a stunning focal point.
Imagine vibrant swirls and splashes of color blending and overlapping on a large canvas. The textured sponge strokes create depth and movement, making the art feel alive. Hanging this piece above your sofa or bed instantly energizes the room with its dynamic presence.
Use contrasting colors like black and yellow or cool tones like blues and purples for different moods. Experiment with different sponge shapes and sizes to vary textures. Incorporate metallic or glitter paints for added dimension. Match your color palette to your decor for cohesive styling.
Start with a blank canvas and prime if necessary. Dampen a sponge, dip it into your chosen paint, then dab, press, and blend colors across the surface. Layer multiple colors and textures, building up the composition. Use different sponge techniques—stippling, swirling, or blotting—to create variety. Let each layer dry before adding the next.
Add metallic accents or metallic paints for a luxe effect. Incorporate metallic or glitter paints for extra shimmer. Frame it in a sleek border or leave it raw for an industrial look. Change color schemes to match your decor or mood.
This project proves you don’t need fancy tools to create eye-catching art. It’s liberating and encourages experimentation. Once finished, it’s a bold, modern piece that showcases your creativity and adds personality to your home.
16. Construct a Floating Corner Shelf with Simple Brackets
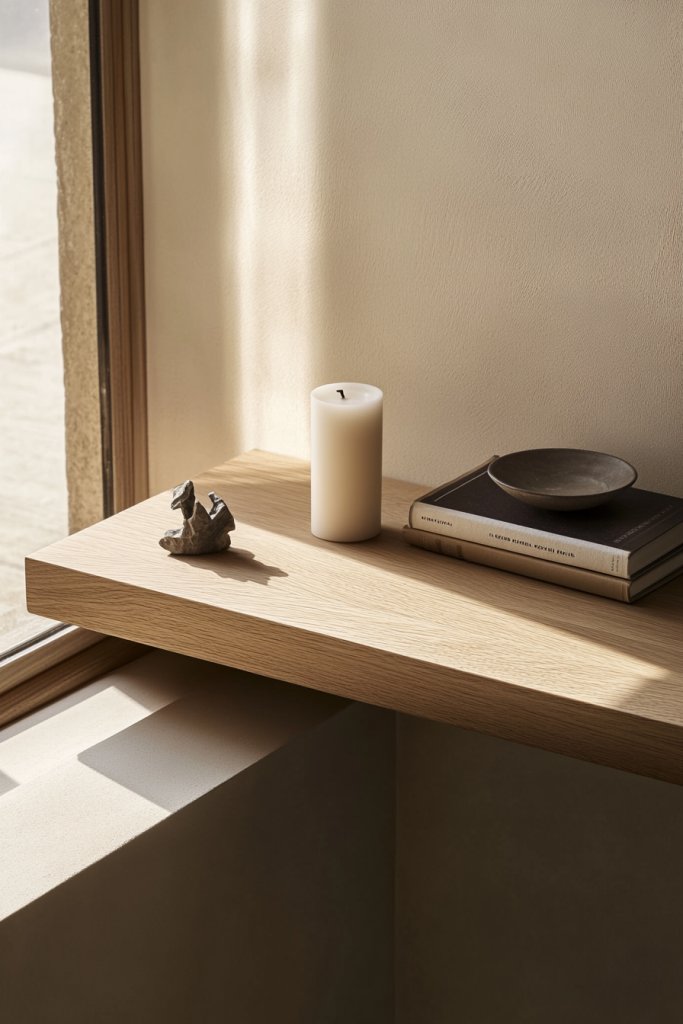
Running out of space for decor and essentials in tight corners? A floating corner shelf with basic brackets is a sleek, space-saving solution. It’s quick to build and adds a polished look to any room.
Imagine a minimalist wooden plank supported by discreet brackets, floating seamlessly into your corner. Decorated with candles, small sculptures, or books, it creates a layered, curated display. The clean lines and hidden brackets give a modern, uncluttered vibe.
Choose different finishes—natural wood, painted, or stained—to match your decor. Use metal or acrylic brackets for a contemporary look. Adjust the shelf’s length and thickness for functionality. Incorporate multiple shelves for a dynamic, modular setup.
Measure your corner space and select a durable wood plank. Attach brackets securely to the wall using appropriate anchors, ensuring they can support your intended items. Place the shelf on the brackets and secure with screws if necessary. Finish with paint or sealant to enhance durability. Ensure the shelf is level.
Customize with decorative edge trim or paint in bold colors. Decorate with miniature potted plants, framed photos, or decorative objects. Add LED strip lighting underneath for a subtle glow. Change the items periodically to keep the display fresh.
A floating corner shelf is a simple yet effective way to elevate your decor. It’s perfect for DIY beginners and offers endless styling options. Once installed, it’s a sleek, functional addition that showcases your eye for design.
17. Refresh Your Space with DIY Painted Drawer Knobs or Handles
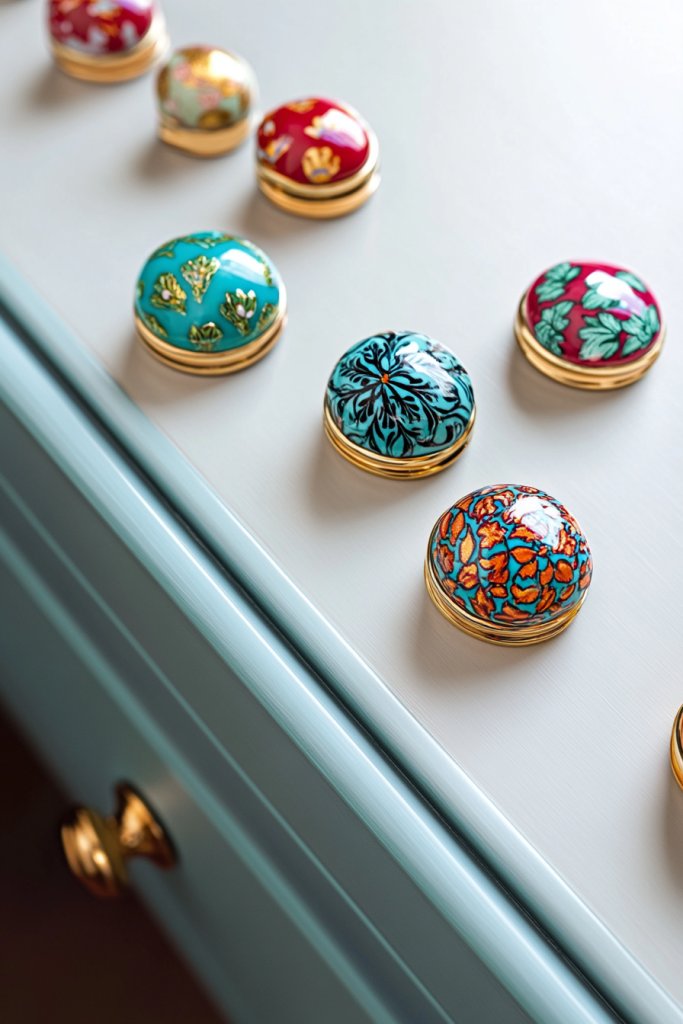
Tired of plain or outdated furniture hardware? Painting or decoupaging drawer knobs and handles is an easy trick to give your furniture a fresh, personalized look. It’s a small change that makes a big difference.
Imagine replacing generic knobs with vibrant, patterned or metallic ones on your dresser or kitchen cabinets. The new hardware immediately updates the piece and adds a touch of personality. Coordinating knobs across furniture pieces creates a cohesive, curated vibe.
Choose colors and patterns that complement your room’s theme—bright for playful, metallic for glam, or matte for modern minimalism. Use decoupage for intricate designs or paint for bold blocks of color. Change handles seasonally or when you want a quick decor refresh.
Remove existing knobs and clean the surfaces thoroughly. Sand if needed for better paint adhesion. Use spray paint, brush, or decoupage glue to apply your chosen finish or design. Seal with a clear topcoat for durability. Reattach once dry, ensuring they are securely fixed.
Add small decorative elements like rhinestones or metallic accents for extra flair. Mix different styles and finishes for an eclectic look. Label drawers with painted initials or symbols for a functional twist. Regularly update handles for ongoing style refresh.
This simple upgrade can dramatically change your furniture’s appearance. It’s a satisfying project that boosts your confidence in DIY home decor. Small details like knobs reflect your personal style and elevate your overall interior design.
Conclusion
With a variety of quick DIY home decor ideas at your fingertips, you’re equipped to make your space more inviting and personalized in just a few simple steps. These creative updates are perfect for adding charm, character, and a fresh vibe to any room. Don’t wait — dive into these ideas and start transforming your home today. Your dream space is just a DIY away!