Your entryway is the first impression visitors get of your home, and what better way to make it welcoming than with DIY decor hacks? These creative and budget-friendly ideas have gained popularity because they allow you to personalize your space while adding charm and functionality.
In this article, you’ll find a variety of inspiring hacks—from clever storage solutions to decorative touches—that can transform your entryway into a stylish and inviting space. Whether you’re a seasoned DIY enthusiast or just starting out, these ideas are easy to implement and guaranteed to make your home feel warmer and more inviting.
1. Upcycled Crate Shoe Organizer for a Rustic Charm
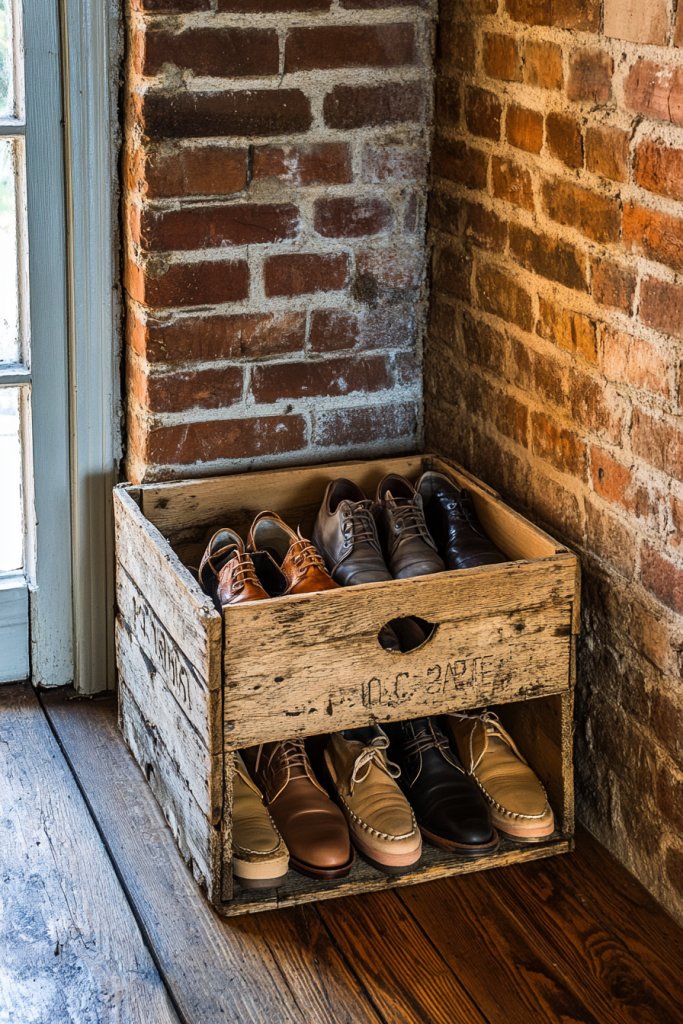
Ever struggle with cluttered entryways where shoes seem to multiply overnight? A messy shoe pile not only looks bad but also makes finding your favorite pair a daily treasure hunt. You want a solution that’s both practical and adds a touch of personality to your space. Who doesn’t love a bit of rustic charm that also keeps things tidy?
Imagine stacking weathered wooden crates horizontally and vertically, creating a cozy, farmhouse vibe. Brightly colored or distressed paint adds character, while open compartments make grabbing your shoes quick and easy. The texture of aged wood paired with soft rugs underneath creates a warm, inviting feel. Shoes sit neatly, almost like curated art pieces, instead of chaotic clutter.
You can customize this idea by choosing different wood finishes or staining the crates for a more polished look. For smaller spaces, stack fewer crates or opt for narrow, vertical arrangements. For seasonal flair, add decorative touches like faux greenery or seasonal fabric linings. If you prefer modern rustic, pair the crates with sleek metal brackets or painted accents.
Start with sturdy wooden crates from your local craft store or repurposed pallets. Sand rough edges and consider sealing the wood for durability. Use heavy-duty screws or brackets to secure crates together if stacking vertically. Place the whole setup on a non-slip rug or add small feet to prevent movement. Organize shoes by type or family member for extra efficiency. DIY assembly is straightforward but take your time to ensure stability.
Paint labels or stencil names on each crate to personalize the storage. Add fabric or burlap liners inside for a softer look. Incorporate small hooks on the sides for umbrellas or keys. You could also attach decorative metal handles for a vintage look or add small chalkboard signs for easy updates. The goal is to make the space uniquely yours.
Transforming simple crates into charming shoe organizers not only declutters but also elevates your decor style. It’s a project that combines creativity with practicality, perfect for DIY enthusiasts. Your entryway will look more inviting and organized, welcoming guests with character and warmth. Ready to give your shoes a stylish home?
2. Hanging Pegboard Organizer for Coats and Accessories
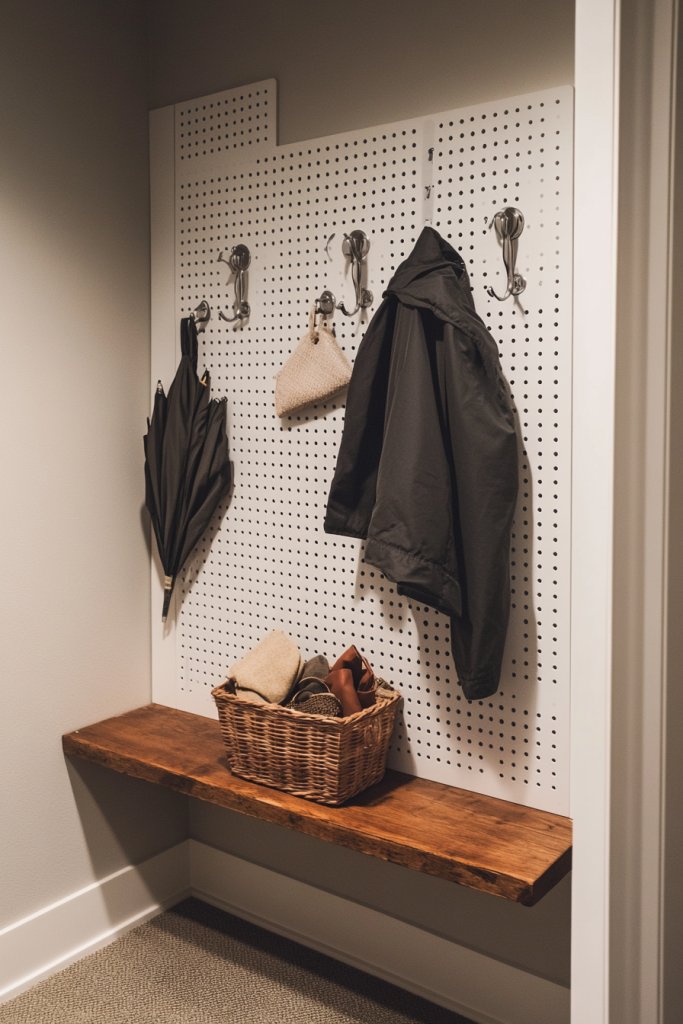
Ever wish your coats, umbrellas, and bags could find a tidy, accessible home instead of cluttering up your hallway floor? A messy entryway not only looks chaotic but also wastes precious time searching for that one missing jacket. You need a smart, space-saving solution that keeps everything within arm’s reach.
Picture a colorful pegboard mounted on your wall, with hooks holding coats, umbrellas, and bags in a neat, organized display. Brightly painted pegs or a bold patterned background add visual interest, turning a plain wall into a striking feature. The hooks hold items securely, while small shelves or baskets can store smaller accessories like scarves or gloves. The entire setup feels both functional and playful, transforming everyday clutter into a curated display.
Choose a pegboard with a finish that complements your decor style, from sleek metal to rustic wood. For a more subtle look, paint it in neutral tones matching your walls. Adjust the hook types or add decorative elements like small baskets or hooks for keys and sunglasses. You can also customize it seasonally by swapping out accessories or changing hook arrangements. Larger spaces can incorporate multiple panels for extended storage.
Begin by selecting a durable pegboard that can handle the weight of coats and bags. Mount it securely on studs using appropriate anchors and screws—don’t hang it on drywall alone! Arrange hooks and shelves in a pattern that suits your needs, leaving enough space for bulky items. Use a level to ensure everything lines up perfectly. Consider adding small labels or color-coded hooks for quick identification. Keep accessibility in mind so that daily essentials are easy to reach.
Personalize your pegboard with painted or decorative hooks, or add a small framed chalkboard for notes. Incorporate a strip of LED lighting along the top for visibility during darker months. Use different hook styles or baskets to create visual interest and functionality. You might even include a small mirror or decorative element to make it more inviting. The key is to make it both practical and reflective of your style.
A pegboard organizer is a versatile, customizable solution that turns chaos into order. It’s a simple project that delivers big results, making your entryway more welcoming and efficient. Plus, it’s easy to update as your needs or style preferences change. Ready to hang up some order and add a pop of color to your space?
3. Reclaimed Wood Wall-Mounted Key and Mail Station
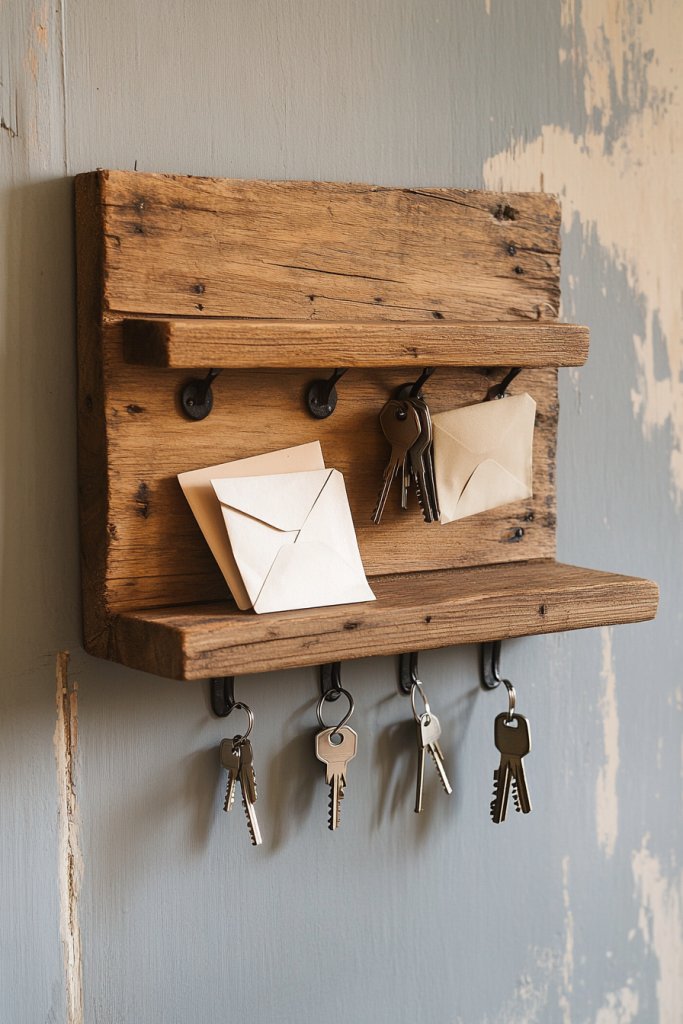
Keys and mail are the classic clutter culprits that make your entryway look chaotic. Do you find yourself constantly searching for misplaced keys or piles of unopened mail? Creating a dedicated station can solve this daily frustration and make your space look effortlessly organized.
Envision a rustic wooden panel mounted on your wall, with small hooks or pegs for keys and a shallow shelf for mail. The wood’s natural grain adds warmth, contrasting with sleek hardware or modern paint accents. Small cubbies or baskets can hold sunglasses, receipts, or notes, turning an ordinary wall into a functional art piece. The station looks inviting, like a cozy nook that welcomes organization.
Choose reclaimed wood with a finish that matches your decor, from distressed gray to warm honey tones. For small spaces, a narrow panel with just a few hooks suffices. For larger areas, incorporate multiple shelves or a combination of hooks and cubbies. Add decorative elements like vintage knobs or painted accents to suit your style. You can also swap out hardware seasonally or to match your color scheme.
Start by sourcing reclaimed wood from salvage yards or repurposing an old door or pallet. Sand and seal the wood to prevent splinters and damage. Mount it securely on studs using appropriate anchors. Install hooks or small hardware for keys and mail slots, spacing them evenly for easy access. Attach small baskets or containers underneath or beside the station for added storage. Keep everything within reach to streamline daily routines.
Personal touches include painting or staining the wood in your favorite shades or distressing it for rustic charm. Label baskets or compartments with chalk labels for clarity. Add decorative elements like vintage keys or small metal accents for visual interest. You could also incorporate a small chalkboard or dry erase section for reminders.
A wall-mounted key and mail station turns clutter into charm, transforming your entryway into a welcoming, organized space. It’s an easy DIY project that’s both functional and stylish. Plus, it helps you start each day on the right foot with everything in its place. Ready to reclaim your space and keep essentials at your fingertips?
4. DIY Fabric-Covered Storage Bins for Hidden Clutter
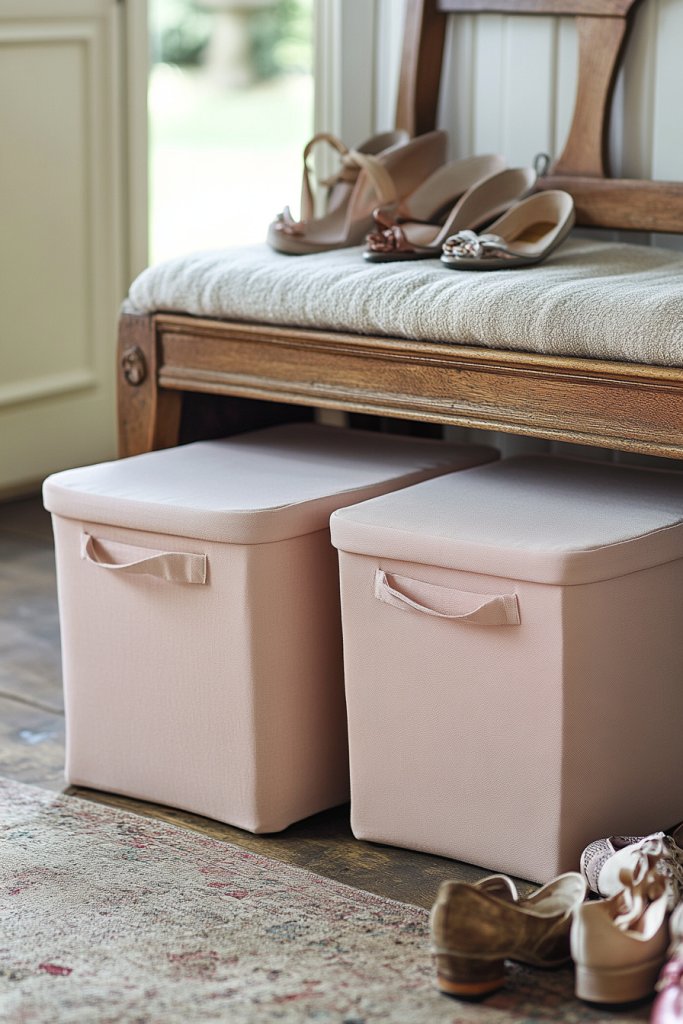
Cluttered entryways can quickly become overwhelming, especially when shoes, scarves, or gloves spill out of their designated spots. You want a way to hide the mess without sacrificing style. Using fabric-covered storage bins offers a charming, customizable solution that keeps your space tidy.
Imagine soft fabric bins in neutral tones or vibrant prints sitting neatly on shelves or the floor. The fabric adds texture and warmth, softening the look of your entryway. You can choose fabrics with patterns or textures that match your decor theme, from boho to modern chic. When filled with shoes or accessories, these bins create a cozy, organized environment that’s also visually appealing.
Select fabrics that suit your style—think linen for a minimalist look or patterned cotton for a playful vibe. Use different-sized bins for varied storage needs, or add decorative trim for extra flair. For seasonal updates, swap fabric covers easily to reflect holidays or trends. Incorporate labels or tags for quick identification, especially if you store multiple items.
Start by choosing sturdy cardboard or plastic storage bins in your preferred sizes. Cover these with fabric using a hot glue gun or fabric adhesive, ensuring smooth edges and corners. Reinforce with double layers or fabric lining if needed. Decorate the outside with ribbons, trims, or painted patterns for a personalized touch. Place them on shelves, under benches, or in corners for maximum impact.
Create custom labels with fabric paint or iron-on transfers. Mix and match fabrics to add visual interest or reflect your personality. You can also add decorative buttons or appliques for a unique touch. For extra organization, include small pockets or compartments sewn onto the fabric covers.
These fabric-covered bins turn clutter hiding into a stylish statement. They’re a simple, budget-friendly DIY that elevates your entryway while keeping essentials out of sight. The versatility allows you to change looks seasonally or as your style evolves. Ready to hide the mess and boost your decor game?
5. Mason Jar Cup Holders for Keys and Small Items
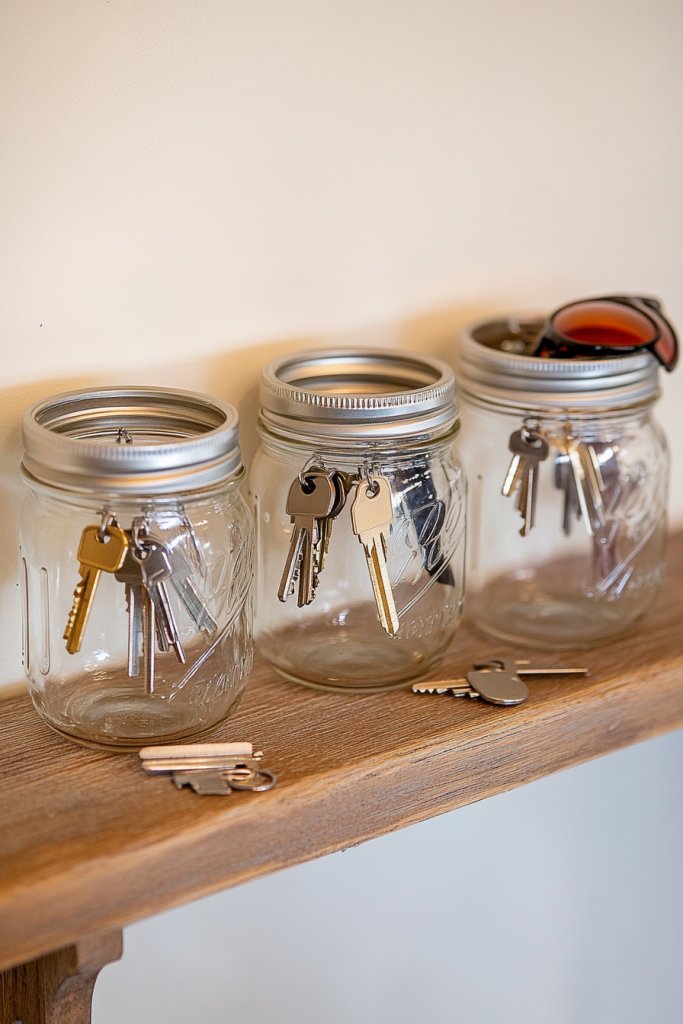
Keys, sunglasses, and loose change always seem to vanish right when you need them most. Sound familiar? A simple, charming solution is to repurpose mason jars into holders that keep your small essentials in one place. No more frantic searches or chaotic countertops.
Visualize a row of mason jars mounted on a wooden plank or attached to a metal frame, each holding keys, coins, or jewelry. The clear glass showcases your items beautifully, while a splash of paint or decorative lid adds personality. The jars sit neatly, making everything easy to see and grab. It’s a vintage-inspired, functional display that adds a cozy, farmhouse touch.
You can paint or frost the jars for a different look, or use colored lids for a pop of color. Attach the jars with mounting brackets, or hang them with sturdy wire hooks. For a minimalist aesthetic, opt for sleek, clear jars with simple labels. Seasonal decorations like ribbon or twine can add festive flair. This setup works well on narrow walls or inside cabinets.
Start with clean mason jars and a sturdy wooden or metal backing board. Drill holes or attach mounting brackets to hold the jars securely. Use strong adhesive or screw-in fittings to ensure stability. Organize by item type—keys in one jar, small accessories in another. Label the jars with waterproof paint or stickers for easy identification. Keep everything accessible and within arm’s reach.
Personalize with painted or chalkboard labels on each jar for quick identification. Decorate the backing with stenciled patterns or painted designs. You might also add small hooks or clips inside the jars for additional organization. Incorporate seasonal ribbons or charms to match holidays or your decor theme. The key is to keep it functional yet fun.
Using mason jars as catch-all holders is a clever, budget-friendly upgrade that adds charm and order to your entryway. It’s a quick DIY that makes everyday routines smoother. Plus, it’s easy to adapt and update as your needs change. Ready to turn glass jars into your new organizing heroes?
6. Stylish DIY Coat Rack from Repurposed Ladder
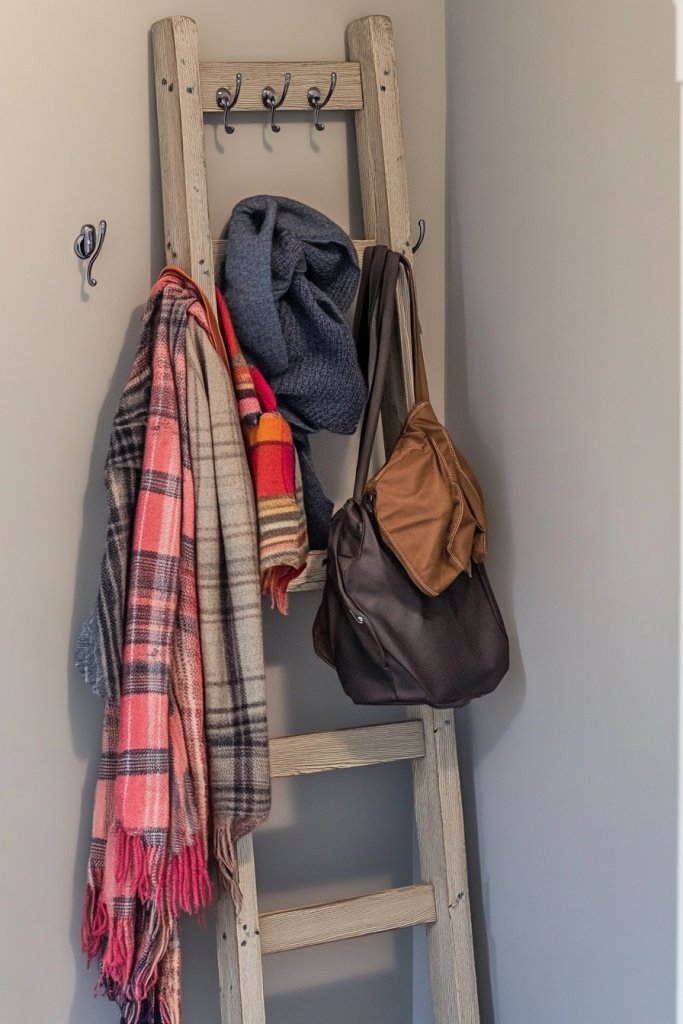
Cluttered entryways often turn into a coat jungle, making it hard to find what you need and creating visual chaos. You want a functional, attractive solution that doubles as a statement piece. How about transforming an old ladder into a chic coat rack?
Picture a vintage wooden ladder leaned against the wall, with hooks attached at various rungs. It’s painted in a bold color or left distressed for a rustic vibe, depending on your style. Coats, scarves, and hats hang neatly from the rungs, while the open design keeps the space feeling airy. The combination of old-world charm and modern function makes this a focal point.
Choose a ladder that matches your decor—weathered wood for farmhouse, sleek metal for industrial. Add hooks or pegs in different finishes or colors for visual interest. For smaller spaces, lean the ladder at a slight angle or attach it securely to the wall. Decorate the steps with baskets or small shelves for extra storage. For seasonal updates, paint or distress the ladder to suit your theme.
Select an old wooden or metal ladder from thrift stores or repurpose one you already own. Sand and paint it if needed, then attach sturdy hooks evenly spaced along the rungs. Use wall anchors or brackets to lean or secure it in place, ensuring safety. Hang coats and accessories with ease, and consider adding non-slip pads to the bottom for stability. It’s a straightforward project with high visual impact.
Personalize by adding decorative elements like stenciled patterns or distressing for a vintage look. Use different hook styles or finishes for contrast. Incorporate small baskets or fabric bins on the steps for smaller items. For a more polished look, seal the paint with a clear protective coat. Mix functional and decorative elements to create an inviting entry.
Repurposing a ladder as a coat rack adds instant charm and practicality. It’s a unique project that boosts your decor style while organizing clutter. Plus, it’s easy to adapt to your space and personal taste. Your entryway will feel more welcoming and stylish—ready to hang up your worries?
7. Peel-and-Stick Wallpaper Accent Wall for Instant Visual Impact
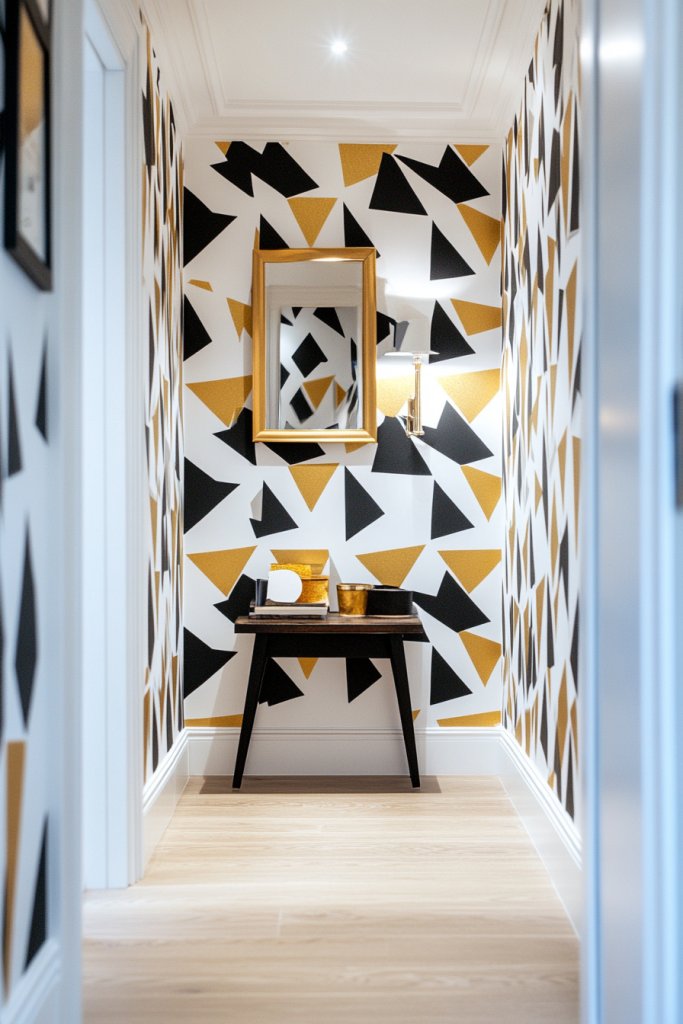
Is your entryway feeling dull or uninspired? Want a quick way to add personality without a full remodel? Peel-and-stick wallpaper offers an easy, mess-free solution to transform your space instantly. It’s perfect for renters or anyone hesitant about permanent changes.
Imagine a vibrant patterned wall behind your entry table or coat hooks, instantly drawing the eye. The peel-and-stick wallpaper features bold geometric designs, botanical prints, or textured patterns in a variety of colors. It adheres smoothly, creating a seamless, high-impact backdrop that elevates the entire entryway. The textured or matte finish adds depth without overwhelming the space.
Choose a wallpaper pattern that complements your existing decor—think subtle textures for a calm vibe or loud patterns for a statement. For small entryways, a single accent wall creates drama without feeling cramped. Seasonal or themed wallpaper options add versatility for holidays or special occasions. You can also layer it with artwork or shelving for a layered, personalized look.
Start by measuring your wall carefully, then select a peel-and-stick wallpaper that matches your style and space. Clean the surface thoroughly to ensure adhesion. Carefully peel the backing, aligning the paper with your marked guidelines. Smooth out air bubbles with a squeegee or credit card, working from the center outward. Trim excess edges for a perfect finish. It’s a DIY that requires minimal tools and effort.
Add decorative decals or painted accents on top of the wallpaper for extra flair. Change the look seasonally by swapping out wallpaper or adding removable decals. Use complementary wall paint or trim to frame the accent wall. Incorporate small decorative elements like hooks or shelves to maximize the visual impact.
A peel-and-stick wallpaper accent wall is a game-changer for creating a bold entry statement. It’s an affordable, reversible project that’s perfect for experimenting with your style. Your space will feel more vibrant and welcoming in no time. Ready to peel and transform?
8. DIY Pegboard Shoe Storage with Color-Coded Cubbies
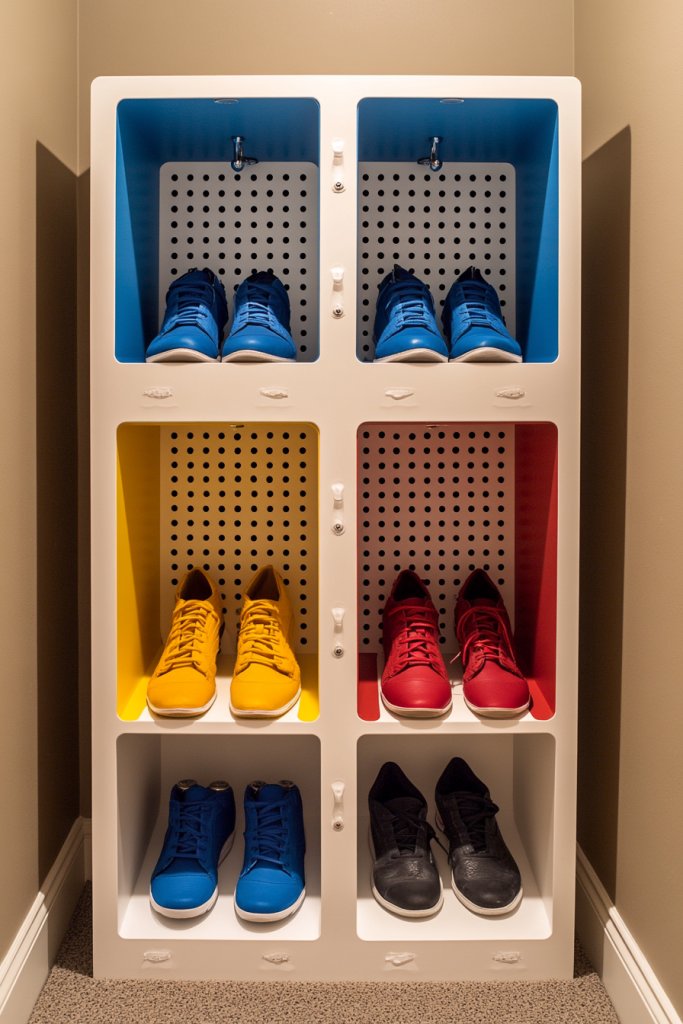
Shoe chaos at the entryway is a common frustration. Shoes scattered everywhere make the space look untidy and make finding the right pair a hassle. Want a simple, colorful solution that keeps everything organized and adds a dash of personality?
Visualize a pegboard mounted on your wall, painted in a cheerful color or pattern. Small cubbies or baskets hang from the pegs, each assigned to a different family member or shoe type. Brightly painted or patterned sections help identify where each pair belongs at a glance. The display looks playful, organized, and adds a pop of color to your entry.
Choose a pegboard in a bold hue or a neutral tone that blends with your decor. Use painted or patterned pegboard sections to assign different zones, such as kids’ shoes versus adult footwear. Incorporate decorative hooks for accessories like hats or scarves. For smaller spaces, customize the size and number of cubbies to fit your needs.
Start by measuring your wall space and selecting a sturdy pegboard. Paint or decorate it beforehand for a personalized touch. Mount it securely on studs using appropriate hardware. Attach cubbies or baskets with hooks or brackets, ensuring each is level and stable. Organize shoes by type or person, making daily routines smoother. Regularly update the colors or labels for a fresh look.
Label each cubby or basket with names, or use color coding for quick identification. Add decorative elements like patterned fabric linings or small ornaments. Incorporate a small shelf for shoe polish or care supplies. Change the color scheme seasonally or for special occasions for variety. The goal is to make storage fun and functional.
A pegboard shoe system makes your entryway look lively and organized, proving that storage can be both practical and playful. It’s an easy project that can be customized to your style, and it keeps clutter off the floor. Your shoes will thank you, and so will your peace of mind. Ready to peg your way to order?
9. Wreath or Garland Made from Recycled Materials for Seasonal Cheer
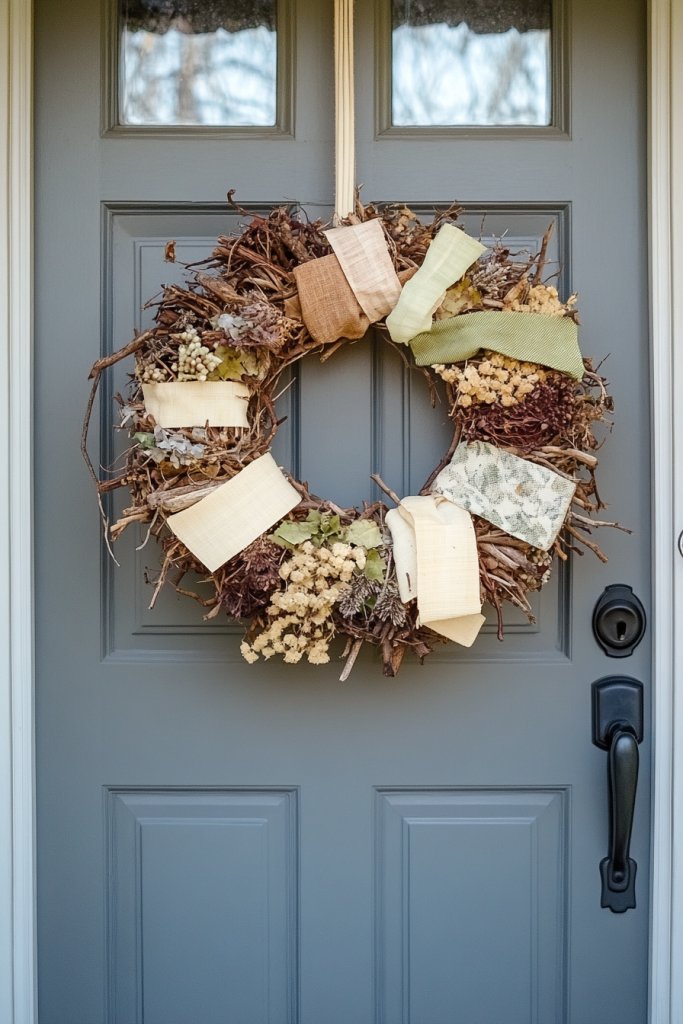
Want to add a welcoming touch that’s eco-friendly and budget-conscious? Seasonal wreaths or garlands crafted from recycled or natural materials offer a charming way to decorate your entryway year-round. They’re reusable, customizable, and full of character.
Imagine a wreath made from scrap fabric, paper, or natural elements like twigs and pinecones. Bright colors or earthy tones set the mood, depending on the season. The textures create visual interest—soft fabrics, rough burlap, or shiny paper—adding layers of depth. Hang it on your door or wall, and instantly elevate your space with a handmade, eco-conscious vibe.
Create different themes for each season—floral for spring, berries for winter, or leaves for autumn—using recycled materials. Incorporate natural elements like dried flowers, seed pods, or twine for a rustic look. For a modern twist, use metallic or glitter accents. Keep the design simple or elaborate, depending on your taste and time.
Gather recycled or natural materials—fabric scraps, paper, twigs, etc. Shape them into circles or other shapes using wire or foam bases. Attach pieces with hot glue or string, layering for fullness. Add decorative touches like bows, ribbons, or painted details. Hang with sturdy twine or a hook, ensuring it’s balanced and secure.
Personalize with initials, messages, or seasonal symbols painted or attached to your wreath or garland. Incorporate leftover holiday ornaments or small upcycled charms. Use different textures and colors to match your decor or mood. Keep it lightweight for easy handling and hanging.
A recycled material wreath or garland is a fun, eco-friendly project that adds seasonal charm. It’s a great way to showcase your creativity while being environmentally conscious. Plus, each piece tells a story and is a conversation starter. Ready to craft some cheerful, sustainable decor?
10. Floating Shelf with Baskets for Smart Storage and Decor
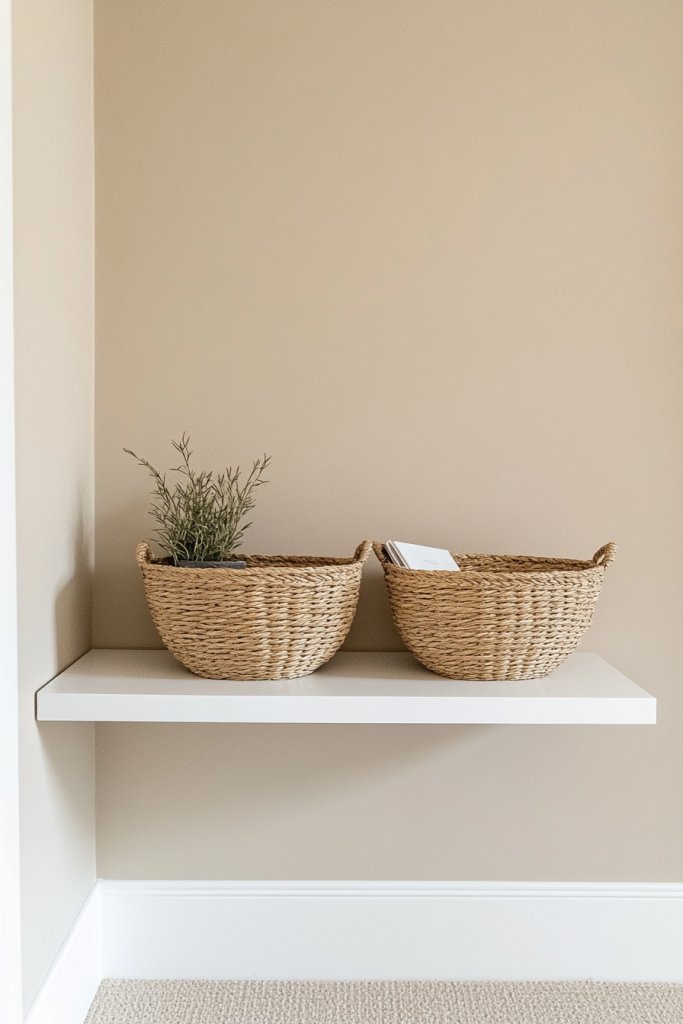
Cluttered entryways make it hard to keep essentials organized and accessible. You want a solution that’s sleek, functional, and stylish. Floating shelves paired with baskets offer a minimalist approach to keeping your space tidy without sacrificing design.
Visualize a simple wooden or metal floating shelf mounted on the wall, with woven or fabric baskets underneath. The open design creates a spacious feel, while the baskets hide smaller items like gloves, scarves, or mail. The layered textures and neutral tones blend seamlessly with your decor, making your entryway look modern and inviting.
Choose shelves in different finishes—natural wood, painted, or metallic—to match your style. Use baskets in contrasting textures or colors for visual interest. For added personalization, label the baskets or decorate the shelf with small decorative items. Adjust the height and number of shelves based on your space and storage needs.
Securely mount the floating shelf on wall studs using appropriate hardware, ensuring it can handle the weight of stored items. Arrange baskets underneath, either sitting directly on the shelf or hanging from hooks. Use fabric or woven baskets for a cozy feel, or sleek plastic for a modern look. Organize daily essentials in the baskets for quick access. Regularly clean and swap out items for a fresh appearance.
Add labels or tags to each basket for clarity. Incorporate decorative elements like small plants, candles, or photo frames on the shelf. Change the arrangement seasonally or as your needs evolve. Utilize different basket styles or colors to match your decor theme, ensuring everything remains functional and attractive.
A floating shelf with baskets elevates your entryway from cluttered to curated. It’s a simple DIY that offers versatile storage while maintaining a clean aesthetic. You’ll enjoy a more organized space that still feels warm and inviting. Ready to elevate your entryway with this sleek, practical solution?
11. Chalkboard Panel for Messages and To-Do Lists
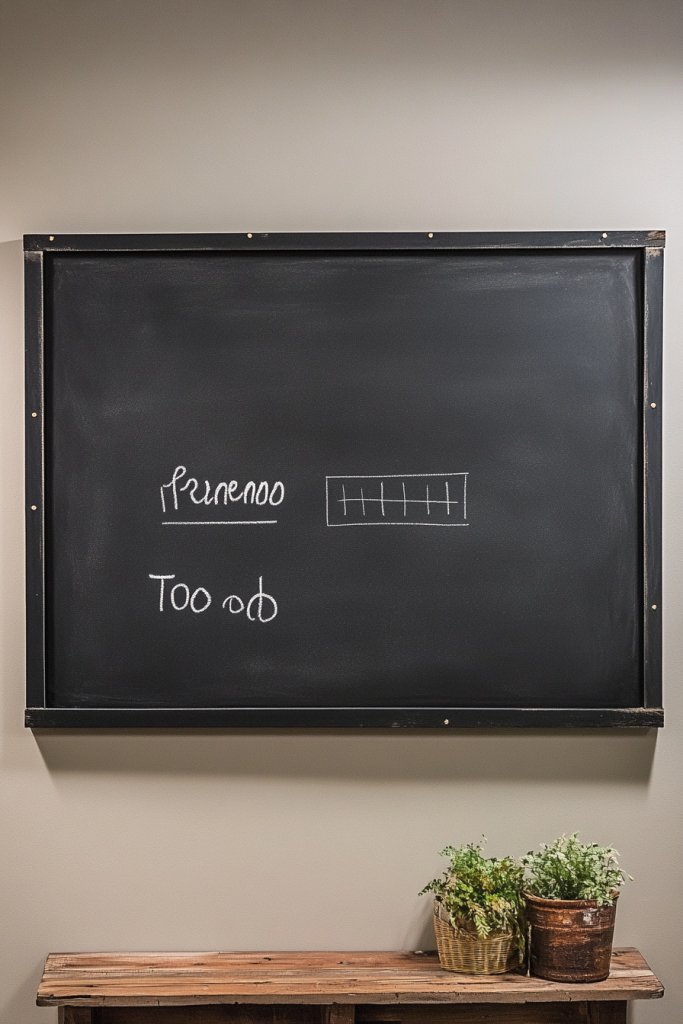
Forgetfulness and last-minute reminders often clutter your entryway, making it look messy and disorganized. Want an easy way to keep everyone on the same page? A chalkboard panel provides a dedicated spot for notes, messages, and daily to-do lists that’s both functional and charming.
Picture a sleek black or chalk-colored panel mounted on your wall, filled with handwritten notes, reminders, or motivational quotes. Use colorful chalk or markers to add personality and vibrancy. The surface becomes a canvas for creativity and organization, turning a blank wall into a functional art piece. It’s perfect for leaving quick messages for family members or guests.
Choose a framed chalkboard for a polished look or a simple panel for a more casual vibe. Decorate the frame or edges with washi tape or paint for a personalized touch. For a cohesive look, match the chalkboard color with your decor scheme. You can also add small shelves or hooks nearby for accessories or notes.
Select a durable, high-quality chalkboard surface or paint a panel with chalkboard paint. Mount it securely on the wall at an easy-to-reach height. Use chalk or chalk markers for writing, and clean with a damp cloth for updates. Incorporate a small eraser or cloth nearby for convenience. Regularly update the messages to keep the space fresh and useful.
Personalize with decorative borders or labels. Use colorful chalks or markers to add drawings or accents. Incorporate a small tray or container for chalks and erasers. Change the message or design seasonally or for special occasions to keep it engaging. It’s a practical yet creative way to stay organized.
A chalkboard panel transforms your entryway into a hub for daily planning and communication. It’s a simple DIY project that adds personality and functionality, making your space more efficient. Plus, it encourages family participation and keeps you motivated. Ready to start writing your way to a more organized home?
12. DIY Tile or Painted Floor Mat for a Pop of Color
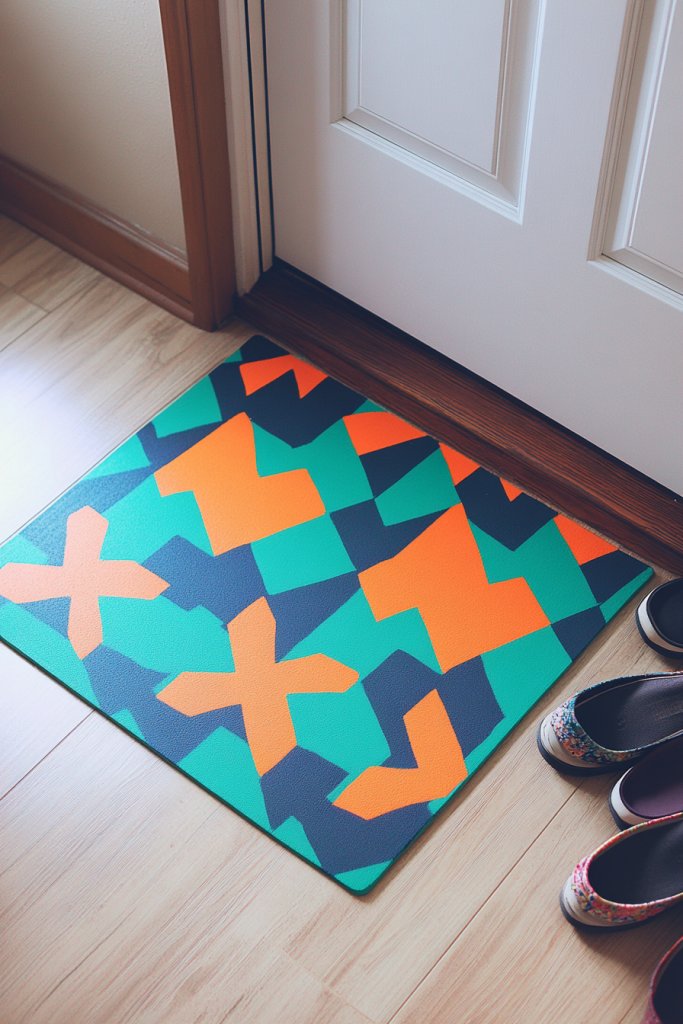
Your entryway floor sees a lot of foot traffic and can quickly look worn or dull. Want to add personality and protect your flooring at the same time? A DIY painted or tiled floor mat offers a fun, customizable way to brighten up your space while defining the entry zone.
Imagine a vibrant patterned floor mat with geometric shapes, floral motifs, or abstract designs in bold colors. Use stencils or adhesive tiles to create a custom look that complements your decor. The textured surface catches the light and adds visual interest, making your entrance instantly more welcoming. It’s like a piece of art right at your doorstep.
Choose paint colors and patterns that reflect your personality, from playful to sophisticated. For a quick update, use stencils and outdoor acrylic paint for durability. If you prefer tiles, opt for peel-and-stick adhesive varieties in creative patterns. For seasonal updates, simply repaint or replace tiles for a fresh look. Match the colors with your overall entryway palette for cohesion.
Clear and clean your floor thoroughly before starting. For painted mats, sketch your design lightly with chalk or pencil. Use painter’s tape for clean edges and outdoor-grade paint for durability. For tile options, measure and arrange tiles or stencils before adhering or painting. Seal the surface with a clear coat to protect against wear and tear. Allow ample drying time before placing shoes on it.
Add decorative borders or accents around the design. Incorporate your favorite colors or motifs to match your style. For extra flair, embed small embellishments like metallic accents or textured paints. Change the pattern seasonally or for special occasions to keep your entryway lively and fresh. It’s a practical project with a big visual payoff.
A custom painted or tiled floor mat transforms a mundane space into a statement area. It’s a DIY project that combines creativity with function, making your entry more inviting. Plus, it’s easy to update or change for fresh seasonal looks. Ready to make a colorful first impression?
13. Repurposed Vintage Suitcase as a Storage Bench
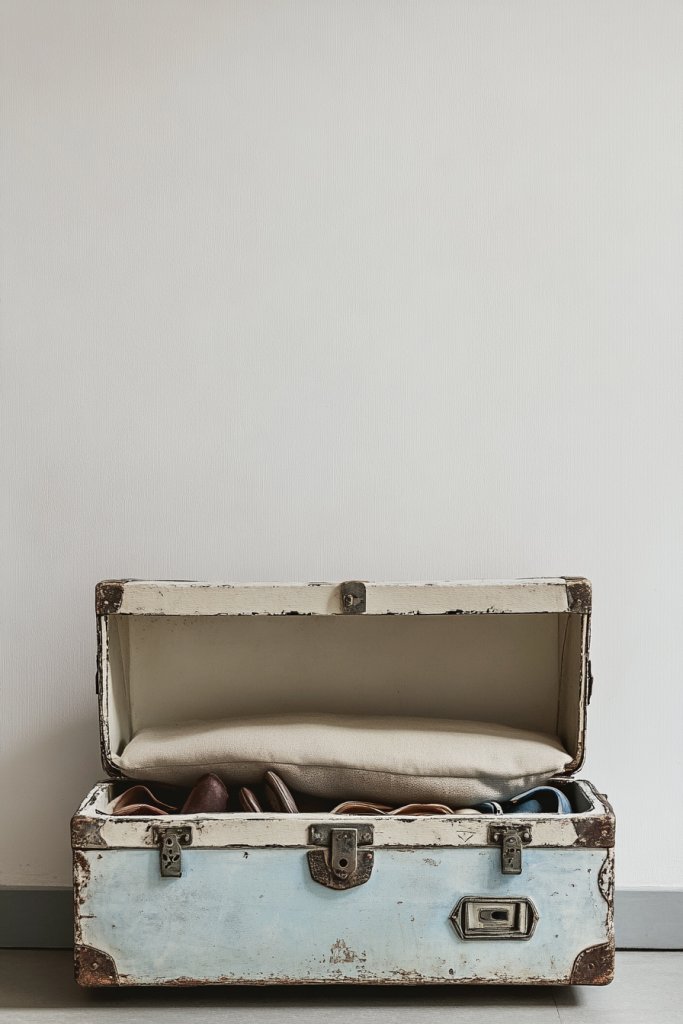
Clutter and lack of seating often make entryways feel cramped and chaotic. Want a stylish solution that doubles as storage and seating? Repurposing an old vintage suitcase into a bench adds character and practicality all in one.
Imagine a well-loved suitcase with leather straps and brass clasps, transformed into a comfy seat placed against your wall. The interior can store shoes, umbrellas, or seasonal gear, keeping clutter out of sight. The top provides a cozy spot to sit while putting on shoes or waiting. The vintage charm invites curiosity and complements both rustic and eclectic decor styles.
Choose suitcases with interesting textures or patterns—distressed leather, floral fabric, or bold prints. Decorate the outside with paint or stencils for a personalized touch. For a more modern look, replace the handle with a cushion or add a fabric top. You can also stack multiple suitcases for a layered storage effect or vintage display.
Clean and repair the suitcase as needed—fixing loose straps or hinges. Add a cushioned seat on top, secured with fabric or foam. For stability, place the suitcase on a sturdy base or legs if desired. Use the interior for storing shoes, scarves, or small accessories. Incorporate labels or dividers inside for better organization. Protect the exterior with a clear sealant or paint.
Add decorative elements like stencils, decals, or fabric accents to the outside. Personalize with family initials or favorite motifs. Insert a cushion in your choice of fabric for comfort. Use the interior for seasonal storage or to keep everyday essentials close by. The goal is a functional, charming piece that reflects your style.
A vintage suitcase turned storage bench is a charming, creative upgrade that adds both utility and personality. It’s a project that invites your touch and imagination, making your entryway unique. Plus, it’s a conversation starter and a reminder that beauty and function can coexist. Ready to sit pretty and stay organized?
14. Minimalist Wall Hooks from Industrial Pipe Fittings
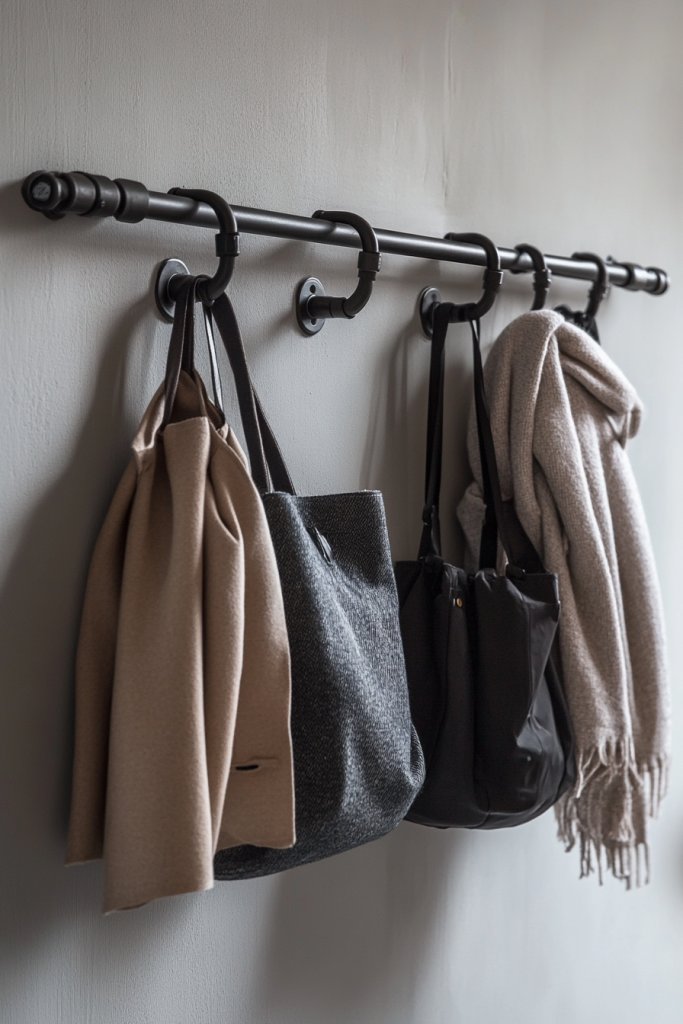
Cluttered hooks and racks can make your entryway feel busy and disorganized. Want a clean, modern look that’s also highly functional? Industrial pipe fittings offer a sleek, minimalist way to hang coats, bags, and hats without cluttering your wall space.
Picture black or metallic pipe fittings attached to the wall, with hooks or rods extending outward. These fittings look both stylish and sturdy, giving your entry a subtle industrial edge. Coats and bags hang neatly, with the simple metal lines adding a touch of modern sophistication. The minimal design keeps the space feeling open and uncluttered.
Choose pipe fittings in matte black, brushed nickel, or antique brass to match your decor. Mix and match fittings for visual interest or keep it uniform for a clean look. Install hooks or rods at different heights for layered storage. For a softer touch, add wooden accents or paint the pipes in colors that complement your decor.
Measure and mark the placement of fittings on your wall, ensuring they align with your storage needs. Drill into wall studs or use appropriate anchors for drywall. Attach fittings securely with screws, making sure they’re level. Hang your coats, bags, or umbrellas on the hooks or rods. For added stability, reinforce with additional brackets or supports if needed.
Incorporate decorative elements like wood accents, painted pipes, or hanging baskets for small accessories. Use labels or tags for organized items. Change the arrangement or paint the fittings to match seasonal decor or personal taste. Keep the setup simple but adaptable for future needs.
Industrial pipe fittings create a sleek, modern entryway that’s easy to customize and expand. It’s an affordable DIY upgrade that adds a stylish edge while providing practical storage. Your space will look polished and inviting, proving that minimalism can be both functional and beautiful. Ready to pipe your way to a tidy entrance?
15. Custom Mirror Frame Using Reclaimed Wood for a Spacious Feel
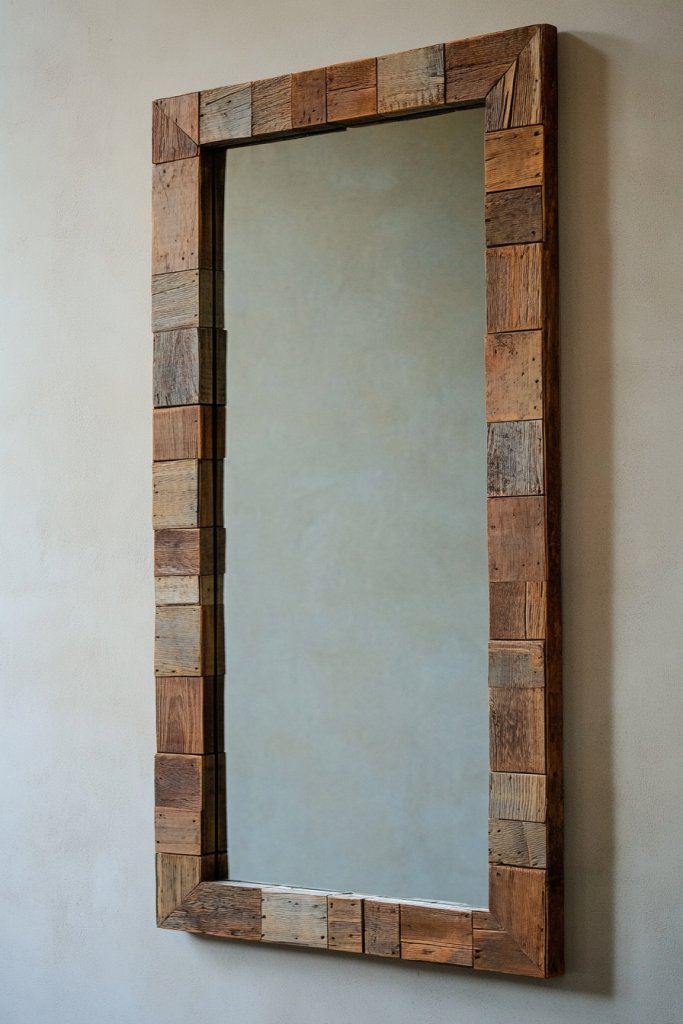
A small or dull entryway can make your home feel cramped and uninviting. Want to create an illusion of space while adding a decorative touch? Framing a mirror with reclaimed wood offers a charming, eco-friendly way to brighten and expand your entry.
Envision a large mirror with a rustic wooden frame crafted from weathered or stained reclaimed wood. The natural textures and imperfections add warmth and character, making the mirror a focal point. As light reflects off the glass, the space feels larger and more open. The combination of rustic and modern elements creates a welcoming, stylish ambiance.
Use different wood tones—light, dark, or distressed—to suit your decor. Decorate the frame with small embellishments like metal accents or paint for a personalized look. For a sleek modern style, opt for a thin, smooth frame, or go for a chunky, textured border for rustic charm. Position the mirror at eye level for functional use and visual impact.
Select reclaimed wood from salvage yards or repurpose old furniture components. Sand and treat the wood to prevent splinters and decay. Measure and cut the wood pieces to frame the mirror, then assemble using nails, glue, or brackets. Mount the frame securely to the wall with heavy-duty anchors, ensuring stability. Hang the mirror and adjust as needed for perfect alignment. Consider sealing or staining the wood if desired.
Add decorative elements like metal corner brackets, painted accents, or small carvings for a unique look. Incorporate a distressed or weathered finish for vintage appeal. Use the mirror for daily checks and the frame for a statement piece. Pair it with lighting or small shelves nearby to maximize functionality.
A reclaimed wood framed mirror is a beautiful, sustainable upgrade that makes your entryway appear larger and brighter. It’s a project that blends eco-consciousness with style and practicality. Plus, it’s a rewarding DIY that adds a personal touch to your home. Ready to reflect your style and expand your space?
16. DIY Decorative Tray for Catch-All Spot on a Small Table
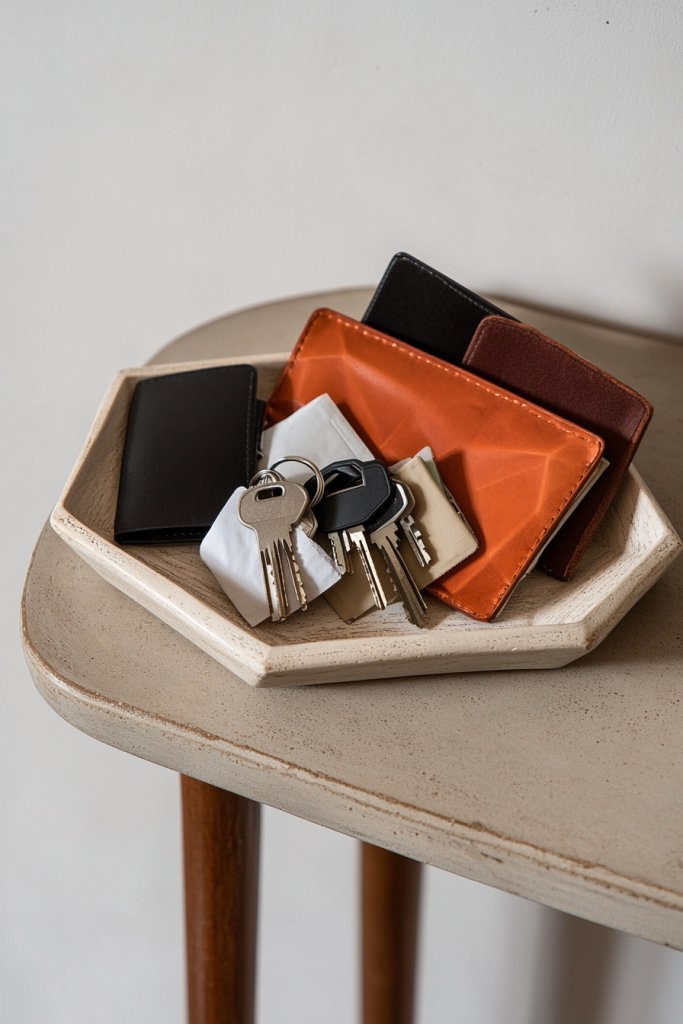
Cluttered entry tables with keys, wallets, and mail make your space look messy and uninviting. Want a simple, stylish way to organize these essentials? A DIY decorative tray offers a chic solution that keeps everything in one place and adds a decorative touch.
Imagine a beautifully crafted tray made from wood, metal, or ceramic, placed on a small table or bench. It holds keys, sunglasses, and coins, while decorative elements like candles or small plants add charm. The tray’s edges contain everything, preventing spills or clutter from spreading. Its design complements your decor—be it modern, rustic, or eclectic—and instantly elevates the space.
Choose materials that match your style—smooth wood, hammered metal, or patterned ceramic. Customize the shape and size of the tray based on your space and needs. Decorate with paint, stencils, or decals for a personal touch. For versatility, opt for a tray with handles or layered designs that can be moved easily.
Create your tray by cutting or selecting a pre-made base, then decorating its surface with paint or adhesive embellishments. Add non-slip pads underneath for stability. Arrange your essentials within, grouping similar items for quick access. Incorporate decorative touches like small bowls or coasters inside for extra flair. Place it on a table or shelf and enjoy an organized, attractive focal point.
Add labels or monograms with paint or vinyl stickers. Change out decorative elements seasonally or when your style evolves. Incorporate small personal items like charms or mementos for a unique look. Keep it functional yet stylish by combining aesthetics with everyday practicality.
A DIY decorative tray is an easy upgrade that combines function and style, making your entryway more welcoming. It’s a quick project that instantly declutters and personalizes your space. Plus, it’s a versatile piece you can update or move to other areas as needed. Ready to organize with style?
Conclusion
With a diverse range of DIY entryway decor hacks, you now have plenty of creative options to enhance your home’s first impression. From practical organization tips to eye-catching accents, these ideas are perfect for any style or skill level. Embrace these projects and let your entryway reflect your personality—your welcoming space awaits a stylish transformation!