Ever find yourself frustrated by clutter lurking under your bathroom sink? You’re not alone! Undersink storage ideas have surged in popularity because they transform what seems like a cramped, chaotic space into an organized oasis, making daily routines smoother and more enjoyable.
In this article, you’ll uncover a variety of clever and practical storage solutions that cater to different needs and styles. From simple DIY hacks to sleek, space-saving designs, these ideas will inspire you to reclaim your bathroom space and keep essentials within easy reach. Get ready to turn under the sink into your new favorite storage spot!
1. Install Stackable Clear Acrylic Bins for Visible, Easy Access
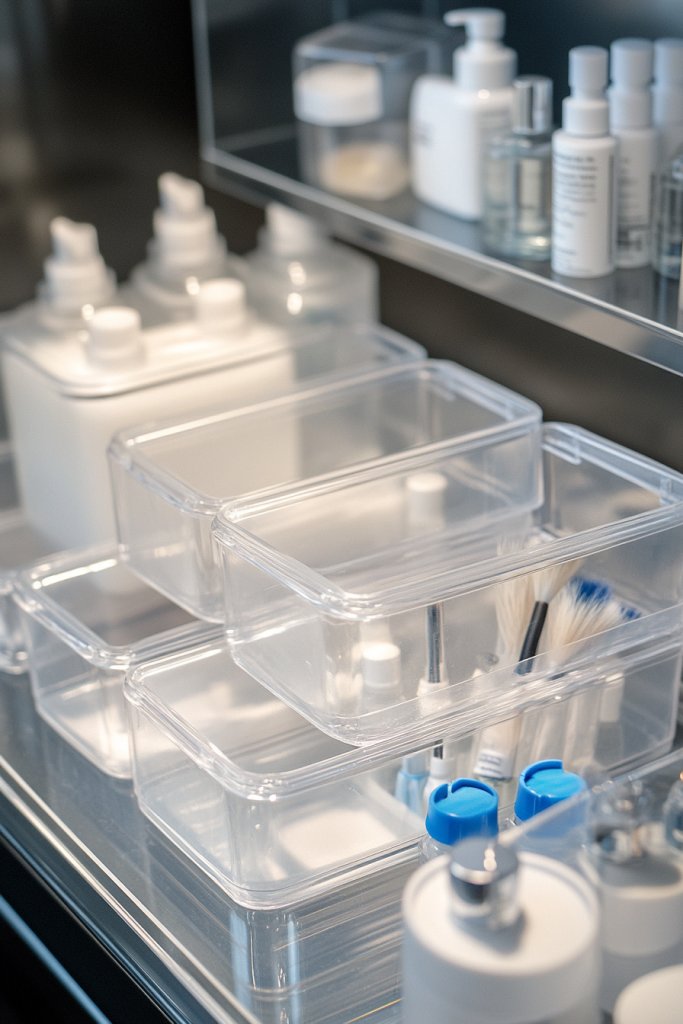
Ever spent minutes rummaging through a cluttered cabinet trying to find that one tiny bottle or brush? Undersink chaos can make daily routines frustrating and inefficient. Clear acrylic bins promise a simple fix, transforming chaos into clarity. Who doesn’t want to see everything at a glance without digging through layers of clutter?
Picture a set of sleek, transparent bins stacked neatly in your cabinet. Brightly colored bottles and tools sit visibly, their labels facing up for quick identification. The clean lines of acrylic catch the light, giving your space a modern, organized vibe. Small items like cotton swabs and hair ties sit in separate compartments, easily accessible and mess-free.
Choose bins in different sizes to accommodate various items or opt for those with lids for dust protection. For a minimalist look, go for all-clear, sleek designs that blend with your cabinet. If you prefer a pop of color, select tinted acrylic options. Seasonal updates might include adding labels or decorative stickers for a personalized touch.
Start by measuring your cabinet space to select appropriately sized bins. Clear acrylic is widely available online or at home improvement stores. Arrange items by category—cosmetics, medicines, cleaning supplies—and assign each a dedicated bin. Secure the bins in place if necessary with adhesive strips or non-slip mats. Regularly review and refill to maintain order, and wipe down with a damp cloth to keep transparency clear.
Label each bin with waterproof stickers or use a chalk marker for easy updates. Incorporate decorative touches like patterned liners or colored tape to add a bit of personality. Stack bins vertically for height variation or add small risers for easier access. Personal touches make maintenance fun and motivate consistent organization.
A well-organized under-sink area boosts your confidence in tackling daily chores. It turns a dreaded task into a quick, effortless routine. Plus, it makes cleaning and restocking less of a hassle. Ready to see your cabinet transform into a sleek, functional space?
2. Use Over-the-Door Hanging Organizers for Additional Storage
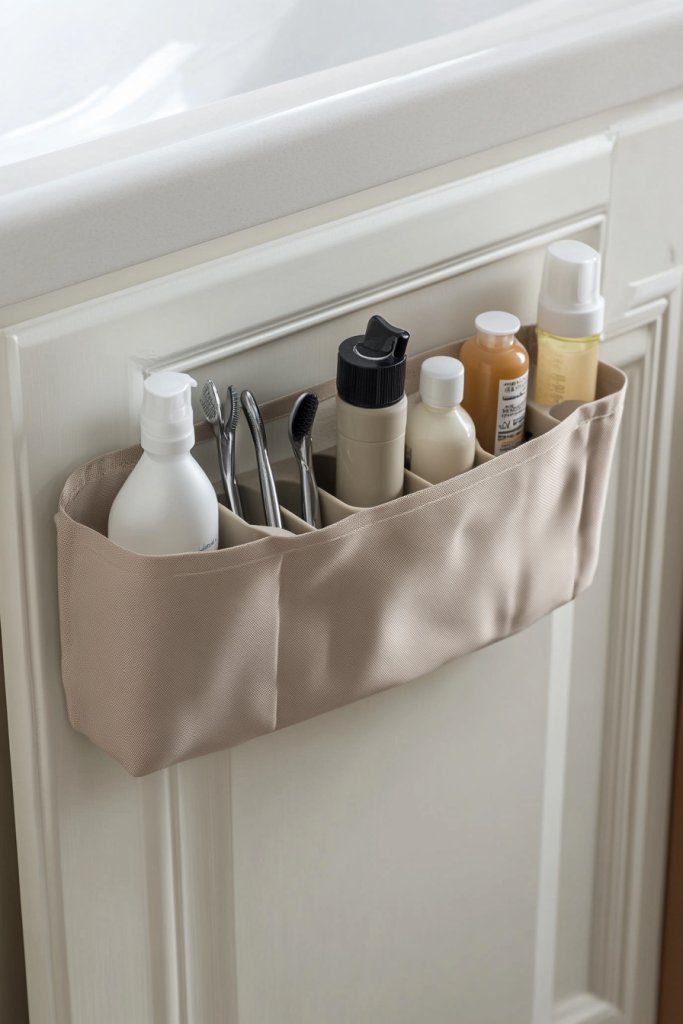
Is your under-sink space running out of room faster than you can say ‘storage solution’? Sometimes, the real estate on cabinet shelves isn’t enough. Over-the-door hanging organizers offer a quick fix, turning unused space into prime storage real estate. Ever wondered why the back of your door isn’t used more often?
Imagine waterproof fabric pockets hanging securely on the inside of your cabinet door. Small bottles, brushes, and tools sit neatly in each pocket, easily visible and reachable. The fabric’s texture adds a soft, cozy element to your storage, while the organized pockets keep everything from rolling around. It’s like giving your cabinet a set of extra drawers without any drilling.
Choose materials that match your decor—waterproof nylon for a sleek look or canvas for a more casual vibe. Pockets come in various sizes, so you can customize based on your needs. For seasonal changes, swap out pockets for different styles or colors. These organizers work well in small bathrooms or shared spaces where every inch counts.
Select a durable, waterproof organizer designed for bathroom use. Hang it over the door or attach it to side panels with hooks or adhesive strips. Arrange items by frequency of use—everyday essentials in front pockets, less-used items in the back. Regularly check for sagging or wear, and replace if necessary. This setup requires minimal tools and can be done in minutes.
Personalize with labels or color-coded pockets for different categories—medications, skincare, tools. Add small hooks inside pockets for hanging razors or brushes. Use decorative trims or patches to match your bathroom style. This makes organization both functional and stylish.
Using over-the-door organizers frees up shelf space and keeps everything within arm’s reach. It simplifies your routine, making it easier to maintain order. Plus, it’s a quick project that instantly upgrades your storage game. Who knew hanging pockets could make such a difference?
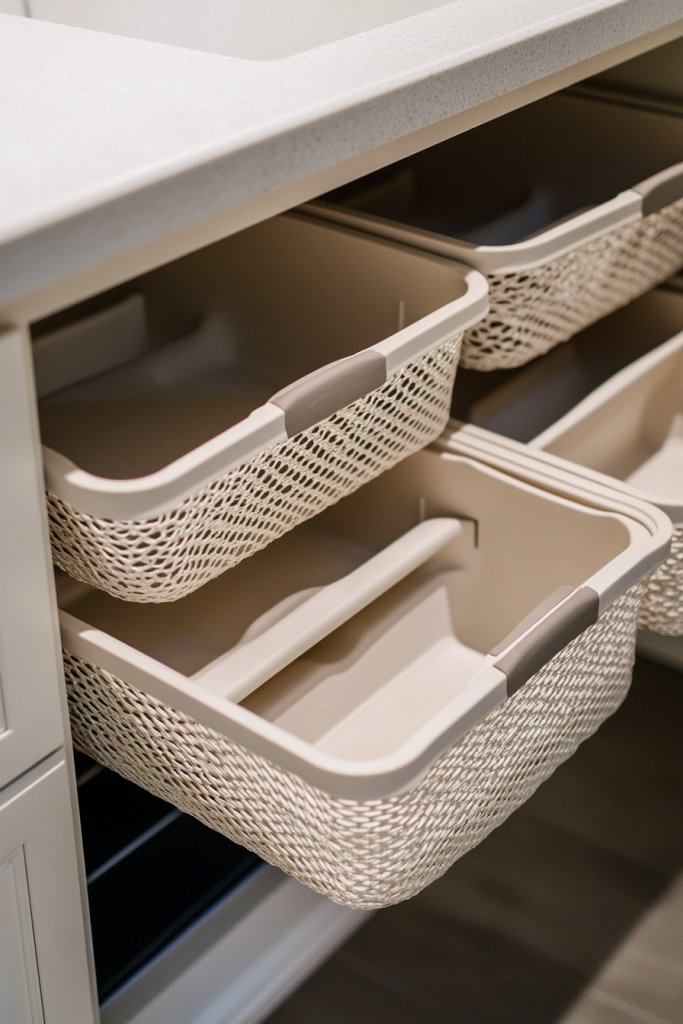
3. Incorporate Pull-Out Drawers with Dividers for Custom Organization
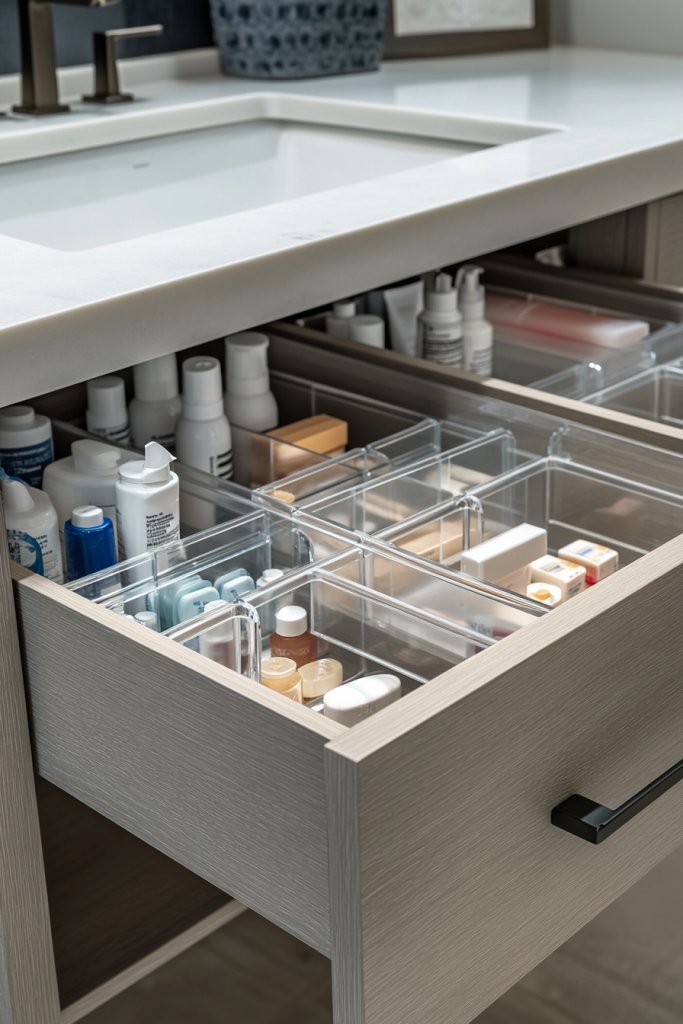
Ever feel overwhelmed by a jumble of cosmetics, medicines, and cleaning supplies in your undersink space? Fixed shelves often leave you digging through layers to find what you need. Pull-out drawers with dividers offer a tailored solution, giving you full visibility and easy access. Who wouldn’t want a custom setup that reduces clutter?
Visualize sleek, sliding drawers installed beneath your sink, each section divided into compartments. Cosmetics sit in one, medicines in another, cleaning sprays in a separate zone. When you pull the drawer out, everything is within reach, organized in neat, labeled sections. The smooth glide and clear dividers make searching a thing of the past.
Choose drawer fronts that match your cabinet style—wood, matte, or glossy finishes. Adjustable dividers allow customization based on item size. For a more rustic look, opt for wire baskets that slide out. In smaller spaces, stacking multiple drawers can maximize vertical storage. Seasonal decor can be added with decorative liners or labels.
Start by measuring the cabinet opening and planning your drawer dimensions. Purchase pre-made drawer units or have custom ones built for a perfect fit. Install slides securely to ensure smooth operation. Use adjustable dividers to separate items by category or size. Regularly declutter and reorganize to keep the system functional. Label each section for quick identification.
Personalize with color-coded dividers, labels, or decorative trims. Incorporate small containers within drawers for tiny items like cotton swabs or pins. Use waterproof labels for easy updates. Consider adding a soft liner or rubber mats at the bottom for extra grip and protection.
Custom pull-out drawers turn your chaos into calm, making every morning routine smoother. They help you see everything at a glance and reduce wasteful searching. Embrace this organized approach and enjoy a clutter-free, functional space that feels luxurious and practical.
4. Add Lazy Susans for 360-Degree Accessibility
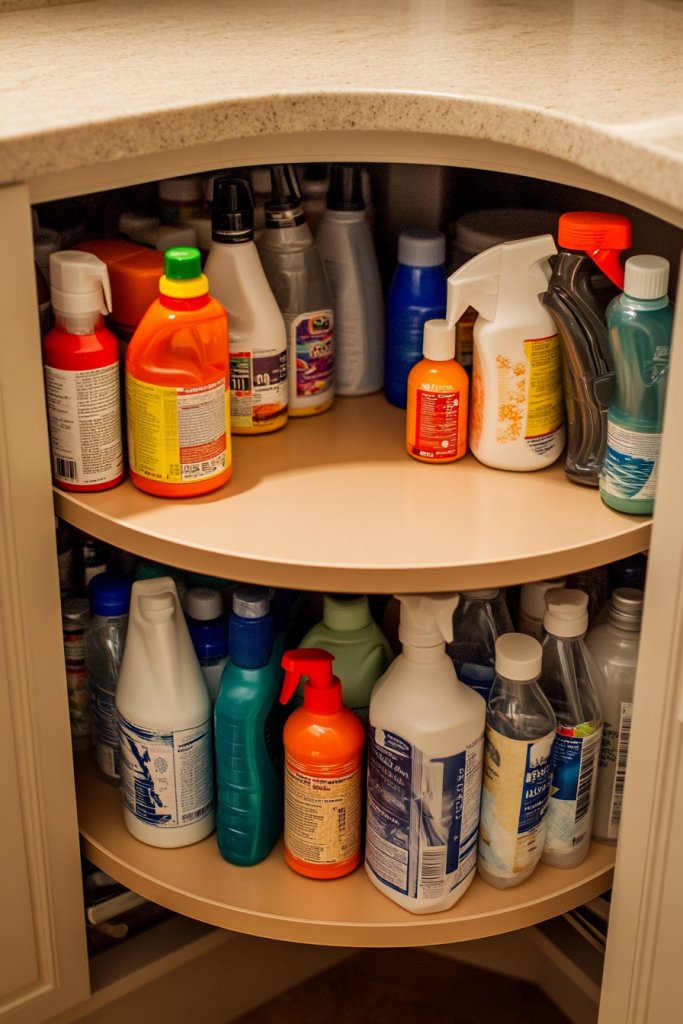
Do you hate reaching behind stacks of bottles only to find everything topples over? Lazy Susans are the perfect remedy for stubborn corner spaces, turning awkward spots into accessible storage zones. Imagine having all your bottles and jars spinning right out when you need them—no more digging or knocking things over.
Picture a sleek, round turntable sitting in the corner of your cabinet, filled with neatly arranged toiletries and cleaning supplies. The surface spins smoothly, revealing items stored at the back without hassle. The textured edge prevents items from slipping off, and the polished finish adds a touch of elegance. It’s a simple but effective way to utilize every inch.
Choose from various sizes—small for tight spaces or large for bigger cabinets. Use multiple units for different sections, such as one for brushes and another for bottles. Decorate with labels or liners to match your decor theme. For seasonal use, switch out items or add decorative accents like stones or beads on the surface.
Select a Lazy Susan with a sturdy base and smooth rotation. Measure your cabinet space to pick the right size. Place the turntable on a clean, non-slip surface or add rubber feet for extra grip. Arrange bottles, jars, and tools in an organized manner, grouping similar items together. Regularly clean and spin to check for smooth operation, and replace if the spinning becomes stiff.
Label sections or individual items for quick identification. Use decorative liners or mats underneath to add flair. Incorporate small risers or stacking trays to create multi-level storage within the Lazy Susan. Add small decorative elements like pebbles or shells around the base to personalize.
Lazy Susans turn the most inaccessible corners into user-friendly storage zones. They make your space look tidy and feel welcoming. Plus, they’re a fun way to keep everything organized without much effort. Get ready to spin your way to a clutter-free bathroom.
5. Utilize Small Wire Baskets for Loose Items and Extra Towels
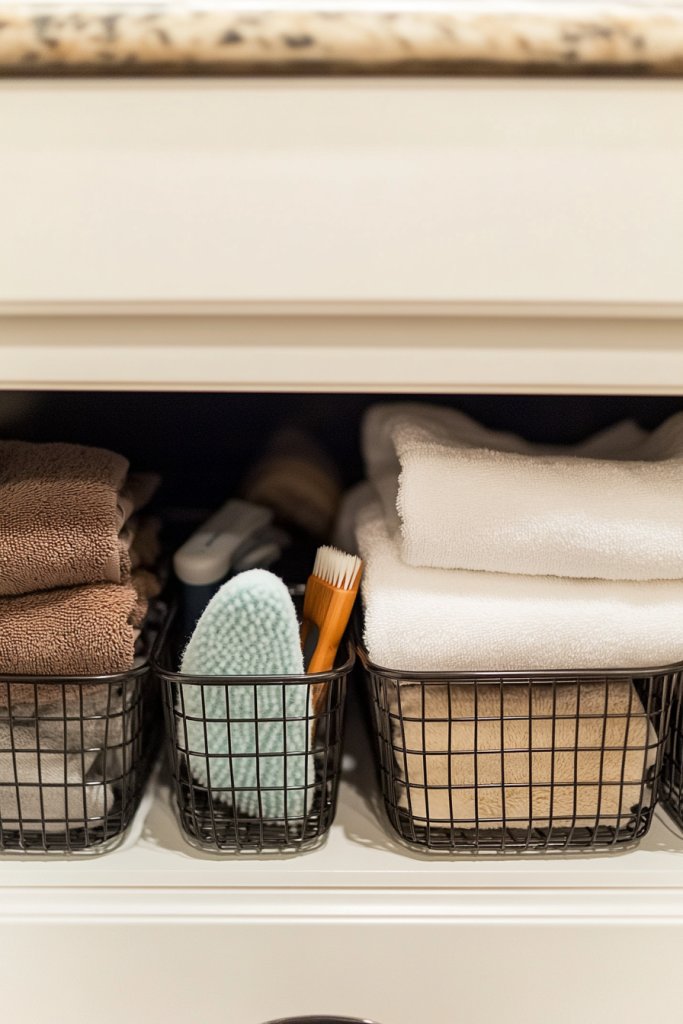
Loose items and spare towels often end up in piles, making the space look messy and uninviting. Small wire baskets offer a simple way to corral these odds and ends into neat groups. Who doesn’t want to effortlessly grab a spare washcloth without digging through a mountain of clutter?
Visualize a series of compact wire baskets hung from hooks or stacked on shelves inside your cabinet. Razors, brushes, and spare towels sit tidily in their respective baskets, ready to be grabbed. The metallic finish adds an industrial touch, contrasting nicely with soft textiles or smooth surfaces. It’s a functional yet stylish way to keep everything in sight.
Opt for baskets with different sizes or finishes—brushed nickel, matte black, or brass—to match your bathroom decor. Hang them from wall hooks or place on adjustable shelves. For a softer look, add fabric liners or colorful cloth covers. You can also use baskets to hold cleaning supplies, making them easier to carry or move.
Decide which items need containment—razors, brushes, towels—and select appropriate basket sizes. Use sturdy hooks or adhesive mounts to hang baskets securely. Group similar items in each basket for quick access. Regularly check for dust or corrosion, and wipe down with a damp cloth. Reorganize seasonally to keep the setup fresh.
Label baskets with waterproof tags or stickers for quick identification. Add colorful liners or fabric covers for a cozy vibe. Use S-hooks or clips for hanging additional items like cloths or small brushes. Personal touches like decorative tags or painted finishes can make the baskets more inviting.
Small wire baskets make your cluttered space look intentional and tidy. They’re a quick win that boosts your confidence in managing daily routines. Plus, they’re versatile and easy to update. Ready to turn chaos into order?
6. Implement Under-Sink Shelving with Adjustable Height Options

Are your large bottles and boxes making your current shelves feel cramped and disorganized? Fixed shelves often don’t accommodate bulky items well. Adjustable under-sink shelving offers a customizable solution, letting you tailor your space for maximum efficiency. Who doesn’t want a perfect fit every time?
Imagine modular shelves that can be moved up or down easily, creating dedicated spaces for tall bottles or wide boxes. The shelves are made of durable plastic or metal, with a sleek finish that matches your cabinetry. Items are neatly organized, with space to spare, making everything easy to see and reach. It’s like creating custom compartments within your cabinet.
Choose adjustable shelves with removable or foldable panels for flexible configurations. Use different heights for different sections—one for bottles, another for boxes. For a more polished look, select shelves with matching finishes or add decorative edge trims. Seasonal adjustments can include swapping out shelves for different sizes or styles.
Measure your cabinet interior to select the right-sized adjustable shelving system. Install the brackets or tracks following manufacturer instructions, ensuring stability. Arrange your items by size and usage frequency, placing heavier items on lower shelves. Regularly review and reorganize to optimize space and accessibility. Use non-slip mats on shelves to prevent sliding.
Add labels or color-coded strips to identify sections quickly. Incorporate decorative liners or mats that match your bathroom decor. Use hooks or small containers on shelves for extra storage. Personal touches like stickers or painted edges can make the setup uniquely yours.
Adjustable shelves turn a cluttered, inefficient space into a well-organized haven. They adapt to your changing needs and grow with your collection of bathroom essentials. Feeling confident in your organized space makes every routine smoother and more enjoyable.
7. Use Magnetic Strips for Metal Items and Small Tools
Small metal tools and accessories often get lost or cluttered in drawers, causing frustration each time you need them. Magnetic strips offer a sleek, space-saving solution to keep these items visible and accessible. Want to avoid the time-consuming search for your nail clippers or scissors?
Visualize a slim magnetic strip mounted inside your cabinet door or on a wall. Metal tools like tweezers, scissors, or nail clippers stick firmly, held in place by magnets. The strip keeps everything in a line, making it easy to grab precisely what you need without sifting through clutter. The minimalist look adds a modern touch to your storage.
Select magnetic strips with a sleek metal finish or a colorful rubber coating for added style. Use multiple strips for different tool categories or size variations. For seasonal or occasional tools, swap out or add additional strips as needed. Mount strips at varying heights to optimize space and reach.
Clean the mounting surface thoroughly before attaching the strip with screws or adhesive pads. Arrange your metal tools on the strip, grouping similar items together. Check periodically for magnetic strength and reattach or replace strips as needed. Keep your tools organized and within arm’s reach, reducing clutter in drawers or containers.
Personalize with labels or color-coded clips to identify tool types. Use decorative tape or paint the mounting surface to match your bathroom decor. Add small hooks or clips nearby for hanging non-metallic items like brushes or cloths. This keeps everything tidy and easy to find.
Magnetic strips turn a jumble of loose tools into a neat, organized display. They make your routine more efficient and less stressful. With everything in place, you gain confidence in maintaining an orderly space for the long haul.
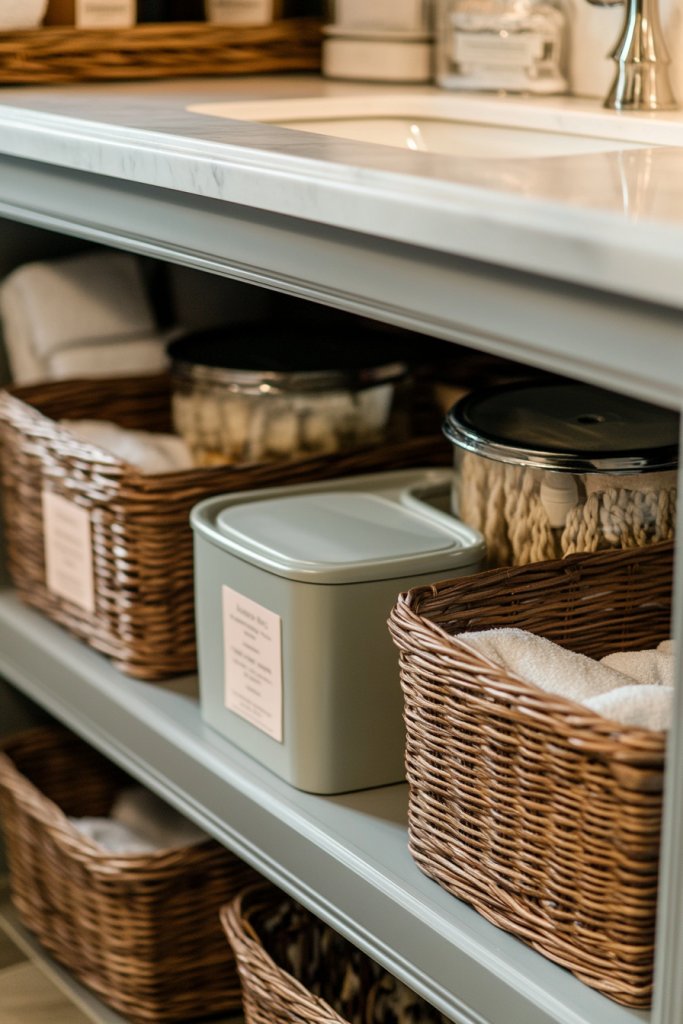
8. Incorporate Decorative Baskets or Fabric Bouches for a Cozy Look

Cluttered, disorganized storage can bring down the vibe of even the most stylish bathroom. Decorative baskets or fabric bins offer a way to conceal chaos while adding texture and warmth to your space. Want a cozy, inviting atmosphere without sacrificing function?
Imagine woven baskets or soft fabric bins arranged on built-in shelves or inside cabinets. They hide everyday essentials like toiletries, spare towels, or cleaning supplies, while their textures add visual interest. The natural fibers or plush fabrics soften the look of your storage, making it feel less clinical and more homey. It’s a simple upgrade that makes your space instantly more welcoming.
Choose baskets in colors or materials that complement your decor—rattan, velvet, or linen. Use uniform sizes for a clean, organized appearance or mix and match for an eclectic vibe. Incorporate decorative tags, ribbons, or trims to personalize each basket. Seasonal options might include adding throws or plush liners for winter or lighter fabrics for summer.
Select baskets with sturdy handles for easy removal. Place them strategically on shelves or inside cabinets, grouping similar items together. Regularly declutter and wash fabric bins to keep them fresh. Use decorative liners or padding to protect delicate items stored inside. Rotate or swap baskets seasonally for a fresh look.
Add labels or tags for quick identification. Use decorative trims or paint to match your theme. Incorporate small decorative accents like faux flowers or seasonal ornaments for extra charm. Personal touches make your storage both functional and aesthetically pleasing.
Decorative baskets turn a cluttered mess into a styled display, boosting your confidence in maintaining order. They make your bathroom feel more like a retreat and less like a storage closet. With a little effort, your space will look polished and cozy.
9. Install Tension Rods to Hang Spray Bottles or Cloths

Tired of spray bottles toppling over or cluttering your sink area? Tension rods provide a simple, adjustable way to create extra hanging space. Want to keep your cleaning supplies orderly and within easy reach without taking up shelf space?
Visualize a sleek metal tension rod stretched across your cabinet interior, holding spray bottles upside down or hanging cloths. The bottles hang securely, freeing up shelf space and reducing mess. Soft cloths dangle from hooks or clips attached to the rod, always ready for action. It’s like adding a secret storage compartment inside your cabinet.
Choose from different finishes—brushed nickel, matte black, or chrome—to match your fixtures. Use multiple rods for different purposes—one for spray bottles, another for cloths or brushes. Adjust the height for different item sizes or to clear larger bottles. For a more decorative touch, add colorful clips or fabric wraps around the rods.
Select a tension rod that fits your cabinet width, ensuring it’s sturdy enough to hold your items. Install by extending the rod until it’s tight and secure. Hang your spray bottles upside down for easy dispensing or drape cloths over the rod for quick grab-and-go access. Regularly check the tension, especially after cleaning or rearranging.
Add labels or color-coded clips to identify different cleaning supplies. Incorporate decorative wraps or paint the rods for a custom look. Use hooks or clips for hanging other small accessories like sponges or brushes. This setup is flexible and easy to change as your needs evolve.
Tension rods turn a cluttered collection of bottles into a streamlined display. They save space and keep everything tidy, making your routine more efficient. With a simple setup, you gain confidence in maintaining an organized, functional bathroom.
10. Use Stackable, Labelled Storage Containers for Bulk Items
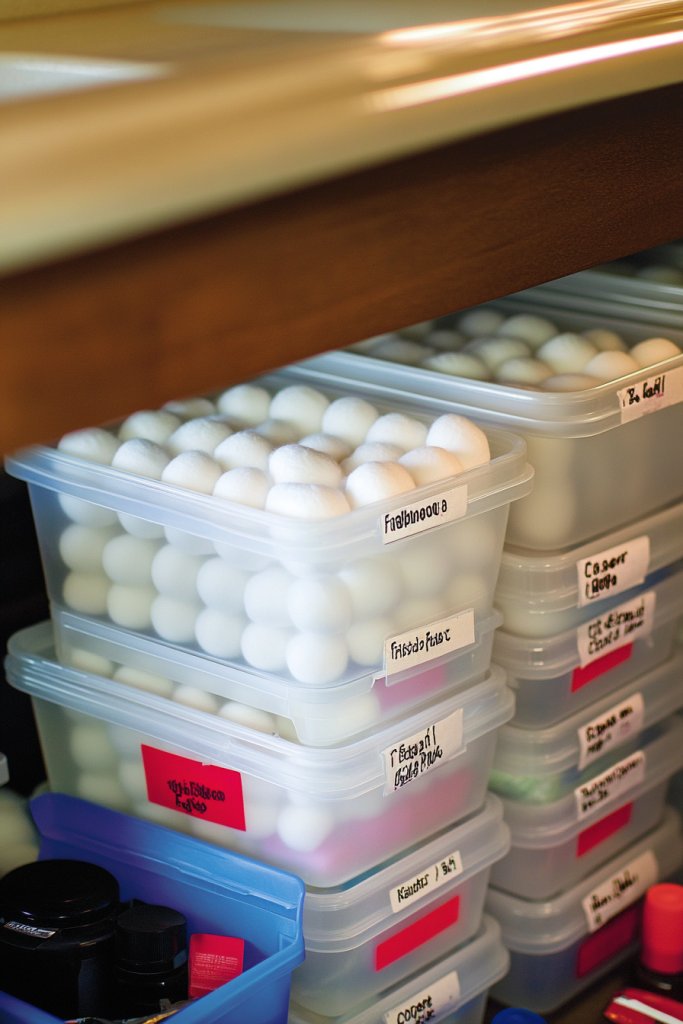
Bulk items like cotton balls, swabs, or first aid supplies often end up in messy piles, making it hard to find what you need quickly. Stackable containers with labels help organize these essentials into neat, accessible groups. Want to avoid rummaging through clutter for a tiny item?
Envision uniform, clear containers stacked neatly on each other, each with a bold label indicating its contents. The uniformity creates a clean, organized look that’s easy to maintain. Inside, items like cotton swabs or bandages sit in tidy rows, ready to use. The labels ensure you can grab what you need without delay.
Choose containers in different sizes depending on your storage needs. Use color-coded labels for quick category recognition. For a more aesthetic look, select matte or frosted containers that match your bathroom decor. Stack vertically or place side by side, depending on your space constraints. Seasonal updates could include changing labels or colors.
Purchase uniform, stackable containers with secure lids. Label each container with waterproof labels or a dry-erase marker. Store similar items together—cotton balls in one, swabs in another. Place containers on shelves or inside drawers, stacking efficiently. Regularly review and refill to keep everything current.
Use decorative labels or custom stickers to add flair. Incorporate small containers inside larger ones for tiny items. Add colored lids or labels to differentiate categories visually. Personal touches make organization easier and more fun to maintain.
Labelled, stackable containers bring a sense of control and order to your space. They simplify your routine and make restocking straightforward. Feeling confident in your organized setup turns bathroom chores into a breeze.
11. Create a Tiered Tray System for Small Bottles and Tubes
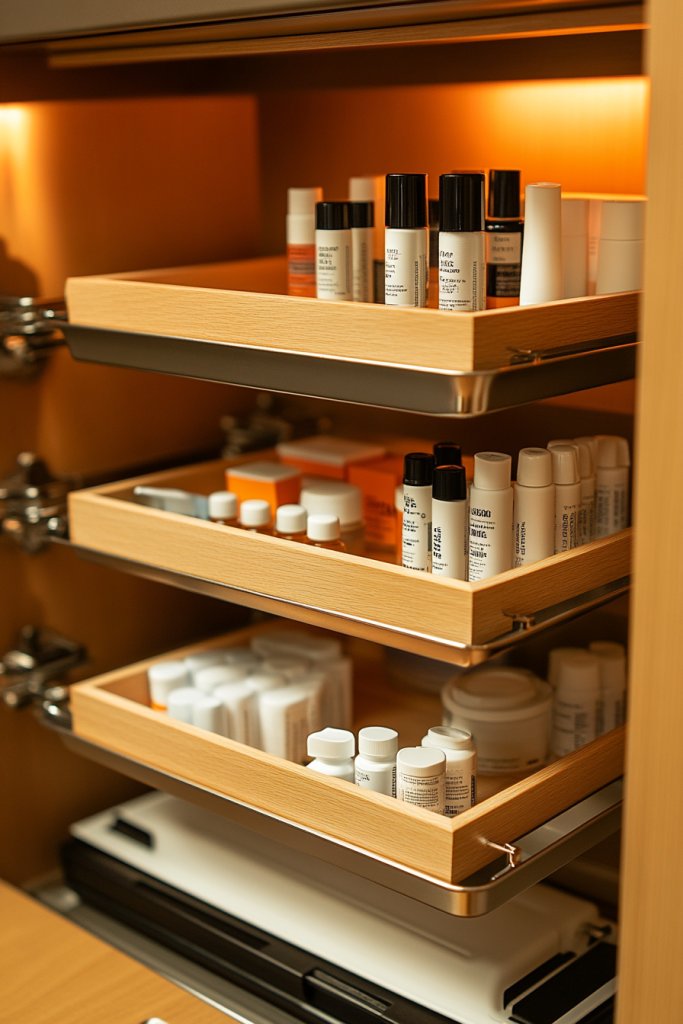
Small bottles and tubes often get lost in the back of shelves or drawers, making it hard to find what you need quickly. A tiered tray system provides a clear, organized way to display and access these items. Want to keep everything upright and visible without clutter?
Picture a compact, multi-level tray with small, individual sections designed to hold mini bottles, tubes, and jars. Items stand upright, arranged neatly by type or frequency of use. The tiers add visual interest and make the most of vertical space. It’s a simple solution that keeps everything accessible and tidy.
Choose materials like wood, acrylic, or metal to match your decor style. Use risers or stacking trays to create multiple levels within a small footprint. Decorate with labels or color-coded accents for easy identification. For seasonal refreshes, swap out trays or add decorative elements like beads or stones.
Select a tiered tray or riser that fits your space and holds your favorite small bottles. Arrange your products in an orderly fashion, grouping similar items together. Place the tray on your countertop or inside a cabinet for easy access. Regularly tidy and rotate items to keep the display fresh. Use labels if needed for quick identification.
Add decorative stickers or paint to match your decor. Incorporate small containers or cups within the trays to separate tiny items. Use themed accessories like shells or beads to personalize the display. Regularly update the arrangement for seasonal or style shifts.
A tiered system transforms clutter into a charming display, boosting your confidence in organization. It makes your everyday routine smoother and more enjoyable. Plus, it’s a quick, inexpensive upgrade with a big visual payoff.
12. Hang Small Baskets or Mesh Pouches Inside the Door for Daily Essentials
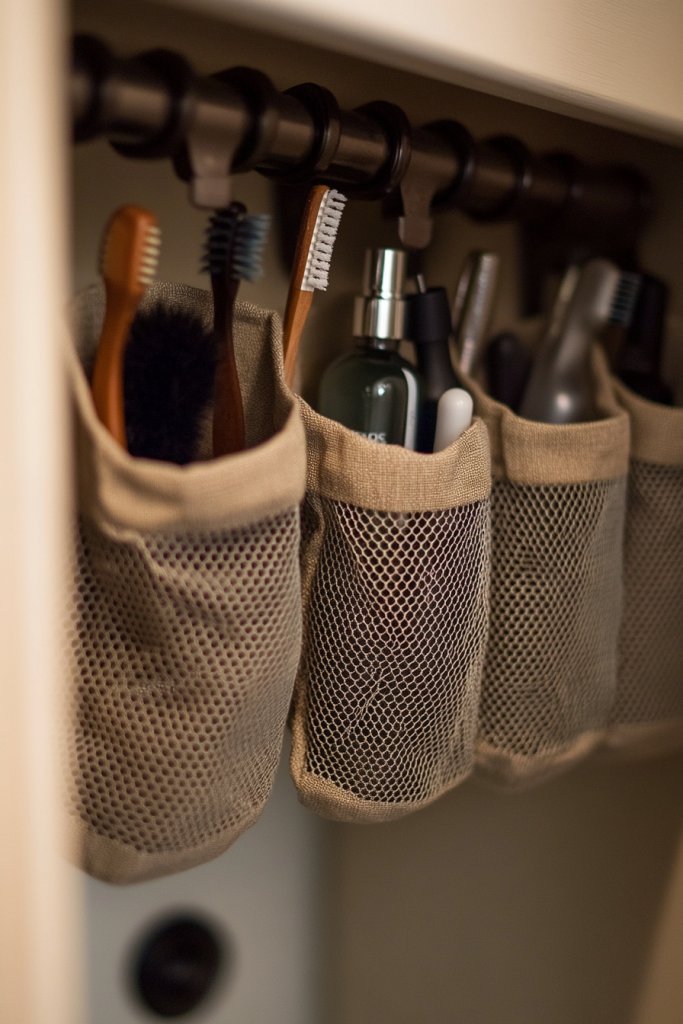
Constantly searching for your daily essentials like razors, brushes, or small bottles is frustrating. Hanging small baskets or mesh pouches inside the cabinet door creates a dedicated space for these must-haves. Want everything within arm’s reach without cluttering your shelves?
Visualize lightweight mesh or fabric pouches attached to the inside of your cabinet door. Items like brushes, razors, or travel-sized products sit neatly inside, visible through the mesh. The pouches hang securely, keeping your essentials accessible and organized. It’s a simple solution that saves space and time.
Choose materials that suit your aesthetic—mesh for a modern look or fabric with decorative trims for a cozy feel. Use different sizes for various items, and consider color coding for quick identification. Attach with hooks, clips, or adhesive strips depending on your cabinet material. Rotate or swap out pouches seasonally.
Secure the pouches or baskets with hooks or adhesive strips, making sure they are firmly attached. Group similar items together—daily essentials in one, travel items in another. Regularly empty and clean the pouches to prevent dust buildup. Keep your most-used items in front for quick grabbing.
Personalize with labels, decorative trims, or color-coded pouches. Add small hooks inside pouches for hanging tiny tools or accessories. Incorporate themed or patterned fabrics to match your decor. This simple upgrade adds both function and style.
Using hanging pouches makes your daily routine faster and more organized. It also keeps clutter off your shelves, making your space look cleaner. Small changes like this build confidence in your ability to maintain an orderly bathroom.
13. Incorporate Foldable or Collapsible Storage Solutions for Flexibility

Sometimes you need extra storage but don’t want permanent fixtures cluttering your space. Foldable or collapsible bins and trays offer a flexible, space-saving solution that adapts to your changing needs. Ever wished your storage could be as dynamic as your life?
Imagine lightweight fabric or plastic containers that fold flat when not in use, then pop up into a sturdy bin when needed. They sit neatly in a drawer or on a shelf, ready to expand for bulkier storage. When not in use, they fold away, keeping your space tidy and adaptable. It’s like having a secret storage army.
Choose from materials like silicone, fabric, or flexible plastic for durability and aesthetic appeal. Use different sizes and colors to match your decor or organize by item type. Seasonal or occasional needs can be accommodated by swapping or storing these containers elsewhere.
Select collapsible containers with sturdy frames and handles for easy transport. Use them to store overflow items or seasonal supplies. When not in use, fold them flat and tuck them away in a drawer or closet. Regularly check for wear and tear, replacing as needed. They’re perfect for quick, temporary storage needs.
Add labels or decorative stickers to identify contents. Use fabric liners or colorful tapes to personalize. Incorporate small hooks or clips to hang lightweight tools or accessories from the sides. These solutions make your storage versatile and fun.
Foldable storage solutions give you control over your space, even when it’s tight. They encourage you to experiment with different setups without long-term commitment. Embrace flexibility and enjoy an organized, adaptable bathroom environment.
14. Use Foam or Non-Slip Liners to Prevent Items from Sliding
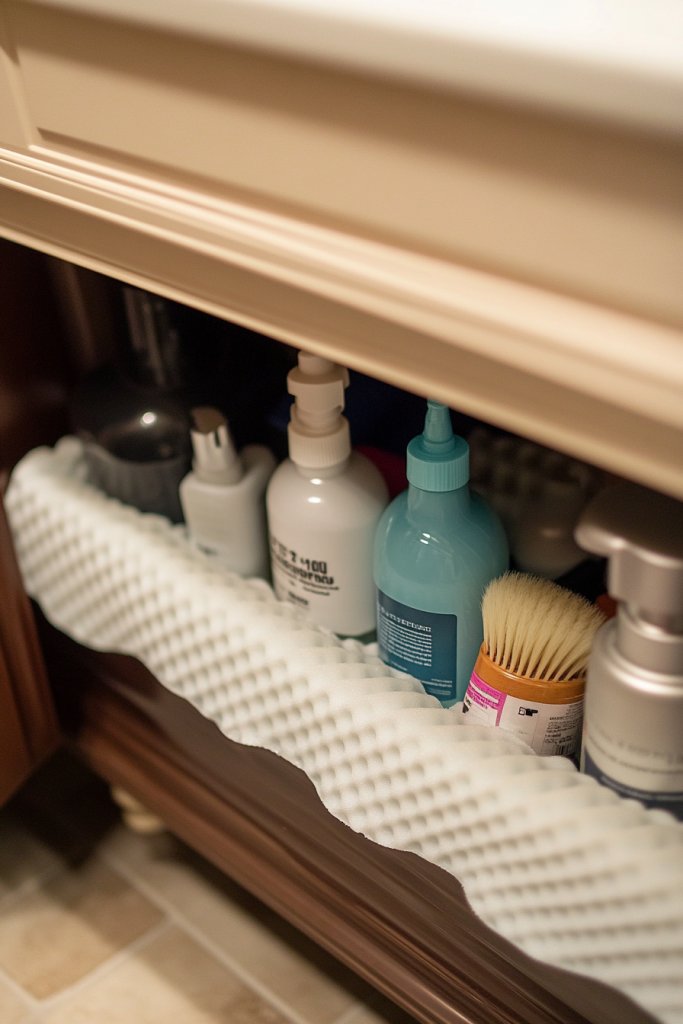
Ever open your cabinet to find bottles and brushes rolling around or knocking over? Slippery surfaces can turn tidy storage into chaos. Foam or non-slip liners help keep everything in place, reducing noise and damage. Want your stuff to stay put while you grab what you need?
Imagine textured foam mats or rubber liners lining the shelves and baskets inside your cabinet. Items like bottles, jars, and brushes sit securely on their surfaces. The cushioned, grippy material absorbs noise and prevents slipping, keeping your space looking neat and orderly. It’s a simple way to protect your items and your sanity.
Choose liners in various colors or patterns to match your decor for a cohesive look. Use cut-to-fit foam or rubber mats for custom coverage. For extra grip, add adhesive strips or non-slip pads underneath the liners. Seasonal updates might include swapping out printed or patterned liners for plain or vibrant ones.
Cut liners to fit your shelves or baskets precisely. Clean the surfaces thoroughly before placing the liners for maximum adhesion. Arrange your items on the liners, ensuring they’re stable. Regularly wipe the liners to prevent dust buildup, and replace when worn or stained. This simple step enhances both safety and aesthetics.
Add decorative trims or painted accents along the edges of liners. Use labels or stickers to mark different zones or item groups. Incorporate textured or patterned liners for visual interest. These small touches make your storage smarter and more personalized.
Foam and non-slip liners bring order and safety to your storage, boosting your confidence in maintaining tidiness. They protect your belongings, reduce noise, and simplify cleaning routines. Small upgrades like these make a big difference in your daily life.
15. Install a Compact, Multi-Tiered Shelf for Specialized Items
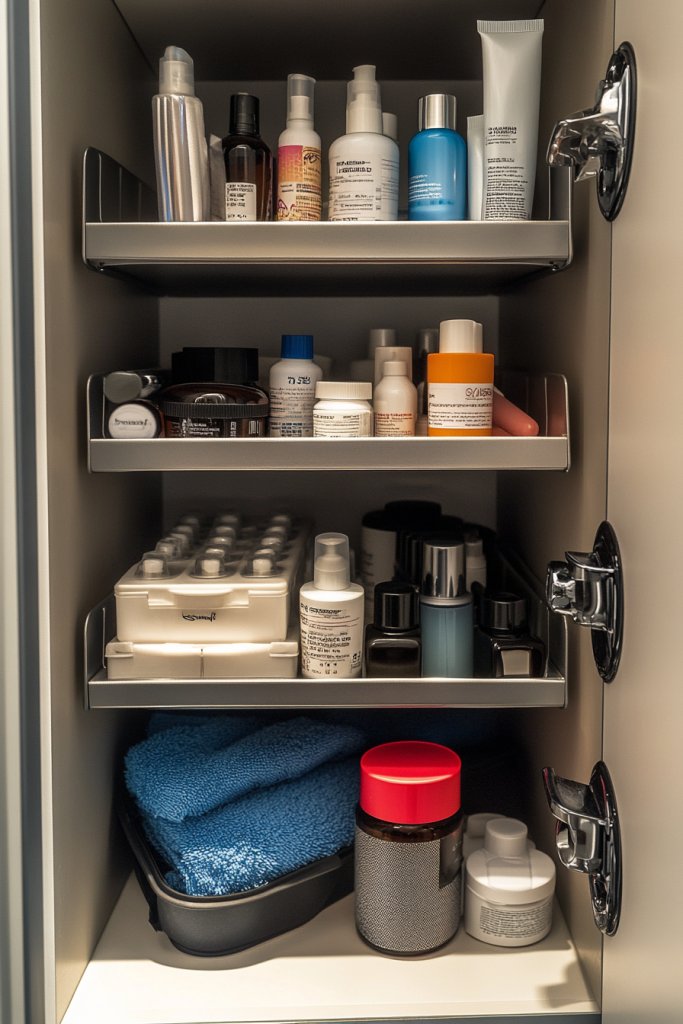
Do bulky items like hair tools, skincare, or medications clutter up your limited space? A dedicated, multi-tiered shelf can organize these essentials in a compact, accessible way. Want a designated spot for your specialty items that keeps everything in view?
Envision a slim, multi-level shelf nestled inside your cabinet or on the wall, each tier holding a specific category—hair tools on top, skincare in the middle, medications below. The tiers are made of metal, wood, or plastic, designed to maximize vertical space. Items stand upright or lay flat, creating a neat, organized display that’s easy to access.
Choose from open or enclosed designs, depending on your preference. Use different materials—metal for a sleek look, wood for warmth, or acrylic for transparency. Install adjustable or fixed tiers based on your needs. Decorate with labels or paint for personalization, and incorporate seasonal updates with themed accents.
Measure your space and select a shelf that fits comfortably. Secure it to the wall or inside the cabinet using brackets or adhesive. Arrange your items by frequency or category, placing the most-used at the top or front. Regularly tidy and reorganize to keep everything functional. Use non-slip pads or liners to keep items stable.
Personalize with custom labels, decorative trims, or painted finishes. Add small baskets or containers within tiers for tiny items. Incorporate decorative stickers or motifs to match your decor style. Seasonal updates can include new colors or themed accessories.
A dedicated tiered shelf simplifies your routine and keeps your essentials at your fingertips. It transforms clutter into a curated display, boosting your confidence. Feeling organized and in control makes every bathroom moment more enjoyable.
16. Opt for Stylish, Coordinated Storage Accessories to Match Decor
Cluttered storage can stick out like a sore thumb, spoiling your bathroom’s aesthetic. Coordinated, stylish accessories help your storage blend seamlessly with your decor. Want functionality that doesn’t compromise style?
Visualize matching sets of containers, baskets, and organizers in finishes like matte black, soft pastels, or metallics. They sit neatly on shelves or inside cabinets, creating a harmonious look. Attention to color, shape, and material turns storage from an eyesore into a design feature. It’s a subtle way to elevate your entire space.
Select accessories that reflect your personal style—minimalist, boho, industrial, or luxe. Mix and match textures for added interest, such as matte with glossy finishes. Incorporate decorative elements like textured trays or patterned liners to add depth. Change accessories seasonally for fresh updates.
Choose storage pieces that are durable and easy to clean. Arrange them in a way that balances accessibility and aesthetic appeal. Use consistent colors or materials to unify the look. Regularly dust and wipe down accessories for a polished appearance. Incorporate decorative touches like labels or embellishments for a personalized finish.
Add small decorative accents like metallic tags or engraved labels. Use matching sets for different categories—lotions, tools, or towels. Incorporate seasonal or themed accessories to keep the look fresh. Personal touches make your storage both functional and fashionable.
Stylish, coordinated accessories boost your confidence in maintaining an organized space. They create a cohesive look that reflects your taste and effort. When your storage looks this good, keeping it tidy feels natural and rewarding.
17. Incorporate Hidden Storage Solutions with Removable Baskets or Trays
Does your bathroom feel cluttered but you hate permanent fixtures? Hidden storage with removable baskets or trays offers a sleek, versatile way to conceal mess and make cleaning a breeze. Want a clutter-free look that’s easy to maintain?
Imagine a clean, smooth cabinet interior with discreet pull-out baskets or trays that slide out smoothly. When you need to clean or access items, you simply remove the basket, wipe down, and slide it back in. They blend seamlessly into the space, hiding clutter behind a sleek facade. It’s smart, simple, and effective.
Choose baskets or trays in neutral colors or materials that match your decor—bamboo, plastic, or fabric-lined. Use different sizes to accommodate various items, from small tools to larger bottles. Incorporate labels or decorative trims for a personalized touch. Seasonal updates could involve swapping out trays for different styles or colors.
Select sturdy, easy-to-clean baskets or trays with handles for quick removal. Install slides or rails if needed for smooth operation. Organize items inside with dividers or small containers. Regularly remove and clean the baskets to prevent dust buildup. Reorganize as your needs change.
Label baskets or trays with waterproof tags or stickers. Add decorative liners or fabric covers for style. Incorporate small hooks or clips inside for hanging tiny tools or accessories. These touches help keep your storage sleek and personalized.
Hidden storage solutions make your space look uncluttered and sophisticated. They make cleaning easier and help you stay organized long-term. Feeling confident about your tidy, stylish bathroom is just a slide away.
Conclusion
With a variety of creative and efficient undersink storage ideas, you now have the tools to optimize your bathroom space effortlessly. Whether you prefer minimalist baskets, custom shelves, or inventive DIY solutions, there’s something here to fit your style and needs. Don’t wait—start implementing these ideas today and enjoy a more organized, functional bathroom. Your ideal space is just a few simple changes away!