Looking to add a touch of elegance and charm to your bathroom? Bathroom board and batten walls have become a favorite among homeowners for their ability to create visual interest while offering a timeless appeal. Their versatility allows for a range of styles, from rustic farmhouse to sleek modern, making them a popular choice for transforming any space.
In this article, you’ll discover a variety of creative bathroom board and batten ideas that can elevate your decor. Whether you prefer subtle accents or bold statements, these ideas will inspire you to personalize your bathroom with beauty and sophistication, turning an ordinary space into a stunning retreat.
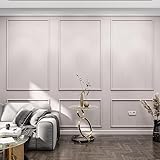
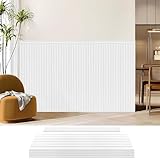
1. Classic White Vertical Board and Batten for a Crisp, Clean Look

Ever feel like your bathroom could use a fresh, timeless upgrade that doesn’t scream trendy but still makes a statement? Classic white vertical board and batten is the answer. It offers a crisp, clean aesthetic that brightens up any space while adding subtle architectural detail. If your goal is a look that’s both elegant and effortless, this style ticks all the boxes. Plus, it’s easy to match with almost any decor style.
Recommended Products to replicate this idea
| # | Preview | Product | |
|---|---|---|---|
| 1 |

|
PVC Wall Panels - 8 Foot Accent Wall Panels Reversible for Interior Wall Decor, Easy to Install... | Buy on Amazon |
| # | Preview | Product | |
|---|---|---|---|
| 1 |

|
Art3d Premade Board and Batten Paintable Wainscoting Kit, MDF Accent Wall Panel for Kitchen Bedroom... | Buy on Amazon |
Visualize tall, pristine white battens running from floor to ceiling, creating a vertical rhythm that elongates the walls. The smooth, matte finish reflects light softly, making the room feel larger and more open. Shadows play gently along the edges, adding depth without clutter. The simplicity of the white paint combined with the structured lines creates a serene, polished environment that invites relaxation. It’s like wrapping your bathroom in a clean, fresh sheet of paper.
You can keep it purely white for a minimalist vibe or add subtle variations like a matte or semi-gloss finish for texture. For a more vintage touch, pair with slightly distressed wood battens. If space allows, experiment with wider battens for a more dramatic effect. Seasonal updates could include swapping out accessories to complement the clean backdrop, like cozy towels in winter or airy textiles in summer. This style also adapts well to small or large bathrooms alike.
Start by measuring your wall height and decide on the width and spacing of your battens. Use a level and pencil to mark vertical lines for precise placement. Choose a high-quality, durable paint—preferably mildew-resistant for bathrooms. Attach battens using construction adhesive or nails, ensuring they’re perfectly aligned and flush. For a seamless look, paint the battens and wall in one go or apply a primer beforehand. Finish with a protective sealant if desired to prolong durability.
Add personal flair by painting some battens in a contrasting shade for a subtle pop, or incorporate decorative trims at the top or base. For a more textured look, opt for a raised panel or beadboard effect within the battens. Incorporate hooks or small shelves painted in the same tone for extra function without breaking the clean aesthetic. Textured fabrics or soft towels in complementary hues can soften the sharp lines and make the space inviting.
This classic style never goes out of fashion, proving that simplicity can be stunning. It offers a clean, elegant backdrop that works with any decor trend, from modern to rustic. Once installed, it boosts your confidence in DIY projects, as it’s straightforward yet impactful. Embrace this timeless look for a bathroom that feels fresh, organized, and effortlessly stylish.
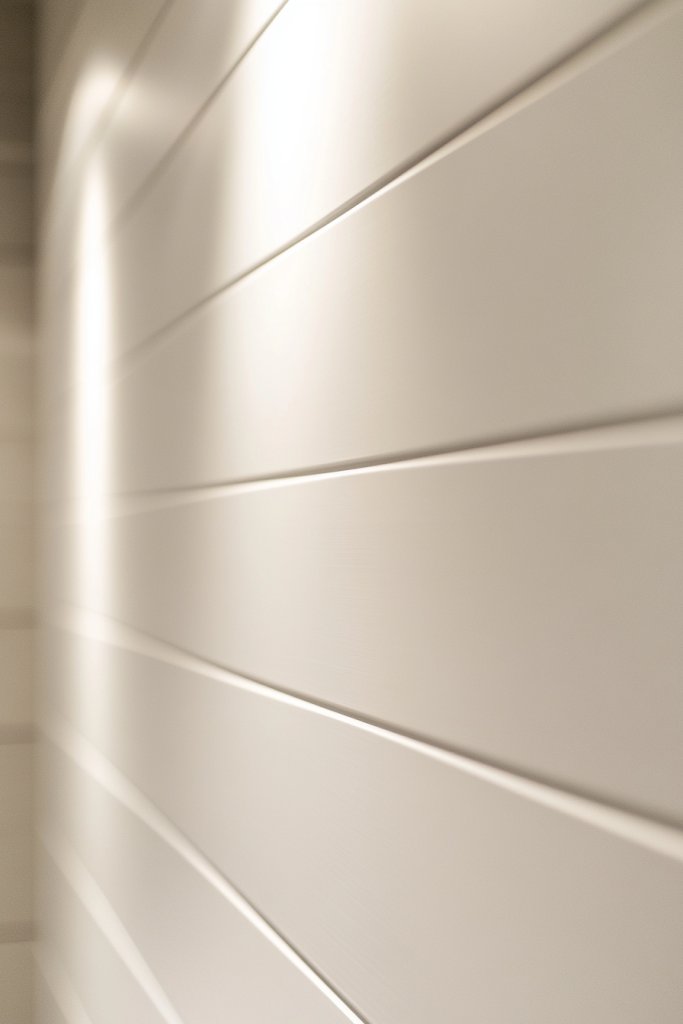
2. Horizontal Paneling with Wide Battens for a Modern Sophistication

Looking to add a touch of modern sophistication to your bathroom without overdoing it? Horizontal paneling with wide battens offers a sleek, contemporary twist on traditional wall treatments. It creates a bold visual statement that can elevate even the simplest of spaces. If you crave a design that’s both minimalist and striking, this idea is your new best friend. Plus, it’s surprisingly easy to implement.
Recommended Products to replicate this idea
| # | Preview | Product | |
|---|---|---|---|
| 1 |
|
Art3d Premade Board and Batten Paintable Wainscoting Kit, MDF Accent Wall Panel for Kitchen Bedroom... | Buy on Amazon |
| # | Preview | Product | |
|---|---|---|---|
| 1 |
|
Art3d Premade Board and Batten Paintable Wainscoting Kit, MDF Accent Wall Panel for Kitchen Bedroom... | Buy on Amazon |
Imagine broad, horizontal planks running across the wall, their wide surfaces catching the light and emphasizing the room’s width. The battens create a rhythmic pattern that guides your eye across the space, adding a sense of order and balance. The smooth, painted surfaces can be in a neutral or bold color, amplifying the modern feel. The contrast between the flat panels and narrow gaps adds subtle texture, making the wall a focal point. It’s like dressing your bathroom in a tailored suit—sleek and sharp.
For a warmer look, choose natural or stained wood instead of painted panels. Wide battens can be paired with darker or metallic paints for a high-contrast, luxe vibe. In smaller bathrooms, keep the width of the panels proportionate to avoid overwhelming the space. Seasonal accents like textured towels or sleek accessories can complement the modern aesthetic. This pattern also works well in both wall-to-wall installations or as an accent behind a vanity.
Begin by marking your wall with a level to ensure straight, even lines. Decide on the width of your panels—generally 12-24 inches works well—and mark those sections. Use a stud finder if attaching directly to drywall for extra security. Install the battens using nails or adhesive, making sure they’re flush and evenly spaced. Sand and paint or stain the panels for a polished look. For a seamless appearance, consider using a high-quality primer and finish coat.
Introduce metallic or matte black accents in your hardware or fixtures to complement the sleek lines. For added depth, paint some battens in a contrasting hue or add textured wallpaper behind the paneling. Incorporate minimalist shelving between panels for practical storage. You could also embed LED strip lighting behind the panels for a subtle glow that emphasizes the horizontal lines at night.
This style screams modern elegance and instantly upgrades your bathroom’s vibe. It’s a great way to reflect your taste for clean lines and contemporary design. Once installed, you’ll feel proud of your DIY skills and inspired to explore other modern updates. It’s a timeless look that will remain stylish for years to come, making your bathroom truly stand out.
3. Two-Tone Board and Batten Wall for Visual Depth and Contrast

Ever wish your bathroom had more visual depth without adding clutter? A two-tone board and batten wall is the perfect solution. It creates striking contrast that adds dimension and sophistication to your space. This approach is ideal if you want to break up a monotonous wall and introduce a bit of personality. It’s like giving your bathroom a stylish, modern facelift.
Recommended Products to replicate this idea
| # | Preview | Product | |
|---|---|---|---|
| 1 |
|
Art3d Premade Board and Batten Paintable Wainscoting Kit, MDF Accent Wall Panel for Kitchen Bedroom... | Buy on Amazon |
| # | Preview | Product | |
|---|---|---|---|
| 1 |

|
CSY art gallery Two-Tone Iridescent Effect Metallic Acrylic Paint Set Pink Color 2 oz/60 ml Bottel,... | Buy on Amazon |
Picture a crisp divide where the lower half of the wall is painted a dark, rich color, and the upper half in a soft, light shade. The vertical battens act as clean, sharp separators, emphasizing the contrast. The darker hue grounds the space, while the lighter top reflects natural light and keeps the room feeling airy. The battens add texture, creating a layered, dimensional look that invites the eye to explore. It’s a balanced dance of tone and texture, making the wall a visual feature.
Switch up the colors based on your style—deep navy and warm cream, charcoal and soft gray, or even bold jewel tones for dramatic impact. For a more subtle effect, use different shades of the same color family. In small bathrooms, keep the darker tone limited to the lower half to avoid making the space feel cramped. Seasonal accents like plush towels or textured rugs can enhance the layered look.
Start by choosing your two colors and measuring the wall height. Use painter’s tape to create a clean division line at your desired height. Paint the top and bottom sections separately, allowing drying time. Install vertical battens over the transition line, ensuring they are evenly spaced and aligned with your aesthetic goal. Seal and finish with high-quality paint to prevent chipping, especially in humid environments. Optional: add a clear protective coat for longevity.
Personalize this look with decorative trims or molding along the division line for extra architectural detail. Use textured or patterned paint on one section to add visual interest. Incorporate accessories like soft towels, bathmats, or even a small sculpture on a shelf to complement the color contrast. The key is balancing boldness with subtlety for a harmonious, curated vibe.
A two-tone wall elevates your bathroom from ordinary to extraordinary, showcasing your eye for design. It’s a versatile look that aligns with current decor trends and can be tailored to any color palette. Installing this feature boosts your confidence in tackling bold design choices. Plus, it’s a simple yet impactful way to express your style and refresh your space beautifully.
4. Beadboard-Inspired Board and Batten for a Vintage Charm

Want to add a cozy, vintage charm to your bathroom without overwhelming the space? Beadboard-inspired board and batten offers that classic cottage feel. It combines the structured lines of battens with the textured, tongue-and-groove look of traditional beadboard. This style is perfect if you love a nostalgic vibe with a touch of elegance. Plus, it’s surprisingly simple to install.
Recommended Products to replicate this idea
| # | Preview | Product | |
|---|---|---|---|
| 1 |
|
Art3d Premade Board and Batten Paintable Wainscoting Kit, MDF Accent Wall Panel for Kitchen Bedroom... | Buy on Amazon |
| # | Preview | Product | |
|---|---|---|---|
| 1 |
|
Art3d Premade Board and Batten Paintable Wainscoting Kit, MDF Accent Wall Panel for Kitchen Bedroom... | Buy on Amazon |
Imagine vertical battens framing sections of textured paneling that mimic the look of vintage beadboard. The raised lines and subtle indentations add tactile interest, inviting touch and visual warmth. Soft, pastel paint hues or weathered finishes amplify the vintage appeal, making the space feel inviting and lived-in. The gentle ridges and grooves create shadows that soften the overall look, giving your bathroom a cozy, timeless ambiance. It’s like stepping into a charming seaside cottage.
Opt for painted beadboard in pale shades like mint, blush, or creamy white for a light, airy feel. For a more rustic look, use distressed wood or faux beadboard with darker, aged finishes. This style works well in small bathrooms by adding texture without visual heaviness. Seasonal tweaks could include layered textiles or vintage-inspired accessories to enhance the nostalgic feel.
Begin by installing vertical battens with a small gap between them. Attach panels with a tongue-and-groove or shiplap design, or simulate the look with textured wallpaper if you prefer a less labor-intensive option. Paint or stain the panels in your chosen hue, and seal for durability. For authentic beadboard, use a primer and finish with a semi-gloss or eggshell sheen. Add molding or decorative trim at the top for a finished look.
Accessorize with vintage-inspired hardware, ceramic knobs, or antique-style hooks. Incorporate decorative shelves or small wall-mounted cabinets painted in coordinating colors. Add textured or patterned fabrics in curtains or towels to complement the vintage charm. Consider layered lighting with wall sconces to highlight the textured panels and create a warm glow.
This classic style never goes out of fashion and adds instant warmth and charm. It’s a wonderful way to evoke nostalgia while maintaining a clean, polished look. Successfully installing beadboard-inspired battens boosts your confidence in tackling textured wall treatments. It’s a timeless choice that will make your bathroom feel cozy, inviting, and beautifully crafted.
5. Natural Wood Grain Board and Batten for Warmth and Texture
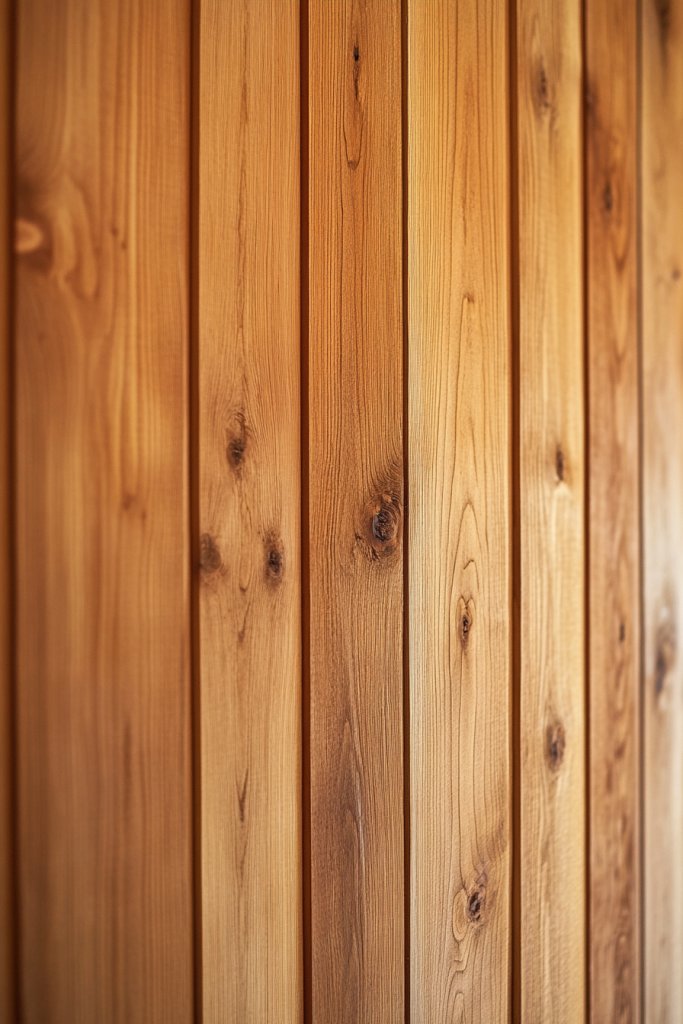
Craving a warm, organic vibe in your bathroom that feels inviting and cozy? Natural wood grain board and batten can transform your space into a rustic retreat or a modern zen oasis. It adds rich texture and visual warmth that paint simply can’t replicate. If you love the idea of bringing the outdoors inside, this style is a perfect fit. Plus, it ages beautifully with time.
Recommended Products to replicate this idea
| # | Preview | Product | |
|---|---|---|---|
| 1 |
|
Art3d Premade Board and Batten Paintable Wainscoting Kit, MDF Accent Wall Panel for Kitchen Bedroom... | Buy on Amazon |
| # | Preview | Product | |
|---|---|---|---|
| 1 |

|
Art3d 102-Piece Peel and Stick Tile Backsplash for Kitchen Bathroom, 3in. x 6in. Stick on Subway... | Buy on Amazon |
Picture panels of stained or sealed natural wood running vertically, their grain patterns and knots adding character and depth. The warm hues — from honey to deep mahogany — catch the light and create a soothing, earthy atmosphere. The textured surfaces invite your touch, making the walls feel alive. Paired with soft, plush towels and matte fixtures, this look emphasizes natural beauty and craftsmanship. It’s like wrapping your bathroom in a piece of the forest.
Opt for light oak for a Scandinavian-inspired look or darker walnut for a more luxe vibe. For a coastal feel, use bleached or whitewashed wood. This style suits larger bathrooms where the wood can be a statement feature without feeling overwhelming. Seasonal accents like woven baskets or textured textiles can enhance the natural theme. It also pairs well with minimalist decor for a clean, modern twist.
Choose high-quality, moisture-resistant wood or wood veneer designed for bathrooms. Install vertical battens using corrosion-resistant fasteners, ensuring they’re straight and evenly spaced. Finish with a protective sealant or oil to enhance grain and prevent water damage. For a seamless look, paint or stain prior to installation and add a clear topcoat for extra durability. Consider adding subtle lighting to highlight the wood’s natural beauty.
Incorporate sculptural wooden hooks or small shelves for practical storage. Use textured or woven textiles in bath mats and towels to complement the organic theme. Personalize further with handcrafted accessories or decorative pieces that highlight natural materials. For a more contemporary twist, combine with matte black fixtures and minimalist decor, creating a balanced mix of rustic and modern.
Using natural wood in your bathroom instantly elevates the space with warmth and authenticity. It’s a design choice that reflects a love for nature and craftsmanship. Mastering the installation boosts confidence in working with organic materials. Your bathroom will not only look stunning but also radiate a sense of calm and organic beauty that lasts for years.
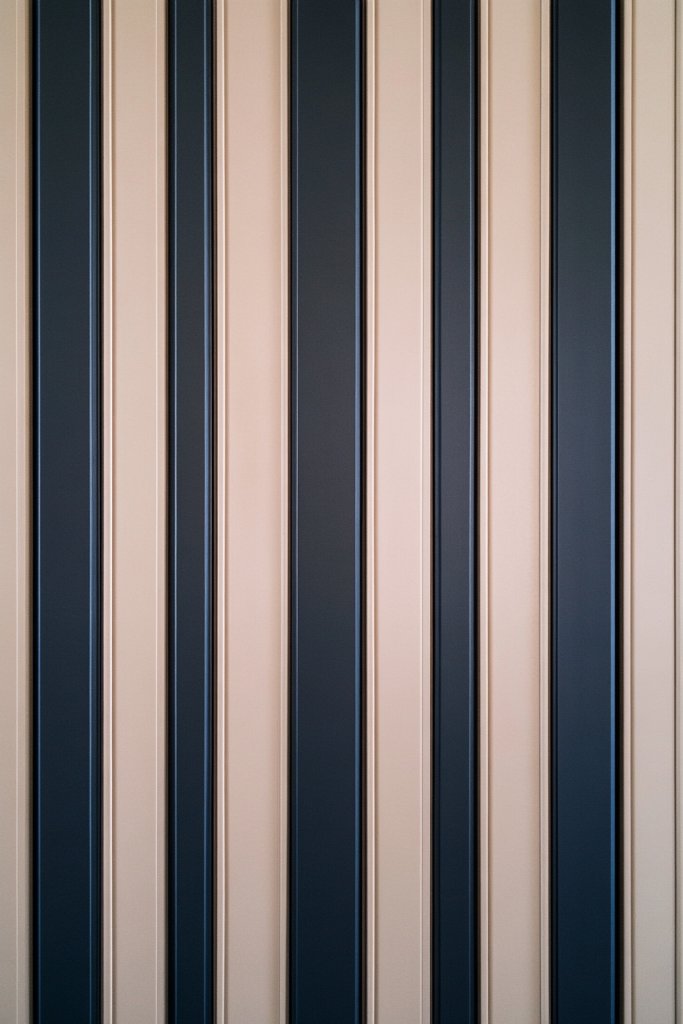
6. Painted Dark Gray or Navy for a Bold, Elegant Statement
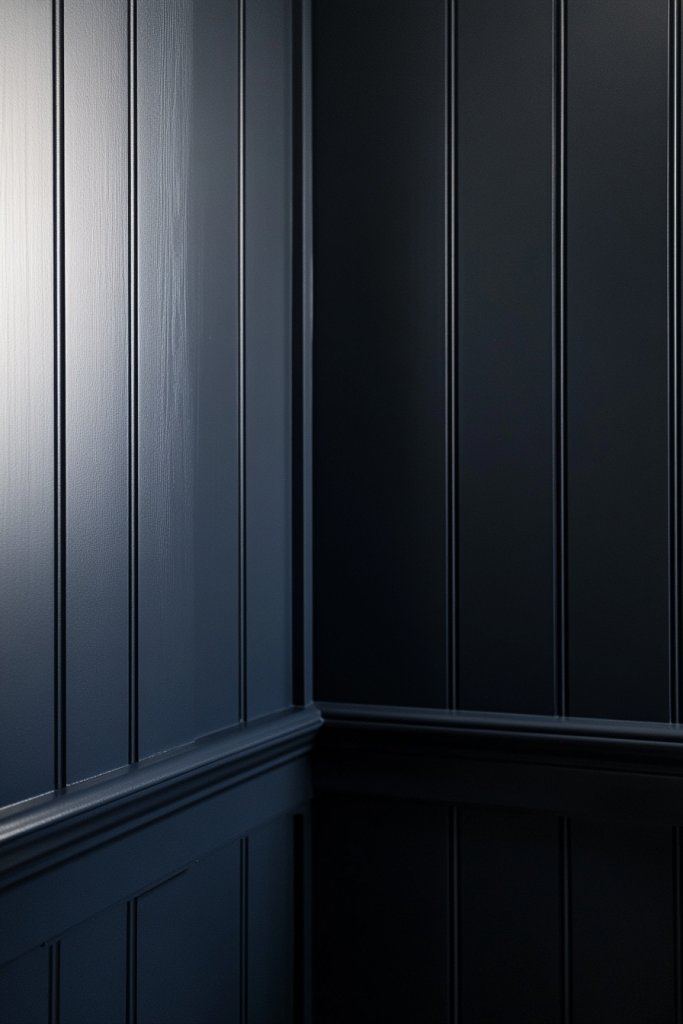
Want your bathroom to stand out with a bold yet elegant vibe? Deep, dark hues like charcoal gray or navy paint can turn a mundane space into a statement room. These colors evoke sophistication and create a moody, luxurious atmosphere. If you’re tired of bland whites and pastels, this is your chance to make a dramatic impact. Plus, it’s surprisingly versatile for various decor styles.
Recommended Products to replicate this idea
| # | Preview | Product | |
|---|---|---|---|
| 1 |

|
Rust-Oleum 369386 Advanced Dry Door & Trim Paint, Quart, Satin Nantucket Navy | Buy on Amazon |
| # | Preview | Product | |
|---|---|---|---|
| 1 |

|
Dupli-Color Vinyl & Fabric Spray, Charcoal Gray, 11 oz | Buy on Amazon |
Envision walls painted in a rich navy or dark gray, with matte or satin finishes that absorb light beautifully. Vertical or horizontal battens painted in the same hue or a contrasting shade add subtle texture without breaking the mood. The deep tones create a cocooning effect, making the room feel intimate and refined. Accentuate with metallic fixtures, white towels, or light-colored accessories for sharp contrast. The overall effect is both bold and polished, like a tailored tuxedo.
Pair dark walls with crisp white or soft metallic accents for a modern look. For a more classic style, incorporate warm wood or gold fixtures. Smaller bathrooms benefit from ample lighting or glossy finishes to prevent the space from feeling too heavy. Seasonal updates might include light-colored textiles or vibrant accessories to break the darkness without losing mood.
Start with high-quality, moisture-resistant paint designed for bathrooms. Prepare the wall surface thoroughly, filling any holes and sanding for smoothness. Use painter’s tape for clean edges and apply multiple coats for even coverage. Consider adding a semi-gloss or satin topcoat to increase durability and water resistance. When installing battens, ensure they’re aligned perfectly and sealed to prevent water infiltration. Finish with fixtures and accessories that complement the dark, rich color.
Introduce textured or patterned textiles, like plush towels or a soft, dark bathmat, to add tactile contrast. Incorporate metallic or brushed fixtures for a luxe touch. For a personalized twist, add a statement mirror frame or decorative hardware in gold or brass. Use light-colored accents, such as a soft cream or blush, to soften the intensity of the dark walls if desired.
Diving into bold color choices like navy or charcoal demonstrates confidence in your design instincts. These shades instantly elevate your bathroom’s style quotient and give you a space that feels both modern and timeless. Mastering the painting and installation process makes you feel accomplished and ready for more DIY projects. Embrace the drama — your bathroom is now a true reflection of sophistication.
7. Incorporating Narrow Mirror Strips Between Battens for Reflection and Light
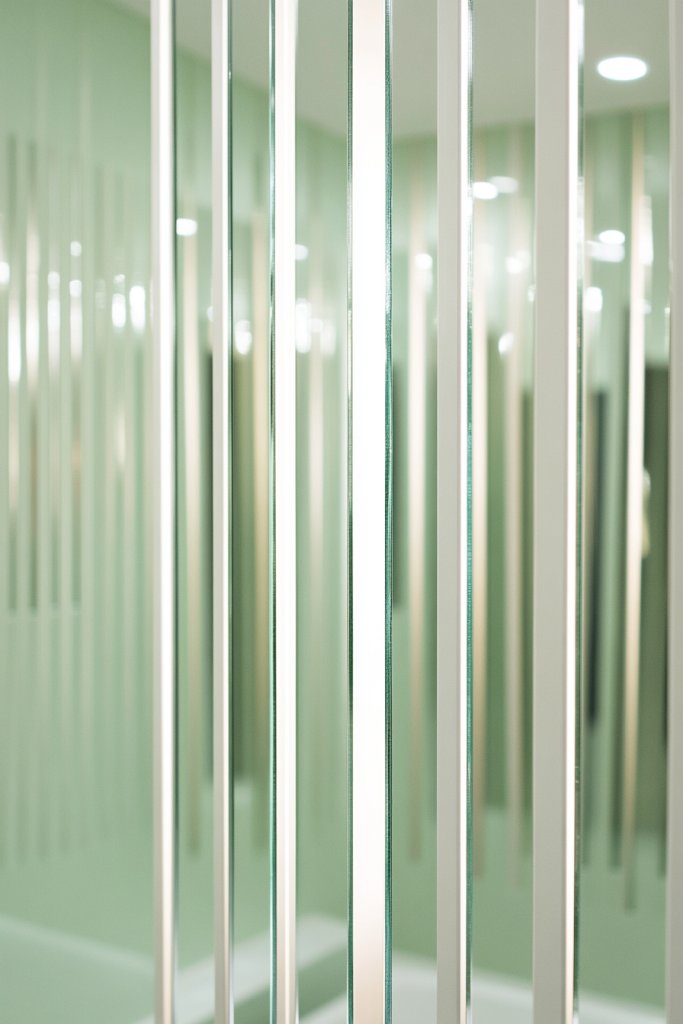
Ever wish your bathroom had more light and a touch of glamour? Narrow mirror strips integrated between battens can do just that. They reflect natural or artificial light, making the space feel brighter and larger. Plus, they add a sleek, modern edge that elevates your entire design. If you love a hint of luxe but want to keep it minimal, this idea is perfect.
Recommended Products to replicate this idea
| # | Preview | Product | |
|---|---|---|---|
| 1 |

|
PP OPOUNT 2360 PCS Self Adhesive Mosaic Tiles, 5 x 5 mm Disco Tiles, Square Mirror Mosaic Tiles for... | Buy on Amazon |
| # | Preview | Product | |
|---|---|---|---|
| 1 |
|
Art3d Premade Board and Batten Paintable Wainscoting Kit, MDF Accent Wall Panel for Kitchen Bedroom... | Buy on Amazon |
Imagine slim mirror panels inserted vertically or horizontally between painted battens. These mirrors catch the light from fixtures or windows, bouncing it around the room. The reflective surfaces create an illusion of depth and openness, especially in small bathrooms. The clean lines of the mirrors contrast beautifully with textured or painted battens, adding visual intrigue. It’s like a subtle, stylish dance between light and shadow that enhances the overall ambiance.
Use full-length mirrors for a dramatic effect or smaller strips for a subtle touch. Combine with matte or glossy finishes depending on your style preference. Mirrors can be framed or frameless, with beveled edges for a sophisticated touch. In tiny spaces, even a narrow strip can make a big difference in perception of size. Add integrated lighting behind the mirrors for an extra glow.
Measure and mark the placement of your mirror strips carefully, ensuring they align with the battens. Use mirror adhesive or mounting clips designed for secure attachment. For framed mirrors, choose slim profiles that don’t overpower the wall. Seal edges with a clear silicone if needed to prevent moisture damage. Make sure the mirrors are perfectly level to avoid a crooked appearance. Finish by cleaning the glass thoroughly to remove fingerprints or smudges.
Incorporate LED backlighting behind the mirrors for a soft glow that’s perfect for nighttime routines. Use decorative hardware or trim to add a personalized touch. Mirror strips can be etched or frosted for subtle texture and privacy if needed. Play with the mirror placement—vertical, horizontal, or staggered—to create a custom pattern that suits your style.
Adding narrow mirror strips is a smart, stylish way to boost your bathroom’s visual appeal and functionality. It’s a minimalist approach that delivers maximum impact, especially when paired with modern fixtures. Successfully integrating mirrors into your battens builds confidence in your ability to blend form and function. Now, your bathroom not only looks great but also feels brighter and more inviting.
8. Using Decorative Molding and Trim for a Custom, Architectural Finish
Craving a bathroom that feels truly custom and architecturally refined? Decorative molding and trim can elevate your wall design from simple to sophisticated. They add depth, character, and that high-end feel many homeowners desire. If you’re tired of cookie-cutter finishes, incorporating molding is your ticket to a bespoke space. Plus, it’s easier than you think to achieve stunning results.
Recommended Products to replicate this idea
| # | Preview | Product | |
|---|---|---|---|
| 1 |

|
Vinyl Baseboard Molding Trim 4 Inch x 20 Feet Peel and Stick Baseboard Trim Flexible PVC Cove Base... | Buy on Amazon |
| # | Preview | Product | |
|---|---|---|---|
| 1 |
|
Wall Molding Kit for Interior Walls – Pre-Cut Factory Primed Trim Set for Decorative Panel Look,... | Buy on Amazon |
Visualize intricate crown molding framing the top of your wall, with decorative trim outlining your battens. The combination creates a layered, three-dimensional effect that adds architectural interest. Soft shadows fall beneath the molding, emphasizing the craftsmanship. A subtle contrast in paint or stain can highlight the trim’s details, giving your bathroom a polished, personalized look. It’s like giving your walls a custom frame—an instant upgrade.
Choose from a variety of styles, from ornate Victorian to sleek modern profiles. Paint the trim in a contrasting color for boldness or match it to the wall for subtle sophistication. Use it to frame mirrors, niches, or even windows for a cohesive look. In smaller bathrooms, keep the molding delicate to avoid visual overload. Seasonal tweaks, like gold or silver accents, can add festive flair.
Start by selecting your molding profiles and carefully measuring the lengths needed. Use a miter saw to make precise cuts at corners. Attach molding with a pneumatic nail gun or construction adhesive, ensuring secure and flush placement. Fill nail holes with wood filler and sand smooth. Prime and paint or stain the trim for durability and visual appeal. For high moisture areas, select water-resistant or sealed options.
Add decorative rosettes, corner blocks, or medallions for extra detail. Use metallic paints or gilding for a luxe finish. Incorporate small ledges or built-in shelves within the molding for display or storage. Play with different paint finishes—matte, satin, or gloss—to complement your overall decor. Personal touches make your bathroom feel truly one-of-a-kind.
Architectural trim transforms a plain wall into a work of art, showcasing your taste and attention to detail. It’s a rewarding DIY project that boosts confidence and pride in your craftsmanship. The layered effect adds value and character that’s hard to replicate with paint alone. Once finished, your bathroom will feel more refined, personalized, and truly custom designed.
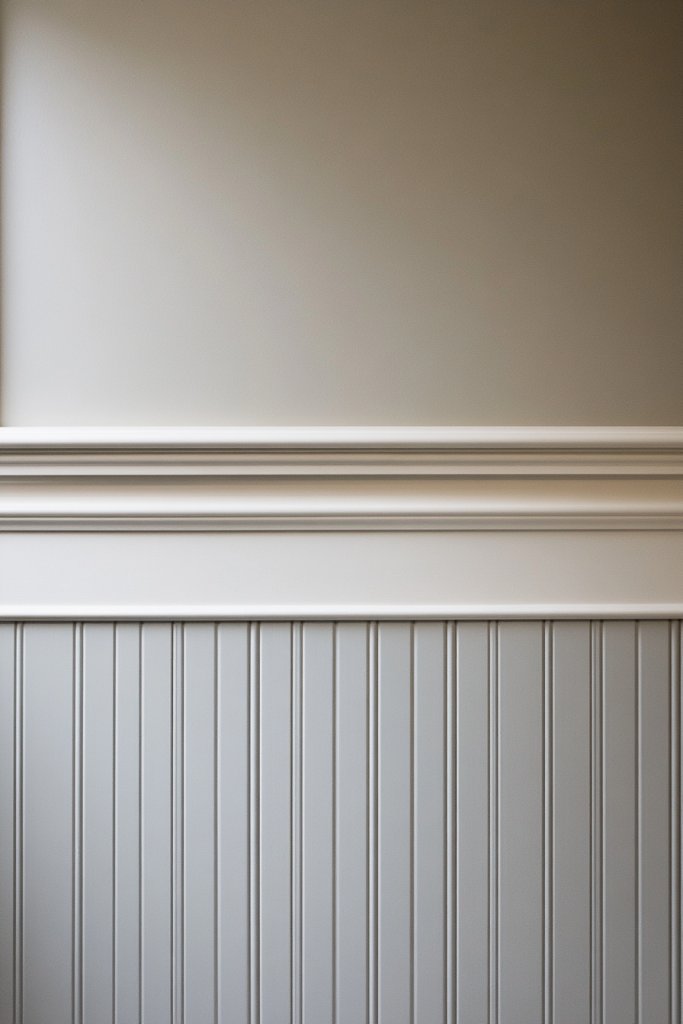
9. Combining Board and Batten with Wainscoting for a Layered Effect

Looking to create a rich, layered wall that feels upscale and sophisticated? Combining board and batten with traditional wainscoting offers a textured, architectural look that elevates any bathroom. It’s perfect if you want to achieve depth and interest without overdoing it. This layered approach is a classic technique that adds a sense of craftsmanship and luxury.
Recommended Products to replicate this idea
| # | Preview | Product | |
|---|---|---|---|
| 1 |
|
Art3d Premade Board and Batten Paintable Wainscoting Kit, MDF Accent Wall Panel for Kitchen Bedroom... | Buy on Amazon |
| # | Preview | Product | |
|---|---|---|---|
| 1 |
|
Art3d Premade Board and Batten Paintable Wainscoting Kit, MDF Accent Wall Panel for Kitchen Bedroom... | Buy on Amazon |
Picture a wainscot paneling covering the lower portion of your wall, topped with a row of narrow battens that extend upward. The contrast between the detailed wainscot and the sleek battens creates a dynamic visual rhythm. The different textures and profiles add depth and dimension, making the wall a focal point. Soft lighting enhances the shadows and highlights, emphasizing the layered design. It’s like giving your wall a tailored, bespoke finish.
Choose traditional beadboard or raised panel wainscoting for a vintage look, or go for flat, smooth panels for a modern aesthetic. Paint or stain both elements in complementary or contrasting colors. In smaller bathrooms, keep the wainscoting height modest to avoid crowding the space. You can also add decorative molding or a chair rail for extra detail. Seasonal decor can include textured fabrics or soft accessories to match the layered theme.
Start with measuring and marking your wainscot height, then install paneling using adhesive and nails, ensuring it’s level and securely attached. Attach battens over the top, spacing them evenly to create your desired pattern. Seal and paint or stain all elements for durability and aesthetic consistency. Consider adding a decorative cap rail or molding at the top for a polished finish. Take your time to ensure all pieces align properly for a seamless layered look.
Add decorative details like carved trims, gilded accents, or textured finishes to personalize the layered effect. Incorporate small shelves or ledges between panels for functionality and decor. Use contrasting paint colors or finishes to make each layer stand out. Incorporate metallic or matte fixtures that complement the layered textures for a cohesive, upscale vibe. Play with lighting to highlight the shadows and depth created by the layers.
This layered approach demonstrates a keen eye for detail and craftsmanship, boosting your confidence in DIY wall treatments. It creates a luxurious, high-end feel that can impress any guest or potential buyer. Mastering the combination of wainscoting and battens opens up endless design possibilities. Once complete, you’ll enjoy a visually stunning wall that’s both functional and artistic, elevating your whole bathroom aesthetic.
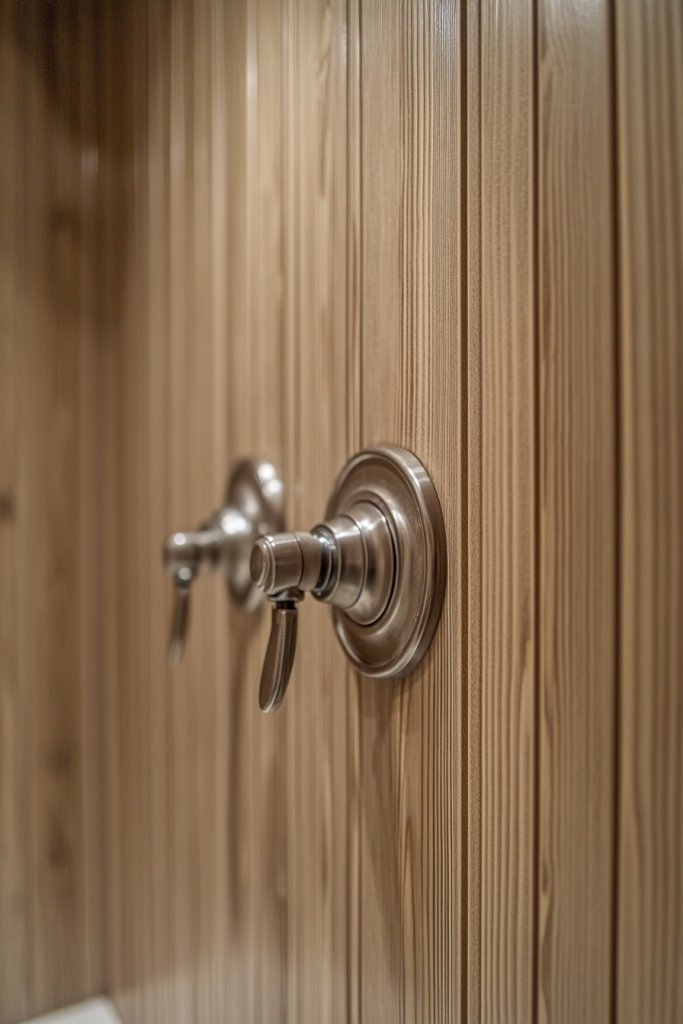
10. Vertical Board and Batten with Textured Wall Finish for a Tactile Touch
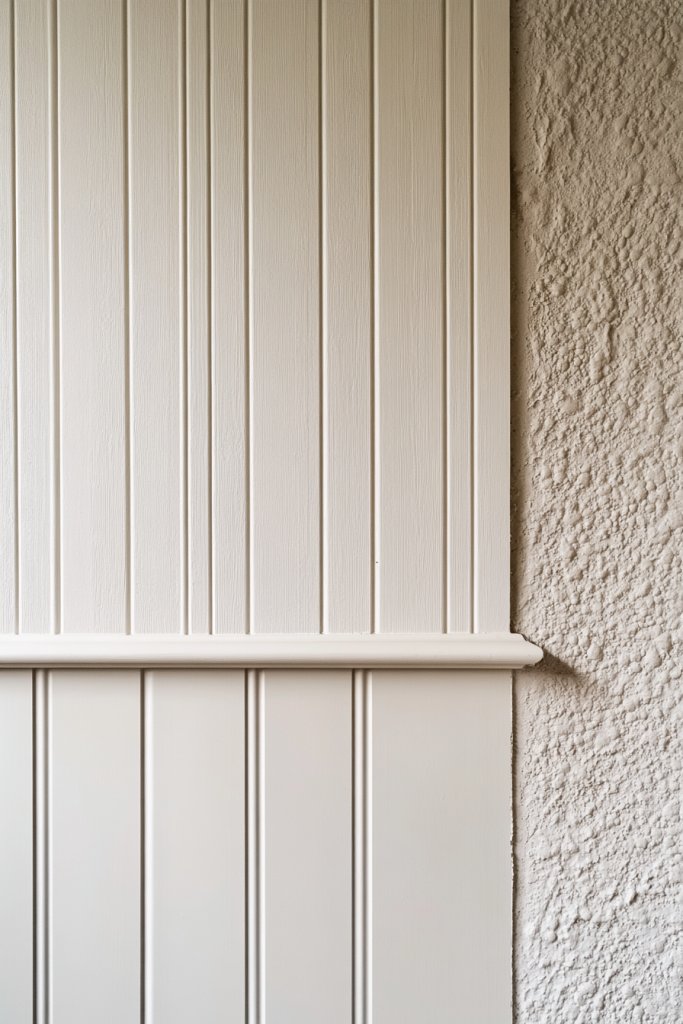
Ever wish your bathroom walls had more character and tactile appeal? Vertical board and batten combined with a textured wall finish offers a unique, inviting feel. It adds depth and dimension that smooth paint simply can’t provide. If you love the idea of a space that’s as beautiful to look at as it is to touch, this style is perfect. It transforms everyday walls into a sensory experience.
Recommended Products to replicate this idea
| # | Preview | Product | |
|---|---|---|---|
| 1 |

|
Board and Batten Wall Molding Kit – Paintable MDF DIY Trim for Accent Walls, Shaker Style... | Buy on Amazon |
| # | Preview | Product | |
|---|---|---|---|
| 1 |
|
Homax Roll On Paint Additive, Sand Texture, 6 oz | Buy on Amazon |
Picture vertical battens installed over a wall finished with textured plaster, stucco, or textured paint. The rough, tactile surface contrasts beautifully with the clean lines of the battens, creating a layered, multi-dimensional look. The texture catches light differently throughout the day, adding visual interest and warmth. This combination makes the space feel cozy and handcrafted, like a custom piece of art on your wall. Think of it as giving your bathroom walls a soft, tactile hug.
Choose from a variety of textures, from subtle sand finishes to bold stucco or Venetian plaster. Keep the battens in a neutral color to highlight the textured wall, or paint everything in a single hue for a cohesive look. Seasonal variations could include adding textiles or accessories with tactile fabrics that echo the textured theme. This approach works especially well in larger bathrooms where the textured wall can be a focal point.
Apply textured wall finish according to manufacturer instructions, using rollers or trowels for a consistent surface. Allow sufficient drying time before installing the battens to prevent damage. Use a level and spacers for precise placement of battens, which can be nailed or glued onto the textured surface. Seal the entire wall with a protective coat suitable for textured finishes to ensure longevity. Finish with a coat of paint or stain that enhances the texture’s natural appeal.
Add decorative elements like sculptural fixtures, textured tiles, or tactile accessories to amplify the sensory experience. Incorporate layered textiles such as plush towels or textured bath mats that invite touch. Use metallic or matte fixtures to complement the textured walls. Personal touches like handcrafted soap dishes or textured art pieces can enhance the overall tactile theme.
Blending texture with vertical battens creates a bathroom that’s rich, inviting, and uniquely yours. It’s a bold move that shows confidence in your design choices and craftsmanship. Mastering textured finishes alongside clean lines boosts your skills and encourages further creative experimentation. Your bathroom will not only look stunning but also offer a sensory retreat that feels warm and personal.
11. Minimalist Flat-Panel Batten Design for a Contemporary, Sleek Style
Craving a bathroom that’s sleek, modern, and clutter-free? Minimalist flat-panel battens deliver a contemporary look that emphasizes clean lines and simplicity. It’s perfect for those who love a streamlined aesthetic without sacrificing texture or interest. If your goal is a space that feels fresh, open, and effortlessly stylish, this design is your answer. Plus, it’s surprisingly easy to achieve with the right approach.
Recommended Products to replicate this idea
| # | Preview | Product | |
|---|---|---|---|
| 1 |
|
Art3d Wainscoting Wall Panel Kit, 37.8" Tall Beadboard Panels for Walls, Polystyrene Board and... | Buy on Amazon |
| # | Preview | Product | |
|---|---|---|---|
| 1 |
|
Art3d Premade Board and Batten Paintable Wainscoting Kit, MDF Accent Wall Panel for Kitchen Bedroom... | Buy on Amazon |
Imagine smooth, flat battens set against a wall painted in a neutral tone, creating subtle shadow lines that define the space. The uniformity of the panels gives a calm, ordered feel, making the room appear larger and more organized. The lack of ornate details emphasizes craftsmanship and quality materials. The overall effect is modern minimalism—quiet, refined, and functional—like a well-tailored suit for your bathroom.
Choose monochromatic shades or soft pastels for a calm, cohesive look. For added depth, use different textures or finishes—matte, satin, or semi-gloss—on the battens and walls. Incorporate integrated shelving or hidden storage behind the flat panels for a clutter-free environment. Seasonal accents like soft textiles or subtle lighting can warm up the minimalist aesthetic without cluttering it.
Begin by marking your wall with a level to ensure precise, straight lines for the battens. Use a router or a specialized tool to create a subtle groove or recess, if desired, for an even more modern look. Attach battens using adhesive or nails, making sure they are perfectly aligned and flush. Consider painting everything in one go for a seamless finish, and use masking tape for clean edges. Seal if necessary for moisture protection.
Personalize with sleek hardware, integrated hooks, or hidden compartments for a clutter-free space. Incorporate textured textiles like a soft, monochrome bathmat or towels to add warmth. Use lighting strategically—perhaps recessed LED strips—to highlight the flat-panel design. Keep accessories minimal but impactful, like a single sculptural piece or a geometric mirror.
This minimalist style exemplifies modern elegance and demonstrates your confidence in less-is-more design. Mastering the flat-panel technique sets the stage for future sleek upgrades. It creates a bathroom that feels calm, organized, and timeless. Once completed, you’ll enjoy a space that’s both functional and a true reflection of your modern taste.
12. Incorporating LED Accent Lighting Behind Battens for a Soft Glow
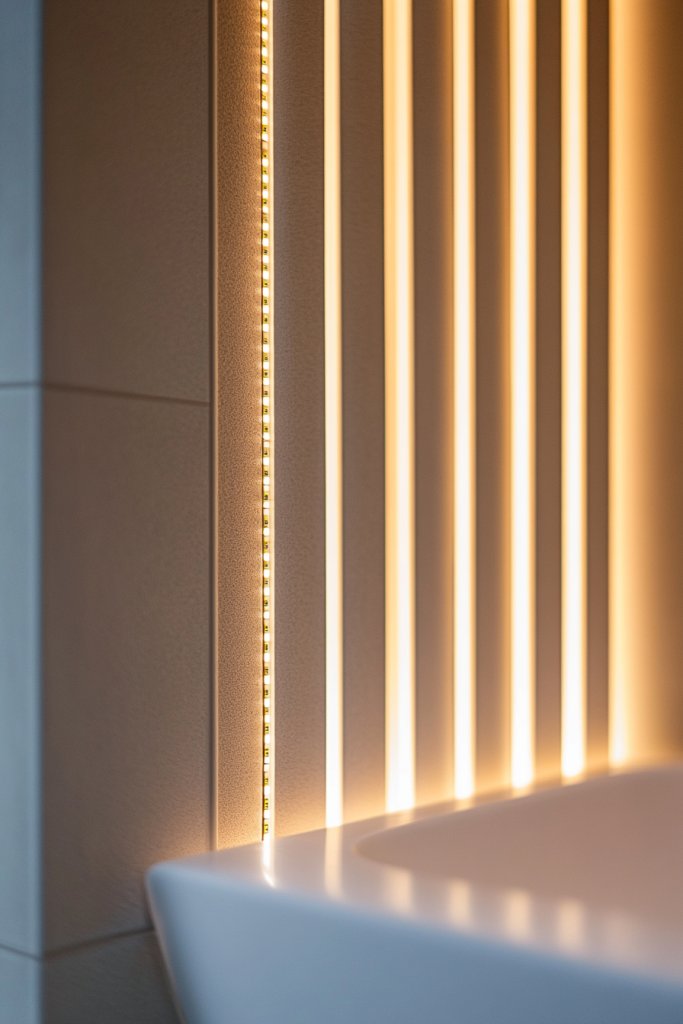
Ever want your bathroom to feel more inviting and spa-like? LED accent lighting hidden behind battens can create a soft, ambient glow that transforms the atmosphere. It’s perfect for relaxing baths or unwinding after a long day. If you love subtle lighting effects without cluttering your space, this idea hits the mark. Plus, it’s an easy upgrade that adds a wow factor.
Recommended Products to replicate this idea
| # | Preview | Product | |
|---|---|---|---|
| 1 |

|
DAYBETTER Led Strip Lights Waterproof, 32.8ft(2 Rolls of 16.4ft) Led Tape Lights Color Changing 300... | Buy on Amazon |
| # | Preview | Product | |
|---|---|---|---|
| 1 |

|
hunhun 10-Pack 6.6ft/ 2Meter U Shape LED Aluminum Channel System with Milky Cover, End Caps and... | Buy on Amazon |
Picture a wall with vertical battens, with concealed LED strips running behind each one. The light gently diffuses through the gaps, casting a warm or cool glow depending on your preference. The subtle illumination highlights the wall’s texture and architecture, creating a layered, sophisticated look. Shadows and light interplay add depth, making the space feel more spacious and calming. It’s like your bathroom is softly glowing from within, inviting you to relax.
Choose warm white for cozy atmospheres or cool white for a fresh, modern vibe. Install dimmable LEDs to control brightness and mood. For larger walls, consider multiple strips for even lighting; in smaller spaces, a single strip may suffice. Pair with textured paints, matte finishes, or contrasting colors for added interest. Seasonal updates might include changing the color temperature to match your mood.
Start by planning your lighting layout, ensuring the LED strips are hidden behind the battens. Use a quality LED tape with a compatible power supply and controller. Mount the strips with adhesive backing and connect to a dimmer switch for adjustable lighting. Seal the edges with a clear, moisture-resistant coating if necessary. Test thoroughly before final attachment, and hide wiring for a clean look. Consider hiring a professional if you’re unsure about electrical work.
Personalize by adding color-changing LEDs or programmable lighting scenes for different moods. Use textured or patterned battens to add visual interest and catch the light differently. Combine with other ambient lighting features like backlit mirrors or sconces for layered illumination. Incorporate small, decorative fixtures or sculptural elements that complement the glow and add personality.
Adding LED accent lighting creates a luxurious, customized environment that elevates your daily routine. It also demonstrates your ability to incorporate modern tech seamlessly into your decor. Mastering subtle lighting techniques boosts confidence in DIY upgrades. Your bathroom will feel more inviting, stylish, and perfectly suited for relaxing moments anytime.
13. Framing the Vanity Mirror with Board and Batten for a Cohesive Look
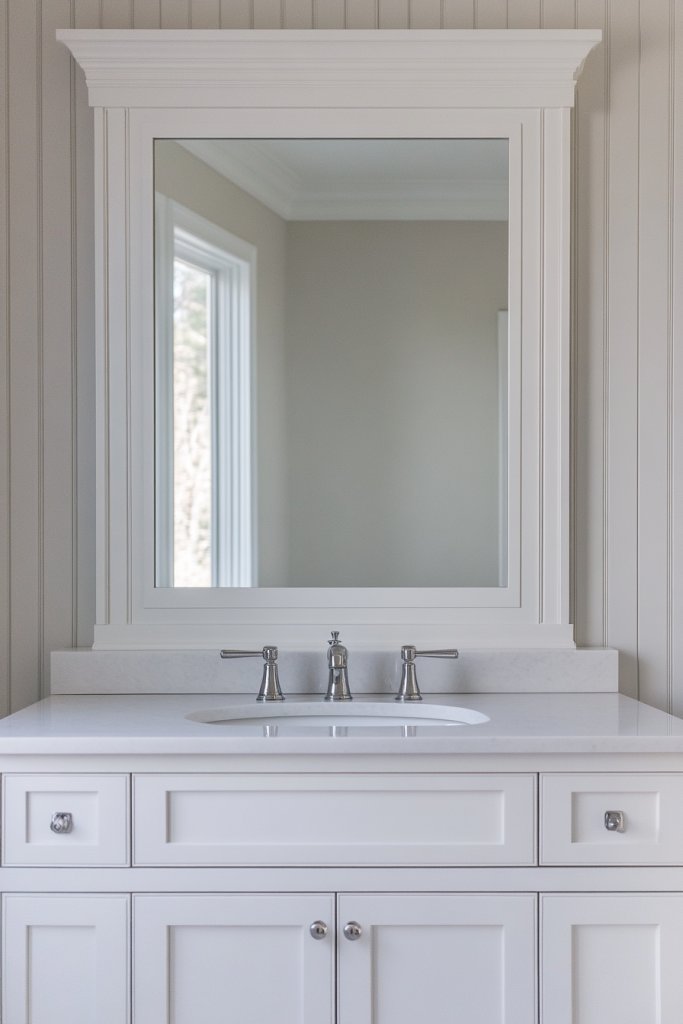
Tired of a plain, uninspired bathroom mirror? Framing your vanity mirror with matching board and batten can turn a basic feature into a stunning focal point. It adds architectural interest and a polished, cohesive look that pulls the entire space together. If you want your mirror to feel like a custom piece, this idea is for you. Plus, it’s a surprisingly straightforward DIY project.
Recommended Products to replicate this idea
| # | Preview | Product | |
|---|---|---|---|
| 1 |
|
Art3d Premade Board and Batten Paintable Wainscoting Kit, MDF Accent Wall Panel for Kitchen Bedroom... | Buy on Amazon |
| # | Preview | Product | |
|---|---|---|---|
| 1 |

|
DESOMINOR 32FT Black Border Peel &Stick Black Wood Grain Wallpaper Border Removable Waterproof... | Buy on Amazon |
Imagine a large mirror framed perfectly in vertical battens, creating a framed artwork effect. The battens extend slightly beyond the edges of the mirror, adding depth and dimension. The texture of the battens contrasts with the smooth glass, emphasizing the frame’s craftsmanship. Paint or stain the battens to match your decor—white, dark wood, or bold colors—making the mirror a statement piece. This framing technique instantly elevates your vanity area.
Choose a narrow frame for a sleek, modern look or a wider, more elaborate surround for a traditional feel. Use contrasting colors or finishes to make the frame pop or blend seamlessly. Incorporate decorative trims or molding for extra detail. This approach works well with large, wall-mounted mirrors or smaller, framed ones for a more intimate feel. Seasonal touches like painted accents or textured finishes can refresh the look.
Measure your mirror carefully, including its height and width. Cut your battens to size, mitering corners for a clean joint. Attach the battens to the wall using nails or adhesive, ensuring they’re straight and secure. Mount the mirror inside or just behind the battens, depending on your design. Finish by painting or staining the battens, sealing all edges for moisture resistance. Make sure everything is aligned before finalizing.
Add decorative hardware or small brackets for functional or aesthetic accents. Use contrasting paint or stain to emphasize the frame, or match it to your decor for subtlety. Incorporate small ledges or shelves within the frame for accessories or storage. Play with different textures—matte, gloss, or metallic—to customize the look further. The framing also offers a place to add personalized touches like monograms or decorative motifs.
Framing your vanity mirror with battens elevates your bathroom’s design and demonstrates your DIY skills. It creates a refined, high-end appearance that feels custom-made. Successfully completing this project boosts confidence in working with architectural details. Your bathroom will look more cohesive and thoughtfully designed, inspiring you to pursue other creative updates with pride.
14. Using Colorful or Metallic Paints for a Fun, Glamorous Update
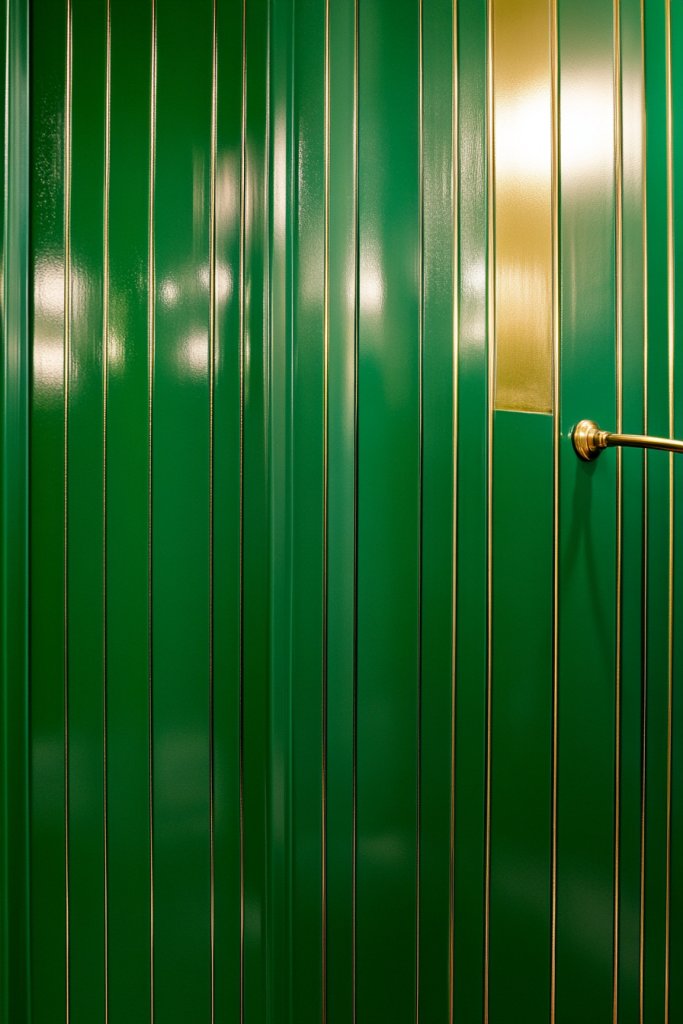
Looking to add a splash of personality and glamour to your bathroom? Colorful or metallic paints can instantly transform a dull space into a lively, luxurious retreat. It’s perfect if you want your walls to be a bold statement or have a hint of shimmer that catches the eye. If you’re tired of neutral palettes, this approach offers endless creative possibilities. It’s a fun way to showcase your style.
Recommended Products to replicate this idea
| # | Preview | Product | |
|---|---|---|---|
| 1 |

|
COLOR CARE Metallic Paint – Satin Champagne, 1 Quart (Pack of 1) | Water-Based Low-Odor Paint for... | Buy on Amazon |
| # | Preview | Product | |
|---|---|---|---|
| 1 |

|
Watercolor Decor Bathroom Art Prints, Funny Brush Wash Wall Decor, Colorful Abstract Paint Splats,... | Buy on Amazon |
Imagine vibrant hues like emerald green, royal blue, or even blush pink on your battens, accented with metallic gold or silver. The glossy or shimmer finishes reflect light beautifully, creating a dynamic, energetic atmosphere. When combined with neutral backgrounds, the painted battens become a focal point that adds depth and excitement. The metallic accents catch the light from different angles, giving your bathroom a glamorous, high-end feel. It’s like dressing your walls in jewelry.
Use metallic paints as accents on select battens or entire walls for maximum impact. Colorful paints work well in small doses—try painting just the battens in a bright hue while keeping the walls neutral. Pair with matching accessories or textured fabrics to complete the look. For a more dramatic effect, combine contrasting metallics and vibrant colors in different areas of the room. Seasonal updates might include metallic or jewel-tone accessories to keep the space lively.
Prepare your surface thoroughly by cleaning and sanding. Use a high-quality primer suitable for your chosen paint type to ensure adhesion. Apply the colorful or metallic paint in thin, even coats, allowing proper drying time between layers. For metallic finishes, consider a special topcoat to enhance shine and durability. When painting battens, tape off edges precisely to avoid bleeding. Seal with a clear protective coat to preserve the finish.
Incorporate accessories like metallic or colorful hardware, textured towels, or decorative textiles to complement the vibrant walls. Add small decorative elements, such as shimmering soap dishes or metallic sculpture accents, for extra flair. Play with lighting—use warm bulbs to enhance metallics or colorful accents. Incorporate artwork or framed prints in matching hues for a cohesive, glamorous vibe. Personal touches will make the space uniquely yours.
Using bold colors and metallics shows your flair for daring design choices. It’s a quick way to refresh your bathroom and make it feel more luxurious and fun. Mastering painting techniques for vibrant or metallic finishes boosts your confidence in color and texture application. Your bathroom will look lively, trendy, and personalized—proof that you can pull off high-impact style with a little creativity and elbow grease.
15. Installing a Board and Batten Shower Wall for a Waterproof, Stylish Surface
Fed up with traditional tile maintenance or uninspired shower walls? A board and batten shower wall offers a stylish, functional alternative that’s also waterproof when properly installed. It creates a clean, cohesive look that echoes the rest of your bathroom’s design. If you want a durable, easy-to-clean surface that feels custom, this is your solution. Plus, it’s surprisingly simple to DIY.
Recommended Products to replicate this idea
| # | Preview | Product | |
|---|---|---|---|
| 1 |
|
Art3d Premade Board and Batten Paintable Wainscoting Kit, MDF Accent Wall Panel for Kitchen Bedroom... | Buy on Amazon |
| # | Preview | Product | |
|---|---|---|---|
| 1 |

|
Medsuo 10pcs 2.4" Clear Double Sided Adhesive Pads for Mounting Waterproof Double Sided Sticker... | Buy on Amazon |
Visualize sleek battens running vertically or horizontally over a waterproof backing, creating a uniform, modern surface. The battens can be painted in any color or finish to match your decor, giving your shower a cohesive, high-end look. The textured or smooth panels between battens add visual interest and break up the space. When sealed properly, this wall resists water penetration, making it both beautiful and practical. It’s like giving your shower a stylish new outfit.
Choose water-resistant materials like PVC, fiber cement, or sealed wood composites. For a seamless look, install the battens flush with the panels, or add decorative trim for extra detail. Use contrasting colors or finishes to highlight the battens. Incorporate niches or shelves within the paneling for added functionality. Seasonal updates could include changing grout or sealant colors for a fresh look.
Start by selecting waterproof, mold-resistant panels or cladding. Install a moisture barrier on the wall surface. Affix battens with waterproof adhesive and corrosion-resistant fasteners, ensuring they’re level. Seal all joints and edges with waterproof caulk or sealant. Paint or finish the battens with moisture-resistant paint or stain. Regularly inspect and reseal to maintain waterproof integrity and keep your shower looking pristine.
Add decorative trims or inserts to customize the look. Incorporate built-in shelves or niches within the paneling for toiletries. Use contrasting colors or finishes for battens and panels to create visual interest. Consider textured or patterned panels to add depth. Pair with sleek fixtures and accessories to complete a modern, waterproof sanctuary.
Installing a stylish, waterproof wall in your shower boosts your confidence in tackling more advanced projects. It combines form and function, offering a beautiful solution that lasts. Achieving this upgrade enhances your skills and sense of accomplishment. Your bathroom will look more polished, personalized, and ready for relaxing, spa-like escapes anytime.
16. Combining Vertical and Horizontal Battens for a Unique Geometric Pattern
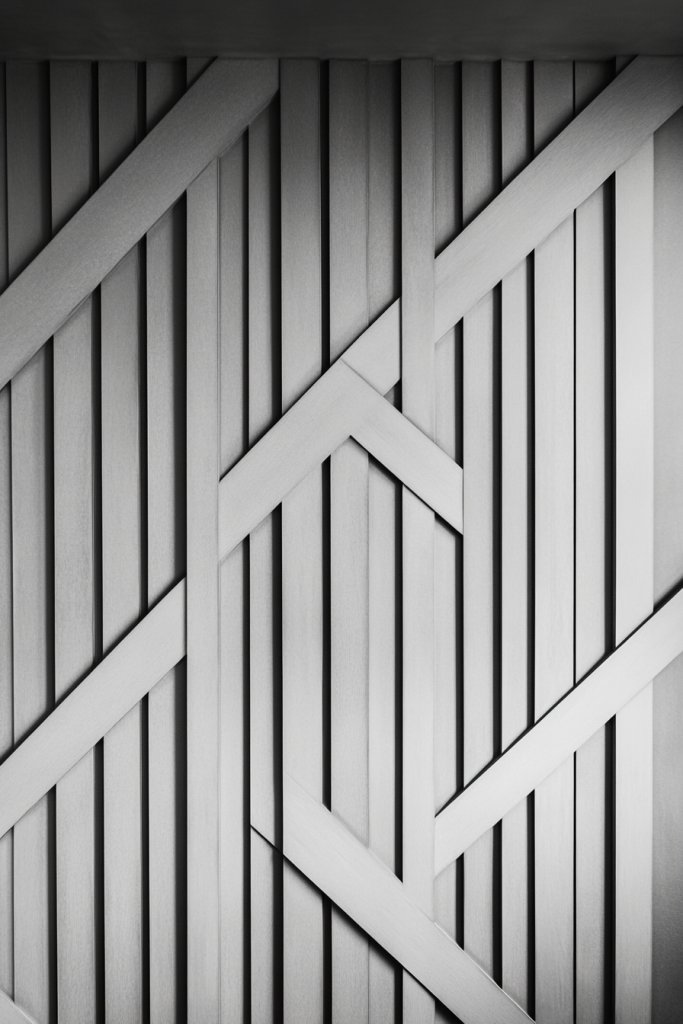
Want to create a truly eye-catching wall that breaks the mold? Combining vertical and horizontal battens forms a dynamic, geometric pattern that adds visual interest and modern flair. It’s perfect if you’re tired of uniform designs and crave something more playful yet sophisticated. This approach makes your bathroom stand out as a true design statement. Ready to experiment?
Recommended Products to replicate this idea
| # | Preview | Product | |
|---|---|---|---|
| 1 |
|
Art3d Premade Board and Batten Paintable Wainscoting Kit, MDF Accent Wall Panel for Kitchen Bedroom... | Buy on Amazon |
| # | Preview | Product | |
|---|---|---|---|
| 1 |

|
Dryzone Bathroom & Kitchen Paint (1 Quart) Brilliant White - 105 sq. ft to 130 sq. ft coverage | Buy on Amazon |
Imagine a wall where vertical battens intersect with horizontal ones, forming squares, rectangles, or other geometric shapes. The contrasting orientations create a lively, rhythmic pattern that guides the eye across the space. Play with different widths and spacing to achieve your desired effect—wide, bold stripes or delicate, intricate grids. The layered pattern adds depth, shadow, and texture, making your walls a piece of art. It’s like turning your bathroom into a modern mosaic.
Use contrasting colors or finishes—matte and gloss, dark and light—for maximum impact. Incorporate different materials like wood, painted MDF, or metal for added texture. You can also vary the size of the geometric shapes to create a more organic or structured look. This pattern suits larger walls best but can be scaled down for smaller spaces with careful planning. Seasonal accents like colorful textiles or accessories enhance the playful vibe.
Plan your pattern carefully by sketching the design first. Mark the wall with a level and tape to ensure precise placement of both vertical and horizontal battens. Attach battens with nails or adhesive, starting with the main grid lines. Use a level and measuring tape frequently to maintain accuracy. Fill gaps and seal all joints to prevent moisture ingress. Finish with paint or stain in contrasting shades, and inspect for alignment and consistency.
Add decorative hardware or lighting to emphasize the geometric pattern. Incorporate textured or patterned battens for more visual complexity. Use accessories like colorful towels or artwork that echo the pattern. You might also embed LED strips along certain lines for a subtle glow. Personal touches turn a bold pattern into a reflection of your style and creativity.
Mixing orientations shows your boldness and willingness to experiment with design. It’s a fresh, modern approach that can redefine your space. Mastering geometric patterns boosts your confidence in working with complex layouts. Your bathroom becomes a showcase of your personal style, inspiring confidence for future creative projects. Go ahead—make a statement with your walls!
17. Incorporating Open Shelving with Board and Batten for Practical Storage
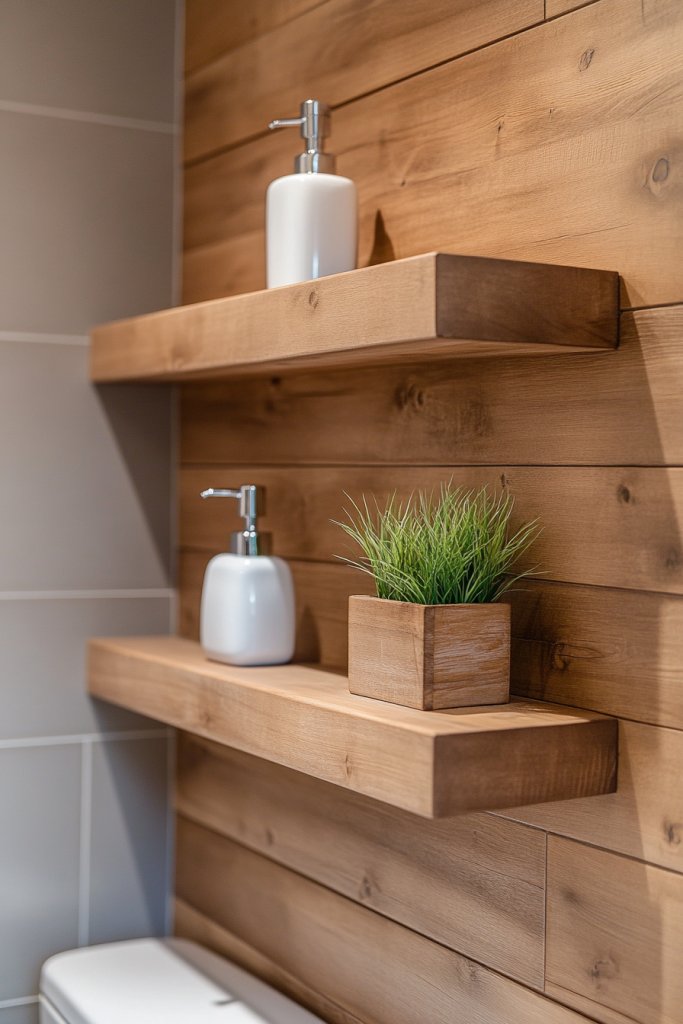
Need more storage but don’t want to sacrifice style? Integrating open shelves into your board and batten design provides practical storage options that look great. It’s a smart way to keep essentials accessible while maintaining a cohesive aesthetic. If clutter is your enemy, this idea offers a tidy, decorative solution. Plus, it’s a DIY project that adds personality to your bathroom.
Recommended Products to replicate this idea
| # | Preview | Product | |
|---|---|---|---|
| 1 |

|
upsimples Floating Shelves for Wall, Wall Shelves for Decor Storage Set of 6, Wall Mounted Wood... | Buy on Amazon |
| # | Preview | Product | |
|---|---|---|---|
| 1 |
|
Art3d Premade Board and Batten Paintable Wainscoting Kit, MDF Accent Wall Panel for Kitchen Bedroom... | Buy on Amazon |
Picture open wooden or painted shelves nestled between vertical battens, offering space for towels, baskets, or decorative items. The shelves can run the length of the wall or be segmented into smaller sections for variety. The open design invites display and organization, making your bathroom feel orderly yet inviting. When styled with textured textiles, colorful containers, or sculptural accents, the shelves enhance the overall visual appeal. It’s like giving your walls a practical yet stylish clothing rack.
Choose materials that match your decor—natural wood, painted MDF, or even metal for a modern touch. Vary the shelf widths and heights to suit different storage needs. In small bathrooms, keep shelves shallow and minimal to avoid visual clutter. Seasonal styling can include decorative jars, plants (if acceptable), or textured baskets. Incorporate lighting underneath or above the shelves for added ambiance.
Mark the placement of shelves carefully, using a level and measuring tape. Attach brackets or shelf supports securely to the battens, ensuring they can bear weight. Install the shelves on top, securing with screws or adhesive as appropriate. Seal or paint the supports and shelves for durability. Style with your preferred accessories, and regularly assess stability and cleanliness. This setup combines utility with design.
Personalize with decorative brackets, painted or stained shelves, or unique hardware. Add small containers or trays for toiletries to keep things organized. Incorporate decorative elements like textured textiles or small sculptures that complement your overall style. Use lighting to highlight your display, or add a small plant if your restrictions allow. The goal is functional beauty with personal flair.
Open shelving boosts your confidence in blending storage with decor. It’s a practical solution that also showcases your personality. Successfully installing and styling shelves encourages you to take on more DIY projects. Your bathroom will feel more organized, functional, and personalized—proof that style and practicality can go hand in hand.
18. Painting the Batten Insets in a Contrasting Color for a Subtle Pop
Want to add a touch of visual interest without overwhelming your bathroom’s calm aesthetic? Painting the insets between battens in a contrasting color can create a subtle yet eye-catching detail. It’s perfect for those who love a little flair but prefer a restrained, elegant look. This small tweak can make your walls feel more dynamic and layered. Ready to add some subtle pop?
Recommended Products to replicate this idea
| # | Preview | Product | |
|---|---|---|---|
| 1 |

|
KILZ TRIBUTE Paint & Primer, Interior, Color Sample, Sea Balm, 8 Ounces | Buy on Amazon |
| # | Preview | Product | |
|---|---|---|---|
| 1 |

|
Duck Brand Clean Release Painter's Tape, 0.94 Inch x 60 Yards (240193) | Buy on Amazon |
Imagine your battens painted in a soft, neutral hue, with the inset panels in a darker or metallic shade. The contrast emphasizes the grid pattern, creating a refined, textured effect. The different colors catch the light differently throughout the day, adding depth and dimension. It’s like a subtle game of hide-and-seek—your eye is drawn to the details without feeling overwhelmed. The overall vibe is sophisticated and understated.
Use a monochromatic palette with varying shades for a more cohesive look, or opt for bold contrasting colors to make the pattern stand out. This technique works well with painted battens or wallpapered insets for added texture. Keep the overall color scheme harmonious to maintain elegance. In smaller bathrooms, use subtle contrasts to avoid visual overload. Seasonal updates could include soft metallics or muted jewel tones.
Start by planning your color scheme and taping off the inset areas carefully. Paint the battens first, then mask the inset sections with painter’s tape. Apply your chosen contrasting color in thin, even coats, allowing drying time. Use a high-quality brush or roller for precise application. Seal the finished sections with a clear coat if needed for protection. Ensure all edges are crisp and clean for a polished look.
Add decorative hardware or textured finishes to the inset panels for extra interest. Incorporate metallic or matte accents in fixtures or accessories that echo the inset colors. Use textiles, towels, or rugs in coordinating hues to tie the look together. Personal touches like monograms or painted motifs can further customize the design. The goal is subtle sophistication with a personalized twist.
This technique is a smart way to add personality without overwhelming your space. It shows your eye for detail and ability to create layered, refined aesthetics. Mastering contrasting insets enhances your DIY confidence and design skills. Your bathroom will look more tailored, stylish, and thoughtfully curated—proof that small details make a big difference.
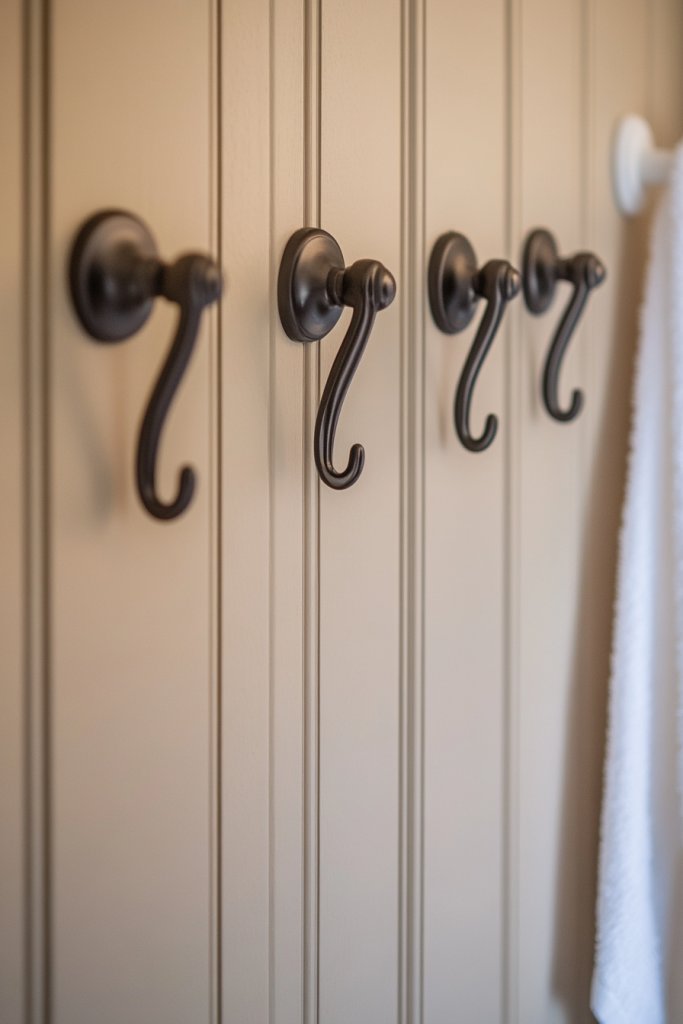
19. Adding Decorative Hardware or Hooks to Batten Panels for Functionality
Wish your bathroom was more functional without sacrificing style? Attaching decorative hardware or hooks to your battens adds practical storage and visual interest. It’s a clever way to keep towels, robes, or accessories within reach while enhancing your wall’s design. If you love combining form and function, this idea is a game-changer. Plus, it’s easy to customize.
Recommended Products to replicate this idea
| # | Preview | Product | |
|---|---|---|---|
| 1 |

|
Railroad Spike Cast Iron Hooks (10 Pack) Handmade Blacksmith, Wall Mounted Farmhouse Decorative... | Buy on Amazon |
| # | Preview | Product | |
|---|---|---|---|
| 1 |

|
TURS Brushed Gold 5 Piece Bathroom Hardware Set, SUS304 Stainless Steel 24 Inch Bath Towel Bar Set,... | Buy on Amazon |
Picture sleek hooks or decorative knobs mounted along your battens, matching your fixtures or contrasting for a pop. The hardware can be minimalist, vintage, or sculptural—whatever suits your style. Arranged in a pattern, these elements create rhythm and visual appeal along the wall. Functional yet artistic, they turn plain battens into a display of your personality and taste. It’s like giving your walls a set of stylish accessories.
Use different hardware styles for different needs—large hooks for towels, smaller knobs for toiletries, or decorative brackets for hanging baskets. Coordinate finishes with your fixtures—brushed nickel, matte black, brass, or antique finishes work well. In small bathrooms, keep the hardware sleek and unobtrusive; in larger spaces, go bold with statement pieces. Seasonal updates can include swapping out hardware for special occasions or different decor themes.
Decide on placement and mark positions carefully, ensuring even spacing and alignment. Attach hardware securely with appropriate anchors or screws, making sure they can handle the weight of towels or other items. Seal or paint hardware if needed to match or contrast with your battens. Clean and polish hardware regularly to keep it looking fresh. Combining practicality with style enhances your overall bathroom experience.
Add decorative hardware with unique shapes, finishes, or engraved details to reflect your personality. Incorporate matching or contrasting hooks, knobs, or brackets to create visual cohesion. Use hardware to hang decorative textiles, baskets, or other accessories that personalize your space. Play with different finishes—matte, glossy, metallic—to add depth and interest. Personal touches make your bathroom uniquely yours.
Adding functional hardware transforms your battens into a practical, stylish feature. It’s a straightforward upgrade that shows your attention to detail and clever use of design elements. Successfully installing decorative hooks boosts your confidence in DIY projects. Your bathroom becomes more organized, functional, and expressive of your style—a space you’re proud of.
Conclusion
From classic white panels to striking painted accents, the bathroom board and batten ideas showcased here demonstrate how versatile and impactful this design technique can be. Feel empowered to try these ideas and customize them to suit your unique style and space. Embrace the opportunity to refresh your bathroom and create a space that reflects elegance and your personal touch—your stunning new bathroom awaits!
Last update on 2026-02-18 / Affiliate links / Images from Amazon Product Advertising API