Are you ready to make your bathroom the ultimate sanctuary? Big bathroom makeovers are trending because they allow for bold transformations, increased functionality, and a touch of luxury that turns everyday routines into spa-like experiences.
In this article, you’ll find a variety of inspiring ideas that cater to every style and budget. From modern minimalist updates to classic elegant touches, these suggestions will help you reimagine your space and create a bathroom that truly reflects your personality and needs. Get ready to be inspired and discover the perfect makeover ideas to elevate your bathroom to the biggest and best it’s ever been!
1. Transform with Bold Statement Tiles for a Modern Look
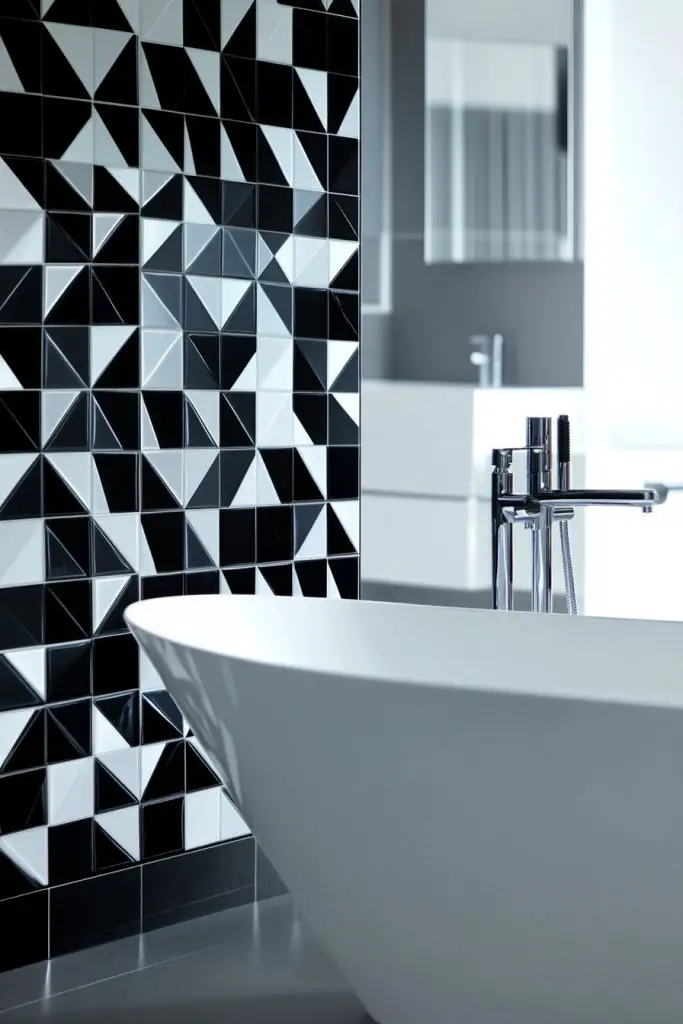
Ever walk into a bathroom that feels dull and uninspired? Sometimes, a simple tweak like adding eye-catching tiles can completely change the vibe. If you’re craving a space that screams modern chic, statement tiles are your secret weapon. They turn a boring bathroom into a visual masterpiece without a total overhaul.
Imagine large, geometric tiles with sharp lines and bold patterns lining your walls or floors. The contrast of a glossy finish against matte elements creates a dynamic look that captures attention. A splash of color or intricate pattern can serve as a focal point, drawing the eye immediately. Think of it as wearing a statement necklace—instant style boost.
You can opt for monochrome tiles for a sleek look or mix patterns for a playful vibe. Seasonal options include softer pastels or warm earthy tones, depending on your mood. Whether your bathroom is tiny or spacious, large-format tiles make small rooms seem bigger. For a rustic feel, textured tiles work beautifully; for ultra-modern, sleek, polished finishes are ideal.
Start by choosing durable, waterproof tiles with a design that fits your style. Measure your space carefully to select tiles that won’t require too many cuts. Prepare the surface, ensuring it’s clean and level. Use high-quality adhesive and grout to keep everything secure and water-resistant. Consider hiring a professional for complex patterns or large slabs to avoid mishaps.
Add a border or inlay with contrasting tiles to highlight a feature wall. Incorporate metallic or matte grout for a refined look. You can also layer textures—matte tiles with glossy accents—to create depth. Personalize further with custom mosaics or initials embedded subtly within the design. These small touches make your bathroom uniquely yours.
Bold statement tiles prove that a little risk can lead to major style gains. They reflect confidence and a keen eye for detail. With the right choice, your bathroom becomes a showcase of your personality. Ready to make a statement? It’s easier than you think to transform your space into a modern oasis.
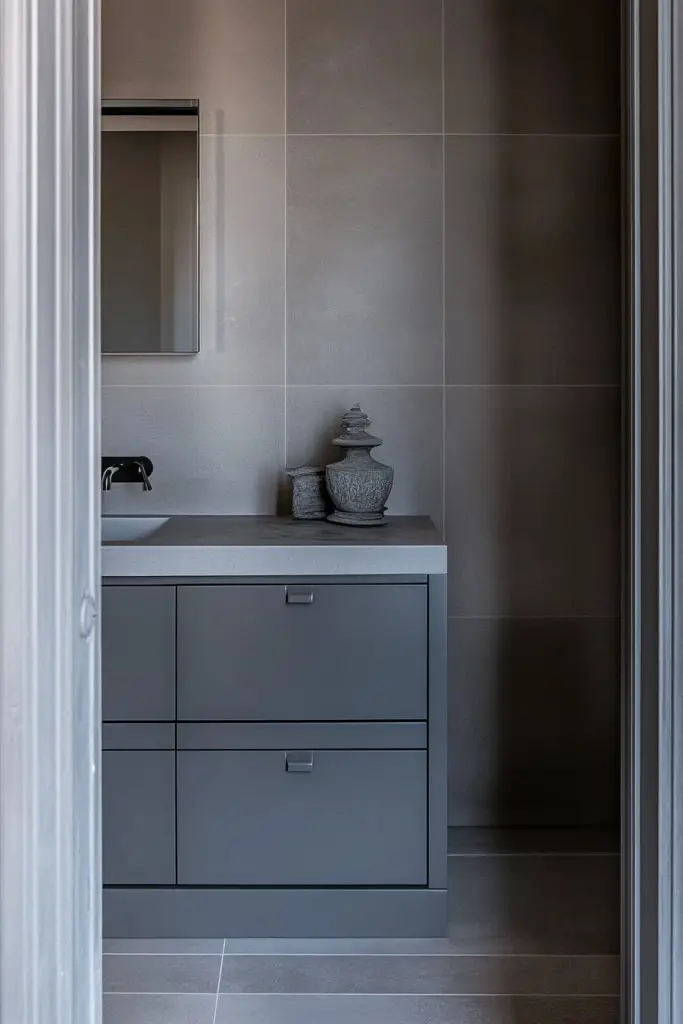
2. Install a Floating Vanity for a Sleek, Airy Feel
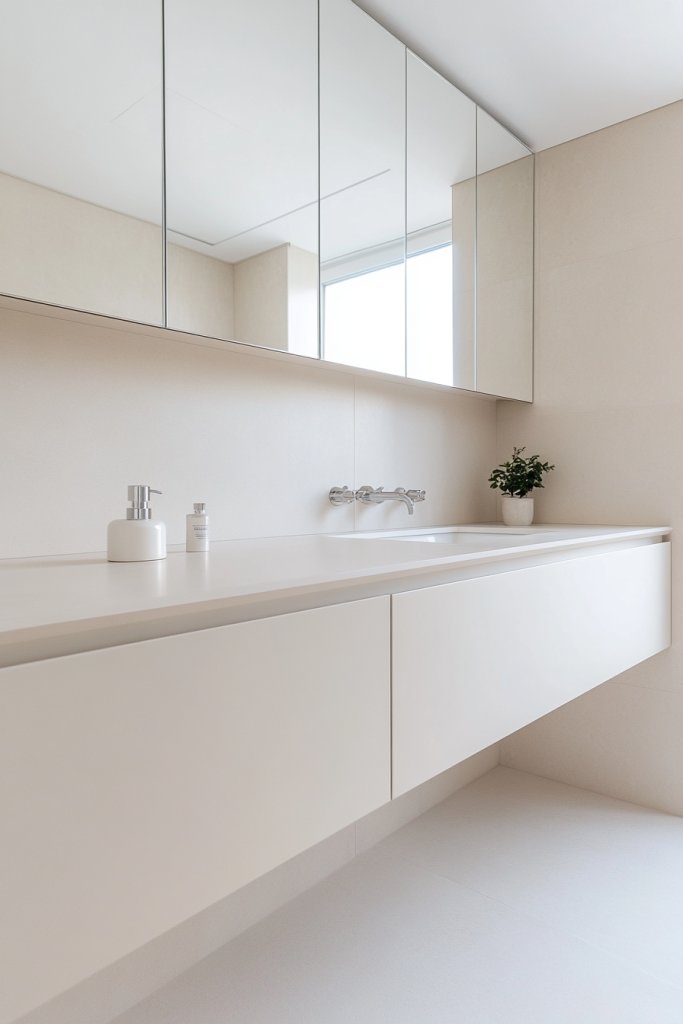
Cluttered, heavy-looking vanities can make even the biggest bathrooms feel cramped. If you’re dreaming of a more spacious, airy vibe, a floating vanity might be your answer. It instantly lightens the room and adds a touch of modern elegance. Plus, cleaning under a floating piece is a breeze—literally and figuratively.
Picture a sleek, wall-mounted vanity with a smooth surface and minimalist handles. The open space beneath creates the illusion of more floor area, making the room look larger. Soft LED lighting underneath can add a glowing effect, emphasizing the floating effect. The clean lines and uncluttered look bring a sophisticated, contemporary feel that’s hard to beat.
Choose from wood, matte laminate, or high-gloss finishes to match your aesthetic. Small bathrooms benefit from narrow, wall-hung designs, while larger spaces can incorporate double sinks. For a warmer vibe, pair it with natural wood tones; for sleek modernity, opt for glass or lacquered surfaces. Incorporate open shelves or hidden cabinets for extra storage.
Start by measuring your space to select a size that fits perfectly without overwhelming. Mount the vanity securely into wall studs, ensuring it can support the weight of your fixtures. Use waterproof, high-quality materials to prevent damage over time. Install a durable countertop, like quartz or solid surface, that’s easy to clean and resistant to moisture. Finish with stylish fixtures that complement the floating design.
Add a unique backsplash, such as textured tiles or a metallic strip, to elevate the look. Incorporate soft-close drawers or innovative storage solutions inside for practicality. Personalize with a statement mirror or a custom vessel sink for a bespoke touch. Use decorative hardware that adds subtle contrast or matches your overall theme.
Floating vanities are all about modern simplicity and maximizing space. They demonstrate that less is more, proving that a minimal approach can be impactful. Your bathroom will look more open, clean, and inviting. Ready for a bathroom upgrade? This sleek style is a guaranteed upgrade in both form and function.
3. Incorporate Matte Black Fixtures for a Trendy Contrast
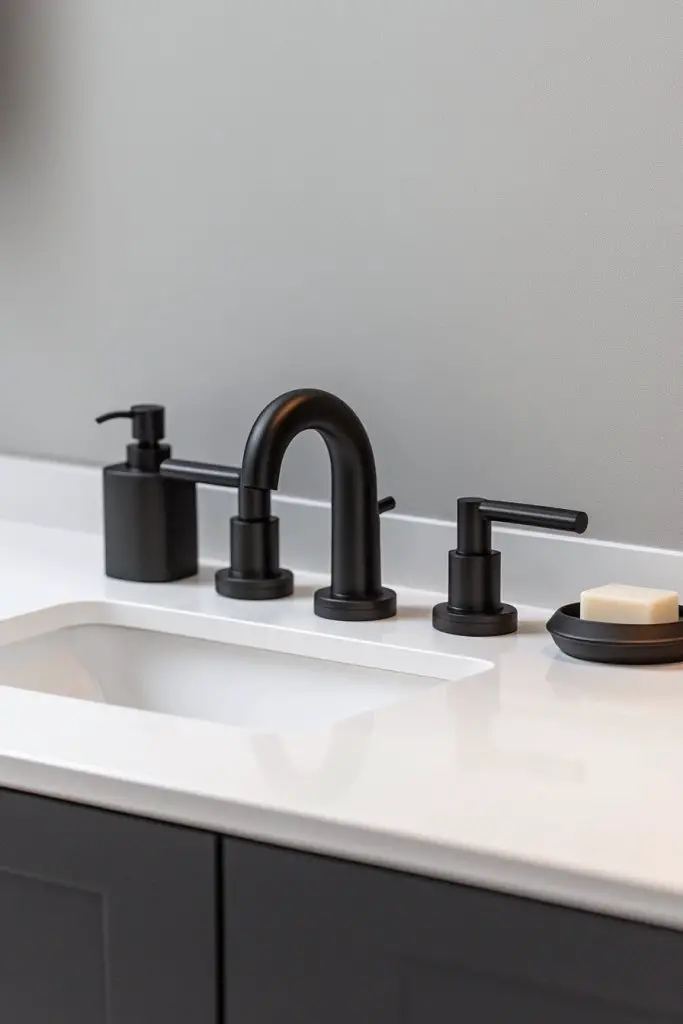
Boring chrome and shiny fixtures can make even a beautifully designed bathroom feel flat. If you crave a stylish and modern contrast, matte black fixtures might be your new best friend. They add a bold edge and elevate the overall look with minimal effort. Plus, they hide fingerprints and water spots better than shiny finishes.
Picture matte black faucets, showerheads, and handles against light-colored tiles or walls. The dark finish creates a dramatic, high-contrast effect that commands attention. When paired with natural textures or sleek surfaces, they establish a refined, contemporary vibe. These fixtures also serve as a subtle yet impactful focal point.
Match matte black with various styles—from industrial and rustic to ultra-modern. Combine with brushed gold or brass accents for a layered, sophisticated look. For a softer feel, pair matte black fixtures with warm wood tones or textured ceramics. You can also incorporate matte black hardware on cabinets and shelving for consistency.
Choose high-quality, corrosion-resistant fixtures suitable for humid environments. Remove existing shiny fixtures carefully, then prepare the surface for installation. Use appropriate tools and sealant to prevent leaks. Ensure all fixtures are securely mounted and aligned for a clean look. Consider installing a matching matte black drain cover for a cohesive finish.
Add subtle touches like matte black towel bars, soap dishes, or robe hooks to create a unified look. Incorporate textured or patterned tiles that complement the dark fixtures. For a personal touch, opt for fixtures with unique shapes or matte finishes with subtle detailing. These small updates make a big style statement.
Matte black fixtures are a timeless trend that exudes confidence and sophistication. They instantly modernize and elevate your bathroom’s aesthetic. Once installed, you’ll wonder why you didn’t do it sooner. Ready to make a bold, stylish change? This upgrade is a game-changer.
4. Refresh Walls with Waterproof Peel-and-Stick Wallpaper

Tired of plain, boring bathroom walls? Want a quick, affordable way to add personality without permanent commitments? Waterproof peel-and-stick wallpaper offers a fun solution. It transforms your space instantly and can be removed or changed whenever your style evolves.
Imagine bold patterns or textured designs—like tropical leaves, geometric shapes, or abstract art—adhering effortlessly to your walls. The waterproof surface withstands humidity and splashes, so it stays pristine over time. When installed correctly, it looks seamless, giving your bathroom a fresh, vibrant vibe. Light-colored or metallic finishes can add an extra layer of sophistication.
Choose from a wide range of patterns, from subtle textures to statement prints. Use lighter shades to keep the space bright or dark, moody hues for drama. Accent one wall with wallpaper for a focal point, or cover all surfaces for a bold, immersive look. Seasonal or temporary options make changing styles fun and flexible.
Start by cleaning and preparing your walls thoroughly. Measure carefully to get the right amount of wallpaper, and plan your pattern alignment. Apply using a smoothing tool to avoid bubbles or wrinkles. Trim excess edges for a clean finish. Maintenance is minimal—just wipe with a damp cloth if needed. For best results, follow manufacturer instructions precisely.
Pair wallpaper with matching accessories, like towels or rugs, to create a cohesive look. Use it to highlight architectural features or add a pop of color to neutral palettes. Try layering with textured wall panels or decorative molding for added dimension. Changing out wallpaper seasonally keeps your space feeling fresh.
Updating walls with peel-and-stick wallpaper is a quick way to refresh your bathroom’s personality. It shows that you’re not afraid to experiment and express your style boldly. With minimal effort and cost, your space can look completely new. Ready to transform your walls? This is a simple, effective upgrade that makes a statement.
5. Upgrade Lighting with Statement Fixtures and Layered Illumination
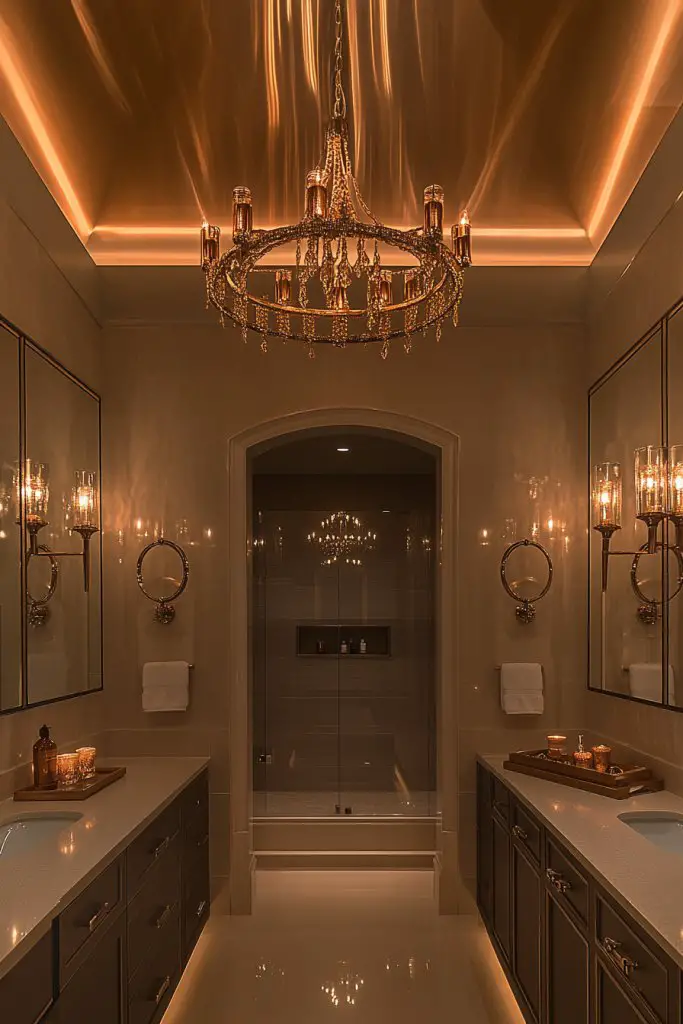
Harsh overhead lighting or dim, unflattering bulbs can ruin even the most beautiful bathroom. Want a space that feels warm, inviting, and functional? Upgrading to statement fixtures and layered lighting makes all the difference. It sets the mood and highlights your design details.
Picture a stunning pendant or sconce with unique design details illuminating your vanity area. Combine ambient lighting with task lighting around mirrors and accent lights highlighting architectural features. The layered approach creates depth, warmth, and an inviting atmosphere. Soft, warm bulbs mimic natural light, making your space more flattering.
Choose fixtures that match your style—industrial, vintage, minimalist, or glam. Install dimmer switches to control brightness and mood. Use frosted or decorative glass shades for softness or metallic finishes for a modern edge. Incorporate LED strips or backlit mirrors for additional layers of light and dimension.
Assess your space to determine optimal light placement—around mirrors, ceiling, and corners. Hire an electrician for safety and proper wiring. Select fixtures that are rated for damp environments. Install dimmers and timers for flexibility and energy efficiency. Position lights at eye level or slightly above for best reflection and ambiance.
Add decorative fixtures with unique shapes or finishes to serve as focal points. Use warm bulbs to create a cozy glow or cooler tones for a crisp, clean look. Incorporate candles or LED candles for softer, mood-enhancing light. Personal touches like colored bulbs can change the vibe instantly.
Good lighting transforms your bathroom into a functional retreat and a personal sanctuary. It’s a small change that yields huge style and comfort improvements. Once you see how layered lighting elevates your space, you’ll wonder why you waited. Brighten up your bathroom—literally and figuratively!
6. Incorporate Natural Textures with Stone or Wood Accents
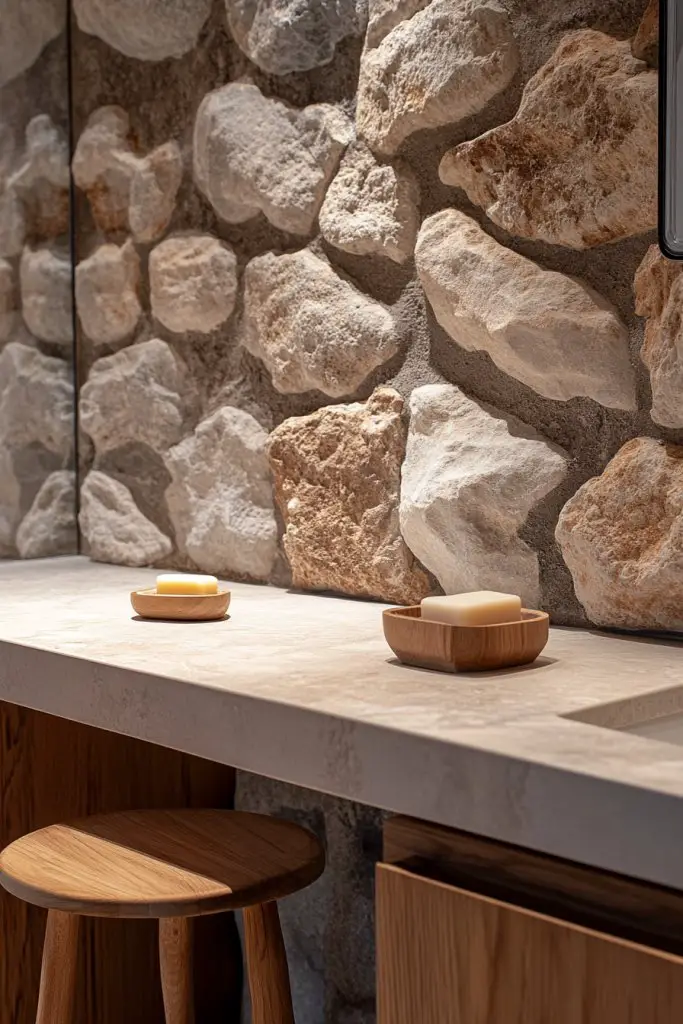
If your bathroom feels cold or sterile, adding natural textures can create warmth and coziness. Stone and wood accents bring an organic vibe that makes the space feel more inviting and balanced. It’s a simple way to add depth without cluttering the design.
Imagine a countertop made of sleek marble or textured travertine. Wooden shelves or cabinetry introduce warmth and tactile interest. Soft, woven baskets or textured towels complement these materials, creating a balanced, natural aesthetic. The combination of smooth stone and rougher wood creates visual contrast and harmony.
Use stone tiles or slabs for flooring or shower surrounds to add a sense of luxury. Incorporate reclaimed or light-stained wood for a rustic or Scandinavian look. For a beach-inspired vibe, combine sandy tones with driftwood accents. Seasonal changes include switching to darker, richer woods or lighter stones for a fresh look.
Select high-quality, moisture-resistant stone or wood products suitable for humid environments. Seal stone surfaces thoroughly to prevent staining and water damage. Mount wooden elements securely, ensuring they are treated or sealed for longevity. Combine with other natural elements like jute or linen textiles. Maintain regularly to keep their appearance fresh and pristine.
Add sculptural stone or wood accents as focal points or art pieces. Use textured stone tiles in the shower for a spa-like feel. Incorporate small wooden details, like carved handles or decorative trims. Layer with textiles in earthy tones to enhance the organic vibe and create a cozy atmosphere.
Natural textures remind us of the outdoors and add a calming influence to your daily routine. They demonstrate a mindful approach to design—less artificial, more authentic. Once integrated, these accents elevate the entire bathroom aesthetic. Embrace nature-inspired decor for a timeless, stylish retreat.
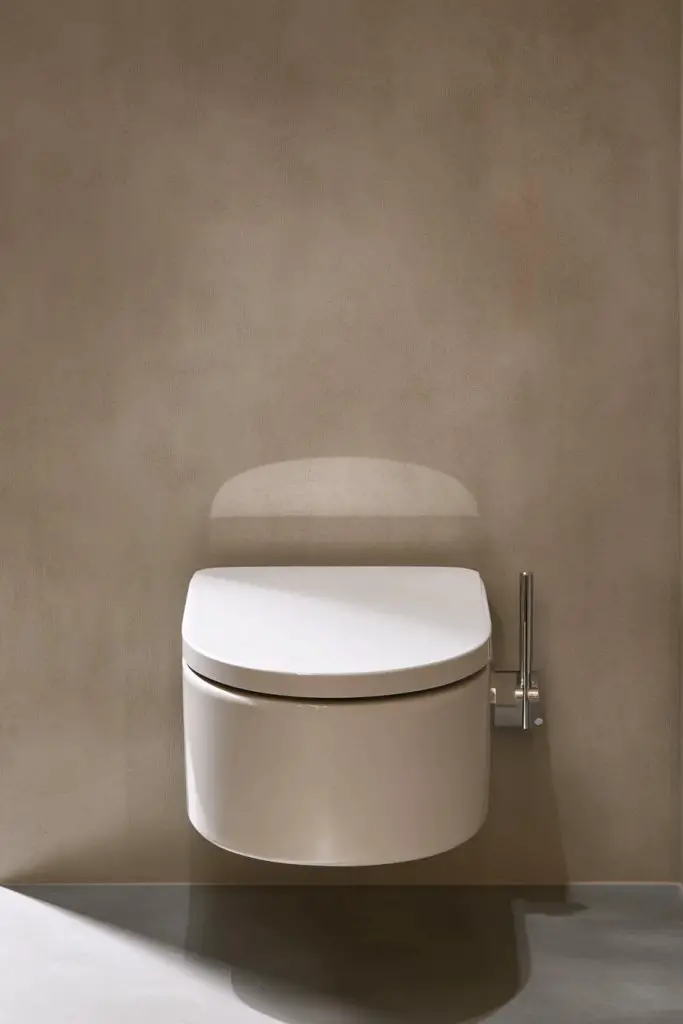
7. Maximize Space with a Compact Corner Toilet or Bidet
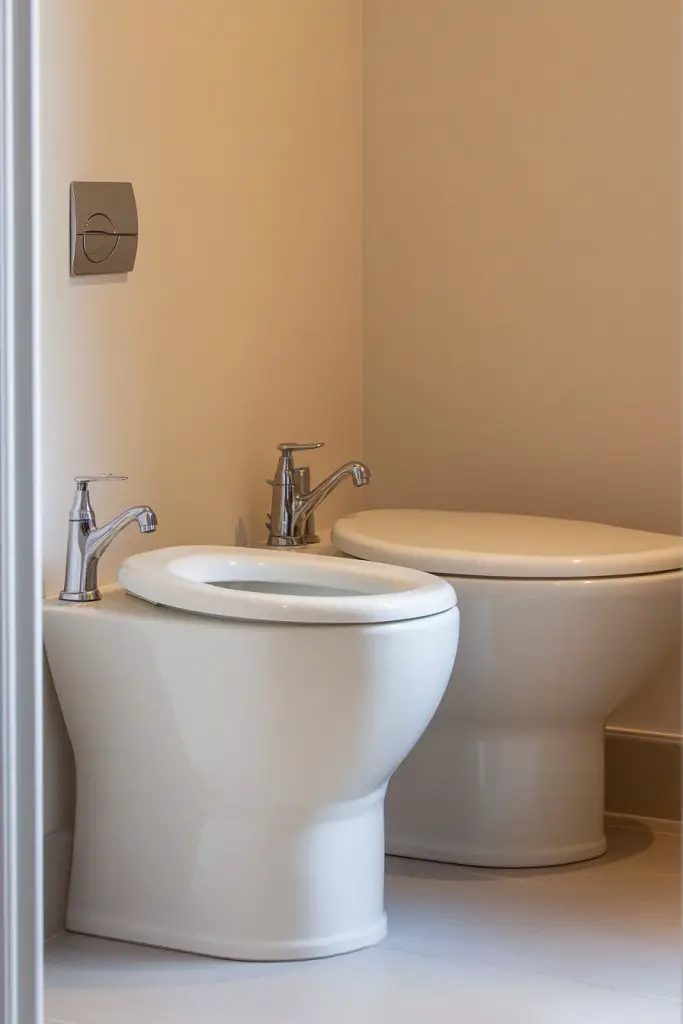
Standard toilets can take up more space than necessary, especially in small bathrooms. If you’re after a sleek, functional upgrade that saves room, a compact corner toilet or bidet is the way to go. It offers modern convenience without sacrificing style.
Imagine a streamlined, space-saving toilet nestled neatly into a corner, with a matching bidet nearby. The clean lines and minimalist design make the area feel less crowded. The smooth surface and concealed plumbing create a seamless look that blends into the overall aesthetic. It’s almost like a secret space-saving weapon.
Choose from wall-mounted or floor-mounted models based on your space. Opt for neutral colors or matching finishes to keep the look cohesive. In small or awkward layouts, corner models fit perfectly, freeing up valuable floor space. Incorporate dual-flush or eco-friendly options for added efficiency.
Measure carefully to ensure proper fitting into your existing plumbing and space. Hire a professional for installation, especially if relocating plumbing lines or installing wall-mounted units. Select high-quality, durable materials designed for moisture-rich environments. Seal all connections tightly to prevent leaks. Once installed, add a sleek cover or enclosure for a polished finish.
Pair with a matching bidet or add a heated seat for extra comfort. Use concealed cisterns or hidden tanks to streamline the look further. Combine with a small, stylish vanity or storage unit to maximize utility. Personalize with matching hardware or soft-close features for a touch of luxury.
Space-saving toilets and bidets show that smart design can maximize function in minimal space. They make your bathroom feel more open and less cluttered. Once you experience the convenience and style, you’ll wonder how you ever lived without them. Upgrade smartly and confidently—your space will thank you.
8. Introduce a Stylish, Space-Saving Vanity Mirror with LED Backlighting
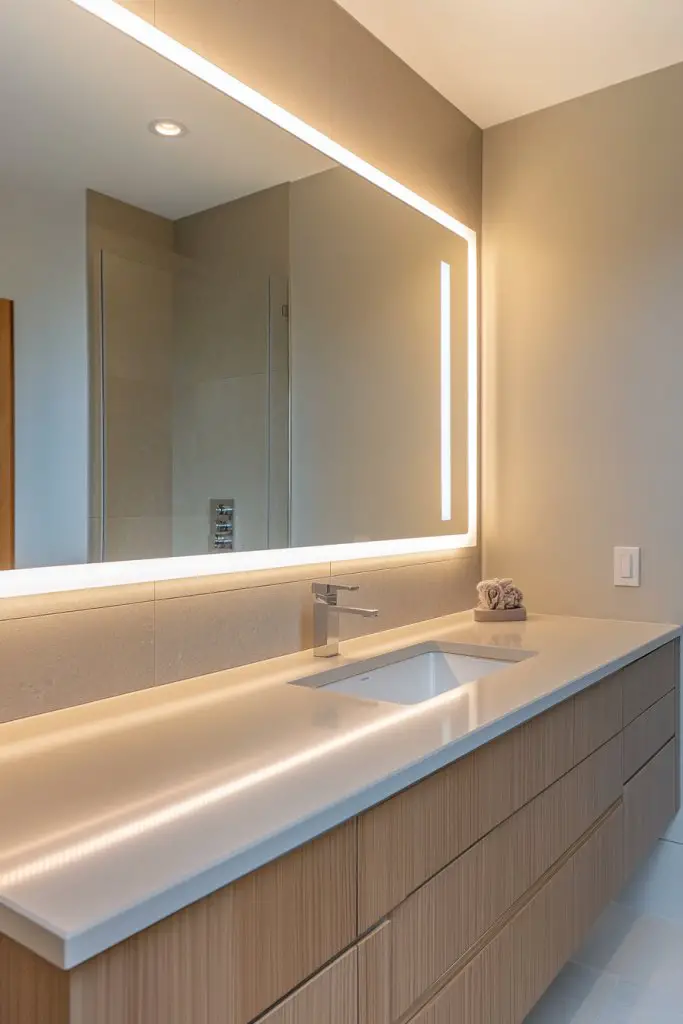
A dull, poorly lit mirror can make even a beautiful bathroom feel uninspired. Want a dramatic upgrade that adds both style and function? A vanity mirror with LED backlighting is perfect. It brightens your face and creates a luxe, modern vibe that’s hard to ignore.
Imagine a large, frameless mirror mounted above your vanity with soft, even LED glow outlining its edges. The backlighting provides optimal illumination for daily routines while eliminating shadows. It adds a sleek, futuristic touch that instantly elevates your decor. The glow creates a cozy ambiance, especially in the evenings.
Choose from round, square, or custom shapes to match your aesthetic. Adjustable brightness levels and color temperatures allow you to customize the mood. For a minimalist look, opt for frameless designs; for more impact, select decorative frames with integrated lighting. Mount it at the perfect height for your needs.
Measure your space carefully, ensuring the mirror fits your vanity and wall area. Hire a professional for wiring, especially if integrating with existing electrical outlets. Use LED strips designed for damp environments—waterproof and energy-efficient. Secure the mirror firmly into wall studs, and test the lighting before finalizing installation. Use dimmers or controls to adjust brightness easily.
Add a decorative frame or surround for a personalized touch. Incorporate smart features like anti-fog technology or touch controls. Pair with matching vanity accessories or storage solutions to complete the look. Keep the design sleek and clutter-free for maximum impact.
A stylish, backlit mirror transforms your daily routine into a glamorous experience. It demonstrates that functional fixtures can also be statement pieces. Once installed, it boosts your confidence and makes your bathroom feel like a high-end spa. Ready for a luminous upgrade? This is the way to do it.
9. Use Colorful or Textured Grout for Subtle Visual Interest
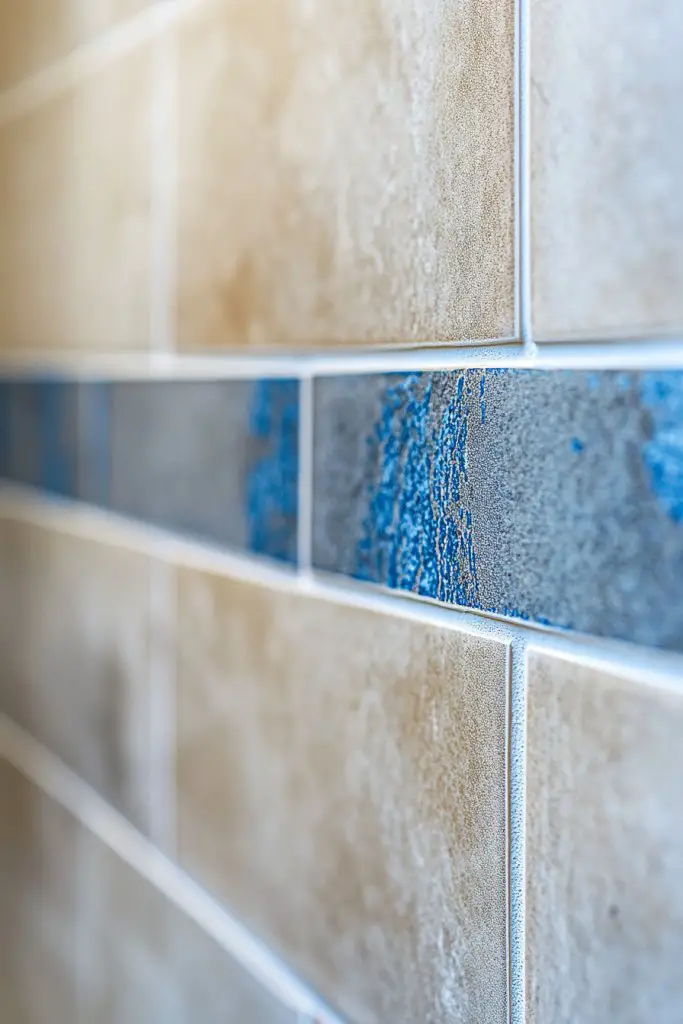
Plain grout can make tile work look flat and uninspired. Want to add a touch of personality without changing your entire tile scheme? Colorful or textured grout is a subtle yet impactful way to elevate your bathroom design. It adds depth and character with minimal effort.
Imagine contrasting grout in a bold hue like navy or emerald accentuating intricate tile patterns. Or textured grout that adds a tactile feel to plain tiles, creating a layered look. The grout becomes a design element, guiding the eye and adding dimension. It’s like jewelry for your tiles—small but striking.
Choose a color that complements or contrasts with your tile for maximum effect. For textured grout, consider raised or beveled finishes to add tactile interest. Seasonal variations include warmer tones for cozy vibes or cool shades for sleek modernity. Use sparingly in small areas or extensively for a dramatic statement.
Select high-quality, waterproof grout suited for bathrooms. Mix according to manufacturer instructions, ensuring a smooth consistency. Apply carefully with a rubber float, pressing grout into joints, and wipe excess with a damp sponge. Seal the grout after curing to protect against stains and moisture. Regular maintenance keeps the look fresh.
Coordinate grout colors with your overall palette for harmony or choose accents for contrast. Use textured grout in areas prone to splashes for added durability. Incorporate color-changing or glow-in-the-dark grout for fun effects. Regular touch-ups maintain the visual interest over time.
A simple change like grout color can dramatically alter the look of your tiles. It demonstrates that small details matter and can have a big impact. Once you see how this subtle tweak transforms your space, you’ll be inspired to experiment further. Elevate your bathroom’s style with this easy upgrade.
10. Incorporate Practical Yet Stylish Storage with Recessed Niche Shelves
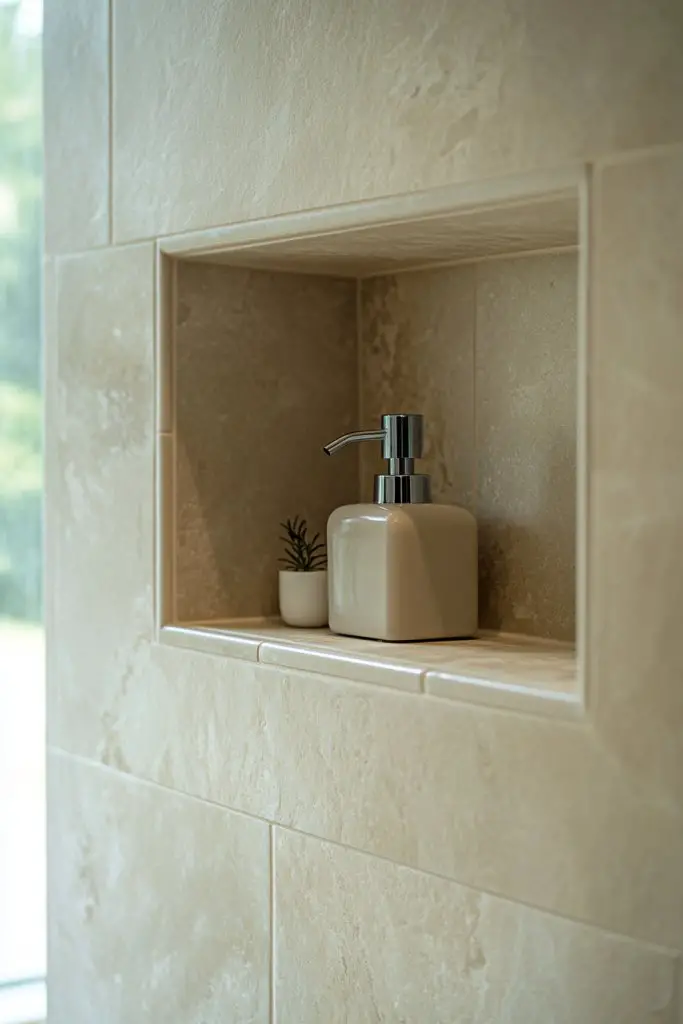
Cluttered surfaces and bulky cabinets can make a bathroom feel chaotic. Want a sleek way to keep essentials handy without sacrificing style? Recessed niche shelves are the perfect solution. They blend seamlessly into walls, offering a clean, minimalist look.
Visualize a built-in niche within the shower or wall, framed with matching tiles or contrasting accents. Fill it with neatly organized bottles, soap, or decorative items—keeping everything within reach but out of sight. The recessed design maintains a smooth, uninterrupted surface, making the space feel uncluttered and modern.
Choose from various sizes and shapes—square, rectangular, or geometric—to suit your needs. Incorporate lighting within the niches for added warmth and practicality. Use waterproof or textured tiles to prevent water damage and add visual interest. Placement can be customized based on your daily routines or aesthetic preferences.
Plan carefully by marking wall locations and measuring for depth and width. Remove drywall or wall covering where needed, and install sturdy framing to support the shelves. Use waterproof, mold-resistant tiles or materials to prevent issues over time. Seal joints meticulously for water tightness. Finish with matching or contrasting grout for a polished look.
Decorate with small, stylish bottles or containers that match your decor theme. Add LED lighting strips or small waterproof sconces inside the niches for a luxurious touch. Personalize with engraved or patterned tiles to make each niche unique. Keep the look cohesive with your overall design scheme.
Recessed shelves combine practicality with sleek aesthetics, proving that smart design can be beautiful. They help keep your bathroom tidy and clutter-free. Once installed, they become a subtle but impactful feature that elevates the entire space. Ready to streamline and style your bathroom? This is the way to go.
11. Add a Touch of Luxe with Metallic Accents in Hardware and Decor
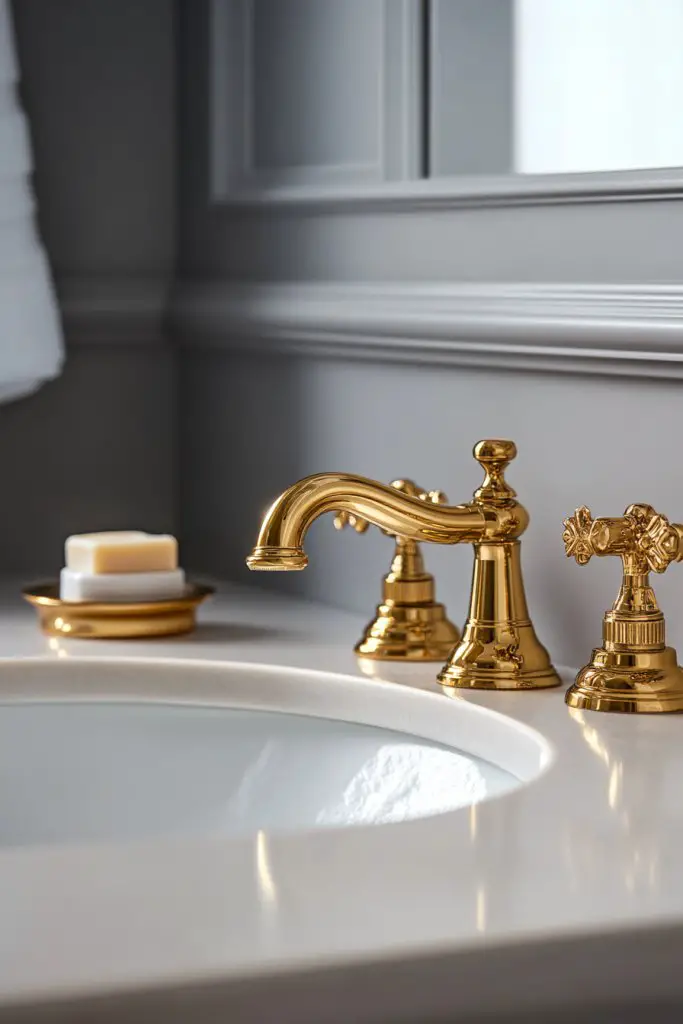
Shiny, plastic-looking fixtures can make a bathroom feel cheap and uninspired. Want to add a sense of luxury without a full renovation? Metallic accents—like gold, brass, or copper—are the effortless way to elevate your space. They bring warmth, shine, and a high-end feel.
Imagine brushed gold faucet handles, brass towel bars, and copper accents that catch the light beautifully. These warm metallic touches contrast nicely with matte or textured surfaces, adding depth and richness. Incorporate metallic fixtures in hardware, mirrors, or decorative accessories for a cohesive look. The shimmer and glow instantly upgrade the room’s ambiance.
Mix metals for a layered, eclectic vibe, or keep it uniform for a sleek, modern aesthetic. Use metallic finishes on cabinetry hardware, light fixtures, or even frames. For a more subtle approach, select fixtures with a brushed or matte finish to avoid overwhelming the space. Seasonal updates include swapping out hardware or accessories for different metallic tones.
Choose high-quality, corrosion-resistant hardware suitable for humid environments. Remove old fixtures carefully, then prepare surfaces for installation. Use proper tools and sealant to prevent leaks and tarnishing. Tighten fixtures securely and align for a polished look. Consider coordinating with other metallic elements in your bathroom for consistency.
Incorporate decorative metallic accents like trays, soap dishes, or hooks for added luxe. Use textured or patterned tiles that reflect light subtly, enhancing the metallic effect. Personalize with vintage or handcrafted hardware for a unique touch. Keep the overall look balanced and not overly shiny.
Metallic accents are timeless and versatile, adding instant sophistication. They demonstrate that a few well-chosen details can transform a space completely. Once you see how they elevate your bathroom, you’ll want to add touches everywhere. Embrace the luxe look—you deserve it.
12. Enhance Privacy and Style with Frosted or Textured Glass Windows
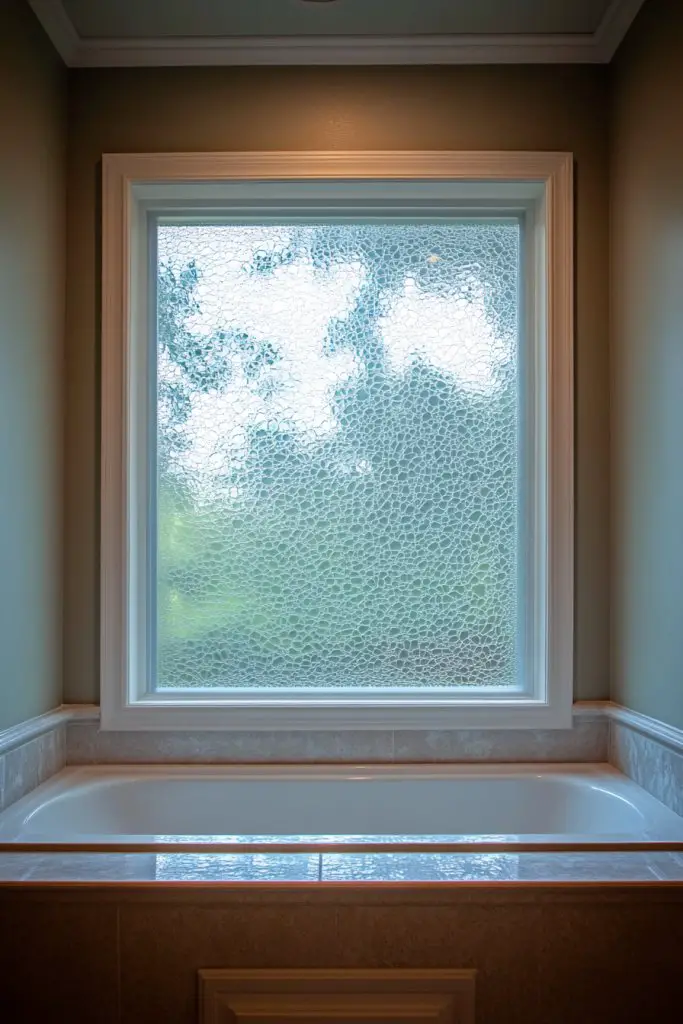
Privacy is essential in a bathroom, but traditional frosted or textured glass can feel dull or utilitarian. Want a stylish solution that maintains light and privacy? Frosted or textured glass windows add a decorative element while keeping prying eyes out. It’s a win-win for style and function.
Visualize a large textured glass window in your bathroom, diffusing natural light softly across the space. The textured surface obscures the view outside, yet allows light to pour in, brightening the room. The pattern adds a layer of visual interest, turning a simple window into a design feature. It creates a sense of privacy without sacrificing style.
Select from options like frosted, hammered, or patterned glass, depending on your aesthetic. Use decorative frames or trims to complement the texture and overall decor. For larger windows, consider tinted or colored textured glass for added personality. Seasonal adaptations include switching between clear and textured glass for versatility.
Measure your window openings precisely and choose the right type of textured or frosted glass. Hire a professional for installation to ensure a perfect fit and seal. Use appropriate waterproof framing and secure the glass firmly to prevent leaks. Regularly inspect for damage or wear, especially in humid environments. Consider adding window treatments that complement the textured glass.
Combine textured glass with decorative hardware or framing in finishes that match your fixtures. Incorporate small details like etched patterns or custom designs to personalize. Use textured glass in shower enclosures or transom windows for privacy and style. Keep the overall aesthetic cohesive with your decor theme.
Frosted and textured glass add a sophisticated touch while serving practical privacy needs. They elevate the look from plain to polished, demonstrating thoughtful design. Once installed, they subtly enhance your bathroom’s ambiance and style. Want to balance privacy with beauty? This upgrade delivers.
13. Opt for Monochromatic Color Schemes for a Cohesive Atmosphere
A cluttered or mismatched bathroom can feel chaotic and unbalanced. Dreaming of a calming, sophisticated space? Going monochromatic creates a seamless, cohesive look that’s both timeless and versatile. It simplifies decision-making and lends an air of effortless elegance.
Imagine walls, tiles, fixtures, and accessories all in shades of white, gray, or beige. The monochrome palette enhances the perception of space and allows textures and finishes to shine. Subtle variations in tone add depth without cluttering the visual flow. It’s like a calming symphony of neutral hues—quiet but striking.
Layer different textures—matte tiles with glossy fixtures, plush towels with smooth surfaces—to add dimension. Use darker shades for a cozy, intimate feel or lighter tones for a bright, airy vibe. Incorporate natural materials like stone or wood to prevent the look from feeling clinical. Seasonal variations include switching to warmer or cooler tones within the same color family.
Choose a primary color and build your palette around it. Select matching or complementary finishes for fixtures and hardware. Keep color consistency across all elements to avoid visual discord. Use textured tiles or matte finishes to add visual interest. Balance the space by varying the scale of elements—large tiles, small accessories—while maintaining tonal harmony.
Introduce subtle pops of metallic or textured accents to break the monotony. Use monochrome artwork or decorative elements with different finishes for contrast. Keep clutter minimal to highlight the cohesive color scheme. Personalize with unique fixtures or custom-made accessories within your chosen palette.
A monochromatic scheme exudes sophistication and calm, making your bathroom a tranquil retreat. It’s easy to update with small accents or seasonal changes without disrupting the overall look. Once you master this style, your space will feel both modern and timeless. Simplify, unify, and enjoy a beautifully cohesive bathroom.
14. Incorporate a Wall-Mounted Toilet with a Hidden Cistern
Clunky, traditional toilets can crowd a small bathroom and make cleaning a hassle. Want a sleek, modern look that saves space and looks effortlessly clean? Wall-mounted toilets with hidden cisterns are the ultimate upgrade. They create a minimalist vibe and make your bathroom appear larger.
Picture a slimline, wall-hung toilet with a concealed tank hidden behind the wall. The smooth, seamless surface makes cleaning easier and the space more open. Its floating design visually elevates the room, removing bulky base units. Paired with a matching wall-mounted bidet or modern fixtures, it creates a cohesive, contemporary aesthetic.
Choose from various shapes—oval, rectangular, or elongated—to suit your style. Opt for soft-close seats and dual-flush options for added convenience. The concealed cistern can be in a flush plate or integrated with your wall decor, offering flexibility. Perfect for small spaces or high-tech bathrooms, it adapts seamlessly.
Plan carefully by measuring your space and ensuring your wall can support the unit. Hire professionals for precise wall framing, plumbing, and electrical work. Use waterproof, mold-resistant drywall and proper sealing techniques. Install the unit securely into wall studs, and connect plumbing carefully to avoid leaks. Finish with a sleek flush plate or cover that complements your decor.
Add a custom flush plate in metallic or matte finishes for a personal touch. Pair with a matching bidet or accessories that continue the minimalist theme. Incorporate soft-close seats and durable, easy-to-clean materials for comfort and practicality. Keep the overall look streamlined and uncluttered.
A wall-mounted toilet with a hidden cistern introduces a high-end feel and smart design to your bathroom. It demonstrates sophisticated taste and attention to detail. Once installed, it simplifies cleaning and enhances the space’s overall aesthetic. Elevate your bathroom with this sleek, space-saving solution—confidence guaranteed.
15. Use Textured or Patterned Rugs for Comfort and Style
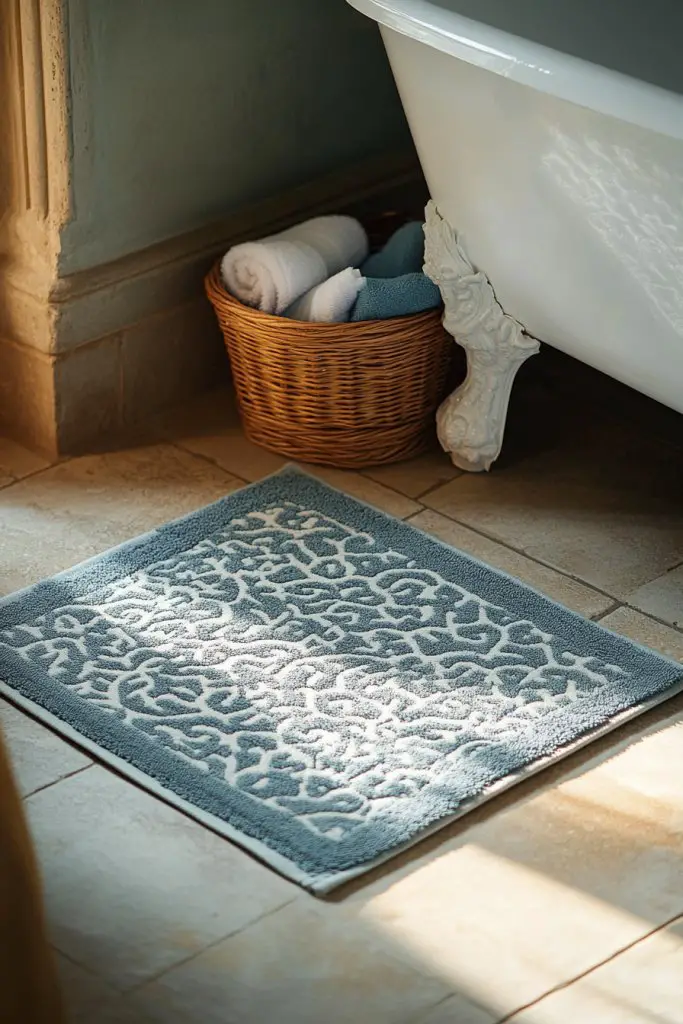
A cold, hard bathroom floor can make your space feel uninviting. Want a touch of warmth and softness that also adds style? Textured or patterned rugs are an easy way to elevate your bathroom’s comfort level. They’re functional, decorative, and totally transform the vibe.
Imagine plush, colorful rugs with bold patterns or textured weaves that add depth to your flooring. They break up large, plain surfaces with tactile interest. The right rug anchors your space, tying together your decor elements. Plus, stepping onto a soft surface feels much better after a shower or bath.
Select washable, quick-drying rugs in vibrant or neutral tones depending on your style. Use textured rugs with shag or loop piles for cozy warmth. Patterned options—like geometric, floral, or abstract—add personality. Mix sizes and shapes to define different areas, such as vanity or shower zones.
Choose rugs made from moisture-resistant, non-slip materials for safety. Place non-slip pads underneath to prevent sliding and protect your floors. Regularly wash or air out to maintain freshness. Coordinate with your overall color scheme or add contrasting textures for visual interest. Keep them clean and replace when worn.
Layer multiple rugs for a layered, eclectic look or keep it simple with a single statement piece. Use rugs to complement your towels or accessories, creating a cohesive palette. Choose bold patterns for a focal point or subtle textures for understated elegance. Refresh your style by swapping out rugs seasonally.
A textured or patterned rug instantly adds personality and comfort to your bathroom. It shows your attention to detail and love for cozy, inviting spaces. Once you experience the difference, you’ll want to add rugs everywhere. Comfort and style—what’s not to love?
16. Personalize with Custom Storage Solutions and Unique Hardware
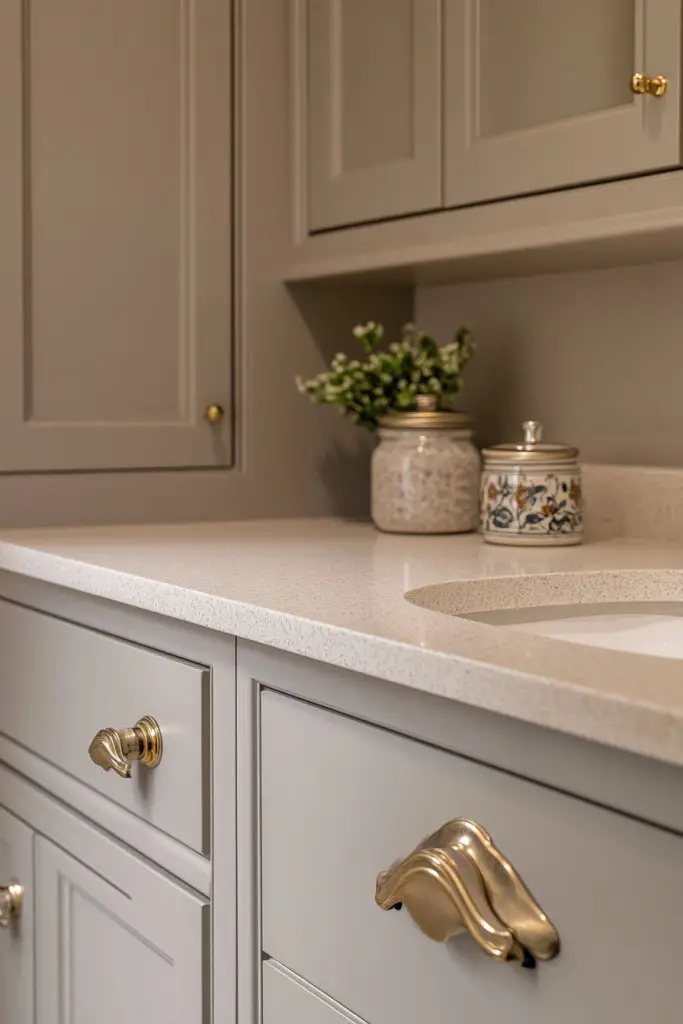
Generic storage and hardware can make your bathroom feel impersonal and cluttered. Want a space that reflects your personality and stays organized? Custom storage solutions and unique hardware turn a basic bathroom into a curated retreat. They add character and practicality in one package.
Visualize built-in drawers with decorative handles or vintage-inspired knobs that match your style. Shelves with personalized labels or unique shapes keep essentials accessible yet stylish. Use custom cabinetry or modular units designed specifically for your space. These details showcase your taste and keep clutter at bay.
Opt for hardware finishes—brushed brass, matte black, antique bronze—that complement your overall decor. Incorporate decorative pulls or knobs with intricate designs for a statement. Build custom storage like pull-out drawers or hidden compartments for maximum utility. Seasonal updates include swapping out hardware or adding decorative accents.
Measure your space accurately and plan your storage needs. Choose durable, moisture-resistant materials for cabinetry and hardware. Hire a carpenter or DIY if skilled, following precise measurements and installation steps. Secure hardware tightly and test for stability. Finish with protective sealants or paint to match your decor.
Add decorative elements like vintage knobs, geometric handles, or themed hardware for a personal touch. Incorporate custom-built features like jewelry drawers or toiletry organizers. Use labels or engraved tags to keep everything organized. Mix and match hardware styles to create a curated, eclectic look.
Personalized storage and hardware choices showcase your creativity and attention to detail. They turn everyday routines into moments of joy. Once you see how these small touches improve functionality and style, you’ll be hooked. Make your bathroom uniquely yours—confidently and beautifully.
Conclusion
With a diverse array of bathroom makeover ideas showcased, you now have the tools to transform your space into something extraordinary. Whether you opt for bold new fixtures, clever storage solutions, or luxurious accents, these ideas are your starting point for a stunning upgrade. Don’t wait—dive in and start creating the bathroom you’ve always dreamed of. Your perfect space is just a makeover away!