Imagine turning an ordinary wall into a vibrant canvas of creativity—chalk murals make this possible and have become a favorite among homeowners and artists alike. Their versatility, affordability, and the ability to easily change designs make chalk murals an appealing choice for adding personality and charm to any space.
In this article, you’ll discover a variety of inspiring chalk mural ideas that suit different styles and moods. Whether you’re looking for playful, elegant, or whimsical designs, these ideas will motivate you to transform your walls into stunning works of art that reflect your unique personality and creativity.
1. Whimsical Cloud and Rainbow Scene for Playrooms
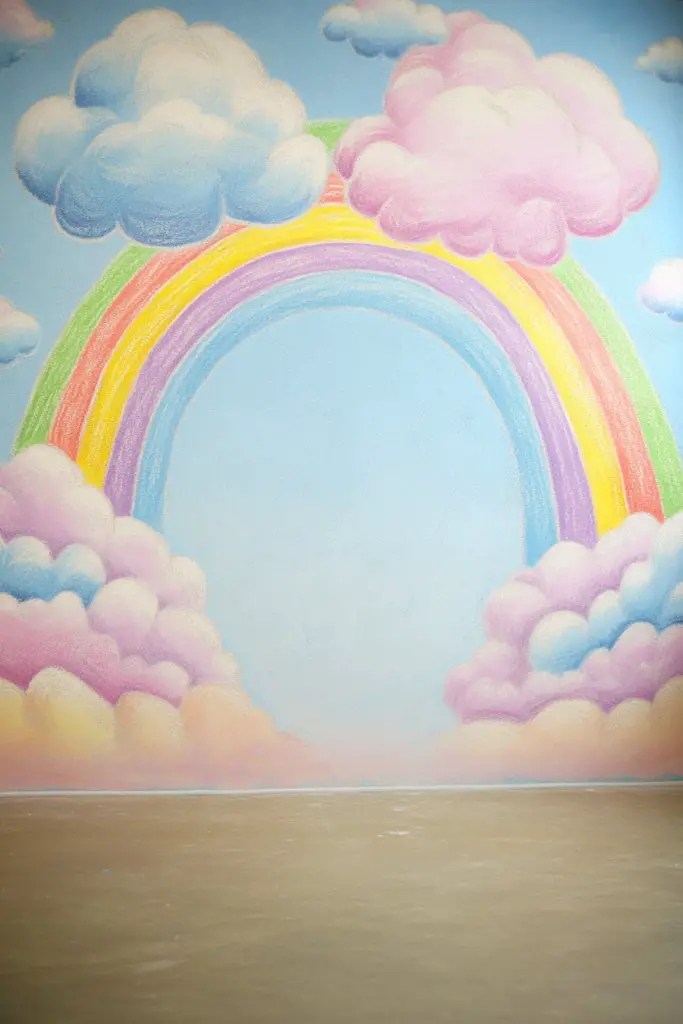
Kids’ rooms often feel like a battleground of colors and clutter, leaving both parents and children overwhelmed. You want a space that sparks joy, creativity, and calm, but typical decor can fall flat. A dull wall makes it hard for little minds to dream big. Brightening up the room with something playful and inspiring sounds like a no-brainer, right?
Imagine a sky painted with fluffy, soft clouds in pastel whites and blues, scattered across a wall. Vibrant rainbows arch gracefully, their colors blending seamlessly, creating a whimsical canopy. The texture of chalk allows you to add subtle shading, making each element pop with depth. Kids’ eyes light up seeing a dreamy scene that invites imagination and storytelling.
Switch up the color palette to match seasonal themes—warm autumn hues or icy winter shades. For a modern look, opt for minimalist clouds with sleek lines and muted rainbows. You could also incorporate themed characters or animals into the scene for added fun. Small chalkboard sections can be added for doodles, making it even more interactive. The scene adapts easily to different room sizes and styles.
Start with a smooth, clean wall surface free of dust or grease. Use painter’s tape to section off the mural area for clean edges. Sketch your cloud and rainbow shapes lightly with a pencil, then fill in with chalk or chalk markers for bold lines and shading. For added depth, layer different shades of chalk, blending softly with a cloth. Keep a damp cloth handy for corrections. This project requires minimal tools—just chalk, tape, and patience. Finish with a sealant spray if you want it to last longer or for easy wiping.
Add personal touches like the child’s name or favorite characters within the scene. Incorporate textured elements like soft fabric clouds or glittery accents for sparkle. Use different chalk textures—matte, glossy, or metallic—to create visual interest. Seasonal accessories like small paper cutouts or fabric banners can be hung nearby to refresh the look. This mural becomes a dynamic background for photos and play.
Creating a playful sky with rainbows turns an ordinary wall into a magical world. It boosts kids’ creativity while making their space feel special. Plus, it’s a project you can customize endlessly, so you feel proud every time you look at it. Ready to turn your child’s room into a dreamy haven? Go ahead, grab some chalk and start dreaming big!
2. Botanical Line Art for a Minimalist Touch
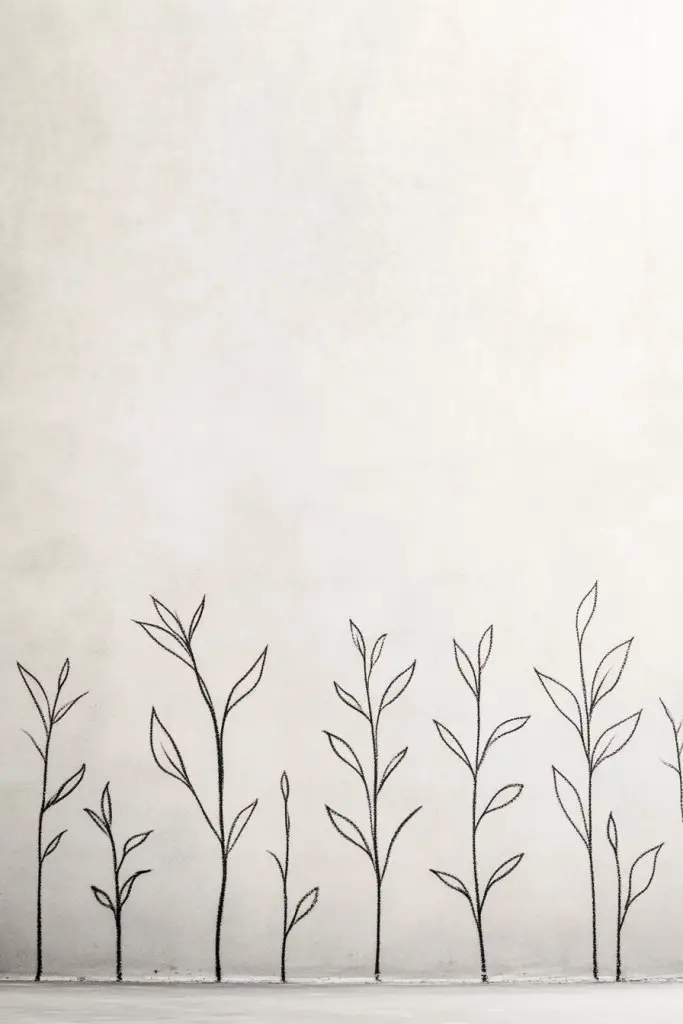
Minimalist decor often feels too sterile or too busy, leaving you craving a touch of nature without the clutter. You want something elegant, simple, yet meaningful enough to soften the space. But how do you add a botanical vibe without overwhelming the room? Line art might be your answer—clean, calm, and surprisingly versatile.
Imagine a wall adorned with delicate, continuous lines forming elegant leaves, branches, and simple floral shapes. The monochrome palette emphasizes the minimalism, while the fluidity of the lines adds a sense of movement. Chalk allows you to create fine, precise strokes that mimic sketches or ink drawings, giving your space an artsy, organic feel. It’s like having a living drawing on your wall.
Adjust the density of the designs—go sparse with just a few leaves or create a lush, sprawling vine. For seasonal updates, add small accents of color or subtle shading. The line art can be framed within geometric shapes or left as a sprawling mural. It works well in modern, Scandinavian, or even boho interiors, fitting various room functions from living rooms to bedrooms.
Start with a clean, smooth wall surface. Lightly sketch your botanical designs with a pencil, focusing on flow and proportion. Use chalk or chalk markers for crisp, clean lines; thicker chalk for bolder elements and finer tips for detail. To keep it neat, work in sections, erasing and adjusting as you go. For more permanence, seal the design with a matte spray or leave it as a temporary art piece. No special tools are needed—just patience and a steady hand.
Incorporate personalized touches like initials within a floral motif or add tiny doodles that symbolize your hobbies. Use subtle shades of pastel or metallic chalk for a splash of color without losing the minimalist vibe. Layering different line weights can add depth and interest. You might also add small shelves or ledges nearby to display botanical-inspired decor or books.
Line art brings a modern yet timeless touch to any space, making it feel serene and stylish. It’s a DIY project that’s easy to update or change as your tastes evolve. Plus, it’s a subtle way to bring nature indoors without the mess or maintenance of real plants. Give it a try—you’ll love the sleek, calming atmosphere it creates.
3. Vintage Map of Your Favorite City
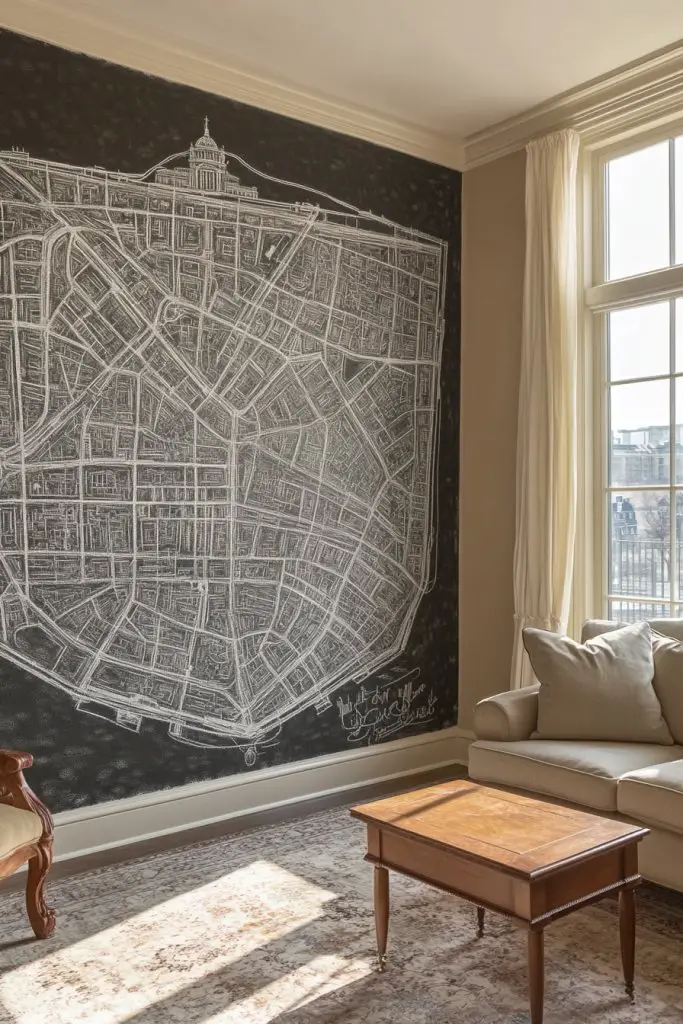
Travel lovers often feel a tug of nostalgia or wanderlust, even when happily settled at home. You want to celebrate your favorite city or memorable trip with decor that’s meaningful and stylish. But generic wall art rarely captures the essence of a place you love. A vintage map can turn your wall into a personal travel story.
Picture a detailed, sepia-toned map of your favorite city, with intricate street layouts and landmarks. The chalk lines can be used to highlight routes or important spots, adding a layered, textured look. The map’s aged appearance pairs well with rustic or eclectic decor, giving a sense of history and adventure. It’s like holding a piece of your travel memories right on your wall.
Opt for a minimalist outline or a fully detailed map, depending on your space and style. For a modern twist, combine it with contemporary frames or overlays of bright colors for emphasis. You can also create a themed collage with other travel-related items or quotes. Seasonal updates could include marking new trips or revisiting old favorites with added doodles or notes.
Start by sourcing a high-quality outline of your chosen city—either print or sketch your own. Use chalk or chalk markers to replicate the map onto a wall, focusing on key landmarks or routes. For accuracy, lightly sketch the main lines first, then fill in details gradually. To enhance the vintage effect, add shading or textured strokes. Seal with a matte spray for longevity, or keep it temporary for seasonal updates. Planning the layout beforehand ensures a neat, precise finish.
Highlight your favorite spots with small icons, doodles, or labels. Incorporate travel quotes or dates to commemorate special trips. Use different chalk colors to differentiate neighborhoods or routes. Frame the map with decorative borders or add string lights nearby for a cozy ambiance. Personal touches make your map a real conversation starter and a cherished piece of your home.
A vintage map celebrates your adventures and inspires future travels. It’s a conversation piece that showcases your personality and passions. Plus, creating it yourself adds a personal touch you’ll take pride in. Ready to turn your wall into a storybook of journeys? Grab some chalk and start mapping out your favorite memories.
4. Abstract Geometric Patterns in Bold Colors
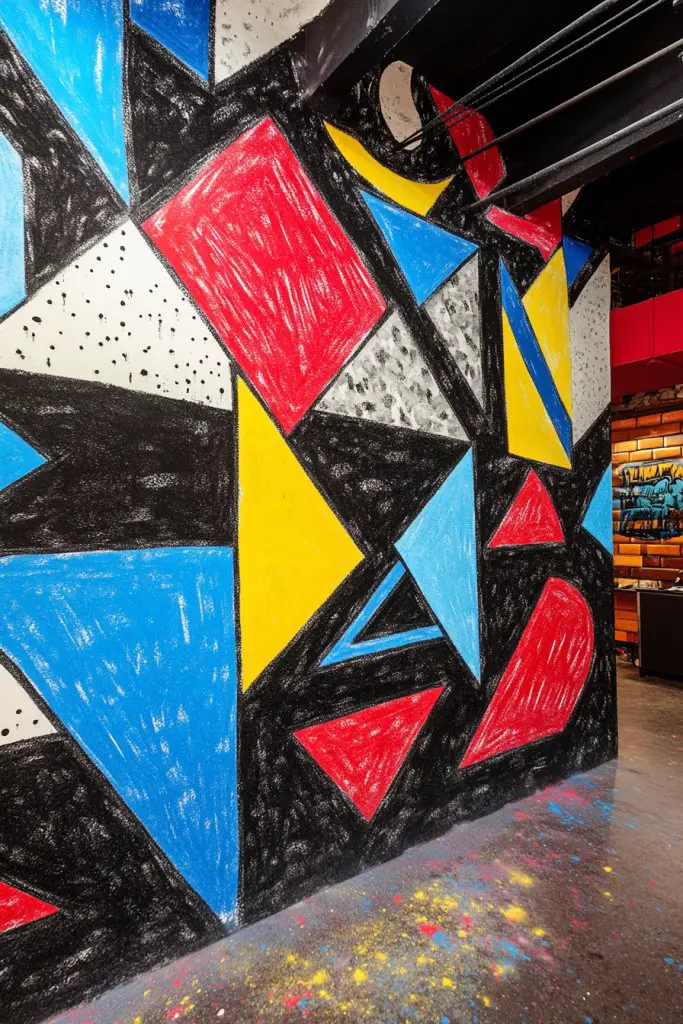
Blank walls can feel uninspired, especially in modern or eclectic spaces craving energy and personality. You want something bold, eye-catching, yet sophisticated—without cluttering the room. Abstract geometric patterns bring a dynamic visual punch that energizes any space. But how do you create something that’s both artistic and chic?
Envision a wall filled with overlapping triangles, circles, and squares in vibrant chalk hues. The shapes are layered, some filled with solid color while others are just outlines, creating depth and movement. Chalk’s versatility allows you to blend and soften edges, giving a handcrafted, artistic feel. Bright colors pop against a neutral background, making the entire wall a statement piece.
Choose a palette that complements your decor—think jewel tones for luxury or neon shades for a playful vibe. Mix large and small shapes for visual interest, or stick to a consistent theme for minimalism. The pattern can be symmetrical for a formal look or chaotic for a wild, energetic vibe. It adapts well to feature walls in living rooms, offices, or even kitchens.
Begin by sketching your design with light pencil lines or using painter’s tape for sharp edges. Fill in the shapes with chalk or chalk markers, layering colors for contrast and vibrancy. For precision, use stencils or rulers to keep lines clean. To add texture, blend chalk softly or use a sponge for gradation effects. Keep a damp cloth nearby for corrections. Seal your work with a fixative spray if you want longevity.
Customize by incorporating your favorite colors or adding metallic accents for a touch of glam. Create a themed pattern inspired by seasons or moods—like fiery reds and oranges for fall. You can also add small decorative elements like metallic dots or textured overlays. Changing out colors or shapes periodically keeps the wall fresh and exciting.
Bold geometric art makes a room feel modern and lively, perfect for expressing your personality. It’s a project that’s flexible—easy to customize and update over time. Plus, it’s a fun way to practice your artistic skills without needing formal training. Dive in and turn your wall into a vibrant, abstract masterpiece!
5. Seasonal Scene Mural for Holiday Cheer
Holidays come and go, but decorating for each season can feel repetitive and boring. You want a way to celebrate every time of year with a wall that captures the spirit of the moment. But buying new decor constantly isn’t budget-friendly or sustainable. A seasonal mural offers a playful, customizable alternative that keeps your space lively.
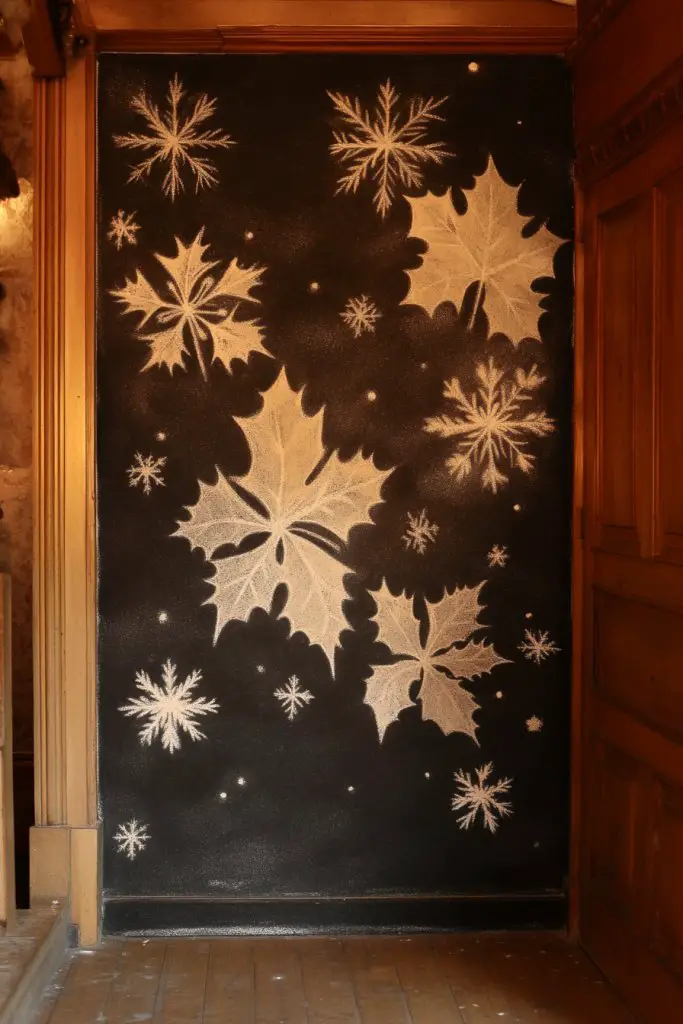
Imagine a wall that transforms with the seasons—snowflakes and winter scenes in December, blooming flowers and butterflies in spring, sunny beaches and umbrellas in summer, and falling leaves in autumn. Chalk enables you to create these scenes with soft shading and intricate details. It’s easy to add or erase elements as the seasons change, making your wall a living, breathing calendar of nature.
Use different color schemes to match each season—cool blues and whites for winter, pastels for spring, bright yellows and oranges for summer, earthy tones for fall. Incorporate seasonal symbols like pumpkins, snowmen, or sunflowers for added charm. The mural can be a large, sprawling scene or a collection of smaller vignettes. It adapts to any room size and style, from cozy nooks to open living areas.
Start by sketching your seasonal elements lightly with chalk or pencil. For winter, draw snowflakes, icicles, and cozy scenes; for spring, add flowers and birds. Use soft shading and blending to create realistic textures. Layer colors for depth, and add details incrementally. Erase and adjust as you go to perfect your design. Refresh the scene each season by adding new details or replacing parts, keeping the mural dynamic.
Personalize by incorporating family traditions or favorite seasonal symbols. Use glitter or metallic chalk for holiday sparkle. Add small decorative accessories nearby—like mini pumpkins or faux snow—on shelves or ledges. Write seasonal quotes or messages within the scene for extra charm. This approach makes your wall a fun, interactive part of your holiday celebrations.
A seasonal mural keeps your decor fresh and relevant, inspiring a joyful, festive atmosphere year-round. It’s a creative way to celebrate each season without cluttering your space. Plus, it’s an engaging project that evolves with your imagination. Ready to bring the seasons to life on your wall? Grab some chalk and start creating!
6. Monochrome Mandala Art for Tranquility
In a world full of noise and chaos, finding a moment of calm can be tough. You crave a peaceful corner in your home that promotes meditation or relaxation. But typical decor often feels too busy or uninspiring. Mandala art offers a soothing, focused visual that invites mindfulness every time you look at it.
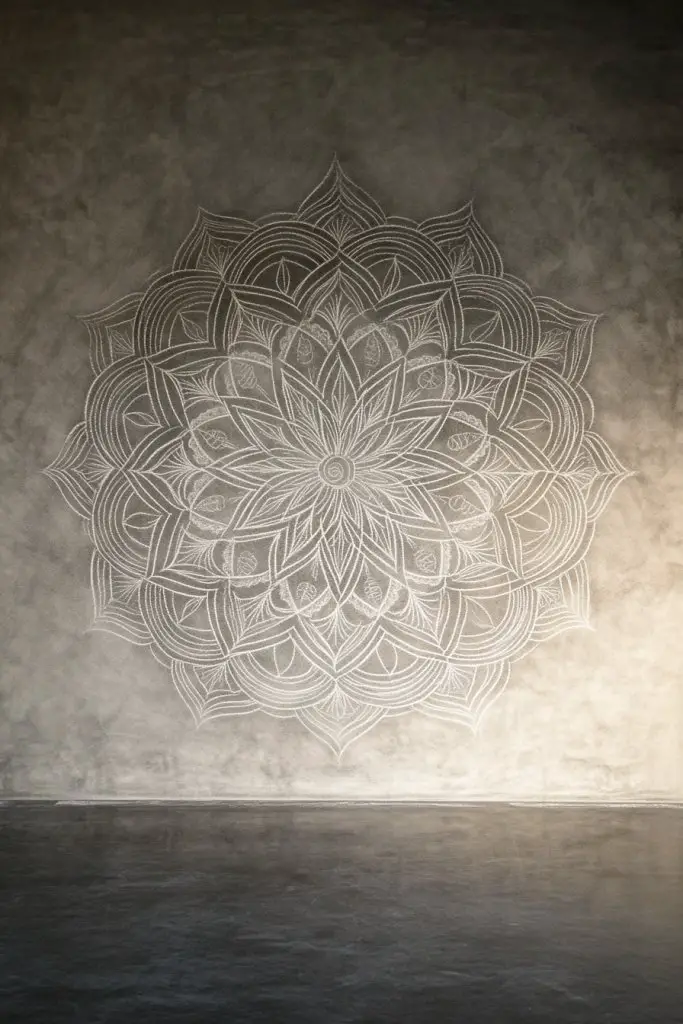
Imagine a large, intricate mandala drawn with white chalk or subtle shades on a dark wall. The repetitive, symmetrical patterns draw your eye inward, creating a hypnotic effect. Delicate lines and detailed patterns evoke a sense of harmony and balance. The chalk’s soft texture adds a gentle, meditative quality, transforming your wall into a calming focal point.
Adjust the complexity of the mandala—simple, bold designs or highly detailed, fine-line patterns. Use monochrome shades for a minimalist look or add slight accents in muted colors for variation. You can place the mandala centrally or create a series of smaller designs for a gallery effect. It suits bedrooms, meditation spaces, or even bathrooms seeking serenity.
Begin by sketching the mandala lightly with a pencil, focusing on symmetry and proportion. Use fine chalk or chalk markers for detailed work, working from the center outward. Use a ruler or compass to maintain precision. Layer different shades to add depth and texture, blending softly with a cloth. Once satisfied, set the design with a fixative spray for longevity. This project is about patience and attention to detail.
Personalize your mandala with symbols or motifs meaningful to you. Use metallic or pastel chalks for a subtle shimmer or a splash of color. Frame the design with a simple border or surround it with soft lighting for added ambiance. Incorporate elements like textured tapestries or soft textiles nearby to enhance the tranquil vibe. It becomes a visual anchor for your mindfulness practice.
A monochrome mandala fosters calm, focus, and inner peace—perfect for a busy life. Creating your own art boosts confidence and provides an ongoing source of relaxation. It’s a timeless design that adapts to any decor style, from boho to modern minimalism. Feel empowered to craft your sanctuary—one symmetrical line at a time.
7. Coastal Beach Scene with Waves and Shells
Longing for the calming sound of waves and the feel of sand between your toes? A beach-inspired space can bring peace and relaxation into your home, especially if you’re landlocked. But decorating with actual shells and driftwood can be pricey or fragile. Chalk murals of coastal scenes offer a budget-friendly, artistic alternative that captures the essence of the sea.
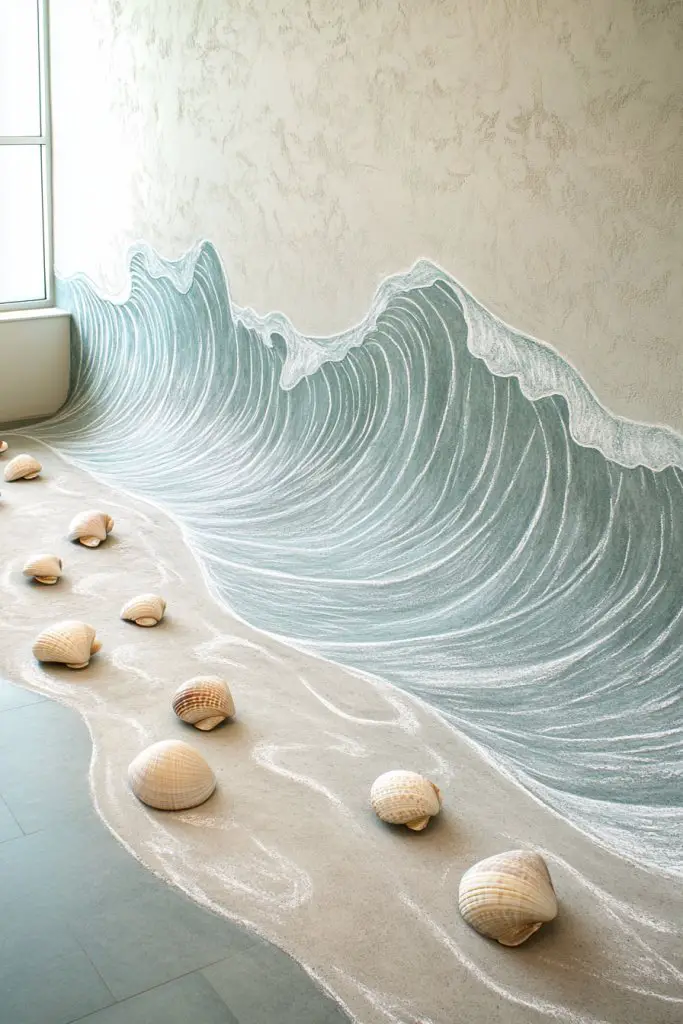
Envision a serene seaside landscape—rolling waves, sandy shores, and scattered shells—all rendered with soft, flowing chalk strokes. The waves ripple across the wall, with shades of blue and white blending seamlessly. Sand-colored textures can be added to the lower part of the mural, and tiny shells or starfish can be sketched in for detail. The chalk’s matte finish mimics the natural, muted tones of a coastal environment.
Adjust the scene to suit your space—more abstract waves for a modern look or detailed shoreline with shells and sea creatures for realism. Incorporate elements like a lighthouse or sailboats for a nautical theme. Use pastel shades for a soft, dreamy feel or bold colors for a lively, energetic vibe. It works well in bathrooms, bedrooms, or even outdoor patios.
Start with a clean wall free of dirt or grease. Lightly sketch the waves and shoreline with a pencil. Use chalk or chalk markers to fill in the colors, blending shades of blue, tan, and white for realistic water and sand effects. Add details like shells or starfish with fine chalk lines. For more permanence, seal with a matte fixative spray. Regularly update or enhance the scene with new details or seasonal elements.
Add personal touches like a favorite quote about the sea or reminders of past beach trips. Incorporate textured materials like fabric or paper shells nearby for a tactile experience. Use different shades and blending techniques to create movement and depth. Hang a small net or driftwood piece on the wall for a three-dimensional effect. It becomes a calming retreat in your home.
A coastal scene immediately transports you to tranquility, reducing stress and promoting relaxation. Crafting it yourself adds a sense of achievement and personal connection. It’s a versatile design that complements various decor styles, from coastal to contemporary. Dive into this project and bring the ocean’s calm into your everyday life.
8. Playful Doodle Wall for Kids’ Rooms
Kids’ rooms often turn into chaos zones filled with clutter and uninspired decor. You crave a space that sparks creativity and keeps them entertained without constant supervision. A doodle wall can be their canvas for imagination, turning blank space into a playground of ideas. Plus, it’s easy to refresh and update over time.
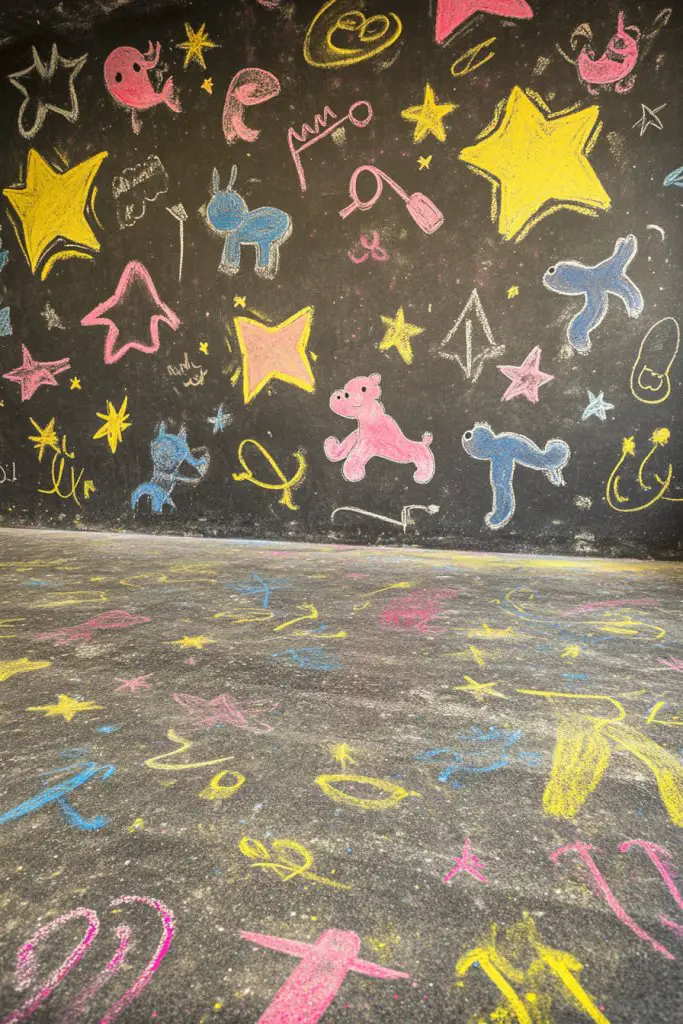
Picture a wall covered in lively, whimsical doodles—characters, animals, shapes, and patterns in bright chalk colors. The designs are spontaneous and playful, with bold outlines and soft shading. Kids can add their own drawings, turning the wall into a collaborative masterpiece. The chalk surface invites endless creativity and mess-free fun.
Create a dedicated doodle zone by sectioning off part of the wall or using a large chalkboard-style surface. Incorporate themed doodles—pirates, princesses, space—to match your child’s interests. Mix in educational elements like numbers or letters subtly within the doodles. You can also add small ledges or shelves nearby for storing chalk and erasers. The style adapts to any room size or theme.
Prepare the wall by ensuring a clean, smooth surface. Outline the doodle area with painter’s tape for clean edges. Use colorful chalk or chalk markers for different characters and patterns. Encourage your kids to sketch freely, or you can draw initial shapes to guide their creativity. Regularly erase and refresh sections to keep the wall lively. For durability, consider sealing with a clear matte spray.
Personalize by adding your child’s name or favorite themes within the doodles. Incorporate interactive elements like puzzles or mazes drawn directly on the wall. Use stencils for specific shapes or characters to keep the style consistent. Hang a small chalk holder or storage bin nearby for convenience. It’s a constantly evolving art space that grows with your kid.
A doodle wall nurtures your child’s imagination and artistic confidence. It makes their room uniquely theirs and encourages playful expression. Plus, it’s a fun, low-cost project you can do together. Watch their creativity blossom as they take ownership of their colorful, ever-changing masterpiece.
9. Modern Typography Wall with Inspirational Words
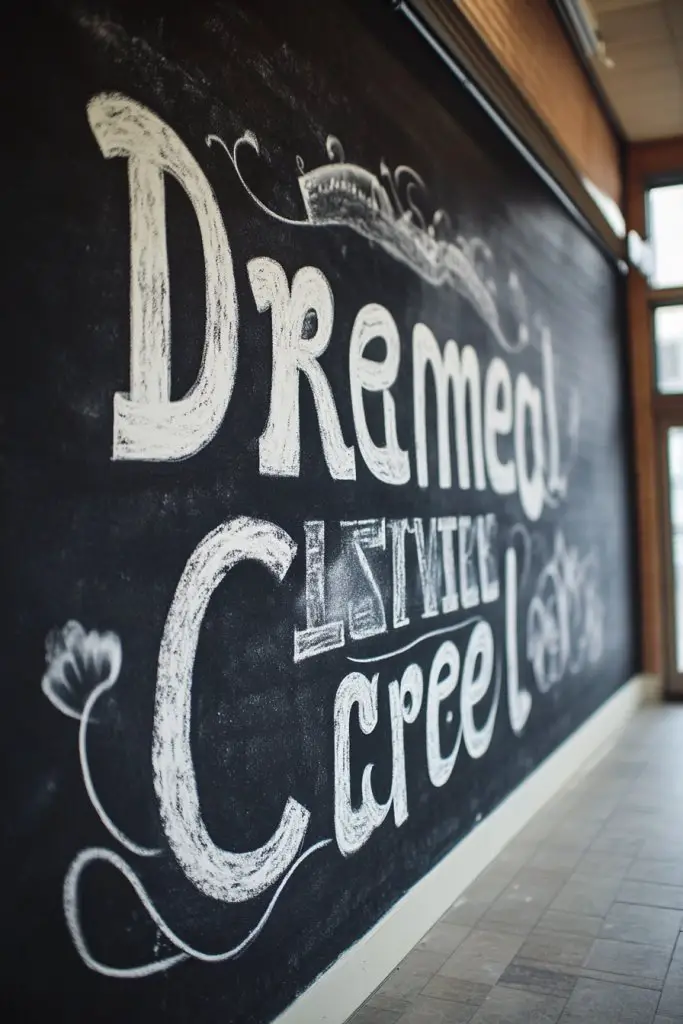
Walls filled with generic art can feel uninspiring and forgettable. You want a space that motivates and energizes, especially in high-traffic areas like hallways or home offices. Modern typography offers a sleek, impactful way to communicate your values or daily affirmations. But creating your own stylish text can seem intimidating—that’s where chalk comes in.
Visualize a wall dominated by bold, artistic words or phrases—’Dream,’ ‘Create,’ ‘Achieve’—written in stylish, creative fonts. The chalk’s matte finish lends a contemporary, artsy vibe, while different colors emphasize key words. The textured strokes add depth and personality, making the words stand out. It’s like a daily mantra that visually energizes your space.
Mix fonts—bold, cursive, block—for visual interest, or keep it consistent for a minimalist look. Use color to highlight different themes or moods. Incorporate decorative borders, arrows, or symbols to enhance the message. Change the phrases seasonally or to match your mood—motivational quotes, affirmations, or fun sayings. It suits both large feature walls and small nooks.
Start by planning your words and layout—sketch lightly with pencil or tape outlines. Use chalk or chalk markers for clean, sharp lettering. Play with different font styles and sizes, adjusting as you go. Add decorative elements like underlines or flourishes for extra flair. Keep a damp cloth nearby for corrections and updates. Seal the design with a fixative spray if you want it permanent or semi-permanent.
Customize with your favorite quotes or personal mottos. Use bright or metallic chalks for emphasis and vibrancy. Add small doodles or icons that complement the message. Surround the words with geometric shapes or borders that match your decor. Regularly update the phrases to keep your space fresh and motivating.
A typography wall transforms a simple space into a source of inspiration and focus. It’s a creative way to reinforce positive habits and mindset. Plus, designing your own lettering builds confidence in your artistic skills. Ready to make your walls talk? Grab some chalk and start lettering!
10. Artistic Chalk Floral Frame for Photos
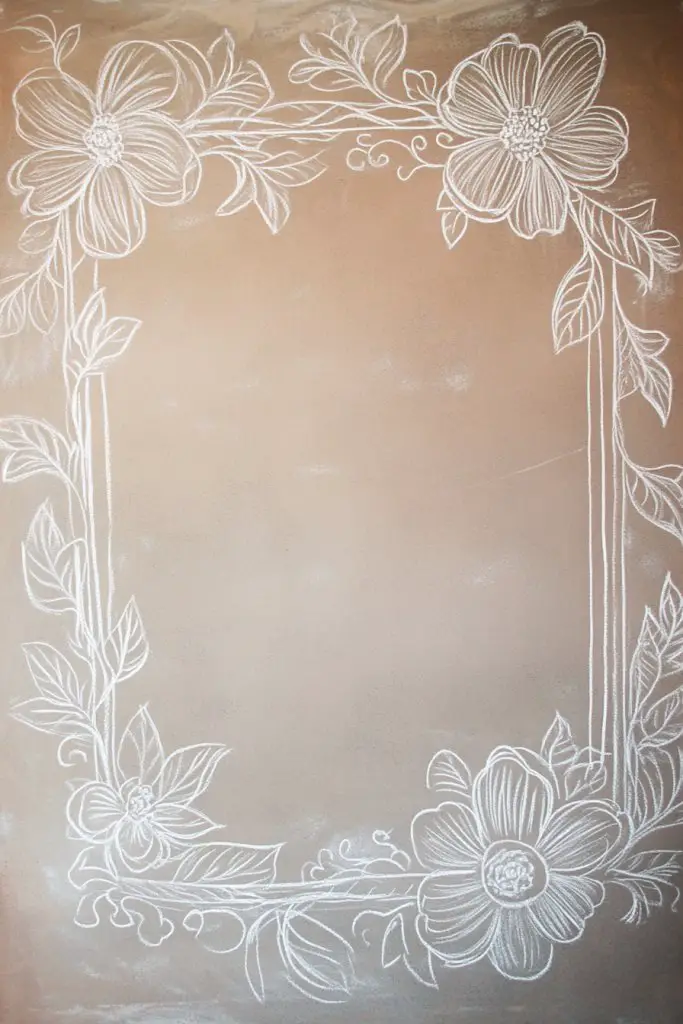
Displaying photos or artwork in a creative way can be challenging—frames can be costly or clash with decor. You want a unique, personalized way to highlight your favorite memories without the fuss of buying or hanging frames. An artistic chalk floral border can beautifully frame your photos directly on the wall.
Picture a delicate, hand-drawn floral frame encircling a cherished photo—roses, vines, or simple leaves in soft chalk shades. The chalk’s textured appearance adds a handcrafted, vintage feel. You can leave space for a quote or caption inside the border, making each display personal and artistic. The design enhances the photo without overpowering it.
Choose different floral motifs—bold, abstract flowers or intricate, detailed designs—based on your style. Use colors that match your decor or the photo’s theme. Combine multiple frames into a gallery wall for variety. You can also adapt the size and complexity for different photos, from small keepsakes to large family portraits.
Start by lightly sketching the floral border around your photo area with a pencil. Use chalk or chalk markers to draw the flowers, leaves, or vines, layering for depth. For a polished look, work from the center outward or use stencils for precise shapes. Erase any guide lines and add details or shading. Seal with a fixative spray to preserve the design. Attach your photo with washi tape or clips nearby.
Add personalized touches like initials, dates, or small doodles within the floral design. Incorporate colors that match your decor or the mood of the photo. Use metallic or pastel chalks for subtle accents. Surround the frame with decorative elements like banners or quotes that complement the photo’s story. It’s a charming, custom display that feels special.
Creating custom floral frames elevates your photo displays into art. It adds a personal, handcrafted touch that’s both stylish and meaningful. This project boosts your confidence in drawing and design, encouraging more DIY decor ideas. Ready to turn your walls into a gallery of heartfelt memories? Grab some chalk and start framing!
11. Cityscape Silhouette at Sunset
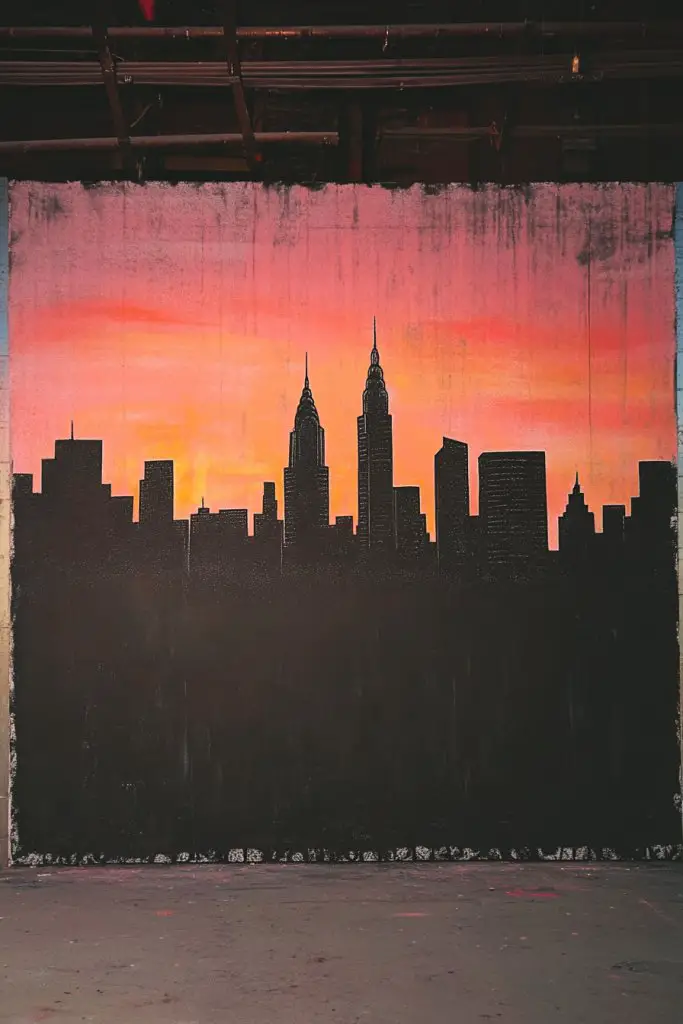
Urban landscapes can feel distant or uninspired in your home decor, especially if you long for the energy of city life. You want a way to bring the vibrancy and silhouette of a city skyline into your space. A sunset cityscape offers a dramatic, stylish focal point that captures the spirit of an urban sunset.
Imagine a bold silhouette of skyscrapers and city landmarks set against a fiery chalk sunset—rich oranges, reds, and purples blending seamlessly. The black city outline pops vividly, creating a striking contrast. Soft shading around the skyline adds depth, making it feel like the city is glowing in the evening light. It’s a captivating scene that evokes both energy and tranquility.
Choose a city that resonates with you, from iconic skylines to local neighborhoods. Simplify the silhouette for a minimalist look or add detailed landmarks for realism. Adjust the color palette to match your mood—warm, cool, or even monochrome for sophistication. This mural fits well in living rooms, offices, or bedrooms, giving an instant urban vibe.
Sketch the skyline outline lightly with pencil on your wall, ensuring correct proportions. Fill in with black chalk or chalk markers, emphasizing the tallest buildings and iconic features. Add a gradient sunset background using soft blending of chalk colors—orange, pink, purple—around the silhouette. For sharp edges, use painter’s tape to define the skyline. To finish, seal with a fixative for longevity. Regular touch-ups maintain vibrancy.
Personalize by highlighting favorite buildings or landmarks with subtle details or accent colors. Incorporate nearby decorative elements like string lights or framed photos of your city adventures. Add a quote about city life or dreams of travel beneath the scene. Use metallic or pastel chalks for subtle highlights. It’s a captivating feature that sparks conversations and memories.
A cityscape mural adds urban charm and a touch of adventure to your home. It’s a DIY project that combines artistry with personal storytelling. Seeing your favorite city come alive on your wall boosts confidence in your creative skills. Turn your space into an inspiring, cosmopolitan retreat—start sketching your skyline today!
12. Fantasy Forest with Mythical Creatures
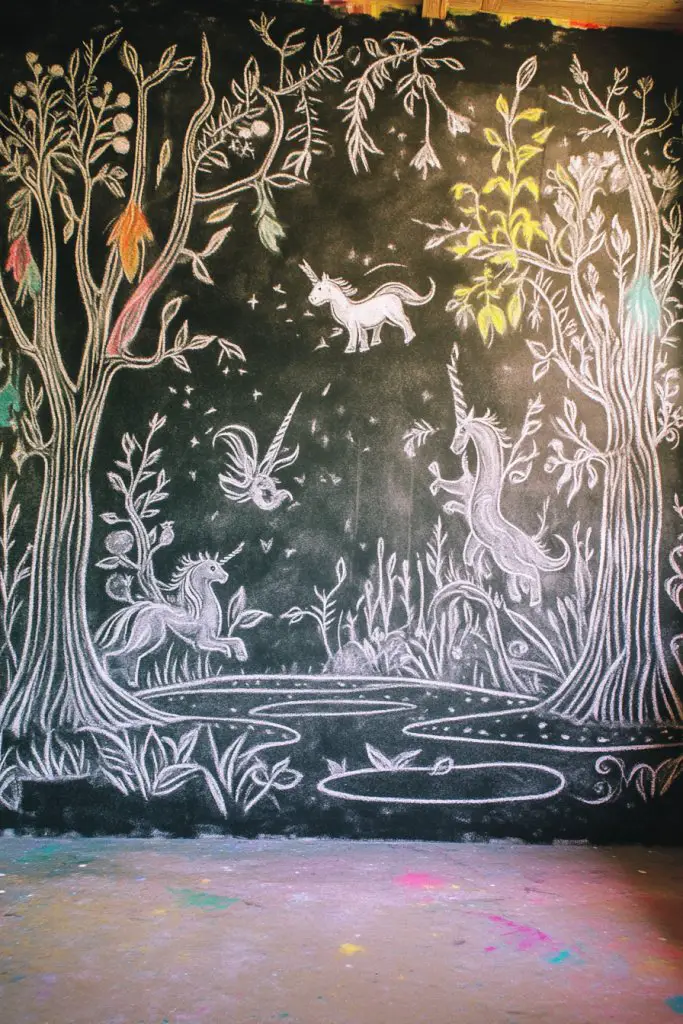
Children and dreamers alike crave a magical space that sparks imagination and transports them to enchanted worlds. Ordinary decor won’t do—what you need is a fantasy forest filled with mythical creatures. But creating a detailed enchanted scene can seem intimidating. Chalk murals make it simple, fun, and adjustable.
Picture a mystical woodland scene with towering trees, winding paths, and hidden fairy doors. Mythical creatures like unicorns, dragons, and fairies peek out from behind branches or hover in the air. The chalk’s soft textures allow shading and layering, giving depth to the scene. Glowing accents can be added with metallic or pastel chalks, making the scene come alive.
Choose a color palette—pastel for a gentle, whimsical effect or bold for a more dramatic fantasy vibe. The scene can stretch across a large wall or be concentrated in a corner for a secret garden effect. Add details like mushroom houses or tiny fairy lights nearby for extra magic. Seasonal updates could include snow or blooming flowers, depending on your fantasy theme.
Sketch your enchanted forest lightly with a pencil, planning the placement of trees and creatures. Use chalk or chalk markers for vibrant coloring and shading—layer different shades for depth and glow effects. Detail the mythical creatures with fine lines and highlights. Incorporate textured elements like faux moss or glitter for added magic. Seal with a fixative spray to preserve your fantasy realm. Regular touch-ups keep it enchanting.
Add personal touches like your child’s favorite fantasy character or a custom fairy name. Use metallic or pastel chalks for shimmering effects. Incorporate small decorative accessories like tiny lanterns or fairy figurines nearby for a three-dimensional effect. Write inspirational or magical quotes within the scene to deepen the fantasy vibe. It becomes a whimsical escape that fosters wonder.
A fantasy forest mural unlocks your imagination and creates a magical retreat at home. It’s a project that’s fun to design and easy to update as your fantasy evolves. Seeing your own enchanted scene boosts confidence in your artistic and creative abilities. Turn your wall into a storybook of magic—start drawing your fantasy today!
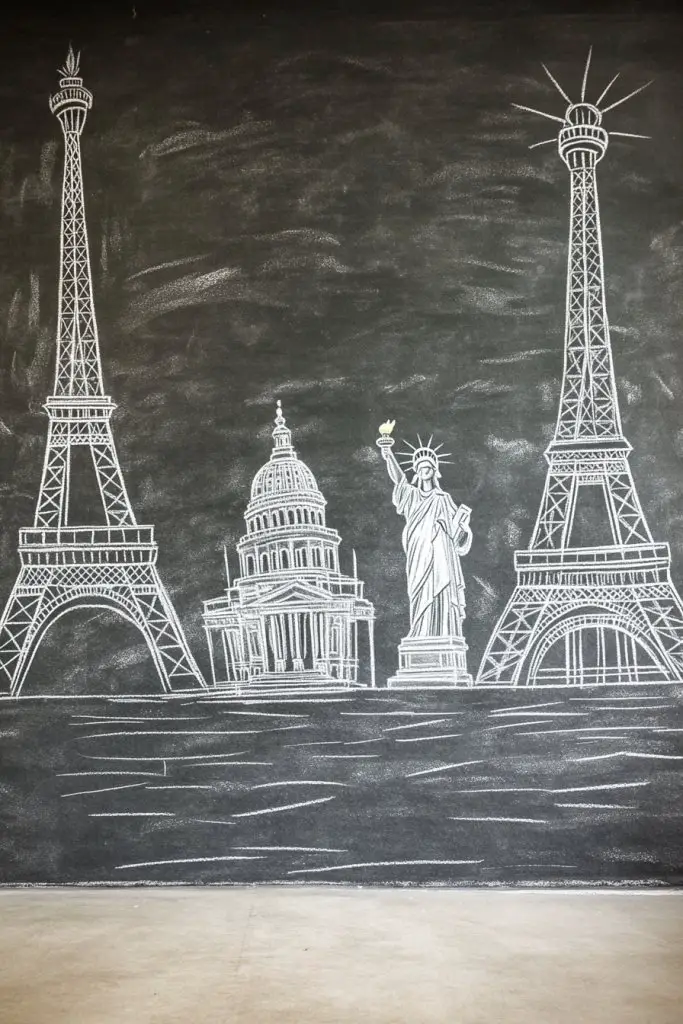
13. Chalk Art of Famous Landmarks
Travel dreams often clash with reality, leaving you longing for a piece of iconic places right at home. You want a decor piece that’s inspiring, educational, and stylish all at once. But buying replicas or posters may not satisfy your creative itch. Chalk murals of famous landmarks offer a personal, artistic touch that’s both impressive and customizable.
Imagine a detailed outline of the Eiffel Tower, Statue of Liberty, or Big Ben drawn with chalk—precise lines capturing their iconic shapes. Use shading to add depth and texture, making them pop against the background. The chalk’s matte finish lends a vintage or sketch-like feel, emphasizing artistry. Small details like flags or city skylines can be added for context.
Choose a single landmark for a focused effect or combine several for a travel collage. Use monochrome shades for a classic look or add splashes of color for vibrancy. Create a cityscape scene or a landmark silhouette for a bold statement wall. It adapts well in living rooms, offices, or even hallways that need a touch of global inspiration.
Start with a light sketch of your chosen landmark, ensuring correct proportions. Use chalk markers to fill in details, emphasizing key features like arches or spires. Add shading and texture with softer chalks or blending tools. Incorporate background elements like clouds or cityscape lines for context. Seal your work with a fixative spray to prevent smudging. Revisit and refine over time for more detail.
Personalize by adding your favorite quotes about travel or adventure. Use colors that match the mood—romantic pastels or bold primaries. Incorporate small decorative accessories like mini flags or travel-themed charms nearby. Write your own travel stories or memories around the landmarks for added meaning. It’s a stylish tribute to wanderlust.
A mural of famous landmarks celebrates your love for travel and culture. It inspires future adventures while making your space uniquely yours. Creating it yourself boosts artistic confidence and personal pride. It’s a timeless, educational decor piece that sparks curiosity and exploration—start sketching your favorite landmarks today!
14. Abstract Ocean Waves in Cool Tones

Sometimes, a space needs a calming vibe that transports you to serene places without leaving home. Ocean-inspired decor can do just that—minus the sand and salt! But realistic beach scenes can be complicated and cluttered. Abstract ocean waves in cool tones offer a tranquil, stylish alternative that’s easy to create.
Imagine swirling, flowing lines representing ocean waves, painted in shades of blue, aqua, and teal. The chalk’s soft textures allow you to blend colors, creating a sense of movement and depth. The abstract shapes evoke calmness and fluidity, making your wall look like a peaceful seascape. Soft highlights and shadows add dimension, inviting viewers to relax.
Choose a monochrome palette for a minimalist look or incorporate multiple shades for richness. The waves can be large and sweeping or small and gentle, depending on your space. Add subtle hints of white to simulate foam or highlights. It pairs well with coastal, modern, or Scandinavian styles and can suit bedrooms, living rooms, or bathrooms.
Sketch the wave shapes lightly with a pencil, focusing on flow and rhythm. Fill in with chalk or chalk markers, blending colors for a watercolor effect. Use curved lines and soft shading to mimic movement. Layer different shades for depth, working from light to dark. Keep a damp cloth nearby for corrections. Seal with a fixative to prevent smudging and preserve the soft, flowing look.
Add tiny white highlights or metallic accents to mimic foam or sunlight reflection. Incorporate shells, driftwood, or other coastal decor nearby to enhance the theme. Use different chalk textures to create variety—smooth blends, stippling, or sharp lines. Write calming quotes or affirmations related to peace and serenity. It’s a gentle, restorative addition to any room.
Abstract ocean waves evoke calm and mindfulness, perfect for relaxing spaces. Crafting this mural boosts your confidence in blending colors and creating movement. It’s a versatile, timeless design that can evolve with your style. Transform your wall into a peaceful retreat—start drawing your waves today!
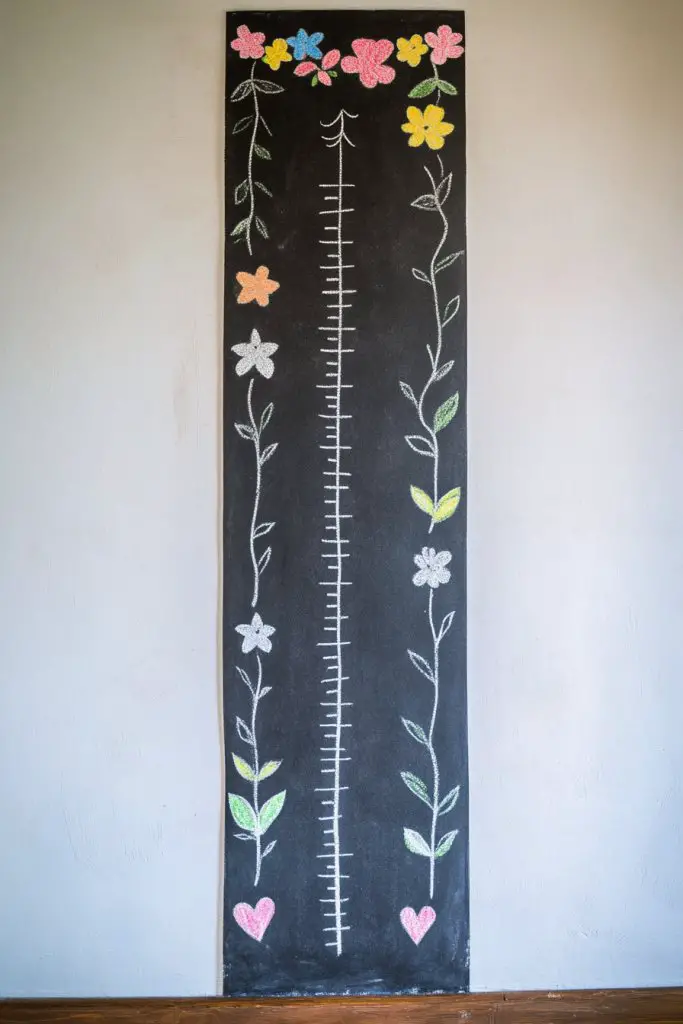
15. Inspirational Growth Chart with Nature Motifs
Kids grow so fast, and it’s tough to keep track of their height milestones while also decorating their space. You want a functional, inspiring piece that celebrates growth and nature’s beauty. A growth chart with nature motifs combines practicality with artistry, making it a lovely keepsake.
Picture a tall, whimsical tree with branches reaching upward, adorned with leaves, flowers, and playful animals. The chalk’s versatility lets you add shading and details, giving the chart depth and charm. Markers for height can be integrated into the design, like hanging apples or flowers, blending seamlessly into the scene. It’s both a measuring tool and a piece of art.
Design the chart with different themes—garden, forest, or jungle—to suit your child’s interests. Use bright, cheerful colors for a lively look or keep it monochrome for a subtle aesthetic. Add personalized details like your child’s name or favorite animals. The chart can be a standalone feature or part of a larger mural, adapting easily to different room sizes.
Begin by sketching the tree and motifs with light pencil lines. Use chalk or chalk markers to fill in colors, shading leaves and animals for realism. Mark height levels with small symbols or icons embedded into the design—like flowers or birds. Regularly update the chart as your child grows, erasing and re-drawing the height markers. Seal with a fixative to preserve the artwork.
Add your child’s name or milestones with decorative lettering. Incorporate personal touches like favorite animals, or themes from books or TV shows. Use glow-in-the-dark chalk for a fun nighttime effect. Surround the chart with decorative elements like banners or frames for a finished look. It’s an evolving piece that celebrates growth and personality.
A growth chart with nature motifs makes tracking milestones fun and artistic. It creates a lasting memory of childhood while enhancing decor. Building it yourself fosters a sense of achievement and personal connection. Ready to watch your child grow and thrive? Start sketching your nature-inspired chart today!
16. Artistic Chalk Portrait Silhouettes

Personalized decor often feels too generic or expensive, leaving you searching for a meaningful statement piece. You want a way to honor loved ones or icons uniquely, without breaking the bank. Chalk silhouettes of portraits are simple, elegant, and deeply personal, perfect for making your wall truly yours.
Visualize a minimalist, black chalk silhouette of a loved one’s profile or a favorite icon—clean lines, smooth contours, and subtle shading. The simplicity emphasizes emotion and personality without clutter. The matte chalk texture lends a timeless, artistic vibe, making the silhouette stand out against the wall. It’s a striking tribute that resonates deeply.
Create a series of silhouettes—family members, pets, or icons—to form a gallery wall. Use different sizes or shapes to add visual variety. Incorporate decorative elements like borders or soft backgrounds for contrast. For a modern aesthetic, keep it monochrome; for a playful vibe, add pops of color or metallic accents. It adapts well in hallways, bedrooms, or living rooms.
Start with a clear photo or image of your subject. Lightly sketch the outline on your wall with a pencil, focusing on key features. Fill in with chalk or chalk markers, emphasizing the profile or pose. Use blending techniques for shading or depth if desired. Keep a damp cloth nearby for corrections. Seal with a fixative spray for durability. This project is about capturing personality with simplicity.
Add personal details like jewelry, glasses, or distinctive features with fine chalk lines. Incorporate a quote or meaningful phrase beneath the silhouette. Use metallic or pastel chalks for highlights or accents. Surround with decorative elements like stars or floral motifs for added elegance. It’s a heartfelt, artistic tribute in your space.
A chalk portrait silhouette is a timeless way to celebrate loved ones or icons. It’s a project that’s doable for all skill levels and results in a meaningful piece. Seeing your own artwork on display boosts confidence and pride. Turn your wall into a gallery of memories—start drawing your silhouettes today!
17. Playful Animal Tracks and Footprints

Nurseries and kids’ play areas often lack fun, whimsical details that inspire curiosity and movement. You want a decor idea that’s adorable, easy to create, and sparks imagination. Animal tracks and footprints are perfect—cute, playful, and simple enough for DIY projects. But how do you make it look natural and charming?
Imagine a trail of footprints crossing the wall—paw prints, bird tracks, or tiny animal footprints—scattered playfully across the space. The chalk’s texture allows you to mimic the look of actual tracks, with soft shading and irregular shapes. The trail could lead to a ‘den’ or ‘forest’ corner, creating a story of animals exploring your home. It’s a delightful scene that invites kids to imagine adventures.
Mix different animal tracks—cats, dogs, rabbits, birds—and vary their sizes for realism. Create a trail that winds around furniture or leads to a designated play zone. Use earthy or bright colors depending on your theme. Add tiny details like grass or leaves nearby for extra charm. It’s suitable for nurseries, playrooms, or outdoor patios.
Sketch the trail lightly with pencil, deciding the path and animal types. Use chalk or chalk markers to draw the footprints, varying shape and size for realism. Add shading or texture to mimic dirt or mud. For a more permanent look, seal with a fixative spray. Regular touch-ups keep the trail fresh after heavy play. Incorporate small decor items like plush animals or toys nearby.
Personalize the trail with your child’s favorite animals or characters. Add their names or stories along the trail. Use different chalk shades to create a sense of movement and depth. Nearby, hang themed banners or place plush toys to extend the scene. It becomes a playful, interactive feature that grows with your child’s imagination.
Animal footprints bring a sense of fun and storytelling to any space. Creating them yourself boosts your confidence in DIY decor and lets your child’s imagination run wild. It’s a simple project with a big impact—transform your wall into a whimsical animal adventure. Ready to leave your own trail? Grab some chalk and start exploring!
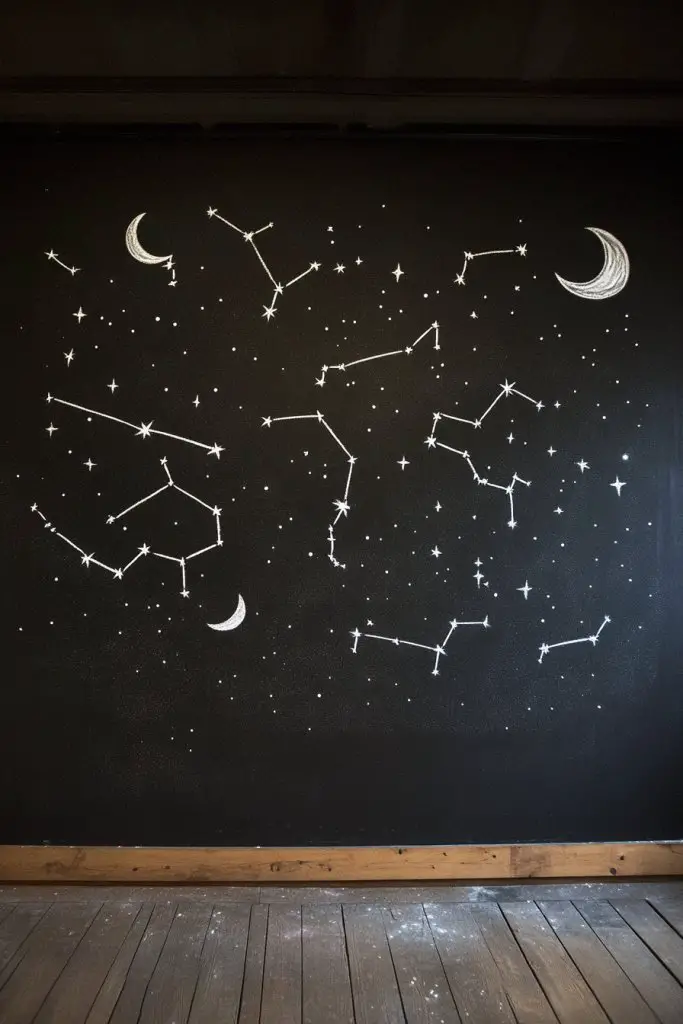
18. Starry Night with Constellations and Moons
Many people find bedtime routines stressful or uninspiring, longing for a calming environment that promotes sleep and dreams. You want a wall that feels magical and soothing, not overstimulating. A starry night scene with moons and constellations can create a tranquil, dreamy atmosphere that’s perfect for winding down.
Visualize a dark sky filled with twinkling stars, glowing moons, and intricate constellations—all drawn with chalk in soft, shimmering shades. The chalk’s matte texture and blending ability allow you to create realistic night effects, with subtle gradients and starbursts. The scene evokes a peaceful, magical night that invites relaxation and sleep. It’s like having a personal galaxy in your own home.
Choose a full mural or a smaller accent area—like above a bed or in a reading nook. Vary the size and brightness of stars, and include personal favorite constellations or zodiac signs. Use metallic or pastel chalks for a shimmering effect. Add soft glow-in-the-dark elements for extra magic at night. This design works well in bedrooms, nurseries, or meditation spaces.
Sketch the night sky lightly with a pencil, planning the placement of moons and constellations. Use chalk or chalk markers to add stars of various sizes, blending softly for glow effects. Draw the moon in phases or as a full circle, shading gently to add depth. Use stencils or guides for accurate constellation patterns. Seal with a fixative spray to preserve the scene and enhance longevity. Regular touch-ups keep the magic alive.
Personalize by adding your child’s zodiac sign or favorite celestial symbols. Use glow-in-the-dark chalk for stars and moons to create a luminous night scene. Incorporate small decorative elements like fairy lights or soft textiles nearby. Write calming or inspiring quotes about dreams or the night. It transforms bedtime into a magical journey.
A starry night mural fosters peaceful sleep and inspires wonder about the universe. Crafting it yourself is a rewarding project that enhances your artistic confidence. It’s a timeless, enchanting feature that creates a calming environment. Ready to bring the cosmos into your home? Start sketching your night sky tonight!
Conclusion
From intricate designs to simple, bold statements, these chalk mural ideas showcase the endless possibilities for transforming your walls into captivating art spaces. Don’t hesitate to try these creative concepts in your own home and make your walls a reflection of your personality. Embrace your artistic side and turn every wall into a beautiful, inspiring masterpiece!