There’s something truly captivating about the charm of antique mirrors, especially when given a fresh new look with chalk paint. This popular technique breathes new life into vintage pieces, making them feel both timeless and trendy at the same time. Chalk painting allows for a customized finish that can range from shabby chic to modern elegance, appealing to a wide range of decorating styles.
In this article, you’ll find a variety of creative ideas to update your antique mirror frames using chalk paint. Whether you prefer subtle distressed finishes or bold, colorful transformations, these ideas will inspire you to personalize your space and showcase your unique style. Get ready to turn ordinary mirrors into stunning focal points that reflect your personality and creativity!
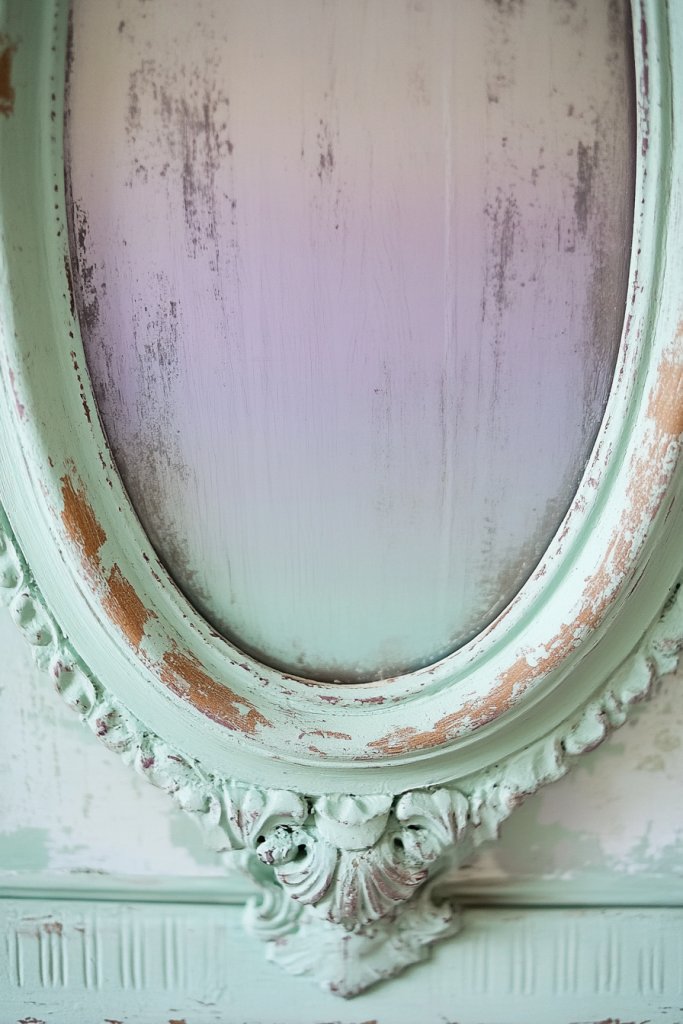
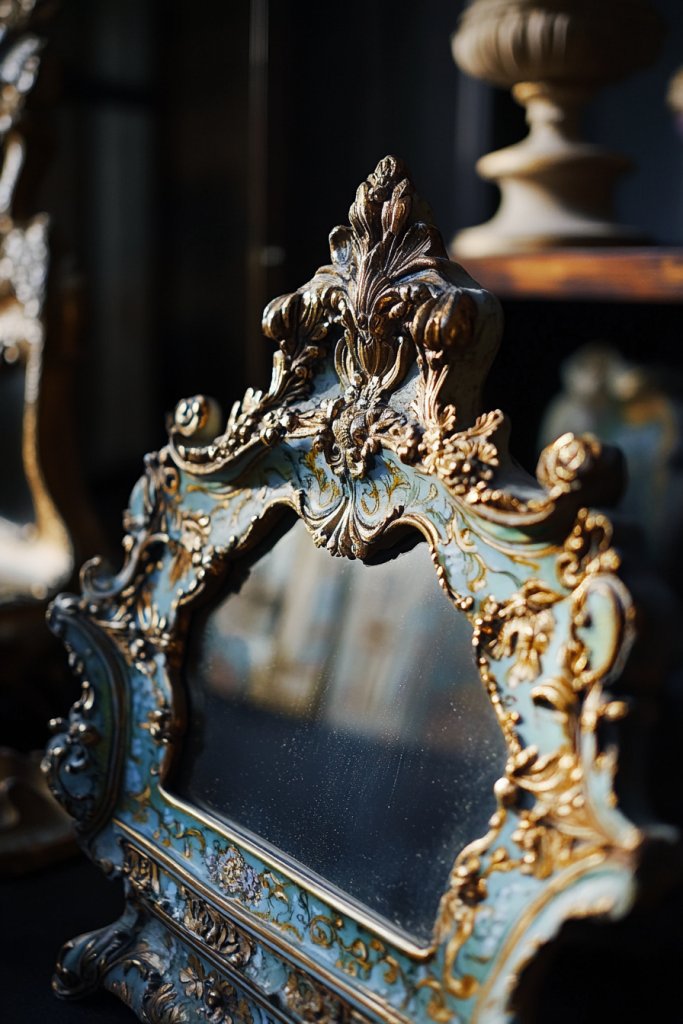
1. Vintage Charm with Soft Pastel Chalk Paint for a Romantic Touch
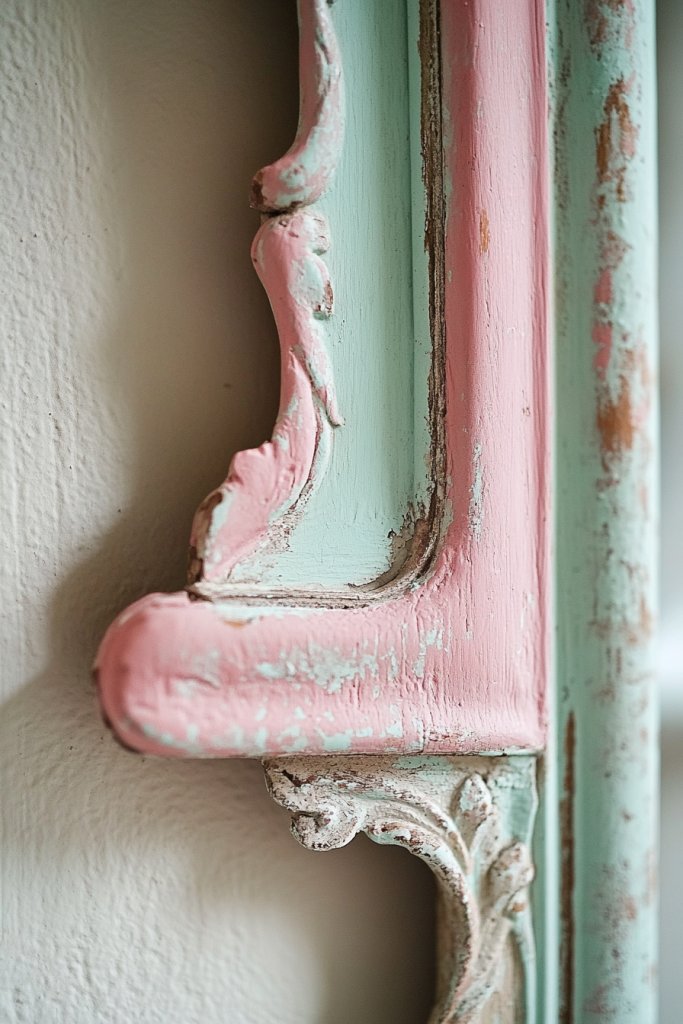
Ever wish your space felt more romantic and timeless without diving into a full overhaul? Vintage charm with soft pastel chalk paint offers a simple way to evoke nostalgia and elegance. Many crave that gentle, dreamy vibe that makes a room feel cozy and inviting. But finding easy, affordable ways to achieve this look can be tricky.
Imagine a delicate blush pink frame softly distressed, with subtle hints of mint green peeking through worn edges. The matte finish gives it a velvety appearance, catching the light just right. Surround this with plush textiles like a silky throw pillow or a soft cream curtain to amplify the gentle ambiance. The overall effect is a charming, romantic nook that feels like it belongs in a vintage romance novel.
For a more subtle touch, opt for pastel shades like lavender or baby blue. Change the look seasonally by swapping in warmer tones or deeper hues. If you prefer a more shabby chic vibe, add a light crackle finish or slightly uneven distressing. Smaller frames work well in cozy corners, while larger mirrors can anchor a bedroom wall. Play with color intensity to match your decor style.
Start with high-quality chalk paint in your chosen pastel shade. Lightly sand the edges for a distressed effect, exposing some of the underlying wood or primer. Use a soft brush or sponge to apply the paint in thin coats, building up the color gradually. For a romantic touch, add a light glaze or wax to deepen the aged look. Finish with sealing spray to protect your work from everyday wear. If you’re new to chalk painting, practice on a scrap piece first.
Add delicate hand-painted floral motifs or subtle gold accents to elevate the antique feel. Incorporate soft textiles, like a vintage-inspired lace trim or a velvet ribbon, around the frame. Personalize by adding small charms or vintage keys tied with ribbon at the top corners. These little touches make your mirror uniquely yours and amplify its romantic vibe.
This soft pastel vintage approach is perfect for creating a dreamy retreat at home. It blends effortlessly with shabby chic or French country styles, giving you flexibility in decorating. Don’t be afraid to experiment with colors and distressing techniques—your unique touch is what makes it special. Ready to add a romantic, vintage charm to your space? Go ahead, and let your creativity shine.
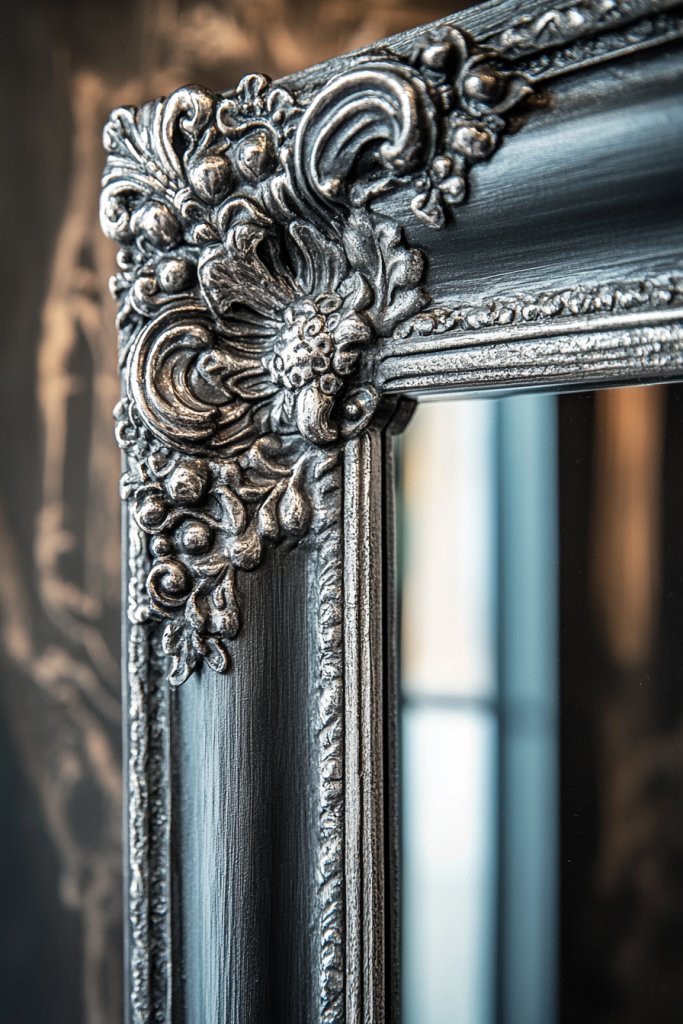
2. Matte Black Finish for Modern Elegance and Contrast
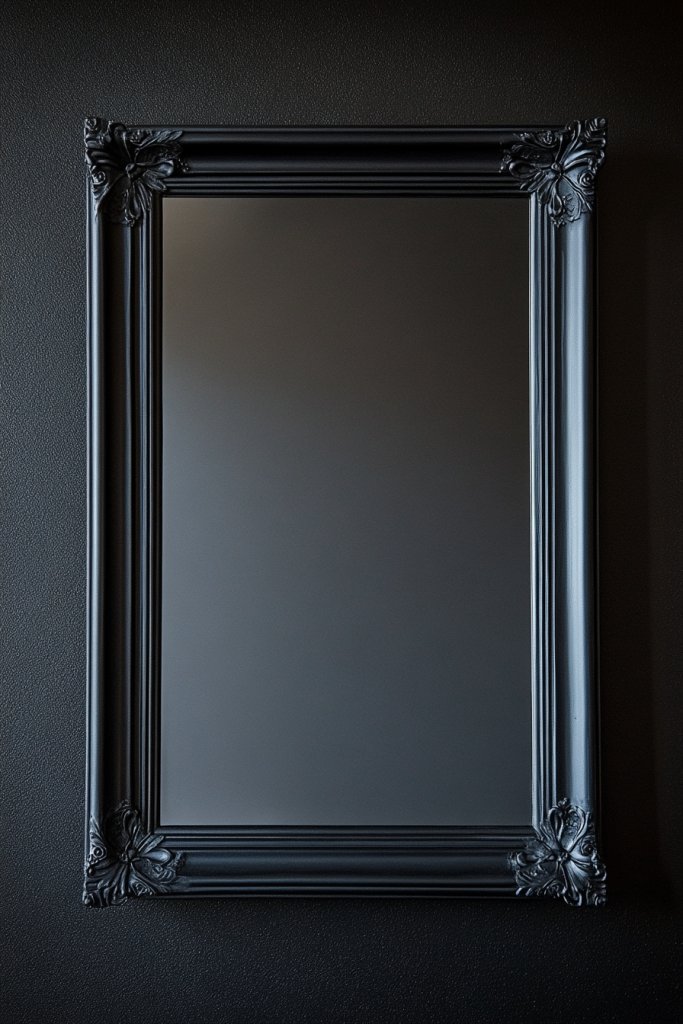
Want to give your antique mirror a fresh, contemporary twist that commands attention? Matte black chalk paint offers a sleek, modern look that instantly elevates any piece. It’s perfect for those who love minimalist, edgy decor but still want a touch of vintage charm. However, many hesitate because they fear it might be too harsh or overpowering.
Picture a bold matte black frame with crisp, clean lines standing out against a crisp white wall. The matte finish absorbs light, giving the mirror a sophisticated, understated glow. Pair it with metallic accents like brushed gold or chrome for added visual interest. Surround it with simple, textured fabrics such as linen or wool to maintain a modern aesthetic. The result is a striking centerpiece that combines vintage shape with a contemporary vibe.
Adjust the intensity by choosing different shades of black or charcoal for a softer look. For a more industrial feel, add metallic or distressed elements. If your space is small, use this bold contrast to make the mirror a focal point. For a warmer vibe, incorporate wood tones or warm-colored textiles nearby. It works well in monochrome schemes or as a statement piece in eclectic decor.
Begin with a high-quality chalk paint formulated for furniture or accessories to ensure a smooth, matte finish. Prepare the surface by cleaning and lightly sanding to remove any gloss or previous coatings. Apply the black chalk paint with a foam roller or brush in thin, even coats, allowing each to dry completely. To prevent brush marks, follow the grain and use light strokes. For a more even matte look, lightly sand between coats. Seal with a matte clear wax or topcoat for durability.
Add subtle metallic accents along the edges or in decorative carved areas for a luxe touch. Incorporate geometric or abstract stenciled patterns with a contrasting color for visual pop. Use textured fabrics or velvet backing to enhance its modern appeal. Personal touches like minimalist hooks or sleek shelf additions can turn it into a functional art piece.
A matte black finish on an antique mirror bridges classic shapes with modern sensibilities, making your space look fresh yet timeless. It’s a versatile choice that adapts to various decor styles, from industrial lofts to sleek apartments. Don’t shy away from experimenting with textures and accents—your space will thank you. Ready to make a bold statement? Matte black is your new best friend.
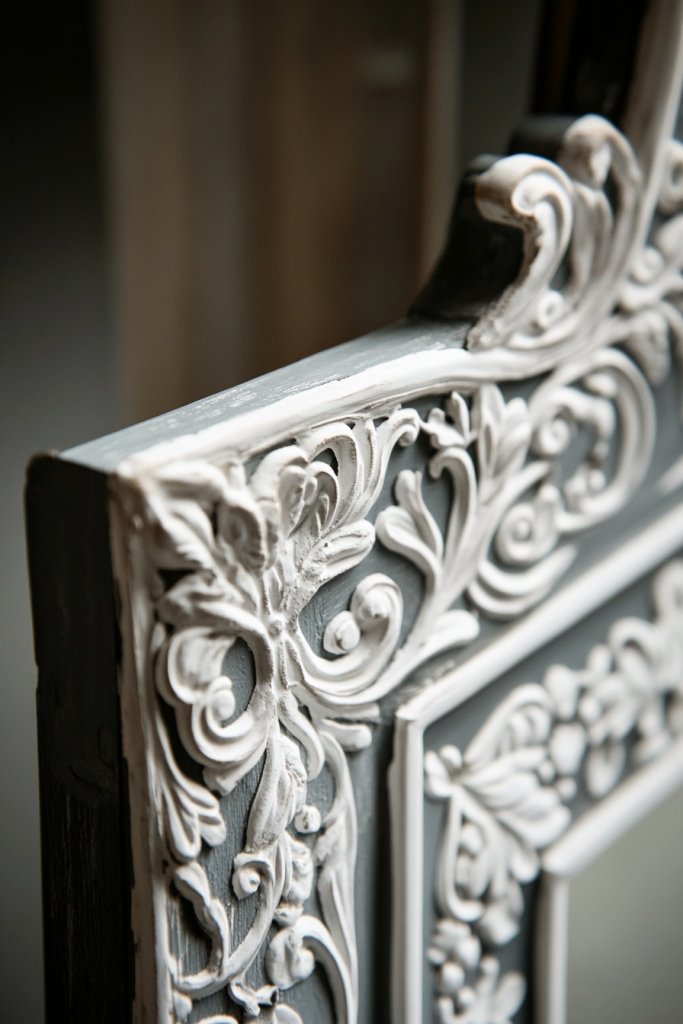
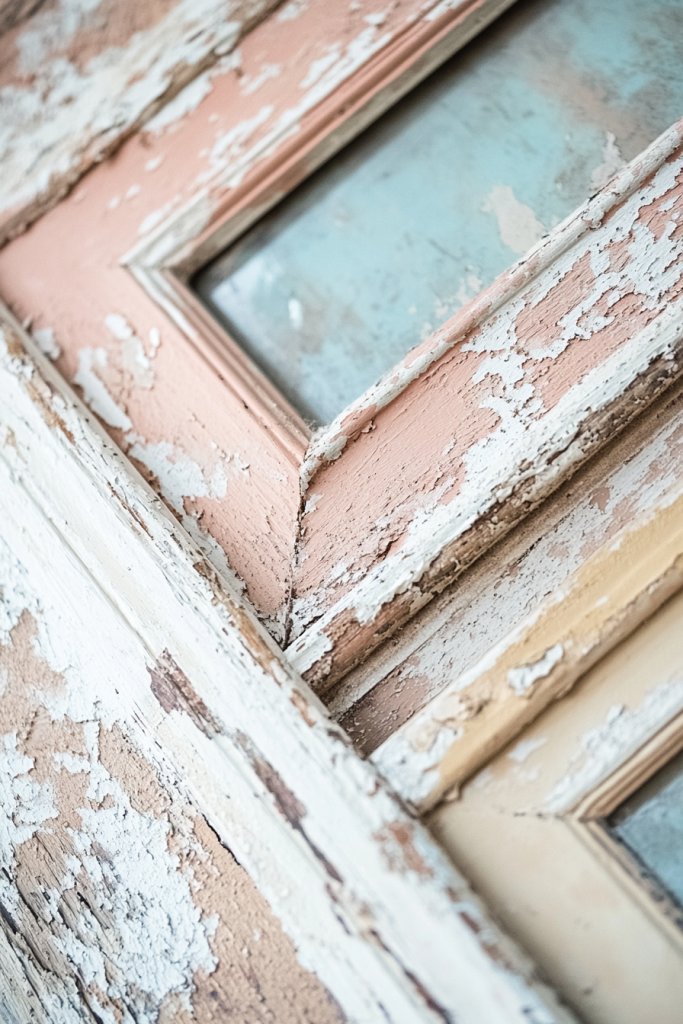
3. Distressed White with Rustic Charm for Shabby Chic Appeal
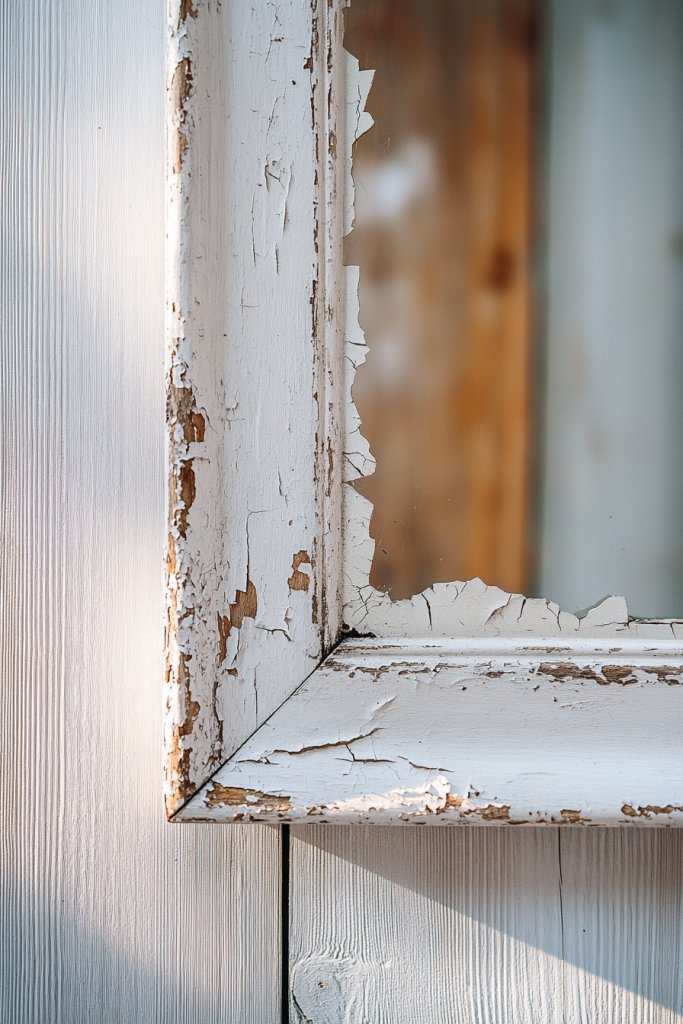
Looking to add a touch of rustic charm that feels both vintage and cozy? Distressed white chalk paint is a go-to for creating that perfect shabby chic look. It’s ideal for making an antique mirror feel warm, welcoming, and full of character. But many worry about achieving the right level of distressing without making it look uneven or cheap.
Visualize a white frame with areas gently worn away to reveal hints of the wood beneath, giving it a well-loved appearance. The soft, matte white surface contrasts beautifully with textured fabrics or soft rugs nearby. Think of a weathered cottage with layers of paint, each chip telling a story. The distressed finish adds depth and a layered, authentic feel that invites a second look.
Vary the distressing by using different tools like sandpaper, steel wool, or even a heat gun for crackling effects. For a more refined look, keep the distressing minimal, focusing on edges and corners. For a more rustic vibe, add a crackled or aged glaze to enhance the worn effect. You can also combine it with vintage-inspired hardware or fabric accents for a complete shabby chic aesthetic. The style adapts well for small or large frames depending on the intended space.
Start by applying a base coat of high-quality white chalk paint. Once dry, use coarse sandpaper or a scraping tool to gently remove paint from areas you want to look naturally worn. Focus on edges, corners, and spots where natural wear would occur. To deepen the distressed look, apply a dark wax or glaze in crevices, then wipe off excess to highlight details. Seal with a matte topcoat for protection. Practice on a scrap piece to perfect your technique.
Decorate the distressed frame with vintage-inspired hardware or small decorative charms glued into the worn areas. Incorporate a soft, neutral fabric backing or cushion behind the mirror to add texture. Personalize further with stenciled floral or scroll patterns in a contrasting light color. Embellishments like tiny pearls or beads can also add a subtle touch of elegance to the rustic charm.
Distressed white finishes are timeless and work beautifully in shabby chic or farmhouse interiors. They make your vintage piece look intentionally aged, not broken. Experimenting with distressing tools will help you find the perfect balance for your style. When finished, your mirror will radiate warmth, character, and a sense of history—ready to elevate any room.
4. Two-Tone Color Blocking for a Bold, Artistic Statement
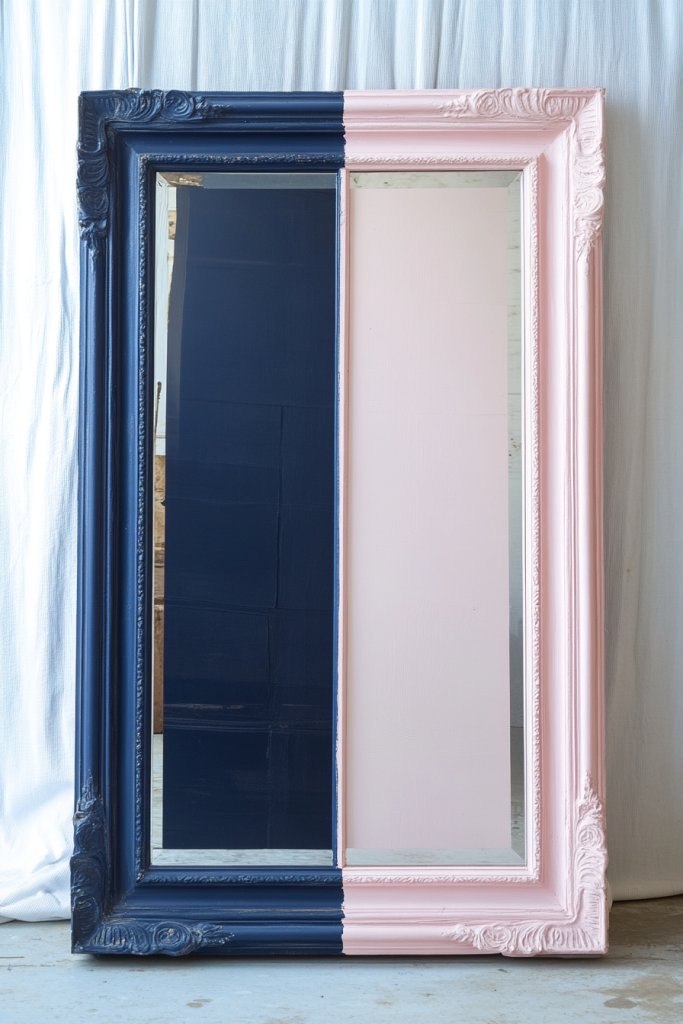
Craving something that screams modern art but still respects vintage lines? Two-tone color blocking offers a bold, creative way to make your antique mirror stand out. It’s perfect for those who want a unique piece that’s both eye-catching and personal. However, many worry about getting the lines straight or choosing the right color combo.
Picture a frame painted in deep navy on one half and crisp white on the other, with sharp, clean lines dividing the two colors. The contrast creates a striking visual impact, almost like a piece of modern art. Incorporate textured or matte finishes to add depth, and consider asymmetric or geometric patterns for extra flair. Set against a neutral wall, this piece becomes both functional and a piece of statement art.
Try contrasting colors like blush and charcoal or teal and beige to match different decor schemes. For a softer look, use pastel shades in a block pattern. In small spaces, a bold color block can define a corner or nook. For larger frames, multiple color blocks or even stripes add complexity. Mixing textures like matte, gloss, or satin can also enhance the visual effect.
Begin by sketching your design with painter’s tape to ensure crisp, straight lines. Use high-quality painter’s tape and multiple layers to prevent bleed-through. Paint each section with a smooth, even coat, allowing adequate drying time before removing tape. For clean edges, use a fine brush for touch-ups. Consider adding a clear matte or gloss topcoat to seal the paint and enhance durability. Patience with tape removal is key for professional-looking results.
Add metallic or contrasting trim along the division lines for extra detail. Incorporate small decorative elements like embedded beads or textured accents within the color blocks. Personalize by painting subtle patterns or initials in one section. Use decorative stickers or stencils to bring more artistic flair to the design, making it uniquely yours.
Bold color blocking transforms a simple antique mirror into an artistic centerpiece that reflects your personality. It’s a versatile technique that can be tailored to any decor style, from minimal to eclectic. Don’t fear imperfections—these add charm and authenticity. Ready to turn your vintage mirror into a modern masterpiece? Just tape, paint, and enjoy your creative journey.
5. Metallic Accents with Gold or Silver Leaf for Luxe Sophistication
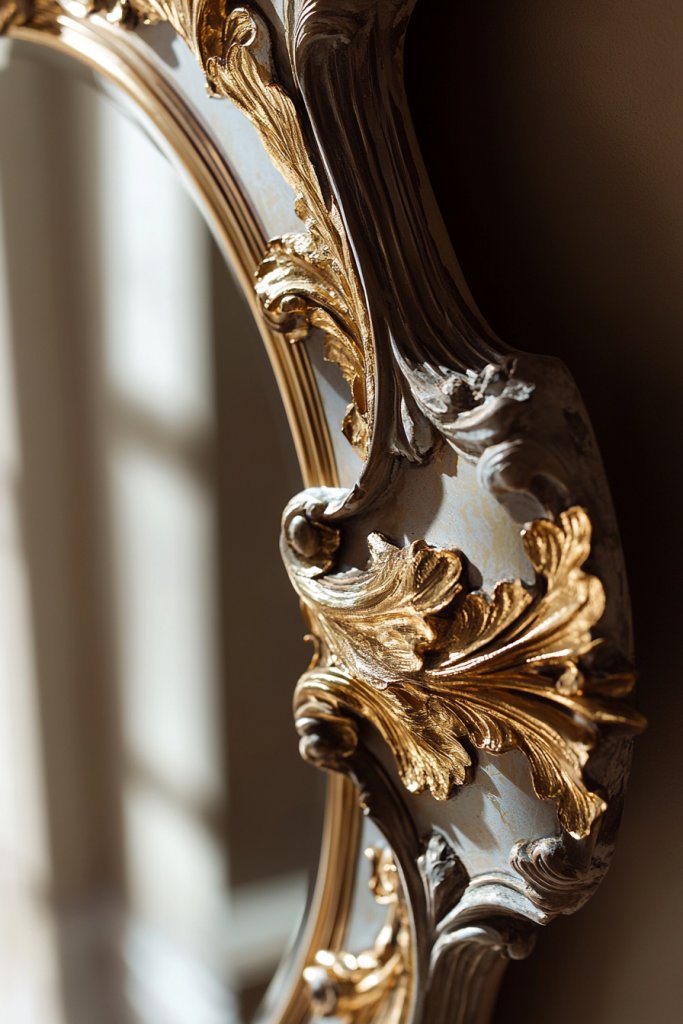
Looking to add a touch of glamour and luxury to your vintage mirror? Metallic accents with gold or silver leaf instantly elevate the piece, making it feel opulent. It’s a popular choice for those who love a bit of shimmer but want to keep the antique charm. Yet, the process can seem intimidating if you’ve never worked with leafing materials before.
Envision a frame with intricate carvings highlighted with gold leaf, catching the light and adding depth. The reflective metallic surface contrasts beautifully with matte paint or distressed finishes. Apply in small, deliberate patches for a subtle glow, or cover the entire frame for a dramatic effect. Pair this with plush textiles or velvet furniture for a truly luxurious vibe. The finished piece looks like a curated antique with a modern twist.
Use gold leaf for a classic, regal look, or opt for silver or champagne tones for a more modern feel. Combine with painted or distressed backgrounds for layered textures. For a less bold effect, apply metallic accents only on carved details or edges. Incorporate other luxe elements like crystal knobs or decorative hardware to amplify the opulence. This technique works well with both small and large frames.
Start by prepping your surface thoroughly—clean and sand if necessary. Use a high-quality adhesive specifically for leafing and carefully apply the gold or silver leaf with a soft brush or applicator. Press gently to ensure adherence, then seal with a clear topcoat to preserve the metallic finish. For a more aged look, lightly buff areas with darker wax or patina. Practice on a scrap before working on your main piece to master the technique.
Add decorative touches like painted patterns or monograms in metallic tones. Use metallic leaf to highlight specific carved features or motifs for a layered effect. Incorporate tiny beads or rhinestones into the design for extra glamour. Personalize the piece further by combining different metallics for a multi-tone luxe experience.
Metallic accents transform a vintage mirror into a statement piece that radiates sophistication. Gold and silver leafing are timeless techniques that work in many decor styles, from glam to eclectic. Once you see the shimmer, you’ll feel confident experimenting with other metallic effects. Ready to add that luxe touch? Gold or silver leafing makes it effortless—and stunning.
6. Ombre Effect for a Soft Gradient Transition
Ever wish your mirror could have a subtle, artistic flair without overwhelming the room? The ombre effect offers a gentle gradient transition that adds depth and sophistication. It’s perfect for creating a calm, flowing visual that complements both modern and vintage settings. But many wonder how to achieve a seamless blend without muddying the colors.
Imagine a frame that transitions softly from a deep navy at the top to a light sky blue at the bottom. The smooth gradient catches the eye and creates a feeling of movement and serenity. Use this technique with chalk paints in various shades, blending them carefully with a sponge or brush. The result is a piece that feels custom-made and artistically refined. Surround it with airy textiles or neutral walls to enhance the gradient’s calming effect.
Experiment with different color combinations like warm oranges to soft peaches or rich burgundy to blush pink. For a more dramatic look, use darker shades with more contrast; for subtlety, keep the transition very gradual. You can also layer multiple ombre effects within different sections or create a multi-color gradient for a vibrant look. Adjust the intensity by adding more or less water or blending time.
Start with a base coat of the lightest color. Apply the darker shade at the top or bottom, then blend where the two meet using a damp sponge or soft brush. Work quickly while the paint is wet to create a smooth transition. Feather the edges by dabbing or lightly brushing to avoid harsh lines. Repeat the process with additional shades for more complex gradients. Finish with a clear matte or satin topcoat to lock in the colors.
Add subtle glitter or metallic sheen to the gradient for extra sparkle. Incorporate hand-painted details like tiny stars or clouds for a whimsical touch. Frame the ombre with contrasting trim or decorative molding to frame the gradient effect. Use stencils or decals to add personalized motifs that blend into the gradient.
Ombre is a versatile and calming technique that adds a professional touch without needing artistic skills. It’s a great way to experiment with color blending and create a custom look. Once mastered, it opens up endless possibilities for creative expression. Ready to try a soft gradient? Your vintage mirror will look fresh and sophisticated in no time.
7. Faux Marble Finish for a Luxurious Look
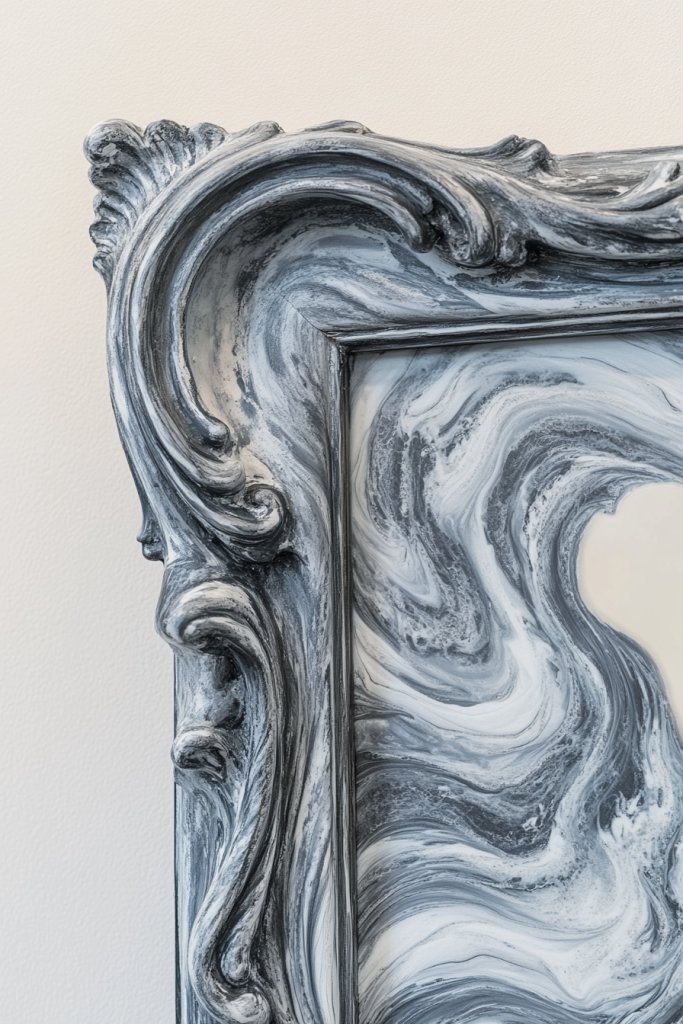
Craving that high-end marble look without the hefty price tag? Faux marble finishes with chalk paint can give your antique mirror an elegant, luxurious vibe. It’s a smart way to add sophistication without breaking the bank. But the process might seem complex, especially for beginners, which can deter many.
Visualize a frame with swirling grays and whites mimicking real marble veins. The textured, glossy finish catches light and adds depth, making it look like a genuine stone surface. The pattern can be subtle or bold, depending on your preference. Pair it with sleek, modern decor or vintage furniture for a striking contrast. The overall effect is a timeless elegance that elevates your space.
Choose different marble color schemes like black and gold or beige and cream for diverse aesthetics. For a more dramatic look, go for bold veining; for subtle sophistication, keep the veins delicate. Combine with metallic accents or glass elements for extra luxe. This technique works well on both small and large frames, adaptable to your space.
Start by painting the frame with a base color that matches your marble scheme. Use a sponge or fine brush to add veining with darker chalk paint, creating irregular lines and swirls. Blend the veins slightly with a damp brush for a natural marble effect. Add a layer of gloss or semi-gloss topcoat for shine. To enhance realism, lightly dab with a metallic or pearl paint in some areas.
Incorporate gold or bronze leaf along the veins for extra luxe. Use stencils to add delicate patterns or borders that mimic high-end marble slabs. Personalize with initials or motifs painted within the veining for a bespoke touch. Combining these elements turns your mirror into a statement piece.
Faux marble is a fantastic way to achieve a timeless aesthetic that suits many decor styles. It allows for creative expression while maintaining elegance. Once you see the realistic veins and glossy finish, you’ll be inspired to try more advanced faux finishes. Ready to add a slice of luxury? Faux marble is your go-to technique.
8. Boho-Inspired Earth Tones for Warm, Natural Vibes
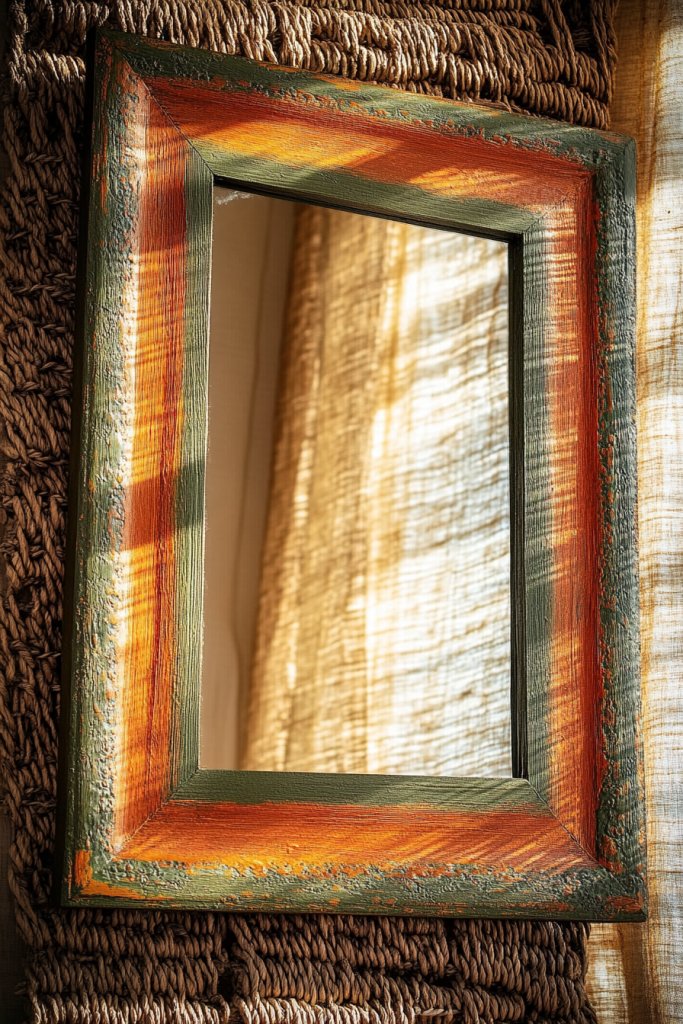
Want your space to feel warm, inviting, and rooted in nature? Boho-inspired earth tones on your antique mirror can create that cozy, natural vibe. It’s perfect for those who love organic aesthetics and relaxed decor. But many worry about how to balance these earthy shades without making the space look dull.
Imagine a frame painted in warm terracotta with hints of ochre and sage green accents. The matte chalk paint gives it a soft, velvety finish that absorbs light, making it feel earthy yet refined. Surround the mirror with woven textiles, rattan baskets, or wooden furniture to enhance the boho aesthetic. The overall look is warm, layered, and inviting, reminiscent of a desert sunset or woodland retreat.
Combine different earth tones like deep browns, muted yellows, and muted greens for a rich layered effect. For a more subtle approach, stick to two or three shades and keep the transitions soft. Use textured finishes or add a lightly distressed look for a weathered, organic feel. This style adapts well to eclectic, rustic, or modern boho interiors.
Choose chalk paints in earthy shades and apply with a soft brush, focusing on creating a matte, velvety surface. Mix in a small amount of natural pigment or clay for added depth. For a more textured look, incorporate sand or fine grit into the paint. Use a dry brush technique to add subtle highlights and variations. Seal with a matte topcoat for durability, and consider adding subtle patinas or waxes to deepen the earthy feel.
Decorate with small sculptural elements like carved wooden motifs or woven accents. Use fabric or leather straps to add tactile contrast. Personalize with hand-painted symbols or patterns inspired by nature—like leaves or waves. Incorporating these details enhances the natural, boho charm of your vintage piece.
Earth tones create a warm, grounded atmosphere that can connect your decor to nature. They’re versatile and forgiving, perfect for experimenting without worry. This approach invites tranquility and authenticity into your space. Ready to embrace the natural vibe? Earth-inspired chalk paints are your new best friend.
9. Glitter Embellishments for a Sparkling, Glamorous Finish
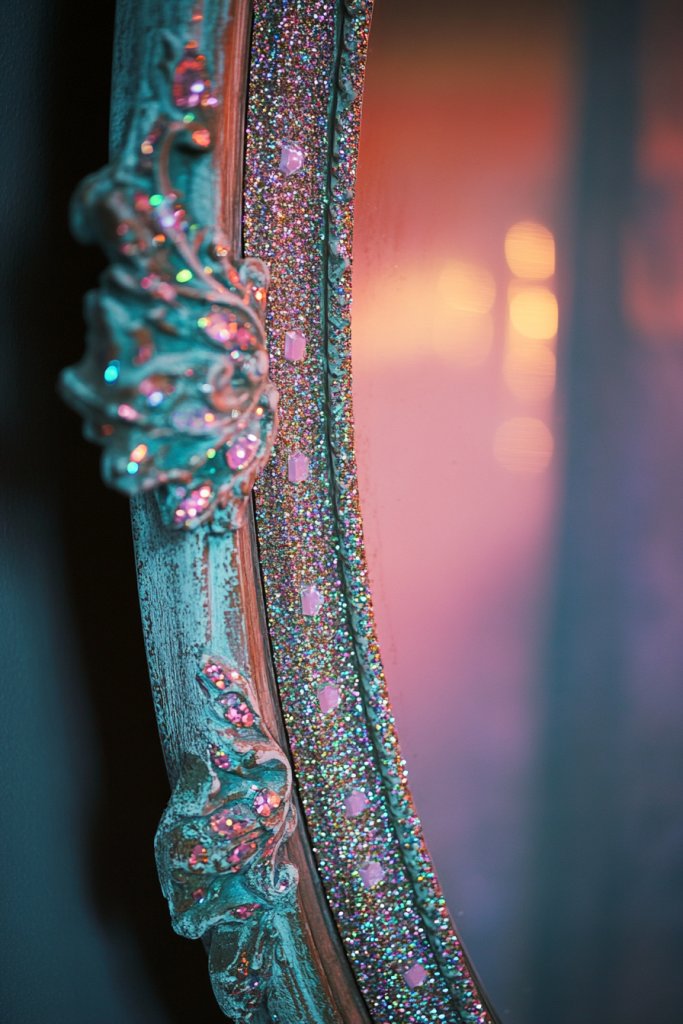
Looking to add a dazzling touch that catches the eye immediately? Glitter embellishments on your antique mirror can turn a simple piece into a glamorous showstopper. It’s perfect for those who love a bit of sparkle and want to make a statement. But applying glitter without mess or clumping can be tricky.
Visualize a frame with shimmering glitter accents along the carved details or edges, catching light from every angle. The sparkle adds a lively, festive feel that elevates the overall aesthetic. Use it sparingly for subtle accents or cover larger areas for full-on glam. Pair with plush fabrics or metallic accessories to complete the luxe look. The finished piece radiates elegance and fun.
Try mixing fine and chunky glitter for texture variation. Use glitter in metallic shades like gold, silver, or rose gold for a more sophisticated effect. Combine with contrasting matte or glossy paint backgrounds for extra depth. For a more subdued look, apply glitter only in small areas or in a pattern. It’s adaptable to both small accent pieces or large, statement frames.
Start by choosing a strong adhesive suitable for chalk paint surfaces. Apply a base coat of your preferred color, then use a small brush or sponge to apply the adhesive along the areas you want to embellish. Sprinkle glitter generously over the adhesive, pressing lightly to ensure adherence. Once dry, seal with a clear spray or brush-on topcoat to lock in the sparkle and prevent shedding. Practice on a scrap first for best results.
Create patterns or borders with glitter for a personalized touch. Mix different shades of glitter for a custom gradient effect. Add small rhinestones or metallic charms for extra glamour. Personalize further by adding initials or symbols with glittered paint or adhesive-backed embellishments.
Glitter transforms a vintage mirror into a party-ready focal point, perfect for glam interiors or special occasions. It’s an easy way to add personality and fun without a major redo. Once you see the sparkling effect, you’ll be inspired to try other embellishment techniques. Ready to dazzle? Glitter accents make your mirror unforgettable.
10. Chalk Paint with Decorative Stencils for Intricate Designs
Want your mirror to look truly one-of-a-kind with detailed patterns? Using decorative stencils with chalk paint allows you to add intricate, personalized designs easily. It’s perfect for those who love craftsmanship and detailed artistry. But the fear of mistakes or uneven lines can hold people back from trying stenciling.
Picture a vintage frame adorned with delicate floral or geometric patterns in contrasting colors. The stenciled designs add a layer of sophistication and personality, transforming a plain piece into a work of art. Use stencils in metallic or matte finishes to match your decor. The patterns can be repetitive motifs or a single statement design—your choice.
Experiment with different stencil shapes, from elegant floral motifs to bold geometric lines. Layer multiple stencil patterns for a complex, layered look. Use contrasting colors for a striking effect, or keep it subtle with tone-on-tone shades. Combine stenciling with distressing or metallic accents for added depth. It’s adaptable to both small and large frames.
Start with a clean, dry surface. Secure your stencil with painter’s tape to prevent shifting. Use a sponge or stencil brush to dab chalk paint onto the design, avoiding excess paint to prevent bleeding. Remove the stencil carefully while the paint is still wet for crisp edges. Repeat for multiple patterns or motifs. Seal with a matte or semi-gloss topcoat for durability.
Customize your stencil designs by adding hand-painted details or initials within the patterns. Use metallic or glitter paints for extra flair. Combine stenciled motifs with hand-painted accents for a layered look. Personal touches like tiny beads or textured paint can make the design uniquely yours.
Stenciling allows you to add intricate, professional-looking details without needing advanced skills. It’s a cost-effective way to personalize and elevate your vintage mirror. Once you master the technique, endless creative possibilities open up. Ready to turn your mirror into a decorated masterpiece? Stencils make it easy and fun.
11. Colorwashed Technique for a Soft, Weathered Appearance
Looking for a way to give your antique mirror a soft, aged look without heavy distressing? The colorwashed technique offers a gentle, weathered finish that’s both subtle and charming. It’s ideal for creating a vintage vibe that feels natural and effortless. Many worry about achieving the right balance or making it look too sloppy.
Visualize a frame with a delicate layer of translucent color that gently fades in certain areas, revealing hints of the base color beneath. The effect resembles a soft, foggy morning or a worn-out piece that’s been loved for years. Use chalk paint diluted with water to create this look, applying with a soft cloth or sponge. The result is a tender, weathered appearance that adds depth and character.
Try different base and wash colors to match your decor—muted greens, dusty pinks, or light browns work well. Layer multiple washes for a more complex, aged effect. For a more pronounced weathered look, focus the wash on edges and corners. Incorporate subtle crackles or glaze to enhance the aged appearance. It’s flexible enough to suit many styles, from shabby chic to rustic.
Start by painting your frame in a solid base color. Mix chalk paint with water to make a thin wash. Using a soft cloth or sponge, apply the wash over the surface, then wipe away excess to reveal the base color beneath. Layer additional washes until you achieve the desired aged look. Allow each layer to dry thoroughly. Finish with a matte sealer to protect and stabilize the finish.
Add subtle crackling or glazing in crevices for more aged details. Personalize by stenciling small motifs or initials in a matching tone. Incorporate textured fabrics or decorative trims that complement the weathered look. These personalized touches enhance the authenticity and charm of your vintage piece.
Colorwashing creates a beautifully soft, weathered appearance that’s easy to customize. It’s a forgiving technique perfect for beginners wanting a vintage look. When finished, your mirror will have a gentle, timeless charm that feels aged yet fresh. Ready to give your piece a soft, weathered glow? Colorwashing is the way to go.
12. Bright and Cheerful Colors for Playful, Updated Style
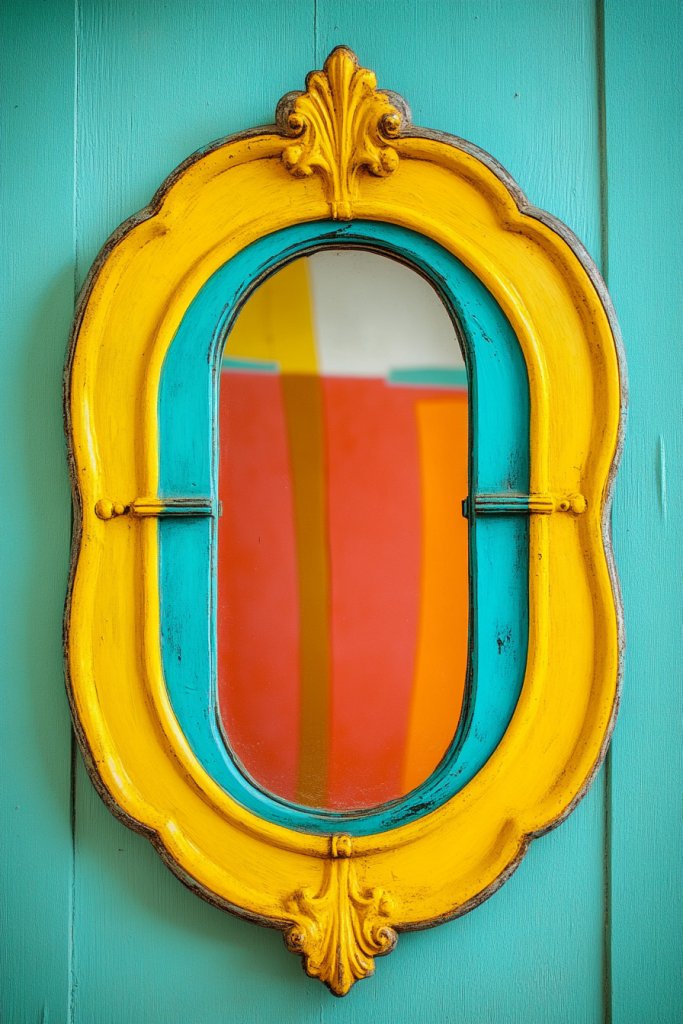
Ever feel like your space needs a fresh burst of energy? Sometimes, the antique mirror frame feels a bit dull or outdated, and a splash of bright color can totally change the vibe. Bright hues inject personality and make your decor feel lively and inviting. Who doesn’t want a home that feels cheerful and full of life?
Imagine a mirror frame painted in vibrant turquoise or sunny yellow, catching the light and instantly drawing your eye. The textured brushstrokes add depth, while the bold color contrasts beautifully with neutral walls. You can even add subtle metallic accents for a touch of shimmer that catches the eye from every angle. Bright colors turn an ordinary mirror into a statement piece that radiates joy.
Vibrant shades work great in playful spaces like kids’ rooms or creative studios, but they also brighten up more subdued areas like entryways or bathrooms. For seasonal variation, swap out bright colors for softer pastels during spring, or deeper jewel tones for winter. You can also experiment with color-blocking techniques or layered washes to add complexity. The key is choosing hues that match your personality and space.
Start with high-quality chalk paint in your chosen cheerful color—think bold and saturated. Prep the frame by cleaning and lightly sanding for better adhesion. Use painter’s tape to create clean lines if doing color blocking. Apply multiple thin coats for even coverage, letting each dry completely. Finish with a matte or satin sealant to protect your work from daily wear. For extra flair, consider adding decorative touches like stenciled patterns or hand-painted motifs.
Make your mirror truly unique by adding contrasting accents like a metallic trim or a patterned border. Incorporate decorative elements such as colorful tassels or fabric trims around the frame for a textured effect. Personalize further by integrating your favorite color combinations or themed motifs that reflect your style. This approach transforms a simple update into a personalized art piece.
Bright, cheerful colors can lift your mood and energize your entire space. Don’t be afraid to experiment—bold choices often pay off. Your upgraded mirror will become a focal point that sparks conversation and admiration. Ready to add some sunshine to your decor? Just pick your favorite hue and go for it!
13. Two-Tone Metallic and Matte Combination for a Contemporary Twist
Tired of your mirror looking like just another piece? Want to elevate it with a modern edge? Combining metallic and matte finishes creates a sophisticated, layered look that’s anything but boring. This approach adds depth and visual interest without overwhelming the space. Who says updates have to be plain?
Picture a frame painted in a soft matte gray with accents of gold or silver leaf highlighting carved details. The matte provides a subtle, understated backdrop, while the metallic elements catch and reflect light, adding a glamorous glow. The contrast between textures makes the frame pop, turning it into a chic centerpiece. Texture variation creates a tactile experience that invites closer inspection.
This finish combo suits contemporary, industrial, or even eclectic decor styles. For a softer look, pair a brushed matte pastel with metallic accents in rose gold or champagne. In more minimalist spaces, keep the metallic subtle and let the matte dominate. Seasonal adaptability involves switching metallic shades or adding a faux patina for vintage appeal. You can also incorporate geometric or abstract stenciled patterns for extra flair.
Choose a durable chalk paint in your preferred matte tone and apply evenly after cleaning the frame thoroughly. Use painter’s tape to mask areas where you want metallic accents—think carved details or edges. Apply a metallic leaf adhesive or metallic chalk paint on these sections, pressing or brushing smoothly for a seamless finish. Seal with a clear matte topcoat to lock in your work. For a more authentic metallic look, consider applying gold or silver leaf with adhesive size, then gently burnish for shine.
Personalize by adding different metallic shades or combining matte and gloss finishes for contrast. Incorporate decorative elements like rivets or studs for an industrial vibe. You could also embellish the frame with subtle hand-painted motifs or geometric lines in metallic paint. Experiment with different placement of metallic accents to create a custom, high-end look that reflects your taste.
This combination screams modern luxury and works beautifully in both small and large spaces. It’s a simple way to add elegance without a full redesign. Once done, your mirror will radiate style and sophistication, elevating your entire decor. Trust your eye—this layered finish is all about balance and contrast, and you’re capable of creating a stunning result!
14. Layered Chalk Paint for a Textured, Vintage Feel
Feeling like your antique mirror could use a bit more character? Flat paint just doesn’t cut it anymore. Layering different shades of chalk paint creates a rich, textured look that mimics aged, vintage finishes. The depth and complexity add a sense of history and craftsmanship to your piece. Who doesn’t want a mirror that looks like it’s been around for generations?
Imagine a frame with a base coat of muted cream, lightly sanded to reveal hints of underlying colors. Over this, you add layers of soft gray, taupe, and even a hint of pastel pink, blending and distressing each layer. The result? A beautifully worn-in look that feels both rustic and elegant. The textured surface invites touch and adds visual interest, making the mirror a true focal point.
Layering works well with shabby chic, farmhouse, or vintage-inspired decor. For a more subdued feel, stick to a monochromatic palette with different shades of the same color family. To adapt seasonally, incorporate warm tones like terracotta or cool shades like icy blue. Techniques such as dry brushing, stippling, or sponging help create various textures and aged effects. The key is layering and sanding to achieve a naturally distressed look.
Start with a clean, sanded surface to ensure adhesion. Apply a base coat of chalk paint and let it dry thoroughly. Use a dry brush or sponge to add additional layers of contrasting colors, working in small sections for control. Lightly sand between layers to reveal underlying colors and create a distressed effect. Consider sealing with a matte wax or topcoat for durability while maintaining a soft finish. For authenticity, focus on uneven application and rough edges.
Add decorative touches like subtle stenciled patterns or metallic rubs on the layered surface for extra dimension. Incorporate fabric or textured trims around the frame for a cozy, eclectic vibe. You could also embed small shell or bead accents into the layers for a personalized touch. The goal is to make the piece feel authentic and uniquely yours, full of character and charm.
Layered finishes give your mirror a story to tell, blending creativity with craftsmanship. They’re forgiving and can be tailored to your style—whether rustic, shabby chic, or vintage glam. Once completed, you’ll have a piece that feels timeless and full of personality. Trust your instincts—layering is all about building depth and character, and you’re more than capable of pulling it off!
15. Minimalist Monochrome for a Subtle, Elegant Update
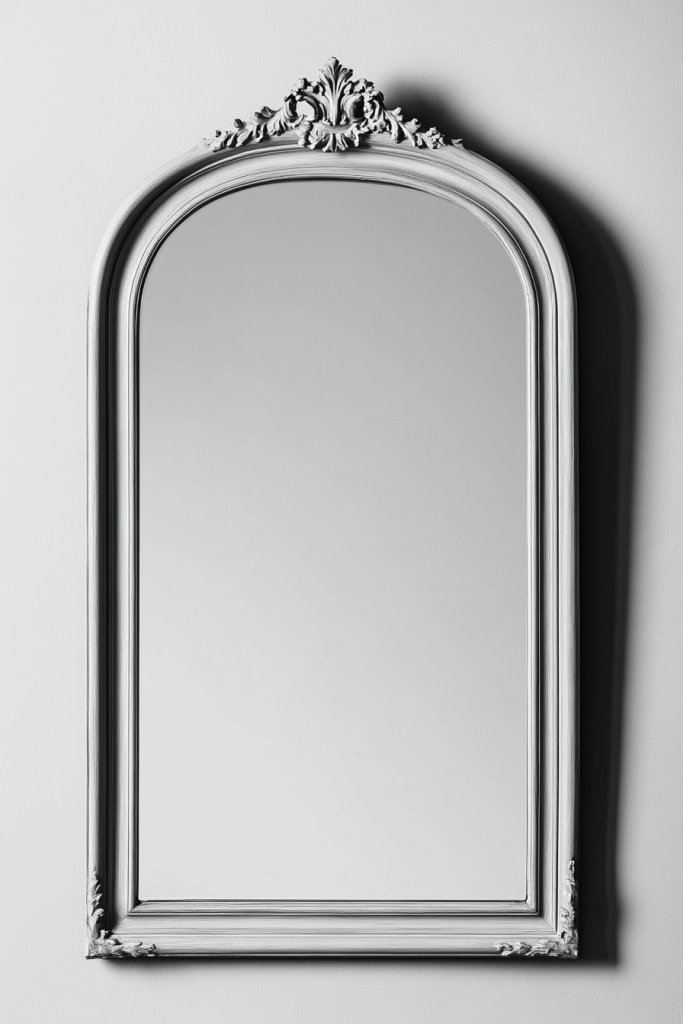
Sometimes, less truly is more. An ornate antique mirror can look overwhelming if it clashes with a busy decor scheme. Opting for a monochrome finish offers a simple yet elegant solution that complements any space. It’s perfect for those who want a clean, refined aesthetic without sacrificing style. Who says subtle can’t be stunning?
Envision a frame painted in a soft, matte beige or cool gray that seamlessly blends with the wall color. The smooth, uniform surface enhances the intricate details without overpowering them. Lightly sanding edges or carved motifs can add just enough texture to prevent flatness. The understated color palette creates a calm, sophisticated vibe that feels both modern and timeless.
Monochrome works well in minimal or Scandinavian-inspired interiors. For seasonal updates, switch between warm neutrals and cool tones, or incorporate slight tonal variations for subtle contrast. Layering textures like a velvet or linen fabric nearby can elevate the simplicity. For a more dynamic look, experiment with matte versus satin finishes or add a hint of metallic sheen to select details.
Start with a clean, dry surface—lightly sand if necessary. Use high-quality chalk paint in your chosen neutral tone, applying multiple thin coats for an even finish. Focus on highlighting carved or beveled details with a slightly darker shade or a contrasting texture. Seal with a matte or satin topcoat to protect the finish. For a refined look, consider hand-rubbing parts of the frame with a wax for a soft sheen and aged effect.
Add subtle accents like metallic or gloss highlights on edges or key details to enhance depth without breaking the minimalist aesthetic. Incorporate textiles like a soft throw pillow or a linen curtain in matching tones. Personal touches such as engraved initials or delicate patterns in the same monochrome palette keep it understated yet personalized. The goal is harmony and elegance.
A monochrome finish elevates your decor with minimal effort while maintaining a timeless appeal. It’s easy to refresh by swapping out nearby textiles or accessories. Your mirror becomes a versatile piece that adapts effortlessly to changing styles. Trust that simplicity can be powerful—sometimes, subtlety makes the biggest statement.
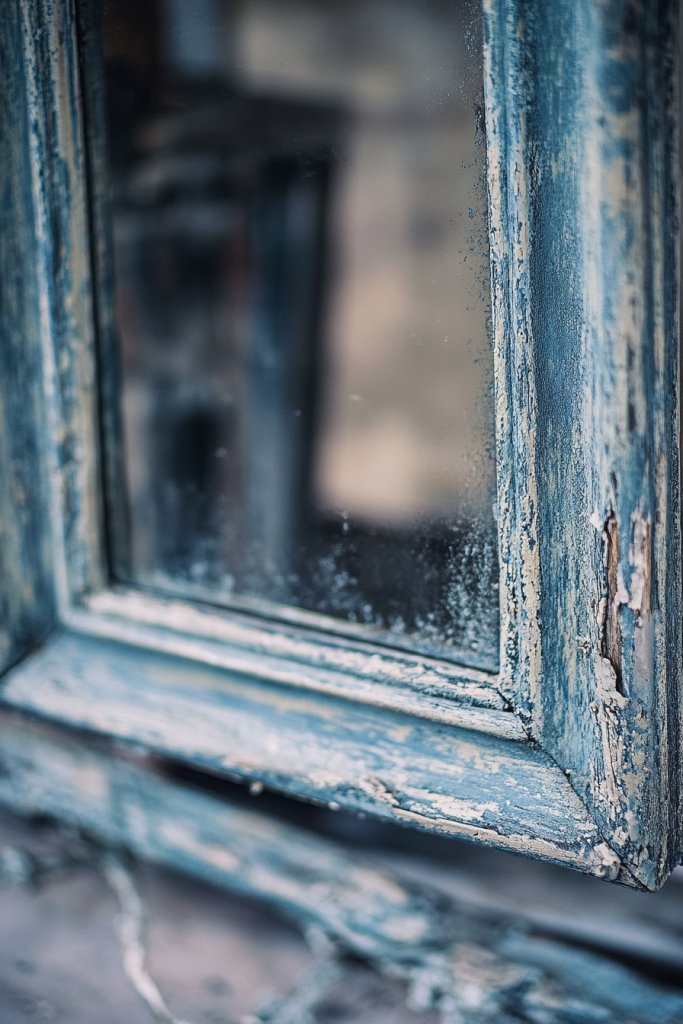
16. Coastal-inspired Blues and Whites for Fresh, Nautical Vibe
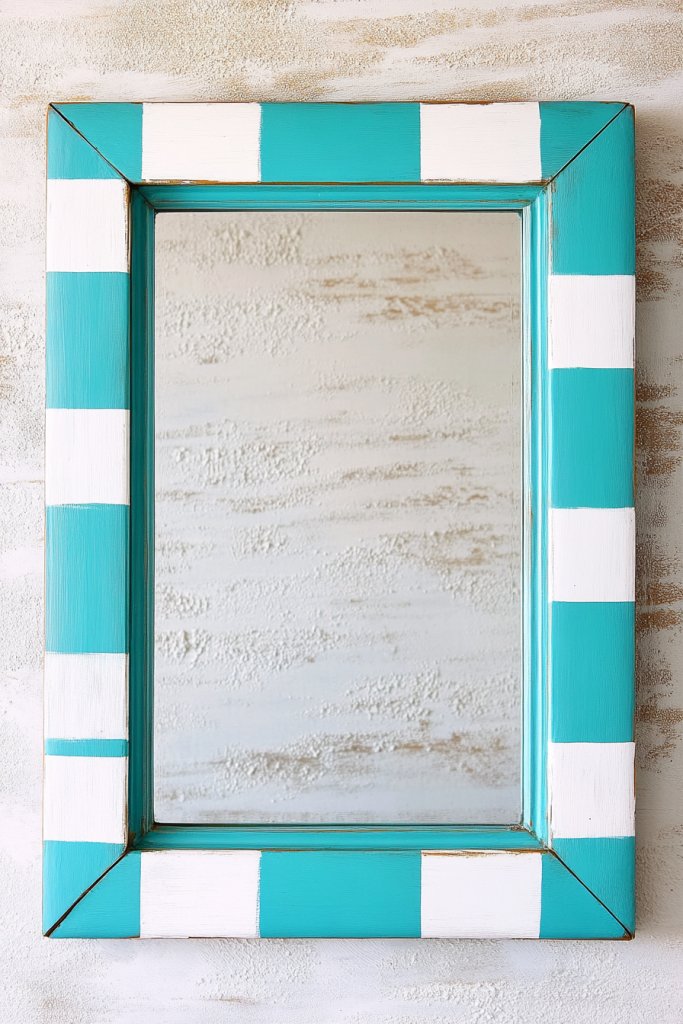
Ever wish your space could feel like a breezy seaside retreat without leaving home? Coastal-inspired blues and whites help you achieve that fresh, airy vibe effortlessly. If your current decor feels dull or too heavy, this color scheme offers a quick refresh that lifts spirits. Plus, who doesn’t want a touch of vacation vibes year-round?
Imagine a mirror frame painted in a soft sky blue, accented with crisp white detailing that mimics foamy waves. The textured finish resembles gentle sand dunes, inviting touch and admiration. The subtle contrast between the cool blues and pristine whites creates a calming, nautical aesthetic. Picture the light reflecting softly off the frame, enhancing the tranquil mood of your room.
This look adapts well to beach houses, coastal cottages, or even urban apartments aiming for a breezy feel. For a more vibrant touch, add coral or turquoise accents in nearby textiles or accessories. During winter, deepen the blue shades for a cozy winter seaside vibe, while in summer, keep it light and bright. You can also incorporate driftwood-inspired textures or nautical knots for added authenticity.
Start by selecting a high-quality chalk paint in your chosen shades—preferably matte for a soft, authentic look. Lightly sand the frame to create a distressed effect if desired, mimicking weathered wood. Use painter’s tape to create clean lines or stripes for a more dynamic design. Apply two coats for vibrant coverage, allowing proper drying time between layers. Finish with a matte sealer to protect the color from moisture and wear.
Personalize the frame further by adding small decorative elements like mini seashells or starfish along the edges—adhesive or embedded in the paint. You could also stencil subtle wave patterns or incorporate metallic accents to add a touch of sparkle. Integrate textured fabrics like linen or burlap in nearby decor to enhance the natural, coastal feel. The key is balancing simplicity with thoughtful details.
This color palette instantly transports your space to a seaside escape, boosting relaxation and freshness. It’s a simple, cost-effective way to update your decor with a timeless theme. Trust that your creative touch will turn a plain mirror into a stunning focal point that exudes calm and style. Ready to bring the coast home?
17. Artistic Hand-Painted Details or Flourishes for a Unique Touch
Looking for a way to make your antique mirror truly stand out? Hand-painted details give your frame a one-of-a-kind personality that can’t be replicated with store-bought options. If you love creative projects or want a personal touch, this idea offers endless possibilities. Plus, it’s a fantastic way to showcase your artistic side, even if you’re a beginner.
Imagine delicate floral motifs swirling along the inner edges of the frame, painted in soft pastel shades for a subtle elegance. Or picture bold, abstract strokes in vibrant colors that make a statement. You might add whimsical flourishes like tiny stars or intricate patterns that catch the light. The textures of the brushstrokes add depth, making the frame feel alive and unique.
This technique works with various styles—from shabby chic to modern boho. For a vintage vibe, use muted tones and delicate designs; for a contemporary look, opt for bold shapes and bright colors. Seasonal themes can be incorporated by changing the motifs—think snowflakes for winter or leaves for fall. It also pairs well with textured backgrounds like crackle finishes or metallic accents.
Begin by sketching your design lightly with a pencil, then use chalk-based or water-based chalk paint for easy correction. Fine-tipped brushes or even tiny detail brushes help achieve precision. Layer your colors gradually, allowing each to dry before adding more details. Use stencils for symmetry or freehand for a more organic feel. Seal your artwork with a clear matte or semi-gloss topcoat to preserve the design. Practice on a scrap piece if needed to perfect your technique.
Add personal symbols, initials, or meaningful motifs that resonate with your style or story. Incorporate metallic or glitter accents sparingly to highlight specific areas, giving a bit of sparkle. Experiment with textured paint or embossing powders for raised effects. The goal is a harmonious blend of your personal flair with artistic expression, making your mirror a true conversation piece.
A hand-painted frame transforms a simple mirror into a work of art that reflects your personality. It’s an affordable way to add character and charm, elevating your decor effortlessly. Trust your creativity—mistakes can become charming imperfections that add to the authenticity. Now, go ahead and create something uniquely yours!
Conclusion
With these diverse chalk painting ideas for antique mirror frames, you have a treasure trove of inspiration to revamp your decor. Each project offers a chance to add a personal touch and elevate the overall look of your home. Don’t hesitate to experiment with colors, finishes, and techniques—your perfect mirror transformation is just a brushstroke away. Embrace your creativity and bring new life to vintage finds!