Imagine transforming your living space without breaking the bank! Cheap curtain upgrades have become a go-to solution for homeowners looking to add style and privacy without spending a fortune. They’re popular because they allow you to refresh your room’s look quickly and affordably, making it easy to experiment with new styles and textures.
In this article, you’ll discover a variety of creative and budget-friendly curtain upgrade ideas that can instantly elevate your home decor. From DIY tips to clever accessory swaps, these ideas are perfect for anyone eager to enhance their space with minimal expense but maximum impact. Get ready to find your next favorite upgrade that combines function, fashion, and affordability!
1. Add a Decorative Valance for Instant Style Enhancement
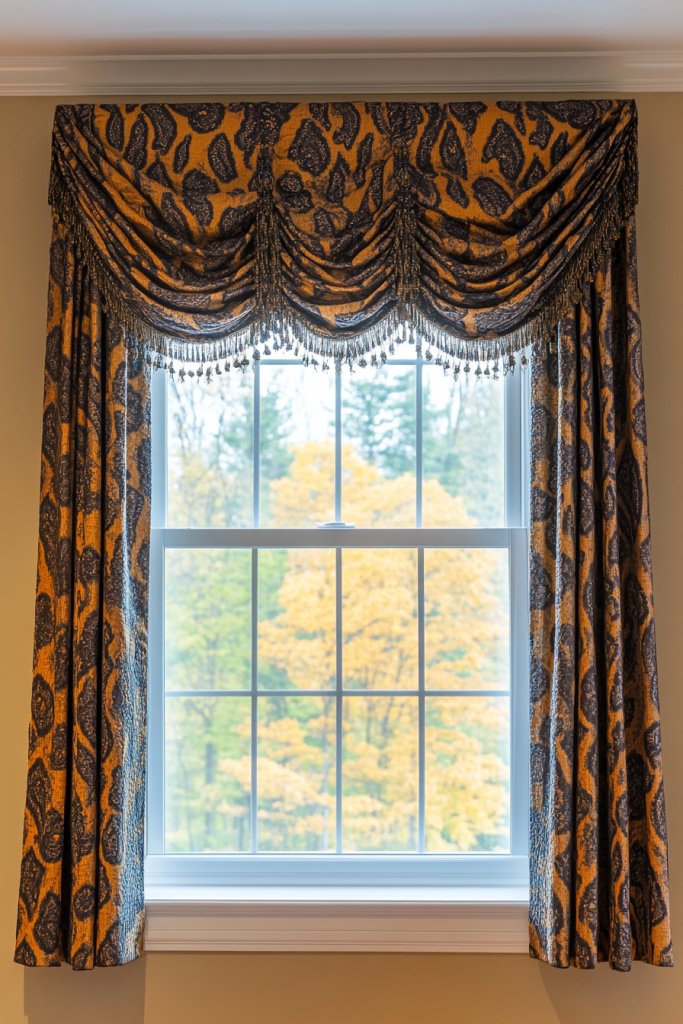
Plain curtains often lack personality and can make a room feel dull or unfinished. If you crave a quick makeover that adds instant charm, a decorative valance is your best friend. It’s a simple way to elevate your window treatment without breaking the bank. Plus, it can hide unattractive curtain rods or hardware that are less than chic.
Recommended Products to replicate this idea
| # | Preview | Product | |
|---|---|---|---|
| 1 |

|
Decorative Things Window Valance Curtain for Kitchen, Living Room, Bedroom Drape Swag Short Curtains... | Buy on Amazon |
| # | Preview | Product | |
|---|---|---|---|
| 1 |

|
1” Diameter Curtain Rods Itself is 30 to144 inch 1 Pack Fit 30-142 inch, 66 to 120 inch Window... | Buy on Amazon |
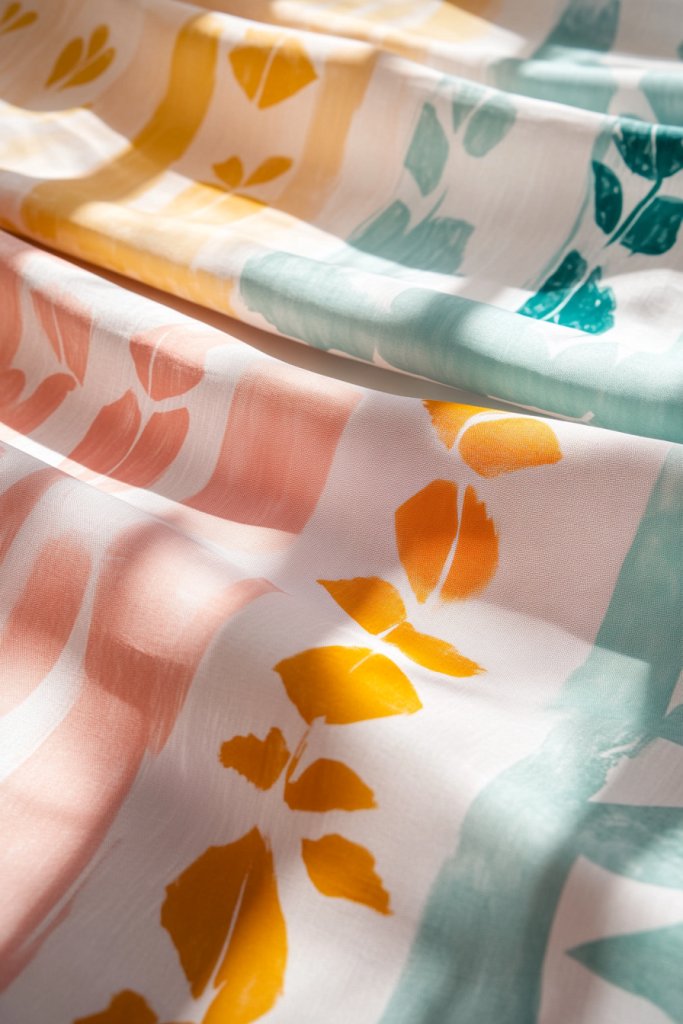
Imagine a soft cream throw blanket with chunky knit texture draped over a sleek, patterned fabric valance. The layered look creates depth, while the contrasting textures add visual interest. Bright, cheerful colors like mustard or turquoise can turn a bland window into a focal point. When sunlight filters through, the fabric’s weave dances with shadows, making the space feel cozy and inviting.
You can choose from a variety of materials—lace, burlap, or even recycled fabrics—for different moods. For a coastal vibe, opt for lightweight linen with tassels. If your decor leans boho, try adding fringes or pom-poms. Seasonal updates are easy: swap out bold patterns for festive prints during holidays or switch to muted tones for a calming winter look.
Start by measuring your window width and decide how much overhang you want on each side. Use inexpensive fabric or scrap materials; old scarves or leftover upholstery fabric work great. Sew or glue the fabric into a simple band, then attach it to a foam board or a sturdy strip that fits behind your curtain rod. Secure with hot glue or safety pins, depending on your comfort level. Hang it, and enjoy an instant upgrade.
Add decorative trim, such as lace, ribbon, or even buttons, to personalize your valance further. You can also embellish with embroidered initials or small fabric flowers for a custom touch. To keep it fresh, rotate different fabrics seasonally or match with throw pillows and other accents in the room.
A DIY valance is a budget-friendly way to showcase your style and creativity. It’s a small change that makes a big impact, boosting your confidence in home decor. Ready to get crafty and turn your windows into statement pieces? Your friends will be asking for your decorating secrets in no time!
2. Use Tension Rods to Create Layered Curtain Effects
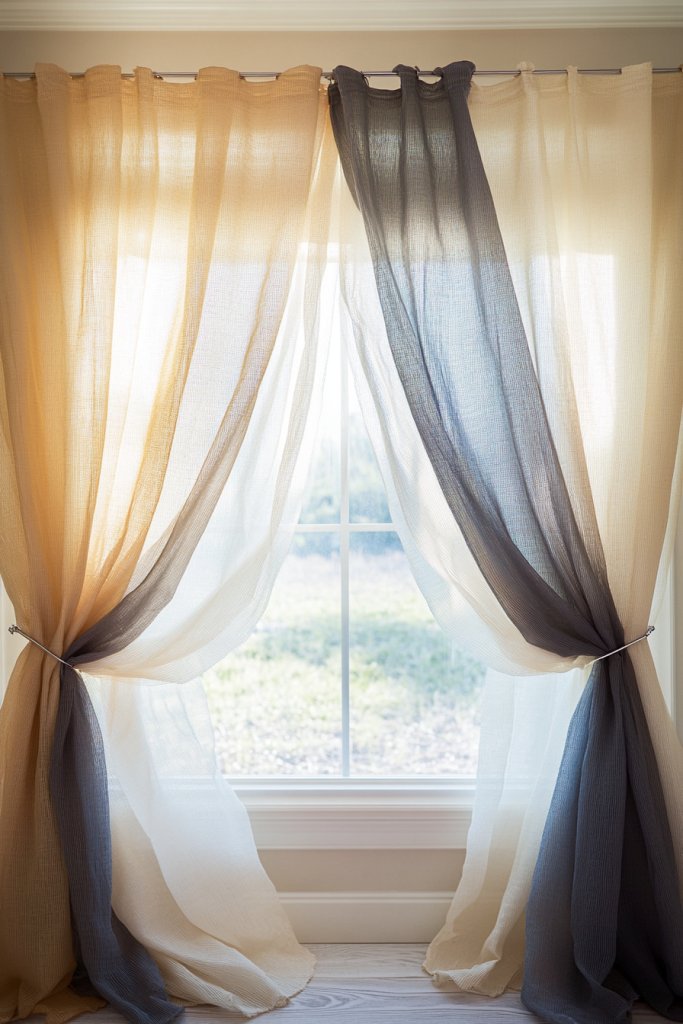
Overly plain curtains can feel lackluster, especially if you want a layered, textured look without the hassle of installing new hardware. Tension rods offer a no-drill, budget-friendly way to add depth and dimension to your windows. It’s perfect for renters or anyone not eager to make permanent changes.
Recommended Products to replicate this idea
| # | Preview | Product | |
|---|---|---|---|
| 1 |

|
AIZESI 2pcs Spring Tension Rods Adjustable 26 to 39 inch Small Tension Curtain Rod No Drilling... | Buy on Amazon |
| # | Preview | Product | |
|---|---|---|---|
| 1 |

|
OWENIE Sheer Curtains 84 inches Long 2 Panels Set for Living Room/Bedroom, Rod Pocket Voile Sheer... | Buy on Amazon |
Picture a sheer, airy layer of fabric gently cascading behind a heavier blackout curtain. The tension rods hold these layers securely, creating a plush, layered effect that adds richness to your space. Soft light filters through the sheer, casting a subtle glow, while the opaque layer provides privacy. The combination makes your window look sophisticated and thoughtfully styled.
Mix and match different textures and colors—maybe a delicate lace behind a bold patterned curtain or a velvet layer for winter coziness. Adjust the number of layers based on your room’s vibe or season. For a casual look, use mismatched fabrics; for a polished feel, choose complementary hues and patterns.
Measure your window frame accurately before selecting tension rods—most come in adjustable sizes. Install the rods inside the window frame, ensuring they’re tight enough to hold the weight of your fabrics. Use lightweight, inexpensive curtains or sheers for easy layering. No tools needed—just twist the rods into place. For heavier fabrics, opt for thicker tension rods designed for extra support. Layer the curtains, adjusting the placement until it looks balanced and full.
Add decorative curtain ties or fabric strips to gather layers neatly. Play with different lengths to create a more dynamic effect. You can also incorporate blackout liners or thermal fabrics for added functionality in colder months. Changing the layers seasonally keeps your window styling fresh and fun.
Using tension rods to layer curtains is a smart, damage-free way to experiment with style. It’s simple, affordable, and reversible—perfect for customizing your space without commitment. Once you see how much more polished your windows look, you’ll wonder why you didn’t try this sooner!
3. Incorporate String Lights for Cozy Privacy
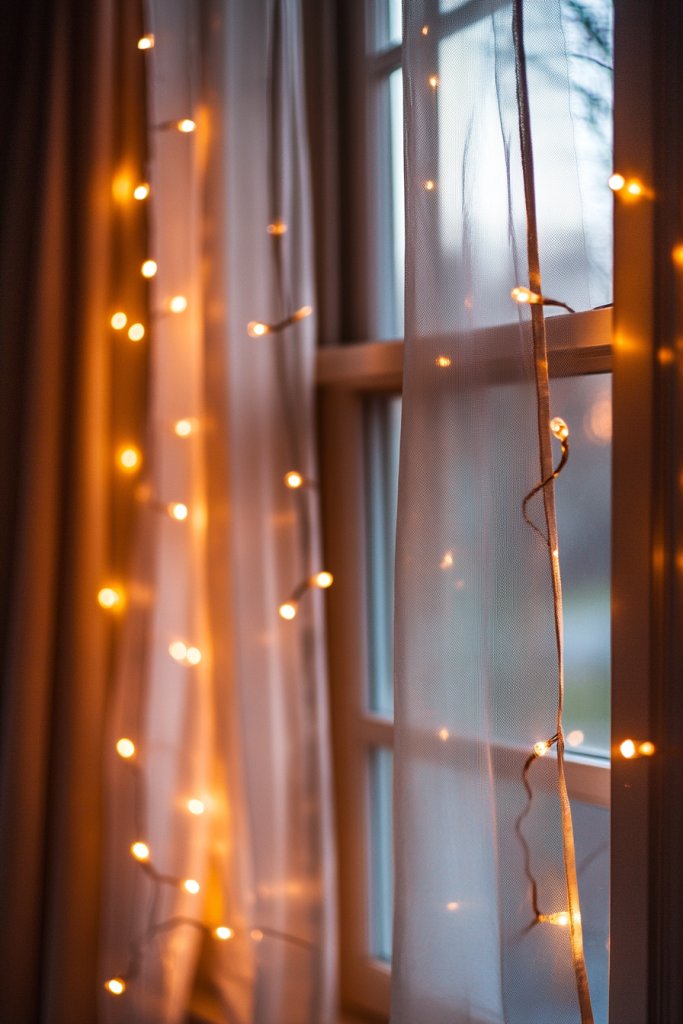
Who says privacy and ambiance can’t go hand-in-hand? If you love a cozy, warm glow but don’t want to invest in expensive lighting fixtures, string lights are your new best friend. They’re inexpensive, versatile, and instantly transform a dull space into a dreamy retreat.
Recommended Products to replicate this idea
| # | Preview | Product | |
|---|---|---|---|
| 1 |

|
suddus Curtain Lights for Bedroom, 200 Led Hanging String Light Outdoor, Fairy Curtain Lights Indoor... | Buy on Amazon |
| # | Preview | Product | |
|---|---|---|---|
| 1 |

|
Solhice LED Curtain Lights Outdoor 20ft x10ft, 600 LED Plug in Hanging String Lights Indoor Bedroom,... | Buy on Amazon |
Imagine delicate fairy lights draped along your curtain rod, casting a gentle, flickering light that makes your room feel intimate. Behind a semi-sheer curtain, the lights create a shimmering backdrop that softens the entire window area. When turned on at night, they add a magical, almost fairy-tale vibe, perfect for relaxing evenings or romantic dinners.
Use different bulb shapes and colors to match your decor—warm white for cozy, yellowish glow or multicolor for playful energy. Drape the string lights in a zigzag pattern or hang them loosely for a relaxed look. For extra impact, combine lights with fabric or lace overlays, or add paper lanterns to create layers of soft illumination.
Choose battery-operated fairy lights for easy placement without the need for outlets. Secure the lights along your curtain rod using clips or adhesive hooks, ensuring they’re evenly spaced. For a more permanent setup, you can attach small hooks along the wall or ceiling edges. Wrap the lights around the curtain or let them hang freely for a casual vibe. Turn them on at night to see how the soft glow enhances your privacy while adding ambiance.
Mix and match different types of lights—twinkle, color-changing, or vintage-style bulbs—for a personalized touch. Incorporate DIY elements like paper origami lanterns or fabric-covered bulbs for a handcrafted feel. Use timers or remote controls to operate the lights easily and set the mood whenever needed.
String lights are a simple way to add personality and warmth without major renovations. They’re perfect for renters and DIY enthusiasts alike. Once you see how much cozier and more inviting your space feels, you’ll never want to go back to plain curtains and boring lighting!
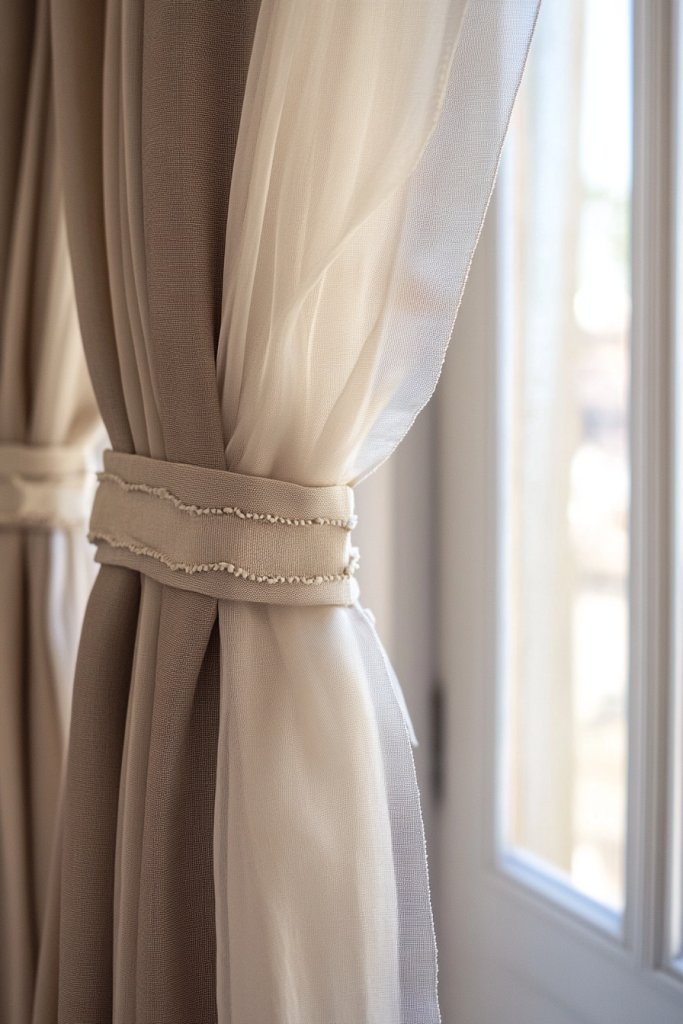
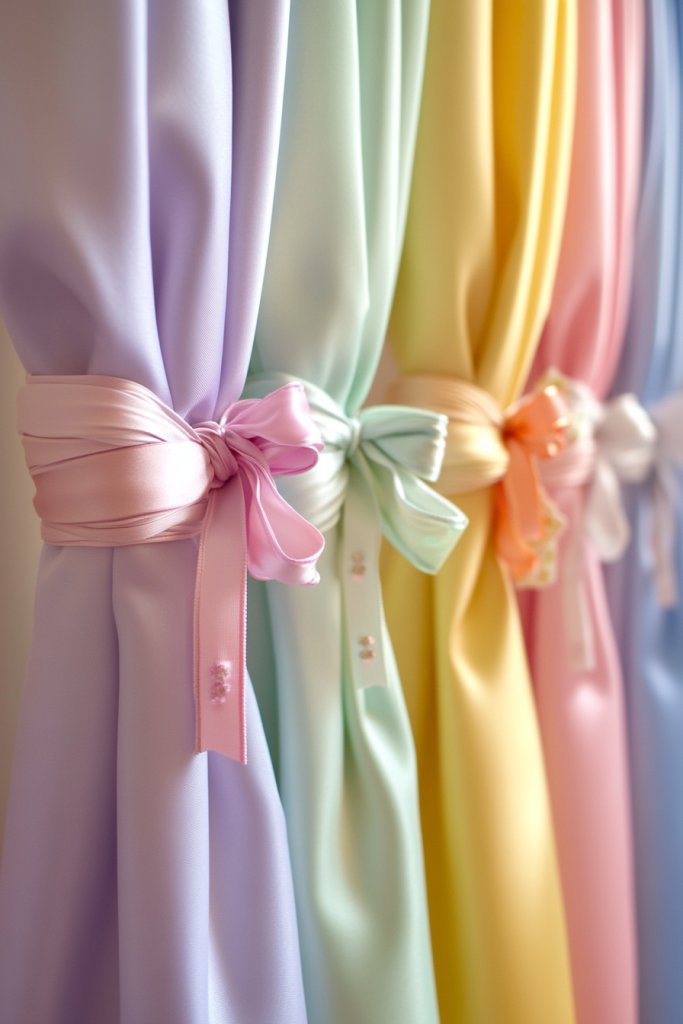
4. Attach Decorative Tiebacks for a Custom Look
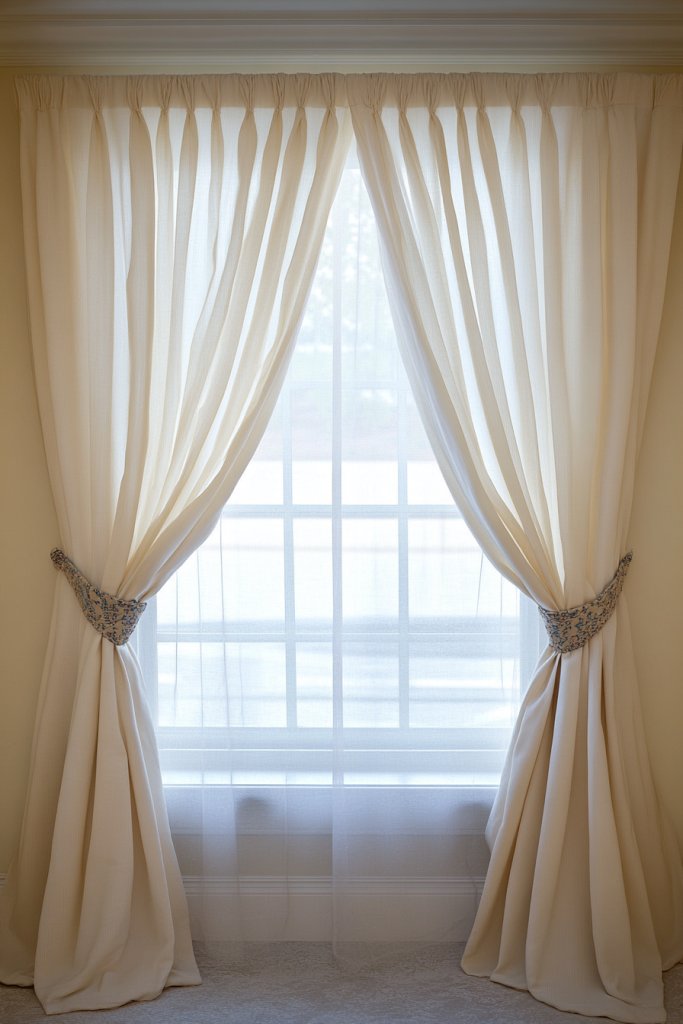
Plain curtains hanging limply can make a room look unfinished. If you want a quick way to add personality and control over privacy, decorative tiebacks are the answer. They’re inexpensive and can turn a simple curtain into a statement piece with just a little styling.
Recommended Products to replicate this idea
| # | Preview | Product | |
|---|---|---|---|
| 1 |

|
KLOGTSIND Magnetic Curtain Tiebacks, Curtain Holdbacks for Curtains 2 Pack, Wood Bead Curtain... | Buy on Amazon |
| # | Preview | Product | |
|---|---|---|---|
| 1 |
|
KLOGTSIND Magnetic Curtain Tiebacks, Curtain Holdbacks for Curtains 2 Pack, Wood Bead Curtain... | Buy on Amazon |
Visualize a brightly colored rope or fabric loop holding back heavy velvet curtains, revealing a glimpse of the room’s decor. When pulled to the side, the curtains frame the window perfectly, creating a balanced and inviting look. The tiebacks add a touch of elegance or whimsy, depending on your choice of material and design, making your window area pop.
Use different fabrics—from satin to burlap—to match your room’s style. For a boho vibe, opt for braided rope or tassel accents; for a modern look, choose sleek metallic or leather straps. Seasonal tiebacks, like festive ribbons or floral accents, can refresh your decor throughout the year. Adjust the tightness for a casual or formal appearance.
Select a tieback style that complements your curtains and decor theme. Attach hooks or rings on either side of the window frame or wall—these can be inexpensive adhesive hooks or decorative rings. Loop your tieback fabric or rope around the curtain, then secure it to the hooks. For a more polished look, add decorative beads or charms to the tiebacks for extra flair. Experiment with different lengths and styles until you find what looks best.
Create custom tiebacks by sewing or braiding together fabrics, adding tassels, or attaching charms. Use color-coordinated or contrasting fabrics to add visual interest. When not in use, let the curtains hang loosely or gather them with a simple knot for a casual vibe. Personal touches like monograms or painted patterns make your tiebacks uniquely yours.
Decorative tiebacks are a quick, DIY-friendly way to elevate your window style. They add a layer of sophistication or fun, depending on your choice. Seeing your curtains styled beautifully will boost your confidence in home decorating. Ready to give your windows a personal, polished touch? Go ahead and experiment—you’ve got this!
5. Use Washi Tape or Fabric Tape for Edgy Edging
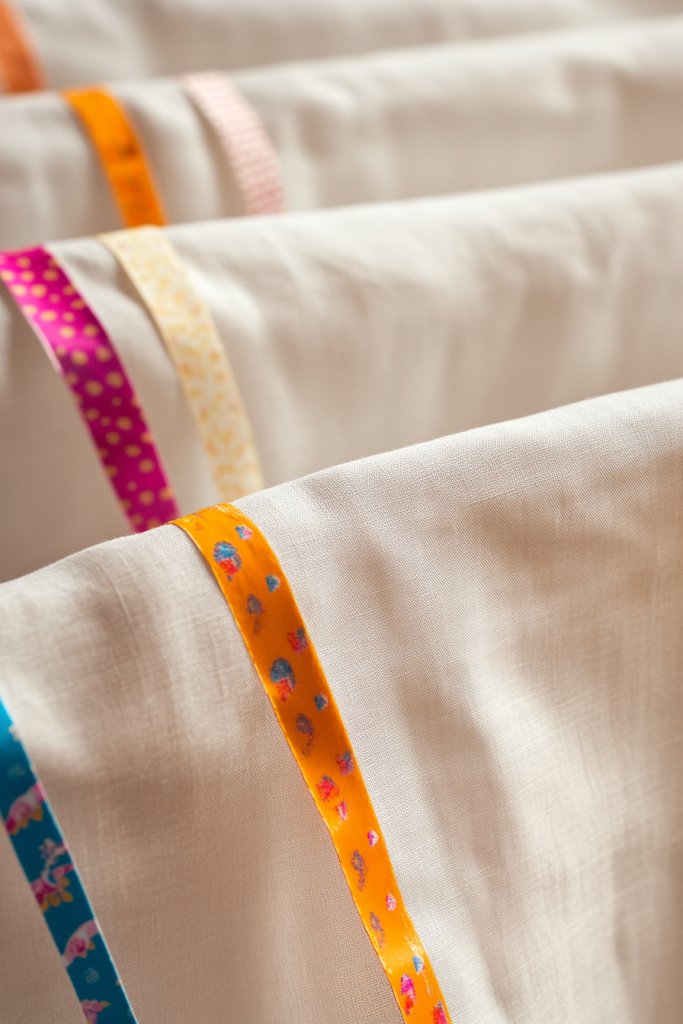
Sometimes curtains feel a bit bland, especially if they’re plain or faded. Want to add a splash of personality without sewing or buying new fabrics? Washi tape or fabric tape is your quick fix for an edgy, modern look. It’s affordable, easy, and perfect for DIY decor lovers craving a little punch.
Recommended Products to replicate this idea
| # | Preview | Product | |
|---|---|---|---|
| 1 |

|
Washi Tape Set 30 Rolls, Decorative Tape, Colored Tape, Scrapbook Tape, Craft Tape for Scrapbook... | Buy on Amazon |
| # | Preview | Product | |
|---|---|---|---|
| 1 |

|
YONGJIN Double-Sided Fabric Tape (2 Rolls) - No Sewing or Ironing Required, Perfect for Quick... | Buy on Amazon |
Imagine bold black and white stripes along the edges of a neutral curtain or colorful geometric patterns that pop against a muted background. The tape creates sharp lines and adds a graphic element that instantly updates the curtain’s style. When sunlight hits the tape, it adds a subtle sheen or matte finish, depending on your choice, giving your window a fashionable edge.
Choose from a variety of tape patterns—florals, polka dots, metallics—and apply them to curtain edges, tiebacks, or even pillowcases. Experiment with different widths and layering for a more eclectic look. For seasonal updates, swap out tapes to match holidays or themes, making your decor feel fresh and personalized.
Clean the curtain edges thoroughly to ensure the tape sticks well. Measure and cut strips to fit the desired sections, then carefully adhere, smoothing down to eliminate bubbles or wrinkles. Use painter’s tape or masking tape temporarily if you want to test the design first. For a more permanent fix, choose fabric or washi tape that’s designed for fabric, and press firmly. You can also add decorative stitches over the tape for extra durability.
Create custom patterns or combine tapes for layered effects. Use metallic or glitter tape for a glam touch, or choose matte finishes for a more subdued look. Add small embellishments like fabric paint or stickers to further personalize the edges. This technique works great on curtains, pillowcases, or even picture frames for a cohesive style.
Using tape to edge your curtains is a fun, budget-friendly way to experiment with style. It’s a quick project that yields big visual impact, boosting your confidence in DIY home decor. Soon, you’ll be looking at plain curtains and thinking, ‘I can totally upgrade this!’
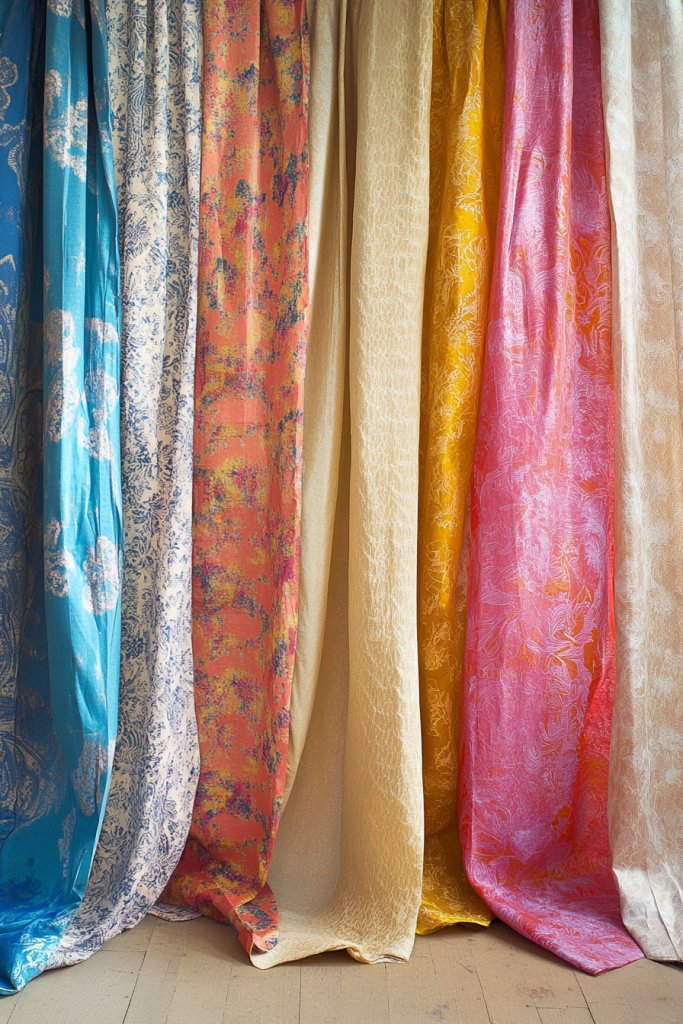
6. Repurpose Scarves or Shawls as Curtain Panels
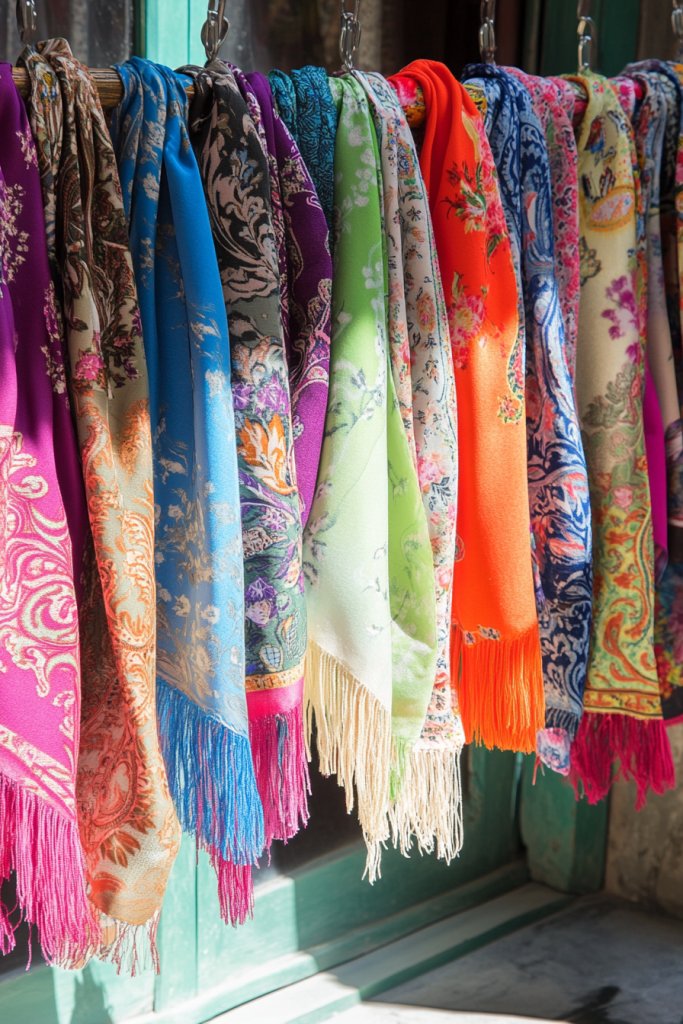
Tired of boring curtains and want a quick, fashionable upgrade? Repurposing scarves or shawls can instantly add color, pattern, and texture to your windows. It’s a creative way to refresh your space without spending a dime on new fabric. Plus, it’s a great excuse to dig through your closet or thrift store finds.
Recommended Products to replicate this idea
| # | Preview | Product | |
|---|---|---|---|
| 1 |
|
NICETOWN Sheer Canopy Bed Curtains Panels 216 - Home Decoration Sheer Voile Scarf Valance for... | Buy on Amazon |
| # | Preview | Product | |
|---|---|---|---|
| 1 |

|
42 Pack Curtain Rings with Clips 1.26" Interior Diameter,Metal Drapery Ring with Clips Compatible... | Buy on Amazon |
Picture a vibrant paisley scarf casually draped over a simple curtain rod, spilling down in flowing folds. The combination of different fabrics and patterns creates a layered, eclectic look that’s both stylish and cozy. When sunlight filters through the fabric, it produces a colorful, dappled effect that brightens the room. It’s like a piece of wearable art framing your window.
Mix and match scarves with different textures—silk, wool, cotton—to suit seasons and moods. For a boho vibe, layer multiple scarves in different lengths and patterns. During colder months, choose thicker shawls for warmth; in summer, lightweight scarves keep it breezy. You can also tie them in knots or drape them for a more casual, relaxed appearance.
Select scarves or shawls that coordinate with your decor. Hang a sturdy curtain rod or even a tension rod for easy setup. Drape the fabric evenly, letting excess fabric cascade for a flowing look. Secure with clips, or simply knot the fabric at the ends for a more relaxed style. If you want a more structured look, sew or glue the fabric onto a backing or curtain panel for added stability.
Add embellishments like beads, tassels, or fabric paint to further personalize the fabric. Incorporate a mix of textures and colors for a playful, layered effect. Combine with matching cushions, throws, or rugs to create a coordinated aesthetic. Changing out scarves seasonally can keep your decor feeling fresh and lively.
Using scarves as curtains is a creative, eco-friendly way to express your style. It’s a flexible approach that encourages experimenting with patterns and textures. Once you see how easy and impactful this technique is, you’ll be inspired to try more DIY projects around your home!
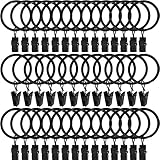
7. Hang Curtain Clips for a Modern, Layered Effect
Plain curtains can look dull, especially if you want a modern, layered vibe. Using curtain clips and rings gives you the flexibility to create a playful, movable look that’s both functional and stylish. It’s a simple upgrade that transforms your window treatment from basic to eye-catching.
Recommended Products to replicate this idea
| # | Preview | Product | |
|---|---|---|---|
| 1 |
|
42 Pack Curtain Rings with Clips 1.26" Interior Diameter,Metal Drapery Ring with Clips Compatible... | Buy on Amazon |
| # | Preview | Product | |
|---|---|---|---|
| 1 |
|
AMZSEVEN 40 Pack Metal Curtain Rings with Clips, Drapery Clips Hooks, Decorative Curtain Rod Clips... | Buy on Amazon |
Visualize a set of sheer curtains clipped to a sleek metal rod, layered with a heavier fabric for depth. The clips allow you to easily slide and rearrange layers, giving you control over privacy and light. When you pull back the curtains, the clips become a decorative element, adding a touch of contemporary flair. The overall effect is fresh, dynamic, and effortlessly chic.
Choose from a variety of clip styles—metal, plastic, or fabric-covered—to match your decor. Use different sizes and colors for contrast or uniformity. For a minimalist look, opt for slim, matte black clips; for a boho feel, go for wooden or beaded clips. Layer multiple curtains in different fabrics or patterns for added visual interest.
Measure your curtain width carefully, then select clips that fit comfortably along the rod. Attach the clips to the top of each curtain panel, spacing them evenly for a balanced look. Slide the clips along the rod to adjust the fullness and layering as desired. If your curtains are lightweight, clips will hold securely; for heavier fabrics, consider stronger clips or additional support.
Customize your clips with paint, fabric wrapping, or embellishments like beads or charms. Use different clip styles to create a layered, eclectic vibe. You can also attach decorative trims or ribbons to the clips for added flair. This method makes it easy to switch up styles without new curtains, giving your decor versatility.
Curtain clips are a sleek, modern upgrade that’s easy to implement and perfect for experimenting. They allow you to play with different layers and fabrics, giving your windows a fresh look anytime. Once you see how simple and stylish this is, you’ll want to update all your window treatments!
8. Create a DIY Curtain Tie or Fringe Trim
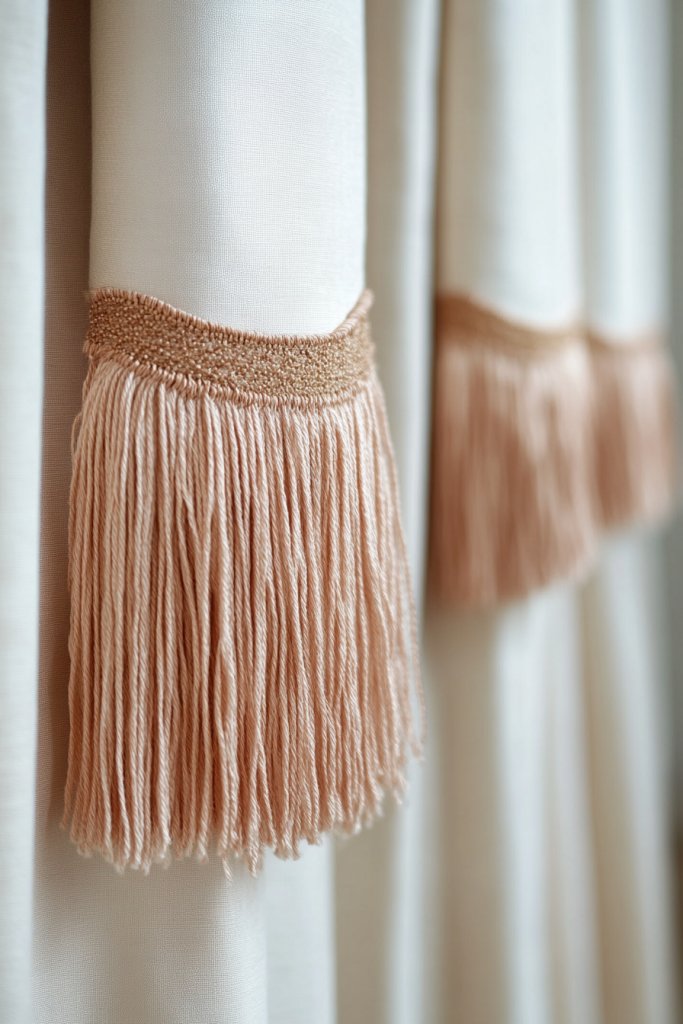
Curtains often feel plain or generic, but adding a little detail can change everything. Creating your own curtain ties or fringe trims is an affordable way to add personality and texture. It’s a fun DIY project that instantly elevates your window style without much effort or expense.
Recommended Products to replicate this idea
| # | Preview | Product | |
|---|---|---|---|
| 1 |

|
Fenghuangwu Curtain Tiebacks Handmade Decorative Curtain Holdbacks Rope with Tassel (Gold, 2P) | Buy on Amazon |
| # | Preview | Product | |
|---|---|---|---|
| 1 |

|
10 Yards Boho Long Fringe Trim 2.3'' Wide Sewing Fringe Trim Cotton Tassel Trims for Clothes Lamp... | Buy on Amazon |
Imagine a simple linen curtain with a thick tassel tieback or a fringe trim along the bottom. The tactile textures and subtle movement of fringes add depth and visual interest. When sunlight hits the fringes, they cast tiny shadows, giving your window a dynamic, handcrafted look. It’s a small detail that makes a big difference.
Use different materials—wool, cotton, leather—for ties and fringes to match your decor. Experiment with colors—metallic, pastel, or neutral—to create contrast or harmony. Attach trims with glue or sew them onto existing curtains for a more secure fit. Seasonal variations include swapping out trims for holiday-themed or colorful options.
Gather inexpensive trims, tassels, or pom-poms from craft stores or online. Measure the curtain edges or tieback areas, then cut trims to appropriate lengths. Sew or glue the trims securely, making sure they’re evenly spaced. For fringe trims, attach along the bottom hem or sides of curtains for a layered effect. Reinforce the attachments to withstand daily use.
Create custom trims by combining different textures, colors, or adding beads and charms. Make your own tassels with embroidery floss or yarn for a personalized touch. Use metallic or glitter trims for a glamorous vibe. Incorporate initials or symbols with fabric paint or embroidery for extra personality.
A DIY curtain tie or fringe trim adds a handcrafted touch that shows off your style. It’s an affordable, creative way to refresh your decor and boost your confidence in DIY projects. Once you see how easy and impactful this is, you’ll be inspired to experiment with other home upgrades!
9. Install Magnetic Curtain Tiebacks
Tired of struggling with traditional tiebacks or constantly adjusting curtains? Magnetic tiebacks offer a sleek, modern solution that’s easy to use and adjust. They’re perfect for quick styling and can be removed or repositioned with minimal effort, giving your windows a polished look in seconds.
Recommended Products to replicate this idea
| # | Preview | Product | |
|---|---|---|---|
| 1 |
|
KLOGTSIND Magnetic Curtain Tiebacks, Curtain Holdbacks for Curtains 2 Pack, Wood Bead Curtain... | Buy on Amazon |
| # | Preview | Product | |
|---|---|---|---|
| 1 |

|
Hion Magnetic Curtain Tiebacks Black 2pcs, Curtain Tiebacks Buckles Holdbacks Holders Hooks Clip for... | Buy on Amazon |
Picture a set of fabric curtains gently pulled to the side and secured with a magnetic tieback. The magnets hold firmly yet are discreet, blending seamlessly into your decor. The smooth, clean look creates a minimalist aesthetic, while the ease of use means you can change your window’s look anytime without fuss. When not in use, they tuck away neatly, maintaining the room’s sleek appearance.
Choose from decorative magnets in metallic, ceramic, or fabric-covered finishes to match your style. Attach magnets to the curtain fabric with fabric glue or sew them into the back for extra security. Use different sizes for a layered or asymmetric look, or combine multiple magnets for heavier curtains. These tiebacks work well with light, medium, or even blackout curtains.
Select strong, neodymium magnets designed for fabric. Sew or glue one magnet onto the curtain fabric at the desired tieback point. Attach the matching magnet to the wall or window frame, ensuring it’s aligned with the fabric magnet. When pulling the curtain to the side, the magnets snap together effortlessly. Adjust the magnets’ position to achieve the perfect hold and look. For a more decorative touch, cover magnets with fabric or paint.
Decorate the magnets with fabric covers, paint, or embellishments like rhinestones. Use contrasting colors for a bold look or matching tones for subtlety. Combine with other hardware like hooks or decorative brackets for added style. Keep extra magnets handy for quick adjustments or to switch between different curtain styles.
Magnetic tiebacks are a clever, no-damage solution that elevates your decor with minimal effort. They’re especially useful for renters or those who like to change their window styles frequently. Once you experience how easy they are to use, you’ll wonder why you waited so long to try this modern upgrade!
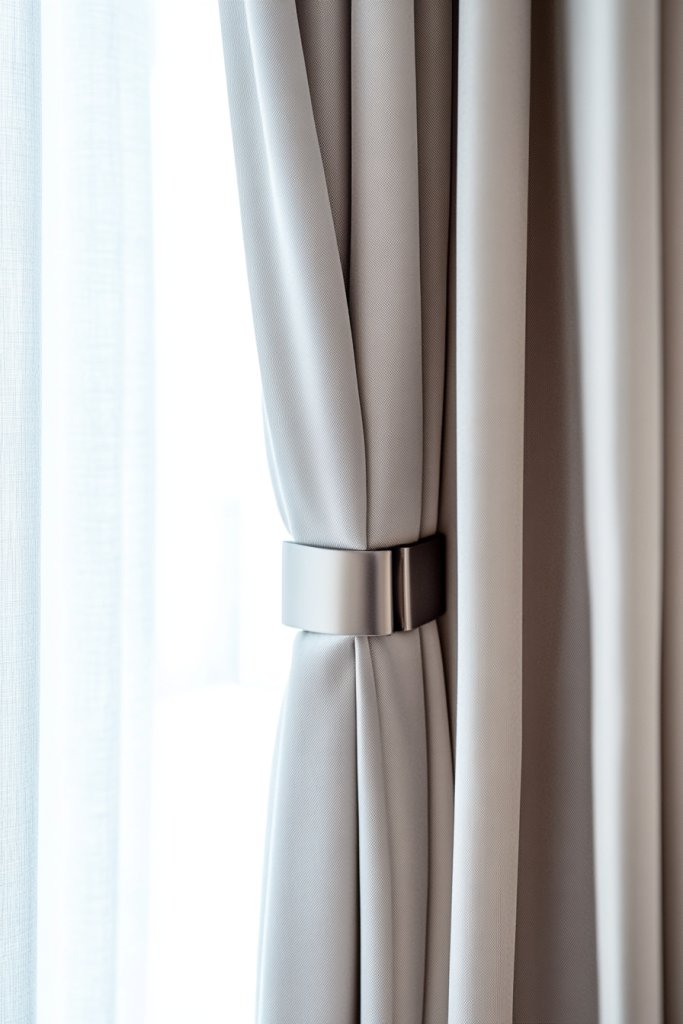
10. Add Decorative Curtain Holdbacks
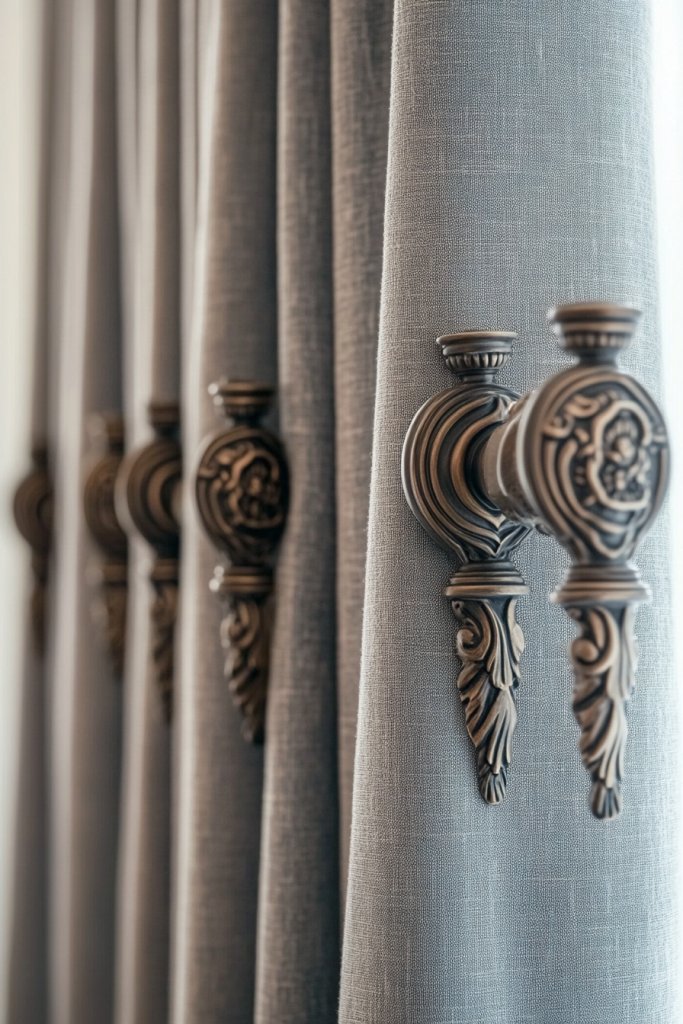
Curtains that hang straight without flair can make a room look dull or unfinished. Decorative holdbacks offer an inexpensive way to style your curtains beautifully while adding visual interest to your windows. They’re a simple upgrade that can make your space feel more polished and personalized.
Recommended Products to replicate this idea
| # | Preview | Product | |
|---|---|---|---|
| 1 |

|
Amazon Basics Decorative Curtain Tiebacks, Sturdy and Easy to Install Holdbacks, Set of 2, Black | Buy on Amazon |
| # | Preview | Product | |
|---|---|---|---|
| 1 |
|
KLOGTSIND Magnetic Curtain Tiebacks, Curtain Holdbacks for Curtains 2 Pack, Wood Bead Curtain... | Buy on Amazon |
Envision a pair of brass or beaded holdbacks pulling back heavy velvet curtains, revealing a stunning window frame. The holdbacks add a touch of elegance or whimsy, depending on your choice. When curtains are pulled back, the fabric is gathered attractively, framing the window like a professional decorator. The result is a balanced, inviting look that enhances your overall decor.
Experiment with different materials—ribbon, rope, metal, or even decorative chains—to match your room’s style. For a vintage look, choose ornate or distressed metal; for a boho vibe, go for braided rope with tassels. Seasonal or holiday-themed holdbacks, like velvet ribbons or plaid fabrics, can refresh your decor throughout the year. Adjust the tightness to control how tightly the curtains are gathered.
Attach your chosen holdbacks to the wall using adhesive hooks, nails, or screws, depending on weight and style. Loop the fabric around the holdback, then secure it, ensuring even gathering. For a neat appearance, align the holdbacks at the same height on both sides. For heavier curtains, opt for sturdier hardware to prevent sagging or damage. Play with different arrangements until you find a look that complements your style.
Decorate holdbacks with paint, fabric wraps, or embellishments like charms and beads. Create mismatched sets for an eclectic look or coordinate colors for a cohesive style. You can also add decorative tassels or fringes for extra flair. Changing the holdbacks seasonally or for special occasions keeps your decor feeling fresh and intentional.
Adding decorative holdbacks is an easy way to instantly upgrade your window dressing. They’re versatile, inexpensive, and can be styled to suit any decor theme. Seeing your curtains beautifully gathered will boost your confidence in DIY decorating skills—so go ahead, give it a try!
11. Use Fabric Paint or Stencils for Custom Patterns
Plain curtains can be boring, especially if you’re into personalized decor. Using fabric paint or stencils lets you create custom patterns and designs easily. It’s a budget-friendly way to add a unique touch that reflects your style without buying new curtains or paying for expensive embellishments.
Recommended Products to replicate this idea
| # | Preview | Product | |
|---|---|---|---|
| 1 |

|
Shuttle Art Fabric Paint, 18 Colors Permanent Soft Fabric Paint in Bottles (60ml/2oz) with Brushes,... | Buy on Amazon |
| # | Preview | Product | |
|---|---|---|---|
| 1 |

|
AFRITEE Floral Stencils for Painting - 12 Pcs Damask Floral Geometric Texture Pattern Reusable... | Buy on Amazon |
Picture a set of light-colored curtains with bold, geometric black patterns painted along the edges. The contrast adds modern flair, making the curtains a focal point. When sunlight hits the painted areas, the designs subtly glow, adding depth and personality. It feels like a designer touch that you made yourself, giving your space a bespoke vibe.
Try stripes, polka dots, chevrons, or floral motifs based on your decor theme. Use painter’s tape or stencils for crisp, clean lines. For a more subtle effect, opt for metallic or pastel paints. Seasonal motifs like snowflakes or leaves can be added for holiday cheer or seasonal updates. Mix and match patterns for an eclectic, artistic look.
Wash and iron your curtains to ensure a smooth painting surface. Use painter’s tape to outline your pattern or position stencils securely. Apply fabric paint with brushes or sponges, working from the center outward for neatness. Allow the paint to dry completely before hanging. For durability, set the paint with heat using an iron or follow the manufacturer’s instructions. This DIY approach makes your curtains truly one-of-a-kind.
Add handwritten initials, quotes, or doodles for a personal touch. Combine different colors and styles for a layered, artistic effect. Seal the painted areas with a fabric medium to prevent cracking or peeling. Incorporate elements like rhinestones or embroidery to add texture and sparkle. Regular touch-ups or repainting keep your design fresh over time.
Custom painting transforms simple curtains into statement pieces that showcase your personality. It’s a satisfying way to practice your artistic side and make your home uniquely yours. Once you see how simple and impactful this is, you’ll be inspired to tackle other DIY decor projects with confidence!
12. Incorporate Velcro Strips for Adjustable Privacy Layers
Sometimes you want privacy but also want to let in light at other times. Fixed curtains can’t do both easily. Velcro strips give you an adjustable solution, letting you add or remove privacy layers quickly. It’s an inexpensive, versatile hack that can make your windows more functional and adaptable.
Recommended Products to replicate this idea
| # | Preview | Product | |
|---|---|---|---|
| 1 |

|
Navona 30Ft x 1 Inch Hook and Loop Strips with Adhesive – 2 Rolls Heavy Duty Hook and Loop Tape... | Buy on Amazon |
| # | Preview | Product | |
|---|---|---|---|
| 1 |

|
VELIMAX Reeded Glass Window Film, Window Privacy Film, Frosted Window Vinyl, 3D Decorative Decals... | Buy on Amazon |
Imagine a sheer curtain attached to a heavier, opaque panel with strips of Velcro. When you want privacy, press the layers together; when you want light, peel back the opaque layer. The Velcro keeps everything in place securely without damage. It’s like having a customizable window dressing that adapts to your mood or needs, all while looking neat and tidy.
Use different colors or patterns of Velcro for a playful or coordinated look. Attach strips along the top, sides, or bottom of curtains, depending on your privacy needs. For a more seamless appearance, hide the Velcro behind decorative trims or fabric flaps. This method works well with lightweight fabrics and can be easily adjusted as seasons or preferences change.
Measure and cut strips of Velcro to fit your curtains. Sew or glue the hook side onto your curtain panels, and attach the loop side to the window frame or a secondary panel. Make sure the Velcro lines up perfectly for easy attachment. Test the strength and adjust as needed to prevent slipping or sagging. This setup allows you to easily switch between open and closed privacy modes.
Decorate the Velcro strips with fabric covers or paint to make them blend with your curtains. Use contrasting colors for a playful effect or matching shades for subtlety. Consider adding decorative trims or embroidery along the Velcro for a polished look. Regularly check and replace the strips to maintain a secure hold.
This adjustable privacy layer adds both function and style to your windows. It’s a clever solution that proves home decor can be flexible and budget-friendly. Once you see how versatile and easy it is, you’ll be eager to try other DIY upgrades that make your space more adaptable!
13. Hang Curtains on Wire or Cables for a Minimalist Look
Traditional curtain rods can feel bulky or out of place in modern decor. If you prefer a sleek, minimalist aesthetic, hanging curtains on wire or cable systems is a game-changer. It’s a simple, inexpensive way to give your windows a clean, contemporary vibe while keeping things lightweight and airy.
Recommended Products to replicate this idea
| # | Preview | Product | |
|---|---|---|---|
| 1 |
![[5 Meters] Wall Mount Curtain Wire Rod Set with (20 Hanging Clips) - Pinowu Stainless Steel Picture Hanging Wire Clothesline Wire Multi-purpose Set Hang Photo Notes, Art](https://m.media-amazon.com/images/I/51Fti2oWd7L._SL160_.jpg)
|
[5 Meters] Wall Mount Curtain Wire Rod Set with (20 Hanging Clips) - Pinowu Stainless Steel Picture... | Buy on Amazon |
| # | Preview | Product | |
|---|---|---|---|
| 1 |
|
[5 Meters] Wall Mount Curtain Wire Rod Set with (20 Hanging Clips) - Pinowu Stainless Steel Picture... | Buy on Amazon |
Picture a transparent cable stretched taut across a window frame, with delicate curtains hanging from clips or hooks. The thin wire creates the illusion of floating fabric, making the room feel more open. When the curtains sway gently, they add movement and softness without cluttering the space. This setup works particularly well in small or studio apartments.
Choose clear or metallic cables to match your decor style. Use clip hooks or curtain rings to attach lightweight fabrics or sheers. For a more artistic look, add decorative clips, or hang multiple layers of curtains at different heights. This method adapts easily to various window sizes and can be expanded with additional cables for multi-layered effects.
Measure your window width and select a cable length slightly longer for tension. Attach the cable securely at both ends using eye bolts or hooks. Use curtain clips or rings to hang your chosen curtains, spacing them evenly. Adjust the tension to keep the wire taut and prevent sagging. For heavier fabrics, reinforce the attachment points or choose sturdier cables. No tools or drilling required—just some basic measuring and securing.
Decorate the cable with fabric sleeves or paint to match your decor. Mix different curtain textures or colors along the wire for visual interest. Use decorative clips or beads for added flair. Change out curtains seasonally or for a new look, as this setup is flexible and easy to modify. It’s a minimalist solution that still makes a big style statement.
Hanging curtains on wire or cable is a smart, modern upgrade that’s easy and damage-free. It’s perfect for renters or anyone who loves clean lines and simplicity. Seeing your space transformed with this sleek solution will boost your confidence in experimenting with home decor DIYs—so go ahead, give it a try!
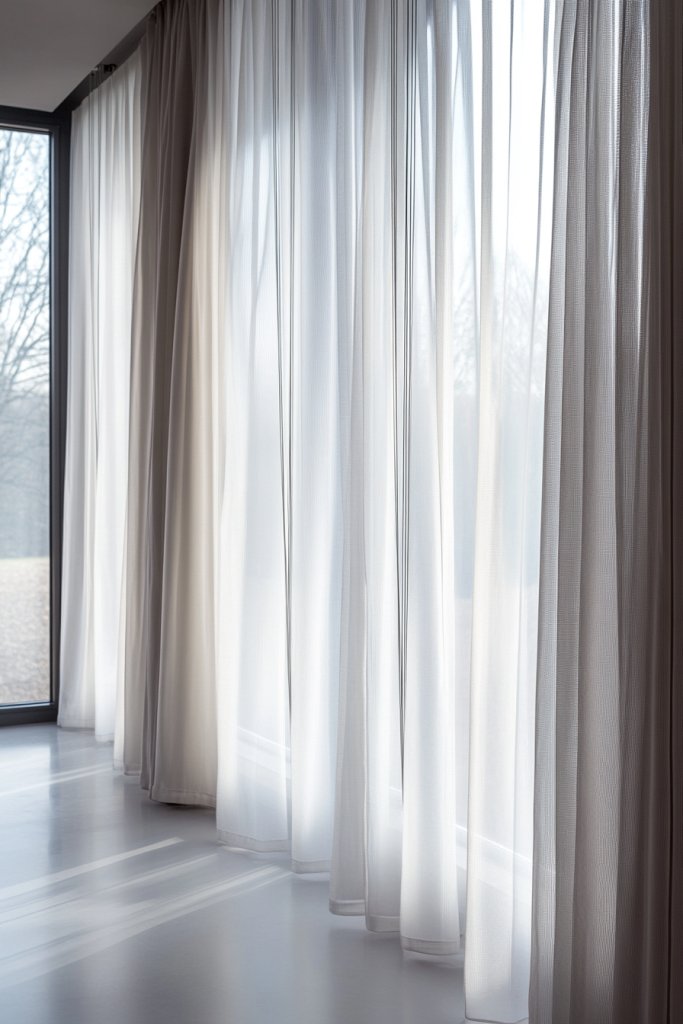
14. Layer Sheer Curtains Under More Opaque Panels

Sometimes a single curtain just doesn’t give you enough control over privacy and light. Layering sheer curtains underneath heavier panels offers a versatile, stylish solution. It’s an affordable way to add depth, softness, and functionality to your window treatments, all without buying new curtains.
Recommended Products to replicate this idea
| # | Preview | Product | |
|---|---|---|---|
| 1 |
|
OWENIE Sheer Curtains 84 inches Long 2 Panels Set for Living Room/Bedroom, Rod Pocket Voile Sheer... | Buy on Amazon |
| # | Preview | Product | |
|---|---|---|---|
| 1 |
|
NICETOWN Pitch Black Solid Thermal Insulated Grommet Blackout Curtains/Drapes for Bedroom Window (2... | Buy on Amazon |
Visualize a pair of blackout curtains with a delicate sheer layer underneath. When closed, the opaque layer blocks out light and offers privacy. When you want a softer look, open the opaque panels while leaving the sheers in place, allowing gentle light to filter through. The layered effect creates an elegant, hotel-like ambiance that’s both functional and beautiful.
Mix different textures—think linen, silk, or polyester—for a rich, layered appearance. Play with colors and patterns to suit your decor style, from classic neutrals to bold prints. Use the sheer layer as a decorative element when the main curtains are open, or draw everything for complete privacy. Adjust the layers based on season or mood for maximum flexibility.
Install a sturdy curtain rod capable of supporting two layers. Hang the sheer curtains first, then add the opaque panels or vice versa. Use lightweight fabrics for easy movement and adjust the length to match your window’s height. When not in use, simply draw the opaque panels closed or leave the sheers in place for a diffused, ambient glow. This layering enhances both privacy and style with minimal effort.
Coordinate the fabrics and colors for a cohesive look, or mix textures for visual interest. Add decorative tiebacks or holdbacks to arrange the layers attractively. Seasonal fabrics or prints can refresh your decor and keep things lively. Incorporate blackout liners or thermal fabrics for energy efficiency during colder months.
Layering sheer and opaque curtains is a timeless, adaptable technique that boosts your decorating confidence. It combines practicality with elegance, making your windows a centerpiece of your room. Once you see how effortlessly this upgrade elevates your space, you’ll want to try it everywhere!
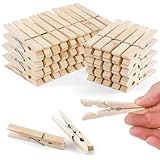
15. Use Binder Clips or Clothespins for a Quirky, DIY Touch
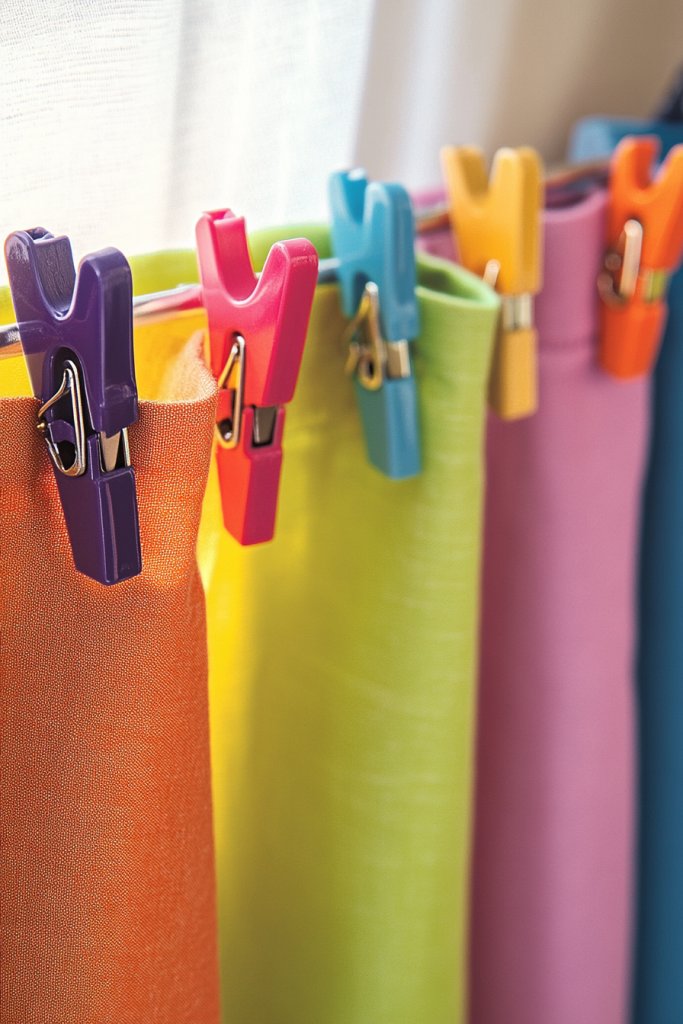
Looking for a fun, budget-friendly way to hold your curtains in place? Binder clips and clothespins are surprisingly stylish and practical tools for DIY curtain upgrades. They add a quirky charm and are super easy to adjust, making your window treatments both functional and fun.
Recommended Products to replicate this idea
| # | Preview | Product | |
|---|---|---|---|
| 1 |

|
Outus 48 Pcs Cute Binder Clips with Box 2 Sizes Floral Office Clips Supplies Assorted Designs... | Buy on Amazon |
| # | Preview | Product | |
|---|---|---|---|
| 1 |
|
30 PCS Clothes Pins, 2.9 Inch Wooden Clothespins, Heavy Duty Clothes Line Clips for Drying Laundry,... | Buy on Amazon |
Imagine colorful clothespins clipped onto a lightweight sheer curtain, holding it neatly against the window frame. The clips create a playful, casual vibe and can be arranged in patterns or randomly for a more eclectic look. When you want to change the style, simply swap or reposition the clips—no tools or damage involved. The result is a cheerful, personalized window display.
Choose clips in different colors, sizes, or materials—metal, plastic, or decorated with washi tape—for variety. Use them to hold back curtains in a playful way or create a pattern along the top edge for visual interest. Combine clips with ribbons or yarn for a boho or rustic aesthetic. They’re also great for holding layers of sheer and opaque fabrics together.
Select clips that match your curtain weight and style. Attach clips at regular intervals along the curtain’s top or sides, securing fabric gently but firmly. For a more polished look, line up clips evenly and hide the clip edges behind decorative trims or fabric borders. You can also hang fabric panels in a zigzag pattern or use clips as hooks for additional accessories. It’s a quick, reversible process perfect for renters.
Decorate clips with paint, washi tape, or fabric for a customized touch. Use matching or contrasting colors to enhance your decor theme. Add small charms or beads to the clips for extra flair. Regularly update or rearrange clips to keep your window styling fresh and playful.
Using binder clips or clothespins is a playful, creative way to upgrade your window look with zero damage. They’re easy to use, inexpensive, and perfect for experimenting. Seeing your curtains styled with these fun accessories will inspire you to try more DIY home decor ideas—so go ahead, get clipping!
16. Create a Curtain Rod Cover with Fabric or Ribbons
Plain, boring curtain rods can stick out like a sore thumb. Want a quick, inexpensive way to add color and personality? Wrapping fabric or ribbons around your curtain rod transforms it into a decorative element. It’s an easy DIY that instantly elevates your window styling and hides less attractive hardware.
Recommended Products to replicate this idea
| # | Preview | Product | |
|---|---|---|---|
| 1 |
|
TidyFriend Shower Rod Cover 58 Inch, Smooth Glide Shower Curtain Rod Cover for Straight Shower Rods,... | Buy on Amazon |
| # | Preview | Product | |
|---|---|---|---|
| 1 |

|
Ribbli Double Faced Red Satin Ribbon,1” x Continuous 25 Yards,Fabric Ribbon Use for Bows... | Buy on Amazon |
Picture a simple white curtain rod wrapped in a vibrant, patterned fabric or silk ribbon. The soft texture and lively colors make the rod part of your decor rather than an afterthought. When curtains are drawn, the fabric-wrapped rod adds a subtle pop of color and texture, creating a cohesive, cozy look. It’s a small detail with big visual impact.
Use different fabrics—jute, velvet, or grosgrain ribbon—to match your decor theme. Wrap the rod completely or add decorative bows or knots for extra flair. For a seasonal update, swap out fabrics or ribbons to reflect holidays or new trends. Layer multiple ribbons for a textured, layered appearance that adds depth.
Measure your curtain rod’s length before selecting fabric or ribbon. Wrap the fabric tightly around the rod, securing with hot glue, fabric adhesive, or small safety pins at the ends. For a more finished look, add decorative trims or bows at the ends or middle. You can also sew fabric covers into a tube and slip them over the rod for a cleaner finish. Regularly replace or refresh the fabric for a new look.
Embellish with painted patterns, embroidered initials, or added charms. Coordinate the fabric or ribbons with your room’s color scheme for harmony. You can also add tassels or pom-poms at the ends for extra fun. This simple upgrade makes your window hardware a stylish accent rather than an eyesore.
Creating a fabric or ribbon cover for your curtain rod is a fun, affordable way to personalize your space. It’s a small project that yields a surprisingly stylish result, boosting your confidence in DIY decor. Once you see your upgraded curtain hardware, you’ll be inspired to tackle even more creative projects!
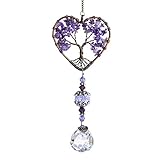
17. Hang Decorative Beads or String Charms Along Curtain Tops
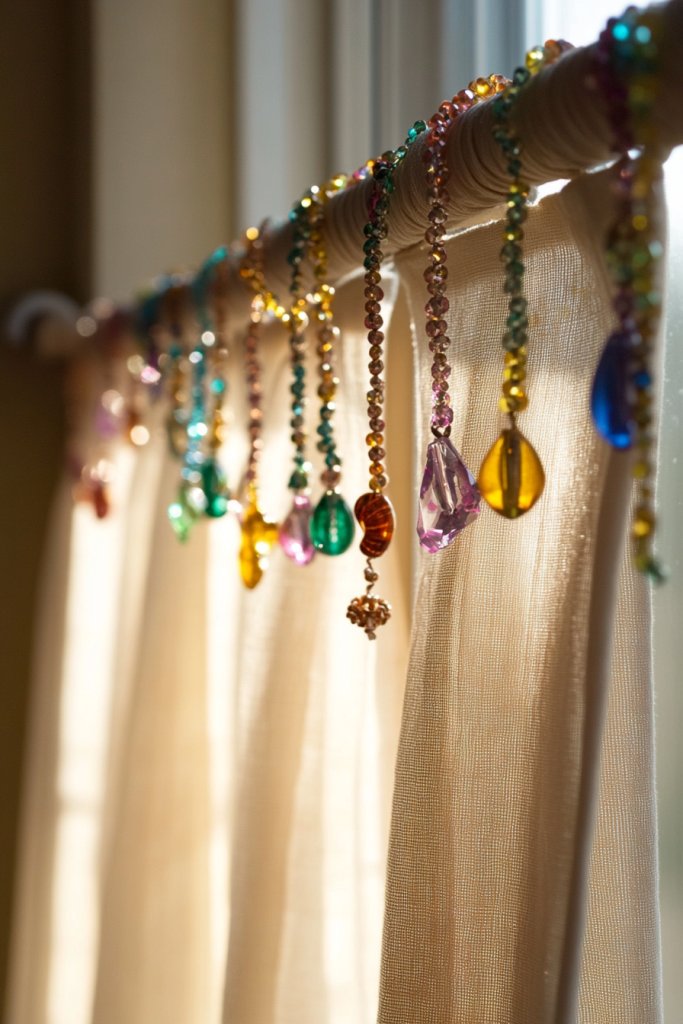
Plain curtain tops can look dull or uninspired. Want to add a playful, textured detail that catches the eye? Hanging beads or charms along the curtain rod or top edge is a simple way to infuse personality and style. It’s an inexpensive, DIY-friendly upgrade that makes your window treatments stand out.
Recommended Products to replicate this idea
| # | Preview | Product | |
|---|---|---|---|
| 1 |

|
99ft Crystal Beads Garland Strand, Iridescent Clear Acrylic Diamond Beads String Roll for Crafts,... | Buy on Amazon |
| # | Preview | Product | |
|---|---|---|---|
| 1 |
|
H&D HYALINE & DORA Sun Catcher Crystal Tree of Life Rainbow Maker Drops Hang for Window, Home Decor,... | Buy on Amazon |
Imagine a curtain with a string of colorful beads draped from each end, with small charms dangling in between. When the curtains sway, the beads catch the light, creating a subtle shimmer. The charms add a touch of whimsy or elegance, depending on your style. This layered, textured look makes your windows feel more curated and lively.
Use beads made of glass, wood, metal, or plastic, depending on your decor. Mix colors and sizes for an eclectic vibe or choose uniform beads for a sleek look. Charms can be shaped as stars, hearts, or abstract designs to match your theme. Attach them with simple string, wire, or decorative cords, and experiment with different lengths and arrangements.
String beads and charms onto thin, durable cords or wires, tying secure knots at each end. Drape the strings along the curtain rod or tie them to the curtain rings or clips. Adjust the length so the charms hang at different heights for visual interest. For a more permanent look, glue or sew the beads onto a fabric strip that can be clipped or pinned onto the curtain top.
Create themed collections—beads in your favorite colors, charms representing your interests, or handmade items. Incorporate metallic or matte finishes for different textures. Swap out beads and charms seasonally for a fresh look. Combine with other decorative elements like ribbons or trims for a layered effect.
Decorative beads and charms are a playful, customizable way to elevate your curtains. They’re easy to add and remove, so you can change your look anytime. Seeing your windows decorated with these personal touches will inspire your confidence in DIY decor projects—go ahead, make your window sparkle!
18. Use Repurposed Wallpaper or Contact Paper for a Patterned Backdrop
Bored with plain or faded curtains? Want a quick way to add style and a touch of personality? Lining the back of curtains with repurposed wallpaper or contact paper is an affordable, creative fix. It creates an unexpected pop of pattern and color that elevates your window treatment with minimal effort.
Recommended Products to replicate this idea
| # | Preview | Product | |
|---|---|---|---|
| 1 |
|
Art3d Smoothing Tool Kit for Applying Peel and Stick Wallpaper, Vinyl Backsplash Tile | Buy on Amazon |
| # | Preview | Product | |
|---|---|---|---|
| 1 |
|
WENMER 17.71" x 118" Geometric Hexagon Wallpaper Peel and Stick Wallpaper Removable Self Adhesive... | Buy on Amazon |
Imagine a sheer curtain layered over a vibrant, patterned contact paper that peeks through when the fabric moves. The contrast between the sheer and the bold background adds depth and intrigue. When sunlight hits the contact paper, it enhances the colors, making the window a visual focal point. It’s like giving your curtains a secret, stylish underlayer.
Choose from various contact paper patterns—florals, geometric, abstract—to match your decor. Apply the paper to the back of your existing curtains, cutting to size with scissors. For a more durable finish, seal with clear contact or Mod Podge. Change the backing seasonally or when you want a new look, swapping out the paper easily.
Clean the curtain’s backside thoroughly for optimal adhesion. Cut the contact paper or wallpaper to fit the fabric, leaving a small margin for adjustments. Carefully apply, smoothing out bubbles and wrinkles with a credit card or smoothing tool. Seal the edges with clear tape or glue for extra security, especially in high-humidity areas. This simple lining instantly transforms your curtains into colorful, patterned statements.
Layer different patterns or textures for a collage effect. Add decorative borders or trim along the edges for a finished look. Use fabric or contact paper with metallic accents for a luxe feel. Incorporate monograms, initials, or motifs with paint or stickers to further personalize the backdrop.
Using repurposed wallpaper or contact paper is a clever, inexpensive way to refresh your curtains. It’s a creative hack that adds instant style and personality to your windows. Seeing how a simple backdrop can completely change your decor will inspire you to explore more DIY projects—your home’s new favorite feature is just a peel-and-stick away!
19. Upgrade with Inexpensive, Colorful Curtain Hooks or Rings
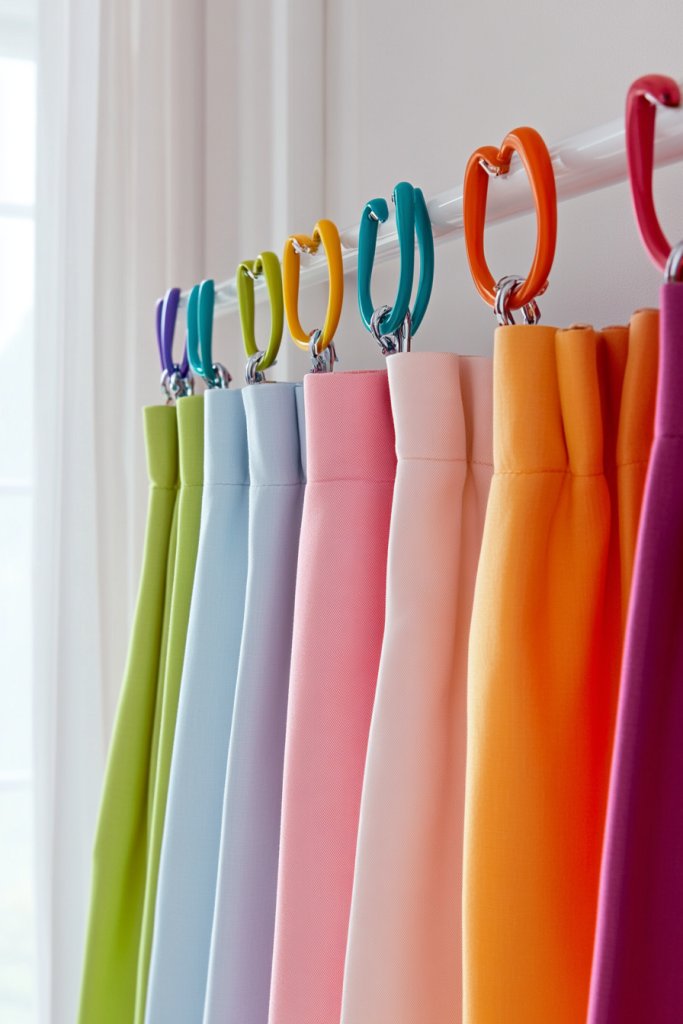
Old, dull curtain hooks or rings can make your window treatments look tired and outdated. Want a quick, budget-friendly way to breathe new life into your curtains? Swapping out your hardware for colorful or decorative hooks instantly refreshes the entire look. It’s a small change with a surprisingly big impact.
Recommended Products to replicate this idea
| # | Preview | Product | |
|---|---|---|---|
| 1 |

|
Qulable 24 pcs Shower Curtain Rings Plastic Shower Curtain Hooks C-Shaped Rings Hook Hanger Bath... | Buy on Amazon |
| # | Preview | Product | |
|---|---|---|---|
| 1 |

|
HIKMLK Leaf Shaped Curtain Tieback Holdbacks 2pcs, Handmade Metal Curtain Side Holders for Wall,... | Buy on Amazon |
Imagine shiny, vibrant hooks in bold reds, blues, or metallic finishes holding up a set of flowing curtains. The new hardware adds a splash of color and personality, transforming the window from plain to playful or elegant. When curtains are drawn, the hooks peek through, giving a hint of style that complements your decor. It’s like jewelry for your window treatments.
Choose hooks and rings in different shapes—vintage, modern, ornate—to match your style. Mix colors or finishes for a layered, eclectic look, or keep it uniform for a sleek, minimalist vibe. For added flair, select hooks with decorative elements like beads or floral motifs. Change out hardware seasonally to keep your decor feeling fresh.
Remove existing hooks and rings carefully, cleaning the rod if needed. Attach new hooks or rings, ensuring they fit the curtain rod size and support the weight of your curtains. For heavier fabrics, opt for sturdier metal hooks with reinforced rings. Space them evenly for balanced hanging. If necessary, use small pliers to tighten or adjust the hardware for a secure fit.
Decorate hooks with paint, washi tape, or small charms for a custom look. Coordinate with other hardware in your room—drawer pulls, knobs, or picture hooks—for a cohesive style. Use different shapes and colors to create visual interest or thematic accents. Regularly swap out hardware to match changing decor themes or seasons.
Upgrading your curtain hooks or rings is an easy, inexpensive way to elevate your window decor. It’s a quick fix that adds color, style, and personality, boosting your decorating confidence. Once you see how a simple hardware change can transform your windows, you’ll be inspired to explore even more DIY upgrades—your home will thank you!
Conclusion
With a diverse array of inexpensive curtain upgrade ideas, you now have plenty of options to enhance your home’s privacy and style. Whether you choose simple DIY projects or stylish accessories, these affordable upgrades can make a big difference in your space. Don’t be afraid to try out different ideas and personalize your curtains to match your unique taste. Take action today and transform your windows into stunning focal points that reflect your personality and flair!
Last update on 2026-03-01 / Affiliate links / Images from Amazon Product Advertising API