First impressions matter, especially when it comes to welcoming guests or boosting your home’s charm — and that’s where curb appeal comes into play! Affordable DIY ideas are trending because they let homeowners enhance their home’s exterior without breaking the bank, making it possible for everyone to enjoy a beautiful, inviting entrance.
In this article, you’ll find a variety of creative and budget-friendly ideas to transform your entryway. From charming paint tricks to simple landscaping tweaks, these tips will inspire you to boost your home’s curb appeal with minimal expense and maximum impact. Get ready to turn your front yard into a warm, inviting space that makes a lasting first impression!
1. Paint a Bold, Inviting Front Door on a Budget
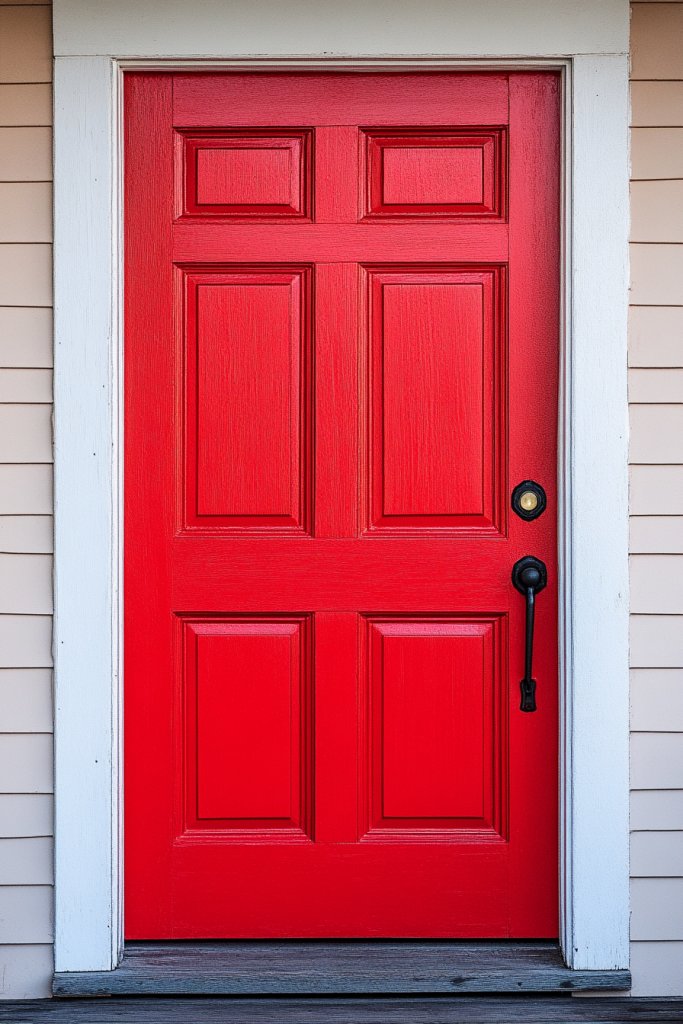
Ever looked at your front door and thought it’s just blending into the neighborhood? Or maybe it’s so dull you forget it’s even there? You want your entrance to say hello with a punch of personality without breaking the bank. A bold door instantly transforms curb appeal and makes visitors feel welcomed.
Recommended Products to replicate this idea
| # | Preview | Product | |
|---|---|---|---|
| 1 |

|
Rust-Oleum 369383 Advanced Dry Door & Trim Paint, Quart, Satin Black | Buy on Amazon |
| # | Preview | Product | |
|---|---|---|---|
| 1 |

|
Pro Grade Paint Brushes, 5-Piece Paint Brush Set: Flat & Angle Brushes for Latex and Oil Paints,... | Buy on Amazon |
Picture a vibrant teal or a deep navy door standing out against a neutral facade. The glossy finish catches sunlight, drawing eyes right to your entry. Adding a contrasting trim or a fun door handle amplifies the effect. The overall look feels fresh, inviting, and totally custom, even if you spent just a few dollars.
You can change your door color seasonally—think warm reds for fall or icy blues for winter. For a more sophisticated vibe, choose matte or muted tones. If your house has a Victorian charm, go for jewel tones; for modern homes, sleek black or white works beautifully. You can also add decals or simple stencils for extra flair.
Start by cleaning your door thoroughly. Pick a high-quality exterior paint suitable for your climate—affordable options are available at hardware stores. Tape off the edges and hardware for clean lines. Apply a primer if needed, then two coats of your chosen color. Finish with a clear sealant to withstand weather. Replacing or painting the hardware can complete the look.
Add a quirky door knocker or a colorful wreath that matches your personality. Use inexpensive chalk paint to create seasonal messages or patterns. Consider adding a small, weatherproof sign with your house number in a bold font. These small touches make your entrance uniquely yours and welcoming.
A freshly painted front door boosts your home’s charm instantly. It’s a simple, cost-effective change that makes a big impact. You’ll love coming home, knowing your entry looks lively and inviting, setting the tone for the entire property.
2. Create a Charming DIY Welcome Sign with Reclaimed Wood

Ever wished your front porch had a warm, personal touch? Standard doormats and generic signs don’t cut it anymore. You want something that welcomes guests with personality and charm, but DIY options can be affordable and fun. A handmade welcome sign instantly adds warmth and character.
Recommended Products to replicate this idea
| # | Preview | Product | |
|---|---|---|---|
| 1 |

|
Rustic Revival | Handmade Reclaimed Barnwood Craft Bundle | Unfinished Authentic Weathered Wood... | Buy on Amazon |
| # | Preview | Product | |
|---|---|---|---|
| 1 |

|
22PCS Large Letter Welcome Stencils for Painting on Wood - Farmhouse Stencils for Crafts Reusable... | Buy on Amazon |
Imagine a rustic, weathered piece of wood with hand-painted lettering spelling ‘Welcome’ in cheerful colors. You can add decorative elements like painted flowers or borders to match your style. The texture of reclaimed wood paired with bright paint creates a cozy, inviting vibe. It looks charming against a variety of home styles, from farmhouse to modern.
Change the message seasonally—‘Hello Spring’ or ‘Happy Holidays’. Use different paint colors or stencils for a more polished look. For a more minimalist style, opt for a simple silhouette or monogram. You can hang it with rope, attach it to a stand, or lean it against the wall for versatility.
Find scrap wood at thrift stores or from your own garage. Sand it lightly to smooth rough edges. Use outdoor-grade paint or chalk paint for durability. Freehand your message or use stencils for precision. Seal with a weatherproof clear coat to prevent fading and damage. Hang with twine or attach hooks for easy placement.
Add decorative touches like painted flowers, small metal accents, or even a metal house number. Personalize it further with a favorite quote or your family name. You could also decorate with colorful ribbons or burlap for a rustic look. It’s about reflecting your style and making guests feel at home.
A DIY welcome sign is a cost-effective way to add personality and curb appeal. It shows off your creativity and makes your entryway memorable. Plus, it’s a fun project that lets you showcase your style—no fancy tools required!
3. Add a Colorful Doormat with Creative Patterns or Messages

Let’s face it—your front door is the first thing visitors see. A boring, plain doormat just doesn’t cut it anymore. You want your entry to feel inviting and fun, without spending a fortune. A colorful, patterned doormat can instantly brighten the space and set the tone.
Recommended Products to replicate this idea
| # | Preview | Product | |
|---|---|---|---|
| 1 |

|
CHICHIC Colorful Welcome Mat, 18x 30 Inch Front Doormat for Home Entrance Outdoors Mat for Outside... | Buy on Amazon |
| # | Preview | Product | |
|---|---|---|---|
| 1 |

|
Eohak Welcome-Ish Front Door Mat - Welcome-Ish Depends Who You are Doormat Non Slip Backing Mat for... | Buy on Amazon |
Picture a vibrant doormat with playful polka dots, stripes, or even a witty message like ‘Hi There!’ in bold lettering. Think about patterns that complement your home’s color palette. Bright reds, cheerful yellows, or cool blues make the entrance pop. When guests step onto it, they feel welcomed and cheerful.
Change your doormat seasonally—pumpkins for fall, snowflakes for winter. You can also personalize it with stencils or fabric paint for a custom message. For different styles, opt for natural coir for rustic charm or rubber mats with fun patterns for durability. Layer multiple mats for a more eclectic look.
Choose a size that fits your porch or doorstep comfortably. Select a weather-resistant material suitable for your climate. Use outdoor paint or stencils to add patterns or messages if you want to customize an existing mat. Regularly clean or shake out dirt to keep it inviting. For a DIY touch, you can sew or glue fabric patches or embellishments.
Add a splash of personality with a personalized message or your favorite quote. You could tie a colorful ribbon or attach a small decorative element like a faux flower or a mini holiday ornament. Consider pairing it with a matching outdoor rug for a coordinated look. These small details create a cohesive, welcoming entry.
A cheerful doormat is an instant mood booster for guests and for you. It’s an easy, inexpensive upgrade that makes your home look cared for and inviting. Plus, it’s a quick way to showcase your personality—no fancy skills needed!
4. Install Simple Solar-Powered Pathway Lights
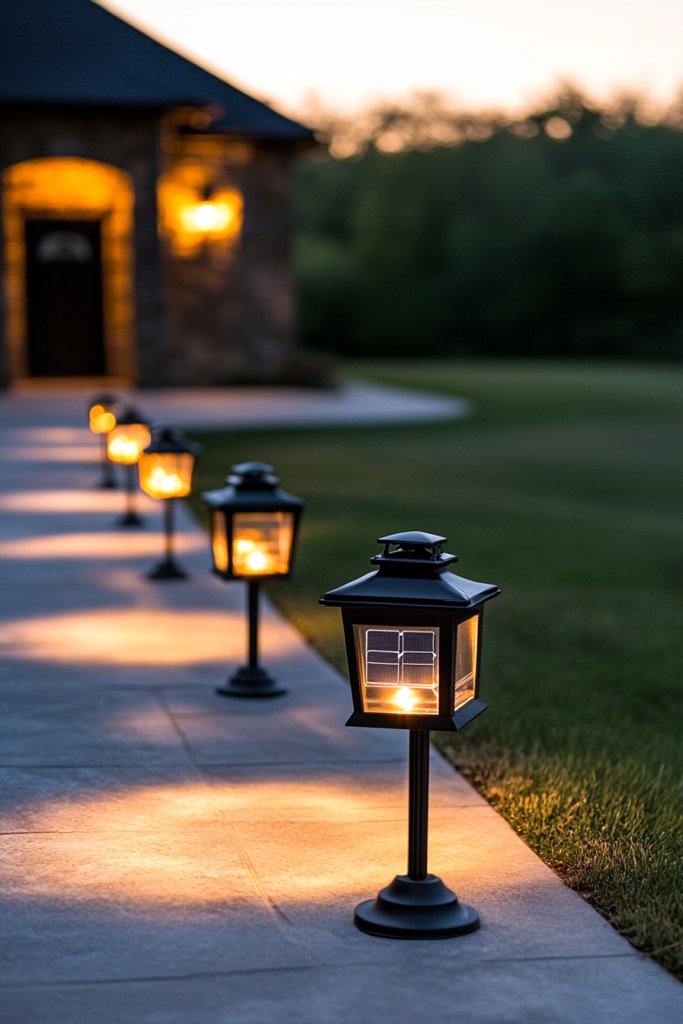
Ever tripped over uneven pavement or stepped into the dark trying to unlock your door? Proper lighting isn’t just safety; it’s also about curb appeal. But installing traditional wired lights can be costly and complicated. Solar pathway lights offer an easy, budget-friendly solution that transforms your yard at night.
Recommended Products to replicate this idea
| # | Preview | Product | |
|---|---|---|---|
| 1 |

|
Mancra Solar Pathway Lights, 8 Pack LED Solar Lights Outdoor Waterproof, Glass Metal Garden Lighting... | Buy on Amazon |
| # | Preview | Product | |
|---|---|---|---|
| 1 |

|
INCX Solar Lights Outdoor Waterproof, 3000 LM 156 LED Motion Sensor Outdoor Lights, 3 Heads Solar... | Buy on Amazon |
Imagine soft, warm glows lining your walkway, illuminating the path with a gentle flicker. The fixtures are simple but charming—metal or plastic stakes with lantern-style covers or sleek modern designs. At dusk, the lights turn on automatically, casting a cozy ambiance. The effect is magical without any wiring or extra effort.
Choose from various styles—classic lanterns, modern globes, or whimsical shapes—to match your home’s vibe. You can cluster different heights or designs for a layered look. Seasonal accents like faux pumpkins or decorative stones can enhance the pathway. Position lights along steps or curves to highlight architectural features.
Determine your walkway’s length and mark where lights will go. Select solar lights with good reviews and enough brightness. Simply stake or mount them into the ground, ensuring they get direct sunlight during the day. Adjust the angle for optimal coverage. No wiring means installation is quick—just insert, turn on, and enjoy.
Decorate the bases with small stones, painted rocks, or seasonal decorations for a personal touch. Group different styles for a playful or elegant effect. Use colored bulbs or filters to change the mood or match your outdoor decor. Regularly clean the solar panels for maximum efficiency.
Solar pathway lights are a no-brainer—easy to install, eco-friendly, and budget-friendly. They create a welcoming glow that invites guests in and keeps your home safe. Plus, they add a charming finishing touch that elevates your entire curb appeal effortlessly.
5. Decorate with Vintage or Upcycled Planters
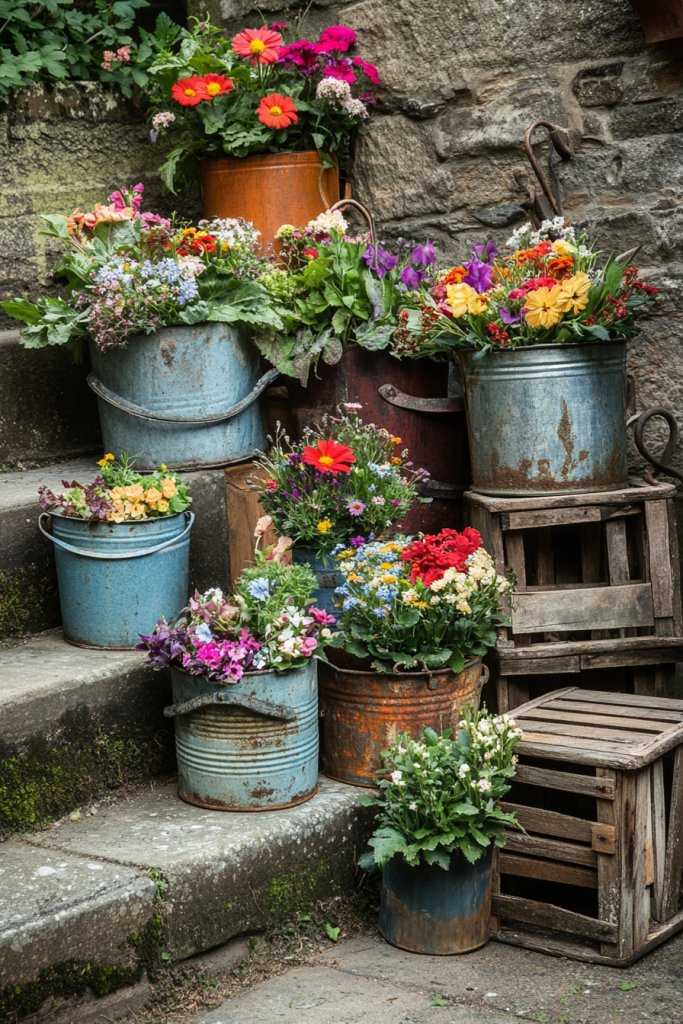
Feeling like your porch needs a splash of charm but don’t want to spend a ton? Vintage or upcycled planters are perfect for adding personality without the high price tag. They also give you a chance to be creative while recycling old items into something beautiful. Plus, greenery is optional—think about colorful flowers, decorative branches, or even seasonal arrangements.
Recommended Products to replicate this idea
| # | Preview | Product | |
|---|---|---|---|
| 1 |
|
vensovo Galvanized Metal Oval Planter Buckets with Handles – Set of 3 Rustic Farmhouse Flower Tubs... | Buy on Amazon |
Picture a collection of mismatched tins, antique buckets, or wooden crates filled with vibrant blooms or natural accents. These containers sit charmingly on steps, against the wall, or hanging from hooks. Their weathered textures and quirky shapes add rustic warmth and character. The overall effect feels curated and inviting, blending nostalgia with modern style.
Mix different materials and sizes for visual interest. Use them seasonally—potted herbs in spring, pumpkins in fall, or twigs and berries during winter. You can paint or distress new planters to match your aesthetic. For small spaces, hang up vintage buckets or use tiered stands. They work well on porches, steps, or even as table centerpieces.
Search thrift stores, flea markets, or your own attic for suitable containers. Clean and prep them—sand, paint, or seal if needed. Fill with inexpensive soil or decorative filler, then add plants or natural elements. Arrange them thoughtfully for balance and interest. Consider adding drainage holes or liners to prolong their lifespan.
Customize with painted patterns, house numbers, or monograms. Incorporate seasonal elements—pinecones, faux berries, or twinkle lights—to keep your display fresh year-round. Use colorful gravel or stones to complement your containers. Personal touches turn these planters into true reflections of your style.
Vintage and upcycled planters are a sustainable way to boost curb appeal. They show off your creativity and love for unique decor. With a little effort, you create a welcoming, charming entrance that feels like a curated garden—without the garden center prices.
6. Layer Rugs or Outdoor Mats for Visual Interest

Bland concrete or plain porch surfaces can make your home look dull and uninspired. Want to add warmth and personality without a major renovation? Layering outdoor rugs is a simple trick to create depth, texture, and a welcoming vibe. It’s also budget-friendly and easy to swap out.
Recommended Products to replicate this idea
| # | Preview | Product | |
|---|---|---|---|
| 1 |

|
2 Pcs Summer Door Mat, Coco Coir Welcome Doormat with Black and White Striped Mats, Extra Thick &... | Buy on Amazon |
| # | Preview | Product | |
|---|---|---|---|
| 1 |

|
OLANLY Front Door Mat Indoor Outdoor Entrance, Waterproof All-Season, All-Weather Doormat, Sturdy... | Buy on Amazon |
Imagine a woven jute rug topped with a colorful patterned outdoor mat, creating a layered effect. The textured fibers add warmth underfoot and contrast beautifully with smooth surfaces. Bright colors or bold patterns draw attention to your entry, making it feel cozy and inviting. The layering also helps define your space naturally.
Mix different textures—think jute, synthetic fiber, or outdoor wool—for variety. Change styles seasonally—cozy plaids for fall or bright florals for summer. For small porches, a single layered mat can suffice; larger spaces can handle multiple layers. Add a small bench or storage trunk to complete the look.
Select rugs that are rated for outdoor use and withstand weather. Measure your space to choose the right sizes and shapes. Lay down the larger rug first, then position the smaller, patterned mat on top. Use non-slip pads underneath to prevent slipping. Clean the surfaces underneath before layering for a polished appearance. Rotate or wash rugs periodically.
Use rugs with designs or colors that reflect your personality. Add decorative pillows or throws on nearby seating for extra comfort. Incorporate seasonal accents—like faux leaves or snowflakes—on top of the rugs. Layering also works well with a simple bench or outdoor storage box that matches your style.
Layered rugs are an easy way to elevate your entry’s visual appeal. They make your porch feel more welcoming and well-designed. Plus, changing out the layers seasonally keeps your space fresh and exciting—no major investment needed!
7. Hang DIY Mason Jar Lanterns or String Lights

Want to create an inviting glow outside without spending a fortune? Standard string lights can be pricey and fragile, but DIY mason jar lanterns offer a charming, customizable alternative. They add a cozy ambiance that’s perfect for outdoor gatherings or quiet evenings.
Recommended Products to replicate this idea
| # | Preview | Product | |
|---|---|---|---|
| 1 |

|
Creative Hobbies Brass Plated Oil Burner for Mason Jars - Turn Any Mason Jar into a Vintage Lamp | Buy on Amazon |
| # | Preview | Product | |
|---|---|---|---|
| 1 |
|
Brightever LED Outdoor String Lights 100FT Patio Lights with 52 Shatterproof ST38 Vintage Edison... | Buy on Amazon |
Imagine glass jars filled with fairy lights, hanging from porch beams or hooks. Some jars hold candles, wind chimes, or even small decorative stones. When lit, they cast a warm, flickering glow that transforms your porch into a magical retreat. The rustic look pairs well with both vintage and modern decor.
Use different jar sizes and shapes for variety. Wrap jar rims with twine, ribbon, or burlap for added texture. Hang them at different heights for visual interest. For a seasonal touch, fill jars with faux flowers, pinecones, or colored sand. You can also string them along a fence or trellis.
Gather empty mason jars, LED string lights, and hooks or twine. Fill jars with battery-operated fairy lights or flameless candles for safety. Attach handles or hangers to the jars, then suspend them from your porch ceiling or railing. Secure the wires neatly to prevent tangling. Switch to solar-powered lights for easier installation.
Decorate jars with painted patterns, seasonal stickers, or personalized labels. Add small decorative elements like faux greenery or glitter inside the jars. For a more polished look, install dimmer switches or remote controls. Use color-changing LED strings for a dynamic effect.
DIY mason jar lanterns are a budget-friendly way to add charm and ambiance. They show off your creativity and can be adapted for any decor style. Nighttime porch gatherings become cozier, making your home more inviting—no fancy electrician needed!
8. Add Seasonal Wreaths Made from DIY Materials
Your front door deserves a warm welcome, but store-bought wreaths can be pricey or lack personality. Creating your own seasonal wreath is a fun, affordable way to showcase your style and mark special occasions. Plus, it’s a great excuse to get crafty!
Recommended Products to replicate this idea
| # | Preview | Product | |
|---|---|---|---|
| 1 |

|
Grapevine Wreath Set, Marrywindix 1 Piece Natural Vine Branch Wreath Christmas DIY Rattan Wreath... | Buy on Amazon |
| # | Preview | Product | |
|---|---|---|---|
| 1 |

|
TEMPUS 4Pcs Fake Wildflowers Colorful Artificial Daisy Forsythia Lavender Summer Flower stem Faux... | Buy on Amazon |
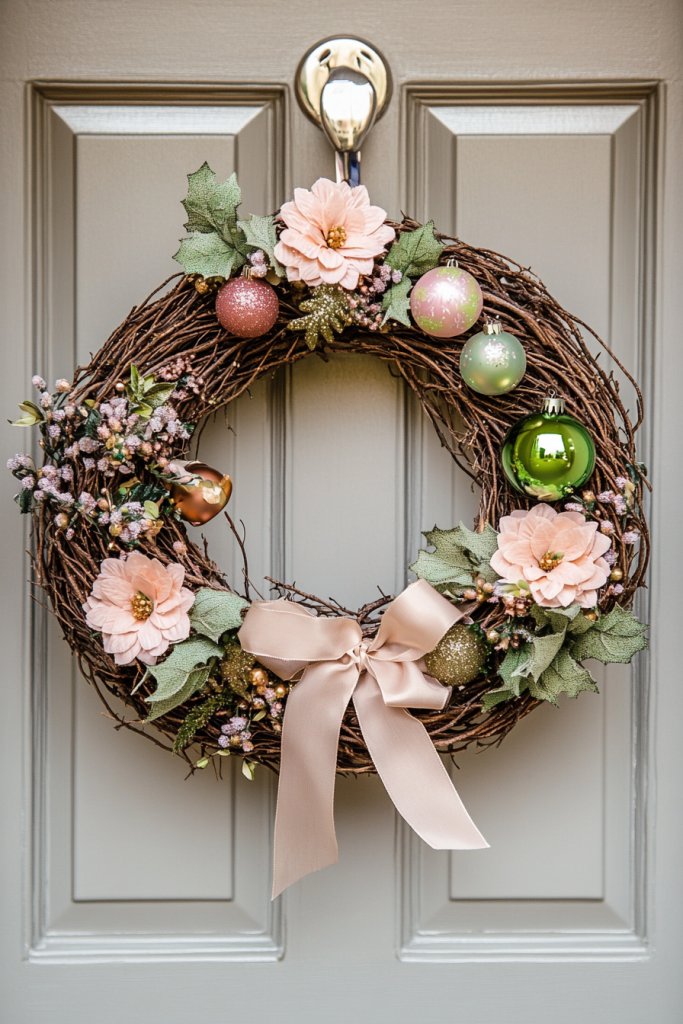
Picture a wreath woven from natural twigs, decorated with faux flowers, ribbons, or ornaments matching the season. It hangs proudly on your door, instantly signaling a festive or welcoming mood. The texture of handmade elements combined with seasonal accents creates a charming focal point.
Switch wreaths throughout the year—bright florals for spring, rustic berries for fall, or snowflakes for winter. Use different bases like wireframes, grapevine, or foam rings. Add personal touches such as monograms, mini pumpkins, or pinecones. Keep it simple or elaborate depending on your style.
Gather natural or faux materials—flowers, berries, ribbons, and ornaments. Attach them securely with hot glue or wire. Use a wreath base that suits your aesthetic—natural twigs for rustic, foam for more elaborate designs. Incorporate seasonal colors and textures. Hang the wreath with a simple ribbon or hook.
Add a small chalkboard sign with a welcoming message or your family name. Incorporate metallic accents or glitter for a festive sparkle. Use contrasting ribbons or bows to match your door color. Reuse parts of previous wreaths for a layered, eclectic look.
Seasonal wreaths are a simple, creative way to refresh your home’s curb appeal. They reflect your personality and celebrate the seasons. With a few supplies, you can craft a beautiful, personalized decoration that everyone notices—and you’ll feel proud of your handiwork!
9. Use Stenciled or Painted Floor Tiles for a Patterned Entryway

Plain concrete or tile floors can make your entryway look dull and uninspired. Want a quick, inexpensive way to add personality? Stenciling or painting patterned tiles is an easy DIY project that dramatically upgrades your curb appeal.
Recommended Products to replicate this idea
| # | Preview | Product | |
|---|---|---|---|
| 1 |

|
Star Floor Stencil,Wall Stencil,Tile Stencil,Floor Stencils for Painting Floors 12x12,Reusable Wall... | Buy on Amazon |
| # | Preview | Product | |
|---|---|---|---|
| 1 |

|
KILZ 1-Part Epoxy Acrylic Concrete & Garage Floor Paint, Slate Gray, Satin, Interior/Exterior... | Buy on Amazon |
Imagine geometric patterns or floral motifs painted directly onto your porch floor. The bold designs draw the eye and create a focal point for your entrance. Bright colors or classic black-and-white patterns can match any style, from modern to vintage. The painted surface adds depth and character, making visitors eager to step inside.
Choose stencils or templates that match your aesthetic—simple chevrons, intricate mandalas, or playful polka dots. Change patterns seasonally or for special occasions. Use outdoor acrylic paints with sealing coats for durability. For a more subtle look, opt for soft pastel shades or neutral tones.
Clean and dry your surface thoroughly. Tape down stencils securely and use a sponge or roller to apply paint evenly. Multiple thin coats give better coverage and prevent drips. Seal the painted area with a weatherproof topcoat to prevent fading. Reapply as needed to refresh the design.
Include your house number or initials within the pattern for a personalized touch. Incorporate seasonal motifs—holly leaves or snowflakes. Use contrasting colors for a striking effect or match your existing decor. Keep it simple with one bold pattern or go for a complex mosaic look.
Patterned entryways are a budget-friendly way to show off your style. They’re easy to change and maintain, making your entrance always fresh. When guests see your creative touch, it sets a warm, welcoming tone right from the doorstep.
10. Incorporate DIY Vertical Gardens with Upcycled Shoe Organizers
Limited yard space doesn’t mean you can’t have a lush, green entrance. Want to add greenery or a splash of color without planting in the ground? DIY vertical gardens using upcycled shoe organizers are a clever, space-saving solution that’s budget-friendly.
Recommended Products to replicate this idea
| # | Preview | Product | |
|---|---|---|---|
| 1 |

|
GORILLA GRIP Over the Door Shoe Organizer, 24 Large Breathable Mesh Pockets, Space Saving Hanging... | Buy on Amazon |
| # | Preview | Product | |
|---|---|---|---|
| 1 |

|
LA Jolie Muse Wall Hanging Planters for Indoor Plants,Hanging Flower Pots for Air Plants... | Buy on Amazon |
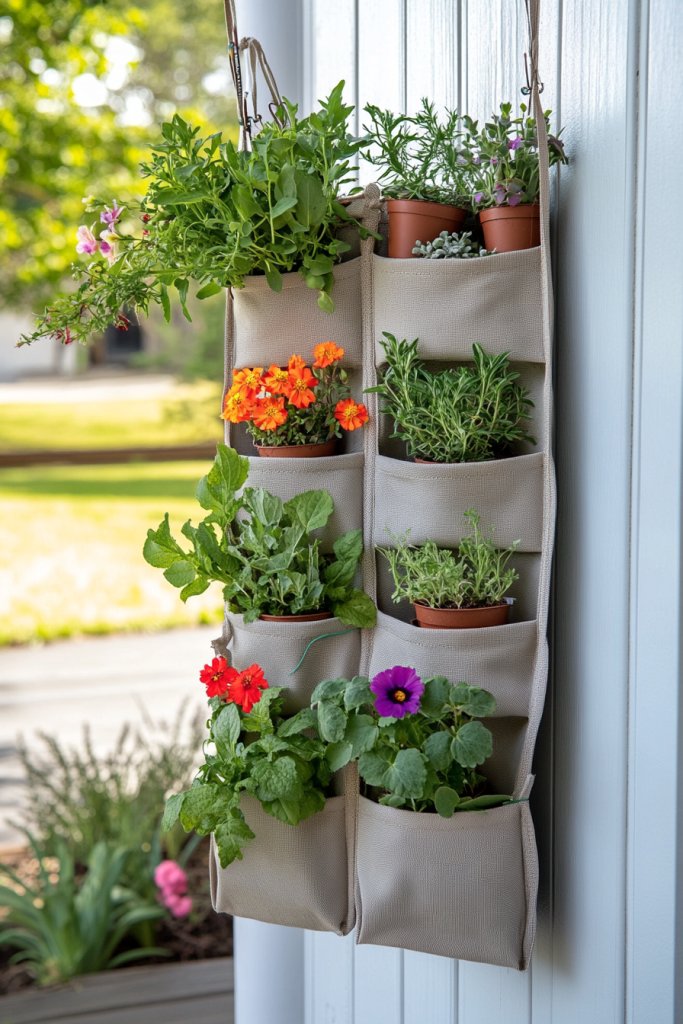
Picture a hanging shoe organizer mounted on your porch wall, filled with small potted herbs, succulents, or vibrant flowers. The pockets create a layered, textured look, turning a utilitarian item into a charming garden feature. It’s functional, fun, and eco-friendly, adding a splash of life to your entry.
Use fabric or plastic shoe organizers for different aesthetics. Arrange plants by color or season—bright blooms in spring, cozy greens in winter. Incorporate decorative stones or fairy lights around the organizer for added charm. You can also hang multiple units for a larger vertical garden.
Pick a sturdy, weatherproof shoe organizer and clean it thoroughly. Fill the pockets with potting soil and plant small, easy-care plants. Secure the organizer to a wall or fence with hooks or nails. Water regularly and ensure good drainage to avoid mold. Mix in decorative elements like small figurines or stones.
Label each pocket for a playful or organized look. Use fabric paint or markers to add patterns or names. Incorporate seasonal decorations—mini pumpkins or pinecones—to keep it fresh. Arrange the plants to suit your lighting and water needs, creating a mini oasis.
Vertical gardens are a creative way to bring nature into small spaces. They’re customizable, inexpensive, and fun to maintain. Plus, they turn a simple organizer into a lively, eye-catching feature that boosts your home’s curb appeal—who knew recycling could look so good?
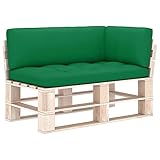
11. Create a Cozy Seating Area with Pallet Furniture
Want a welcoming entry that invites guests to linger? Building a cozy seating area from pallets is cheap, easy, and adds charm to your porch. It transforms an empty space into a functional, stylish nook for relaxing or chatting with neighbors.
Recommended Products to replicate this idea
| # | Preview | Product | |
|---|---|---|---|
| 1 |
|
QZZCED Garden Cushions for Pallet Furniture,Pallet Water Resistant Seating Cushions,Outdoor Wood... | Buy on Amazon |
| # | Preview | Product | |
|---|---|---|---|
| 1 |

|
mtlskopl Brown Acacia Wood Outdoor Pallet Sofa 36.2 x 47.2 x 27.2 in Modular Rectangular Loveseat... | Buy on Amazon |
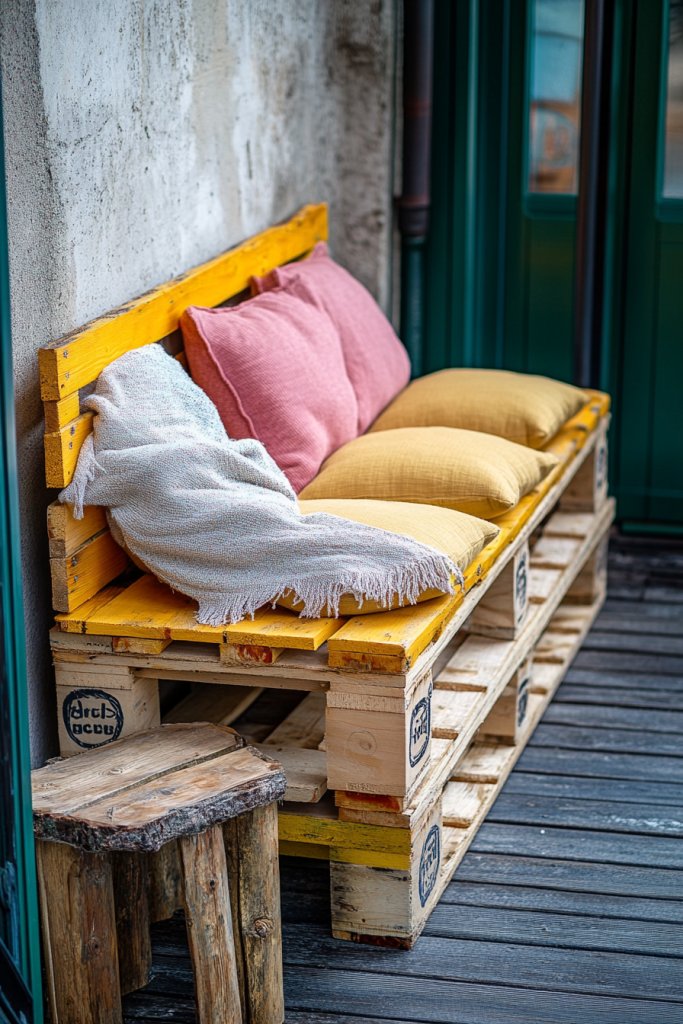
Picture a sturdy wooden pallet painted in your favorite color, topped with comfy cushions and a throw blanket. Add a small side table or plant stand made from extra pallets. The rustic look pairs well with vintage or modern decor, creating an inviting vibe. It’s perfect for sipping coffee or greeting visitors.
Paint or stain the pallets for different aesthetics—bright pastel for a cheerful look, dark stain for sophistication. Add weather-resistant cushions for comfort. Incorporate string lights or lanterns for evening ambiance. Small tables or extra seating can be built from additional pallets.
Source pallets from local stores or online, ensuring they’re sturdy and safe. Sand rough edges and apply weatherproof paint or sealant. Stack and secure pallets with screws or nails to create a stable structure. Add cushions and pillows for comfort—use outdoor fabric for longevity. Decorate with potted plants or lanterns.
Personalize with custom cushions, monograms, or decorative pillows. Use vibrant fabrics or patterns to match your porch theme. Incorporate small side tables or storage beneath the seating. Add personal touches like fairy lights or outdoor rugs for a complete look.
Pallet furniture is a budget-friendly way to add a functional, cozy vibe to your entry. It’s easy to customize and maintain, making it a perfect DIY project. You’ll love having a stylish spot to greet guests that also invites relaxation and good vibes.
12. Add Colorful Outdoor Cushions or Pillows on Existing Seating
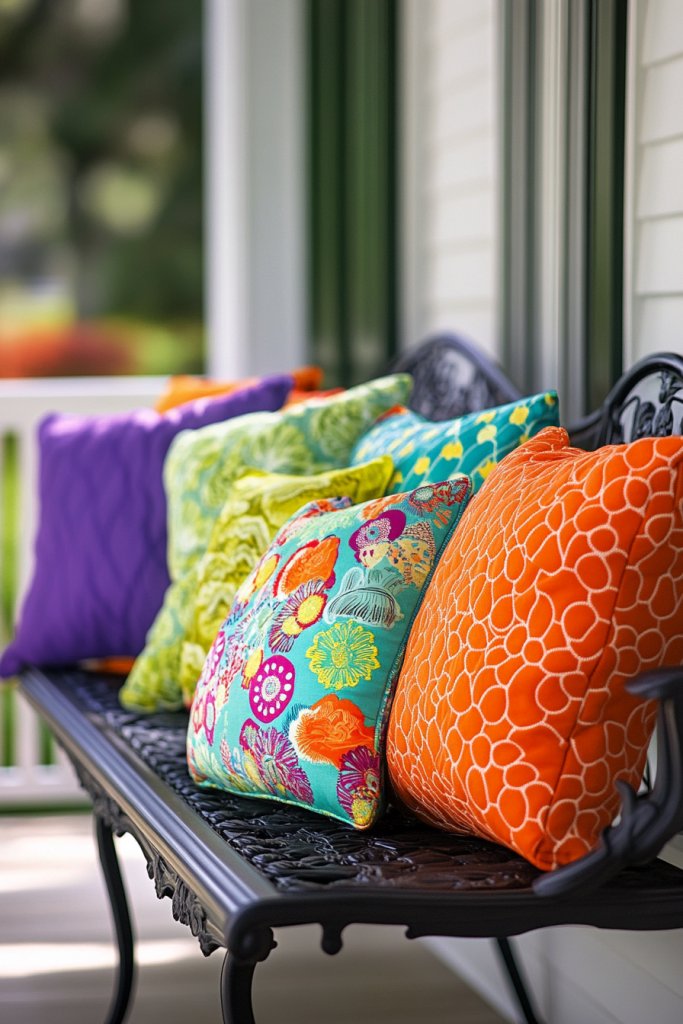
Your porch furniture might be functional but lacking personality. Want to instantly boost your curb appeal and comfort? Adding colorful cushions or pillows is an easy, inexpensive way to refresh your outdoor space. It’s also a quick fix for dull, outdated furniture.
Recommended Products to replicate this idea
| # | Preview | Product | |
|---|---|---|---|
| 1 |

|
Outdoor Chair Cushions Set of 4: Waterproof & Fade Resistant Seat Cushion for Patio Furniture - 18.5... | Buy on Amazon |
| # | Preview | Product | |
|---|---|---|---|
| 1 |

|
Utopia Bedding Outdoor Pillow Inserts 18 x 18 Inches (Pack of 2, White), Water Resistant Garden... | Buy on Amazon |
Imagine a weather-resistant cushion in a vibrant hue or playful pattern, placed on your porch chair or bench. Mix textures like quilted, embroidered, or knotted styles for visual interest. Toss in a few coordinating pillows to add layers and personality. The pops of color invite guests to sit and relax.
Change cushions seasonally—bright and breezy in summer, cozy and plush in winter. Use covers that are easy to remove and wash. Mix solid colors with patterns or stripes for variety. For a layered look, stack cushions or mix sizes and shapes.
Select cushions made from outdoor fabric designed to withstand weather. Measure your furniture to buy the right sizes. Use ties or Velcro straps to keep cushions in place during wind. Store cushions indoors or in waterproof storage boxes when not in use. Refresh with new covers or inserts periodically.
Create custom covers with your favorite fabrics or DIY embroidery. Add decorative trims or tassels for extra flair. Coordinate cushions with your door color or seasonal accents. Change up pillow arrangements for different moods or occasions.
Colorful cushions are an instant upgrade that makes your porch more inviting and lively. They’re a simple way to express your style and add comfort. When friends visit, they’ll notice your thoughtful, cheerful touches—no expensive furniture needed!
13. Wrap the Porch Railing with DIY Tapestry or Fabric Banners
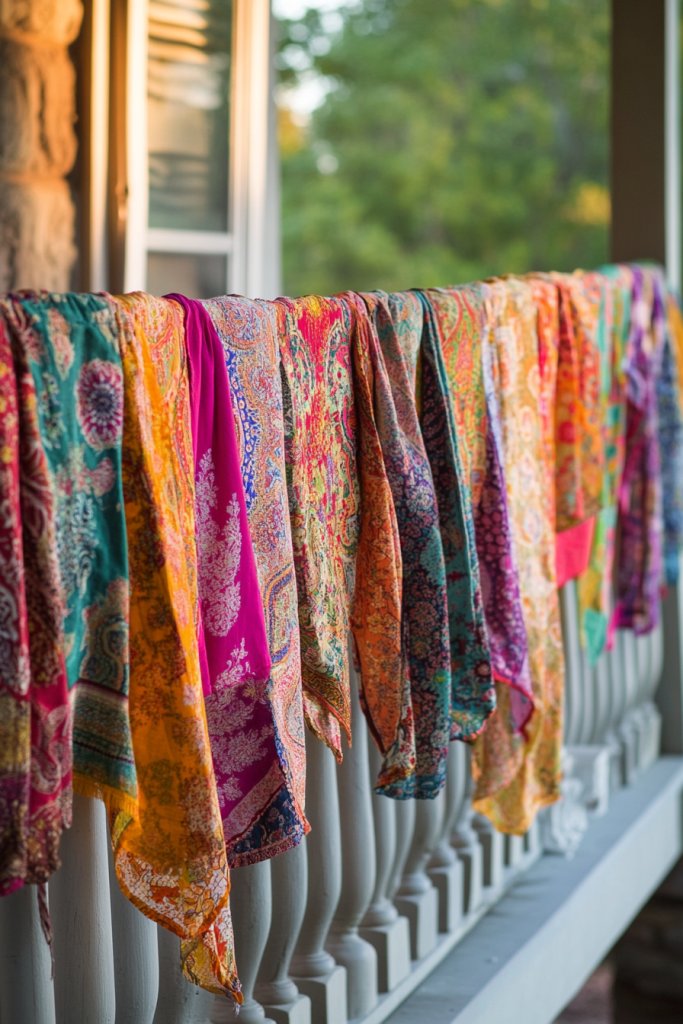
Plain porch railings can look uninspired and dull. Want an easy, inexpensive way to add texture and color? Wrapping fabric or creating banners is a fun DIY solution that instantly elevates your curb appeal. Plus, it’s easy to change for different seasons or moods.
Recommended Products to replicate this idea
| # | Preview | Product | |
|---|---|---|---|
| 1 |

|
Zonon Large Blank Banners And Signs Polyester Oxford Cloth Sublimation Banner To Decorate With... | Buy on Amazon |
| # | Preview | Product | |
|---|---|---|---|
| 1 |
|
Zussun Nature Forest Tapestry Green Tree Wall Tapestry for Bedroom Aesthetic Plant Stream Pool... | Buy on Amazon |
Imagine flowing fabric banners in bright colors or patterned textiles fluttering in the breeze. You can also drape a large tapestry or a series of smaller banners along the railing. The movement and texture create a lively, inviting look that catches the eye from the street. It’s a playful way to add personality.
Choose outdoor or washable fabrics for durability. Use ribbons, twine, or zip ties to secure the fabric to the railing. Layer different textiles for a boho or eclectic vibe. Change the banners seasonally or for special occasions—think floral prints for spring or plaid for fall.
Measure your railing to determine banner length. Cut fabric accordingly, leaving extra for ties or hems. Attach with zip ties, clothespins, or decorative clips. For a more finished look, sew or glue decorative trims or tassels on the edges. Ensure fabrics are securely fastened and won’t blow away.
Add personalized touches like your house number or a welcome message painted or appliqued on the fabric. Incorporate seasonal symbols—pumpkins, leaves, or snowflakes. Use contrasting colors to make the banners pop. Keep the look fresh by swapping out banners regularly.
Wrapping your porch railing with fabric is a playful, budget-friendly way to showcase your style. It’s easy to update and customize, making your home more welcoming. Your neighbors will love the cheerful, personalized vibe you create—no fancy decor required!
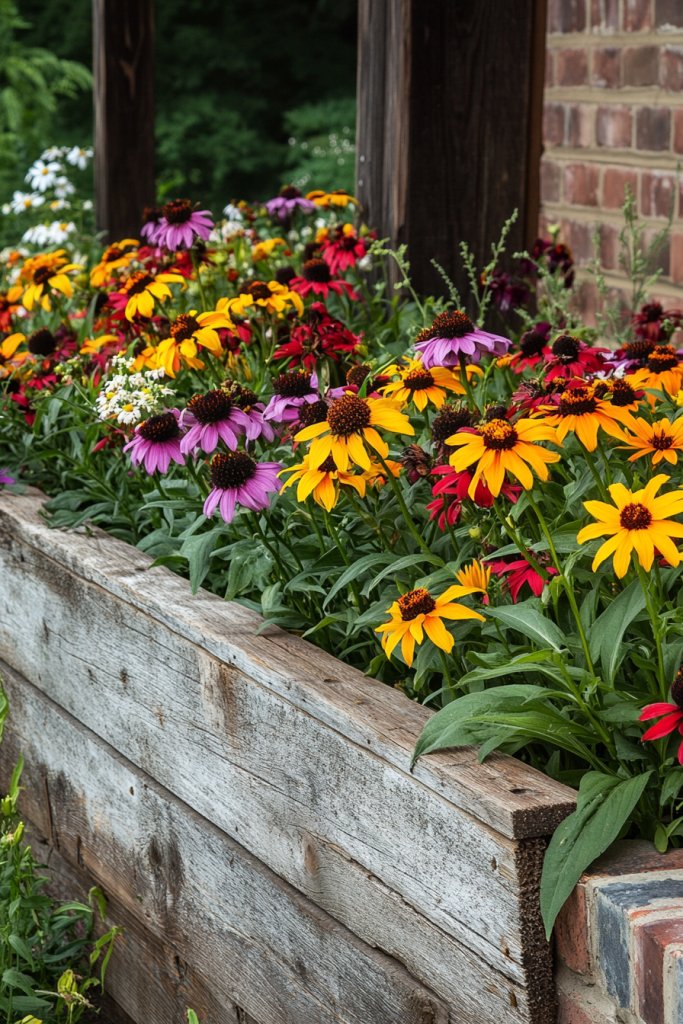
14. Plant Low-Cost Perennials in DIY Raised Beds or Borders
Want your home to look lush and inviting year-round, but don’t want the hassle of frequent planting? Low-cost perennials are the perfect solution. They’re affordable, easy to maintain, and come back season after season, giving your curb appeal a lasting boost.
Recommended Products to replicate this idea
| # | Preview | Product | |
|---|---|---|---|
| 1 |

|
Foxlang 8x4x1ft(2 Pack) Galvanized Raised Garden Bed,Outdoor Planter Box Metal Patio Kit Planting... | Buy on Amazon |
| # | Preview | Product | |
|---|---|---|---|
| 1 |

|
Burpee Wildflower 25,000 Bulk, 1 Bag | 18 Varieties of Non-GMO Flower Seeds Pollinator Garden,... | Buy on Amazon |
Imagine a simple rustic wooden raised bed filled with vibrant perennials like coneflowers, daylilies, or black-eyed Susans. The lush greenery and colorful blooms create a welcoming border that frames your porch. The natural textures of reclaimed wood or bricks add charm, making your home look cared for and beautiful.
Build raised beds from reclaimed wood, cinder blocks, or bricks—whatever fits your budget and style. Choose perennials suited for your climate and sunlight. Plant in layered groups for a fuller look. Mix in low-growing ground covers or ornamental grasses for variety.
Plan your garden beds based on space and sunlight. Use recycled materials for the borders—old pallets or bricks work well. Fill with quality compost and plant your perennials, spacing them appropriately. Mulch with bark or straw to retain moisture and suppress weeds. Water regularly until established.
Incorporate decorative stones, painted signs, or small sculptures within the beds. Use colorful mulch or stones to add visual interest. Plant seasonal annuals among your perennials for variety. Label your plants with DIY tags to keep track of blooms.
Low-cost perennial borders are a smart, sustainable way to boost your home’s curb appeal. They’re easy to care for and grow more beautiful each year. Creating a lush, welcoming entrance with minimal expense is totally doable—your neighbors will be impressed!
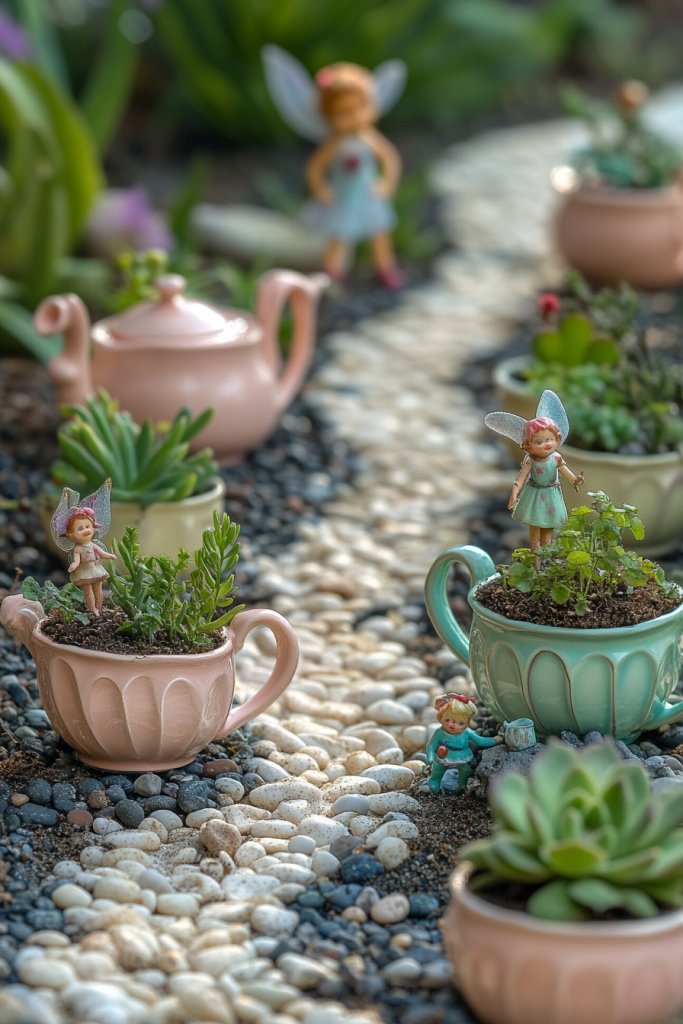
15. Craft Fairy Garden Features from Recycled Items
Looking for a whimsical touch that won’t break the bank? Fairy gardens are charming, fun DIY projects that transform your porch or yard into a magical space. Using recycled items keeps it budget-friendly and eco-conscious. Plus, it’s a creative way to add personality.
Recommended Products to replicate this idea
| # | Preview | Product | |
|---|---|---|---|
| 1 |

|
Tardigrade 200 Pieces Fairy Garden Accessories, Fairy Garden Kit, Fairy Tiny House, Miniature Gnome... | Buy on Amazon |
| # | Preview | Product | |
|---|---|---|---|
| 1 |

|
FOXMIS Miniature Frog Garden Statue Gifts Easter Decorations Outdoor Fairy Garden Accessories... | Buy on Amazon |
Imagine tiny teacups turned into miniature planters, with miniature furniture and fairies made from odds and ends. Small teapots or vintage toys become focal points, surrounded by tiny paths made of pebbles or broken china. The scene feels enchanting, inviting curiosity and delight.
Create themed fairy gardens—rustic, modern, or whimsical. Use natural materials like moss, twigs, and stones combined with recycled containers. Incorporate seasonal decorations or fairy lights for evening magic. Make mini bridges from old popsicle sticks or small stones.
Collect recycled items—tea cups, small containers, broken jewelry, buttons. Clean and prepare them for planting or decoration. Fill containers with soil or moss, then add small plants, miniature figurines, or decorative stones. Arrange them into a charming scene on a porch or in a garden bed.
Add tiny signs with whimsical messages or fairy footprints. Incorporate natural elements like pinecones, shells, or feathers. Use glow-in-the-dark paint or fairy lights to extend the magic into evening hours. Personal touches make each fairy garden unique.
Creating a fairy garden from recycled treasures is a delightful, eco-friendly project. It sparks imagination and adds a whimsical touch to your home’s entrance. Everyone loves a little magic—yours will be the talk of the neighborhood!
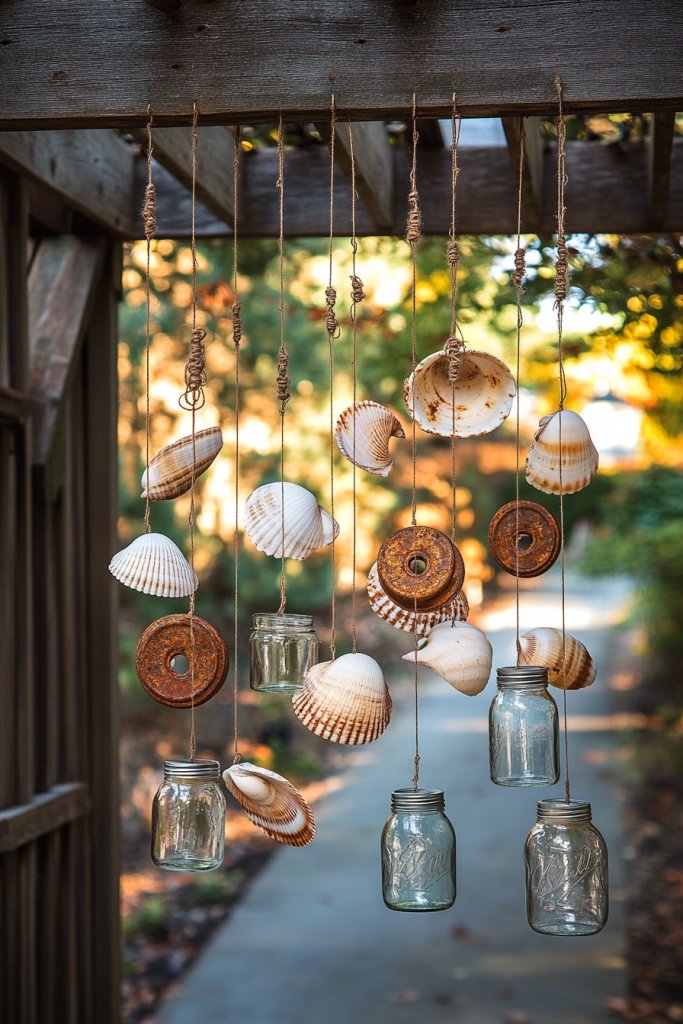
16. Hang Up DIY Wind Chimes or Rustic Décor from Recycled Materials
Want to add gentle movement and soothing sounds to your porch without spending a lot? DIY wind chimes or rustic décor made from recycled materials can do the trick. They enhance your curb appeal with charm and personality while making your outdoor space more inviting.
Recommended Products to replicate this idea
| # | Preview | Product | |
|---|---|---|---|
| 1 |

|
4M Make A Wind Chime Kit - Arts & Crafts Construct & Paint A Wind Powered Musical Chime DIY Gift for... | Buy on Amazon |
| # | Preview | Product | |
|---|---|---|---|
| 1 |

|
Bursvik Large Aluminium Wind Chimes 37" to Create a Zen Atmosphere Suitable for Outdoor, Garden,... | Buy on Amazon |
Picture metal washers, shells, or glass jars hanging from a metal or wooden frame. When the breeze blows, they produce soft, tinkling sounds that contrast beautifully with your home’s exterior. Visual textures like rusted metal, painted wood, or natural twine add warmth and character. It’s a sensory delight.
Create themed chimes—nautical, bohemian, or vintage—using different materials. Incorporate natural elements like driftwood, feathers, or beads. Hang them from porch beams, trees, or hooks, adjusting lengths for visual rhythm. Mix metals and colors for eclectic charm.
Collect recycled items such as metal lids, shells, beads, or small pipes. Drill or punch holes for hanging. String items with weatherproof cord or wire, securing tightly. Attach to a frame or directly hang from hooks. Test the sound and adjust lengths for the perfect melody. Protect with weather-resistant finishes if needed.
Paint or decorate individual elements with patterns or initials. Incorporate seasonal accents—like mini pumpkins or snowflakes—into the design. Use different materials for a layered, textured look. Swap out parts seasonally to keep the sound fresh.
DIY wind chimes turn recycled materials into musical art, adding movement and personality to your porch. They’re easy to make and customize, providing a personal touch that’s both functional and decorative. Your outdoor space will feel lively and welcoming—music to everyone’s ears!
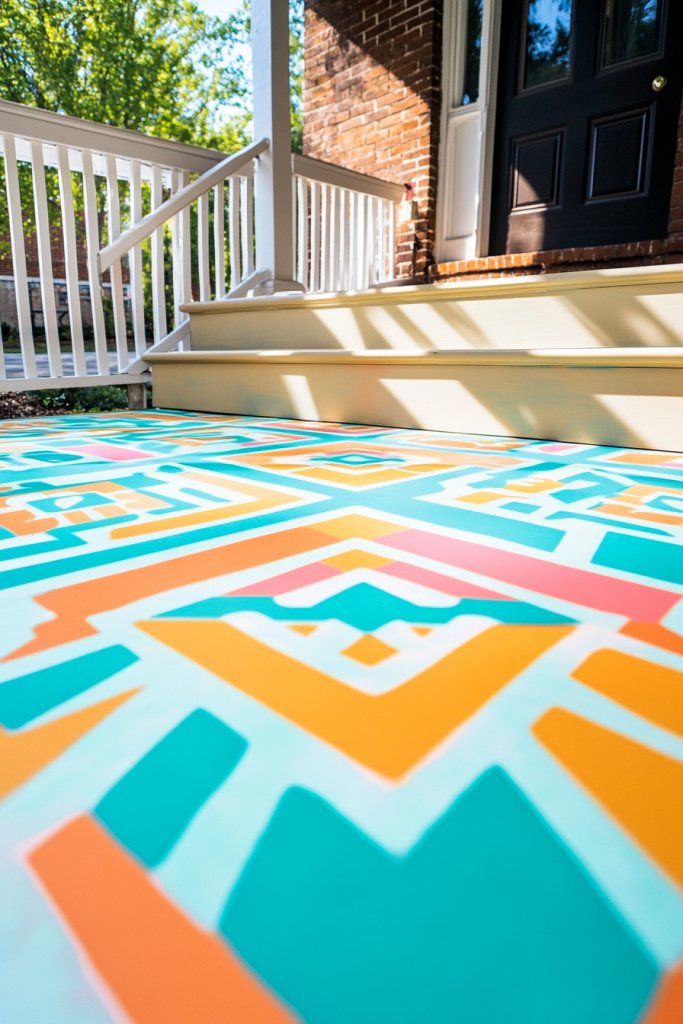
17. Paint or Stencil a Pattern on the Porch Floor or Steps
Plain concrete or wood steps can make your entryway look dull and uninviting. Want a simple way to add color and style without a hefty renovation? Painting or stenciling patterns is a budget-friendly trick to give your porch a fresh, artistic vibe.
Recommended Products to replicate this idea
| # | Preview | Product | |
|---|---|---|---|
| 1 |
|
KILZ 1-Part Epoxy Acrylic Concrete & Garage Floor Paint, Slate Gray, Satin, Interior/Exterior... | Buy on Amazon |
| # | Preview | Product | |
|---|---|---|---|
| 1 |

|
Zonon 4 Pieces Reusable Tile Stencil Floor 12 x 12 Inches Wall Templates Tile Pattern Stencil... | Buy on Amazon |
Imagine bold geometric shapes or delicate floral motifs painted onto your steps or porch floor. Bright colors like turquoise, coral, or mustard can energize the space. A subtle stencil pattern in neutral tones can add sophistication. The painted design creates a focal point and enhances your home’s personality.
Choose patterns that reflect your style—modern, boho, Scandinavian, or vintage. Change designs seasonally or for holidays—stars, snowflakes, flowers. Use outdoor-quality paint and sealants to withstand weather. Keep the design simple or go for intricate mosaics.
Clean the surface thoroughly. Tape off edges and pattern outlines with painter’s tape. Use stencils and sponges or brushes to apply the paint evenly. Apply multiple thin coats for full coverage, allowing drying time. Seal with a weatherproof topcoat for durability. Repaint or touch up as needed.
Add your house number or a welcoming message within the pattern. Incorporate seasonal symbols—hearts, pumpkins, or holiday motifs. Use contrasting colors for visibility. Pair with outdoor rugs or planters to complement the painted surface.
Patterned floors and steps are an affordable way to showcase your style and make your entrance inviting. They’re easy to update and maintain, giving your home a polished look. Your neighbors will be impressed by your artistic touch—no professional help required!
18. Create a DIY Welcome Basket with Seasonal Décor Items
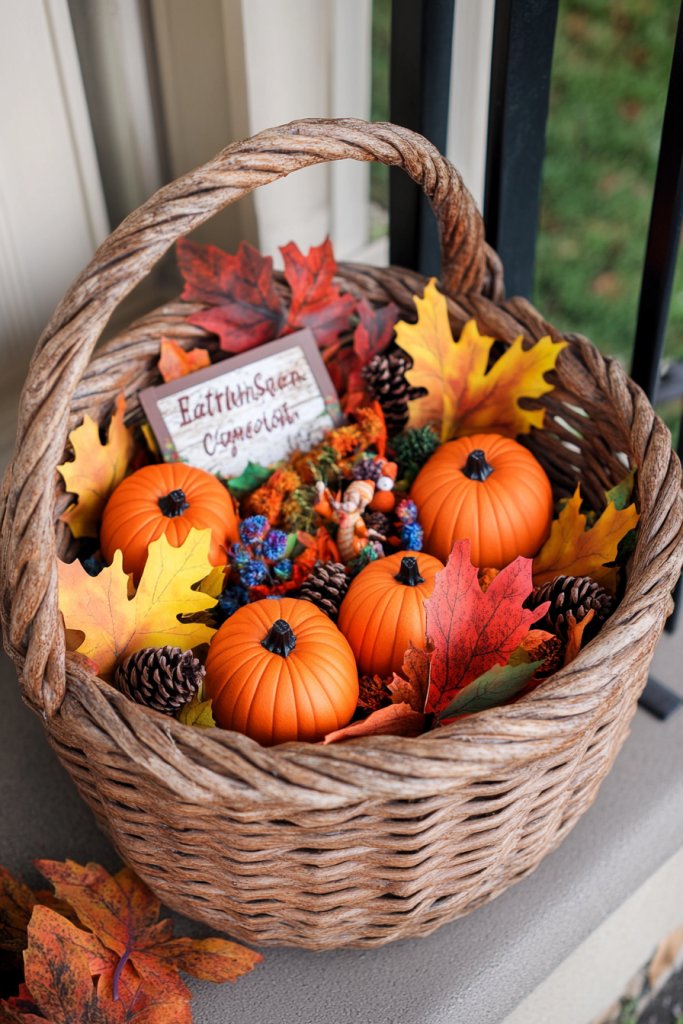
Looking for a charming, inexpensive way to greet guests and passersby? A DIY welcome basket filled with seasonal décor instantly adds warmth and personality to your entry. It’s also a wonderful way to celebrate holidays or change your look throughout the year.
Recommended Products to replicate this idea
| # | Preview | Product | |
|---|---|---|---|
| 1 |

|
Woven Hanging Wicker Basket for Door, Handmade Rattan Hanging Wall Baskets for Garden Farmhouse Home | Buy on Amazon |
| # | Preview | Product | |
|---|---|---|---|
| 1 |

|
MagicWreath 12 Pack Spring Floral Picks 17 Inch Artificial Flower Stems Colorful Spring Flowers with... | Buy on Amazon |
Imagine a rustic woven basket overflowing with mini pumpkins, faux leaves, or colorful pinecones. Add a few decorative signs or small figurines that match the season. The arrangement invites curiosity and sets a friendly, festive tone for visitors. It’s a cozy, approachable way to show you care.
Change contents seasonally—spring flowers, summer shells, fall harvest items, winter pinecones. Use a variety of textures and colors for visual interest. Incorporate small fairy lights or ribbons for extra charm. Place the basket on a porch bench, step, or hang it on a wall.
Choose a basket that suits your style—woven, wire, or wooden. Fill it with seasonal décor like faux flowers, mini gourds, or ornaments. Add a small chalkboard sign or a personalized tag. Decorate with ribbons or twine. Keep items lightweight for easy placement.
Personalize with a family name or welcoming message on a small sign. Incorporate your favorite colors or motifs. Use faux flowers or leaves for longevity. Change the contents regularly to keep your entry fresh and inviting.
A DIY welcome basket is a simple, heartfelt way to make your home feel warm and inviting. It’s easy to customize and update, reflecting your seasonal spirit. Guests and neighbors will appreciate your thoughtful, personal touch—no big budget needed.
19. Add Affordable Faux Flower Arrangements in DIY Containers
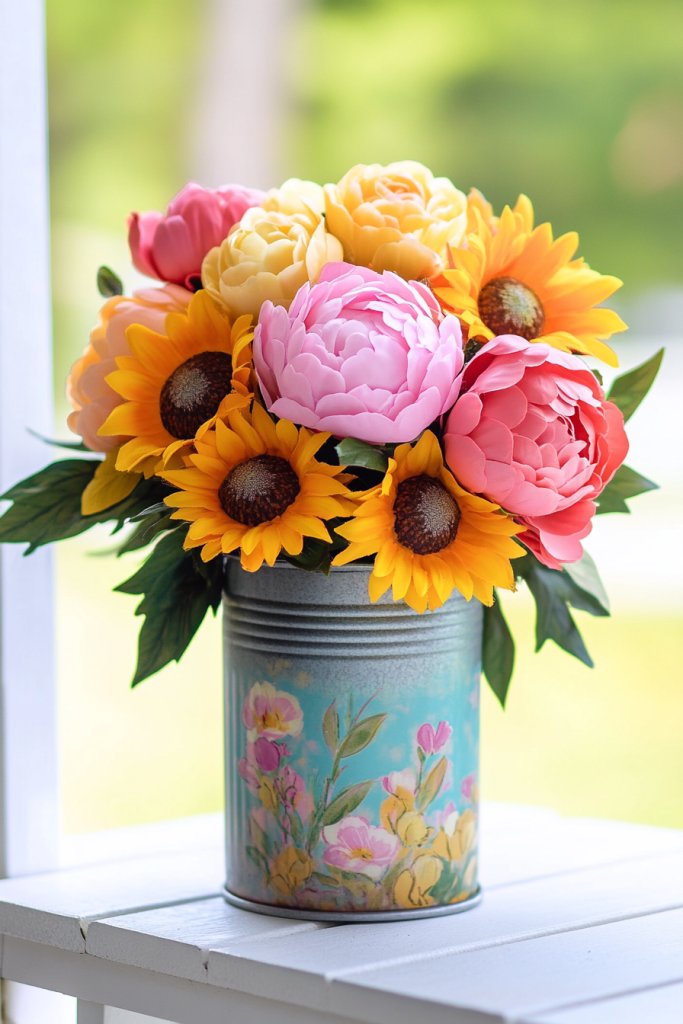
Want to add vibrant color and charm to your porch without the upkeep of real flowers? Faux flower arrangements in DIY containers are a fantastic, cost-effective solution. They never wilt, and you can customize them to match any style or season.
Recommended Products to replicate this idea
| # | Preview | Product | |
|---|---|---|---|
| 1 |

|
Ouddy Decor 24 Bundles Artificial Flowers for Outdoors Fake Silk Flowers UV Resistant Faux Plastic... | Buy on Amazon |
| # | Preview | Product | |
|---|---|---|---|
| 1 |

|
Ninehaoou 7.7" Large Ceramic Plant Pot Beige Green Vintage Floral Crackle Glaze Rustic Flowers Pot... | Buy on Amazon |
Picture a vintage tin can or painted ceramic pot filled with bright faux blooms—peonies, sunflowers, or roses. Place them on your doorstep, porch table, or window sill. The lifelike colors and textures make your entry feel fresh and welcoming all year round. It’s like a garden that never sleeps.
Mix different container styles—metal, ceramic, or reclaimed wood—to create a curated look. Change the arrangement seasonally—think autumn leaves and berries or spring blossoms. Incorporate greenery or decorative fillers to add fullness. Position arrangements in pairs or clusters for maximum impact.
Choose high-quality faux flowers that mimic real blooms. Fill your containers with floral foam or floral picks for stability. Secure the flowers in place and arrange for natural-looking flow. Add decorative stones or moss on top for realism. Place them where they catch the eye.
Add personalized touches like painted initials or decorative ribbons. Incorporate seasonal accents—mini pumpkins, pinecones, or holiday ornaments. Use matching containers for a cohesive look or mix styles for an eclectic vibe. Refresh the arrangements as needed.
Faux flower arrangements are a long-lasting, low-maintenance way to brighten your curb appeal. They showcase your style and add a cheerful, inviting atmosphere. Everyone will think you have a lush garden—without any watering!
20. Refresh Your Entryway with a New Coat of Budget-Friendly Exterior Paint
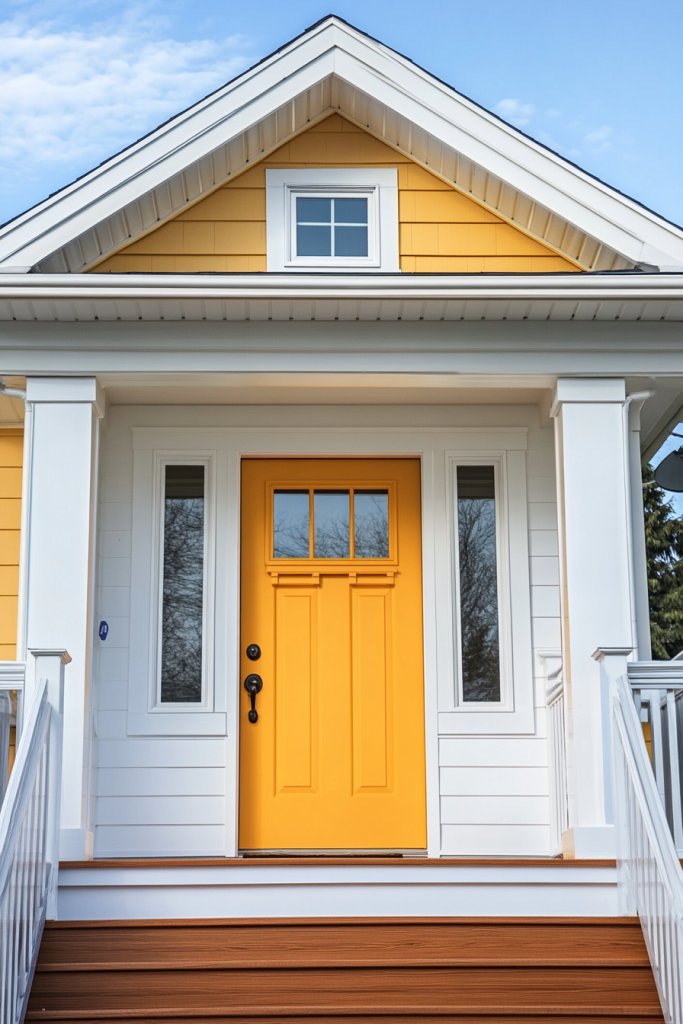
Does your home look tired or faded? A fresh coat of paint can dramatically boost curb appeal without the expense of a full remodel. Choosing budget-friendly exterior paint is a smart way to give your entry a clean, updated look that welcomes guests.
Recommended Products to replicate this idea
| # | Preview | Product | |
|---|---|---|---|
| 1 |

|
Glidden Porch and Floor with Cool Surface Technology Satin Interior/Exterior Paint, Steel Gray, 1... | Buy on Amazon |
| # | Preview | Product | |
|---|---|---|---|
| 1 |

|
Bates - Paint Tray Set, Paint Rollers, Paint Brushes for Wall, Tray, Roller Brush, 11 Piece Home... | Buy on Amazon |
Imagine a crisp, bright trim framing a bold, new front door color—perhaps a cheerful yellow or a sophisticated charcoal gray. The fresh paint instantly brightens the facade, making your home look cared for and vibrant. Small details like freshly painted railings or window frames add polish and style.
Pick colors that complement your neighborhood or stand out tastefully. Use contrasting shades for trim, shutters, or accents to add depth. Repaint periodically to keep the look fresh. Seasonal color swaps can also reflect your mood or trends.
Start by cleaning the surfaces thoroughly. Scrape away peeling paint and sand rough spots. Use painter’s tape to create clean lines around edges. Apply primer if necessary, then two coats of your chosen paint. Finish with a weatherproof sealant for durability. Regular touch-ups keep your home looking sharp.
Add house numbers, decorative accents, or a contrasting color stripe for extra flair. Use stencil techniques for patterns or motifs. Combine with other updates like new hardware or lighting fixtures. The result is a cohesive, refreshed look that boosts your home’s value.
A simple repaint can completely transform your home’s curb appeal. It’s a cost-effective project with a big visual impact. When your home looks fresh and vibrant, you’ll feel more pride and joy every time you come home—or when neighbors pass by.
Conclusion
With a diverse range of affordable DIY curb appeal ideas, you now have plenty of opportunities to upgrade your home’s exterior without overspending. Whether it’s adding colorful plants, repurposing materials, or quick painting projects, these ideas are easy to try and customize to your style. Don’t wait — start transforming your entryway today and create a welcoming space that reflects your personality. Your dream curb appeal is just a few creative steps away!
Last update on 2026-03-01 / Affiliate links / Images from Amazon Product Advertising API