Imagine transforming your bathroom with a stylish new mirror frame without breaking the bank! DIY bathroom mirror frames for just $10 are taking the home decor world by storm because they offer a perfect blend of creativity, affordability, and customization.
In this article, you’ll discover a variety of fun and easy ideas to craft your own unique mirror frames. Whether you love rustic charm, modern minimalism, or quirky designs, there’s something here to inspire your next budget-friendly upgrade—and all without spending a fortune!
1. Mason Jar Lid Frame Wraps for Rustic Charm
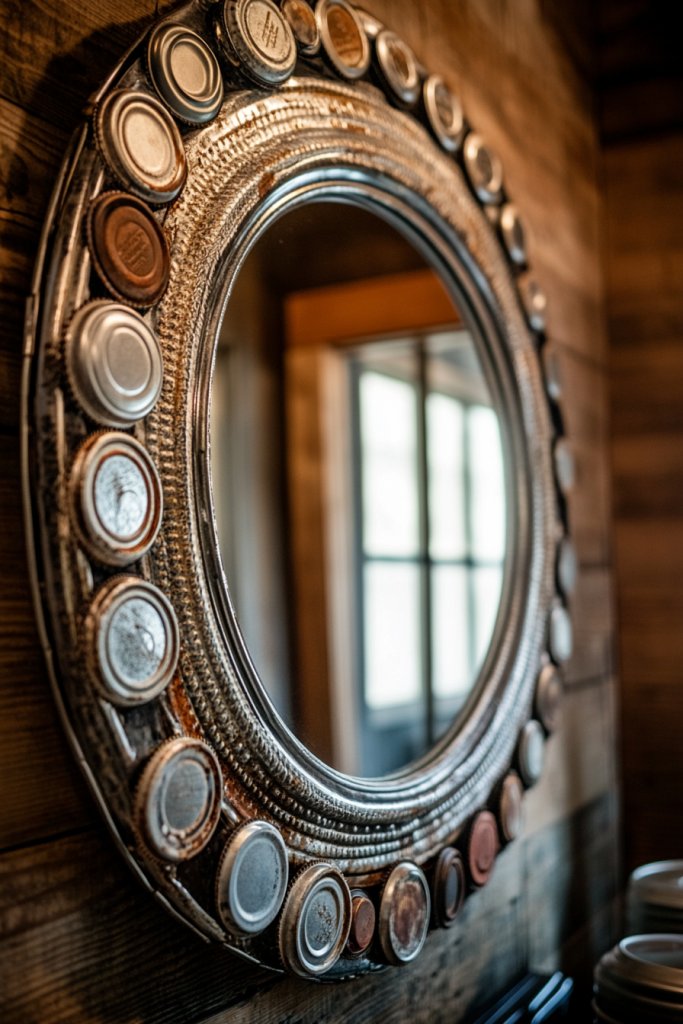
Ever wanted to add a touch of vintage charm to your bathroom without breaking the bank? Sometimes, the simplest materials can turn into stunning decor pieces. Using recycled items not only saves money but also gives your space a personalized, eco-friendly vibe. Who says you need expensive frames to make a statement?
Imagine a series of shiny metal mason jar lids painted in soft pastel hues or distressed neutrals, lined up around your mirror. The texture of the lids contrasts beautifully with smooth wall paint, adding a rustic, worn-in feel. The glossy spray paint gleams under your bathroom lighting, catching your eye with every glance. It’s like a little vintage market stall in your own home.
You can customize this look by choosing different paint finishes—matte for a shabby chic look or metallic for a bit of glam. For a more colorful vibe, mix and match lids in various shades. This idea adapts well to small or large mirrors, and you can even add decorative elements like twine or faux greenery for seasonal flair. It’s perfect for farmhouse, cottage, or industrial styles.
Start by collecting mason jar lids—check your kitchen or thrift stores. Clean and dry them thoroughly, then prime and spray paint in your chosen color. Arrange the lids around your mirror in your preferred pattern, securing each one with hot glue. For extra durability, hit the glued areas with a clear sealant. Make sure to space them evenly for a tidy, balanced look. Use a level to keep everything straight.
Add embellishments like small vintage stickers or label tags for a quirky touch. You could also incorporate different sizes or shapes for a more eclectic feel. Using metallic spray paints or glitter finishes can elevate the rustic vibe into something more modern. Consider attaching small hooks or clips for holding jewelry or accessories.
This is a perfect way to showcase your creativity while saving money. It’s easy to swap out colors or patterns whenever you want a fresh look. Plus, you get the satisfaction of making a unique piece that no one else has. DIY projects like this prove that stunning decor doesn’t have to cost a fortune—just a little imagination.
2. Wooden Clothespin Frame Accents
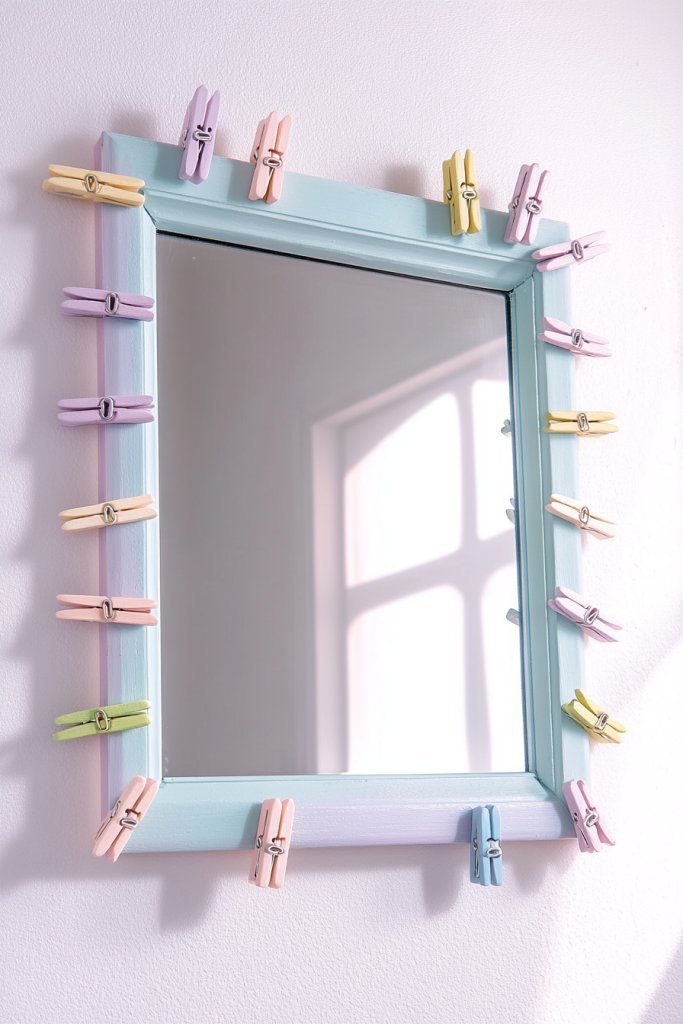
Looking to add a playful yet stylish touch to your bathroom mirror? Sometimes, a simple craft can turn a plain mirror into a focal point. Wooden clothespins, often overlooked, can be transformed into a fun decorative border that’s both affordable and charming. Who knew something so mundane could look so cool?
Picture a row of painted or stained wooden clothespins clipped along the edge of your mirror. The warm wood tones contrast against crisp white walls, creating a fresh, modern vibe. When painted in bold colors or patterns, the clothespins pop with personality. It’s like a colorful, textured frame that invites curiosity.
Experiment with different paint colors or stain finishes to match your bathroom decor. For a boho look, mix in some natural twine or fabric accents. You can also vary the length of the row, clustering them for a more dynamic border. This idea scales well for small or large mirrors and fits casual, eclectic, or modern styles.
Gather a handful of wooden clothespins, then paint or stain them in your chosen shades. Let them dry completely. Arrange the clothespins along the mirror’s edge, spacing evenly or clustering for visual interest. Use hot glue or small nails for secure attachment—just be careful not to crack the wood. For a more polished look, trim the clothespins slightly or add decorative washi tape at the top.
Personalize further by adding tiny stickers, mini pom-poms, or metallic markers for details. For a seasonal touch, paint some in holiday colors or add small embellishments like faux flowers or feathers. The versatility allows you to change the look seasonally or whenever inspiration strikes. You can even create a pattern or design with the clothespins.
This project is so simple, yet it produces a fun, whimsical effect. It’s perfect for anyone who loves DIY and wants a quick update. Plus, it’s a great way to reuse old clothespins and avoid buying expensive frames. DIY decor like this proves that you don’t need big budgets to make a big style impact.
3. Repurposed Picture Frame Overlay
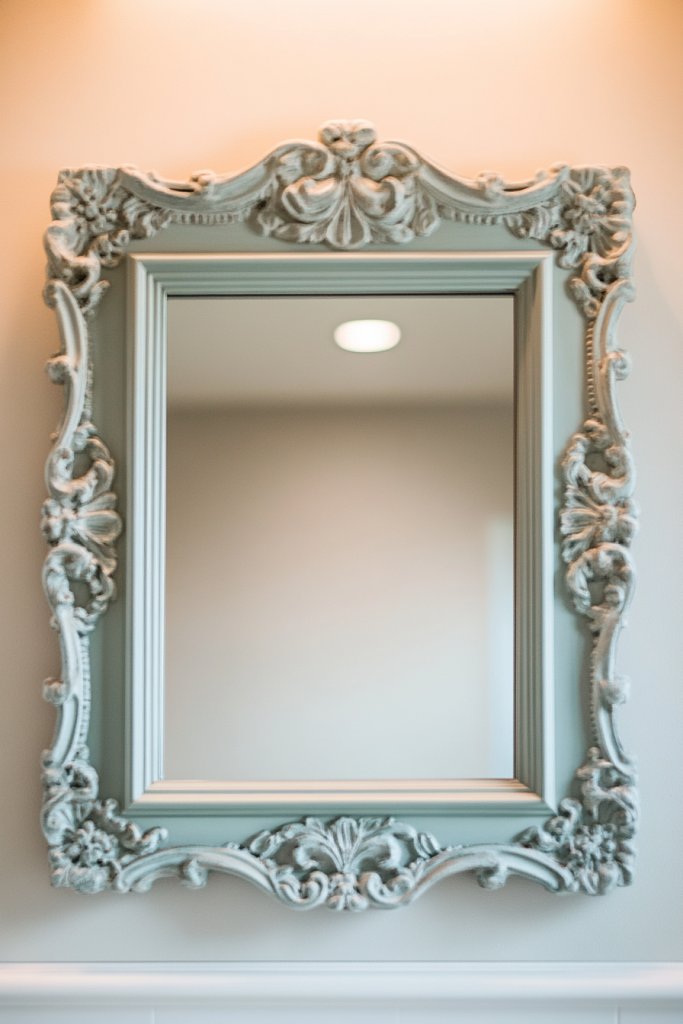
Ever feel like your bathroom could use a touch of elegance without the hefty price tag? Using an old picture frame as a decorative border is an easy way to elevate a simple mirror. Repurposing thrifted or vintage frames adds character and charm that mass-produced options lack. Who says fancy has to be expensive?
Imagine a distressed white or bold black frame surrounding your mirror, adding depth and contrast. The frame’s intricate details or rustic finish create an eye-catching outline. When hung securely, it acts as a statement piece that complements both modern and vintage decor. The frame’s texture and color instantly draw the eye and add personality.
Choose frames in various styles—ornate, minimalist, or shabby chic—to match your aesthetic. You can paint or distress the frame for a custom look, or leave it as-is for authentic vintage appeal. Combining different frame styles layered together creates a unique, layered border. This idea works for different mirror sizes and room themes, from rustic to glam.
Start by sourcing an old or thrifted picture frame, then clean and lightly sand it. Paint or distress it if desired. Attach the frame around the mirror with strong adhesive or small nails, ensuring the edges are flush. Use a level to keep everything aligned perfectly. For added stability, consider using brackets or corner supports. Seal the paint if you’ve customized the finish.
Customize the frame with decorative embellishments like metallic leaf, stencils, or decoupage for extra flair. You can also add a decorative trim or beads along the edges. For a seasonal twist, swap the frame or add themed accents. Personal touches make your mirror truly one-of-a-kind and reflect your style.
Upcycling old frames is a budget-friendly way to craft a bespoke look. It’s satisfying to see a piece transformed from old to elegant. This trick can dramatically change the vibe of your bathroom, making it feel more polished and curated. DIY projects like this show that creativity beats expensive décor every time.
4. Twine or Jute Rope Border
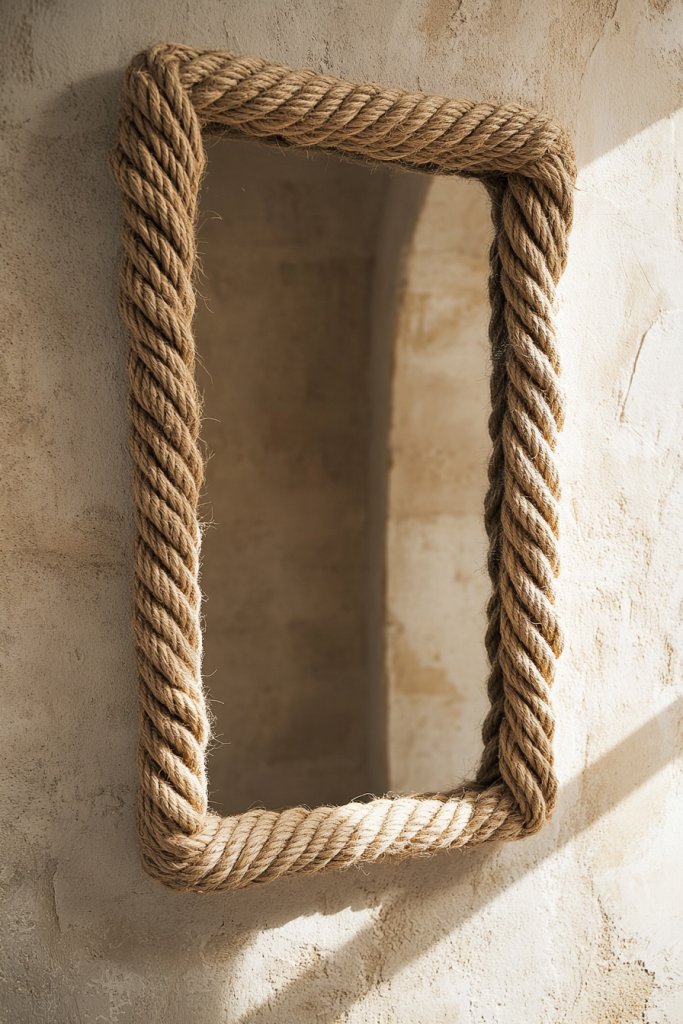
Want to add a natural, coastal vibe to your bathroom without spending a lot? Twine or jute rope is an inexpensive material that can instantly give your mirror a warm, textured border. It’s perfect for creating a relaxed, earthy atmosphere. Who needs fancy frames when you have rustic charm?
Picture thick twine wrapped snugly around the perimeter of your mirror, secured with hot glue. The rough texture contrasts beautifully with smooth glass and sleek walls. In natural tones, it evokes a seaside cottage feel, especially paired with soft linens and woven baskets. The tactile quality invites touch and makes your mirror a centerpiece.
Choose different rope widths or colors—whitewashed, natural, or dyed for a pop of color. Wrap the rope in multiple layers for more texture or keep it simple with a single wrap. Combine with small decorative shells or beads for a nautical theme. This style adapts easily to various bathroom sizes and can be a quick seasonal decor update.
Cut your rope to the length needed, ensuring enough overlap for a seamless look. Apply a line of hot glue along the mirror’s edge, then press the rope into place. For a neater finish, use small nails or clips at the ends. Repeat the process all around, keeping tension even to avoid sagging. You can also add a clear sealant for extra durability.
Decorate the rope border with small charms, charms, or painted accents. For a more modern look, paint sections of the rope in metallic or bright hues before wrapping. Layering different textures, like adding a burlap ribbon underneath, can create a layered, boho effect. Personalize it with DIY charms or initials.
This simple idea transforms your mirror into a cozy, inviting feature. It’s a great project for beginners and can be easily changed out for different seasons or moods. Using natural materials keeps your space feeling fresh and grounded. DIY decor like this proves that you don’t need to spend a fortune to create a stylish statement.
5. Reclaimed Pallet Wood Frame
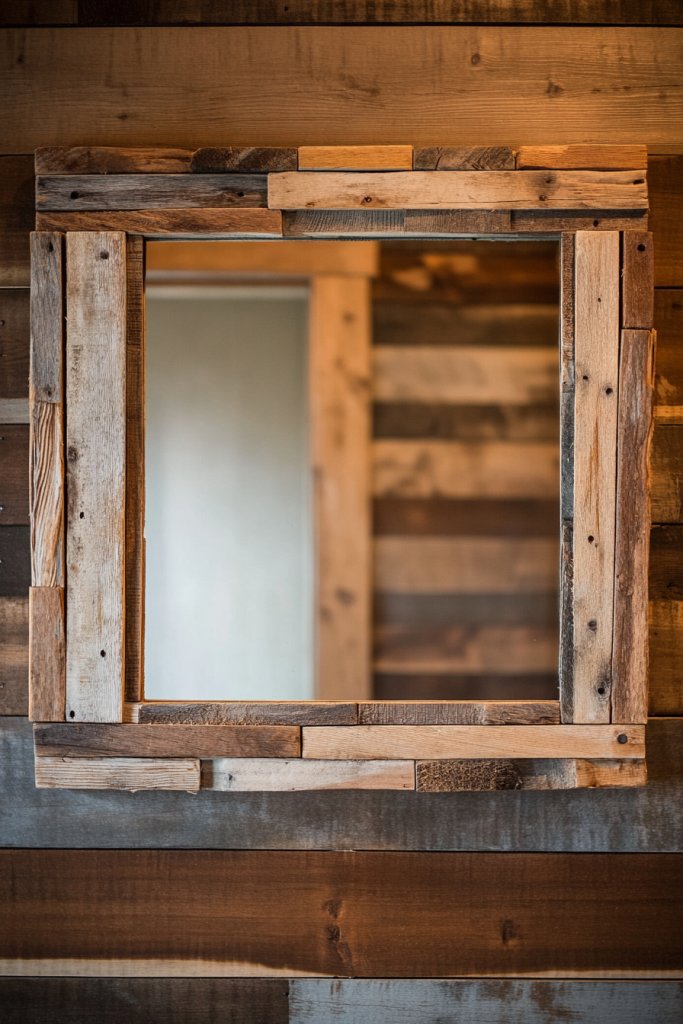
Dreaming of a rustic, farmhouse vibe in your bathroom? Pallet wood is often free or cheap at recycling centers and can be turned into a stunning custom frame. It’s a perfect way to add warmth and character without a hefty price tag. Who needs fancy mouldings when you have reclaimed wood?
Visualize a frame made from weathered, uneven pallet planks, sanded smooth but retaining their distressed charm. The natural knots and grain add texture, while a coat of clear or colored stain highlights the rustic appeal. The rough-hewn look perfectly complements vintage fixtures or modern industrial decor. It frames the mirror like a piece of art.
Use planks of different widths and lengths for an eclectic look, or keep it uniform for a cleaner appearance. Stain or paint the wood to match your bathroom palette—light wash for airy feel or dark stain for drama. For added durability, seal with a clear protective coat. This idea works with large or small mirrors and suits rustic, industrial, or shabby chic styles.
Source reclaimed pallet wood, then cut to size with a saw. Sand thoroughly to remove splinters while preserving texture. Assemble the frame by attaching the planks with nails or wood glue, ensuring corners are square. Reinforce with corner brackets if needed. Finish with stain or paint, then seal. Attach the frame to the wall or directly around the mirror with adhesive or brackets.
Add decorative touches like metal accents, stenciled patterns, or carved details to customize your frame. Incorporate hooks or small shelves into the frame for extra functionality. For a seasonal update, paint or stain the wood in different shades. Personalization makes your reclaimed wood frame a true reflection of your style.
Using reclaimed pallet wood is eco-friendly and budget-smart. It creates a warm, inviting atmosphere that’s hard to replicate with store-bought frames. Plus, it’s a rewarding project that adds genuine character to your bathroom. DIY projects like this empower you to craft a space that’s uniquely yours.
6. PVC Pipe Frame for a Contemporary Look
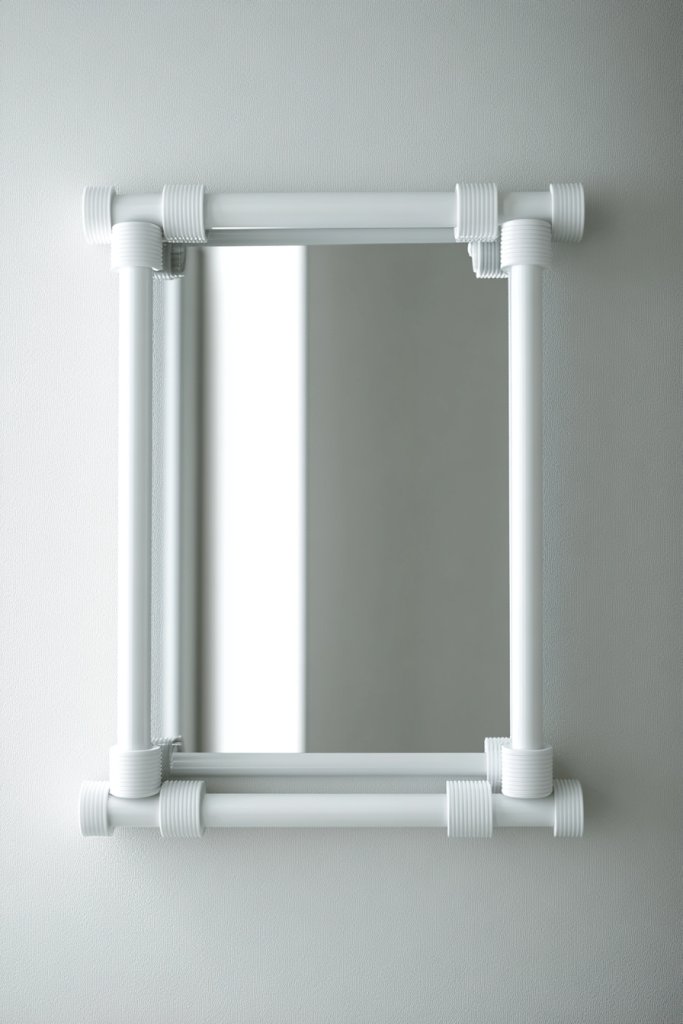
Looking for a sleek, modern edge in your bathroom decor? PVC pipes, usually associated with plumbing, can be repurposed into a minimalist, geometric mirror frame. It’s an affordable solution that screams contemporary style. Who needs expensive mouldings when you have DIY ingenuity?
Envision a clean-lined frame made from white or black PVC pipes, assembled into a simple rectangular or square shape. The smooth surface and sharp angles create a bold contrast against soft bathroom textures. The matte finish makes it look polished and professional, like a piece straight out of a designer showroom.
Experiment with different pipe sizes or arrange multiple pipes for a layered, industrial look. Paint the pipes in metallic or matte finishes for variety. Incorporate decorative connectors or caps to add visual interest. This idea scales well for small or large mirrors and complements modern, minimalist, or urban decor.
Purchase PVC pipes and connectors from hardware stores, choosing the color and size you prefer. Cut pipes to length with a hacksaw or pipe cutter. Assemble the frame by connecting the pipes with appropriate fittings, ensuring tight joints. Use strong adhesive or screws for extra stability. Attach the assembled frame around your mirror with adhesive or mounting brackets.
Add metallic paint or metallic foil tape to give the PVC a luxe look. Wrap the pipes with LED strip lighting for a backlit effect (if permitted). For a more artistic touch, drill small holes and insert decorative elements like small hooks or charms. Personalize your frame to match your decor theme.
This project proves that even plumbing supplies can become high-design decor. It’s customizable, budget-friendly, and fun to build. Plus, it’s a great conversation starter—your bathroom will definitely stand out. Embrace your inner DIYer and create a statement piece that’s totally unique.
7. DIY Fabric or Tapestry Frame

Want a soft, textured border that adds warmth and personality to your mirror? Fabric or tapestry offers a cozy, inviting alternative to traditional frames. It’s affordable, customizable, and easy to change with your mood or decor trends. Who says fabric can’t be fancy?
Picture a vibrant or subdued fabric wrapped around the edges of your mirror, secured with staples or adhesive. The tactile surface adds a layer of softness, while bold prints or textured weaves create visual interest. Imagine a floral tapestry or a woven textile in earthy tones—perfect for adding depth and personality.
Use different fabrics for different seasons or occasions—think chunky knits for winter or light linen for summer. Layer fabrics for a patchwork effect or add decorative trims and tassels for extra flair. This idea works well for small or large mirrors and complements eclectic, boho, or rustic styles.
Cut your fabric slightly larger than the mirror’s perimeter. Secure the fabric with a staple gun or double-sided tape at the back, stretching it tightly for a smooth finish. For a neater look, fold and hem the edges before attaching. Use hot glue or adhesive strips to keep the fabric in place. For easy removal or changes, opt for velcro strips.
Decorate the fabric with fabric paint, embroidery, or iron-on patches for a personalized touch. Add decorative trim, beads, or pom-poms along the edges. You can also create a layered look by combining different fabrics or textures for a more artistic presentation. This approach allows you to change your style whenever you want.
A fabric border makes your mirror feel like a piece of textile art, adding softness and warmth. It’s a project that anyone can tackle, regardless of sewing skills. With endless fabric choices, your mirror can always match your current decor mood. DIY fabric borders show that comfort and style can go hand in hand.
8. Painted Cardboard or Foam Board Frame
On a tight budget but still crave a stylish frame? Cardboard or foam board can be turned into a surprisingly chic border with a little paint and creativity. It’s perfect for quick, low-cost updates that don’t sacrifice style. Who says DIY has to be complicated or expensive?
Imagine a lightweight, painted border that’s easy to customize. Bright geometric patterns or subtle metallic accents can transform plain cardboard into eye-catching decor. The smooth surface takes paint well, allowing you to get creative with colors and designs. The finished frame looks sleek yet affordable, perfect for renters or temporary setups.
Use stencils, tape, or freehand painting to create patterns or motifs that match your decor. Combine multiple layers or shapes for a modern collage effect. For seasonal updates, switch out colors or add themed designs. This idea scales for small or large mirrors and suits contemporary, artsy, or minimalist styles.
Cut the cardboard or foam board to size, leaving a border slightly wider than your desired frame width. Prime with a base coat of paint if needed, then decorate with your chosen colors or patterns. Attach the frame to the wall or directly around the mirror with strong double-sided tape or adhesive. Seal with a clear acrylic spray for durability. Keep edges neat and even for a professional look.
Add textured details with metallic foil, glitter, or decoupage techniques. Incorporate stickers or small decorative elements to make the frame uniquely yours. For a more polished appearance, frame the painted border with washi tape or trim. Switch up designs seasonally for a fresh look that’s still budget-friendly.
This project is perfect for creating a custom, artistic statement without a hefty price. It’s quick to assemble and easy to modify, making it ideal for experimentation. Your budget-friendly frame can look just as stylish as high-end options, proving that creativity beats cost every time.
9. Rope or Chain Fringe Accents
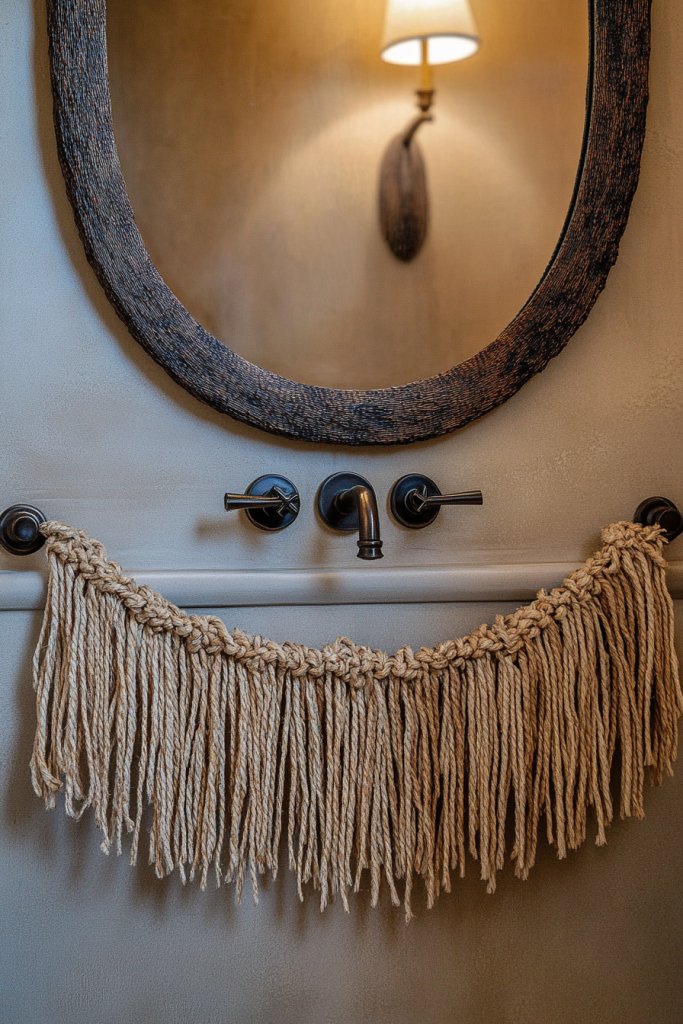
Searching for a boho or industrial touch to your mirror? Adding fringe made from rope or chain links can give your bathroom a textured, layered look. It’s a budget-friendly way to create visual interest and a bit of movement. Who says accents need to be complicated?
Imagine a thick, twisted rope or metallic chain draped along the edge of your mirror, secured with glue or small hooks. The tactile quality and shimmer create a dynamic border that catches the light. Think of a chic, layered necklace framing your reflection, adding depth and dimension.
Use different materials—jute, hemp, metallic chain, or leather—to match your style. Vary the length or layer multiple fringes for a richer effect. For a more refined look, combine the fringe with decorative beads or charms. This idea works for small or large mirrors and suits boho, industrial, or eclectic aesthetics.
Cut your rope or chain to the desired length, leaving extra for securing. Attach along the mirror’s edge with heavy-duty adhesive, small hooks, or eyelets. For chains, use small S-hooks or connectors. Space the accents evenly or cluster for a more dramatic effect. Double-check the security to prevent slipping or sagging.
Decorate with painted beads, charms, or tassels for extra flair. Combine different textures like leather and metal for contrast. For seasonal decor, switch to colored or glittered cords. Personal touches make your fringe border truly stand out and reflect your style.
This simple fringe adds a playful, textured element that elevates your mirror instantly. It’s easy to DIY and customize, making it accessible for all skill levels. Your bathroom will feel more lively and inviting, proving that small details make a big impact.
10. Twisted Wire or Metal Rod Frame
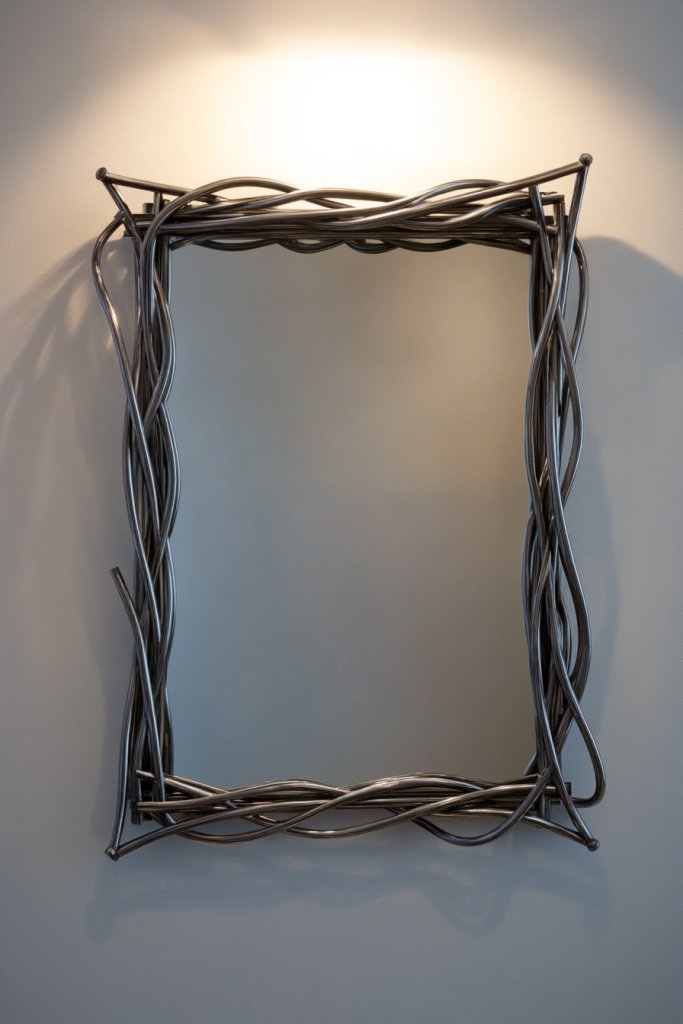
Craving a sleek, modern edge with a minimal footprint? Twisted wire or thin metal rods can be crafted into a minimalist, industrial-inspired frame. It’s an inexpensive way to add structure and style without overwhelming your space. Who says metal can’t be elegant?
Picture a geometric frame made from black or metallic-finished wire, bent into clean rectangles or abstract shapes. The thin, curved lines create a delicate but bold border that highlights your mirror. The sleek finish reflects light and adds a contemporary touch. It’s like a piece of modern sculpture framing your reflection.
Experiment with different shapes—circular, square, or asymmetrical designs—using flexible wire. Combine multiple rods for layered or multi-dimensional effects. Paint or coat the wire in metallic or matte finishes for variety. This approach suits minimalist, industrial, or modern decor themes and scales well for tiny or large mirrors.
Bend the wire carefully into your desired shape using pliers, ensuring smooth curves. Secure joints with soldering or strong adhesive if necessary. Attach the frame to the wall or around the mirror with small brackets or clips. For extra stability, reinforce with additional wire or thin metal rods. Ensure all connections are tight and secure.
Decorate with colored wire, metallic paint, or incorporate small charms or beads at intersections for detail. For a more artistic look, create abstract shapes or layered designs. You can also add LED strip lighting behind for a backlit effect—perfect for a contemporary vibe. Personalize to match your decor style.
Using simple wire or rods demonstrates that high style can come from basic materials. This project is adaptable, sleek, and perfect for those who love clean lines. It’s a subtle upgrade that makes your mirror stand out while maintaining a minimalist aesthetic. DIY metal framing is a testament to creative reuse.
11. Corkboard Frame for Functional Style
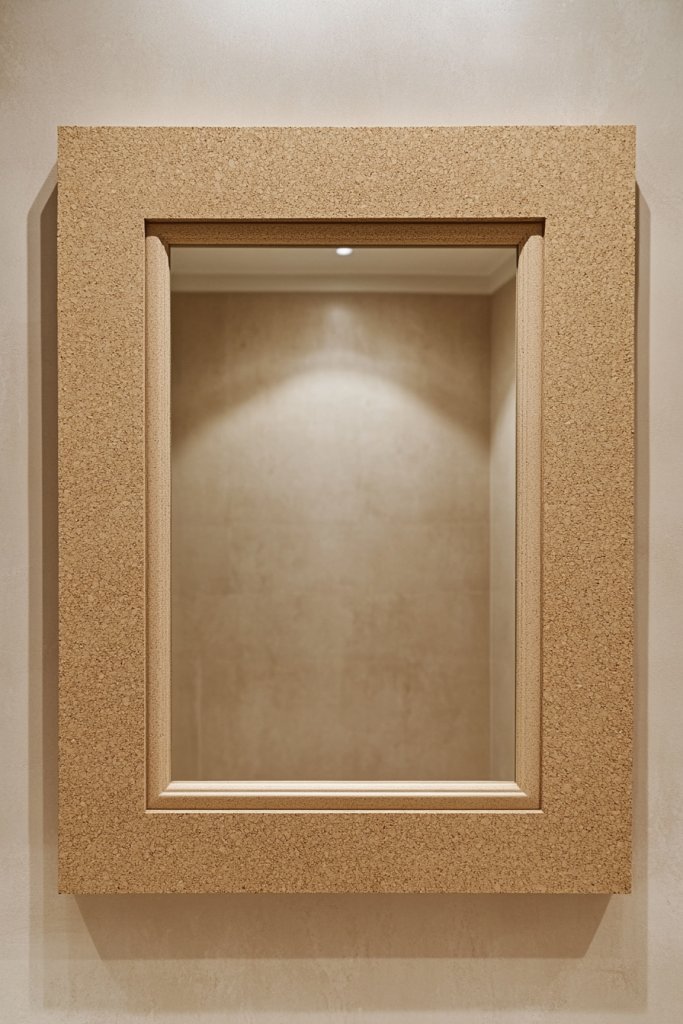
Want a mirror that’s both stylish and practical? Incorporating corkboard around your mirror gives you a dual-purpose spot for notes, reminders, or small accessories. It’s a budget-friendly upgrade that adds function without sacrificing style. Who says your mirror can’t be a mini command center?
Visualize a border made of cork tiles or strips pinned neatly around the mirror’s edge. The warm, textured surface contrasts with sleek glass and smooth walls, creating a cozy yet functional look. Pin colorful notes, photos, or small jewelry pieces directly onto the cork for a personalized touch. It’s like a bulletin board and mirror in one.
Choose cork tiles in natural, white, or patterned finishes to suit your decor. Create a framed look with a border of cork, or layer sections for a patchwork effect. Add decorative pins or clips for visual interest. This idea adapts easily for small or large mirrors and works well in casual, rustic, or modern spaces.
Cut cork tiles or strips to size, then attach around the mirror using strong double-sided tape or adhesive. Make sure to press firmly so the cork adheres well, especially at corners. Secure with small nails or staples if needed. Keep the surface clean before application for a smooth finish. For added stability, seal edges with clear glue or trim.
Decorate the cork with washi tape borders, painted designs, or decorative push pins. Personalize with small photos, inspirational quotes, or seasonal notes. Change out the pinned items regularly to keep your space fresh and inspiring. The corkboard border becomes a living, evolving part of your decor.
This functional border transforms your mirror into a practical, aesthetic feature. It’s easy to update and personalize, making your space uniquely yours. Plus, it encourages organization and creativity. DIY corkboard frames demonstrate that utility and style go hand in hand.
12. Upcycled Drawer Handle Frame Borders
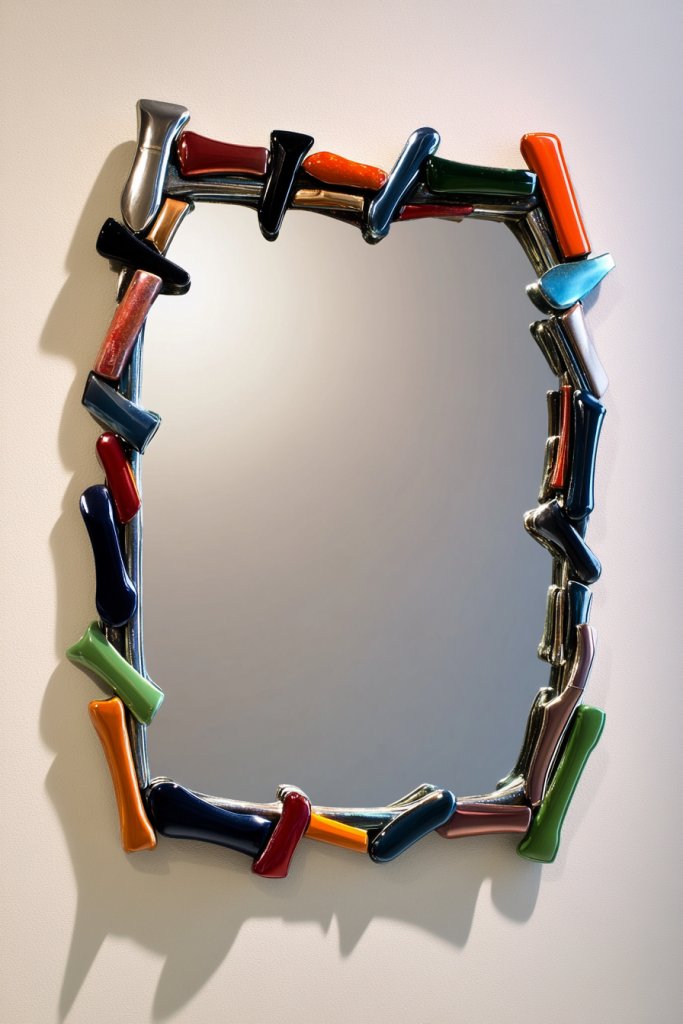
Looking to add a quirky, eclectic touch to your bathroom? Vintage or modern drawer handles can be repurposed into decorative borders around your mirror. It’s a fun, budget-friendly way to showcase personality and craftsmanship. Who knew handles could double as art?
Imagine a series of colorful or metallic drawer handles arranged along the perimeter of your mirror. The handles add a three-dimensional element and serve as both decoration and functional hooks. The mix of shapes and finishes creates an eye-catching frame that’s full of character. It’s like a jewelry display for your bathroom.
Mix vintage and modern handles for an eclectic look or stick to one style for a more cohesive effect. Paint or leave handles as-is to match your decor. Vary handle sizes and shapes for visual interest or create a pattern with contrasting finishes. This idea works for small or large mirrors, fitting various decor themes from shabby chic to industrial.
Source handles from thrift stores, flea markets, or your own drawers. Clean and possibly paint them to coordinate with your decor. Attach handles along the border with strong adhesive or small screws—ensure they’re evenly spaced. For stability, reinforce with a bead of glue on the backside. Keep handles aligned and level for a balanced look.
Add decorative elements like painted designs or small charms on or near handles. Incorporate themed handles for holidays or special occasions. Use different colors or finishes to create a pattern or highlight certain areas. Personal touches turn your mirror into a functional art piece.
Repurposing drawer handles is a clever way to add personality without a big budget. It’s a project that invites creativity and can be easily customized. Your bathroom will have a distinctive, handcrafted vibe that reflects your style—proof that DIY can be both fun and stylish.
13. Bamboo or Reed Mat Frame
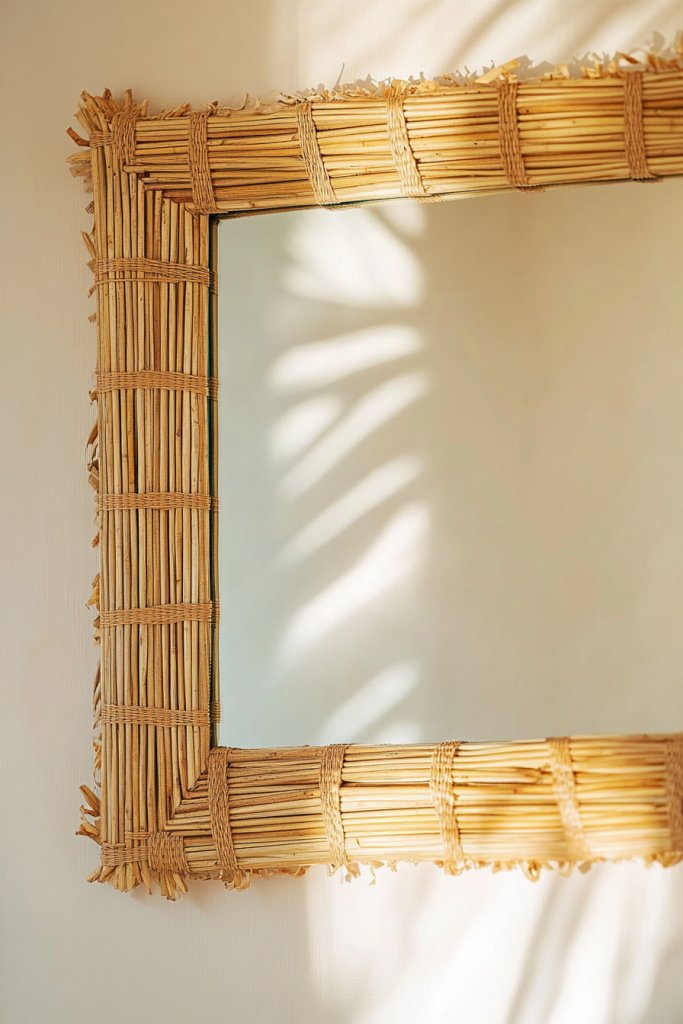
Craving a tropical, relaxed vibe in your bathroom? Bamboo or reed mats can be repurposed into a natural, textured frame that instantly transports you to a beachside retreat. It’s an affordable way to add warmth and organic appeal. Who says you need a resort to get that vacation feel?
Imagine a frame made from woven bamboo or reed strips, carefully glued or tied around the mirror’s edges. The intricate weave adds a tactile, textured border that’s both rustic and elegant. The natural tones blend beautifully with neutral or earthy color schemes, creating a calming centerpiece. It’s like a piece of nature captured in your bathroom.
Choose different weaving patterns or combine bamboo with other natural fibers for variety. You can stain or paint the reeds for a different look—darker for a more dramatic effect or lighter for a soft, airy feel. Incorporate small shells or stones for added detail. This idea suits coastal, tropical, or boho decor styles and scales well for various mirror sizes.
Select a reed or bamboo mat that fits your mirror size. Cut to shape if necessary and secure with hot glue or waterproof adhesive. Reinforce corners for stability and prevent warping. Attach the mat around the mirror with strong adhesive or mounting strips. Seal with a clear protective coating to withstand moisture. Make sure the edges are smooth and secure.
Decorate with small seashells, stones, or painted accents for a customized look. Use contrasting or matching stains to highlight weave patterns. For seasonal updates, add festive charms or decorative elements. Personal touches turn a simple natural border into a statement piece.
Natural materials like bamboo or reed bring a calming, organic vibe that’s hard to replicate with synthetic options. It’s a straightforward project that adds a lot of character and texture. Your bathroom will feel more inviting and relaxed, proving once again that DIY doesn’t have to be complicated or expensive.
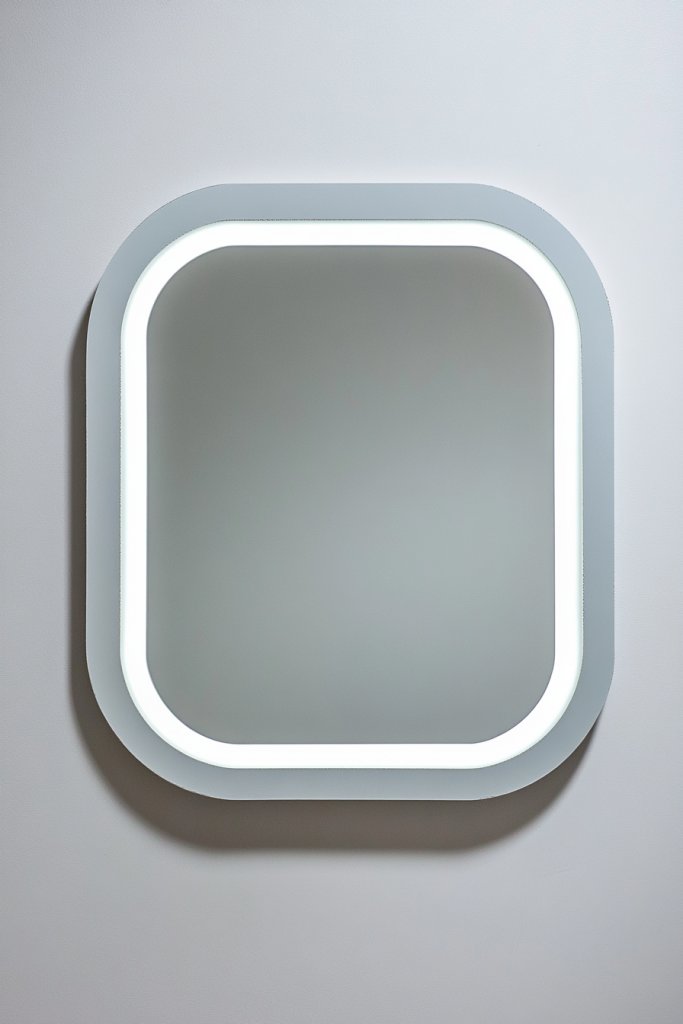
14. Painted Concrete or Plaster Frame
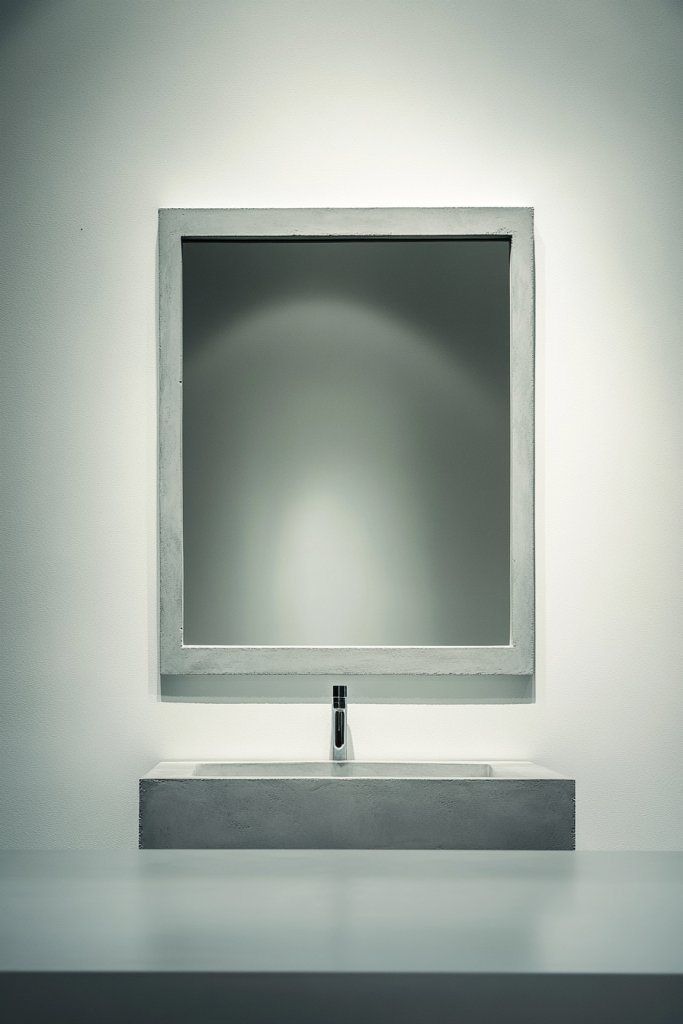
Ever wish your bathroom mirror had a bit more flair without breaking the bank? A concrete or plaster frame can give that sleek, modern vibe you crave, all for under ten dollars if you get creative. It’s a perfect way to add texture and depth to your space without resorting to expensive materials. Plus, DIY concrete and plaster are surprisingly forgiving, even for beginners.
Imagine a matte, textured border that looks like a high-end sculpture. The concrete or plaster can be smoothed for a clean, minimalist finish or left rough for an industrial edge. Rich gray tones or even bold colors can be achieved with simple paint mixed into the mix. The frame surrounds your mirror like a chic, contemporary sculpture, bringing an urban loft feel into your bathroom.
You can opt for a sleek, seamless look with a single color or go for a layered, mottled effect for more visual interest. Seasonal variations might include darker tones for winter coziness or lighter shades for summer freshness. This method also pairs well with rustic or industrial decor themes, but can be adapted to fit minimalist or eclectic styles too.
Start by sourcing inexpensive concrete mix or plaster from a hardware store. Use a sturdy cardboard or foam board cut to the mirror’s perimeter as a mold. Mix the concrete or plaster according to package instructions, then pour or spread it around the edge of the mirror, shaping it with a spatula or your fingers. Allow it to cure for a few hours, then sand lightly if needed. Finish with a coat of waterproof sealant or paint for color and durability. Be sure to work in a well-ventilated area and wear gloves.
Add visual interest by embedding small decorative elements like metallic flakes or colored pigments into the mix. You can also carve subtle patterns or lines into the still-soft material for a textured look. Painting the dried frame with metallic or matte finishes can elevate the design further. Personalize the edge with initials or motifs painted with fine brushes for a custom touch.
This DIY concrete or plaster frame proves you don’t need a big budget to achieve high-end look. It’s a versatile project that turns everyday materials into a statement piece. Once finished, your bathroom will feel more polished and styled, inspiring confidence in your creative skills. Plus, it’s a fun way to add a personal touch to your space without a hefty price tag.
15. Decorated Mirror with Washi Tape Borders
Looking for a quick, inexpensive way to jazz up your bathroom mirror? Washi tape offers a fun, colorful solution that’s totally customizable. It’s perfect for renters or anyone who loves to switch up decor without damage or commitment. Best of all, it costs less than a coffee and takes just minutes to apply.
Picture a mirror framed with a vibrant, patterned washi tape border, transforming a plain glass into a playful focal point. The tape can feature geometric designs, florals, or abstract art, instantly adding personality. The textures are subtle but visually impactful, creating a layered, artistic effect that catches the eye. The tape’s matte finish contrasts nicely with shiny fixtures and tiles.
Change the tape’s pattern or color scheme seasonally—think warm tones in fall, cool hues in summer. For a more sophisticated look, opt for metallic or marble-effect washi tapes. You can also combine different patterns for a more eclectic vibe or create geometric shapes and borders for a clean, modern aesthetic. This method works well in small bathrooms or to add a pop of color to neutral tones.
Start by cleaning your mirror thoroughly. Measure the border area and cut strips of washi tape accordingly. Carefully apply the tape along the edges, smoothing out air bubbles with your fingers or a credit card. For a clean look, use painter’s tape as a guide for straight lines. To remove or change the design, simply peel the tape off without residue. For extra durability, press the tape down firmly and avoid harsh cleaning agents.
Create custom patterns or designs by layering different washi tapes or using stencils underneath. Add small decorative stickers or metallic accents for an extra touch. You can also create a themed border—like tropical leaves, holiday motifs, or minimalist lines—matching your bathroom decor. This approach allows endless customization, making your mirror uniquely yours.
Washi tape borders turn a plain mirror into a statement piece quickly and cheaply. It invites your personality into your bathroom and makes changing styles effortless. This simple project boosts confidence in DIY decorating, proving you can refresh your space without professional help. Plus, it’s a perfect weekend project that delivers instant gratification.
16. Scrapbook Paper or Decoupage Frame
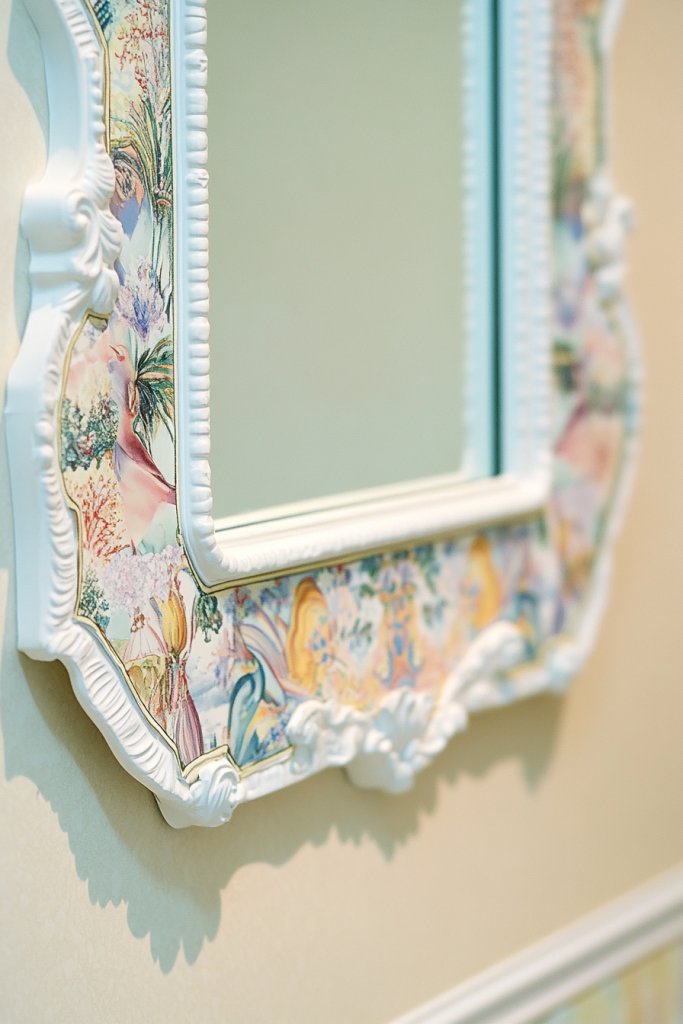
Want to add a splash of personality to your bathroom without spending a fortune? Decoupage with scrapbook paper is a creative way to give your mirror a custom, artistic frame. It’s ideal for those who love DIY crafts and want a unique look that reflects their style. And yes, it’s easier than it sounds—and budget-friendly too.
Imagine a vivid collage of patterned papers, layered and sealed to create a vibrant border around your mirror. The designs can range from floral motifs to geometric patterns or vintage prints, giving your space a personalized touch. The textured surface adds depth, making the mirror a focal point with a handcrafted charm. The glossy or matte finish seals the design, protecting it from moisture.
Mix and match different themed papers for seasonal or mood changes. For a subtle look, choose muted tones or monochrome prints. To make it more sophisticated, add metallic accents or lace patterns. This technique also works well with a vintage or shabby chic aesthetic, especially when paired with distressed furniture and soft textiles. It’s adaptable to small or large mirrors alike.
Start by choosing scrapbook paper that complements your decor. Cut the paper slightly larger than the mirror’s edge. Apply a thin layer of decoupage glue or Mod Podge to the back of the paper, then carefully adhere it to the frame area. Smooth out air bubbles with a squeegee or credit card. Once dry, seal the surface with additional coats of glue or varnish for durability. Trim any excess paper with scissors or craft knife for a clean edge. For a more polished look, consider adding embellishments like stickers or washi tape accents.
Create a theme—like tropical, vintage, or minimalist—by selecting coordinating papers. Add personal touches such as handwritten quotes or tiny illustrations. Incorporate textured elements like burlap or fabric scraps for a mixed-media effect. This project offers endless possibilities to express your personality and match your overall decor.
Decoupage transforms your mirror into a piece of art you crafted yourself. It’s a fun, inexpensive way to showcase your creativity and refresh your bathroom’s look. Once complete, you’ll feel proud of your personalized decor upgrade, boosting your confidence to tackle more DIY projects. It’s proof that a little imagination goes a long way.
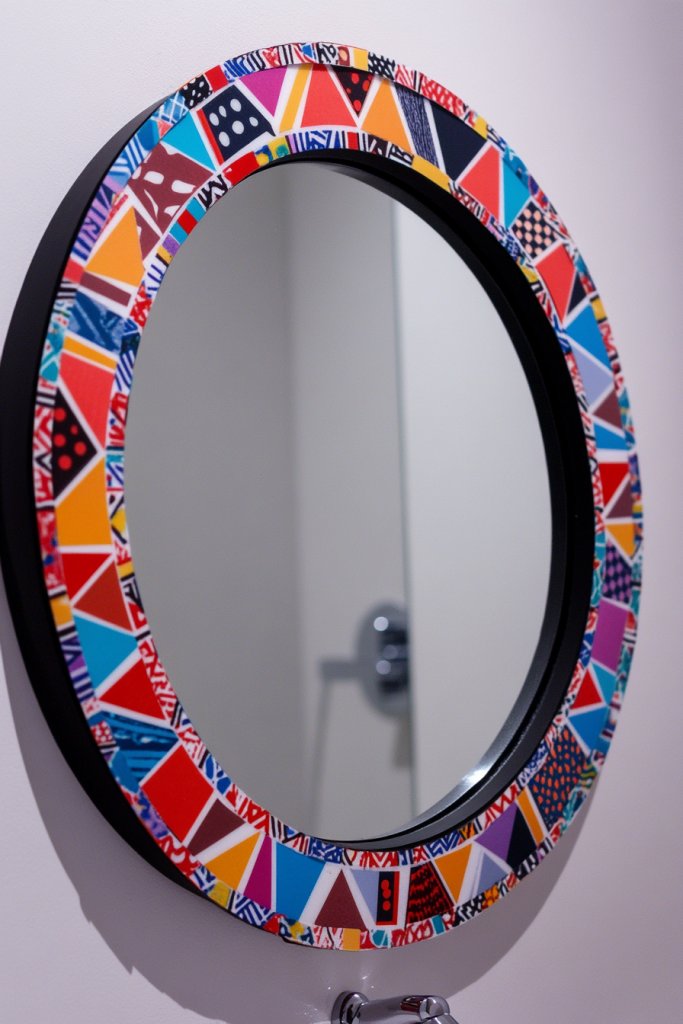
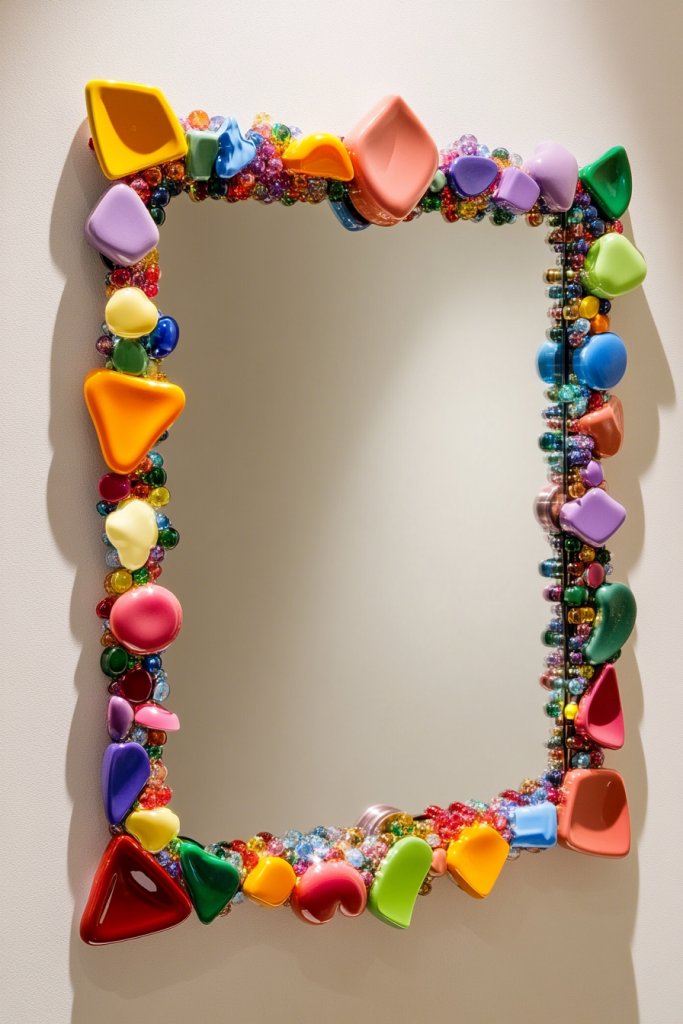
17. Plastic Bottle Cap Mosaic Frame
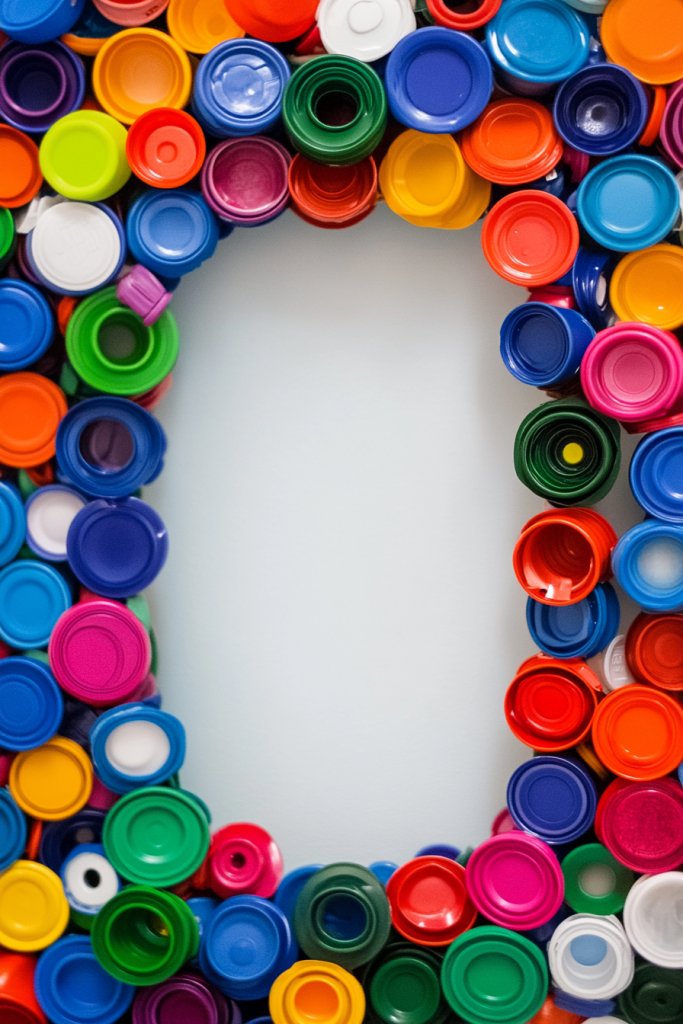
Looking for a bold, eco-friendly way to frame your mirror without spending much? Recycled plastic bottle caps are perfect for creating a vibrant mosaic border. It’s a fun project that turns trash into treasure, giving your bathroom a unique and colorful focal point. Plus, it’s a great way to reduce waste and make a statement.
Visualize a lively mosaic of caps in various colors and sizes, arranged meticulously around your mirror. The glossy, textured surface of the caps adds a playful, tactile element that catches the light. Bright reds, blues, and yellows create a cheerful ambiance, while monochrome schemes can deliver a sleek, modern look. The mosaic frames the mirror like a piece of eclectic art, full of personality.
Choose caps that match your decor palette or go for a rainbow of colors for maximum impact. Create patterns or random arrangements—either way, it’s a statement. For a more refined look, set caps into a clear resin or attach them directly to a sturdy backing. This technique suits boho, eclectic, or even industrial styles, and can be scaled to fit various mirror sizes.
Gather clean, colorful caps and a sturdy base such as plywood or thick cardboard. Plan your layout before gluing, using a template or freehand. Use strong adhesive or hot glue to attach caps securely, pressing them firmly into place. For durability, you can coat the mosaic with a clear sealant or resin. Trim and sand edges if necessary, and ensure the entire piece is stable and even. Attach the mosaic to the mirror frame with additional adhesive or brackets, depending on the weight.
Incorporate different cap shapes or sizes for added visual interest. Highlight specific colors or create themed designs—like a rainbow or a pattern that mimics your favorite sports team. You can also add small decorative elements like glitter or metallic paint to some caps for extra sparkle. Personal touches make this project uniquely yours.
This mosaic project proves that eco-friendly can also be stylish. It’s a colorful testament to your creativity and commitment to sustainability. Once finished, your mirror becomes a conversation starter and a proud centerpiece. It’s a DIY win that shows anyone can craft art from everyday waste—plus, it boosts your confidence for bigger projects.
18. String Art Frame Design
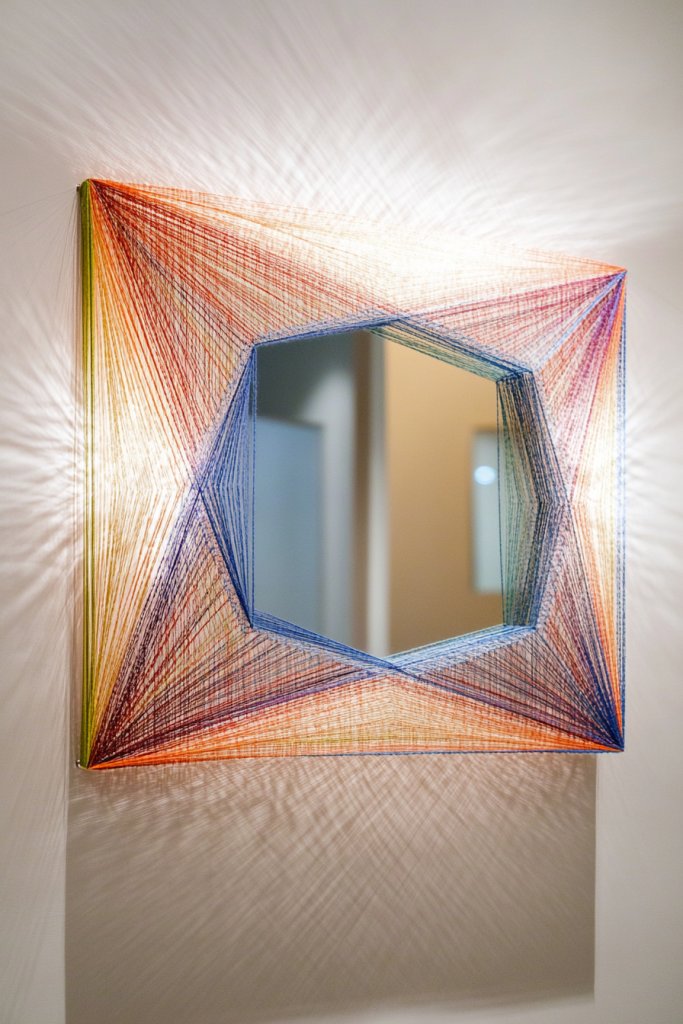
Ever wanted to add a modern, artistic twist to your bathroom mirror? String art offers a creative, budget-friendly way to do just that. It’s perfect for those who love crafts and want a personalized touch that’s easy to customize. No fancy tools or expensive materials needed—just some string, nails, and a little patience.
Picture a geometric or abstract pattern of colorful strings stretched between small nails or pins around your mirror. The intricate web of threads creates a dynamic, textured border that feels both playful and sophisticated. Bright colors or metallic threads can add vibrancy, while monochrome schemes lend a sleek, minimalist vibe. The result is a three-dimensional art piece that energizes the space.
Experiment with different shapes—hexagons, circles, or freeform designs—to match your decor style. Change colors seasonally or for special occasions. For a softer look, use thinner threads or incorporate beads into the design. It’s also adaptable for small or large mirrors and can be layered to add depth. This project suits both modern and eclectic themes.
Start by marking the outline of your desired pattern on the wall or directly on a backing board. Hammer small nails or push pins at each point, ensuring they are evenly spaced. Tie the string around the first nail, then stretch it to the next, creating your pattern. Secure the string by wrapping it around nails or tying off at the ends. You can add multiple colors or layers for complexity. Finish by trimming excess string and sealing the design with a light spray of clear acrylic if needed.
Incorporate metallic or glow-in-the-dark threads for special effects. Create personalized initials or symbols within the pattern. Use different textures like yarn or embroidery floss for a tactile experience. Frame the string art with a painted or decorative border for a complete look. The possibilities are endless for making this project truly yours.
String art transforms a simple mirror into a piece of wearable art. It’s a fun, interactive project that demonstrates how creative you can get on a budget. Once finished, it becomes a reflection of your personality and style, inspiring confidence to explore more DIY decor ideas. Plus, it’s a conversation starter that shows off your artistic side.
19. Magnetic Frame with Decorative Magnets
Want to add a playful, functional touch to your bathroom mirror? A magnetic frame allows you to decorate and change up your look effortlessly. It’s a simple idea that combines style with practicality—perfect for those who love versatility. And the best part? It costs next to nothing if you already have some magnets lying around.
Visualize a slim magnetic strip or frame around your mirror, decorated with a variety of small, colorful magnets. These could be decorative icons, quotes, or themed magnets that reflect your personality. The magnets create a dynamic border that’s easy to swap out, making your mirror a constantly evolving piece of art. The sleek metallic or magnetic paint adds a modern, minimalist touch.
Use themed magnets for holidays, seasons, or personal interests. Mix different shapes and sizes for a playful look or stick to a monochrome palette for elegance. You can also add a magnetic chalkboard strip for jotting notes or reminders. This idea works well in small bathrooms or as an interactive element in your decor.
Attach a thin magnetic strip or sheet around the mirror’s edge using adhesive or double-sided tape. Decorate the strip with decorative magnets, arranging them in patterns or randomly for a fun look. To prevent magnets from sliding or falling, ensure they are magnetic enough for the strip used. You can customize the magnets with paint, stickers, or printouts for added flair. For extra durability, seal with a clear spray if needed. Swap out magnets regularly to keep your decor fresh.
Create custom magnets with photos, initials, or small artwork. Combine magnets with small decorative elements like metal charms or mini frames. Use magnets as a way to display small notes or favorite quotes—making your mirror both decorative and functional. You can also organize magnets into themes or collections for a cohesive look.
A magnetic frame makes your bathroom mirror interactive and fun, encouraging you to experiment with styles. It’s a simple project that shows how small changes can make a big difference. Once you see your personalized, ever-changing mirror, you’ll feel more confident in your decorating skills. It’s a playful way to elevate your space without major investments.
Conclusion
With these diverse DIY bathroom mirror frame ideas, you have everything you need to add a personal touch to your space without overspending. From sleek modern looks to charming rustic styles, these projects are simple, affordable, and highly customizable. Give one a try today and turn your bathroom into a stunning, personalized retreat—your creative transformation starts now!