Ever dreamed of transforming your closet into a personalized storage paradise? DIY closet ideas have surged in popularity because they allow you to customize your space without breaking the bank, turning a mundane area into something truly functional and stylish.
In this article, you’ll explore a variety of creative and practical DIY closet ideas that cater to different tastes and needs. Whether you’re looking for sleek organization solutions, space-saving hacks, or charming decorative touches, these ideas will inspire you to craft a closet that reflects your personality and makes daily routines a breeze.
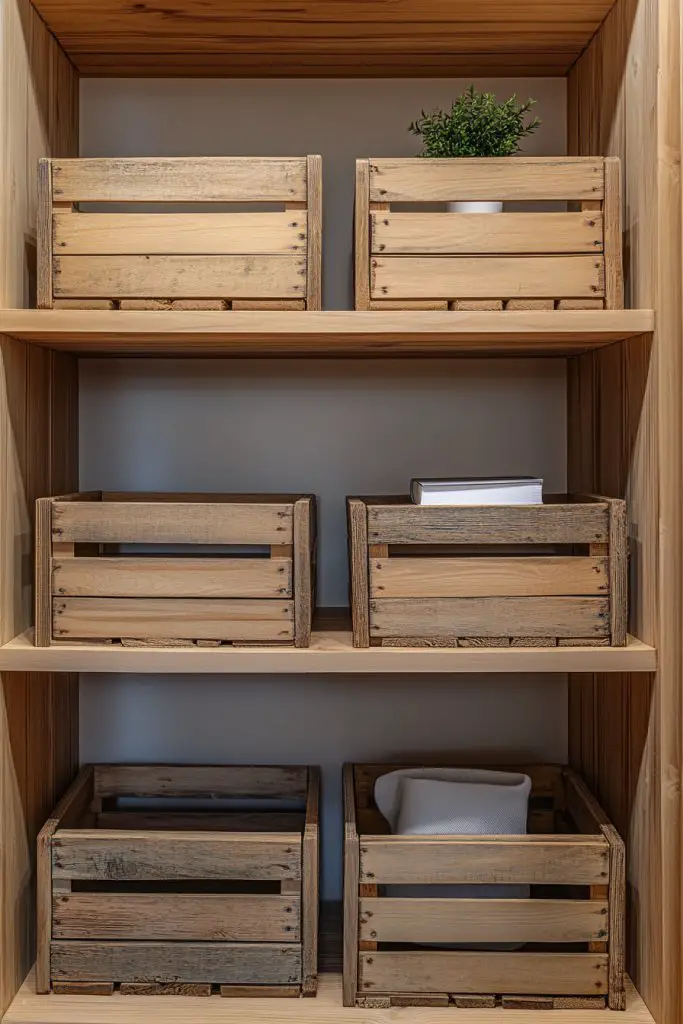
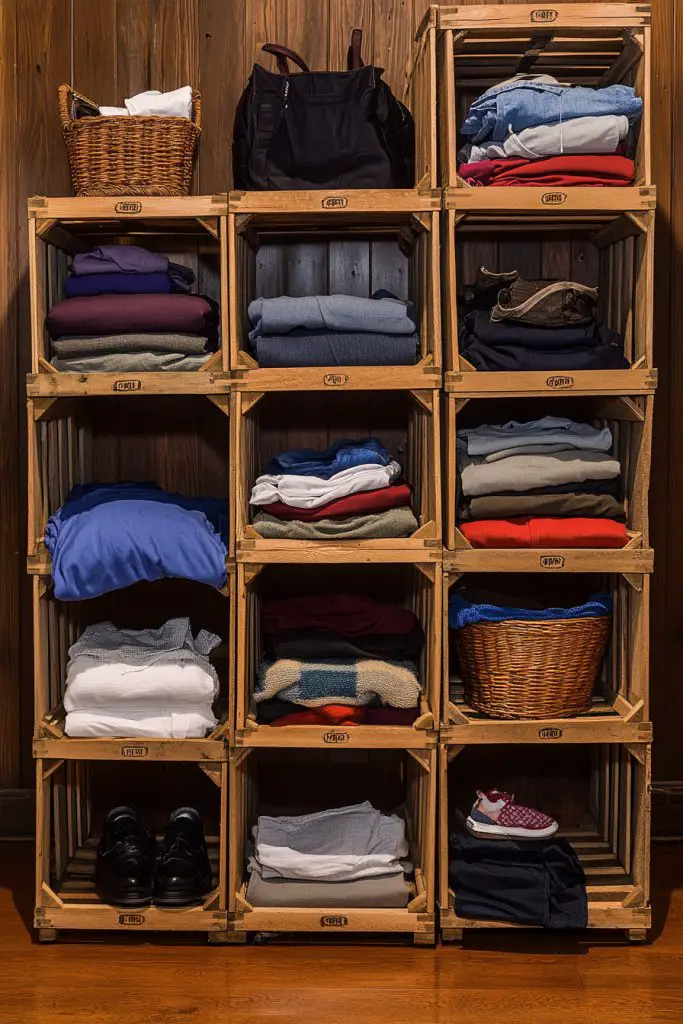
1. Install DIY Open-Shelving Units Using Repurposed Wooden Crates
Ever feel like your closet is a chaotic mess with no real order? Stacking random items or cramming everything into a single shelf can make finding what you need feel like a treasure hunt. The desire for a neat, accessible, and stylish storage system is universal. You want your closet to look good while making daily routines smoother.
Imagine rustic wooden crates painted in a soft matte hue, stacked neatly or mounted directly onto the wall. The crates create a layered shelving system that feels both vintage and modern. Clothes, shoes, and accessories sit comfortably inside, with textures contrasting against the wall. The open design invites you to see everything at a glance, making organization effortless.
Choose crates in different sizes for flexibility or uniform ones for a sleek look. For a coastal vibe, go with weathered wood and pastel paints; for industrial style, opt for raw, dark-stained crates. Mount them at varying heights to accommodate different items or space constraints. Seasonal decor, like fairy lights or fabric liners, can add personal flair.
Start by collecting sturdy wooden crates, either repurposed or bought new. Sand down rough edges and paint or stain to match your aesthetic. Use heavy-duty brackets or wall anchors for secure mounting. Arrange the crates in a pattern that suits your storage needs, securing them to the wall with appropriate hardware. Consider adding labels or small decorative elements for clarity and style. Regularly check stability to prevent accidents.
Personalize your crates with decorative washi tapes, chalkboard labels, or stenciled patterns. Incorporate small baskets or fabric bins inside for tiny accessories or socks. Mix and match painted crates with open shelving for visual interest. Add hooks underneath for necklaces or keys, turning the crates into multi-functional storage zones. Let your creativity run wild to match your personality.
Repurposing wooden crates transforms a cluttered closet into a curated space. It’s affordable, easy to customize, and highly versatile. Once finished, you’ll feel proud of your DIY skills and excited to show off your organized closet. Ready to give your space a rustic-chic upgrade? The possibilities are endless, and your closet will thank you.
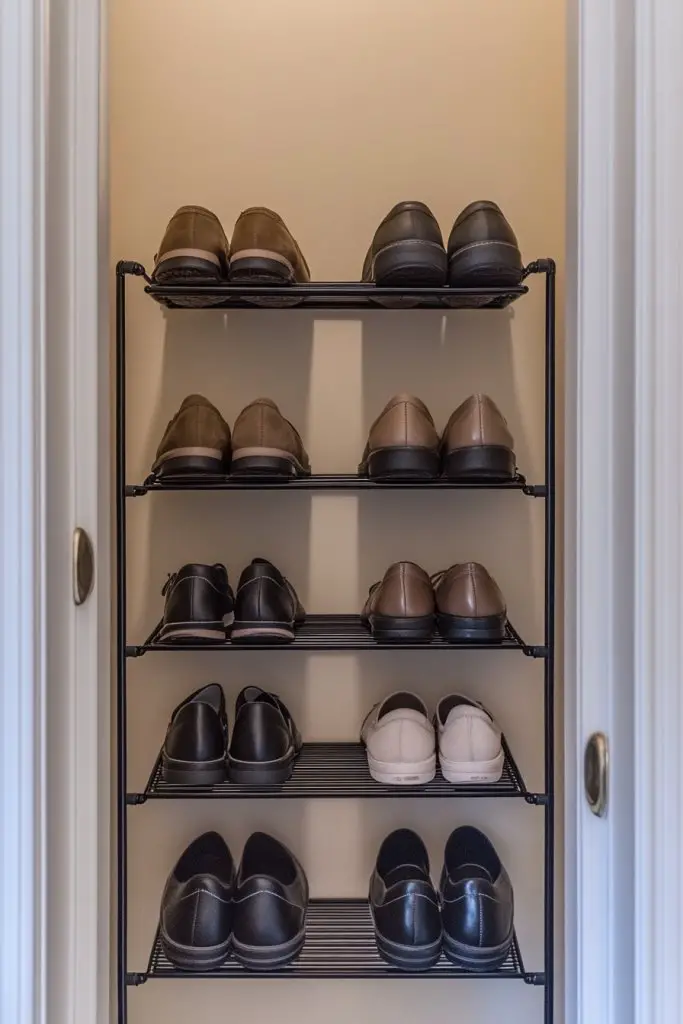
2. Create a Space-Saving Over-Door Shoe Rack
Shoes piling up at the foot of your closet or spilling over onto the floor can make your space look messy and uninviting. Keeping footwear organized without sacrificing precious space is a challenge many face. An over-door shoe rack offers an easy fix that keeps shoes accessible and out of sight.
Imagine a set of fabric or plastic pockets hanging neatly over your closet door, each holding a pair of shoes. The pockets are transparent or color-coded, making it simple to grab your favorites. The door remains free, yet the shoes are perfectly organized in a compact, tidy manner. It’s a simple, yet effective visual upgrade that saves space.
Choose between fabric, mesh, or plastic pockets depending on your style preference and durability needs. For a sleek look, opt for neutral tones or matching colors to your decor. Attach the rack with adjustable hooks or adhesive strips for easy installation. You can also customize with labels or decorative trims to reflect your personality.
Start by measuring your door’s height and width to select the appropriate rack. Install hooks or adhesive strips on the door, ensuring they are secure and won’t damage the surface. Hang the pockets evenly, leaving enough space for easy access. Organize shoes by type, season, or frequency of use. Regularly clean and rearrange as needed to keep the system efficient and clutter-free.
Add decorative patches or fabric trims to elevate the look. Use color-coded pockets to match your wardrobe organization system or label each pocket for specific categories. Incorporate a small hook or clip at the top for accessories like shoehorns or insoles. This makes the entire footwear management more fun and customized.
This simple upgrade can revolutionize your closet’s efficiency and appearance. It’s an easy DIY project that yields instant results and keeps your space looking tidy. With your shoes neatly stored, getting ready becomes quicker and less stressful. Ready to reclaim your floor space? Let’s do it!
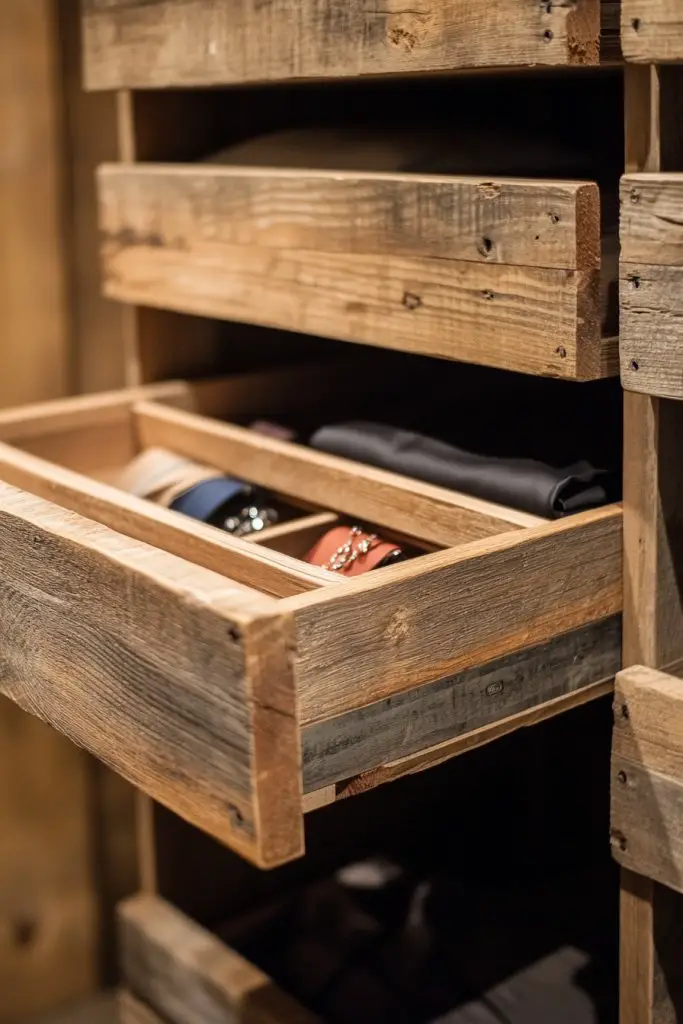
3. Construct a DIY Sliding Drawer System from Repurposed Pallets
Messy piles of small items or cluttered shelves can make your closet feel chaotic. Finding a way to hide clutter while maintaining easy access is a common challenge. A sliding drawer system built from repurposed pallets offers a rustic, budget-friendly solution that keeps everything neat.
Visualize a set of wooden pallets, sanded and painted in a finish of your choice, mounted on sliding rails. Small dividers inside hold jewelry, socks, or accessories, with smooth slides for quick access. The natural wood finish adds warmth and charm, blending practicality with style. The drawers glide effortlessly, hiding clutter behind a clean, organized facade.
Paint the pallets in bright or muted tones to match your decor. Use different sizes for varied storage needs, or add decorative hardware for a vintage touch. Incorporate soft liners or fabric inserts inside the crates to protect delicate items. Adapt the size and number of drawers to fit your closet’s space and your collection size.
Source sturdy pallets, clean and sand the surfaces thoroughly. Paint or stain them as desired, then attach sliding rails or wheels underneath. Secure the pallets to the wall with brackets, ensuring they can slide smoothly. Organize small items inside with dividers, labels, or fabric lining for added protection. Test the movement before filling with your collection. Regular maintenance will keep the system functioning seamlessly.
Decorate with stenciled patterns or vintage hardware for a unique look. Use custom-sized dividers or fabric-lined compartments to match your needs. Label each drawer with chalkboard tags or painted initials. Incorporate small hooks or knobs on the sides for hanging necklaces or bracelets. Personal touches make storage both functional and charming.
Repurposing pallets for sliding drawers proves that you don’t need fancy furniture to organize beautifully. It’s a creative, sustainable way to hide clutter and keep essentials within reach. Your space will look more polished, and you’ll feel accomplished knowing you built it yourself. Ready to slide into a tidier closet? Let’s get started!
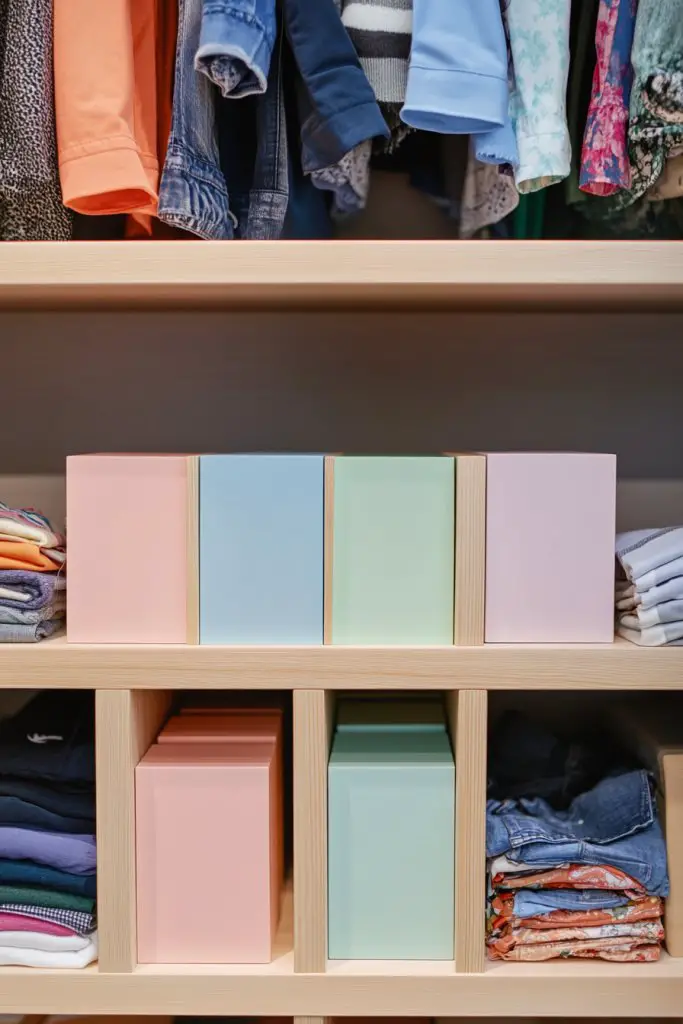
4. Craft a Custom Closet Dividers with Painted Wooden Blocks
Clothing and accessories mixed together on shelves can make it hard to find what you need quickly. Random piles and messy stacks force you to dig around, wasting time and patience. Custom dividers from painted wooden blocks offer a simple, stylish way to organize and categorize your space.
Imagine colorful wooden blocks, each painted in a different hue or pattern, stacked vertically or laid flat as dividers on your shelves. Small labels or symbols can indicate categories like shirts, pants, or accessories. The blocks create a visual boundary that makes your closet look tidy and inviting. The vibrant colors add personality and visual interest.
Use natural wood for a minimalist look, or paint in bold or pastel shades to match your decor. Mix sizes for different shelf depths or create themed sets for seasons or styles. Attach small hooks or fabric pouches to some blocks for added storage. These dividers are flexible and can be easily moved or replaced.
Cut wooden blocks to your desired size, then sand the edges for smoothness. Paint or stain the blocks, adding labels or decorative patterns if you like. Place the blocks upright or flat on shelves, using their weight for stability or attaching them with small brackets. Organize your items behind or alongside each divider for clear separation. Keep some spare blocks for future categories or seasonal shifts.
Decorate blocks with hand-painted designs, stickers, or washi tape for a playful look. Label each block with chalk markers or stencils for easy identification. Coordinate colors with your overall closet theme, or make each set reflect a different mood. Use some blocks as mini stands for accessories or folded items. These personal touches make organization enjoyable.
Custom wooden blocks turn chaotic shelves into a visually appealing, easy-to-maintain system. It’s DIY-friendly and budget-conscious, with room for creative expression. Once set up, finding and returning items becomes a breeze. Your closet will look more organized and feel more inspiring. Ready to block out the clutter? Let’s craft!
5. Install Tension Rods for Layered Clothing and Scarves
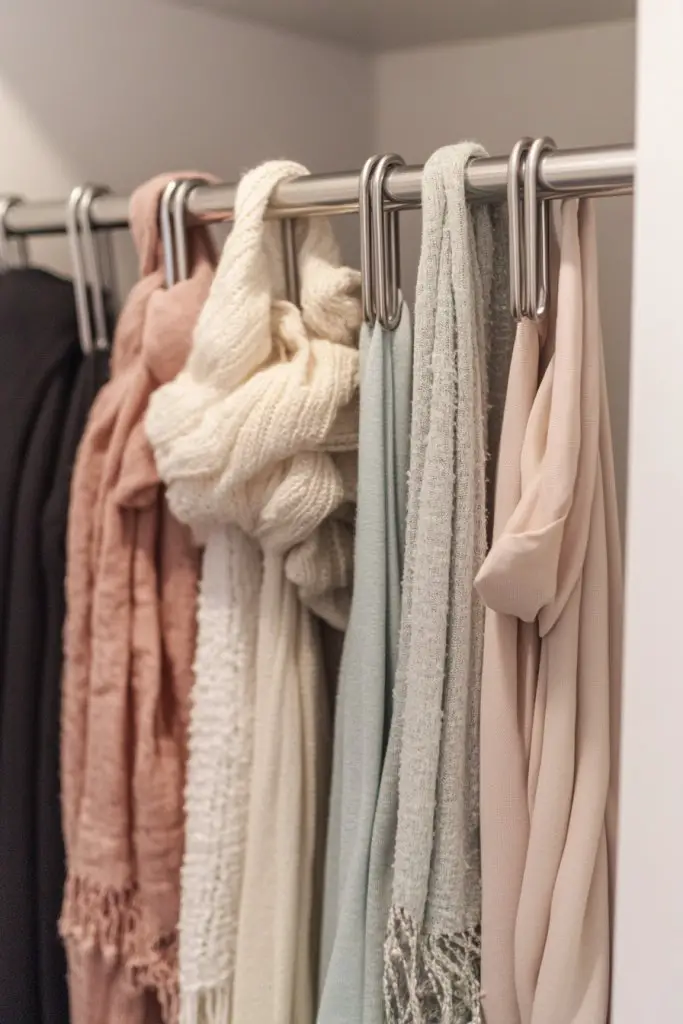
Hanging clothes in a single layer often leads to wrinkles and difficulty seeing options at a glance. Scarves and accessories tend to tangle or fall behind other items. Installing tension rods provides a simple way to add layered hanging space without permanent fixtures, making your closet more functional.
Visualize a sleek tension rod stretched horizontally across a section of your closet, with multiple layers of clothes or scarves hanging neatly. The rods create a cascading effect, allowing you to see all your items without rummaging. Soft fabrics and organized outfits hang side-by-side, creating a colorful, textured display that’s both practical and inviting.
Use adjustable tension rods in different lengths and finishes to match your aesthetic. Install multiple rods at different heights to maximize vertical space. For seasonal shifts, swap out heavier fabrics for lighter ones or vice versa. Combine with hooks or small baskets for accessories or small items for a multi-layered system.
Measure the width of the area where you want the tension rod, then choose a rod that fits snugly without slipping. Install by simply stretching the rod between two walls or panels, ensuring it’s tight enough to stay secure. Hang your layered clothing or scarves, using the space efficiently. Periodically check the tension and readjust if needed. To keep things tidy, organize items by type or color.
Decorate the rods with washi tape or paint for a pop of color. Use small hooks or clips to hang jewelry or accessories from the tension rods. Add decorative hangers or fabric sleeves to enhance visual appeal. Rotate seasonal items to keep your closet feeling fresh and inspiring.
Tension rods are an easy, damage-free way to add extra storage layers. They’re perfect for quick fixes and can be moved or removed anytime. Your closet will look more organized, and accessorizing becomes faster. Feel confident knowing you can customize your space effortlessly. Ready to layer up? Let’s do it!
6. Create a Hanging Closet Organizer from Repurposed Curtain Rods
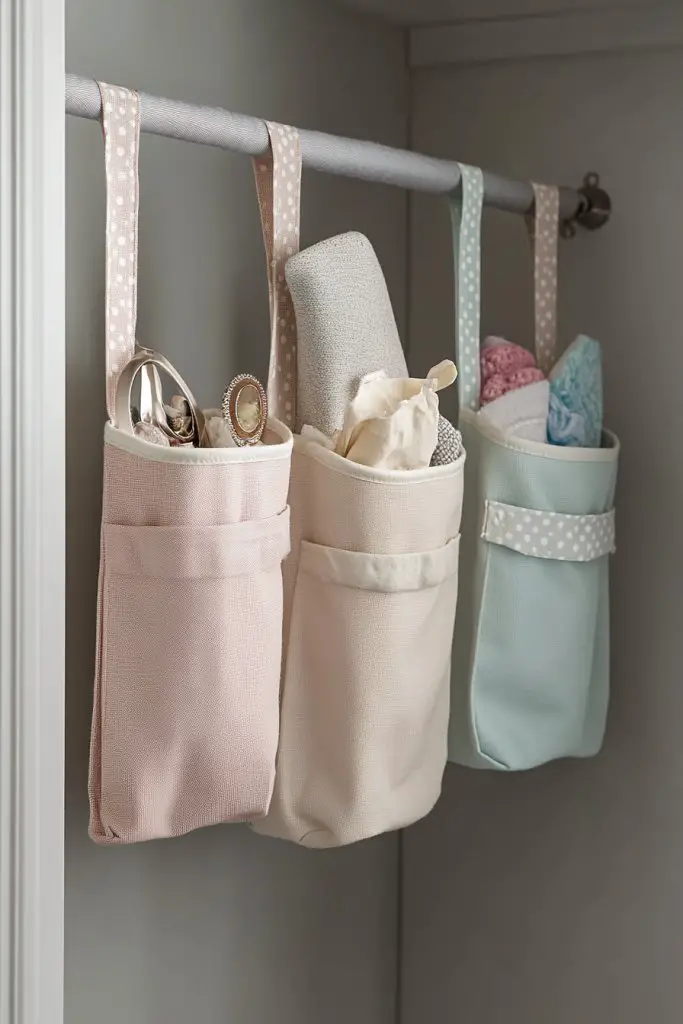
Limited shelf space and cluttered floors make organizing accessories and small items a nightmare. Hanging fabric or canvas pockets can maximize vertical space and keep everything within easy reach. This DIY project transforms simple curtain rods into a stylish and functional hanging organizer.
Picture a series of lightweight fabric pockets suspended from a sturdy curtain rod, mounted inside your closet. Shoes, socks, or small accessories are stored in each pouch, visible and accessible. The fabric adds a soft, textured element to your closet, with the pockets fluttering gently as you reach for your items. It’s both practical and aesthetically appealing.
Choose fabrics that complement your space—think neutral linen for a minimalist look or patterned cotton for a boho vibe. Attach multiple pockets or layers depending on your storage needs. Use decorative trims or embellishments to add personality. Mount the rod at various heights or angles to adapt to your closet’s design.
Securely attach a wooden or metal curtain rod inside your closet, ensuring it’s level and sturdy. Sew or attach fabric pockets with reinforced seams and loops that slide onto the rod. Organize your small items into each pocket, grouping similar items together. Regularly check the stability of the rod and the condition of the fabric. For added style, add decorative ribbons or labels.
Decorate the fabric pockets with embroidery, paint, or iron-on patches. Use different fabrics for various categories—waterproof for shoes, breathable cotton for accessories. Incorporate small hooks or clips on the rod for additional hanging options. Change out fabrics seasonally to keep the look fresh and fun.
This project is a simple, customizable way to declutter and organize your closet. It’s inexpensive, easy to update, and tailored to your needs. Once installed, you’ll find it easier to keep track of your accessories and small items. Feel empowered to create stylish storage solutions that work for you. Ready to hang and organize? Let’s go!
7. Build a DIY Hanging Rod Divider with PVC Pipes
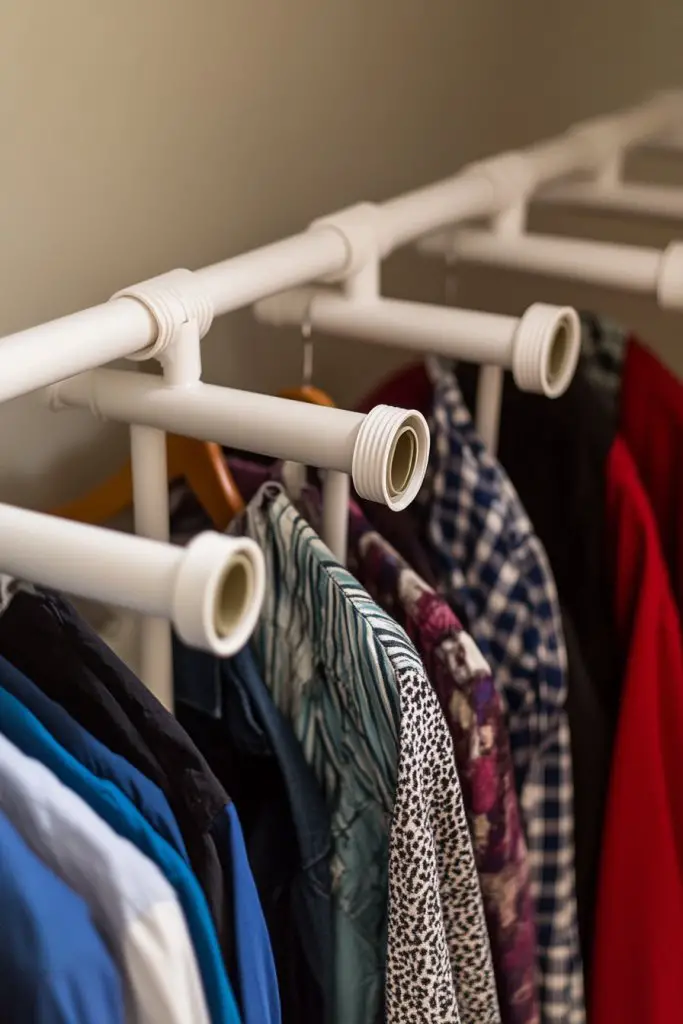
Clothes that are all mixed together on one rod can make choosing outfits a hassle. Separating different types or lengths of clothing keeps things tidy and accessible. DIY PVC pipe dividers offer a versatile, cost-effective way to segment your hanging space without complicated tools.
Picture a horizontal PVC pipe, cut into sections at different heights and lengths, mounted across your closet rod. Each section acts as a mini divider, creating separate zones for shirts, pants, or dresses. The white or colored PVC adds a sleek, modern touch, and the segmented design keeps everything in its place. It’s a simple yet effective visual organizer.
Paint or decorate the PVC pipes in vibrant colors or metallic finishes to match your decor. Use different diameters to create varied visual interest and accommodate different clothing weights. Combine with labels or fabric ties for specific categories. Adapt the length and height of dividers based on your closet’s dimensions.
Cut PVC pipes into your desired lengths with a saw, then sand the edges for safety. Drill small holes at the ends to attach hooks or brackets for mounting. Slide the pipes onto your existing closet rod or suspend with additional hardware. Organize clothing behind each divider, grouping similar items. Secure the pipes firmly to prevent shifting.
Add decorative elements like colorful tape or metallic accents to the pipes. Label each section with waterproof markers or adhesive labels. Use fabric or ribbon ties at the top for a softer look. Rearrange or extend the dividers seasonally or as your wardrobe evolves.
PVC pipe dividers demonstrate that even simple materials can revolutionize your closet organization. They’re inexpensive, customizable, and easy to install. Once in place, your closet will look more structured and be easier to maintain. Feeling confident in your DIY skills? Let’s build!
8. Design a Fold-Down Jewelry and Accessory Organizer from Wooden Pallets
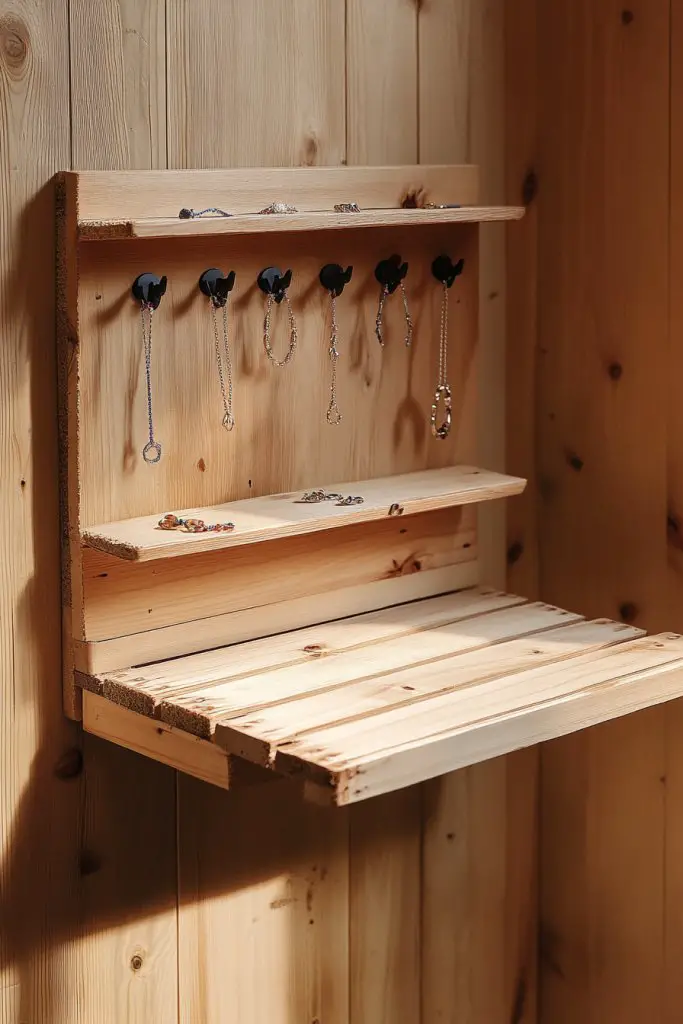
Messy jewelry drawers and tangled accessories sap your time and patience. Finding a stylish, functional way to keep everything organized and visible is a common wish. A fold-down jewelry organizer made from wood pallets merges practicality with rustic charm, making your space both beautiful and efficient.
Envision a pallet mounted on your closet wall, with hooks, small shelves, and fabric pouches attached. When folded down, it reveals a mini jewelry station—earrings hang from hooks, necklaces drape over shelves, and small pockets hold rings or bracelets. When not in use, it folds up neatly against the wall, saving space. The raw wood texture adds warmth and character.
Paint or stain the pallet to match your decor, or leave it natural for a rustic look. Attach decorative knobs or vintage hardware for a personalized touch. Incorporate small fabric pouches or cork strips for added organization. Adjust the size and number of hooks based on your collection, and add a mirror if space allows.
Select a sturdy pallet and sand it smooth. Attach hooks, small shelves, and pouches with screws or nails, ensuring they’re secure. Mount the pallet on the wall at a comfortable height, using appropriate anchors. Organize your jewelry and accessories, grouping similar items together. When not in use, simply fold it up or close a latch to keep everything tidy. Regularly check hardware for stability.
Decorate with painted patterns, stenciled designs, or personalized labels. Use fabric or leather straps for a luxe look. Incorporate small decorative elements like vintage knobs or charms. Keep your collection fresh by updating hooks or pouches seasonally, and add a small mirror or lighting nearby for convenience.
A pallet jewelry organizer proves you don’t need fancy store-bought solutions to get organized. It’s a fun, customizable project that adds rustic charm to your space. Once installed, you’ll find it easier to see and access your accessories, making dressing up more enjoyable. Ready to craft your own jewelry station? Let’s do it!
9. Repurpose Wooden Crates into Stackable Storage Cubes
Cluttered shelves and overflowing closets make it hard to find what you need. You crave a flexible, stylish storage system that can grow and adapt with your needs. Wooden crates, stacked and secured, turn into modular cubes that are both functional and fashionable.
Imagine a series of wooden crates, stacked vertically or horizontally, forming a customizable shelving tower. Filled with folded clothes, shoes, or accessories, each crate acts as a mini storage unit. The natural wood grain and simple design bring warmth and texture to your closet. The cubes can be rearranged easily, creating a dynamic display.
Paint or stain the crates in colors that match your decor or leave them natural for a rustic vibe. Mix sizes for visual interest or keep uniform for a streamlined look. Secure the crates together with brackets or straps for stability. Use liners or fabric inserts inside for delicate items, and add labels or tags for easy identification.
Gather sturdy wooden crates, clean and sand if needed. Paint or stain to your liking, then stack in an arrangement that suits your space. Secure the crates with screws, brackets, or zip ties to prevent shifting. Fill each crate with designated items, and label for quick access. Adjust the configuration over time to fit changing needs. Ensure stability to avoid accidents.
Decorate the crates with stencils, decals, or patterned fabric linings. Incorporate decorative handles or hardware for aesthetic appeal. Use color-coded crates for different categories or seasons. Add small wheels or furniture feet for mobility, and personalize with labels or tags. It’s an adaptable system that reflects your style.
Stacking crates offers a DIY solution that’s both affordable and versatile. It transforms clutter into a charming, organized display. Once set up, your closet feels more spacious and inviting. Feel empowered by your creative storage system—ready to stack and style your way to order?
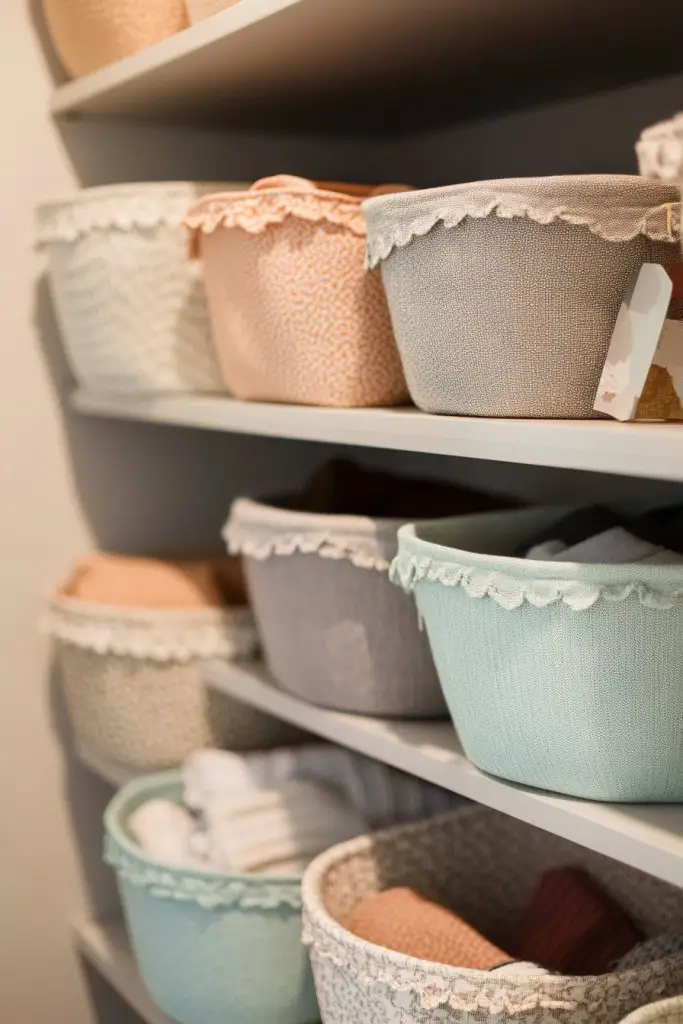
10. Use Fabric-Covered Baskets for Stylish Storage on Shelves
Small items and accessories scattered across shelves can turn your closet into a chaotic mess. You want a neat, cohesive look that keeps everything accessible without sacrificing style. Fabric-covered baskets are the perfect blend of function and fashion, hiding clutter behind a soft, decorative exterior.
Visualize a row of baskets in neutral tones or vibrant patterns, sitting neatly on your closet shelves. Each basket contains socks, scarves, or jewelry, with the fabric adding texture and warmth. The uniform shapes create a clean, organized look, while the fabric’s variety offers endless customization options. They soften the space and add visual interest.
Choose fabrics that suit your decor—linen, cotton, or burlap for a rustic feel; velvet or satin for luxe vibes. Use labels or tags to identify contents easily. Mix different sizes or add decorative trims to enhance aesthetics. Incorporate decorative lids or drawstrings for a polished look, or layer baskets with other storage solutions.
Select baskets in various sizes, then cover them with your chosen fabric, securing with hot glue or stitching. Add handles or decorative ribbons for ease of use. Place the baskets on shelves, grouping similar items together. Label each basket with tags or fabric labels for quick identification. Regularly refresh the fabric covers to keep the look current and neat.
Decorate the fabric with embroidery, painted patterns, or iron-on patches. Use coordinated color schemes or seasonal fabrics for variety. Attach small decorative charms or pins for extra flair. Incorporate labels or tags that match your style, making the system both functional and beautiful. Keep your space lively by switching fabrics periodically.
Fabric baskets elevate simple storage into a stylish decor element. They’re easy to customize and maintain, making your closet look cohesive and inviting. Once organized, you’ll spend less time hunting for items and more time enjoying your space. Ready to add softness and style? Let’s fill those baskets!
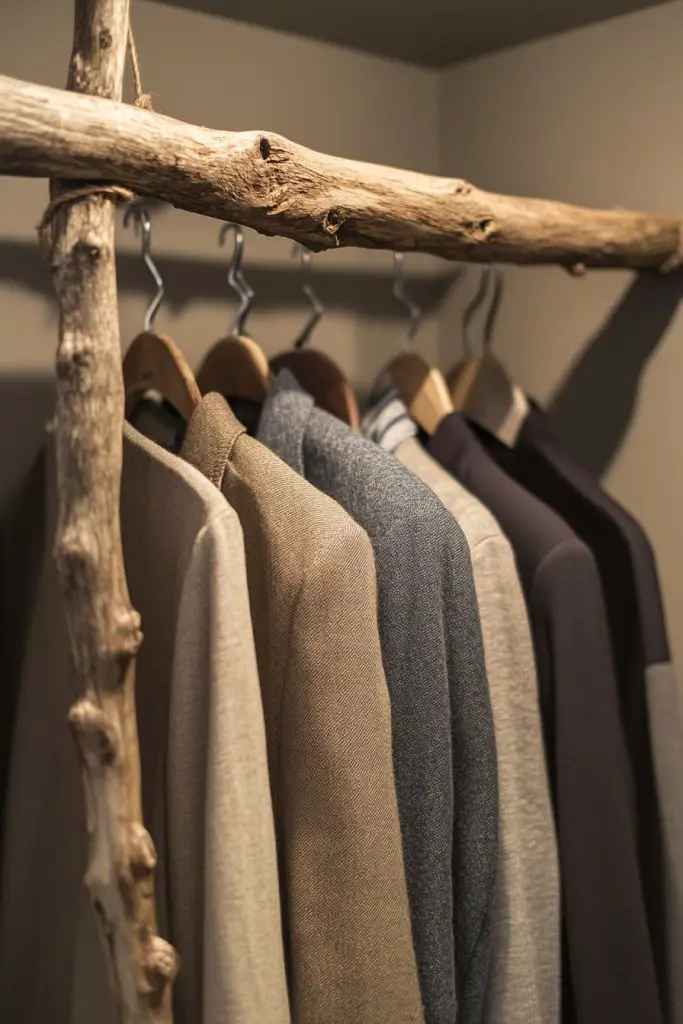
11. Create a DIY Hanging Closet Rod with Reclaimed Ladder or Branch
Clothes hanging in one long rod can look cluttered and feel overwhelming to manage. You want a stylish, space-efficient way to separate clothing types or create visual interest. Using a reclaimed ladder or sturdy branch as a hanging rod offers a rustic yet functional upgrade.
Picture a vintage wooden ladder, hung horizontally across your closet with sturdy hooks or brackets. Clothes hang from its rungs, creating a layered, textured display. The natural wood or painted finish adds warmth and character, transforming your closet into a charming, rustic space. It’s an eye-catching feature that doubles as storage.
Choose a ladder with a weathered finish for farmhouse appeal, or paint it in bold colors for a modern twist. Suspend from the ceiling or mount on the wall at different heights for variety. Use hooks or clips to hang different clothing types or accessories. Pair with decorative elements like fabric drapes or lights for a cozy vibe.
Securely attach the ladder horizontally with heavy-duty hooks or wall brackets, ensuring it can support the weight of your clothes. Adjust height to suit your needs—higher for dresses, lower for shirts. Hang clothes directly from the rungs, using non-slip hangers if possible. Regularly check mounting stability, especially if using reclaimed wood, which may be less predictable. Keep it balanced and safe.
Decorate the ladder with painted designs, stenciled patterns, or added hooks for accessories. Use colorful or patterned fabric strips to soften the look. Incorporate small decorative elements like vintage hardware or fairy lights. Change the arrangement seasonally or to match your mood for a personalized touch.
Repurposing a ladder or branch is a creative way to add character and function to your closet. It’s a DIY project that’s both affordable and adaptable. Once installed, it makes selecting outfits more enjoyable and adds a unique focal point. Feel inspired to craft your rustic hanging space—let’s hang out!
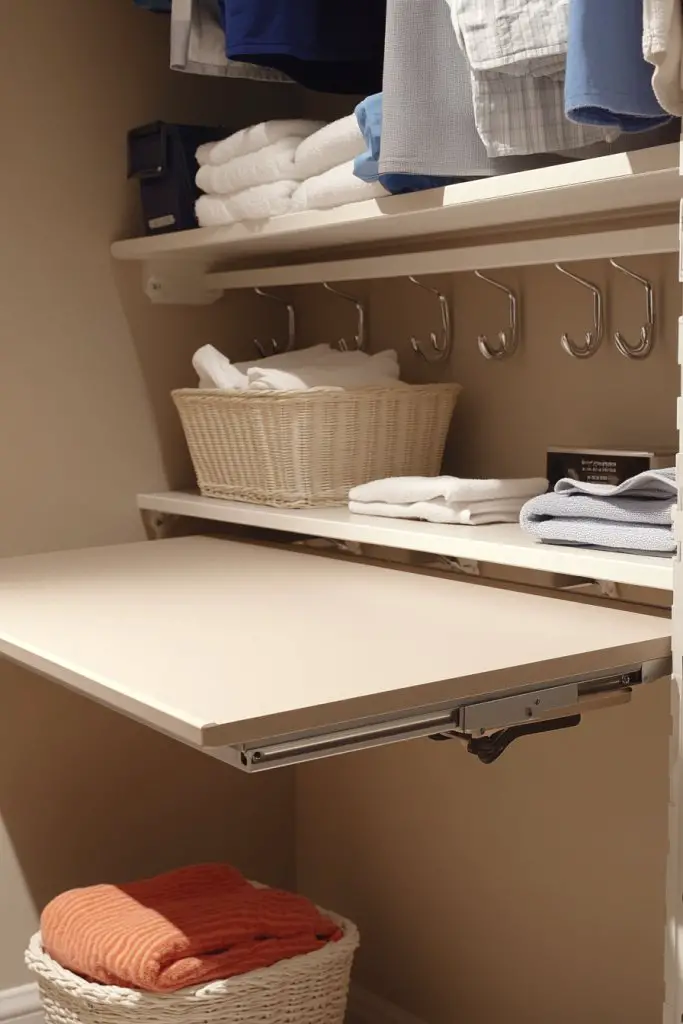
12. Design a Compact Folding Station with a Fold-Out Table or Surface
Sorting and folding clothes in a cluttered space can be a hassle, especially when counter space is limited. A dedicated folding station makes the chore easier and more organized. Creating a fold-out surface within your closet turns a small area into a functional, space-saving laundry or prep zone.
Visualize a slim cabinet or wall-mounted panel that folds down into a small table or surface. When needed, it swings out or opens up to provide a sturdy workspace. Store laundry baskets or folded items nearby, with hooks or shelves for tools. The compact design blends into your closet, ready when you need it, hidden when not.
Choose materials like lightweight wood, plastic, or laminate for durability and ease of cleaning. Decorate the surface with a colorful tablecloth or mat for a personal touch. Install a fold-down table at a convenient height, and add small storage compartments or hooks underneath for supplies. Adapt size and style for your space and needs.
Build or repurpose a wall-mounted panel or cabinet with a fold-out surface. Secure hinges or brackets that support the weight of folded laundry or supplies. Install at a comfortable height, ensuring stability and ease of use. When not in use, fold it back up neatly against the wall. Use hooks or small baskets underneath for additional storage. Regularly check hinges and hardware for wear.
Decorate the fold-out surface with paint, decals, or a decorative mat. Add labels or small containers for detergents and accessories. Use colorful hardware or handles to match your decor style. Change the surface’s look seasonally or as your taste evolves. It’s a practical, personal space that simplifies laundry routines.
A fold-out station turns a tiny closet corner into a functional workspace, saving space and reducing clutter. It’s a satisfying DIY project that makes chores less of a hassle. Once installed, it encourages a more organized, efficient routine. Feeling motivated? Time to fold and conquer!
13. Build Custom Drawer Inserts from Cardboard or Plywood for Small Items
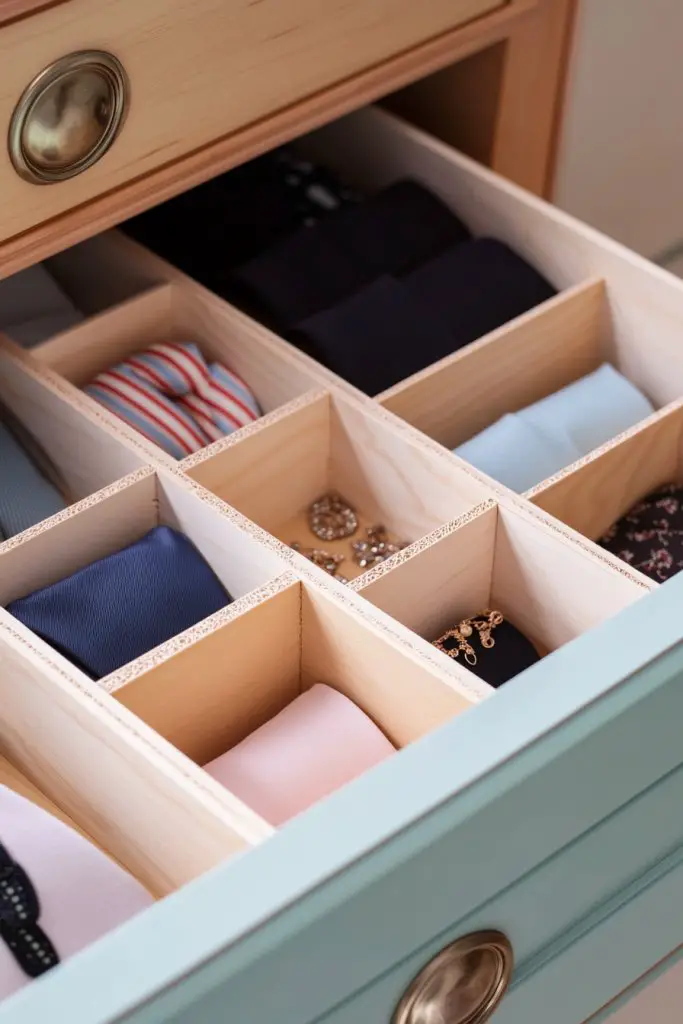
Small items like ties, underwear, or jewelry often clutter drawers, making it hard to find what you need quickly. Pre-made organizers can be expensive or bulky. Building custom inserts from cardboard or plywood offers an affordable, tailored solution that keeps everything visible and accessible.
Imagine neatly divided compartments inside your drawers, crafted from painted or plain plywood, or reinforced cardboard. Each section holds a specific item—socks in one, ties in another, jewelry in a third—creating a tidy, organized interior. The compartments fit perfectly, making the best use of space while adding a touch of DIY charm.
Customize the size and shape of each insert to fit your drawer and collection. Use decorative paint, contact paper, or fabric to match your room decor. Stack multiple layers or modules for additional organization. Incorporate small dividers or removable sections to adapt to changing needs or seasonal swaps.
Cut plywood or sturdy cardboard into your desired dimensions, then assemble with glue or small nails. Reinforce edges with tape or paint for durability. Fit the inserts snugly inside your drawers, and organize items accordingly. Label sections with paint or stickers for quick identification. Regularly clean and update the inserts to keep everything fresh.
Decorate with colorful paints, patterns, or decals to match your style. Add small handles or knobs for easy removal. Use fabric or foam padding inside for delicate items. Mix and match different sizes to maximize space and function. Seasonal updates keep your system fresh and inspiring.
Custom drawer inserts prove that organization doesn’t need to be complicated or costly. They’re a simple, effective way to keep small items tidy and visible. Once in place, your drawers will look more appealing and be easier to maintain. Feeling motivated to DIY? Let’s craft those inserts!
14. Hang Clear Plastic Storage Bags for Seasonal or Rarely Used Items
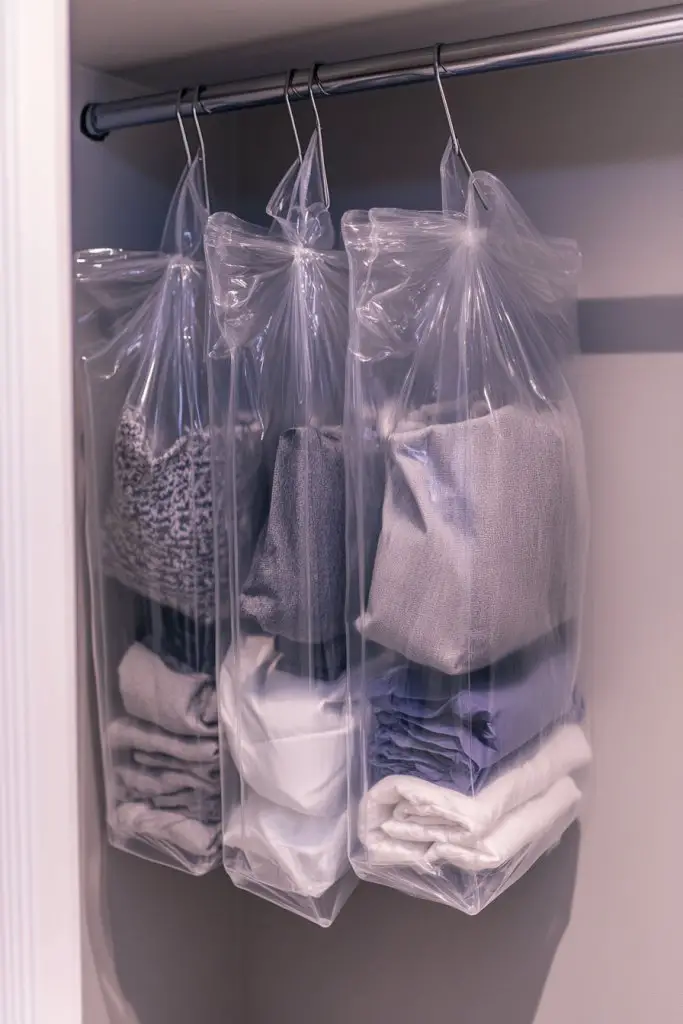
Seasonal clothes and rarely worn accessories tend to clutter your closet or get lost in dark corners. Storing them visibly and safely is a challenge. Clear plastic storage bags offer a straightforward way to organize and protect these items while keeping them accessible.
Imagine transparent bags hanging from hooks or rods, filled with sweaters, scarves, or special occasion outfits. The visibility of contents makes it easy to grab what you need without rummaging. Labels or tags can be added for quick identification. The neat, uniform appearance of the bags creates a tidy, functional display.
Choose bags with sturdy zippers or drawstrings for security. Use color-coded labels or tags to differentiate seasons or categories. Hang the bags on hooks, over a tension rod, or attach with clips. Incorporate decorative tags or fabric trims for extra style, matching your decor theme.
Fill each bag with seasonal or special items, then seal securely. Attach hooks or clips to the closet wall or door, and hang the bags in an organized sequence. Label each bag with permanent markers or adhesive tags. Periodically review and swap out items as seasons change or needs evolve. Keep the bags clean and intact for longevity.
Decorate tags with hand-lettered labels, stickers, or washi tape for a personalized touch. Use different colored bags for easy sorting. Add small charms or decorative elements to the zippers for fun. Regularly refresh the contents and labels to keep the system engaging.
Using clear bags turns storage into a visual delight and simplifies seasonal swaps. It’s a cheap, DIY-friendly solution that keeps your closet looking fresh and organized. Once in place, you’ll spend less time searching and more time enjoying your wardrobe. Ready to bag your clutter? Let’s hang them up!
15. Incorporate Colorful Labels and Chalkboard Tags for Easy Identification
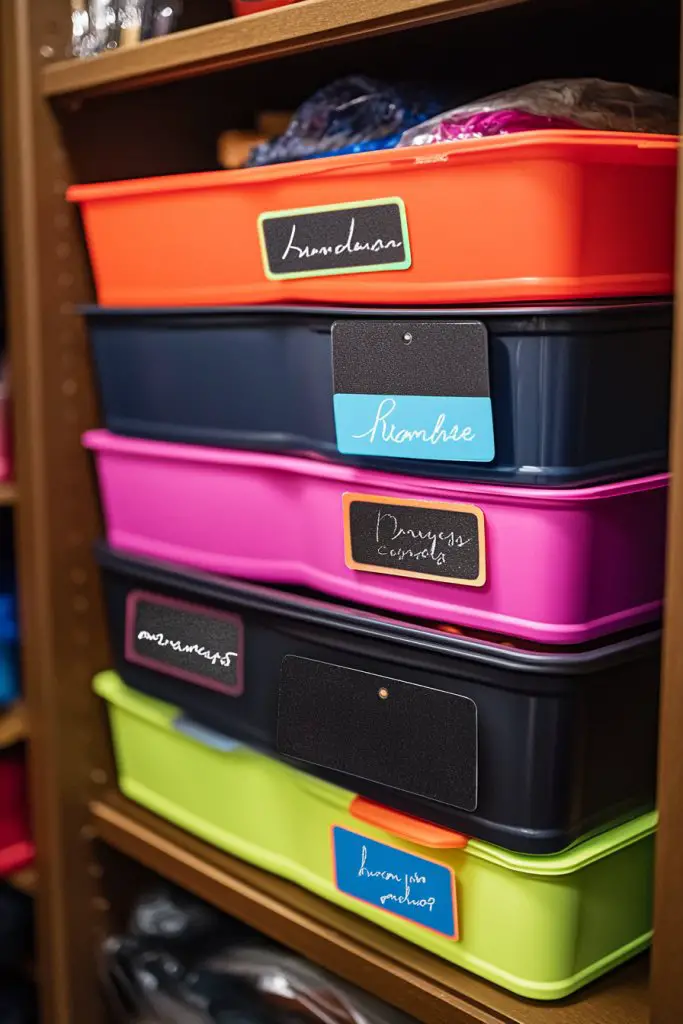
Disorganized storage often leads to wasted time and frustration, especially when trying to find specific items. Labels help create clarity, but plain labels can be dull and forgettable. Colorful labels and chalkboard tags combine function with fun, making your closet both organized and visually appealing.
Picture a series of storage containers, bins, or baskets each marked with vibrant, handwritten labels or chalkboard tags. The labels contrast beautifully with neutral backgrounds, instantly drawing attention to their contents. The colorful tags add personality and a cohesive look to your entire closet system, turning organization into an art form.
Use chalkboard paint or adhesive chalkboard labels for easy updates. Incorporate colors that match your decor or mood, creating a color-coded system for categories like workwear, casual, or special occasions. Add decorative borders or illustrations for a playful effect. Change labels seasonally or as your collection evolves for a fresh look.
Apply chalkboard paint to small tags, containers, or labels, and let dry thoroughly. Use chalk or chalk markers to write descriptive labels, wiping clean and rewriting as needed. Attach tags with string, clips, or adhesive backing to containers or baskets. Organize your items according to the labels, and update regularly for clarity. Keep a small cloth or eraser nearby for quick corrections.
Decorate the tags with doodles, borders, or personalized initials. Use color-coded chalks or markers for categories or seasons. Incorporate decorative strings, ribbons, or washi tape for added flair. Personal touches make organization more inviting and fun, encouraging consistent use.
Colorful labels and chalkboard tags turn mundane storage into a lively, engaging system. They’re easy to customize and update, making your space more functional and attractive. Once labeled, your closet becomes a seamless, stress-free environment. Ready to label and love your space? Let’s start!
Conclusion
From innovative shelving to clever organization hacks, these DIY closet ideas demonstrate how a bit of creativity can revolutionize your storage space. Don’t hesitate to try these concepts and tailor them to fit your unique needs—your perfect closet is within reach. Take action today and turn your closet into a customized haven that combines beauty and practicality!