A master bathroom makeover is the perfect way to refresh your personal sanctuary without the need for a full renovation. DIY projects have gained popularity because they allow homeowners to add a personal touch, save money, and enjoy the satisfaction of creating something beautiful with their own hands.
In this article, you’ll find a variety of creative and practical ideas to update your master bathroom. From simple decor swaps to innovative organization hacks, these ideas will inspire you to transform your space into a stylish, functional retreat tailored to your taste and needs.
1. Install a Stylish Floating Vanity for a Modern Look
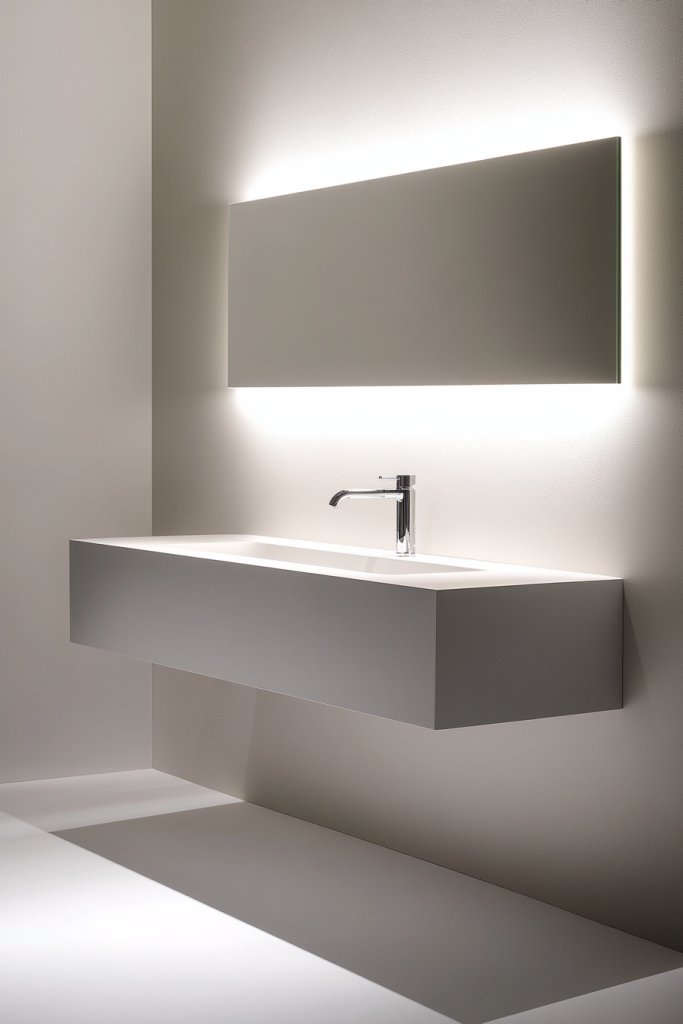
Ever felt like your bathroom is stuck in a time warp with clunky, outdated vanities that eat up space and kill your vibe? A sleek, floating vanity might just be the breath of fresh air your space desperately needs. It’s not just about looks—it’s about transforming your daily routine into a mini spa experience. Who doesn’t want an airy, open feel with a touch of sophistication?
Imagine a wall-mounted unit with clean lines and a matte finish, floating effortlessly above a textured tile floor. The open space underneath makes the room feel bigger, while a modern vessel sink adds a sculptural element. Soft, warm lighting reflects off its smooth surface, creating a calming glow. It’s like turning your bathroom into a high-end boutique with minimal effort.
Choose a floating vanity in a bold color for a statement or keep it neutral for a more timeless look. Small bathrooms benefit from narrow, wall-hung designs, while larger spaces can handle double sinks or extended surfaces. Seasonal swaps might include adding a decorative tray or contrasting countertop materials. You can also incorporate open shelving or closed drawers depending on your storage needs.
Start by measuring your space accurately, then select a wall-mounted vanity that fits your style and size constraints. Use a stud finder to securely anchor the unit, ensuring it can handle daily use. Install a durable, moisture-resistant countertop—quartz or solid surface works great. Hook up plumbing, making sure to hide pipes for a seamless look. Finish with a wall-mounted faucet and minimalist hardware for a sleek vibe.
Add a touch of personality by choosing a vanity with unique legs or decorative hardware. Incorporate a contrasting countertop material like wood or stone for visual interest. Decorate the top with chic soap dispensers or a sculptural piece instead of clutter. You could also install LED strip lighting underneath for a floating effect at night. The key is balancing style with function.
A floating vanity elevates your bathroom’s style quotient instantly, making it feel more spacious and modern. Plus, it’s easier to clean underneath—bye-bye dust bunnies! You’ll love how this simple upgrade transforms your daily routine into a more luxurious experience. Ready to float your way to a chic bathroom?
2. Add Peel-and-Stick Tile Backsplash for a Fresh Accent
Tired of your plain, boring backsplash that doesn’t inspire you to cook or relax? A peel-and-stick tile backsplash offers a quick, affordable way to inject personality into your bathroom. It’s perfect for renters or anyone hesitant about permanent renovations. Plus, it’s a fun DIY project that instantly upgrades your space.
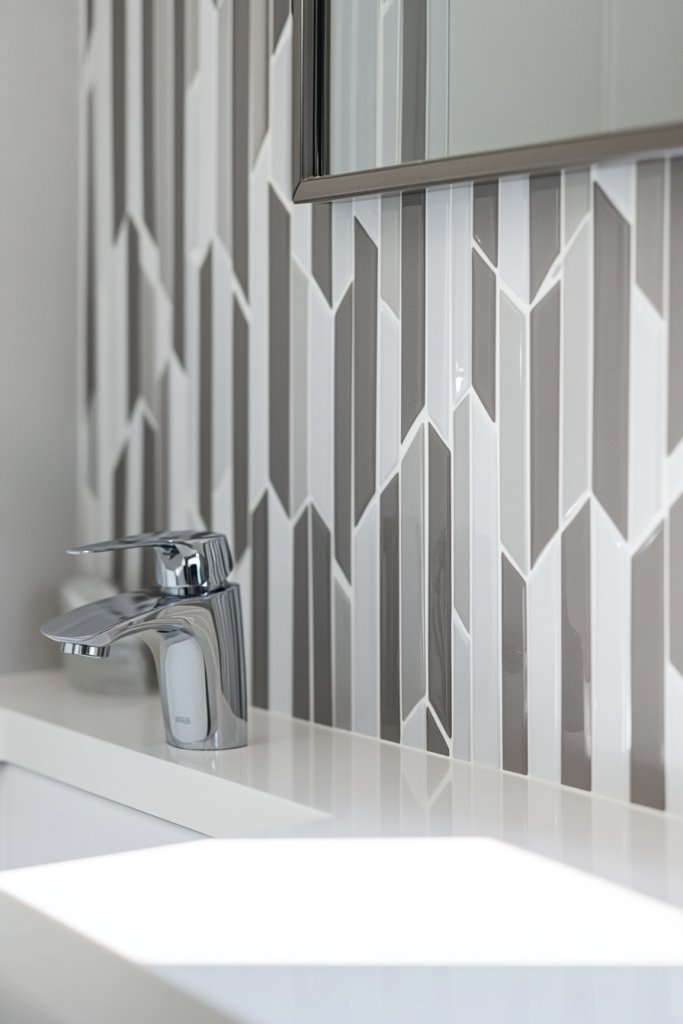
Picture a vibrant mosaic of geometric tiles in shades of blue and gray, creating a focal point behind your vanity. The tiles have a matte finish with subtle texture, adding depth without overwhelming. The adhesive backing makes installation a breeze—no grout, no mess. When finished, the space looks polished, modern, and totally personalized.
Choose from a variety of patterns, colors, and textures to match your style—think classic subway tiles or bold, large-scale designs. For small bathrooms, opt for bright, light hues to enhance the sense of space. Seasonal updates could include swapping out patterns or adding metallic accents for holiday glamour. These tiles can also be used on shower walls or around mirrors for extra flair.
Start by cleaning the wall thoroughly to ensure adhesion. Measure and plan your layout, cutting tiles with scissors or a utility knife for perfect fit. Peel off the backing and press each tile firmly in place, smoothing out bubbles as you go. For uneven surfaces, apply a primer or use a thin layer of adhesive. Seal edges with clear caulk if needed for extra durability.
Create a cohesive look by coordinating the tile pattern with your towels or accessories. Add metallic or matte trim pieces for a professional finish. Incorporate a contrasting grout line or colored caulk to add subtle detail. For a more eclectic vibe, mix different tile patterns or shapes—there are no rules!
Peel-and-stick tiles are a game-changer—transforming your bathroom with minimal effort and cost. They’re a great way to experiment with bold looks without the commitment of real tile. Once installed, you’ll feel proud every time you see your stylish new backsplash. Time to stick and style!
3. Refresh Walls with Bold, Removable Wallpaper
Bored of plain walls that do nothing for your bathroom’s personality? Bold, removable wallpaper offers a quick way to make a statement without the permanence of paint or traditional wallpaper. It’s perfect for renters or anyone who loves changing up their decor frequently.
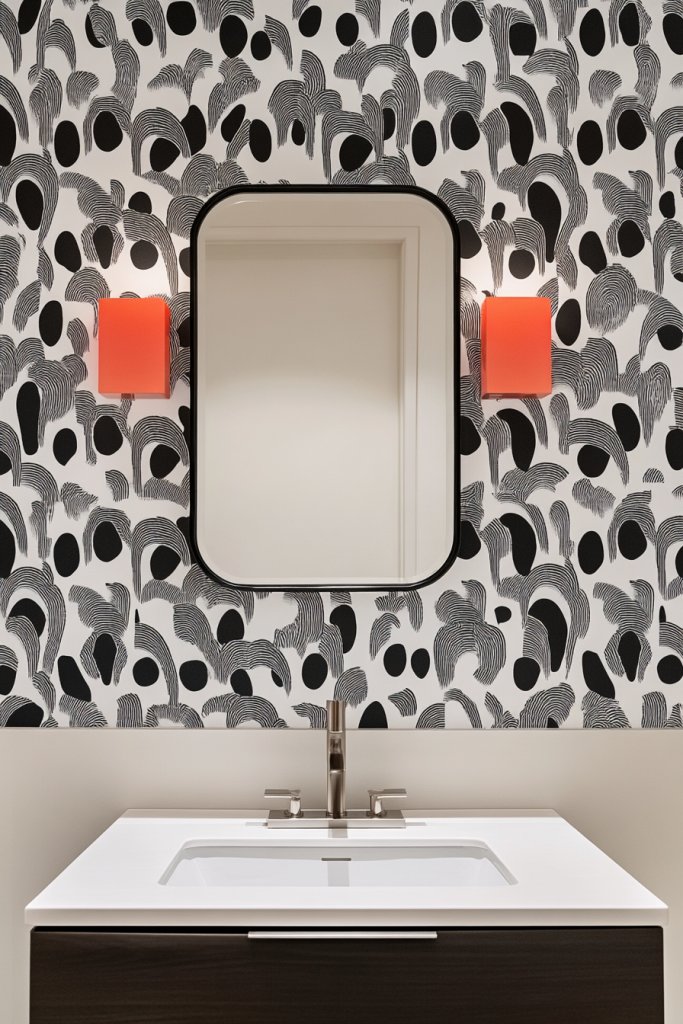
Visualize a striking geometric pattern in deep navy and gold, adding richness and depth behind your vanity. The textured surface catches light differently throughout the day, creating a dynamic focal point. The adhesive backing ensures easy application—no mess, no fuss—while giving you the flexibility to peel off or reposition if needed. It’s like an instant style upgrade that’s totally reversible.
Opt for vibrant, tropical prints for a summery vibe or subtle, textured designs in neutral tones for elegance. Use it on a single accent wall or wrap it around the entire room for maximum impact. Seasonal variations could involve swapping out patterns or adding decorative trims. It pairs well with simple accessories and minimal decor.
Start by measuring your wall carefully, then cut wallpaper panels with a slight overlap. Clean the surface thoroughly and ensure it’s dry. Peel back the backing a few inches at a time, smoothing as you go with a squeegee or plastic card. Address air bubbles immediately with a pin or small tool. For uneven surfaces, applying a primer can help the adhesive stick better.
Create a cohesive look by choosing wallpaper that complements your towels and accessories. Add metallic or textured trim along edges or around fixtures for extra detail. You can also personalize further with stenciled patterns or painted accents over the wallpaper for layered visual interest.
Bold wallpaper instantly elevates your bathroom’s style and injects personality into a usually overlooked space. It’s an inexpensive, low-commitment way to experiment with color and pattern. Once done, you’ll wonder why you didn’t do this sooner—your bathroom will feel like a fresh, new space.
4. Create a DIY Wooden Shelving Unit for Storage & Decor
Cluttered counters and messy corners make your bathroom feel chaotic every morning. A DIY wooden shelving unit offers a stylish solution, adding both storage and visual appeal. Plus, building it yourself means you get exactly what fits your space and style.
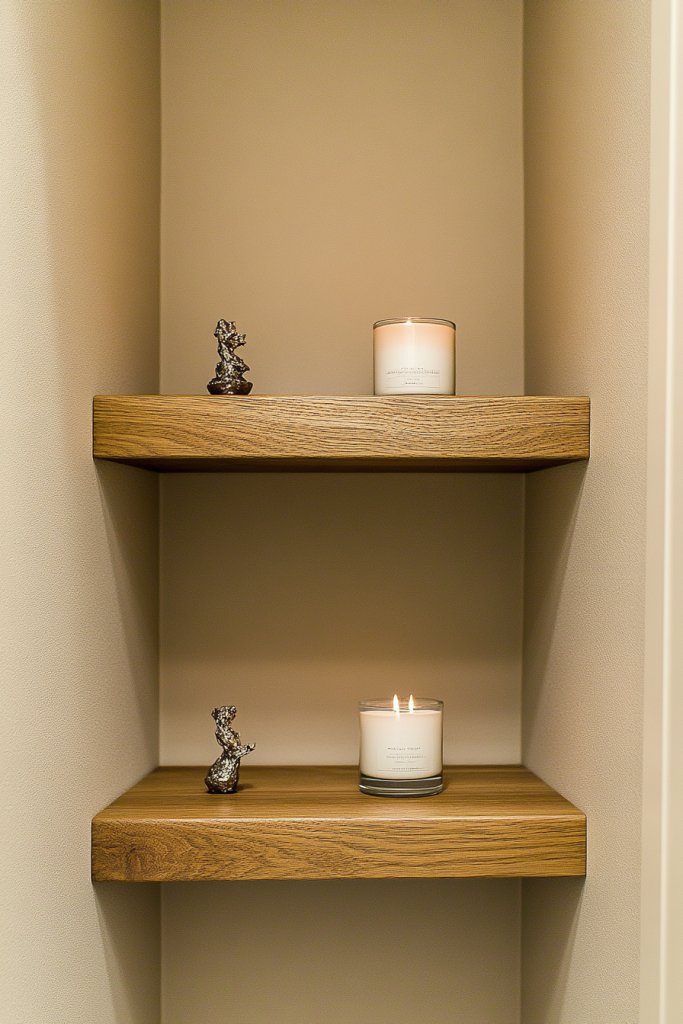
Imagine a set of rustic, wall-mounted shelves made from reclaimed wood, arranged asymmetrically for a modern touch. They hold neatly folded towels, decorative jars, or small plants—no plants, remember! The natural grain and warm tones contrast beautifully with sleek tiles or painted walls. Soft lighting from nearby sconces highlights their texture and craftsmanship.
Opt for floating, open shelves in a distressed finish for a cottage feel, or sleek, painted wood for a contemporary vibe. You could also install a ladder-style shelf for a more dramatic look. Seasonal updates might include adding decorative baskets or fabric storage bins for extra organization.
Start by selecting sturdy wood and cutting it to your desired lengths. Sand edges smoothly and apply a protective finish or paint to suit your style. Use wall anchors and brackets to secure the shelves firmly, ensuring they can handle daily use. Arrange items in a way that balances function and aesthetics—think minimal but impactful.
Personalize your shelves with decorative elements like vintage jars, framed quotes, or sculptural pieces. Incorporate a mix of open and closed storage to hide clutter while displaying favorite items. You can also add hooks underneath for hanging brushes or small towels, making it both beautiful and practical.
A custom wooden shelving unit is a low-cost, high-impact upgrade that adds warmth and personality to your bathroom. It’s satisfying to create something functional with your own hands, and it personalizes your space perfectly. Once your shelves are up, your bathroom will feel more organized and inviting—no more chaos!
5. Replace Hardware with Trendy Matte Black or Brushed Nickel Finishes
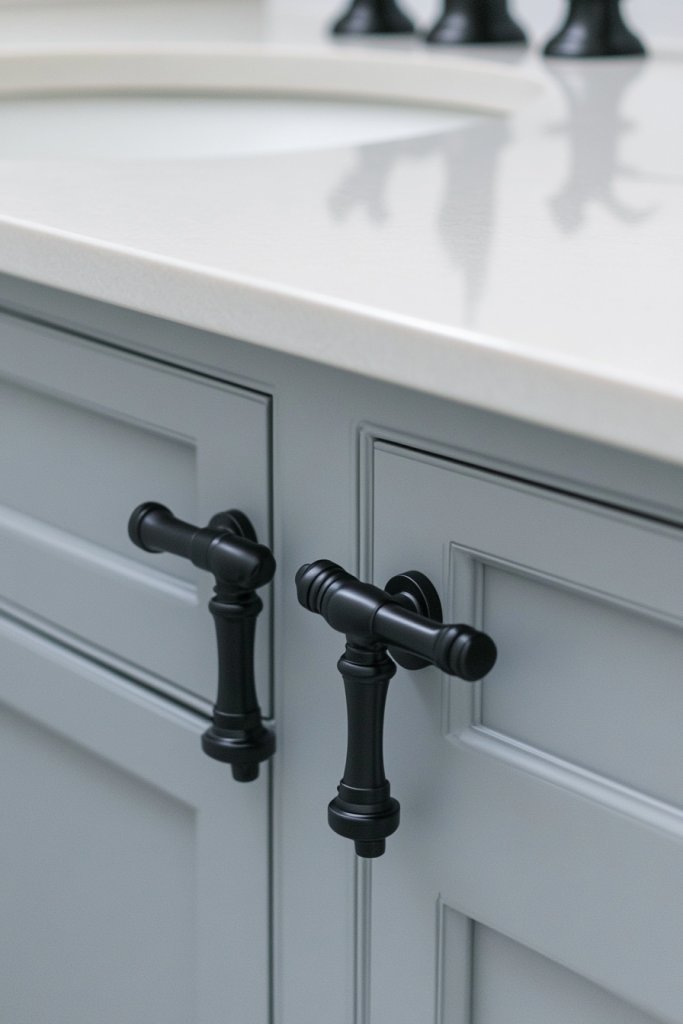
Old, tarnished hardware can drag your bathroom’s style down faster than a bad hair day. Swapping out knobs, pulls, and faucet handles for trendy matte black or brushed nickel finishes instantly refreshes the look. It’s a small change that packs a huge visual punch.
Picture sleek matte black cabinet pulls contrasting against a soft pastel vanity, or brushed nickel faucets gleaming under bright lighting. The hardware’s matte or brushed finish adds a subtle texture, making everything feel more modern and refined. These finishes hide fingerprints and water spots better, keeping your bathroom looking cleaner longer.
Mix and match finishes for a layered look—pair matte black hardware with chrome fixtures for an industrial vibe or keep everything uniform for a minimalist aesthetic. Seasonal tweaks could include swapping out hardware for decorative knobs or handles to match holiday themes or new decor styles.
Remove existing hardware carefully, keeping screws handy. Measure to ensure new pieces match existing holes or plan to drill new ones. Use a level and a template for precise placement. Install new hardware, tightening screws securely but avoiding over-tightening that can damage the finish. Finish by cleaning any fingerprints or smudges for a pristine look.
Coordinate hardware finishes with light fixtures or mirror frames for a cohesive vibe. Add decorative touches like leather pulls or textured handles if you want a more eclectic look. Consider upgrading your towel bars and toilet paper holders simultaneously for a fully coordinated refresh.
New hardware is an easy, cost-effective way to make your entire bathroom feel more polished. It shows that even small details matter, and you’ll enjoy the sleek, modern feel every day. Ready to replace those tired fixtures?
6. Paint Walls with a Calm, Neutral Color Palette
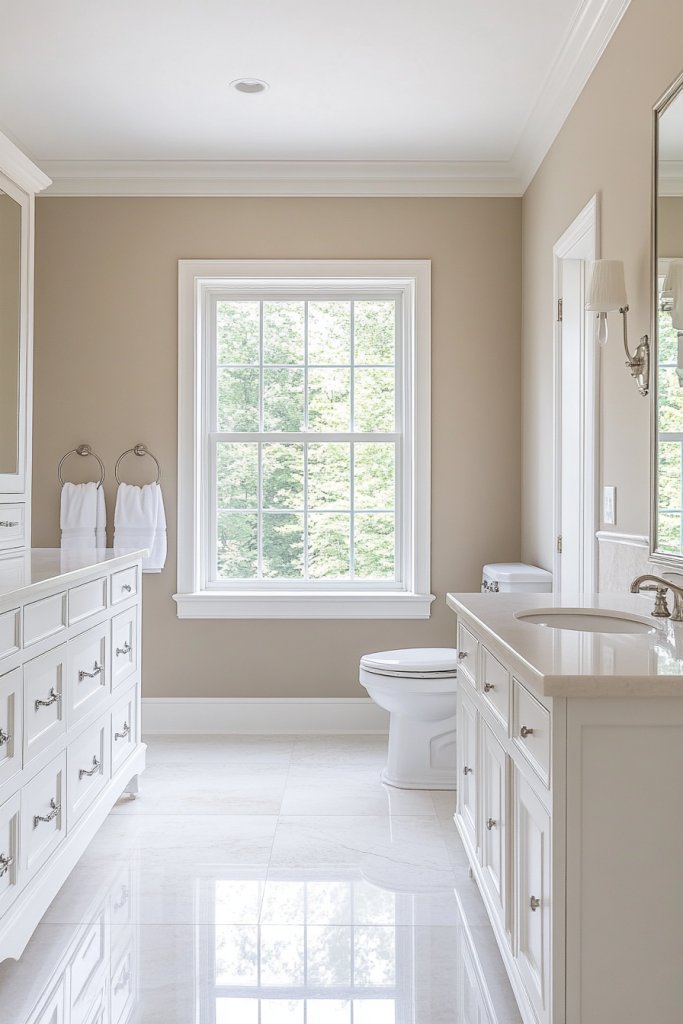
Bored with your bathroom’s dull, outdated wall color? A fresh coat of paint in calming neutrals can instantly lift the space and create a serene retreat. It’s one of the simplest ways to update your bathroom without a full renovation.
Imagine soft greys, warm beiges, or subtle pastels that reflect light and make the room feel larger. The smooth, matte finish provides a clean backdrop for your fixtures and accessories. When painted properly, the walls become a calming canvas that invites relaxation after a long day.
Layer different neutral shades for depth—think a darker accent wall or a crisp white ceiling. Seasonal updates could include swapping out towels, rugs, or accessories in brighter or darker hues to change the mood. Neutral tones also pair well with bold tiles or textured finishes.
Start by cleaning walls thoroughly, then patch any holes or imperfections. Use painter’s tape to protect edges and baseboards. Apply a primer if covering dark or uneven paint. Use high-quality, moisture-resistant paint, and apply multiple thin coats for an even finish. Allow ample drying time between coats. Finish with a clear sealant if desired for extra durability.
Incorporate subtle textured finishes or subtle sheen options for visual interest. Add decorative towels or a plush rug that complements the wall color. Consider painting a small strip or stencil for a personal touch without overwhelming the space.
A neutral palette provides a timeless, adaptable base for your bathroom decor. It’s easy to update accessories and accents over time, keeping your space fresh and current. You’ll love how a simple paint job can make your bathroom feel brand new.
7. Add a DIY Vanity Mirror Frame for a Custom Touch
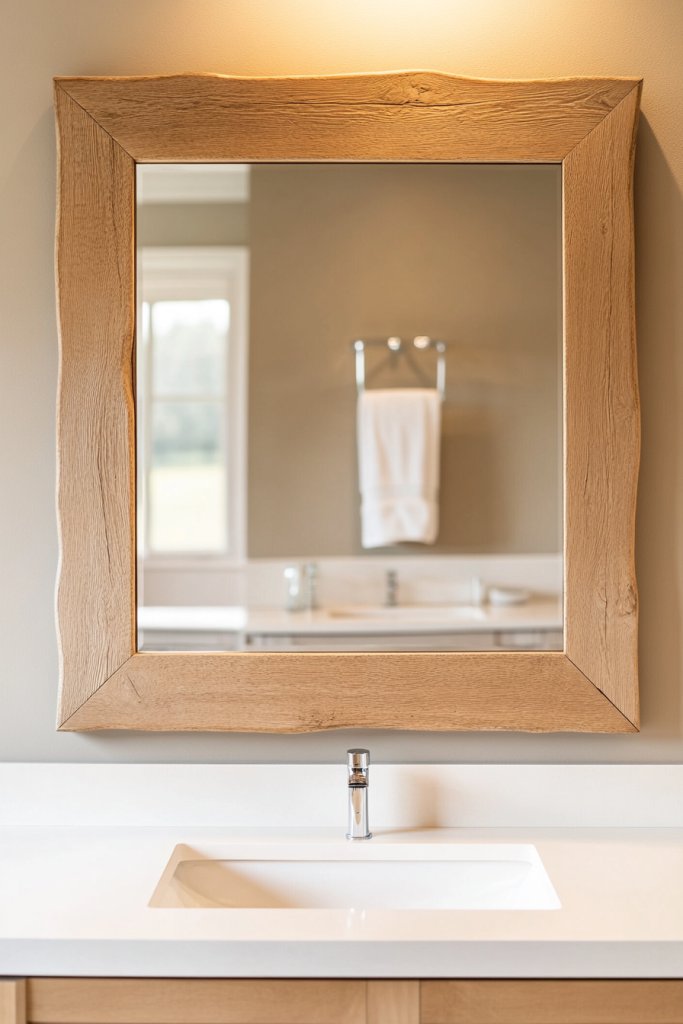
Standard bathroom mirrors can be bland and uninspiring. A DIY frame transforms a basic mirror into a personalized statement piece. It’s a fun project that adds character and elevates your entire vanity area.
Imagine a thick wooden frame with a natural or painted finish encasing your mirror. The textured edges and decorative trim create a focal point that draws the eye. Bright or warm lighting reflecting off the frame enhances its charm, making your bathroom feel curated and stylish.
Use reclaimed wood for a rustic look or sleek metal for a modern edge. For seasonal updates, paint or stain the frame in different colors or finishes. You can also add decorative molding or geometric shapes to match your decor theme.
Measure your mirror accurately, then cut your frame material to size. Sand edges smoothly and finish with paint, stain, or sealant. Use strong adhesive or mounting brackets to attach the frame securely around the mirror. Ensure the frame is level and flush for a seamless look. Finish by cleaning the mirror surface to remove fingerprints.
Add decorative elements like metal accents, stenciled patterns, or textured finishes to customize your frame further. Incorporate LED backlighting behind the frame for a glow effect. You can also add hooks or small shelves to the frame for extra functionality.
A DIY mirror frame allows you to express your style and create a one-of-a-kind focal point. It’s a simple upgrade with a big visual payoff. Once finished, you’ll love how personalized your bathroom feels—like a boutique retreat.
8. Incorporate a Towel Ladder or Railing for a Functional Decor Piece
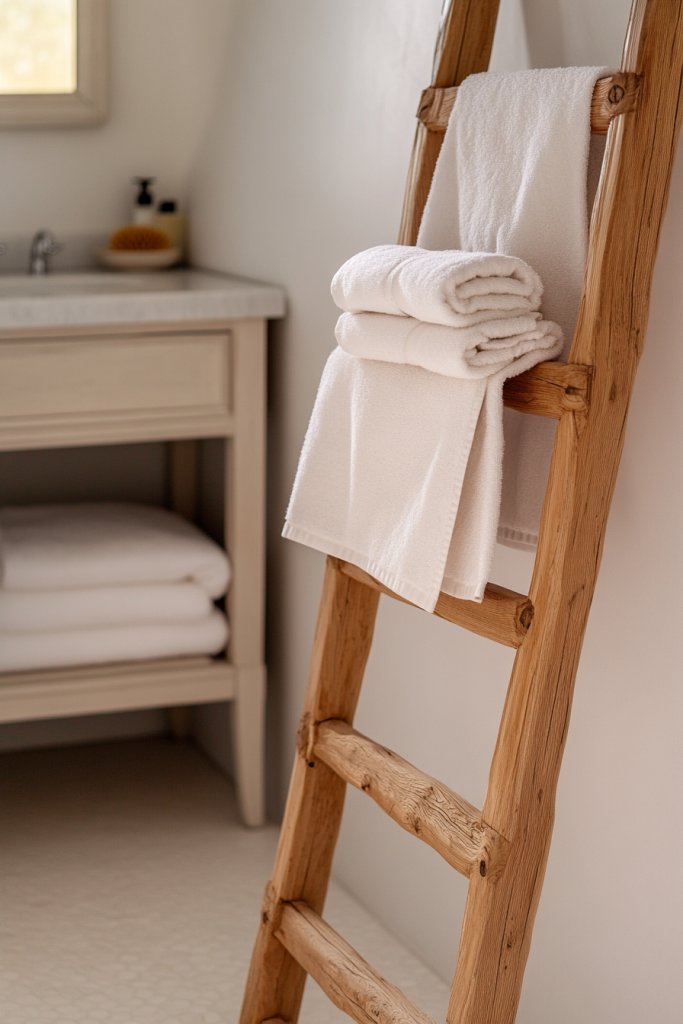
Cluttering your bathroom with towels on counters or hooks looks messy and feels inefficient. A towel ladder or rail not only organizes but adds a touch of rustic charm or modern flair. It’s a practical solution that also enhances your decor.
Picture a leaning wooden ladder with a distressed finish, holding neatly folded or draped towels. Alternatively, a sleek metal rail mounted vertically on the wall provides a minimalist look. Both options display your towels beautifully while freeing up space. Textured materials and metal finishes add tactile and visual interest.
Use a vintage ladder for a farmhouse vibe or a sleek, powder-coated metal one for contemporary spaces. Seasonal changes could involve swapping towels in different colors or textures. For small bathrooms, a wall-mounted rail maximizes space without cluttering the floor.
Select a ladder or rail that fits your style and space. Securely mount the rail at a comfortable height, ensuring it can support the weight of towels. For ladders, lean against the wall at a slight angle and secure the top for stability. Decorate with towels in coordinating colors or textures for a cohesive look. Regularly check mounts for stability.
Add decorative touches like fabric wraps or hooks on the ladder rungs. Incorporate small baskets or pouches on the ladder for toiletries or accessories. For a more luxe feel, choose metallic finishes or add decorative tassels or trims.
A towel ladder or rail combines function with style, making your bathroom look more curated and less cluttered. It’s a small change with a big impact that invites you to keep your space tidy and beautiful. Ready to elevate your towel game?
9. Use Creative Storage Solutions with Baskets and Bins
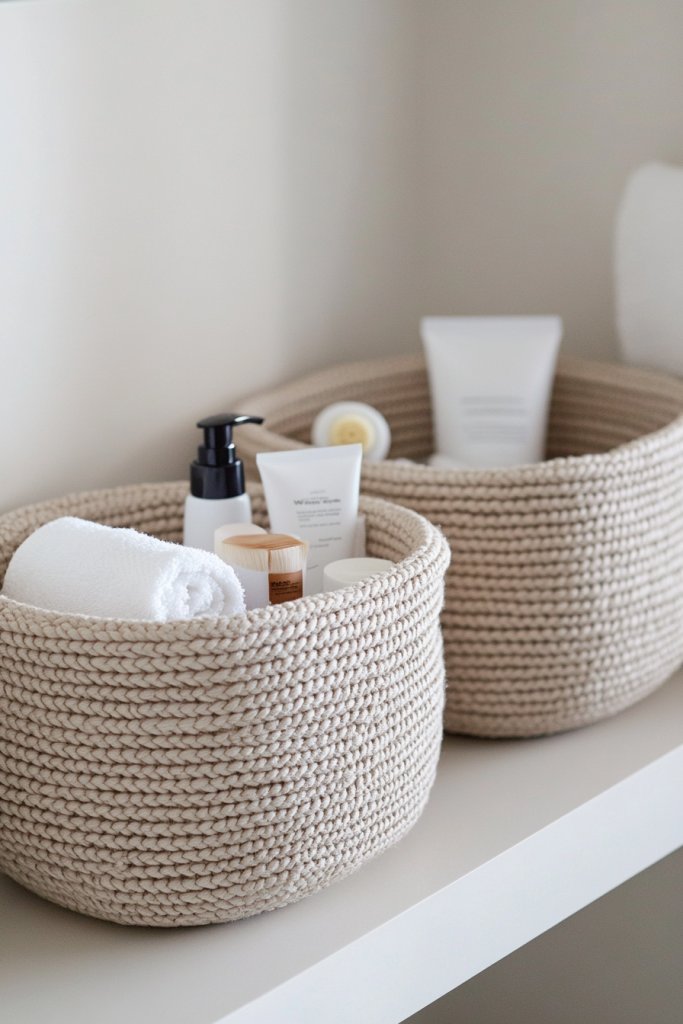
Messy countertops and cluttered cabinets ruin the vibe of an otherwise stylish bathroom. Creative storage solutions like woven baskets and decorative bins help organize toiletries while adding texture and warmth. It’s an easy way to bring order and charm together.
Picture a set of woven rattan baskets placed under the sink or on open shelves, holding towels, brushes, and other essentials. Clear acrylic bins keep smaller items visible and easy to find, while decorative fabric-lined baskets add a cozy touch. These containers introduce natural textures and colors that soften the overall look. It’s both functional and pretty.
Use uniform baskets for a tidy, minimalist look or mix different shapes and textures for an eclectic vibe. Seasonal updates include swapping out fabrics or adding decorative labels. Incorporate stackable bins or tiered trays to maximize vertical space, especially in small bathrooms.
Identify areas where clutter accumulates, such as under the sink or open shelves. Select baskets and bins that fit your space and style—consider size, material, and color. Group similar items together for easy access and aesthetic appeal. Label containers if needed to maintain organization long-term. Regularly declutter and rotate items to keep everything fresh.
Decorate baskets with ribbons, tags, or fabric covers to match your decor theme. Use decorative trays or nested baskets for layered storage. Incorporate small decorative objects like candles or sculptures alongside practical containers for a curated look.
Creative storage solutions make your bathroom more functional and inviting. They show that organization can be beautiful, not boring. Once you start, you’ll wonder why you didn’t do this sooner—your space will thank you!
10. Install a DIY Matte Black or Gold Faucet for a Luxe Touch
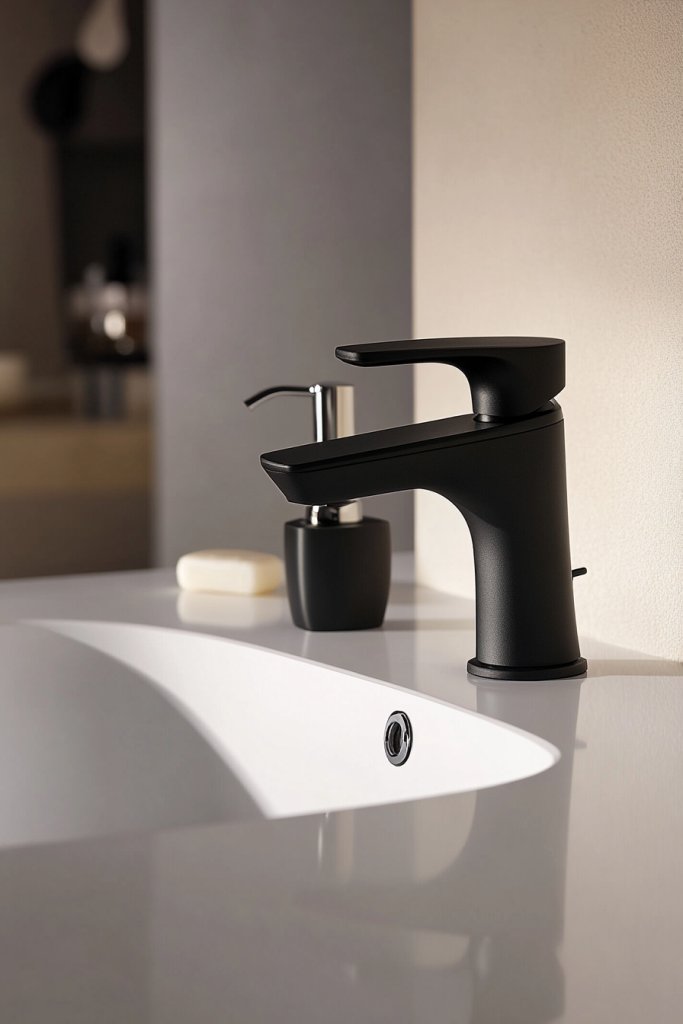
Outdated or dull faucets can drag down your bathroom’s style faster than a bad hair day. Upgrading to a matte black or gold faucet instantly adds a luxe, modern vibe. It’s a small detail with a big impact that makes your sink area look designer-quality.
Visualize a sleek matte black faucet with angular lines paired with a marble countertop or a warm gold fixture shining against a dark tile wall. The contrast creates a focal point that draws attention and elevates the overall aesthetic. The finish’s texture adds depth and sophistication, making your sink area look polished and intentional.
Choose a matte black for an industrial or contemporary look, or opt for gold for a touch of glamour. Match the finish with other fixtures like towel bars, hooks, or showerheads for cohesion. Seasonal updates might involve swapping hardware or adding decorative accents in complementary metals.
Turn off water supply and disconnect existing fixtures carefully. Measure the openings and ensure the new faucet fits your sink. Apply plumber’s tape to threads to prevent leaks, then tighten fixtures securely. Check for level and proper operation before finishing. Finish by cleaning the area for a spotless, professional look.
Coordinate the faucet finish with your cabinet hardware or lighting fixtures. Add a decorative soap dispenser or matching accessories nearby to complete the look. Consider installing a small tray or dish in the same finish for soap or jewelry.
A new matte black or gold faucet transforms your sink from functional to fabulous. It’s a quick upgrade that instantly makes your bathroom feel more upscale. Go ahead — splash some style into your daily routine!
11. Enhance Lighting with DIY Sconce or Pendant Fixtures
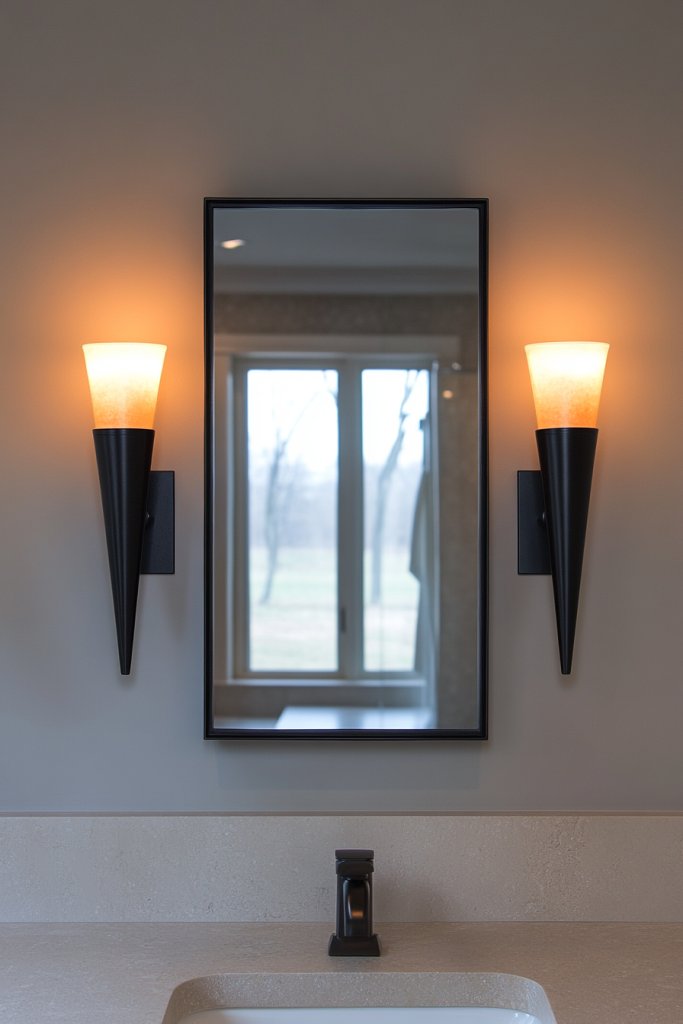
Harsh overhead lighting or outdated fixtures can make your bathroom feel unwelcoming. Upgrading to DIY sconces or pendant fixtures adds warmth and character, creating a cozy, functional space. It’s an easy way to boost both ambiance and utility.
Imagine a pair of matte black wall sconces with Edison bulbs flanking your mirror, casting a warm glow. Or a minimalist pendant light hanging over the vanity, adding a sculptural element. The soft lighting accentuates textures and creates a flattering environment for your daily routine.
Select fixtures that match your decor style—industrial, modern, or boho. Seasonal updates could involve switching out bulb styles or adding dimmer switches for adjustable ambiance. For small spaces, choose compact fixtures; larger bathrooms can handle statement pieces.
Turn off power before any electrical work. Mount the fixtures at eye level or slightly above, ensuring they align with your mirror or vanity area. Connect wiring according to the manufacturer’s instructions, using wire nuts and electrical tape for safety. Secure fixtures firmly and test before restoring power. Consider adding dimmers for mood lighting.
Decorate with vintage filament bulbs or smart bulbs for color control. Pair fixtures with matching hardware or accessories for a cohesive look. You can also add decorative backplates or textured shades to personalize your lighting.
Upgrading your lighting transforms the bathroom’s mood, making it more inviting and functional. It’s a DIY project that significantly elevates your space without breaking the bank. Brighten your day every day with just a few simple changes.
12. Incorporate a DIY Ladder Shelf for Extra Storage and Style
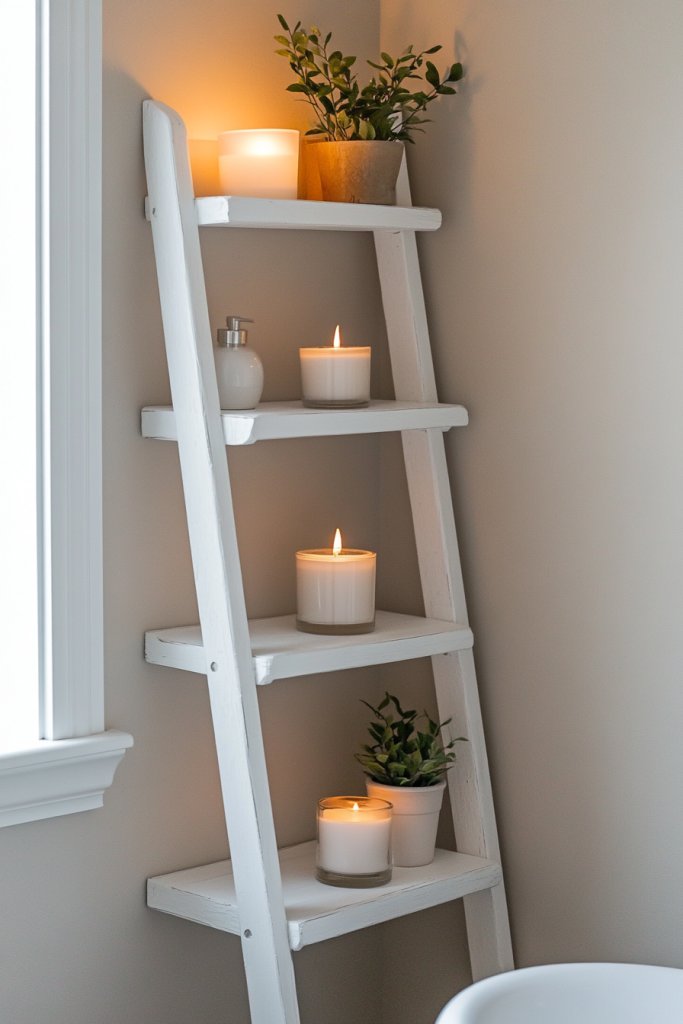
Cluttered counters and awkward corners make your bathroom feel chaotic. A DIY ladder shelf offers a chic, space-saving solution to display essentials and add visual interest. Plus, it’s a fun project that personalizes your space.
Picture a tall, wooden ladder leaning against the wall, with shelves holding folded towels, jars, and decorative accents. The open design keeps everything accessible and adds warmth with natural wood tones. It’s a modern twist on traditional shelving that enhances your bathroom’s aesthetic.
Choose a distressed finish for a rustic look or smooth painted wood for a sleek, contemporary vibe. For smaller spaces, opt for a narrow ladder or a wall-mounted version. Seasonal updates can include changing the items displayed or painting the ladder in different colors.
Select a sturdy wooden ladder or build one from scratch using reclaimed wood. Sand and finish it with paint or stain as desired. Secure it to the wall at a slight angle or lean it for stability. Decorate with towels, baskets, or small decorative objects—remember, no plants!
Add hooks or small baskets for extra storage. Use fabric or decorative tape to customize the appearance. Incorporate artwork or patterned textiles nearby for a layered, styled look that matches your decor.
A DIY ladder shelf brings both function and style, making your bathroom more organized and inviting. It’s a satisfying project that results in a personalized touch you’ll enjoy every day. Ready to lean into organization?
13. Upgrade Your Toilet with a Modern, Water-Efficient Model
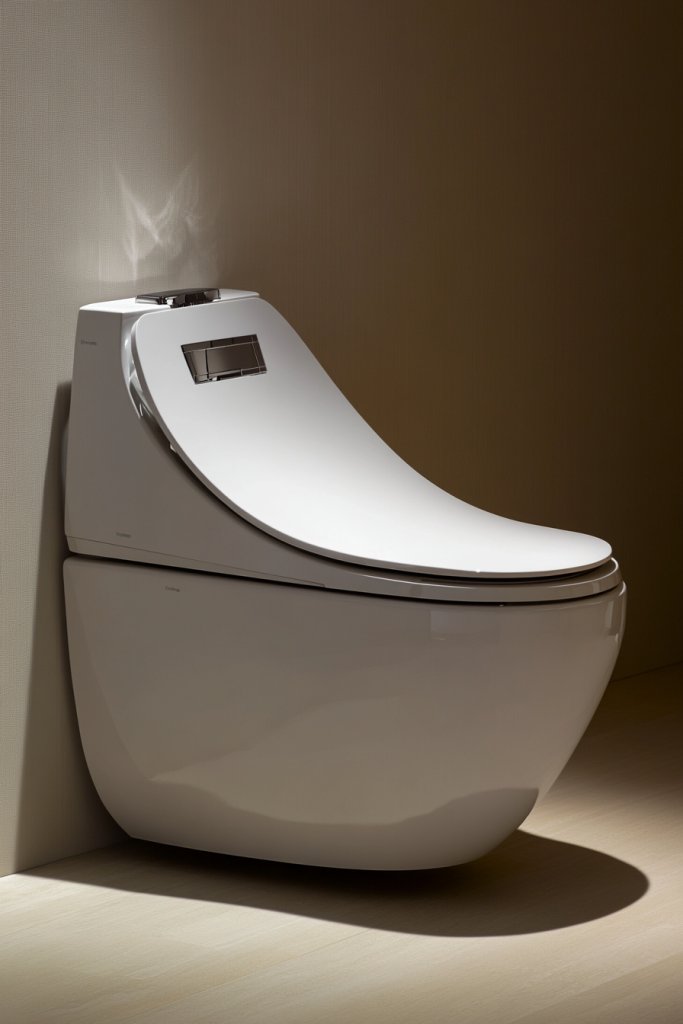
An outdated toilet not only looks tired but can also be a water waster. Upgrading to a modern, water-efficient model improves functionality and saves you money on your water bill. It’s a practical upgrade with a big payoff.
Picture a sleek, elongated toilet with clean lines in a matte white finish. Its minimalist design blends seamlessly with your updated decor, giving the bathroom a fresh, contemporary feel. Soft-close lids and quiet flushing mechanisms add a touch of luxury and convenience.
Choose from various shapes and flush styles—dual flush for eco-friendliness or comfort height for accessibility. Coordinate the finish with other fixtures, such as faucets or towel bars, in matte black or brushed nickel. Seasonal touches could be adding decorative seat covers or matching brushes.
Turn off water supply and drain the existing toilet. Disconnect and remove it carefully, then install the new unit following manufacturer instructions. Ensure the wax ring and bolts are properly sealed to prevent leaks. Test the flush and water connections thoroughly before finishing. Consider professional installation if unsure.
Add a custom toilet seat cover or decorative tank sticker for a personal touch. Pair with coordinated accessories like a modern brush holder or a small trash bin. Keep the area clean and dry to maintain the sleek look.
A modern, water-efficient toilet enhances both the look and function of your bathroom. It’s an easy upgrade that reflects your commitment to style and sustainability. Feel good about making a smart, eco-friendly choice.
14. Use Removable Decals or Patterned Window Films for Privacy and Style
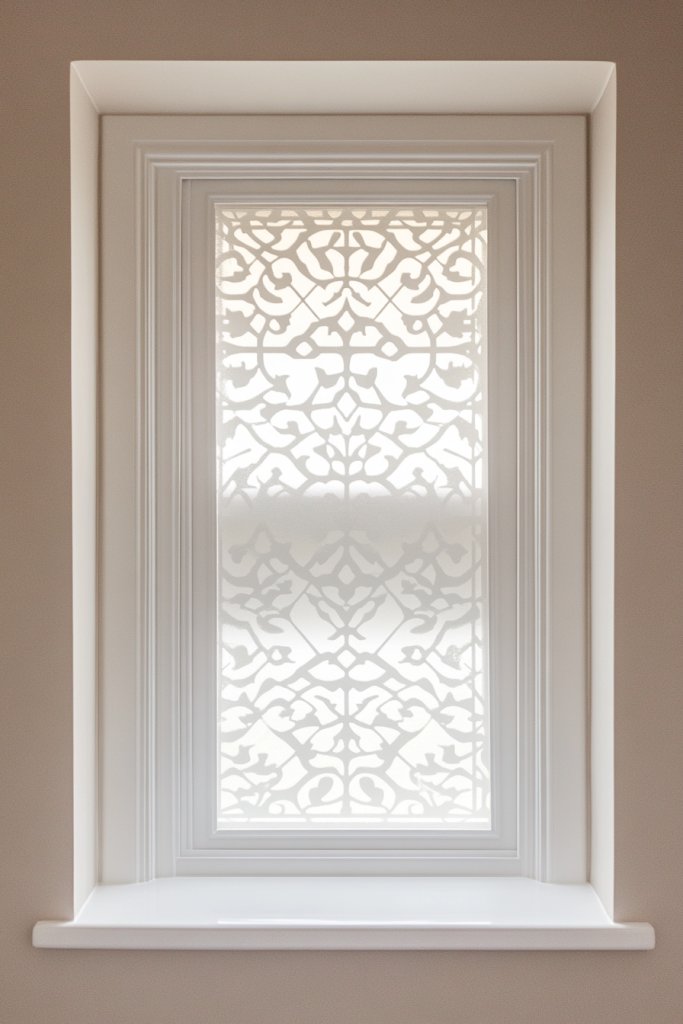
Privacy in the bathroom is essential, but heavy curtains or frosted glass can feel dull and uninspired. Removable decals or patterned window films offer a stylish, temporary solution that adds flair and privacy without permanent changes. They’re perfect for renters or anyone wanting flexibility.
Imagine a delicate floral or geometric pattern in frosted or stained glass effect on your window. The film diffuses light softly, creating a cozy glow while obscuring outside views. When sunlight hits it, subtle colors or textures come alive, transforming your window into a piece of art. It’s a quick, impactful upgrade.
Choose from a variety of patterns, colors, and textures—think metallic, matte, or textured finishes. Seasonal updates include swapping out designs or adding decorative borders. These films can be cut into custom shapes or patterns for a personalized touch.
Clean the window thoroughly before application. Measure and cut the film to size, then peel off the backing and smooth onto the glass, working from the center outwards to avoid bubbles. Use a squeegee or card to press out air and ensure adhesion. Reapply or remove as needed without residue.
Coordinate the film with your decor palette or add decorative window decals. Use the opportunity to experiment with bold or subtle patterns, depending on your taste. Change designs seasonally for a fresh look.
Window films provide privacy and style in one simple package. They’re a non-permanent way to express your personality and improve your bathroom’s vibe. Once installed, you’ll love how much character they add.
15. Add a DIY Mason Jar or Wall-Mounted Organizer for Toiletries
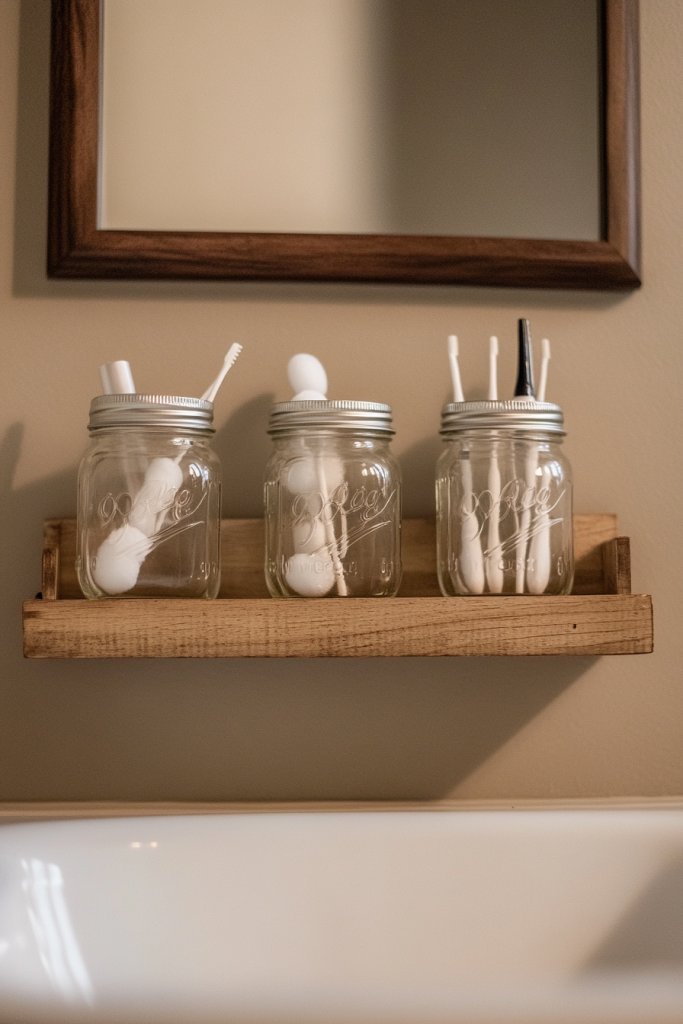
Countertop chaos makes your bathroom look cluttered and uninviting. DIY mason jar or wall-mounted organizers keep toiletries accessible and stylishly contained. Plus, they’re super easy to customize and add a rustic or modern touch.
Visualize a row of glass mason jars with chalkboard labels, filled with cotton balls, q-tips, or bath salts, mounted on a wooden plank above the sink. Alternatively, sleek wall-mounted baskets or containers in metal or acrylic provide a minimalist look. The open storage keeps essentials visible and adds texture to your decor.
Use vintage jars for a farmhouse vibe or sleek metal containers for a contemporary style. Seasonal updates could include changing labels or container colors. Incorporate hooks or small shelves for additional storage of brushes or tools.
Gather your containers—mason jars, small baskets, or wall-mounted holders. Attach mounting brackets or a wooden board to the wall securely. Decorate or label containers as desired. Fill with your toiletries, ensuring everything stays organized and easy to access. Regularly update and clean as needed.
Personalize with decorative ribbons, tags, or chalkboard paint for labels. Add small decorative elements like beads or stones inside jars for visual interest. Coordinate with your overall bathroom color scheme for a cohesive look.
A DIY organizer keeps your space tidy and adds a charming, personalized touch. It’s a functional project that makes your daily routine smoother and more enjoyable. Ready to get organized?
16. Incorporate Natural Elements with Faux Wood or Stone Accents
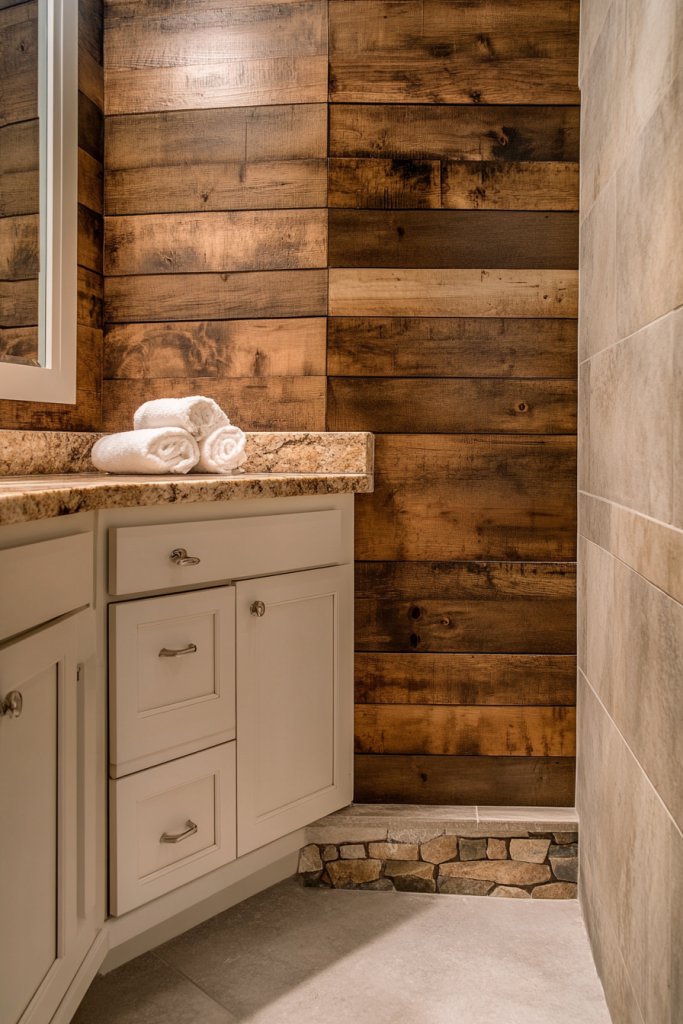
Your bathroom can feel cold and sterile without natural textures. Faux wood panels or stone-look tiles introduce warmth and texture, creating a spa-like atmosphere. Best of all, they’re low-maintenance and easy to install.
Imagine a feature wall clad in faux reclaimed wood planks, adding rustic charm and depth. Or envision a shower niche lined with textured stone-look tiles that evoke a sense of nature. The tactile surfaces and earthy tones contrast beautifully with sleek fixtures, making your bathroom feel grounded and inviting.
Select from different finishes—weathered wood, polished stone, or textured concrete—to match your decor. Seasonal updates could involve changing accessories or adding textiles that complement the earthy palette. These accents work well on walls, floors, or as decorative insets.
Choose high-quality faux panels or tiles suited to wet areas. Follow manufacturer instructions for proper installation, including surface prep and adhesive application. Use grout or sealant to protect surfaces and enhance durability. Coordinate with existing fixtures for a seamless look.
Pair with eco-friendly accessories, textured towels, or natural fiber rugs. Incorporate sculptural decor or minimalist art that echoes earthy tones. Maintain a simple, clean aesthetic to let the textures shine.
Adding natural elements elevates your bathroom into a relaxing retreat inspired by nature. It’s a stylish, sustainable upgrade that combines beauty and function. Once finished, you’ll enjoy a calming, spa-like environment every day.
Conclusion
With a diverse array of DIY master bathroom makeover ideas, there’s no shortage of ways to elevate your space. Whether you’re tackling small upgrades or bold design changes, these ideas empower you to create a bathroom that reflects your style and enhances your daily routine. Dive in, get inspired, and start transforming your bathroom into a stunning retreat today!