Summer is the perfect time to brighten up your outdoor spaces and impress guests with stunning table decor. DIY summer centerpiece ideas are incredibly popular because they allow you to add a personal touch to your gatherings while keeping things fresh and vibrant. Plus, creating your own centerpieces is a fun and budget-friendly way to elevate any summer event!
In this article, you’ll find a delightful variety of DIY centerpiece ideas that cater to all styles and skill levels. From colorful floral arrangements to creative repurposed decor, these ideas will inspire you to craft unique displays that capture the essence of summer and make every meal or party memorable.
1. Vibrant Citrus & Herb Mason Jar Arrangements
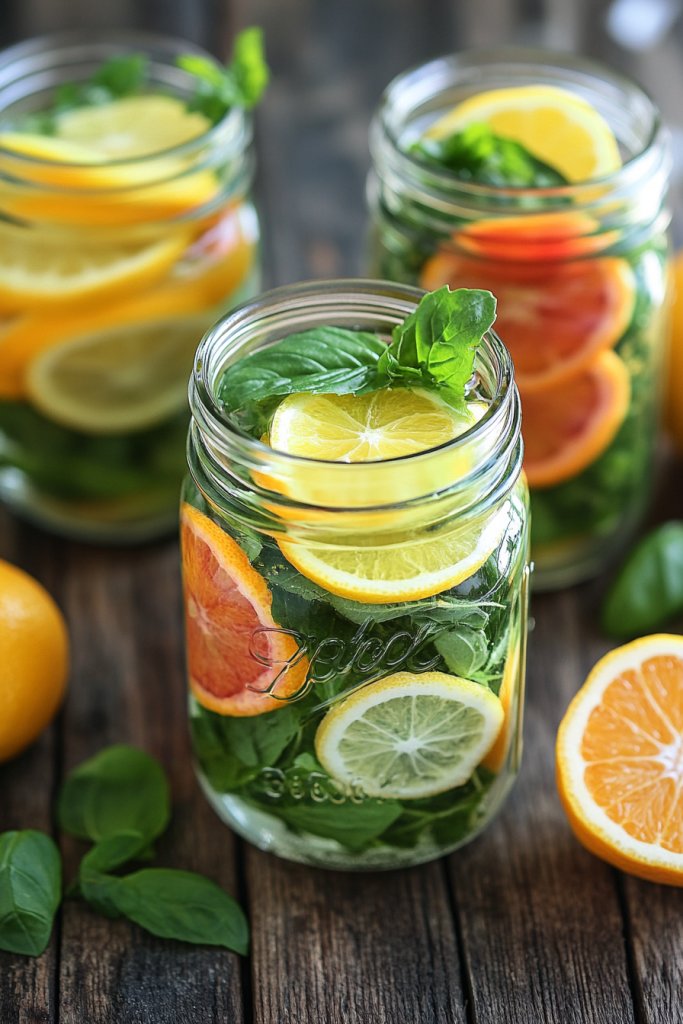
Ever tried hosting a summer gathering and felt your table lacked that fresh, lively centerpiece? Sometimes, it’s hard to find something that’s both eye-catching and easy to assemble without looking too staged. You want your table to feel vibrant, fragrant, and inviting, but with minimal fuss. Luckily, a simple solution involves turning everyday jars into colorful, aromatic focal points.
Imagine a collection of clear mason jars, each filled with bright orange and yellow slices of citrus, nestled among sprigs of fragrant herbs like basil or mint. The fruits’ vivid colors pop against the transparent glass, while the herbs add a lush green contrast. The jars sit clustered together, with sunlight filtering through, casting playful shadows on your table. It’s a combination of freshness and color that screams summer.
You can swap out citrus for berries or tropical fruits for a different vibe. For a rustic look, tie burlap or lace around the jar rims. If you prefer a more modern aesthetic, use sleek black or metallic lids with minimal labels. Adjust the herbs based on your theme—rosemary for a Mediterranean touch or thyme for a herbaceous aroma. And if you’re outdoors, add some small pebbles or decorative stones at the base for extra flair.
Gather empty mason jars and fill them with sliced oranges, lemons, and herbs. You can add a splash of water or leave them dry for a more preserved look. Arrange the jars in a cluster or line them along the table edge. For added fragrance, lightly crush the herbs before placing them in the jars. These arrangements are easy to prepare ahead and require minimal cleanup afterward. No fancy tools needed—just a sharp knife and your favorite herbs.
Personalize by adding labels or tags with guests’ names or fun summer quotes. Incorporate additional elements like small decorative umbrellas or colorful straws sticking out of the jars. Use different jar sizes for visual interest. You could also layer different fruits for a rainbow effect or add edible flowers for an elegant touch. The key is to make it reflect your style and the vibe of your gathering.
This simple, vibrant centerpiece elevates any summer table without breaking the bank. It’s a versatile look that works equally well indoors or outdoors. Plus, it’s easy enough for beginners and impressive enough for seasoned hosts. Ready to give your table that fresh, lively boost? Just grab some jars and start slicing—your guests will love it!
2. Tropical Leaf & Pineapple Fruit Bowl

Looking for a centerpiece that screams summer but also brings a touch of exotic flair? Sometimes, traditional floral arrangements just don’t cut it when you want something more fun and playful. You want your table to feel lively, tropical, and a bit whimsical, but without the hassle of high-maintenance plants or elaborate decor. A pineapple-filled fruit bowl might just be the answer.
Picture a large, ripe pineapple hollowed out to hold an array of colorful fruits like mango slices, kiwi rounds, and bright berries. Surrounding it, oversized tropical leaves fan out, creating a lush green backdrop. The vibrant colors of the fruits contrast beautifully with the deep green leaves, making the centerpiece pop. It’s like bringing a slice of paradise right to your table, with textures and colors that make everyone do a double-take.
You can swap the pineapple for other tropical fruits like papayas or coconuts, depending on availability or theme. For a more minimalist look, use large monstera or banana leaves as a base instead of tropical foliage. Change the fruit selection seasonally—think melons in summer or pomegranates in early fall—to keep it fresh. For a touch of elegance, add a few edible flowers or decorative toothpicks to enhance presentation.
Start by choosing a large, ripe pineapple and cut a circular opening at the top. Hollow out the pineapple carefully with a knife and spoon, removing the core and some flesh for easier filling. Fill the hollowed pineapple with a vibrant mix of sliced fruits, ensuring a variety of colors and textures. Arrange tropical leaves around the pineapple for visual interest. Keep it chilled until serving, or assemble shortly before your event. This method is fuss-free and instantly transports your guests.
Add personal touches like small flags, themed toothpicks, or a drizzle of honey over the fruits for extra appeal. Use different fruits based on your favorite flavors or seasonal availability. Place the pineapple on a decorative tray or plate that complements your table setting. For a more rustic vibe, incorporate wooden or bamboo serving pieces. Brighten the setup with a few scattered decorative shells or seashells for added coastal charm.
This tropical fruit bowl is a showstopper that’s both fun and functional. It’s perfect for summer parties, barbecues, or any occasion that calls for a splash of island flavor. Plus, it’s surprisingly easy to make and customize. Your guests will be impressed by your bold, creative centerpiece—just grab a pineapple and go wild with the fruits!
3. Rustic Wooden Tray with Seashell & Candle Decor
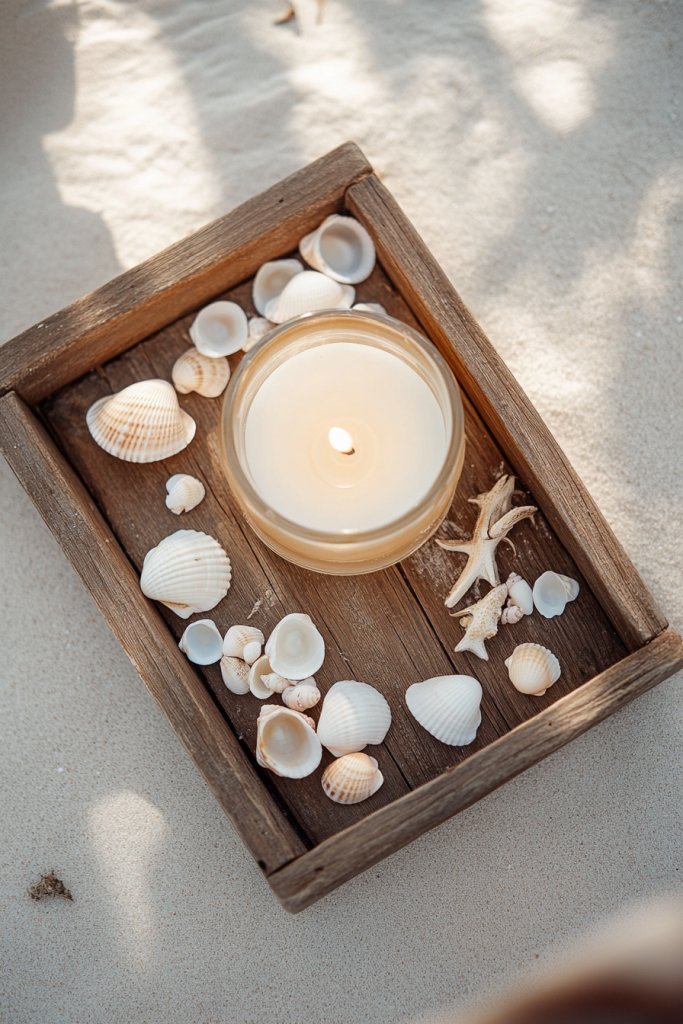
Ever want to evoke a coastal vibe without going overboard? Traditional beach-themed decor can sometimes feel cheesy or overdone, but you still crave that relaxed, seaside charm. You need a centerpiece that captures the essence of the coast—think sand, shells, and flickering light—without looking cluttered. A rustic wooden tray filled with seashells and candles might be just what you need.
Visualize a weathered wooden tray, its rough edges adding to the charm. Scattered across the surface are smooth seashells, driftwood pieces, and small sand dunes. Soft candlelight flickers from pillar candles nestled among the shells, casting warm, gentle glows. The tray sits atop a linen tablecloth, with the ocean’s scent lingering in the air. It’s a simple yet evocative scene that transports your guests to a beachside escape.
You can customize the tray’s contents with different shells or add small starfish for variety. For a more refined look, replace candles with LED tealights or lanterns—safety first! Incorporate additional coastal elements like glass jars filled with sand or miniature boats for added depth. Change the tray’s size and shape depending on your table’s dimensions or go for a layered arrangement with varying heights.
Choose a reclaimed or distressed wooden tray to enhance the rustic feel. Collect shells, driftwood, and sand from local beaches or craft stores. Arrange the shells randomly or in patterns, then add candles—preferably unscented for ambiance. Secure the candles with holders or small dishes to prevent tipping. Light the candles just before your gathering to maximize their glow, and keep an eye on safety if using real flames. This setup is easy to assemble and gives a natural coastal vibe.
Personalize by adding small glass vials with tiny notes or messages for guests. Use different candle colors—white for simplicity or blue for a beachy feel. Incorporate a few decorative starfish or coral pieces for texture. Adjust the arrangement seasonally by adding dried flowers or seasonal motifs to keep it fresh year-round. These small touches make it uniquely yours.
This beach-inspired centerpiece adds a touch of serenity and elegance to any table setting. It’s versatile enough for casual gatherings or more formal events. Plus, it’s affordable and easy to recreate, even if you’re not a decor expert. Your guests will love the relaxed, coastal atmosphere you create with just a few natural elements and some candles—simple yet stunning.
4. Colorful Glass Bottles with Wildflower Bouquets
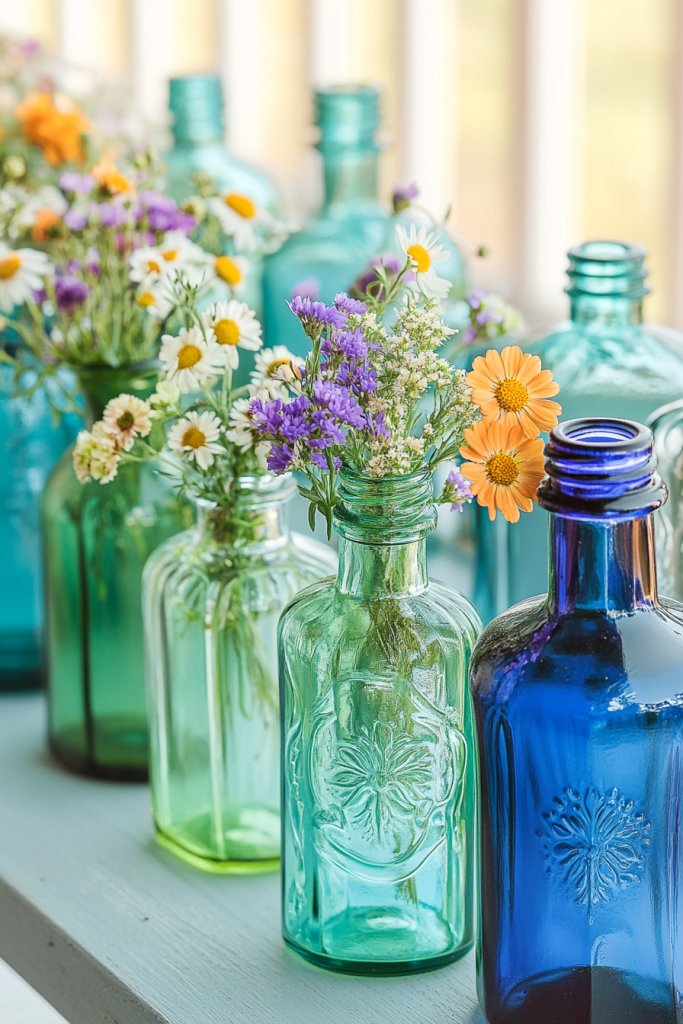
Want a charming, laid-back centerpiece that doesn’t require much fuss? Sometimes, the simplest ideas make the biggest impact, especially when they involve a little DIY flair. You’re craving a display that’s casual, colorful, and full of life—perfect for summer gatherings or brunches. Old glass bottles filled with wildflowers can do just that, adding a touch of rustic charm to your table.
Imagine a collection of vintage glass bottles in various shapes and sizes, each brimming with a handful of wildflowers like daisies, lavender, and Queen Anne’s lace. The bottles’ translucent surfaces catch the sunlight, creating a shimmering effect. The flowers spill slightly over the bottle rims, giving a relaxed, unstructured look. Place them on a wooden or linen runner, and you have a display that feels both curated and effortless.
Mix and match different bottle styles—corks, screw caps, or painted finishes—to suit your aesthetic. For a more polished look, choose uniform bottles and add a ribbon or twine around their necks. Change the flower types to match seasons—sunflowers in late summer or soft asters in early fall. Incorporate greenery or small branches for added texture. For outdoor settings, elevate some bottles on small stands or stacks for visual interest.
Collect bottles from thrift stores, or repurpose what you already have. Clean them thoroughly and fill with water, then arrange your chosen wildflowers inside. Keep the arrangement loose and natural-looking for that wildflower meadow vibe. Position the bottles in clusters or in a straight line along the table. To make it more cohesive, coordinate the bottle colors or add simple twine or fabric tied around the necks. This setup is quick, budget-friendly, and endlessly customizable.
Add small tags with handwritten messages or quotes for each bottle. Use different heights and orientations to keep it playful. Incorporate additional elements like small lanterns or candles nearby for evening events. For a personalized touch, include flowers from your garden or those with special meaning. You could also swap out water for colored dyes or add sparkle for extra pizzazz.
This simple yet effective display brings a whimsical, country-chic vibe to any table. It’s easy to assemble and adapts to any size or style, making it perfect for beginners and pros alike. Plus, it’s a lovely way to showcase seasonal blooms or heirloom bottles. Get creative and enjoy the process—your guests will notice and appreciate your effort.
5. Watermelon Vase with Fresh Flowers
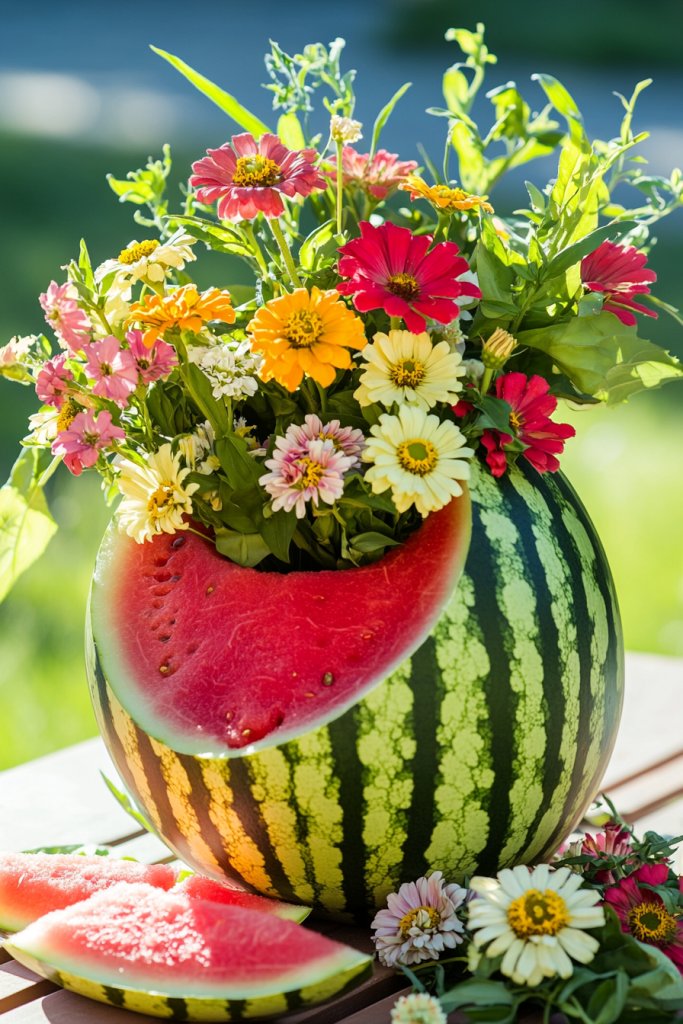
Ever wanted to combine edible and decorative elements for a fun summer centerpiece? Sometimes, traditional floral arrangements lack that playful, edible twist that makes gatherings memorable. You’re looking for something vibrant, unexpected, and easy to assemble—like turning a juicy watermelon into a vessel for fresh flowers.
Visualize a large watermelon, carefully cut to create a hollow cavity. Bright blooms like daisies, zinnias, or petunias spill out of the watermelon’s opening, creating a lush, colorful display. The watermelon’s deep green rind contrasts with the vivid flowers, while its round shape adds a soft, inviting feel. Placed on a rustic tray or wooden board, it becomes an eye-catching, edible centerpiece that sparks conversation.
You can vary the floral choices based on your theme—tropical flowers for a beach party or pastel blooms for a garden tea. For a more polished look, trim the flowers to fit neatly and secure them with floral foam inside the watermelon. Use smaller watermelons or other melons for different sizes or shapes. Incorporate decorative elements like fruit slices or herbs around the base to extend the theme.
Select a ripe, firm watermelon and cut a circular opening at the top with a sharp knife. Carefully scoop out the flesh, leaving about an inch of rind as a container. Fill the hollow with water and arrange your flowers, trimming stems to fit. Secure the blooms with floral foam if needed for stability. Place the watermelon on a tray, and consider adding decorative accents around it for extra flair. Keep it refrigerated until serving to preserve freshness.
Personalize by adding small fruit or vegetable accents, like cherry tomatoes or lemon slices, around the watermelon. Use flowers with special meaning or colors matching your event theme. Incorporate decorative picks or small flags for a whimsical touch. For outdoor parties, position it in a shaded spot or add ice packs underneath to keep it cool longer.
This edible floral arrangement is a delightful way to wow your guests with minimal effort. It’s fun, fresh, and perfect for summer celebrations. Plus, it encourages creativity—no need for fancy vases or complicated setups. Just a watermelon and some blooms, and you’re set to impress!
6. Mason Jar Lanterns with Fairy Lights
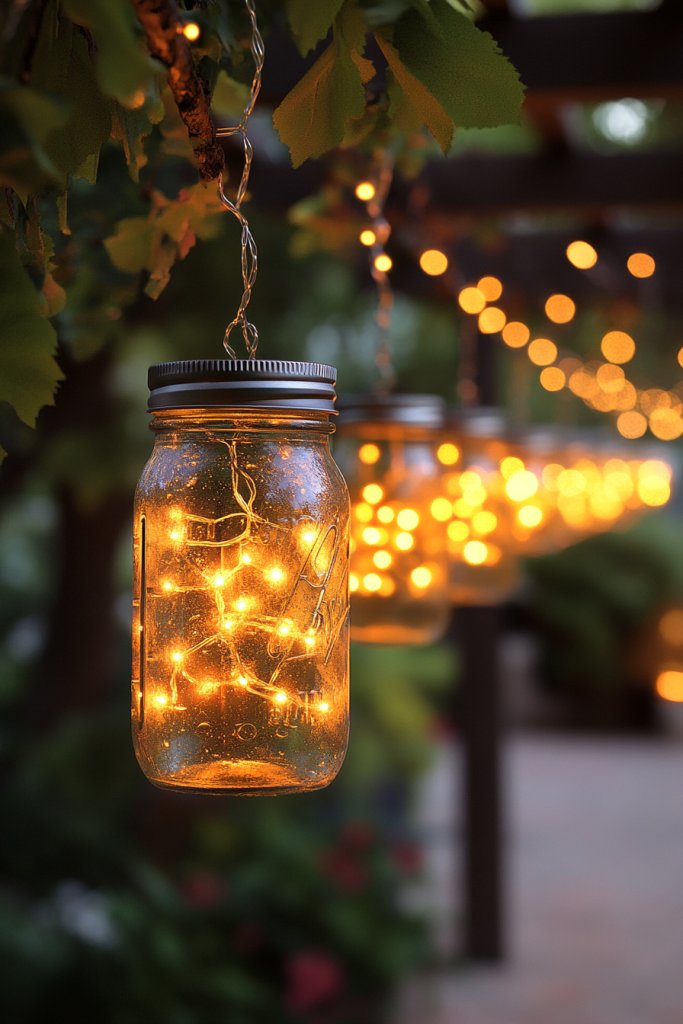
Looking to create a magical summer atmosphere without spending a fortune? Traditional lanterns or string lights can be pricey or complicated to hang, especially outdoors. You want a charming, twinkling ambiance that’s easy to set up and adds a touch of whimsy. Mason jar lanterns with fairy lights offer a simple, DIY solution that transforms your space.
Picture clear mason jars filled with tiny, warm-white fairy lights. Inside, you can add small decorative elements like sand, tiny shells, or even mini pinecones for texture. The jars sit on tables or hang from tree branches, casting a soft, flickering glow. The transparent glass and delicate lights create a cozy, enchanted feel that invites guests to linger and relax. The gentle sparkle mimics a starry night, elevating any gathering.
You can customize jars with painted or patterned lids for different occasions or seasons. For outdoor evenings, hang the jars from hooks or branches using twine or wire. For a more rustic look, use burlap or lace ribbons around the jar rims. Incorporate colored lights or LED candles inside for different effects. Vary jar sizes and heights for visual interest and layered lighting.
Fill clean mason jars with battery-operated fairy lights, ensuring the switch remains accessible. Wrap a small piece of twine or ribbon around the neck of each jar for decoration. For hanging setups, attach sturdy hooks or clamps to the jars, and suspend them from trees or overhead beams. For table placement, set jars directly on surfaces, mixing in candles or flowers for added charm. Make sure to turn on the lights just before your event for maximum effect. They’re simple, inexpensive, and highly effective.
Personalize by adding tags with messages or guests’ names for a welcoming touch. Incorporate seasonal elements—like mini pumpkins or pinecones in fall or seashells in summer. Use different colored fairy lights to match your color scheme. For an extra cozy vibe, place small cushions or decorative trays beneath the jars. These little details make your setup unique and memorable.
These mason jar lanterns are a proven way to add charm and warmth to any gathering. They’re versatile enough for both casual barbecues and elegant parties. Plus, they’re super easy to make and customize, so you can get creative with minimal effort. Brighten your summer nights with these glowing jars—they’re a simple recipe for a magical atmosphere.
7. Sand & Shell Centerpiece with Tealight Candles
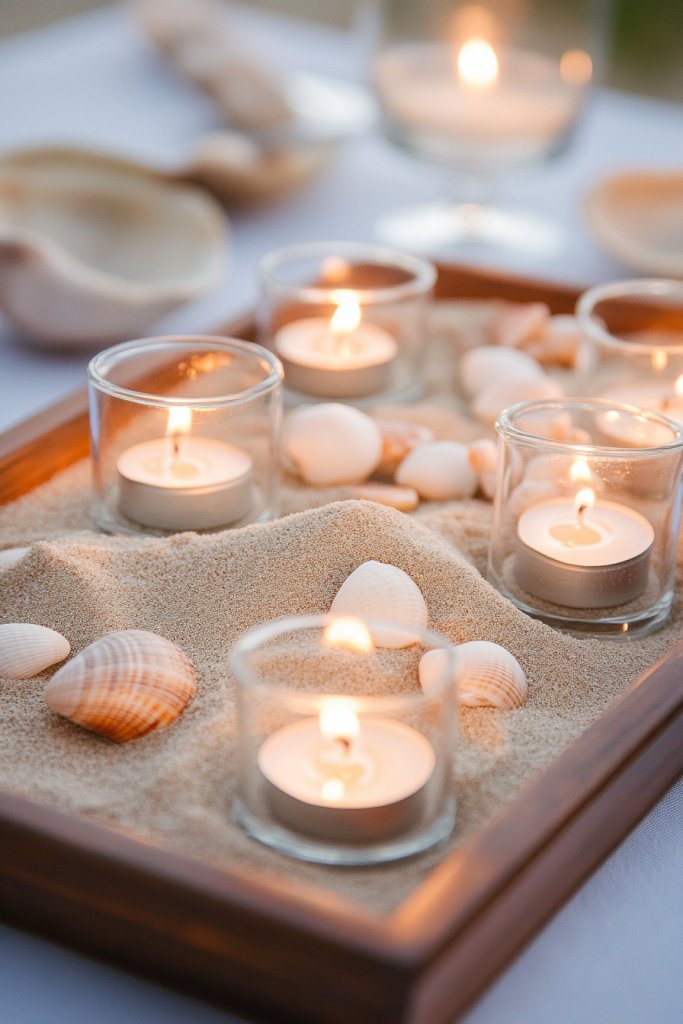
Ever wanted a beach-inspired centerpiece that’s easy to assemble and sets a warm, inviting mood? Sometimes, the most effortless decor makes the biggest splash. You crave a look that’s relaxed, natural, and evocative of seaside escapes. A simple layered display of sand and shells with tealight candles can deliver that coastal vibe instantly.
Visualize a shallow, wide bowl or tray layered with fine sand, creating a soft, textured base. Scattered across are an assortment of shells—conch, scallop, and tiny clam shells—adding variety and interest. Small tealight candles nestled among the shells cast flickering shadows, creating a warm, calm glow. The contrast between the rough shells and smooth sand gives a tactile richness that feels both organic and elegant.
You can customize by choosing different shells to match your theme—larger shells for a bold look or smaller ones for delicacy. Instead of a bowl, use glass cloches or hurricane vases for added height and drama. Incorporate additional elements like starfish or coral for extra texture. Change the base to colored sand or add tiny pebbles for a different visual effect. Seasonal updates might include small ornaments or themed figurines.
Fill your chosen container with a layer of fine sand, smoothing it out with a spatula. Arrange shells randomly or in patterns for a balanced look. Place tealight candles securely among the shells—preferably in holders to prevent tipping. Light the candles just before the event, and keep the display away from flammable materials or direct sunlight. You can prepare this setup hours in advance and light the candles at the last moment. It’s simple, inexpensive, and instantly transports your guests to the coast.
Add small decorative elements like miniature lighthouses or tiny flags. Use scented tealights or incorporate essential oils into the wax for a subtle aroma. Change the shells based on the theme—pink shells for a romantic vibe or darker ones for a more dramatic look. Enhance the base with a decorative tray or place it on a textured runner for visual impact. Seasonal touches can include mini pumpkins or faux sea glass.
This beach-inspired centerpiece is perfect for creating a relaxed, inviting atmosphere. It’s easy to update for different occasions or seasons and doesn’t require special skills. Your guests will love the natural, calming aesthetic, and you’ll enjoy how effortlessly it elevates your table. Just layer sand, shells, and candles—simple, charming, and totally doable!
8. Fruit & Flower Skewers in a Decorative Vase
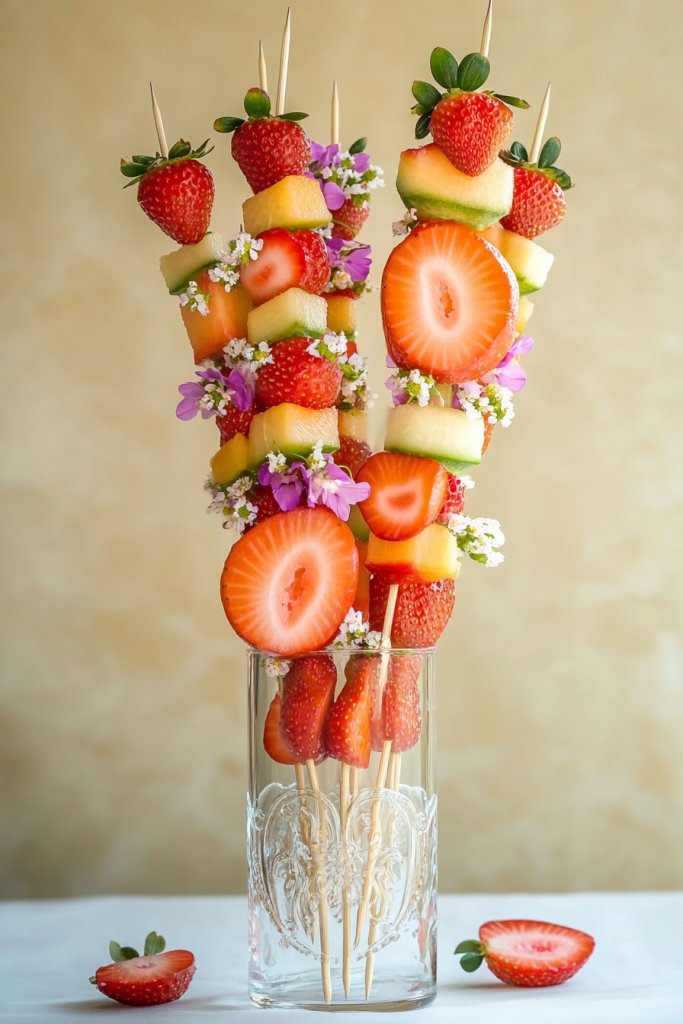
Searching for a centerpiece that combines beauty with practicality? Sometimes, you want something edible and attractive that doubles as a conversation starter. You also need a display that’s colorful, fresh, and easy to assemble without fuss. Fruit and flower skewers in a decorative vase hit all those marks, bringing a playful yet elegant feel.
Picture tall, clear glass vases filled with rows of colorful skewers—each featuring slices of watermelon, pineapple, berries, and edible flowers like nasturtiums or pansies. The skewers stand upright, creating a vertical splash of vibrant colors and shapes. The flowers add a delicate, natural touch, while the fruits provide a juicy, irresistible appeal. It’s a lively, summery tableau that looks both fresh and inviting.
Mix different fruits and edible flowers based on the season or theme. For a more sophisticated look, use skewers with uniform fruit slices and minimal flowers. Change the vase shape—try a wide bowl or a low, wide urn—for different effects. Incorporate herbs like mint or basil on the skewers for added aroma. For outdoor settings, choose sturdy vases or secure the skewers with floral foam inside for stability.
Start by preparing the fruit slices and edible flowers, trimming stems as needed. Thread them onto skewers in colorful patterns or a random, playful style. Insert the skewers into a decorative vase—consider filling the base with decorative stones or sugar cubes for extra support. Arrange the skewers at varying heights for visual interest. Keep the setup chilled until serving to maintain freshness. This idea is quick, fun, and visually appealing.
Add small flags or tags with fun messages or guest names. Use different skewer lengths and colors to create a dynamic display. Incorporate seasonal fruits or native flowers to make it more personalized. Place the vase on a decorative tray or surrounded by complementary decor like small candles or fabric accents. This presentation invites guests to enjoy the bounty and beauty of summer.
This edible centerpiece is a cheerful, engaging way to celebrate summer. It’s simple to assemble, customizable, and sure to turn heads. Plus, it encourages healthy eating and adds an interactive element to your table. Your guests will be impressed by your creativity—just thread, stack, and enjoy!
9. Sunflower & Wheat Bundle in a Vintage Pitcher
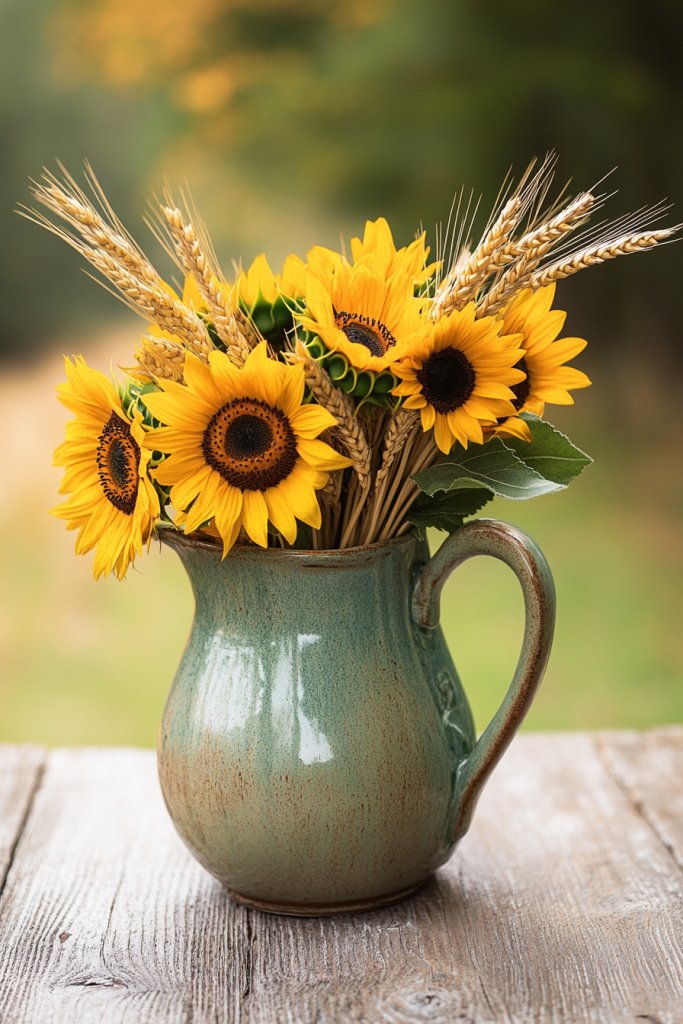
Want a rustic, farmhouse-inspired centerpiece that’s both charming and easy to make? Sometimes, floral arrangements can feel too delicate or formal, but you still crave that warm, country vibe. Combining sunflowers and wheat bundles in a vintage pitcher offers a simple, timeless solution that radiates coziness and charm.
Envision a weathered, vintage pitcher filled with a large bouquet of bright yellow sunflowers, their faces turned towards the light. Accompanying the flowers are sprigs of wheat, adding texture and height. The arrangement sits on a wooden table or a linen cloth, with the sunflowers’ broad petals contrasting beautifully with the slender wheat stalks. It’s a natural, cheerful display that evokes harvest time and countryside serenity.
Switch the sunflower for dahlias or peonies for different seasons or moods. Use a variety of pitchers—metal, ceramic, or distressed wood—to match your decor style. Add berries or small greenery for extra fullness. For a more minimalist look, keep the bouquet simple with only sunflowers or only wheat. Change the container to a rustic bucket or a vintage tin for a different aesthetic.
Fill your vintage pitcher with water and arrange the sunflower stems, trimming them to fit. Tuck the wheat bundles in between for height and texture. Secure the stems with floral foam or tape if needed. Position the arrangement where it can be admired—center of the table or on a sideboard. You can prepare the bouquet hours in advance and keep it in a cool place until your event. This effortless setup radiates warmth and rustic elegance.
Personalize by adding small accents like vintage ribbons, lace, or tiny bells tied around the stems. Incorporate seasonal elements—like acorns or miniature pumpkins in fall. Use different flower varieties or add a few sprigs of lavender for fragrance. Place a small sign or chalkboard with a message for a personalized touch. It’s all about creating a cozy, inviting atmosphere.
This sunflower and wheat arrangement is perfect for bringing a rural, nostalgic feel to your table. It’s straightforward, budget-friendly, and endlessly adaptable. You’ll love how a simple pitcher and fresh blooms can transform your space into a charming escape. Your guests will feel the warmth and authenticity you’ve created—just pick your flowers and set it up!
10. Coral & Aqua Colored Candles with Sea Glass Accents
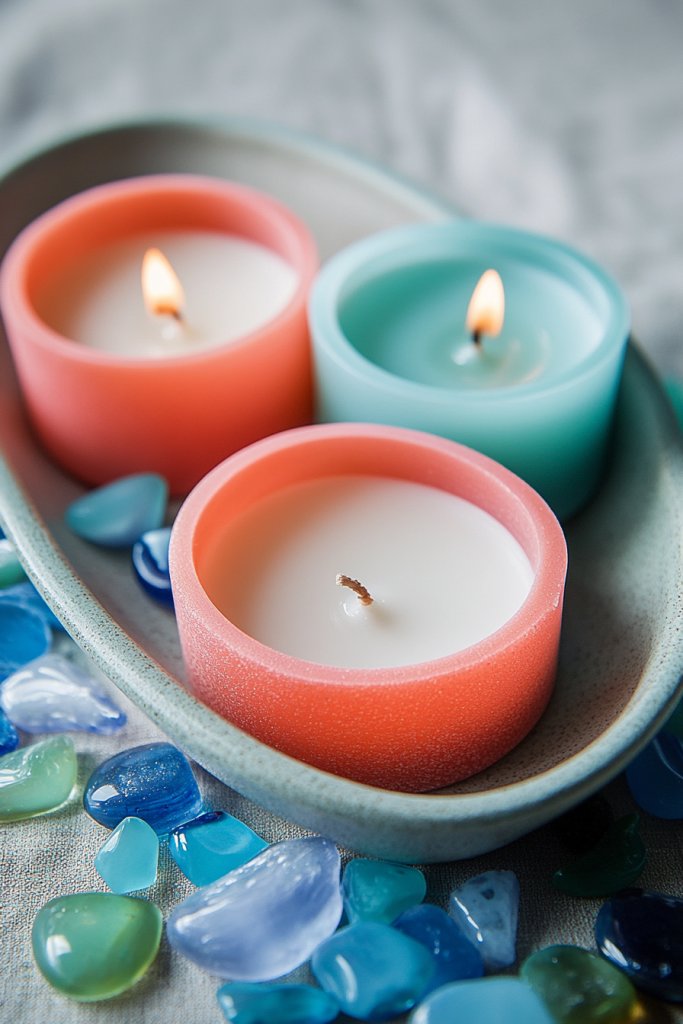
Craving a centerpiece that captures the essence of the ocean without going overboard? Sometimes, traditional seaside decor feels too literal or kitschy. You want a subtle, sophisticated look that hints at the sea—think colors, textures, and gentle lighting. Coral and aqua candles with sea glass accents offer a chic, modern coastal vibe that elevates your table.
Picture layered candles in shades of coral and aqua, arranged on a decorative tray or mirrored surface. Surround the candles with small, smooth sea glass pieces in matching colors, reflecting the candlelight with a gentle shimmer. The candles’ warm glow contrasts beautifully with the cool tones of the glass, creating a serene, calming ambiance. It’s a minimalist yet elegant nod to the seaside, perfect for summer evenings.
Mix different candle shapes—tall tapers with short votives—to add visual interest. Incorporate metallic or clear candle holders for a more refined look. Change the sea glass colors to match your decor palette—turquoise, teal, or even white for a more neutral feel. For outdoor parties, place the setup in shaded areas or inside hurricane lanterns for safety. Accentuate with driftwood or starfish for a more coastal touch.
Arrange the candles on a tray, ensuring they’re stable and secure. Scatter sea glass around the base of the candles, creating a natural, organic pattern. Light the candles just before guests arrive to maximize their effect. For added elegance, use candle rings or decorative borders. Avoid placing the candles near flammable materials or direct sunlight to prevent melting or discoloration. It’s simple but impactful, perfect for sophisticated summer soirées.
Personalize with small tags or charms attached to the candles or sea glass. Incorporate additional elements like tiny shells or pearls for extra texture. Use candles with scented wax—coconut, vanilla, or ocean breeze—to add an olfactory layer. Adjust the arrangement seasonally—warm tones for fall or icy blues for winter. These small tweaks make your centerpiece uniquely yours.
This coastal-inspired setup is easy to assemble and versatile enough for any table size. It’s a subtle yet stylish way to bring the beach home, wherever you are. Plus, it’s a great project for DIY enthusiasts and design novices alike. Elevate your summer decor with these elegant candles and glass accents—you’ll love the tranquil, refined vibe it creates.
11. DIY Paper Lanterns with Tropical Prints
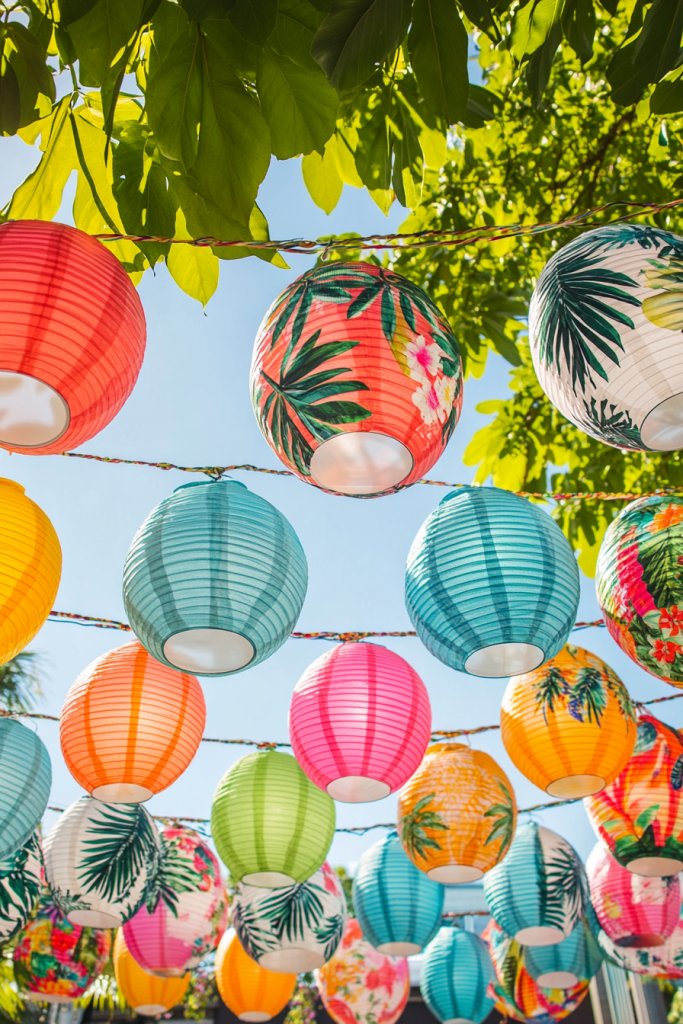
Want to add a festive, tropical touch to your summer gatherings? Standard string lights are nice, but sometimes you need a more eye-catching, customizable solution. Bright, patterned paper lanterns can turn a plain space into a vibrant tropical paradise. They’re affordable, fun to make, and perfect for creating that festival vibe.
Imagine large paper lanterns hanging from tree branches or ceiling hooks, decorated with colorful tropical prints—palm leaves, hibiscus flowers, or exotic birds. The lanterns sway gently in the breeze, casting patterned shadows around your space. Their bold colors and lively patterns set a cheerful, exotic tone, transforming your backyard or patio into a tropical oasis. Soft string lights inside add a warm glow, completing the festive scene.
Customize the lanterns with different tropical patterns or even personal artwork. Use various sizes—small for accents and large for a statement piece. Hang them at different heights for visual depth. Incorporate additional decor like fabric banners or paper flowers to enhance the theme. For indoor parties, suspend lanterns from ceiling beams or balcony rails for a dramatic effect.
Start with plain paper lanterns available at craft stores or online. Print or draw tropical patterns onto adhesive or directly onto the paper using markers or paint. Use a string or wire to hang the lanterns securely. Light LED candles or small battery-powered lights inside for safety and convenience. Adjust the spacing to ensure a balanced, festive look. These lanterns are lightweight and easy to install, perfect for DIY decor.
Add personal touches like custom messages or initials on the lanterns. Incorporate LED string lights with different color options to match your theme. Use metallic or glitter accents to make the lanterns sparkle. Mix patterns and sizes for a playful, dynamic display. They also make great photo backdrops or focal points for your party.
DIY tropical paper lanterns bring a bright, cheerful atmosphere to any summer celebration. They’re simple enough for beginners and highly customizable for seasoned crafters. Plus, they’re a fun activity that adds personality to your decor. Get creative, hang them up, and watch your space come alive with tropical joy!
12. Fresh Fruit & Mint Centerpiece in a Decorative Bowl
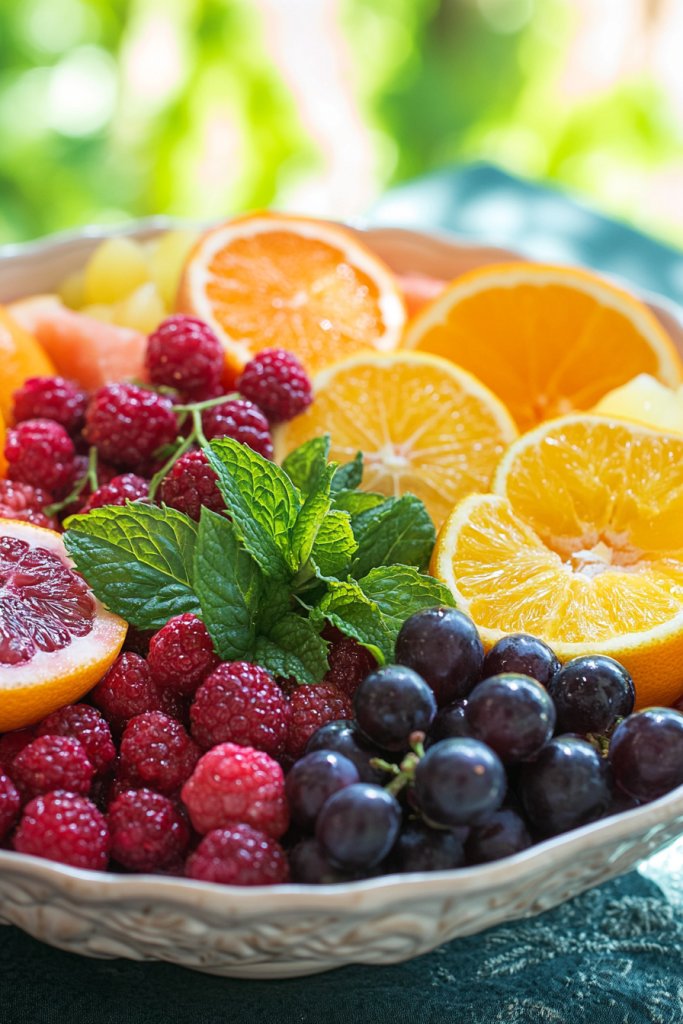
Looking for a centerpiece that’s as refreshing as it is beautiful? Sometimes, traditional floral arrangements don’t quite cut it when you want something edible and aromatic. Fresh fruits and mint leaves combined in a decorative bowl create a vibrant, fragrant display perfect for summer gatherings. It’s a simple way to impress without fuss.
Envision a large, ornate bowl filled with a colorful medley of sliced strawberries, kiwi, blueberries, and citrus segments. Scattered among the fruit are sprigs of fresh mint leaves, adding a splash of green and a refreshing aroma. The fruit’s vivid colors contrast beautifully against the bowl’s intricate design, creating an inviting, sensory-rich centerpiece. It’s a feast for the eyes and the palate, bursting with freshness.
Change the fruit based on season—peaches or cherries for summer, pomegranates or apples for fall. Use a sleek glass bowl for modern elegance, or a rustic wooden or ceramic dish for a country feel. Incorporate additional herbs like basil or thyme for extra flavor and visual interest. For outdoor use, keep the bowl chilled or cover with plastic wrap until serving. Layer fruits and herbs creatively for a more dynamic look.
Prepare your chosen fruits by slicing and arranging them neatly in the bowl. Tuck sprigs of mint among the slices to distribute aroma and color evenly. For presentation, add some whole fruits around the edges or on skewers for height variation. Keep the bowl in a cool place or refrigerate until just before serving to preserve freshness. This setup is quick, colorful, and instantly elevates your table.
Personalize with themed picks, decorative flags, or small signs indicating the fruit types. Use edible flowers for a fancy touch or add a drizzle of honey or balsamic glaze for extra flavor. Incorporate seasonal fruits or exotic varieties for variety. Place the bowl on a decorative tray or surrounded by complementary decor like candles or fabric for extra flair. It’s all about making it your own.
This fresh fruit and mint centerpiece adds a burst of color and freshness to any table. It’s simple yet striking and perfect for summer or brunch settings. Plus, it’s a healthy, delicious focal point that invites guests to indulge. Get creative with your fruit choices and enjoy the vibrant, aromatic display—you’ll love how easy and appealing it is!
13. Bright Pom-Pom & Ribbon Wreath as a Table Center
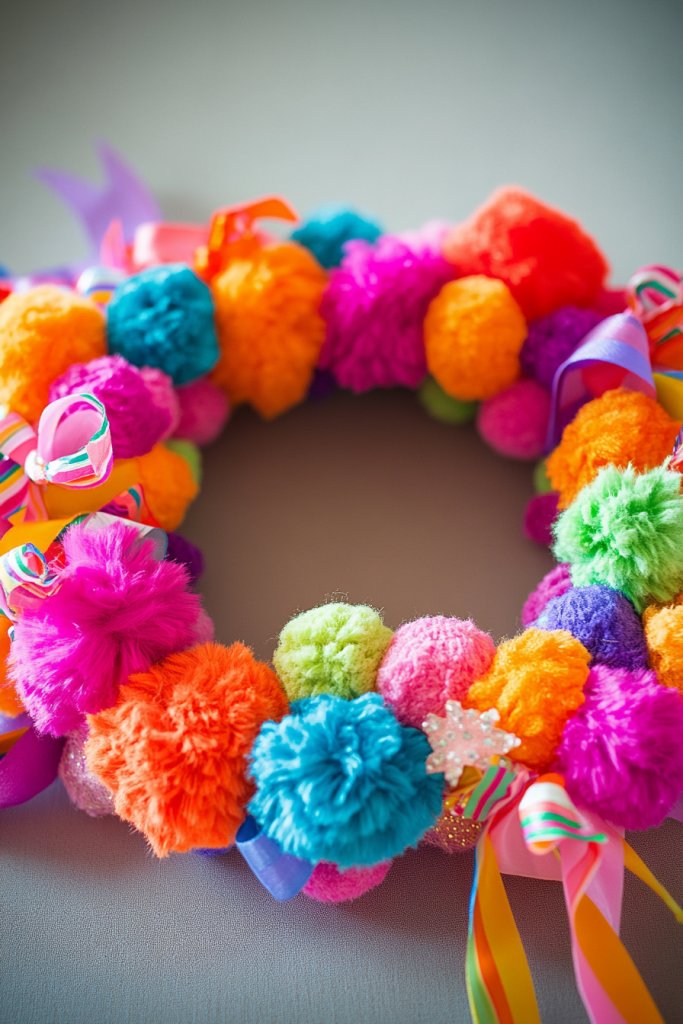
Want a centerpiece that’s bold, cheerful, and easy to make? Sometimes, floral arrangements or elaborate decorations feel too formal or complicated. You need something playful, colorful, and instantly eye-catching. A pom-pom and ribbon wreath offers a DIY option that brightens any table with minimal effort.
Picture a circular wreath made of soft fabric or yarn pom-poms in shades of yellow, pink, orange, and turquoise. Dainty ribbons cascade from the wreath’s edges, flowing gently onto the table. The vibrant colors and fluffy textures create a joyful, whimsical vibe. It sits flat on the table or hangs above, serving as a lively focal point that radiates summer fun.
Customize the color palette to match your theme—pastels for a gentle look, bright neons for a party vibe. Use different ribbon textures—silk, satin, or burlap—for variety. Make it larger or smaller depending on your table size, or add seasonal accents like faux flowers or small ornaments. Hang it above the table for a more decorative effect or lay it flat as a centerpiece.
Create pom-poms using yarn or fabric, securing the ends tightly. Attach them to a wire or foam base in a circular shape, ensuring even coverage. Tie ribbons onto the wreath, letting them cascade or tie into bows. Secure everything with hot glue or sewing, depending on your materials. Place it on the table, or hang it using a decorative ribbon or twine. It’s a fun project that anyone can tackle.
Add personalized touches like initials, small charms, or themed embellishments. Choose ribbon patterns that reflect the occasion—stripes, polka dots, or metallics. Incorporate glow-in-the-dark or metallic threads for extra sparkle. You can also add lightweight lightweight fairy lights for a magical glow. The key is to make it vibrant, fun, and uniquely yours.
This pom-pom and ribbon wreath is a cheerful, versatile centerpiece that’s perfect for summer parties or casual gatherings. It’s easy to customize and assemble, making it suitable for all skill levels. Plus, it adds a burst of color and texture that lifts everyone’s mood. Get creative, and let your personality shine through this playful decor!
14. Succulent & Cactus Arrangement in Mini Terracotta Pots
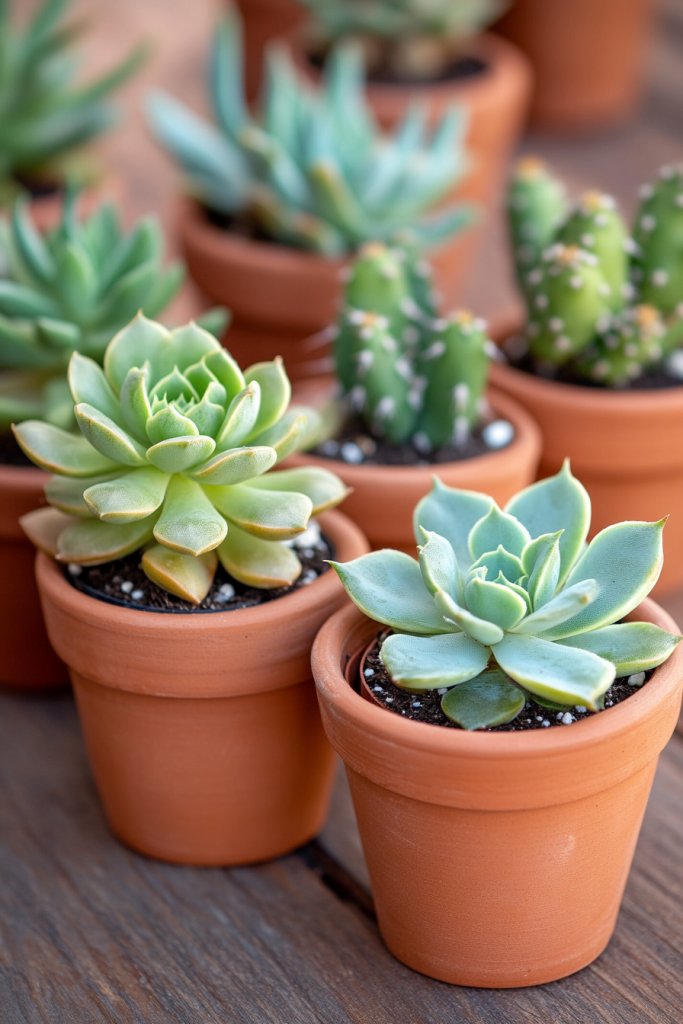
Craving a low-maintenance yet stylish centerpiece? Traditional floral arrangements often require watering, pruning, and care—something you might not have time for during summer parties. Succulents and cacti in mini terracotta pots offer a modern, minimalist aesthetic that’s easy to care for and endlessly customizable. They’re perfect for adding a touch of desert chic without the fuss.
Visualize a collection of small terracotta pots, each housing a different succulent or cactus with unique shapes and textures. The warm earth tones of the pots contrast beautifully with the vibrant greens and muted hues of the plants. Arrange them in a grid or in a staggered cluster on your table or sideboard. The simplicity and natural materials create an understated, contemporary look that complements modern decor.
Mix different types of succulents and cacti for visual interest—try echeverias, haworthias, or small barrel cacti. Use painted or decorated pots for a more personalized touch. For a more dramatic look, place larger pots with taller plants in the center, surrounded by smaller ones. Incorporate decorative stones or sand on top of the soil for added texture. Change the arrangement seasonally or for special occasions.
Plant your succulents and cacti in small terracotta pots, ensuring proper drainage. Arrange the pots on a tray or decorative board for stability. Water sparingly—typically once every few weeks—and place them in bright, indirect sunlight. Group the pots tightly together or spread them out for visual variety. You can also add decorative pebbles or moss for extra flair. This arrangement is low effort but high style.
Paint or decorate the pots with patterns, quotes, or colors to match your theme. Incorporate small figurines or decorative stones for added personality. Use different pot heights to create a layered effect. You could also swap the succulents for small herbs or flowering plants seasonally. Keep the arrangement clean and well-watered for optimal longevity.
This succulent and cactus setup is a sleek, modern take on summer decor that’s durable and fuss-free. It’s perfect for busy hosts or those new to gardening. Plus, it adds a subtle elegance and a touch of nature’s resilience. Create a stylish desert-inspired scene that lasts and impresses—no green thumb required!
15. Vintage Picnic Basket Filled with Seasonal Blooms
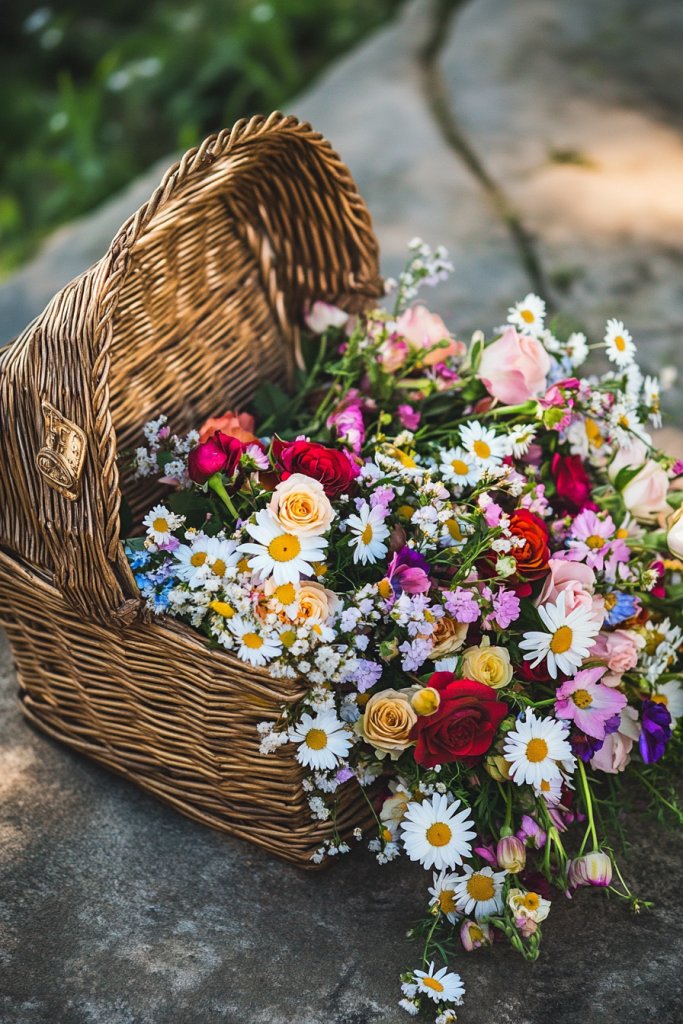
Want a centerpiece that oozes nostalgia and charm? Sometimes, floral arrangements can feel too polished or formal, but you still crave that rustic, picnic-inspired vibe. A vintage picnic basket filled with seasonal blooms offers a romantic, whimsical look that’s perfect for summer gatherings. It’s a charming way to combine functionality with style.
Imagine an old wicker picnic basket, its handle slightly worn, overflowing with a lush bouquet of seasonal flowers—peonies, daisies, or sunflowers depending on the time of year. The flowers spill over the edges, creating a natural, abundant appearance. The basket sits on a wooden table or a picnic blanket, evoking a relaxed, countryside feel. The gentle colors and textures set a cozy, inviting scene.
Replace the flowers with dried or faux blooms for a long-lasting display. Use different vintage baskets—metal, woven, or enamel—to match your decor style. Add small accessories like vintage cutlery or fabric napkins for a layered, picnic-inspired look. Change the flower types seasonally—roses in summer, chrysanthemums in fall—to keep it fresh. Elevate the basket on a stand or place it on a decorative cloth for more visual interest.
Choose a sturdy, vintage-style basket and line it with a floral foam or plastic liner to keep flowers fresh. Arrange the seasonal blooms by inserting stems at varying heights for a natural look. Water the flowers regularly or mist them to prolong freshness. Position the basket centrally on your table, or use it as a decorative focal point on side tables or buffets. You can prepare the arrangement hours beforehand—just keep it in a cool spot until the event.
Add small touches like vintage ribbons, tags with handwritten messages, or tiny flags. Incorporate seasonal elements such as berries, small pumpkins, or faux foliage for variety. Change the flowers based on your event theme or personal favorite. Use a decorative cloth underneath for extra color or texture. Personal touches make it feel curated and heartfelt.
This vintage picnic basket centerpiece brings a nostalgic, cozy vibe that’s perfect for summer and outdoor settings. It’s easy to assemble and endlessly adaptable, making it suitable for all skill levels. Plus, it’s a lovely conversation starter that adds warmth and personality to your table. Just fill it with seasonal blooms, and enjoy the charming ambiance!
16. DIY Confetti & Balloons with Summer Motifs

Craving a lively, playful centerpiece that’s perfect for summer parties? Traditional table settings can sometimes feel too formal or static, but you want something fun and full of energy. Confetti-filled jars paired with balloons decorated with summer symbols instantly create a festive, whimsical vibe. It’s an easy DIY that guarantees smiles and excitement.
Imagine glass jars filled with colorful confetti—tiny paper circles, star shapes, or metallic pieces—sealed with a lid or a decorative fabric cover. From above, floating balloons in bright colors or with summer motifs—palm trees, suns, or flamingos—add height and movement. The combination of shimmering confetti and cheerful balloons creates a dynamic, party-ready scene that invites guests to celebrate.
Use different jar sizes and shapes, filling some with confetti and others with small LED lights or candies. Choose balloons in various sizes and tie them with ribbons matching your color scheme. For a more elegant look, opt for metallic or transparent balloons with printed motifs. Incorporate themed confetti—like seashells or stars—to match your event’s theme.
Fill your jars with confetti, sealing them with decorative fabric, ribbon, or paper covers. Attach helium balloons or air-filled balloons to weights or sticks, decorating with ribbons or banners. Arrange the jars and balloons on the table in clusters or at different heights for visual interest. Use a few string lights or fairy lights nearby for added sparkle. This setup is quick, fun, and adaptable for indoor or outdoor parties.
Add custom tags, banners, or small signs to the jars or balloons. Incorporate seasonal motifs—like beach balls or sunglasses—on the balloons. Use metallic or holographic confetti for extra shine. Personalize with themed stickers or initials. These playful touches make the decor uniquely yours and perfect for summer celebrations.
This confetti and balloon centerpiece guarantees a lively atmosphere, perfect for kids’ parties or casual outdoor gatherings. It’s simple to create, highly customizable, and sure to be a hit. Plus, it’s a great way to showcase your fun, creative side. Just fill, tie, and watch your space come alive with color and joy!
Conclusion
With a diverse array of DIY summer centerpiece ideas, you’ll be inspired to transform your tablescape into a lively and inviting display. Whether you prefer natural elements, bold colors, or innovative repurposing, these ideas are easy to try and customize for your space. Get creative, gather your supplies, and let your summer celebrations shine with your personal touch!