Imagine a space where friendship and fun collide—girls’ shared bedrooms are the ultimate playground for creativity and bonding! These setups are super popular because they create a cozy, personalized environment that fosters sisterhood and shared memories. From playful decor to clever storage solutions, shared bedrooms offer a chance for girls to express their individuality while enjoying each other’s company in a special space.
In this article, you’ll discover a variety of inspiring ideas to transform any shared bedroom into a fun, functional, and fabulous retreat. Whether you’re looking for colorful themes, space-saving hacks, or unique decor tips, there’s something for every style and age. Get ready to spark your creativity and craft a space where friendship truly blossoms!
1. Cozy Bunk Bed with Personalized Touches
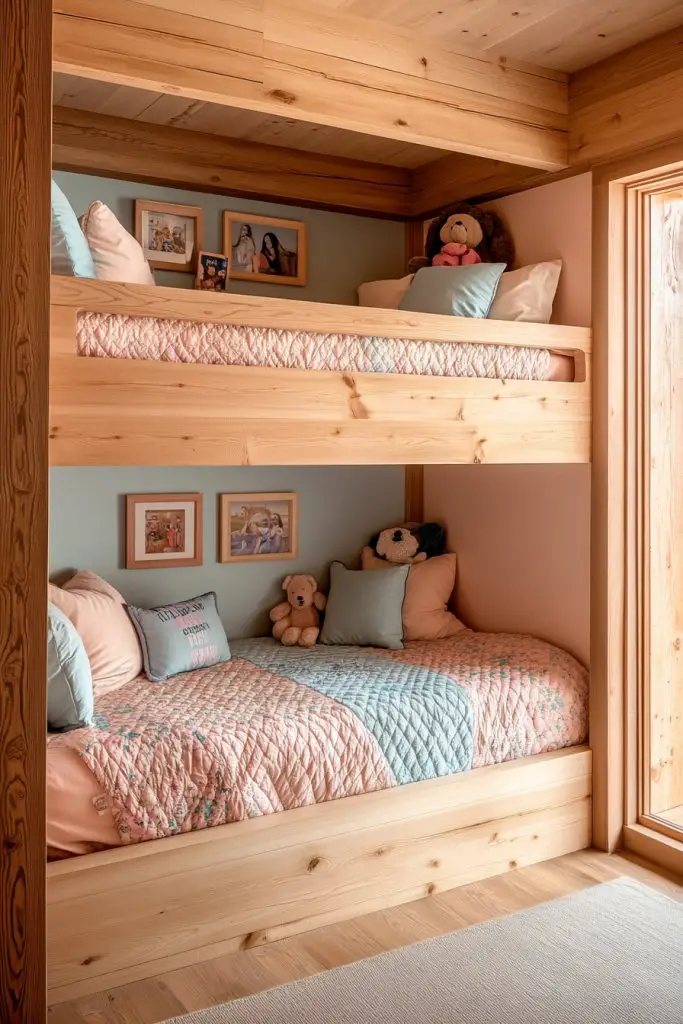
Ever shared a room and wished for a space that feels truly yours? A bunk bed with personalized touches turns a basic sleeping area into a special retreat. It’s not just about sleeping—it’s about creating a cozy zone where friendship and individuality shine. Plus, who doesn’t want to climb into a bed that feels uniquely theirs?
Recommended Products to replicate this idea
| # | Preview | Product | |
|---|---|---|---|
| 1 |

|
Boao Personalized Name Wall Decal Large Letter Stickers Alphabet Custom Name Stickers Nursery Wall... | Buy on Amazon |
| # | Preview | Product | |
|---|---|---|---|
| 1 |
|
Dorm Bottom Bunk Bed Curtains Privacy Curtains 350g Dustproof Breathable Single Bed Blackout... | Buy on Amazon |
Imagine a bright, colorful bunk bed decorated with fun, custom name plaques hanging from the headboard. Fairy lights drape softly around the top bunk, giving a warm glow that invites relaxation. The bedding features cheerful patterns—think polka dots or floral prints—that reflect each girl’s personality. Soft plush pillows and a decorative throw blanket add inviting layers of texture and comfort.
You can switch up the theme with different color schemes—pastel pinks and blues, bold jewel tones, or neutral earthy shades. For a more boho vibe, add crochet or macramé accents. If space is tight, choose a compact bunk with a built-in desk underneath. Seasonal decor can include cozy blankets and themed pillow covers for holidays or special occasions.
Start by selecting a sturdy bunk bed frame that suits your room’s size. Personalize it with removable name plaques made from wood or acrylic, which can be painted or decorated with stickers. String fairy lights with a gentle switch for easy control, and pick bedding that matches your chosen theme. Add some fun accessories like wall decals or hanging fabric banners—just avoid wall art that’s overly bulky or fragile. Regularly check the bed’s safety features to keep it secure.
Encourage each girl to add small decorative items, like a favorite plush or a DIY painted picture frame. Use fabric covers or themed pillowcases to tailor the look further. Incorporate a small personal shelf attached to the bed for books or collectibles. This makes the bed feel truly theirs without cluttering the shared space.
Personalized bunk beds foster a sense of ownership and pride, making the room a true sanctuary. They also create a playful environment that promotes friendship and individuality. Ready to turn a simple bunk bed into a magical, personal haven? Your room will become the favorite spot for sleepovers and giggles alike!
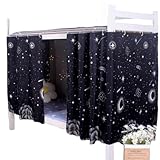
2. Dual Desk Area for Collaborative Studying and Crafts
Ever tried to get two girls to share a tiny desk and ended up with chaos or fights? A dedicated dual workspace transforms shared studying and craft time into an organized, fun experience. It’s about making room for both creativity and focus without stepping on each other’s toes. Plus, a great desk setup encourages teamwork instead of rivalry.
Recommended Products to replicate this idea
| # | Preview | Product | |
|---|---|---|---|
| 1 |

|
SEDETA Farmhouse 96.5" Computer Desk with Drawers, 2 Person Home Office Desk, Gaming Double Desk... | Buy on Amazon |
| # | Preview | Product | |
|---|---|---|---|
| 1 |

|
Xaperexi Kids Desk and Chair Set, Height Adjustable Child's School Study Writing Tables, Kids Desk... | Buy on Amazon |
Picture two matching desks placed side by side or connected with a shared tabletop. Bright, cheerful organizers keep pencils, paints, and papers tidy, while colorful storage bins hold supplies. Each girl has her own space with a personalized nameplate or decorative element, but the overall look is cohesive and inviting. Soft lighting, like clip-on lamps, illuminates the work area, making it perfect for late-night projects or homework.
For smaller rooms, opt for compact wall-mounted desks that fold away when not in use. If space allows, incorporate a long, communal table with individual chairs to foster collaboration. Seasonally, add cozy fabrics or themed accessories—think a science or art theme—to inspire creativity. You can also vary the color schemes to match each girl’s style or keep it unified for a harmonious look.
Choose sturdy desks with ample surface area and adjustable height if needed. Install vertical storage or pegboards above each station for quick access to supplies, avoiding clutter. Use labeled containers or small drawers to keep craft materials sorted. Personal touches like custom name tags or decals make each workspace feel unique. Add portable lighting options to ensure good visibility without taking up too much space. Lastly, position the desks to maximize natural light if possible.
Let each girl decorate her side with stickers, washi tape, or photos—whatever sparks joy. Incorporate themed accessories like a mini whiteboard or chalkboard for notes and doodles. Use different color bins or containers to match their favorite hues, making organization visually appealing. This encourages each girl’s ownership while keeping the space functional.
A dedicated duo workspace boosts confidence by providing a personalized zone for learning and creating. It encourages independence and teamwork, vital skills for growing up. Ready to set up a fun, productive area that both girls will love? Think of it as a mini-studio where friendships thrive and ideas come to life!
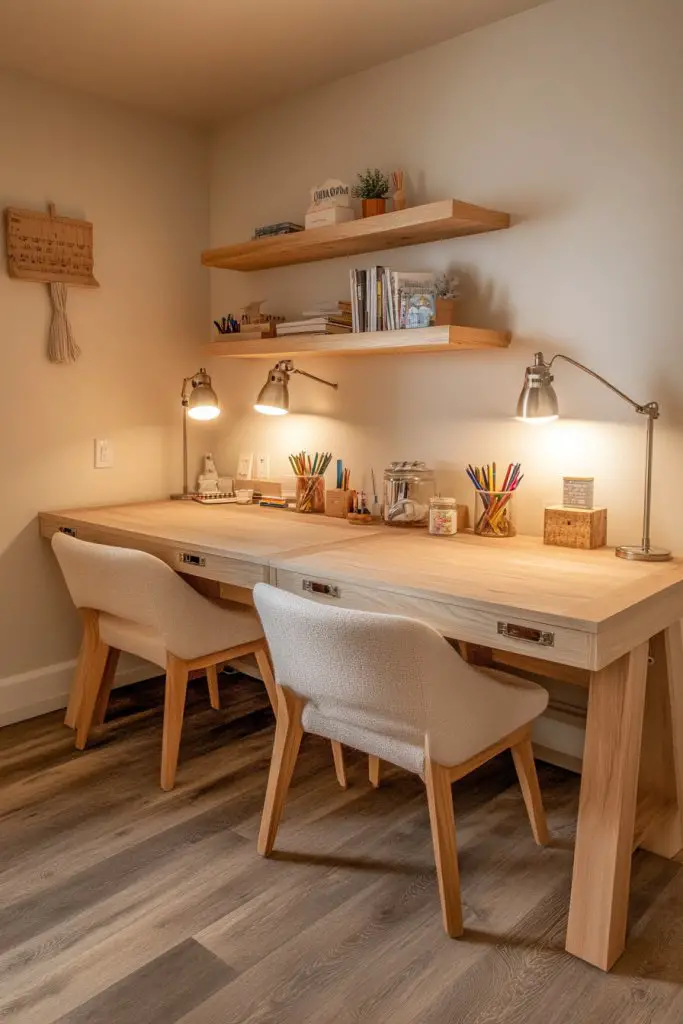
3. Multi-Functional Storage Solutions with Bright Bins
Clutter can turn a cute shared room into chaos fast. Finding a way to keep belongings organized without sacrificing style is a constant challenge. Multi-functional storage solutions with colorful bins help tame the mess while adding a playful vibe. Who says organization has to be boring?
Recommended Products to replicate this idea
| # | Preview | Product | |
|---|---|---|---|
| 1 |

|
SONGMICS Storage Cubes, Set of 6 Odorless Foldable Storage Boxes, 10.2 x 10.2 x 11 Inches, Closet... | Buy on Amazon |
| # | Preview | Product | |
|---|---|---|---|
| 1 |
|
VASAGLE Shoe Bench with Cushion, Shoe Storage Bench with 6 Compartments and 3 Adjustable Shelves,... | Buy on Amazon |
Visualize a series of stackable, bright plastic bins arranged neatly on wall-mounted shelves or under beds. Each bin is labeled with fun icons or stickers, making it easy for the girls to find their stuff. Clear containers let everyone see what’s inside without rummaging, and the vibrant colors brighten up the room. Small baskets or fabric bins can hold toys, craft supplies, or clothes, creating a cheerful, organized environment that invites tidiness.
Mix and match colors to suit each girl’s favorite hues or create a rainbow effect for a lively look. Use modular storage units that can be stacked or rearranged as needs change. Incorporate hanging pockets or over-the-door organizers for max space efficiency. For seasonal swaps, replace or add new bins with themed covers or labels, keeping the room fresh and functional. The flexibility allows the storage to grow with the girls’ changing interests.
Start by measuring available space and selecting storage bins that fit comfortably. Use stackable or modular units for flexibility, choosing durable, easy-to-clean materials. Label each bin clearly with stickers or paint for quick identification. Attach wall-mounted shelves or hooks to free up floor space and keep bins off the ground. Regularly declutter and rotate items to maintain order. Incorporate decorative touches like patterned fabric or themed labels to make storage inviting.
Encourage each girl to decorate her bins with stickers, washi tape, or custom labels. Use color coding to help them easily identify their belongings. Incorporate decorative fabric covers or themed covers that match room decor, making storage part of the design. For added fun, create a ‘treasure chest’ style bin for special keepsakes, personalized with paint or stickers. This promotes ownership and keeps the room looking lively.
Bright, organized storage solutions make the room more inviting and less stressful. They help develop good habits and responsibility over belongings. A neat space boosts mood and encourages creativity. Ready to turn clutter into color and order? Your room will become a cheerful, efficient haven for friends and fun!
4. Friendship Wall with Photo Collage and Notes
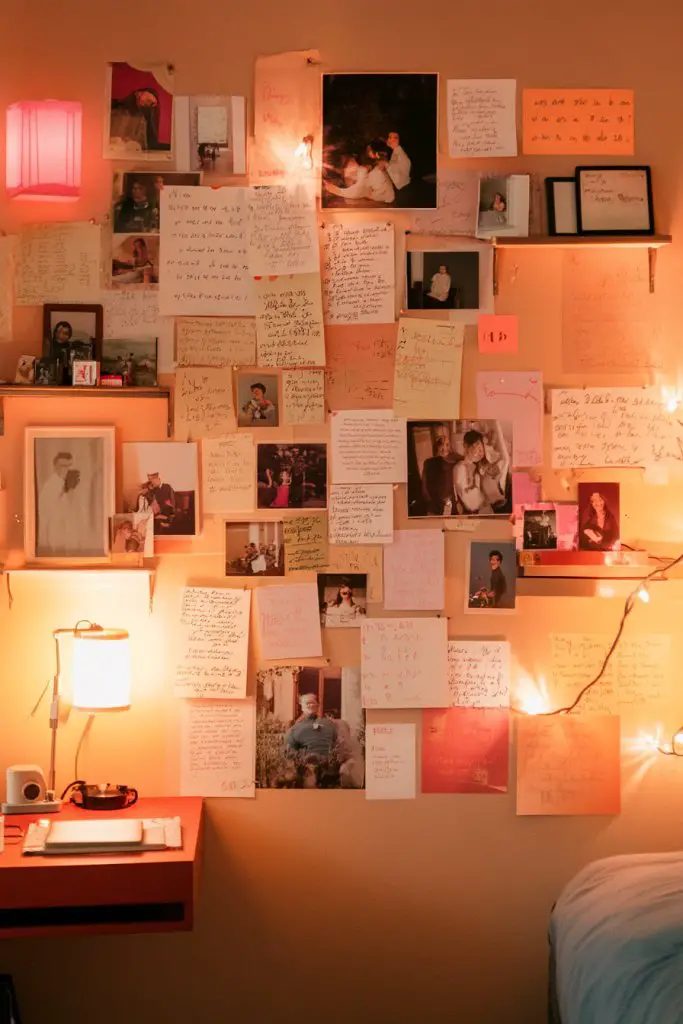
Ever wanted a space that celebrates your friendship? A dedicated friendship wall transforms plain walls into a lively tribute to your bond. It’s a daily reminder of shared memories, inside jokes, and dreams. Plus, it makes the room more personal and inspiring—who wouldn’t want a visual cheerleader?
Recommended Products to replicate this idea
| # | Preview | Product | |
|---|---|---|---|
| 1 |

|
Vittanly 15 Pack Picture Frames Collage Wall Decor for Mounting or Tabletop Display, Gallery Frame... | Buy on Amazon |
| # | Preview | Product | |
|---|---|---|---|
| 1 |
|
Large Cork Board 36" x 24", 6 Pack Felt Bulletin Board with 30 Pushpins, Cork Boards Alternative... | Buy on Amazon |
Picture a collage of framed photos, colorful notes, and doodles pinned or taped onto a vibrant wall. Use string or wire with clothespins to hang pictures and notes, creating a dynamic, ever-changing display. Add decorative elements like paper flowers, banners, or motivational quotes to fill space with positivity. Lights or fairy lights can highlight this wall, but since we’re avoiding restricted items, soft LED strips are a good substitute. The overall look is playful, warm, and full of memories.
Create a themed wall based on shared interests—like music, sports, or travel—using stickers or DIY decorations. Change out photos and notes seasonally to keep the display fresh. For a sleek look, opt for a grid layout with matching frames and uniform spacing. Or, go eclectic with mismatched frames, washi tapes, and layered notes. Incorporate a corkboard or fabric backdrop for added texture, avoiding heavy or fragile wall art.
Start by choosing a wall that’s visible and easy to access. Gather photos, notes, and decorative items—preferably lightweight and removable. Use washi tape or poster strips to avoid wall damage while hanging items. Arrange the photos and notes in a pleasing pattern, ensuring a mix of sizes and colors. Include a few inspirational quotes or friendship messages for extra motivation. Regular updates keep the display engaging and meaningful. Avoid clutter by editing old photos and notes periodically.
Let each girl add her own touches—like doodle notes, stickers, or small drawings. Use colorful paper, borders, or washi tapes to frame or decorate photos. Incorporate small shelves or ledges to display keepsakes or handmade crafts. Personalize with name banners or initials, and consider adding a small chalkboard or whiteboard for messages—avoiding bulky or fragile art. This wall becomes a living tribute to friendship.
A friendship wall boosts morale and strengthens bonds, making the room feel more like a team space. It encourages sharing, creativity, and positivity. Seeing your memories daily builds confidence and reinforces your connection. Ready to craft your own friendship gallery? It’s an easy way to turn shared moments into lifelong memories!
5. Overhead Canopy or Tent Nooks for Private Retreats

Sometimes, sharing a room means sacrificing private space for quiet time or secret chats. Creating cozy nooks with overhead canopies or tents offers a personal retreat within a shared room. It’s your own little hideaway, perfect for reading, dreaming, or just escaping the chaos. Who says you can’t have your own private corner without a room of your own?
Recommended Products to replicate this idea
| # | Preview | Product | |
|---|---|---|---|
| 1 |

|
Sumbababy Large Teepee Tent for Kids: with Star Lights & Flags - Tent for Kids Indoor Kids Teepee... | Buy on Amazon |
| # | Preview | Product | |
|---|---|---|---|
| 1 |

|
AIKASY Princess Canopy Bed Curtains with Top Ties - Windproof & Lightproof for Girls' Adult Bedroom... | Buy on Amazon |
Imagine a soft fabric canopy draped over a corner, with fairy lights woven through the fabric for a magical effect. Inside, plush cushions and a small blanket make it inviting and comfy. Alternatively, a mini tent with breathable fabric walls creates a secluded space that feels like a secret hideout. Bright, cheerful colors or patterns make these retreats pop against the room’s background. It’s a playful, cozy space that beckons for quiet moments or private chats.
Choose from lightweight, breathable fabrics in favorite colors or patterns—think floral, polka dots, or solids. For a more whimsical look, add decorative trims or fringe. Smaller tents or canopies work well in compact spaces, while larger ones suit bigger corners. Seasonal decor can include cozy throws or themed accessories, making each nook feel fresh. These retreats can be easily moved or taken down, offering flexibility as needs change.
Begin by selecting a corner or area that’s quiet and accessible. Hang or suspend lightweight fabric or mesh using ceiling hooks or tension rods—no wall damage needed. Layer cushions, blankets, and stuffed animals inside for comfort. Add string lights or battery-operated fairy lights to enhance the ambiance, ensuring safety and simplicity. Use fabric ties or clips to secure the canopy fabric in place. Regularly refresh the decor with new cushions or accents to keep it inviting.
Let each girl decorate her retreat with her favorite plush toys, small lanterns, or themed accessories. Incorporate personal touches like a tiny hanging pocket for books or a fabric banner with her name. Use removable decals or patches to add patterns or motifs matching her personality. Seasonal updates—like a cozy fleece lining or themed decor—keep each retreat feeling fresh and special. This space becomes her secret sanctuary within the shared room.
A private nook fosters independence and self-care, encouraging girls to enjoy quiet, reflective moments. It’s a confidence booster, making them feel valued and respected in their personal space. Plus, it adds a playful, imaginative element to the room. Want to turn a corner into a magical retreat? It’s easier than you think and totally worth the cozy vibes!
6. Shared Reading Nook with Cushions and String Lights
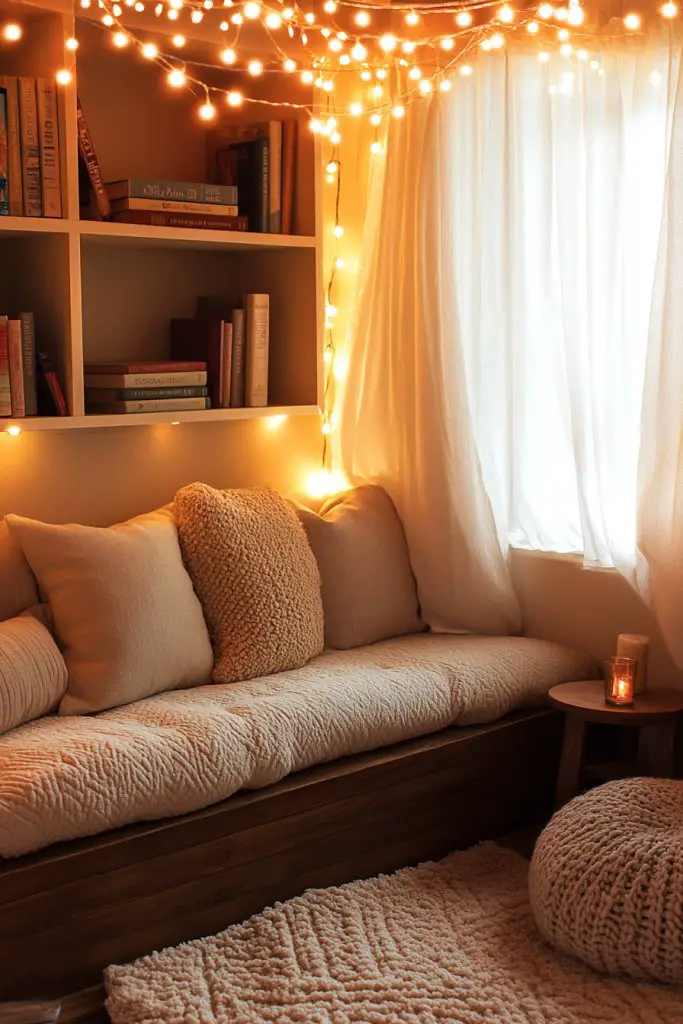
Ever wish for a peaceful corner to escape with a good book? A shared reading nook offers a cozy retreat for both girls, promoting quiet bonding time and a love for reading. It’s the perfect spot to unwind, share stories, or just relax after a busy day. Who says shared spaces can’t be tranquil and inviting?
Recommended Products to replicate this idea
| # | Preview | Product | |
|---|---|---|---|
| 1 |

|
Geetery 12 Pcs Floor Pillows for Classroom Bulk Square Seating Cushions for Floor Chair School... | Buy on Amazon |
| # | Preview | Product | |
|---|---|---|---|
| 1 |

|
Brightown 12 Pack LED Fairy Lights Battery Operated String Lights - 7ft 20LED Waterproof Silver Wire... | Buy on Amazon |
Picture a corner with a plush, oversized cushion or a small sofa layered with colorful throw pillows. String lights hang overhead, casting a warm glow that creates an inviting atmosphere. A shared bookshelf holds favorite books, with some decorative touches like small plush toys or framed quotes nearby. Soft rugs or textured mats define the space, making it feel like a special hideaway in the room. It’s a welcoming, peaceful zone designed for quiet enjoyment.
Choose cushions and pillows in contrasting or matching colors to suit the girls’ styles. Use a small bench or floor cushions for a more casual vibe. Incorporate a lightweight canopy or sheer curtains if privacy or shade is desired. For a seasonal twist, add cozy throws or themed pillow covers. This nook can be adjusted in size or decor to fit different room layouts and personal tastes.
Identify a corner with good natural light or install soft lighting for evening reading. Gather plush cushions, textured rugs, and a small bookshelf or storage unit nearby. Arrange the cushions in a way that invites all to sit comfortably, layering different sizes for visual interest. Hang string lights with clips or hooks, ensuring they’re secure and out of reach of little fingers. Keep the space clutter-free for maximum tranquility. Refresh the decor periodically with new pillows or lighting accents.
Encourage each girl to add her own touches—like a favorite plush or a handwritten quote framed nearby. Use themed pillowcases or textured throws to match the room’s overall vibe. Incorporate personal books or small decorative items that reflect their interests. You could add a small side table or a cozy blanket basket for extra comfort. This personal touch turns a simple nook into a cherished retreat.
A shared reading nook nurtures a love for books and quiet moments, fostering calm and confidence. It’s a perfect space for friendship to blossom over stories and shared adventures. Want to make your room a haven of tranquility? This cozy corner is all about peace, comfort, and connection.
7. Colorful Rug Zones for Play and Conversation

A cluttered room can feel chaotic, making it hard to focus or relax. Creating designated rug zones offers defined spaces for play, chatting, or crafts, making the room more organized and inviting. Plus, a colorful rug instantly brightens up a dull space and adds a touch of personality. Ever wondered how to make a room feel more cohesive and fun?
Recommended Products to replicate this idea
| # | Preview | Product | |
|---|---|---|---|
| 1 |

|
8x10 Area Rugs for Living Room: Floral Washable Rug Vintage Large Soft Boho Non-Slip Carpet Indoor... | Buy on Amazon |
| # | Preview | Product | |
|---|---|---|---|
| 1 |

|
Lahome Abstract Washable Rugs 5x7, Non Slip Soft Living Room Rugs Ultra-Thin Rainbow Bedroom Rug,... | Buy on Amazon |
Visualize a vibrant, plush rug in the center of the room, surrounded by bean bags or low chairs. Different zones are marked with rugs of varying colors or patterns—think a rainbow of hues—each serving a purpose. Soft textures and bold designs invite children to sit and play comfortably. The rugs also define specific activity areas, making it easier to keep toys and craft supplies in their own space. Bright, cheerful colors energize the room and create a lively, welcoming atmosphere.
Mix patterns and colors to suit different personalities—like one zone with geometric shapes, another with floral motifs. Use rugs of different sizes to delineate spaces for games, reading, or quiet time. For seasonal decor, swap out rugs to match holidays or themes—think snowflakes for winter or suns for summer. Incorporate textured or layered rugs for added visual interest and comfort. The key is creating zones that are flexible and fun.
Measure the room carefully to choose appropriately sized rugs for each zone. Place them on a smooth, clean surface and secure with non-slip pads underneath to prevent slipping. Arrange seating or activity areas on each rug, including cushions, small tables, or storage bins nearby. Use bright colors and patterns that complement the room’s decor. Keep the zones tidy by encouraging kids to return toys and supplies after use. Regularly update the rugs to keep the space fresh and lively.
Let kids choose their favorite colors or patterns for their zones. Incorporate themed or character rugs if they have favorites, making each zone feel personal. Add small decorative elements like plush toys or themed cushions on the rugs. For a more sophisticated look, layer rugs with textured edges or borders. This approach helps develop a sense of ownership and makes the space more engaging.
Colorful rug zones turn a chaotic room into a structured, joyful environment. They encourage creativity, organization, and independent play. Seeing designated areas helps children develop routines and responsibility for their space. Want a room that feels lively yet organized? These zones are the perfect solution for playful, harmonious living.
8. DIY Wall Art and Decor Projects
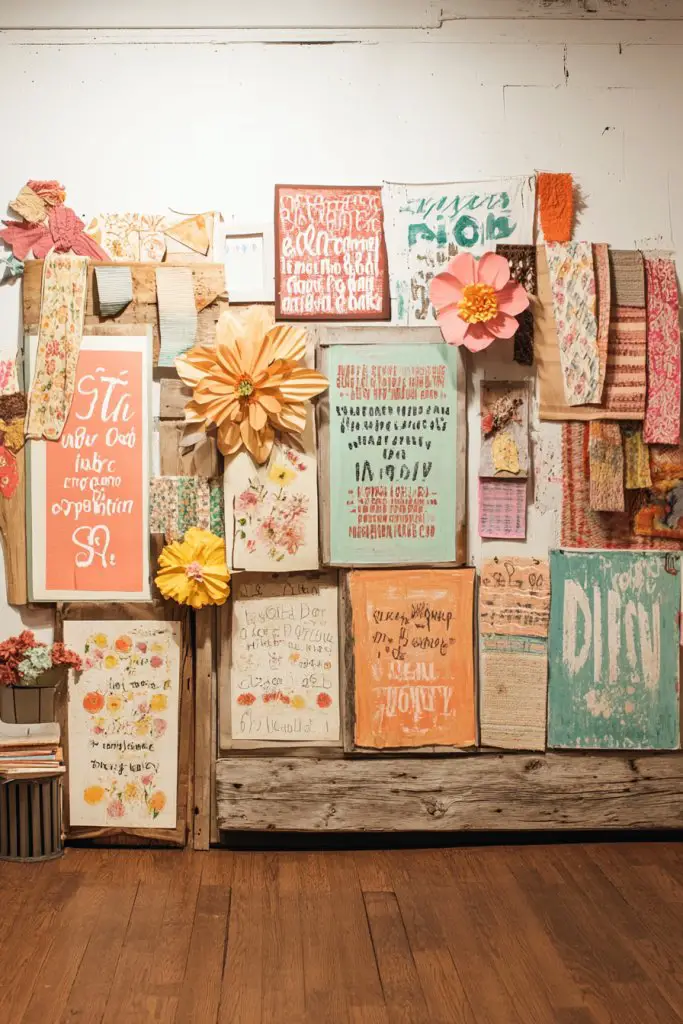
Bored with plain walls? Want a space that reflects personality without breaking the bank? DIY wall art and decor projects let you customize your room with personal touches that are fun to make. They add character and charm, turning a dull space into a creative showcase. Plus, crafting your own decor gives a sense of pride every time you walk in.
Recommended Products to replicate this idea
| # | Preview | Product | |
|---|---|---|---|
| 1 |
|
Biaungdo 6 Pcs Embroidery Hoops Set, Round Wood Embroidery Hoops, Adjustable Bamboo Circle Cross... | Buy on Amazon |
| # | Preview | Product | |
|---|---|---|---|
| 1 |

|
Betem 24 Colors Dual Tip Acrylic Paint Pens Markers, Premium Water-Based Acrylic Paint Markers for... | Buy on Amazon |
Imagine hanging colorful fabric banners, painted signs, or paper flower garlands that you made yourself. Use washi tape or removable adhesive to create geometric patterns or inspiring quotes on the walls. DIY wall art can include painted canvases, personalized name signs, or collaged photo boards. Bright colors and playful shapes make the space lively and cheerful. The finished look combines creativity with a personal story, making the room uniquely yours.
Use different materials—wood, fabric, paper, or even recycled items—to match your style. For a minimalist vibe, stick to monochrome or simple shapes; for boho, use layered textiles and tassels. Change out art seasonally or when tastes evolve. Incorporate elements like painted pallets or washi tape borders for subtle accents. The key is making decor that’s easy to update and reflects your personality.
Gather supplies like paints, brushes, canvases, fabric, and adhesives. Start with simple projects like painted signs or paper flowers and build up to larger wall hangings. Use stencils or freehand designs for added flair. Arrange your art in a balanced layout, mixing large pieces with smaller accents. Secure each piece with removable hooks or command strips to avoid wall damage. Regularly refresh or add new projects to keep the decor fresh.
Encourage each girl to make her own artwork—like painted quotes or handmade mobiles. Customize with favorite colors, motifs, or themes that reflect their hobbies. Incorporate meaningful symbols or initials for a personal touch. Use decorative tape, stickers, or washi strips to add borders or frames. These DIY projects boost creativity and make the room truly one-of-a-kind.
Creating wall art fosters artistic skills and personal expression. It turns the room into a reflection of the girls’ personalities, boosting confidence. Plus, it’s a low-cost way to make big design impacts. Ready to craft your own wall masterpieces? It’s a fun, rewarding project that personalizes your space effortlessly!
9. Modular Bed Frames with Underbed Storage
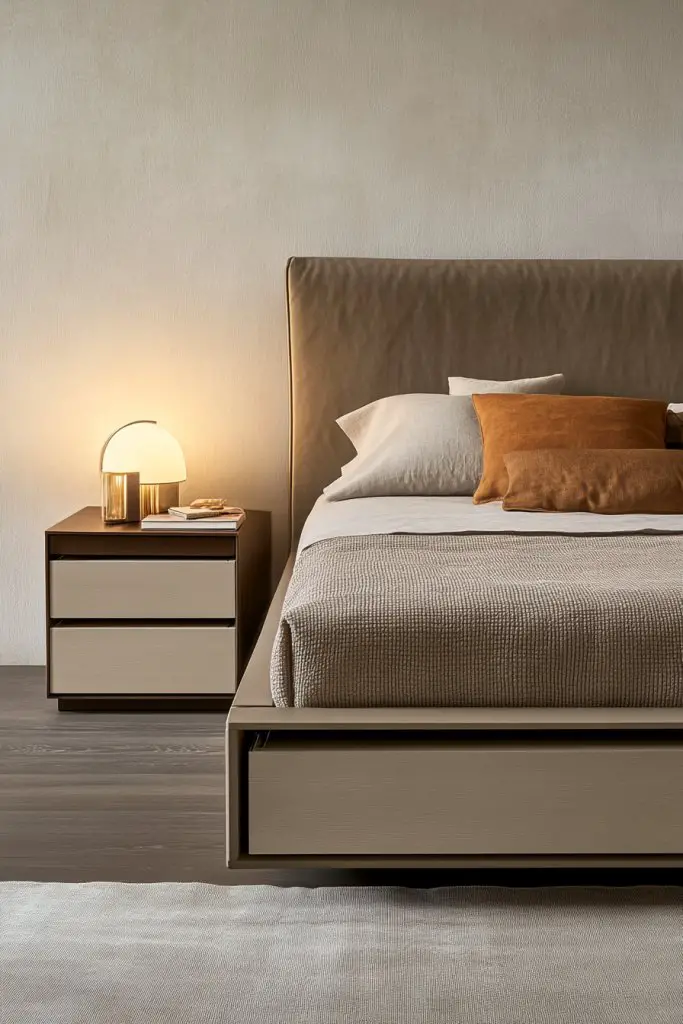
Cluttered bedrooms make it hard to find space for sleep and play. Modular bed frames with built-in underbed storage offer a sleek solution that keeps things tidy without sacrificing style. It’s like having a secret storage compartment directly beneath your bed. Who wouldn’t want a bedroom that’s both functional and fabulous?
Recommended Products to replicate this idea
| # | Preview | Product | |
|---|---|---|---|
| 1 |
|
Queen Bed Frame with 4 Drawers and Storage Headboard, Upholstered Platform Bed Frame Queen Size with... | Buy on Amazon |
| # | Preview | Product | |
|---|---|---|---|
| 1 |

|
Yecaye Under Bed Storage with Wheels, 2Pack Under Bed Storage Containers, Underbed Shoe Storage... | Buy on Amazon |
Picture a modern, minimalistic bed frame with clean lines, topped with cozy bedding and colorful pillows. Underneath, spacious drawers or cubbies hold everything from pajamas to toys. The bed’s design seamlessly integrates storage, making the whole room look uncluttered and stylish. The neutral tones of the frame contrast nicely with cheerful bedding and decor, creating a balanced, inviting space. It’s a clever way to maximize space while keeping the room visually appealing.
Choose from different materials—wood, metal, or composite—to match your decor style. Opt for beds with multiple drawers, open shelves, or a combination of both. For seasonal updates, swap out bedding and add decorative textiles to refresh the look. Smaller rooms benefit from beds that don’t overpower the space, while larger rooms can accommodate larger frames with more storage. The key is balancing comfort with practicality.
Select a sturdy, easy-to-assemble modular bed frame suited for your room size. Ensure the underbed storage compartments are accessible and easy to open. Use organizers or fabric bins inside drawers for better categorization. Attach the bed securely to the frame for safety. Decorate with colorful bedding, and keep the space around the bed clear for easy movement. Regularly tidy the storage areas to maintain order.
Customize the look by painting or staining the bed frame to match the room’s color scheme. Add personal touches like themed bedding, decorative pillows, or DIY headboard accents. Use labels or color-coded bins inside the storage to help the girls find things quickly. Incorporate a small bedside shelf for nighttime essentials—just avoid cluttering the space. It’s all about making the bed both beautiful and practical.
A modular bed with ample storage encourages organization and independence. It makes the room feel bigger and more inviting. Plus, a tidy room boosts mood and makes cleaning easier. Ready to upgrade your sleeping space into a sleek, organized retreat? It’s a smart move for a functional, stylish shared bedroom!
10. Multi-Use Corner for Yoga or Meditation
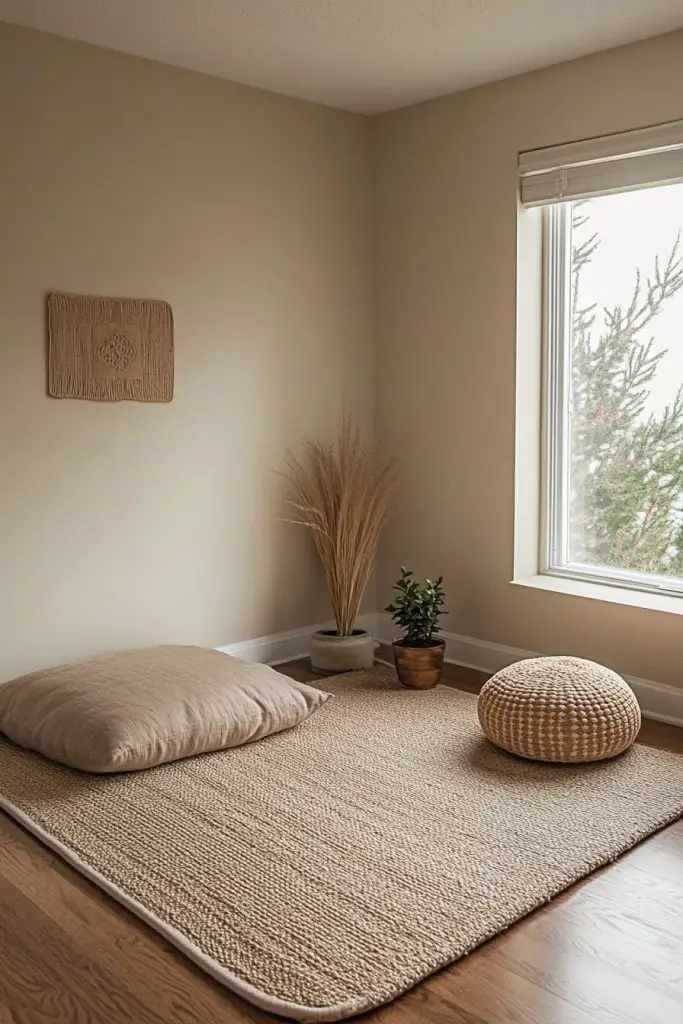
Shared bedrooms are often noisy and busy, leaving little room for calm and mindfulness. Creating a dedicated corner for yoga or meditation offers a peaceful escape to recharge and connect. It’s a simple yet powerful way to promote wellness and friendship through shared relaxation. Who wouldn’t want a tranquil spot in their own room?
Recommended Products to replicate this idea
| # | Preview | Product | |
|---|---|---|---|
| 1 |
|
PAIDU Foldable Fitness Yoga Mat | 2/5" (10MM) Extra Thick | SGS Certified Non-Slip TPE | 76x26"... | Buy on Amazon |
| # | Preview | Product | |
|---|---|---|---|
| 1 |

|
Retrospec Sedona Zafu Meditation Cushion with Buckwheat Hull Fill - Adjustable Yoga & Pilates... | Buy on Amazon |
Visualize a quiet corner with a soft, textured mat or cushion, surrounded by calming decor like soft fabrics in muted tones. Gentle lighting, such as battery-operated candles or dimmable LED lights, creates a relaxing ambiance. A small shelf or basket holds essential oils, calming teas, or meditation guides—without clutter or fragility. The space feels inviting, peaceful, and ready for mindful moments, even in a busy room.
Use calming colors like lavender, mint, or soft gray to enhance relaxation. Incorporate textured textiles like fuzzy throws or woven blankets for comfort. Seasonal changes can include adding cozy elements like fleece blankets in winter or airy fabrics in summer. Portable items like foldable mats or small cushions make it easy to pack up or move the space as needed. The goal is creating a serene, adaptable retreat.
Choose a quiet corner or nook that’s free from distractions. Lay down a comfortable, non-slip yoga mat or cushion. Decorate with calming accents—think soft textiles, simple sculptures, or fabric wall hangings—and avoid fragile or overly decorative elements. Use battery-powered candles or string lights for gentle illumination. Keep essential oils or calming teas within reach, stored in small containers or baskets. Practice mindfulness routines regularly to make it a part of daily life.
Let each girl personalize her meditation space with favorite colors, small sculptures, or meaningful symbols. Add a small plant or natural element if safe—though based on restrictions, opt for faux or decorative items instead. Incorporate a journal or sketchpad nearby for reflection. Use themed or textured blankets for extra comfort. This space becomes a sanctuary for wellness, friendship, and self-care.
A dedicated wellness corner promotes self-awareness and emotional health. It encourages girls to develop healthy habits and support each other’s growth. Sharing peaceful moments builds trust and deepens friendships. Want a room that nurtures both body and mind? This corner makes wellness accessible and inviting anytime!
11. Color-Coordinated Bedding Sets and Accessories
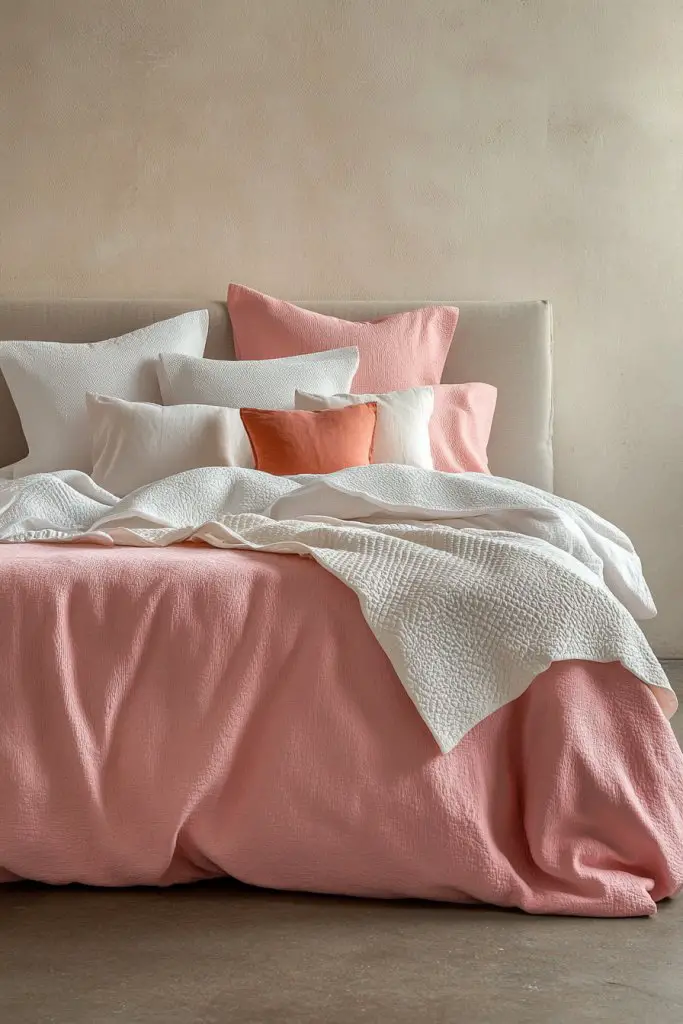
Nothing ties a room together like coordinated bedding, but mismatched sets can make the space look chaotic. Color-coordinated bedding sets and accessories create harmony and a polished look, even in a shared room. It’s an easy way to make the room feel put together without much effort. Who said style has to be complicated?
Recommended Products to replicate this idea
| # | Preview | Product | |
|---|---|---|---|
| 1 |

|
Love's cabin Seersucker Dark Grey Queen Comforter Set, 7-Piece All Season Lightweight Bed in a Bag... | Buy on Amazon |
| # | Preview | Product | |
|---|---|---|---|
| 1 |

|
MIULEE Pack of 2 Corduroy Decorative Throw Pillow Covers 18x18 Inch Soft Boho Striped Pillow Covers... | Buy on Amazon |
Picture two bedding sets in complementary colors—perhaps pastel pink and mint green—layered with matching pillowcases and throws. Add decorative pillows, rugs, and curtains that pick up on the color theme for a cohesive look. The room feels bright, cheerful, and inviting, with every element working together in harmony. This visual consistency makes the room look more spacious and intentional.
Choose bedding with patterns or textures that reflect each girl’s personality—floral, geometric, or plain. Use reversible or interchangeable accessories to vary the look seasonally. Incorporate personalized touches like monogrammed pillowcases or themed throws. For a more subtle approach, select a neutral palette with pops of color through accessories. Make sure each set is easy to wash and durable for everyday use.
Start by selecting a color scheme that suits the room’s overall vibe and each girl’s preferences. Purchase matching or complementary bedding sets, including sheets, comforters, and pillowcases. Coordinate accessories like rugs, curtains, and decorative pillows to enhance the theme. Keep extra sets for easy swaps and cleanings. Use gentle detergents to preserve colors and fabrics. Regularly rotate or refresh accessories to keep the room lively.
Add personalized embroidered initials or motifs to pillowcases or throws. Incorporate favorite characters or patterns that reflect hobbies or interests. Use decorative trims or borders for a custom look. Each girl can choose her own accessories, creating a personalized but harmonious overall aesthetic. This approach encourages ownership and pride.
Coordinated bedding elevates the room’s style and creates a sense of calm and order. It helps the girls feel more confident in their space and proud of their shared environment. A harmonious room fosters positive mood and friendship. Ready to upgrade your bedding game? It’s an easy, impactful way to boost your room’s vibe and your confidence!
12. String Lighted Canopy Over Each Bed
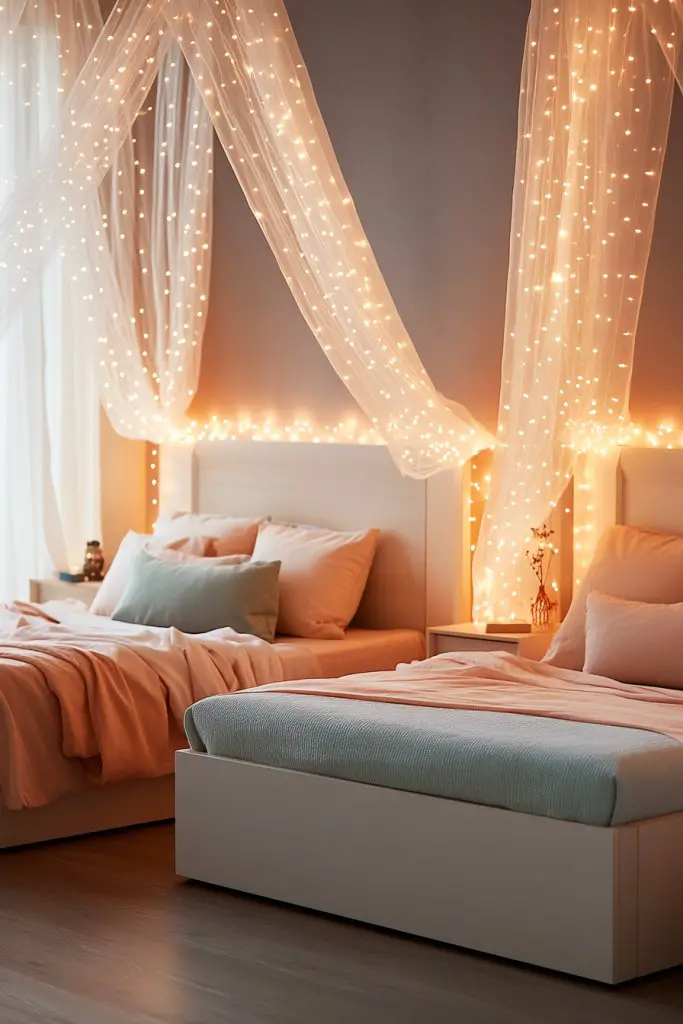
Want to add a touch of magic to your shared bedroom? String lighted canopies over each bed turn ordinary sleeping areas into dreamy retreats. They create a cozy, inviting atmosphere perfect for reading, relaxing, or unwinding. Who doesn’t love a little fairy tale vibe in their own room?
Recommended Products to replicate this idea
| # | Preview | Product | |
|---|---|---|---|
| 1 |
|
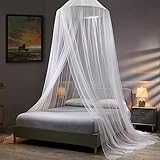
VISATOR Mosquito Net Bed Canopy for Girls,King Canopy Bed Curtains Queen Size from Ceiling,Dome... | Buy on Amazon |
| # | Preview | Product | |
|---|---|---|---|
| 1 |

|
Minetom Fairy Lights Plug in, 33Ft 100 LEDs Waterproof Silver Wire Firefly Lights, Adaptor Included,... | Buy on Amazon |
Visualize delicate fabric draped over the bed frame, with tiny string lights woven into the fabric for a soft glow. The canopy’s sheer material adds a whimsical feel, while the twinkle of lights creates a calming ambiance. The bed looks like a scene from a fairy tale, especially when complemented with plush bedding and decorative pillows. Soft, warm lighting makes it perfect for nighttime stories or late-night chats.
Choose from lightweight, breathable fabrics like tulle or chiffon in favorite colors or patterns. Use battery-operated fairy lights or LED string lights with a timer for safety and convenience. For a more dramatic look, add decorative trims or hanging ornaments—just keep safety in mind. The canopy can be easily removed or repositioned, offering flexibility as tastes or needs change. Seasonal themes can be incorporated with different fabrics or light colors.
Start by attaching ceiling hooks or tension rods above each bed to support the canopy fabric. Drape the fabric evenly around the head or sides of the bed, securing with clips or ties. Weave or clip string lights into the fabric, ensuring they’re out of reach of little fingers. Add decorative pillows or plush toys inside the canopy for a cozy touch. Test the lighting for safety and ease of use, and replace batteries as needed. Regularly tidy and adjust the fabric to keep it looking fresh.
Let each girl choose her favorite fabric and light color for her canopy. Decorate with small charms, fabric flowers, or themed embellishments to personalize. Use removable clips or hooks for easy updates or removal. Incorporate matching bedding or accessories to tie the look together. This dreamy canopy becomes a signature feature and a favorite spot for relaxing or dreaming.
Adding a canopy elevates each bed into a personal sanctuary, fostering comfort and confidence. It turns shared bedrooms into enchanting retreats, inspiring creativity and relaxation. Want to turn your space into a fairy tale? This simple upgrade makes all the difference in creating a magical, cozy environment.
13. Adjustable Partition Screens for Privacy
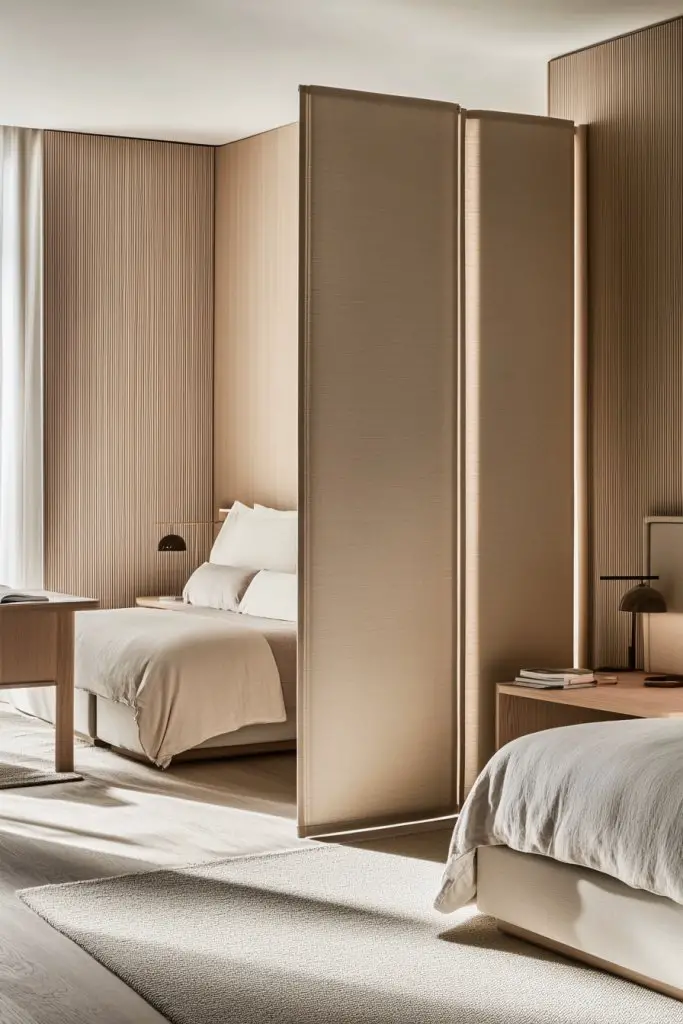
Sharing a room means sacrificing privacy, which can lead to frustration or disagreements. Adjustable partition screens offer a flexible solution that creates personal zones on demand. They help each girl carve out her own space for studying, relaxing, or just having some alone time. Who says you can’t have privacy in a shared space?
Recommended Products to replicate this idea
| # | Preview | Product | |
|---|---|---|---|
| 1 |

|
SUNALLY Room Divider 6FT Folding Privacy Screens with Lockable Wheels, 4 Panel Room Partition for... | Buy on Amazon |
| # | Preview | Product | |
|---|---|---|---|
| 1 |
|
Strongbird Room Partition,Folding Privacy Divider,Office Partition Dividers,Office Dividers Wall,... | Buy on Amazon |
Imagine lightweight, foldable fabric screens or panels that can be moved or angled as needed. These screens can be decorated with colorful fabric, decals, or simple patterns. When open, they blend into the room; when closed, they create a cozy, private nook. The screens can be positioned to block out light or noise, making each zone more peaceful. They’re easy to move, store, or customize to suit mood and needs.
Choose from different materials—opaque fabrics for privacy or transparent mesh for openness. Use colorful or patterned fabrics to match the room’s decor or personal tastes. Opt for foldable or retractable designs to save space when not in use. Seasonal or mood-based changes are simple—just swap out fabrics or decorations. These screens adapt well to different room sizes and layouts.
Install lightweight frames or use tension rods to support the screens, avoiding wall damage. Attach fabric panels with clips, hooks, or ties—making them easy to change or remove. Position screens around beds or in corners for maximum privacy. Use fabric with a calming color or pattern to promote relaxation. Regularly clean or update the fabric to keep the space fresh and inviting.
Let each girl choose her favorite fabric or pattern for her privacy screen. Decorate with removable decals, ribbons, or fabric trims to reflect personality. Incorporate small pockets or hooks on the screens for personal items or accessories. Use matching or contrasting colors to complement the room’s decor. Customization makes each zone feel truly personal and functional.
Adjustable screens foster independence and respect for personal space. They help girls feel more comfortable and in control of their environment. The privacy zones strengthen friendship boundaries while still sharing a room. Want a flexible, easy way to add privacy? These screens are your answer to a happier, more harmonious shared space!
14. Creative DIY Headboards with Personal Flair
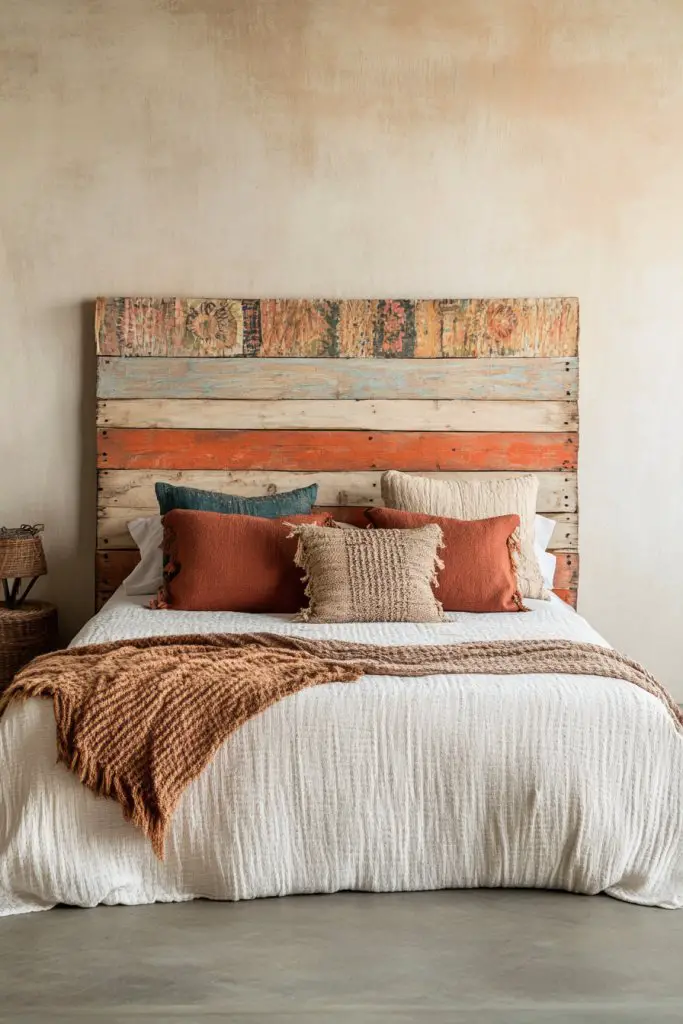
A plain bed can feel uninspired, but a personalized headboard instantly elevates the entire room. DIY headboards allow you to showcase personality and style without paying a fortune. They’re a fun project that adds character and makes the bed the room’s focal point. Who says you need store-bought when you can craft your own?
Recommended Products to replicate this idea
| # | Preview | Product | |
|---|---|---|---|
| 1 |

|
GoTo Foam 1" Height x 24" Width x 72" Length 44ILD (Firm) Upholstery Cushion Made in USA | Buy on Amazon |
| # | Preview | Product | |
|---|---|---|---|
| 1 |

|
Unique Craft Upholstery Repair Tufting Needle and Thread Kit. 4 Heavy Duty Long Button Tufting... | Buy on Amazon |
Picture a headboard made from painted pallets, upholstered fabric panels, or decorated with decals and patterns. Bright colors, playful shapes, or even textured materials like cork or felt add visual interest. The headboard becomes a statement piece, reflecting each girl’s taste—be it whimsical, modern, or boho. It ties the room together, turning a simple sleeping area into a showcase of creativity.
Use different materials—wood, foam boards, textiles, or recycled items—to match your style. Embellish with fabric, paint, or decorative trims for added flair. For seasonal updates, change colors or motifs easily—think floral in spring, bold in fall. Keep the size proportional to the bed, ensuring comfort and safety. Combining multiple styles creates a layered, personalized look.
Start by choosing a headboard base—wooden pallets, foam boards, or fabric-covered panels. Paint or decorate with stickers, fabric, or decoupage techniques. Secure the headboard to the wall or bed frame with brackets, hooks, or adhesive strips—no damage needed. Add decorative elements like faux flowers, fabric rosettes, or painted motifs. Ensure all attachments are secure and safe for daily use. Regularly update or repaint to keep it fresh.
Encourage each girl to decorate her headboard with favorite colors, patterns, or motifs. Use DIY techniques like stenciling, stamping, or fabric appliqué. Incorporate personal symbols or initials for a special touch. Mix textures and finishes for a unique look—smooth, rough, shiny, or matte. This project creates a meaningful focal point that celebrates individuality.
A DIY headboard boosts confidence by showcasing personal style and effort. It turns the bed into a centerpiece of self-expression. Plus, it’s a fun, creative project that builds skills and pride. Want to add a truly personal touch to your room? Building your own headboard is a rewarding way to do it!
15. Fun Themed Storage Bins for Toys and Accessories
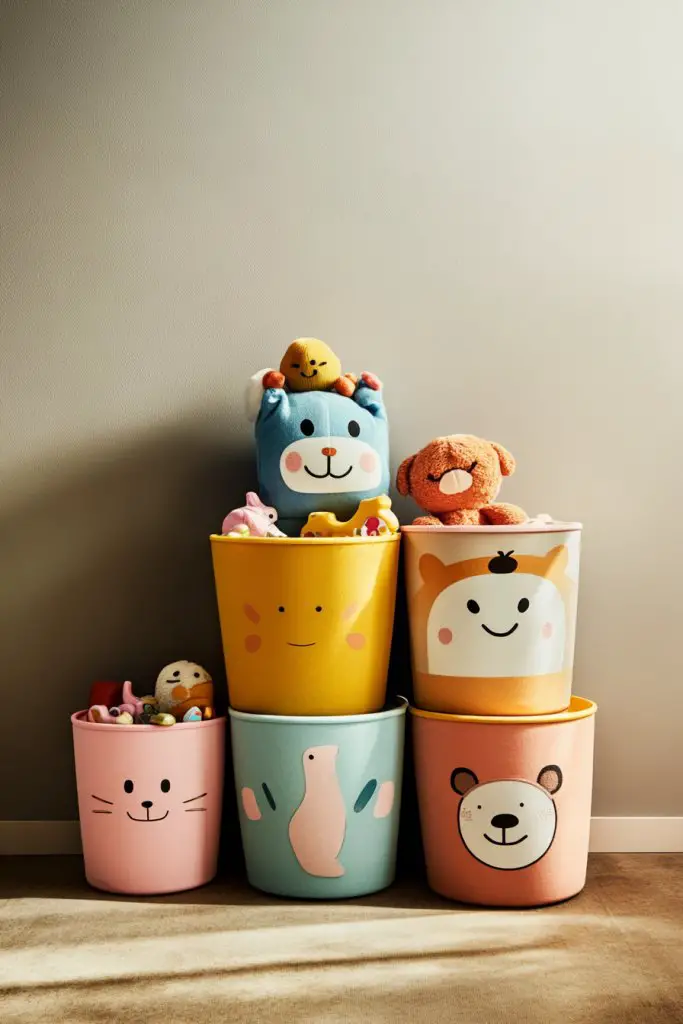
Keeping toys and accessories organized is a constant struggle, especially in shared bedrooms. Themed storage bins make tidying up more fun and visually appealing. They help keep clutter in check while adding a splash of personality. Who says storage can’t be cute?
Recommended Products to replicate this idea
| # | Preview | Product | |
|---|---|---|---|
| 1 |

|
3 Pack Large Capacity Storage Bins Closet Organizer for Shelves, Fabric Closet Storage Baskets Boxes... | Buy on Amazon |
| # | Preview | Product | |
|---|---|---|---|
| 1 |
|
AWTATOS Cube Storage Organizer Storage 12 Cube Bookshelf DIY Plastic Closet Clothes Storage Shelves... | Buy on Amazon |
Imagine brightly colored fabric bins decorated with stickers, labels, or patterns matching the room’s theme—like unicorns, stars, or animals. They sit neatly on shelves or under beds, easily accessible but out of sight when not in use. Clear labels or cut-out shapes make it easy for each girl to find her stuff. The cheerful visuals turn storage into part of the decor, making organization feel less like a chore.
Use different shapes, sizes, and designs to suit various needs—small bins for jewelry, larger ones for toys. Decorate with themed stickers, fabric covers, or painted labels. Change out covers seasonally or for special occasions—think Halloween or birthday themes. Incorporate labels in playful fonts or with icons to help younger kids identify contents easily. The key is making storage both functional and fun.
Choose bins made of durable fabric, plastic, or woven materials that are easy to clean. Label each bin clearly with stickers or painted tags—preferably removable for updates. Organize by category—clothes, craft supplies, toys—and place on open shelves or inside closets. Use matching or contrasting colors to coordinate with the room’s decor. Regularly sort and refresh the contents to maintain order. Keep the design playful and simple to encourage use.
Let each girl decorate her bins with favorite characters, stickers, or fabric covers. Personalize labels with her name or icons that reflect her hobbies. Incorporate decorative trim or appliqué for extra flair. Use themed covers or fabric that matches room decor to unify the look. This not only keeps things tidy but also reinforces ownership and pride.
Fun, themed storage bins make tidying up a game, encouraging responsibility and independence. They turn organization into a creative activity, boosting confidence. Seeing a neat, colorful space inspires pride and promotes positive habits. Want to make storage part of the fun? These playful bins are your best bet!
16. Collaborative DIY Wall Calendar or Chore Chart
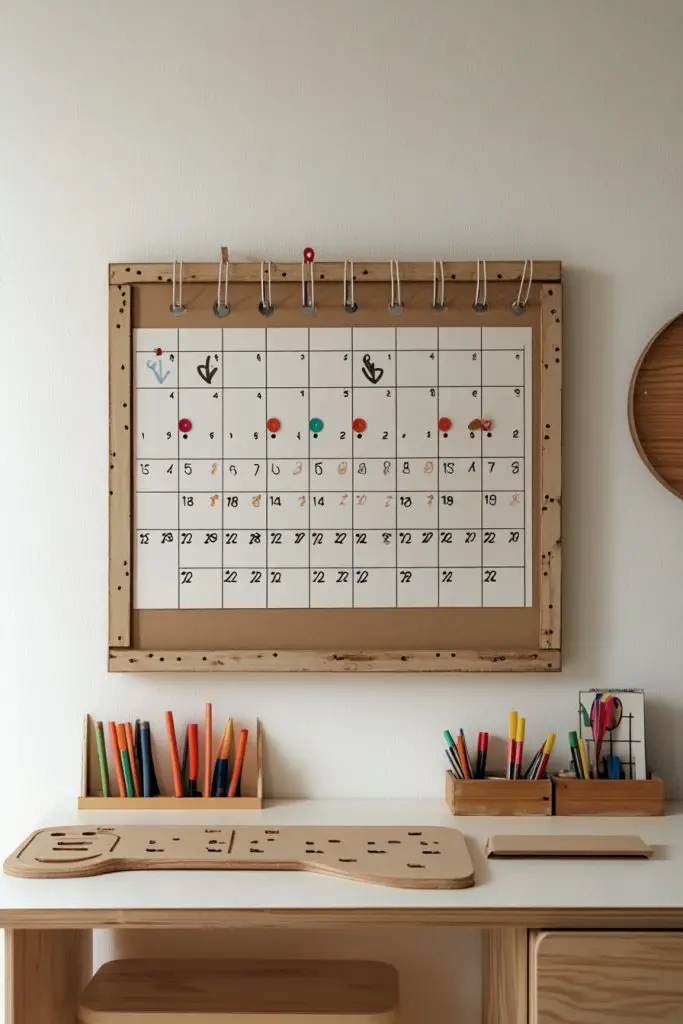
Keeping track of routines and chores in a shared room can lead to forgetfulness or disagreements. A collaborative DIY wall calendar or chore chart promotes teamwork and responsibility. It’s a visual way to organize everyone’s schedule and encourage cooperation. Plus, it’s a fun craft project that everyone can personalize!
Recommended Products to replicate this idea
| # | Preview | Product | |
|---|---|---|---|
| 1 |

|
Calendar Whiteboard for Wall, TANKEE 17x13 Inches Whiteboard Calendar Cork Board Combo, Small... | Buy on Amazon |
| # | Preview | Product | |
|---|---|---|---|
| 1 |

|
Magnetic Dry Erase Chore Chart - 14.5"x11" Chore Chart for Kids, Teens and Adults - 6.5"x8.5" List... | Buy on Amazon |
Imagine a colorful, hand-made calendar with spaces for each day, decorated with drawings, stickers, or painted icons. Or a chore chart with removable magnets or clips, each labeled with tasks like making beds or tidying up. Bright colors and playful fonts make the chart inviting and easy to read. It becomes a central feature on the wall that motivates everyone to stay on track. The visual cues make routines feel less like chores and more like shared goals.
Create a monthly calendar with DIY embellishments—think hand-painted borders or themed stickers. For chores, use magnetic or Velcro-backed cards for flexibility and easy updates. Incorporate reward systems with stars or stickers for motivation. Seasonal themes or special occasion decorations can make it more engaging. Adjust the size and layout based on the room’s space and the number of chores or activities.
Gather supplies like poster board, markers, stickers, and magnet or Velcro strips. Design a grid layout for the calendar or a list format for chores. Decorate with drawings, color coding, or themed elements to match the room. Attach the calendar or chart to the wall with removable adhesive strips or hooks. Set up a system for updating daily or weekly, involving the girls in maintaining it. Celebrate completed chores to build positive habits.
Let each girl decorate her section with drawings, stickers, or colors that reflect her personality. Use custom labels or icons for different chores to make them fun and clear. Incorporate motivational quotes or rewards to encourage participation. Add special sections for upcoming events or goals, making it a dynamic, evolving project. This shared chart becomes a team effort and accountability tool.
A collaborative chore chart teaches responsibility and teamwork, boosting confidence. It shows the girls that working together makes life easier and more fun. Celebrating small wins fosters pride and independence. Want a simple way to keep everyone on the same page? This DIY project is both practical and personal—perfect for a happy shared space!
Conclusion
These girls’ shared bedroom ideas showcase a delightful mix of colors, themes, and clever design tricks that can turn any room into a fun-filled haven. From playful bunk beds to personalized wall art, each idea encourages friendship and self-expression. Don’t hesitate to try out these inspiring tips—your perfect shared space is just a creative step away! Embrace the fun, and watch your girls’ bedroom become a cherished retreat full of laughter and love.
Last update on 2026-02-12 / Affiliate links / Images from Amazon Product Advertising API