Imagine stepping into a lush, green oasis right in your own backyard or even indoors—greenhouses make this dream a reality! Their popularity has soared because they provide a controlled environment, allowing gardeners to grow plants year-round regardless of the weather outside.
In this article, you’ll uncover a variety of innovative and practical greenhouse ideas that suit different spaces and styles. Whether you’re a beginner or an experienced gardener, these ideas will inspire you to enhance your gardening experience, boost productivity, and create a beautiful, functional space that reflects your personal taste.
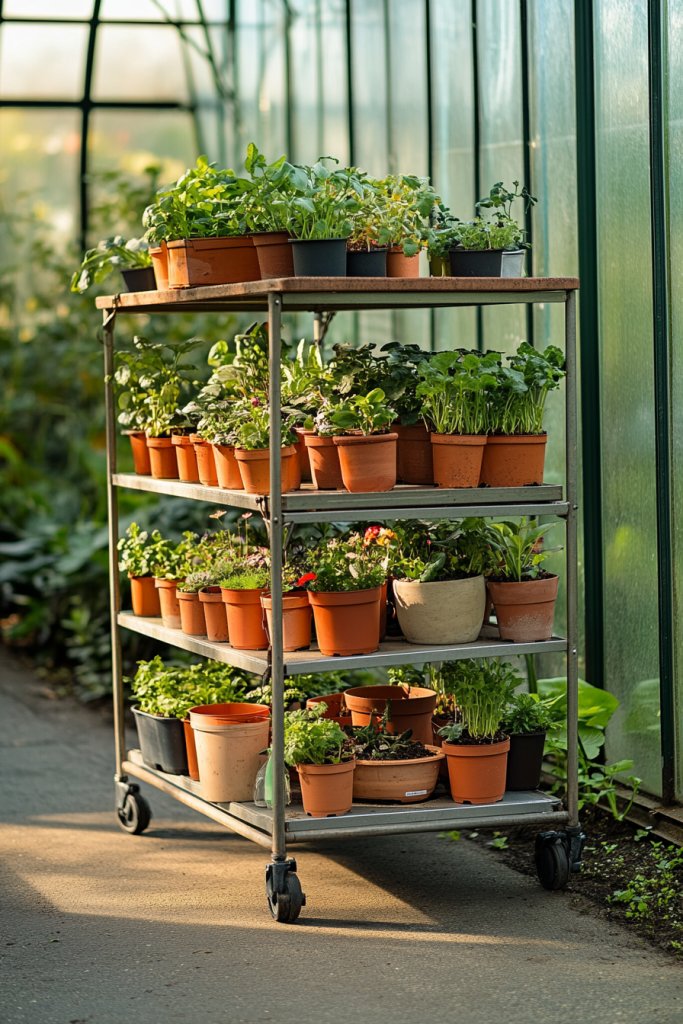
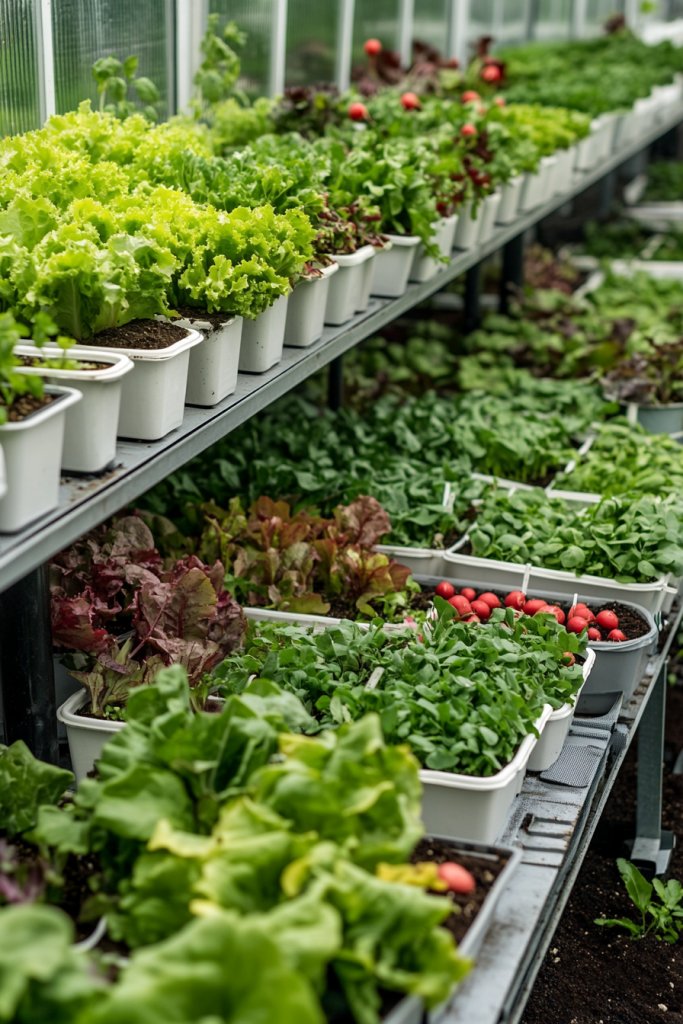
1. Tiered Plant Stands for Maximized Space
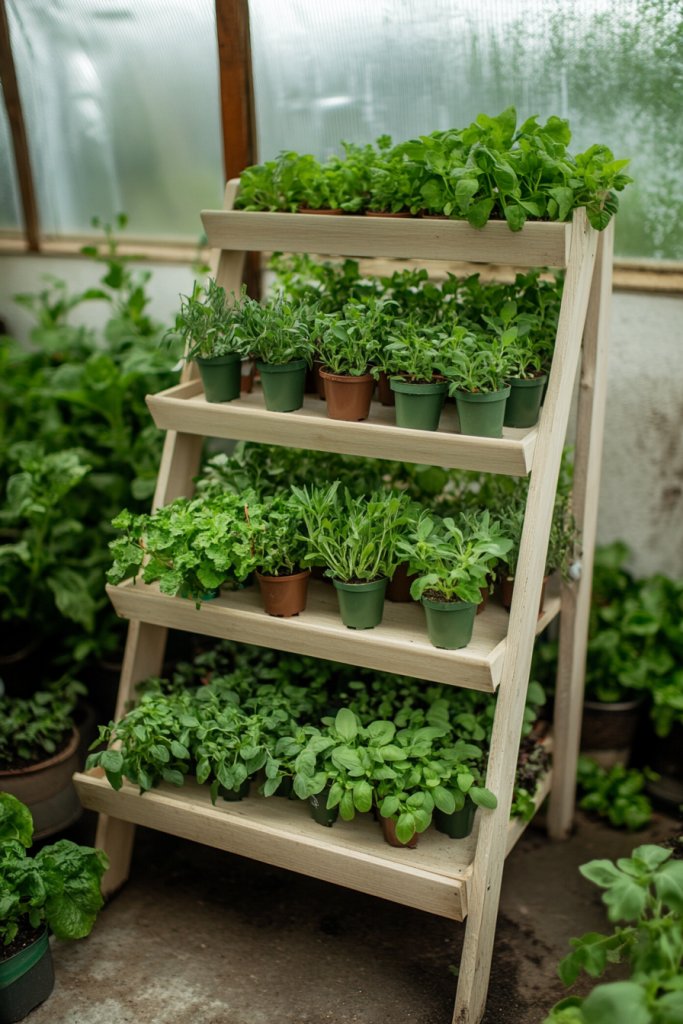
Limited space in a greenhouse can feel like a nightmare, especially when you want to grow a variety of herbs and small vegetables. Finding a way to fit everything without clutter is a constant challenge for passionate gardeners. The desire to maximize every inch while keeping things accessible is real. Nobody wants their greenhouse to look like a chaotic jungle, right?
Recommended Products to replicate this idea
| # | Preview | Product | |
|---|---|---|---|
| 1 |

|
Bamworld Tall Plant Stand Indoor Outdoor, Corner Metal Flower Pot Stands for Multiple Plants, 4 Tier... | Buy on Amazon |
| # | Preview | Product | |
|---|---|---|---|
| 1 |

|
Simple Trending 3 Tier Metal Plant Stand Outdoor Indoor Waterproof, Stackable Heavy Duty Tall Plant... | Buy on Amazon |
Imagine sleek, multi-level shelves made from reclaimed wood or metal, stacked vertically against a sunny wall. Herbs flourish on different tiers, their fragrant leaves catching the light. Small potted veggies like cherry tomatoes or radishes sit neatly on each level, making the most of limited space. The textured wood or smooth metal adds a modern yet rustic vibe, turning clutter into organized charm. It’s like a mini urban farm right in your own greenhouse corner.
You can customize these stands with different finishes—rustic reclaimed wood for a farmhouse look or sleek powder-coated metal for a modern feel. Adjust the height and number of tiers based on your crop size and plant type. During colder months, add protective coverings or use foldable designs to save space. For small spaces, stack the units vertically or mount them on walls, freeing up floor area. Seasonal adaptations like removable trays or adjustable shelves can make the setup even more versatile.
Start by measuring your available space and deciding how many tiers you want. Use sturdy materials like treated wood or galvanized steel to withstand humidity. Secure the shelves with brackets or heavy-duty screws, ensuring stability. For added durability, seal the wood or powder-coat the metal. Arrange your potted plants with enough room for growth and air circulation. Regularly check the stability and clean off dust or debris, maintaining both form and function. DIY kits are available if you prefer a quick setup.
Paint or stain the shelves in your favorite colors to match your greenhouse aesthetic. Add decorative elements like small hooks for tools or hanging planters for trailing herbs. Incorporate labels made from chalkboard paint or engraved wood for easy plant identification. Personal touches like fairy lights or miniature sculptures can turn your plant stand into a focal point. Mix and match materials for an eclectic, personalized look that reflects your style.
A tiered stand transforms a cluttered corner into an organized oasis, making gardening more enjoyable. It’s a simple upgrade that boosts productivity and satisfaction. Once set up, you’ll wonder how you ever managed without this smart storage solution. Your greenhouse will look more professional and inviting, inspiring you to grow even more. Ready to turn your limited space into a lush, organized paradise?
2. Custom DIY Drip Irrigation System
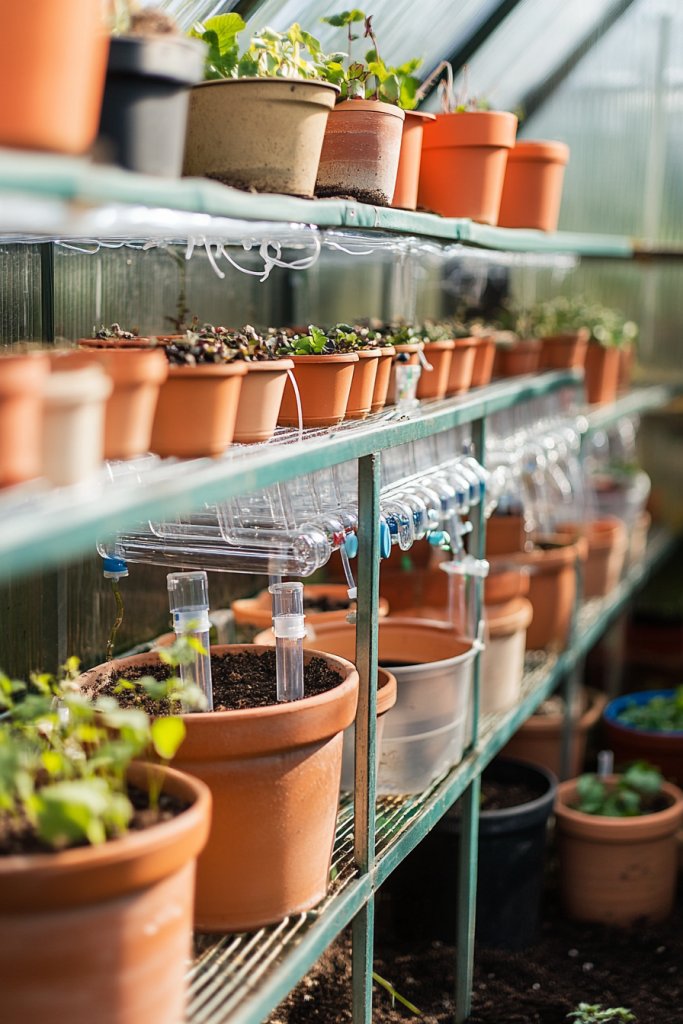
Manually watering your greenhouse plants every day can feel like a chore, especially when you have a busy schedule or a large setup. Overwatering or underwatering becomes a real concern, risking plant health and wasting precious water. The dream is to have an easy, reliable system that keeps plants consistently moist without constant attention. Who wouldn’t want that?
Recommended Products to replicate this idea
| # | Preview | Product | |
|---|---|---|---|
| 1 |

|
CARPATHEN Drip Irrigation System Kit - Complete Premium Garden Watering System with Adjustable... | Buy on Amazon |
| # | Preview | Product | |
|---|---|---|---|
| 1 |

|
Insoma Outdoor Garden Hose Faucet Timers, Programmable Water Sprinkler Timer with Rain... | Buy on Amazon |
Picture a network of thin, flexible tubing snaking through your greenhouse, delivering water directly to each pot or bed. Tiny drippers or emitters are attached at strategic points, releasing a gentle stream of moisture. A simple timer connected to a power source automates the process, ensuring your plants get just the right amount of water at the right time. The setup is discreet, almost invisible, blending seamlessly into your gardening routine. The soft hum of the timer becomes a calming background noise.
Choose from different tubing materials—black polyethylene for durability or clear plastic for visibility. Install adjustable drippers for different plant needs, like more water for thirsty veggies or less for succulents. For larger setups, create zones with separate timers or watering schedules. During colder months, insulate the tubing to prevent freezing. You can also incorporate rain sensors or moisture monitors for added automation, making the system even smarter.
Begin by mapping out your greenhouse layout and deciding which plants need watering and how often. Purchase a basic drip irrigation kit, including tubing, connectors, emitters, and a timer. Install the mainline from your water source, then branch out to individual pots or beds. Secure tubing with clips or stakes, ensuring it stays in place. Adjust the drippers to deliver the desired flow rate, then set your timer for optimal watering times. Regular checks and maintenance will keep the system running smoothly, preventing clogs or leaks.
Label zones or sections with weatherproof tags for easy monitoring. Incorporate a rain barrel to collect rainwater and connect it to your system, making watering more sustainable. Use different emitter types for varied plant needs—spray nozzles for seedlings, drip emitters for mature plants. Add a manual override or a portable hose attachment for flexibility during emergencies or special watering needs. Personalize your system with color-coded tubing or decorative stakes for a fun touch.
A DIY drip irrigation system reduces your daily watering hassle and conserves water, which is a win-win. It gives you peace of mind knowing your plants receive consistent moisture, leading to healthier growth. Plus, it’s a satisfying project that saves you time and effort long-term. Once installed, you’ll feel like a true gardening tech wizard. Ready to let automation do the hard work?
3. Modular Grow Wall with Recycled Pallets
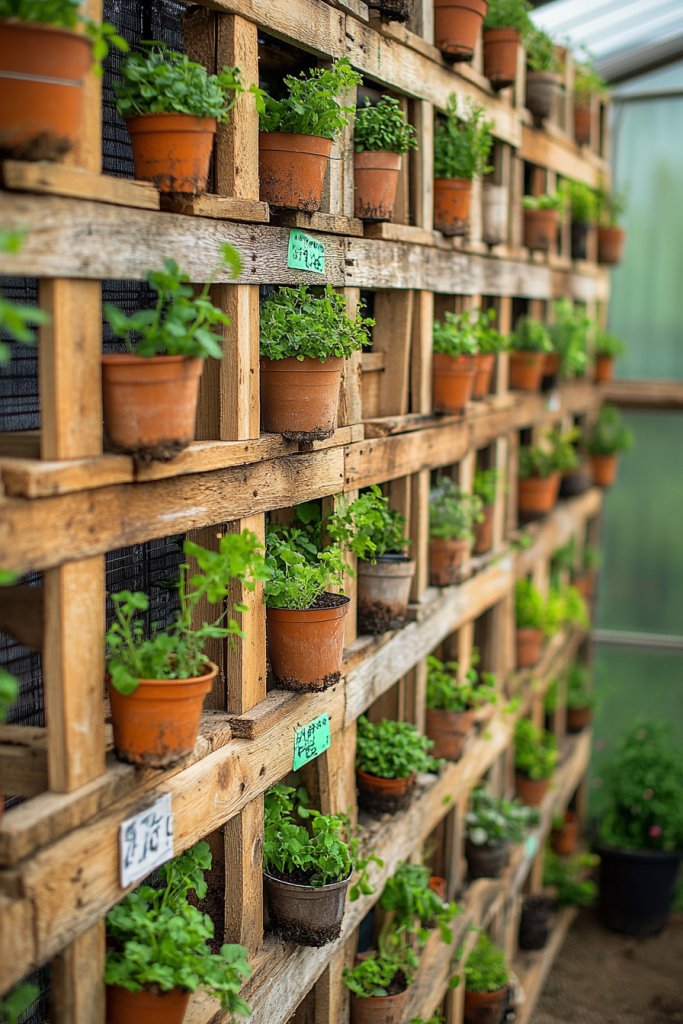
Limited wall space in your greenhouse can feel wasted when you’re just using it for hanging tools or sparse decor. The desire to turn vertical surfaces into productive green areas is strong, especially for small-scale growers. Creating a modular grow wall from recycled pallets is an eco-friendly way to maximize space and grow more plants. Who wouldn’t want a lush, living wall?
Recommended Products to replicate this idea
| # | Preview | Product | |
|---|---|---|---|
| 1 |
|
LaLaGreen Wood Planter Box for Plants (8 Pack) Wooden Wall Hanging Planters for Indoor Plant Holder... | Buy on Amazon |
| # | Preview | Product | |
|---|---|---|---|
| 1 |
|
Ogrmar 36 Pockets Vertical Wall Garden Planter Plant Grow Bag for Flower Vegetable for... | Buy on Amazon |
Imagine a sturdy wooden pallet mounted on your greenhouse wall, filled with small pots or directly planted with herbs, lettuces, or succulents. The rough, rustic texture of the pallet provides a charming backdrop for a vibrant array of greenery. Pockets or containers are attached securely, allowing for easy planting and maintenance. The design creates a layered, textured visual that adds character and life to your space. Light filters through the gaps, enhancing airflow and creating a dynamic environment.
Choose pallets with slats spaced to hold containers snugly or add custom fabric or mesh pockets for a tailored look. Paint or stain the wood to match your aesthetic—bright colors for a cheerful vibe or natural tones for a rustic feel. Incorporate adjustable hooks or brackets to change plant arrangements seasonally. For small spaces, build a multi-panel setup that can be expanded or moved. Use waterproof sealants to extend the lifespan of recycled pallets.
Start by sourcing sturdy, untreated pallets—preferably from local sources or salvage yards. Clean and sand the wood to remove splinters. Attach the pallet securely to a wall using heavy-duty anchors or brackets. Create planting pockets with fabric or attach individual containers, ensuring they are water-resistant. Plant your chosen greenery, considering sunlight and watering needs. Regularly check the stability and replace or rearrange plants as needed, keeping the wall fresh and functional.
Decorate the pallet with stenciled designs or natural stains for a personalized touch. Add small labels or tags made from reclaimed wood or chalkboard paint for easy identification. Mix in decorative elements like fairy lights or small sculptures that don’t interfere with plant growth. For a more artistic look, incorporate decorative stones or pebbles around the plants. Use plant supports or trellises attached directly to the wall for climbing varieties.
A grow wall made from recycled pallets is a sustainable, space-saving solution that also adds a rustic charm. It’s a practical way to grow fresh herbs and greens while making a statement. Once in place, it becomes a conversation starter and a source of daily inspiration. You’ll feel more connected to your plants and your environment, all while doing your part for the planet. Ready to build your living wall?
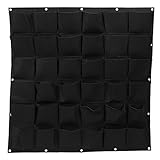
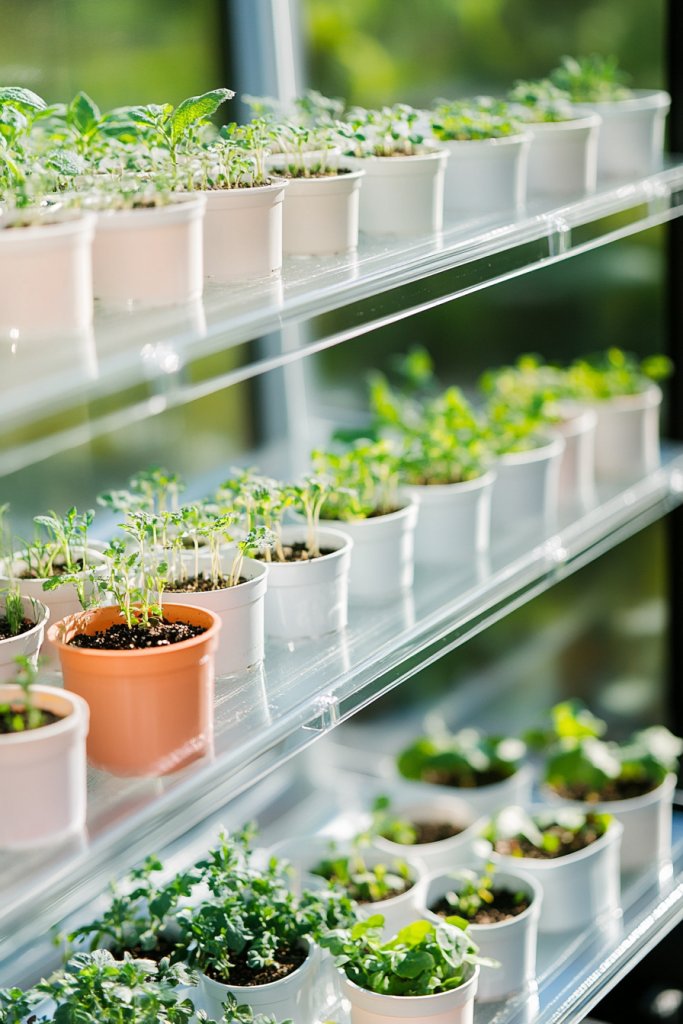
4. Use of Clear Acrylic Shelving for Easy Viewing
Finding it hard to keep track of your tiny seedlings or delicate herbs? Traditional shelving can hide your precious plants behind opaque surfaces, making it hard to monitor their growth. The solution? Clear acrylic shelves that showcase your greenery while keeping everything visible at a glance. It’s like giving your plants a spotlight.
Recommended Products to replicate this idea
| # | Preview | Product | |
|---|---|---|---|
| 1 |

|
ZerzSemp 4-Tier Hanging Clear Plant Shelves for Windows, Acrylic Window Wall Plant Stand Shelf for... | Buy on Amazon |
| # | Preview | Product | |
|---|---|---|---|
| 1 |

|
upsimples Acrylic Shelves for Bathroom Storage, 15" Floating Shelves Wall Organizer for Perfume,... | Buy on Amazon |
Visualize transparent shelves mounted at different heights, allowing sunlight to pass through and bathe your plants in light. The sleek acrylic material blends seamlessly with any decor, creating a modern, minimalist vibe. Plants sit in simple pots or containers, their vibrant leaves and colors on full display. The shelves’ clean lines make the setup look neat and uncluttered, emphasizing the beauty of each plant. You can even see water levels and soil conditions without bending down.
Choose from different thicknesses and edge finishes to match your aesthetic—smoky tinted acrylic for a moody look or crystal-clear for brightness. Mount shelves with adjustable brackets to vary heights or add small hooks for hanging items. For seasonal changes, swap out containers or rearrange the shelves quickly. Consider incorporating built-in LED strips or indirect lighting to enhance visibility without adding bulky fixtures.
Select high-quality, shatter-resistant acrylic sheets and cut them to your desired lengths. Drill mounting holes carefully, then attach using wall anchors and screws designed for your wall type. Place your pots or planters directly on the shelves, ensuring they are stable. Regularly clean the acrylic with a soft cloth to keep it transparent and free of dust. For added safety, reinforce the edges or use rounded corners. This setup requires minimal maintenance but offers maximum visual impact.
Add decorative elements like colored LED backlights or fiber optics for a futuristic look. Use decorative plant labels or engraved acrylic tags for a sleek, uniform appearance. Incorporate small storage compartments or drawers underneath for tools and accessories. Personalize the setup further with painted or frosted accents on the acrylic to match your interior style. Keep the display neat and inviting, inspiring continual care.
Clear acrylic shelving transforms your greenhouse into a gallery of thriving plants, making maintenance easier and more enjoyable. It encourages constant engagement, helping you spot problems early. Plus, it gives your space a polished, professional feel. Once installed, you’ll feel proud of your smart, stylish display. Ready to make your plants the star of your greenhouse?
5. Incorporation of Self-Watering Containers
Ever gone on vacation or just forgot to water your plants? Nothing kills the mood faster than dry, wilting greens when you return. Self-watering containers promise a hands-off approach that keeps your plants consistently hydrated. It’s perfect for busy schedules or forgetful gardeners alike. Who wouldn’t want that peace of mind?
Recommended Products to replicate this idea
| # | Preview | Product | |
|---|---|---|---|
| 1 |

|
YNNICO Indoor Self Watering Planters with Drainage Holes and Saucers, 8, 7, 6.5, 6, 5.5, 5 Inches,... | Buy on Amazon |
| # | Preview | Product | |
|---|---|---|---|
| 1 |

|
Plant Watering Globes Set of 6 - Small Glass Self Watering Bulbs Up to 5 Days of Irrigation - for... | Buy on Amazon |
Picture stylish pots with built-in reservoirs, subtly integrated into your greenhouse setup. These containers have a water level indicator, so you always know when to refill. The soil stays moist without overwatering, thanks to capillary action that draws water upward. Plants look healthy, vibrant, and well-cared-for, even if you’re away for a few days. The design is sleek, often with decorative exteriors that blend into your aesthetic.
Choose from various sizes and shapes—round, square, or rectangular—to fit your space. Some models come with smart sensors that automatically refill from a connected water source. For a more rustic look, DIY self-watering systems can be created using recycled containers or planters with wicks. During winter, insulate reservoirs or bring them indoors to prevent freezing. Use color-coding or labels for different watering needs to stay organized.
Pick containers with high-quality, leak-proof reservoirs and wicks made from absorbent materials. Install the containers in your preferred spots, ensuring they sit level. Fill the reservoirs with water, then plant your chosen greens in the soil or growing medium. Regularly check water levels and top up as needed. For larger setups, consider integrating a gravity-fed system connected to a main water source. This setup minimizes effort and maximizes plant health.
Decorate containers with paint, stencils, or decorative stones to match your greenhouse decor. Label each pot with its watering schedule or plant type for easy management. Incorporate timers or moisture sensors for an even smarter system. Use eco-friendly, biodegradable wicks to enhance sustainability. Personal touches like patterned or textured containers make the experience more fun and engaging.
Self-watering containers bring peace of mind and reduce daily chores, freeing you to enjoy your gardening hobby more. They promote healthier plants with less effort, especially during busy or stressful periods. Once set up, you’ll feel like a gardening genius, turning a simple concept into a reliable routine. It’s a small change with a big impact—are you ready to upgrade?
6. Climate-Responsive Ventilation Solutions

Temperature and humidity swings can turn your greenhouse into a stress zone for your plants. Overheating during summer or stagnation during winter hampers growth and can invite pests or diseases. The goal is to create a climate-responsive system that keeps conditions stable. Who wants to constantly fiddle with vents and fans? Not me.
Recommended Products to replicate this idea
| # | Preview | Product | |
|---|---|---|---|
| 1 |

|
2X Auto Vent Opener Solar Automatic Window Opener for Greenhouse Heat Sensitive Roof Vent Opener... | Buy on Amazon |
| # | Preview | Product | |
|---|---|---|---|
| 1 |

|
iLIVING 12" Wall Mounted Shutter Exhaust Fan, Automatic Shutter, with Thermostat and Variable Speed... | Buy on Amazon |
Envision adjustable vents installed on roof and side panels that open and close automatically based on temperature. Small exhaust fans or ridge vents work in tandem to expel hot, humid air, drawing in fresh air from outside. Sensors monitor temperature and humidity, triggering the system as needed. The airflow creates a gentle breeze, cooling or heating your plants naturally. The setup looks sleek, almost like a smart, breathing organism.
Opt for manual vents with dampers for budget-friendly setups or automated systems with electronic sensors for high tech. During colder months, install insulated panels or use removable shade cloths to prevent heat loss. For larger greenhouses, consider zone-specific controls to tailor conditions to different plant groups. Deploying small exhaust fans or oscillating fans can improve air circulation further. Seasonal adjustments, like closing vents during winter or opening during summer, help maintain optimal conditions.
Identify hot spots and areas prone to humidity buildup. Choose vents with adjustable dampers or motorized actuators for automation. Install sensors in key zones to monitor temperature and humidity levels regularly. Connect vents and fans to a control system or smart controller for automatic operation. Test the system during different weather conditions to calibrate settings. Regular maintenance, like cleaning filters and checking sensors, ensures consistent performance.
Add decorative grill covers or painted vents to match your greenhouse aesthetic. Integrate smart home technology for remote monitoring and control. Use weatherproof labels or color coding to indicate vent status. Install backup manual controls for emergencies. Personalize the airflow with subtle sound-dampening features or adjustable speed settings for comfort.
A climate-responsive ventilation system keeps your plants happy regardless of outside weather, reducing stress and disease risk. It turns your greenhouse into a smart, adaptive environment, making gardening more predictable and enjoyable. When you see how well your plants thrive, your confidence in your setup skyrockets. Ready to breathe new life into your greenhouse?
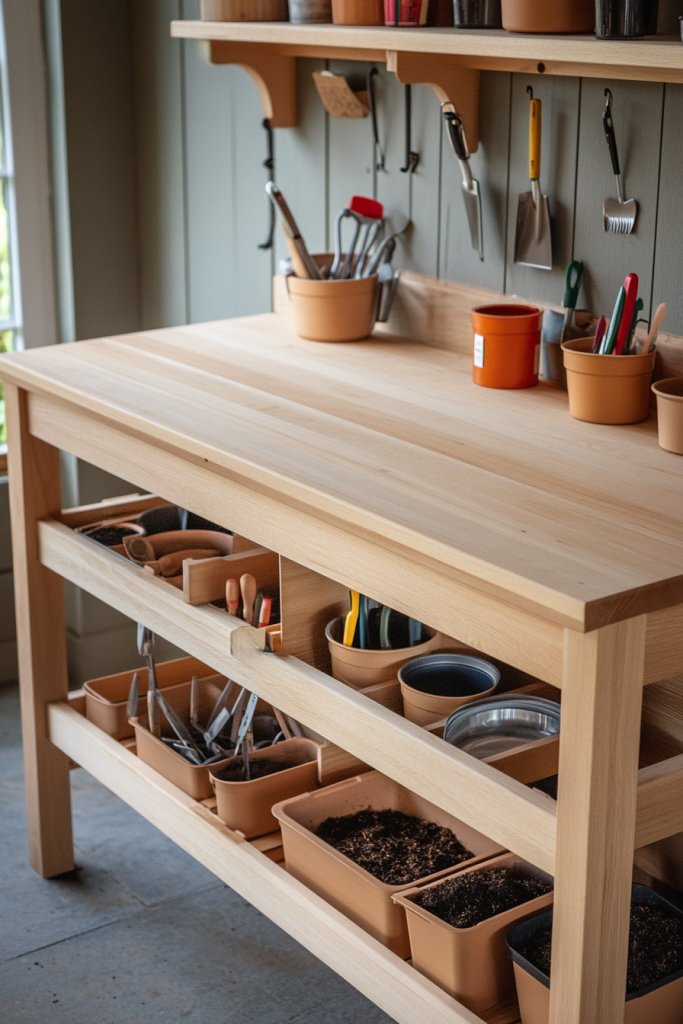
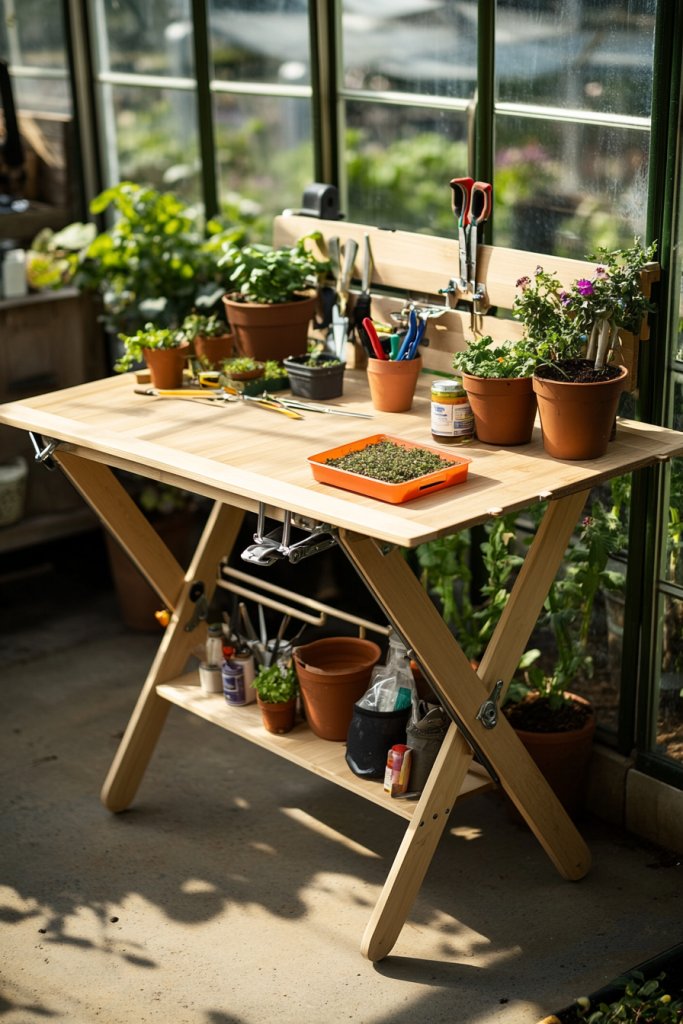
7. Potting Bench with Storage for Tools and Supplies
Messy tool piles and scattered supplies can turn your gardening into a frustrating treasure hunt. A dedicated potting bench with ample storage offers a tidy, organized workspace. It makes planting, repotting, and maintenance more efficient and enjoyable. Who doesn’t want a clean, dedicated zone for garden chores?
Recommended Products to replicate this idea
| # | Preview | Product | |
|---|---|---|---|
| 1 |

|
Yaheetech Outdoor Garden Potting Bench Table Work Bench Metal Tabletop W/Cabinet Drawer Open Shelf... | Buy on Amazon |
| # | Preview | Product | |
|---|---|---|---|
| 1 |

|
3 Tier Garden Tool Organizer, Garage Storage and Organization, Metal Yard Tools Storage up to 78... | Buy on Amazon |
Imagine a sturdy wooden or metal workbench, with drawers, shelves, and cubbies filled with neatly arranged pots, soil, and tools. A wide surface provides enough space to work comfortably, with hooks hanging small hand tools within arm’s reach. The bench is positioned near your plant beds or storage area, creating a functional hub. The clean lines and practical design make it both a workspace and a statement piece. Brightly colored containers and labels add a touch of personality.
Choose materials based on your style—rustic reclaimed wood for country charm or sleek metal for modern minimalism. Add modular storage units or stackable drawers to expand as your collection grows. Incorporate a fold-down surface for extra workspace during busy days. Weather-resistant finishes ensure durability outdoors. Personal touches like magnetic strips for small tools or chalkboard surfaces for notes make it uniquely yours.
Select a sturdy surface, ensuring it can handle the weight of soil and pots. Install drawers and shelves according to your needs, securing them properly. Keep frequently used tools on hooks or in small containers on the bench. Organize supplies by type or frequency of use for maximum efficiency. Maintain the setup by regular cleaning and checking for loose screws or rust. Position it close to your planting areas to minimize trips back and forth.
Decorate with colorful or patterned contact paper inside drawers or on the surface. Add labels or tags for different supplies, making organization intuitive. Install small task lights or magnifying lenses for detailed work. Incorporate a small compost bin nearby for organic waste. Personal touches like vintage garden signs or painted patterns make your workspace inviting.
A dedicated potting bench streamlines your gardening process, making it more enjoyable and less stressful. It boosts your confidence by providing an organized, inspiring space to work. Once set up, it encourages you to experiment and try new projects. Your garden will flourish with your newfound efficiency. Are you ready to upgrade your gardening game?
8. Hanging Basket Arrangements for Vertical Aesthetics
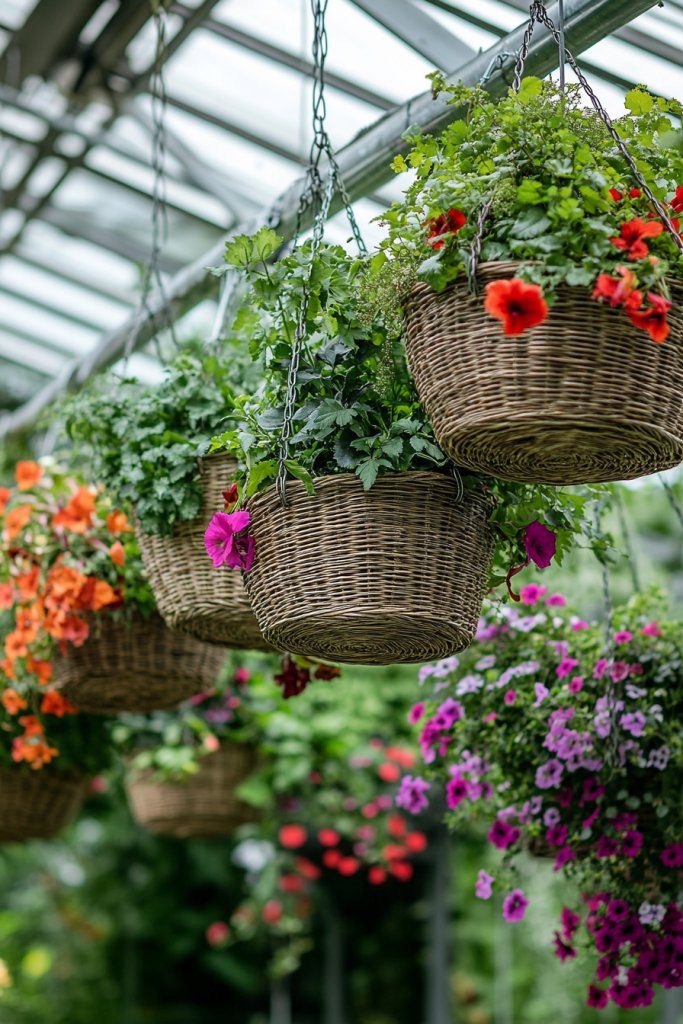
Horizontal space in a greenhouse is precious, but vertical space is often underused. Hanging baskets allow you to add a splash of color and greenery without sacrificing valuable floor or shelf area. They create a lush, layered look that’s both functional and attractive. Who doesn’t love a vibrant cascade of trailing plants?
Recommended Products to replicate this idea
| # | Preview | Product | |
|---|---|---|---|
| 1 |

|
Lchkrep 6 Pack Extra Large Heavy Duty Long Outdoor Plant Hanging S Hooks - for Baskets, Bird... | Buy on Amazon |
| # | Preview | Product | |
|---|---|---|---|
| 1 |

|
Legigo 6 Pack 12 Inch Hanging Basket Coco Liners Replacement, 100% Natural Round Coconut Coco Fiber... | Buy on Amazon |
Visualize ceiling-mounted rails or wall hooks supporting a variety of hanging baskets filled with herbs, flowering vines, or small vegetables. The baskets sway gently in the breeze, adding movement and life to your space. Brightly colored or decorative containers contrast beautifully with the greenery. When placed at different heights, they create a dynamic, eye-catching display that invites exploration and adds depth.
Select baskets in different sizes, shapes, and colors to match your decor style—rustic, modern, or eclectic. Use weather-resistant materials for durability. Combine trailing plants with upright varieties for visual interest. During colder seasons, swap out summer blooms for evergreen or winter-hardy plants. Install adjustable hooks or chains to modify heights easily as plants grow.
Begin by installing sturdy ceiling hooks or wall-mounted rails at appropriate heights. Choose baskets with drainage holes and line them with a breathable fabric or coconut coir. Fill with your favorite soil mix and plant your greens, considering their light and water needs. Hang the baskets securely, ensuring they are balanced and stable. Regularly water and prune to keep the cascading effect lush and tidy. Clean the hooks and chains periodically to prevent rust.
Decorate baskets with colorful ribbons, painted patterns, or personalized tags. Incorporate fairy lights or small solar-powered lanterns for evening ambiance. Use decorative stones or moss in the baskets for added charm. Personalize with labels for each plant type or care instructions. Adjust the height seasonally to optimize sunlight exposure or ease of access.
Hanging baskets add a lively, cheerful touch to your greenhouse, making it feel like a secret garden. They inspire creativity in plant placement and design. Once you see your vertical garden flourish, you’ll gain confidence to experiment further. It’s a simple way to make a big aesthetic impact. Ready to hang your way to a greener space?
9. Incorporation of Natural Light Enhancers
Natural light is the lifeblood of a thriving greenhouse, but sometimes sunlight is limited or unevenly distributed. Properly amplifying available light can boost plant growth and reduce the need for artificial lighting. Who doesn’t want a brighter, more energetic space that feels like a sunlit oasis?
Recommended Products to replicate this idea
| # | Preview | Product | |
|---|---|---|---|
| 1 |
|
Plant Growth Mylar Films High Reflective Mylar Film Garden Greenhouse Covering Foil Sheets for First... | Buy on Amazon |
| # | Preview | Product | |
|---|---|---|---|
| 1 |

|
Shade Cloth - 70-90% Sunblock Net for Garden Patio,Shade Sails for Plants Greenhouse Outdoor Pergola... | Buy on Amazon |
Imagine walls painted with reflective white or light-colored paint that bounce sunlight deeper into your greenhouse. Strategically placed mirrors or shiny metallic surfaces amplify natural rays, creating a radiant glow. Light-colored or glossy tiles on the floor reflect upward, illuminating lower plants. The overall effect is a bright, airy environment that feels open and welcoming. Even on cloudy days, the space remains lively and inviting.
Opt for reflective paints with a matte or semi-gloss finish to reduce glare. Use mirrors with simple frames or frameless designs for a minimalist look. Incorporate reflective panels that can be angled toward the sun for maximum impact. During winter or overcast periods, supplement with grow lights that mimic natural sunlight. Seasonal adjustments like moving reflective surfaces or mirrors can optimize light distribution throughout the year.
Start by choosing light-reflective paints or materials suited for humid environments. Apply to walls, ceilings, or even the underside of shelves for indirect reflection. Position mirrors at angles that direct sunlight into shadowed corners. Use reflective tiles in low-light zones for added brightness. Regularly clean reflective surfaces to maintain their effectiveness. Combine with proper ventilation to prevent overheating and glare issues.
Decorate with framed or ornate mirrors for a stylish touch, or keep it minimalist with sleek panels. Use removable or adjustable reflectors to adapt to changing sunlight patterns. Incorporate decorative elements like stained glass or colored panels for artistic flair while enhancing light. Personalize the space by matching the reflectors’ styles with your greenhouse decor. This approach makes your space brighter and more beautiful.
Maximizing natural light transforms your greenhouse into a vibrant, healthy environment, reducing energy costs. It encourages plants to grow stronger and faster, boosting your success rate. The added brightness lifts your mood and motivation, making gardening more joyful. A well-lit space is a happy space—your plants and you will thank yourself for this upgrade. Are you ready to harness the sun’s power?
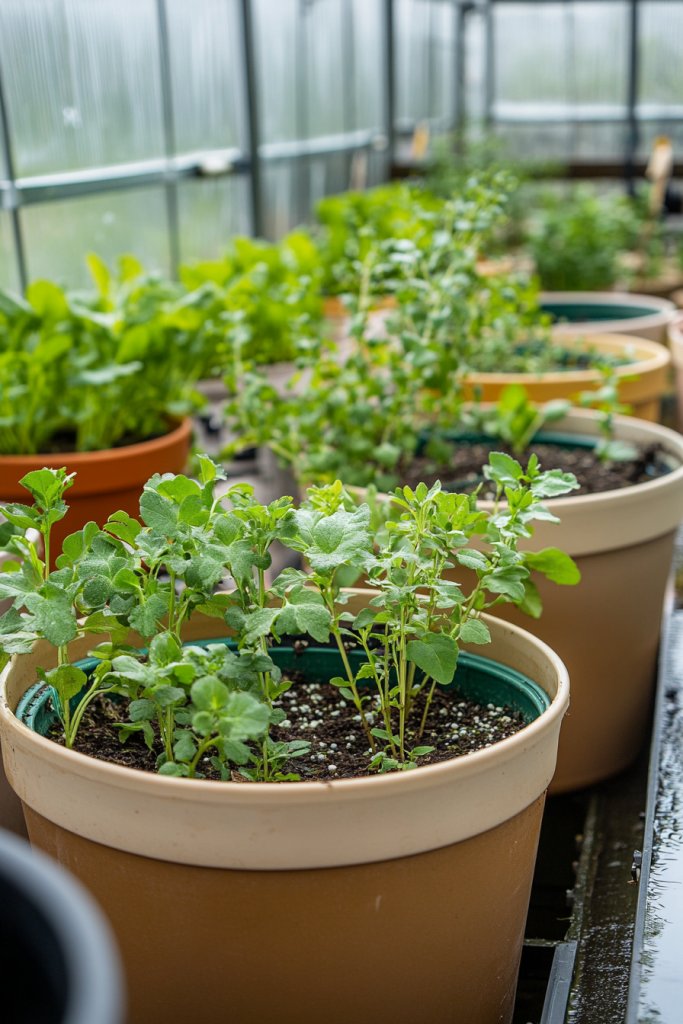
10. Use of Reclaimed Wooden Crates as Plant Containers
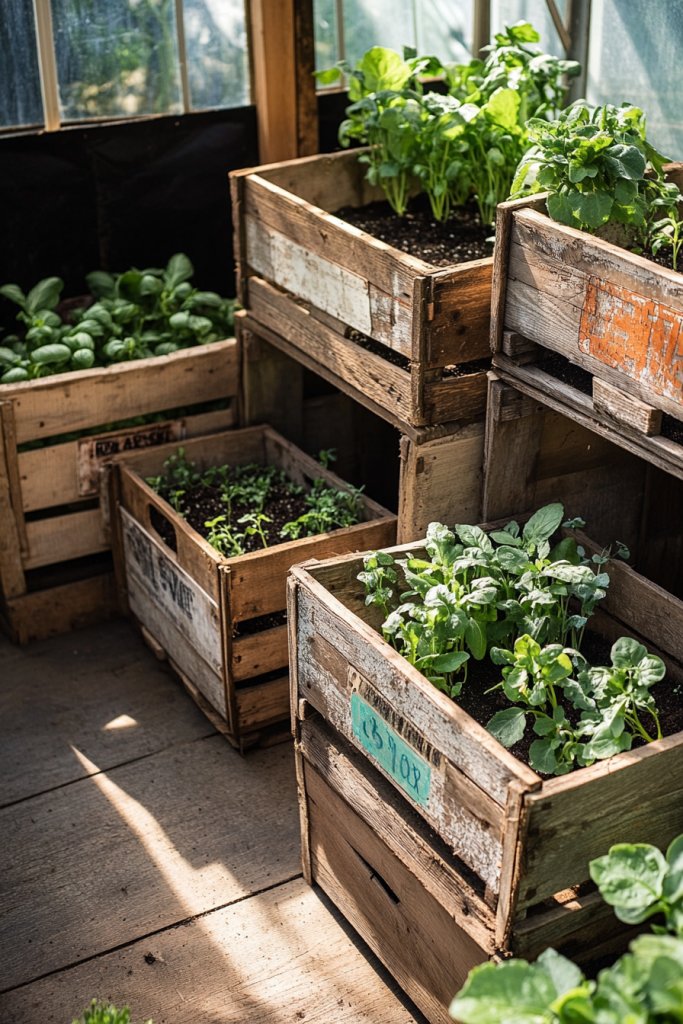
Looking for a rustic, eco-friendly way to house your plants that also adds charm? Reclaimed wooden crates are perfect for creating a vintage look while being budget-friendly. They’re versatile, sturdy, and give your greenhouse an authentic, farmhouse vibe. Plus, you’re recycling—so, win-win, right?
Recommended Products to replicate this idea
| # | Preview | Product | |
|---|---|---|---|
| 1 |

|
TIMRIS Set of 3 Rustic Distressed Wood Nesting Crates, Farmhouse Decorative Wooden Storage Boxes,... | Buy on Amazon |
| # | Preview | Product | |
|---|---|---|---|
| 1 |

|
10 Pcs Plastic Planter Liners Clear Rectangular Plastic Liners for Flower Box Planter Window Box... | Buy on Amazon |
Picture weathered wooden crates filled with lush greens, their rough textures contrasting beautifully with the vibrant foliage. Nestled on the floor or stacked for height, these crates serve as charming plant beds. Some are painted in pastel or bold colors, adding a pop of personality. The open slats allow for excellent drainage and air circulation, keeping roots happy. Small labels or tags can be attached to identify your plants, completing the rustic aesthetic.
Use crates with different sizes and shapes to create varied planting zones. Paint or stain them for a customized look—distressed finishes enhance the vintage charm. Add casters for mobility or line the inside with landscape fabric for better moisture retention. They work well with a range of plants—from flowers and herbs to small vegetables. Stack or arrange them creatively to maximize visual interest.
Source reclaimed crates from thrift stores, flea markets, or salvage yards. Clean and sand them to remove splinters, then seal with non-toxic wood preservative. Drill drainage holes if necessary or line the bottom with a landscape fabric layer. Fill with high-quality soil suitable for your chosen plants. Position in well-lit areas, and water regularly, ensuring proper drainage. Replace or rotate crops seasonally for freshness and variety.
Personalize with decorative paint, stencils, or vintage labels. Add small decorative elements like metal accents or rope handles. Incorporate plant supports or trellises for climbing plants within the crates. Use colorful mulch or stones on top for a finished look. Personal touches turn simple crates into statement pieces that reflect your style.
Reclaimed crates are a sustainable, stylish way to grow your garden with a nostalgic feel. They encourage creativity and resourcefulness, making gardening feel more personal. Once set up, your space will exude warmth and character, inspiring you to experiment more. It’s a charming, eco-conscious upgrade that speaks to your inner gardener. Ready to give it a try?
11. Temperature-Insulating Bubble Wrap or Shade Cloths
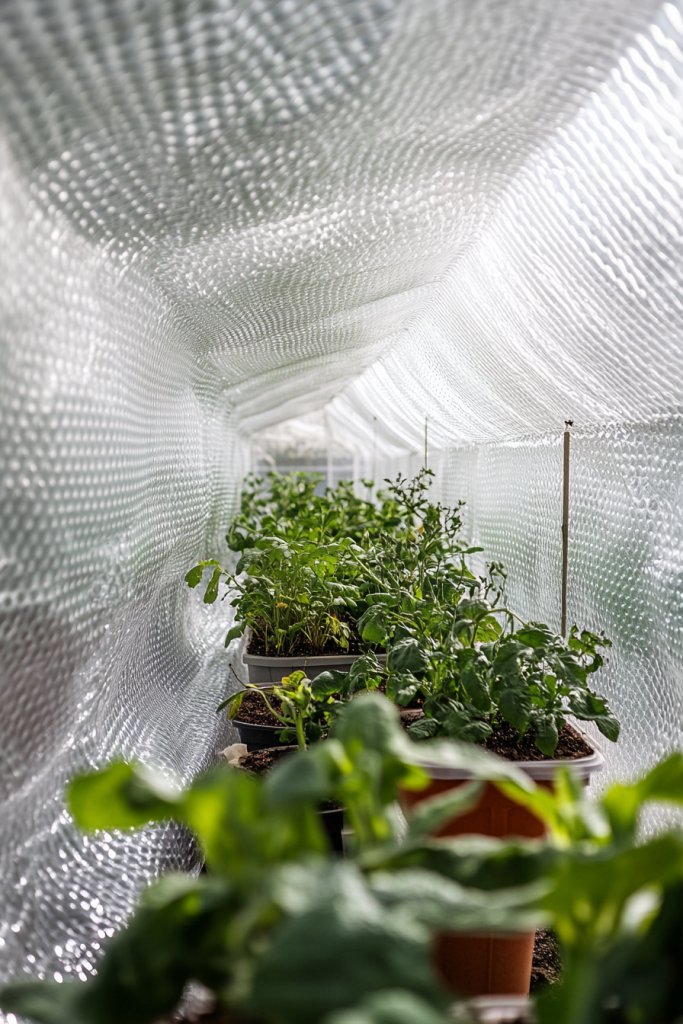
Extreme temperatures can sabotage your greenhouse efforts, causing stress to your plants and wasting energy on heating or cooling. Insulation and shading are crucial to maintaining a stable environment. Who wants their plants to wilt under the summer sun or freeze during cold snaps? Not you.
Recommended Products to replicate this idea
| # | Preview | Product | |
|---|---|---|---|
| 1 |

|
Bubble Cushioning Wrap Roll 48" Wide x 100 ft - Medium Bubbles 5/16", Clear | Buy on Amazon |
| # | Preview | Product | |
|---|---|---|---|
| 1 |

|
90% Blackish Green Shade Cloth, 6.5x10FT Resistant Garden Sun Shade Net, Durable Mesh Shade Tarp... | Buy on Amazon |
Visualize rolls of reflective bubble wrap lining the interior walls, trapping heat during winter or blocking excessive sunlight in summer. Shade cloths drape over vents or windows, diffusing harsh rays while still allowing light penetration. The textured bubble wrap creates a cozy, quilted appearance, while the shade cloth adds a soft, fabric layer. Together, they create a controlled, comfortable climate inside your greenhouse.
Choose bubble wrap with reflective or opaque surfaces depending on your insulation needs. Use removable or roll-up shade cloths for seasonal adjustments. Opt for breathable fabrics that prevent overheating while providing protection. During winter, secure bubble wrap with clips or double layers for extra warmth. For summer, use shade cloths with different density levels to fine-tune sunlight reduction.
Apply bubble wrap directly onto walls or ceiling surfaces using double-sided tape or clips, ensuring a tight seal to prevent heat loss. For shade cloths, install tension rods, hooks, or cable systems for easy removal. Measure your greenhouse openings precisely to get the right fabric sizes. Attach with grommets or clips, and secure edges to prevent flapping. Regularly inspect for tears or loosened fasteners, especially after stormy weather.
Decorate the bubble wrap with painted patterns or stencils for a fun touch. Use decorative trim or colored cords to secure shade cloths stylishly. Incorporate small vents or adjustable panels to increase airflow when needed. Personalize with labels indicating insulation or shading zones. These simple upgrades help your climate control system work smarter, not harder.
Insulating and shading solutions make your greenhouse more energy-efficient and climate-resilient. They help your plants thrive regardless of outside weather, boosting your confidence in managing environmental conditions. Once you see your plants flourish without extreme fluctuations, you’ll feel empowered to experiment even more. It’s a smart, practical upgrade for serious gardeners.
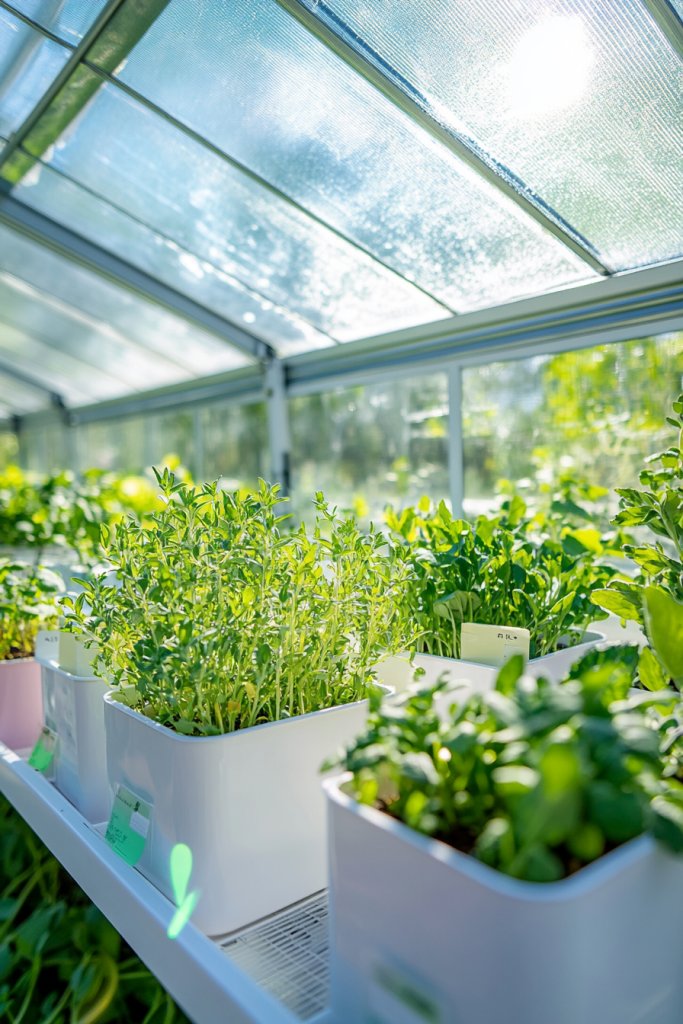
12. Compact Seed Starting Station
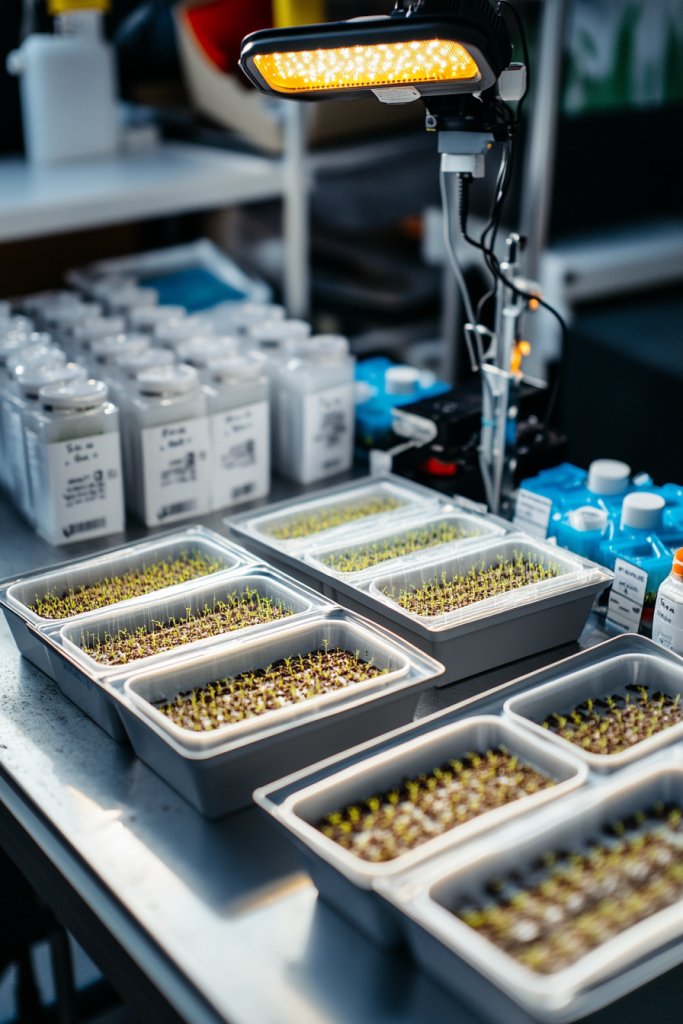
Starting seeds indoors or in a small greenhouse can be tricky without a dedicated space. Without proper setup, seedlings can become leggy, uneven, or suffer from inconsistent light. A compact seed starting station provides a controlled environment to nurture young plants from germination to transplant. Who wouldn’t want a mini nursery right at home?
Recommended Products to replicate this idea
| # | Preview | Product | |
|---|---|---|---|
| 1 |

|
Burpee SuperSeed Seed Starting Tray | 36 Cell Reusable Seed Starter Tray | for Starting Vegetable,... | Buy on Amazon |
| # | Preview | Product | |
|---|---|---|---|
| 1 |

|
Barrina Grow Lights for Indoor Plants with Stand, 42W 169 LEDs Full Spectrum Wide Illumination Area,... | Buy on Amazon |
Picture a small, organized corner with a multi-tiered shelf or table holding seed trays, heat mats, and grow lights. The trays are filled with moist soil and tiny sprouts pushing through, eager for warmth and light. Bright LED grow lights hang overhead, mimicking sunlight, while a small fan circulates fresh air. Labels mark each variety, and clear plastic covers create a mini greenhouse effect, keeping humidity high. It’s a cozy, efficient space that nurtures life from the very beginning.
Choose foldable or stackable shelves to save space when not in use. Use waterproof trays or containers that fit your style—metal, plastic, or wooden. Incorporate adjustable grow lights or timers to match your schedule. During warmer months, place the station near a sunny window or under supplemental lighting. For colder seasons, add heat mats or portable heaters for optimal germination conditions.
Set up a sturdy surface or shelf in a well-lit corner. Arrange seed trays with drainage holes and fill with quality seed-starting mix. Place heat mats underneath for warmth, especially for tropical or slower-growing varieties. Connect grow lights to timers for consistent light cycles. Cover trays with clear plastic domes to maintain humidity, removing them gradually as seedlings develop. Keep soil moist but not soaked, and monitor temperature regularly.
Personalize with colorful labels, or decorate your trays with fun stickers. Use decorative fabric or paper underneath for a cheerful vibe. Incorporate small fans or humidifiers for climate control. Keep your seedling station tidy with storage bins for tools and extra supplies. Add a small chalkboard or whiteboard nearby for tracking sowing dates and growth progress.
A dedicated seed starting station turns chaos into order and helps you grow strong, healthy seedlings. It boosts your confidence by giving you control over the early stages of gardening. Watching tiny sprouts turn into mature plants is incredibly rewarding. It’s a simple investment that pays off with a lush, productive garden. Ready to grow your own from seed?
13. Portable Rolling Plant Carts
Moving plants around your greenhouse for optimal sunlight or seasonal changes can be a hassle. Heavy pots are hard to lift, and carrying multiple containers is a workout nobody signed up for. Portable rolling carts solve this problem by giving you mobility and flexibility. Who wouldn’t want to effortlessly reposition their plants?
Recommended Products to replicate this idea
| # | Preview | Product | |
|---|---|---|---|
| 1 |

|
Bosmere 14" Plant Caddie - Heavy-Duty Rolling Plant Stand with Locking Wheels, 500 lb Capacity –... | Buy on Amazon |
| # | Preview | Product | |
|---|---|---|---|
| 1 |

|
Bamworld Plant Stand Outdoor Rolling Tray Plant Caddy with Wheels 12in Plant Caster with Wheels... | Buy on Amazon |
Imagine a sturdy cart with smooth-rolling wheels, holding several pots or containers of varying sizes. The cart’s surface is spacious enough for watering or pruning, with some models featuring adjustable shelves. When the sun shifts, you simply wheel your plants to sunnier spots or shaded corners. The wheels glide quietly over smooth surfaces, making plant care a breeze. It’s like having a mobile garden studio at your fingertips.
Choose from lightweight plastic or durable metal carts to match your style and needs. Add removable trays, hooks, or baskets for tools and supplies. For uneven floors, select larger, lockable wheels for stability. Use colorful or decorative paint to personalize your cart. During winter, store it indoors or in a sheltered spot, then roll it outside when weather permits.
Start by selecting a cart that can handle the weight of your heaviest pots. Assemble if needed, then organize your containers, tools, and watering cans on it. Test the mobility on your greenhouse floor or surface, locking the wheels when stationary. Use it as a workspace for repotting, pruning, or watering. Regularly check wheel tightness and clean dust or debris to ensure smooth operation.
Decorate with bright colors, patterns, or decals to match your gardening style. Attach small hooks or holders for hand tools or gloves. Add a foldable tray or fold-out workspace for extra functionality. Incorporate plant supports or stakes into the cart for climbing plants. Make it uniquely yours to inspire frequent use.
A rolling plant cart adds flexibility, making your gardening routines more efficient and fun. It encourages you to experiment with plant placement and design. Once you see how easy it is to move heavy pots, your confidence will soar. It turns a simple cart into a versatile gardening companion. Ready to roll into better plant care?
14. Vertical Herb Garden in Mason Jars
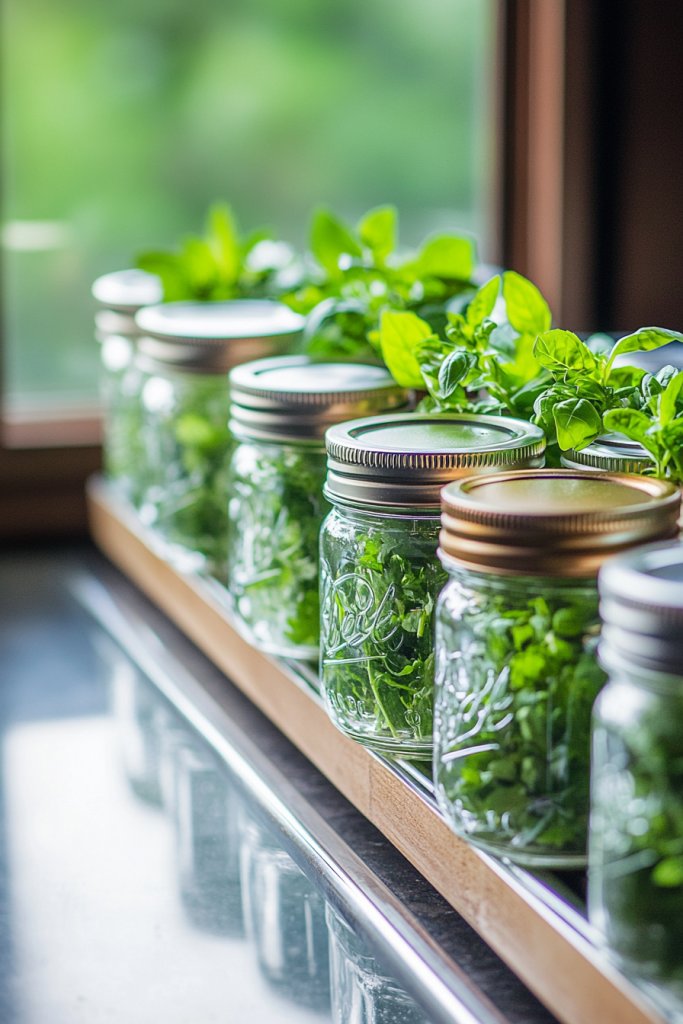
Limited space for fresh herbs? Growing herbs on a countertop or windowsill can be cluttered and inefficient. Vertical herb gardens in mason jars offer a compact, stylish solution that keeps herbs within arm’s reach. Plus, they add a charming rustic touch to your greenhouse decor. Who doesn’t love fresh herbs at their fingertips?
Recommended Products to replicate this idea
| # | Preview | Product | |
|---|---|---|---|
| 1 |

|
Teenyyou 12 Set Hydroponic Herb Garden Planter Indoor Kit, Include 12 Self Watering Mason Jars 12... | Buy on Amazon |
| # | Preview | Product | |
|---|---|---|---|
| 1 |

|
Vesici 6 Set Hydroponic Mason Garden Jar Kit Self Watering Herb Hydroponic Planter Starter Kit with... | Buy on Amazon |
Imagine a wooden or metal board mounted on the wall, with jars suspended from hooks or brackets. Each jar is filled with soil and sprouting herbs—basil, mint, parsley, or thyme—vibrant and lush. The transparent glass showcases roots and soil, adding an organic feel. Greenery spills over the edges, creating a lively, textured display. It’s a functional art piece that combines beauty and practicality.
Use different sizes and shapes of jars for visual interest. Paint jar lids or decorate jars with washi tape or fabric for a personalized touch. Mount the jars at varying heights for a dynamic look or keep them in a straight line for simplicity. During colder months, bring the jars indoors or insulate them against drafts. Label each jar with plant names or care tips for easy maintenance.
Select durable jars with wide mouths for easy planting and watering. Attach sturdy hooks or brackets to your wall or board, ensuring they can support the weight of filled jars. Fill jars with well-draining soil, plant your herbs, and water gently. Hang each jar securely, then position near a sunny window or under grow lights. Regularly water and harvest to keep herbs fresh and vigorous. Clean the jars periodically to prevent mold.
Decorate jars with hand-painted labels, stencils, or adhesive decals. Incorporate small decorative stones or shells in the bottom for drainage and aesthetic appeal. Use colorful twine or ribbons around jar necks for a playful touch. Personalize with engraved tags or chalkboard labels for easy updates. It’s a delightful project that beautifies your space and supplies fresh herbs.
A vertical herb garden in mason jars transforms your space into a lush, accessible herb patch. It encourages culinary experimentation and fresh flavors. Once established, it boosts your confidence in small-space gardening. It’s a simple, attractive way to grow more with less effort. Ready to harvest your own culinary treasures?
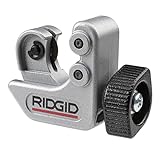
15. DIY Copper Pipe Plant Supports
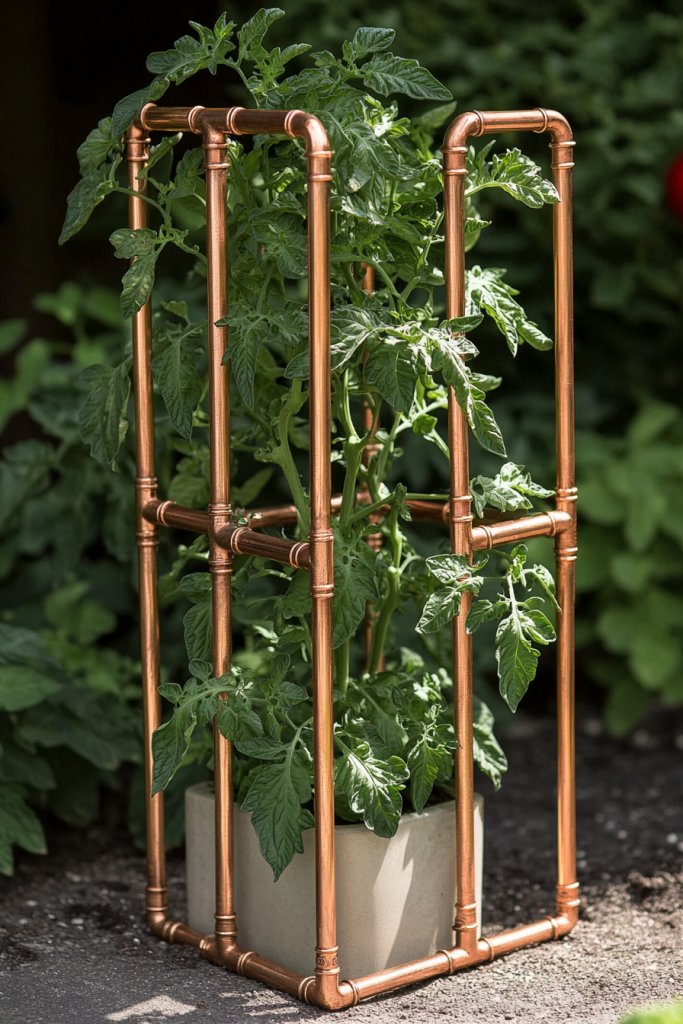
Climbing plants or tall vegetables often need support to grow upright and stay tidy. Commercial trellises can be expensive or clash with your aesthetic. DIY copper pipe supports offer a stylish, durable, and customizable solution. Who wouldn’t want a sleek industrial touch in their greenhouse?
Recommended Products to replicate this idea
| # | Preview | Product | |
|---|---|---|---|
| 1 |

|
Ailbiuko 106PCS Brass Pipe Fittings Assortment Kit NPT Extension Adapter,Reducer Bushing,Hex... | Buy on Amazon |
| # | Preview | Product | |
|---|---|---|---|
| 1 |
|
Ridgid - CC247 RIDGID 40617 Model 101 Close Quarters Tubing Cutter, 1/4-inch to 1-1/8-inch Tube... | Buy on Amazon |
Picture copper pipes bent into elegant stakes or arches, supporting climbing beans, cucumbers, or flowering vines. The shiny, warm-toned pipes contrast beautifully with green foliage, adding a sophisticated touch. You can create geometric shapes, teepees, or curved supports that integrate seamlessly into your plantings. The industrial chic look elevates your greenhouse design while providing functional support.
Use different pipe diameters for various plant sizes. Connect sections with elbow joints or T-connectors for custom shapes. Wrap support points with twine or soft fabric to prevent damage. During winter, disassemble or store supports indoors. For a more decorative look, add patinas or protective coatings to achieve a vintage or modern finish. Support structures can be painted or left natural for different styles.
Cut copper pipes to desired lengths using a pipe cutter. Assemble shapes using connectors, solder, or compression fittings. Secure supports into the soil with stakes or anchors, ensuring they are stable against wind or plant weight. Train your climbing plants along the supports, tying loosely with twine or plant clips. Regularly inspect for corrosion or loosening, and re-tighten or clean as needed. This DIY project combines style and strength effortlessly.
Add decorative elements like engraved patterns or contrasting finishes. Incorporate LED string lights for a magical glow at night. Personalize supports with engraved tags or paint accents. Use different finishes—brushed, matte, or polished—to match your decor. These supports not only serve a purpose but also become a design feature in your greenhouse.
DIY copper supports blend functionality with style, giving your plants elegant backing. They inspire creativity and give a professional feel to your setup. Once in place, you’ll feel confident supporting a variety of climbing plants with flair. It’s an easy upgrade that elevates your entire greenhouse aesthetic. Ready to craft your own support system?
16. Incorporating a Small Compost Bin
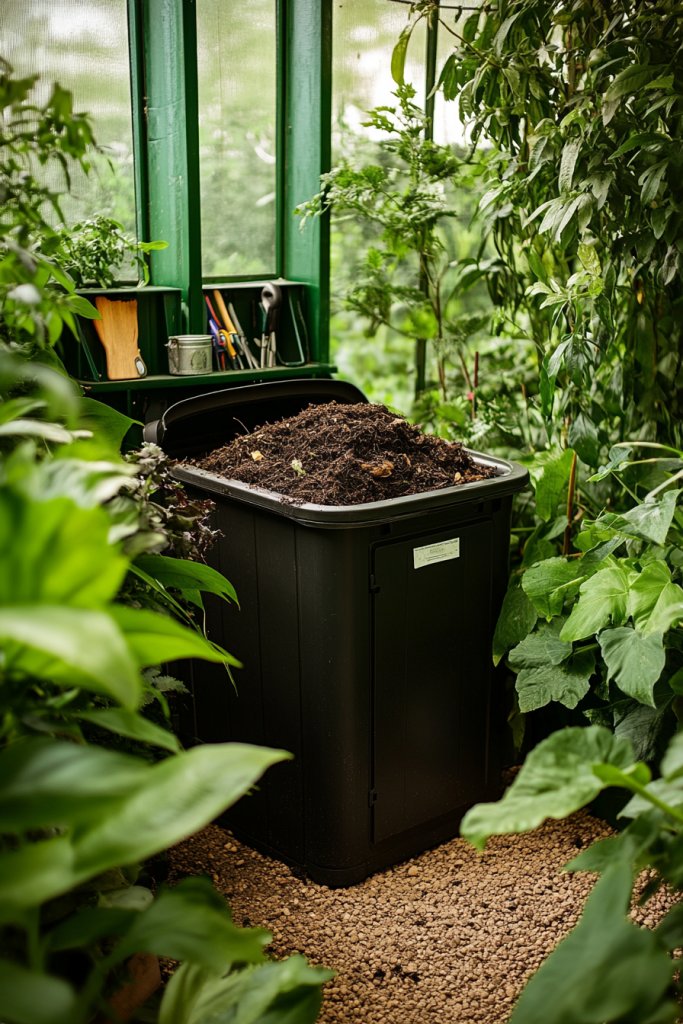
Waste from organic matter piles up quickly, and tossing it in the trash feels wasteful and unsustainable. Composting inside or near your greenhouse turns scraps into rich soil, boosting plant health and reducing landfill contribution. Who doesn’t want to nurture their garden and the planet at the same time?
Recommended Products to replicate this idea
| # | Preview | Product | |
|---|---|---|---|
| 1 |

|
EPICA Countertop Compost Bin Kitchen | 1.3 Gallon | Odorless Composting Bin with Carbon Filters |... | Buy on Amazon |
| # | Preview | Product | |
|---|---|---|---|
| 1 |

|
Charcoal Filters for Kitchen Compost Bin, 10 Pack Compost Filters for Countertop Bin Pail... | Buy on Amazon |
Imagine a compact, stylish compost bin made from recycled materials or sleek plastic, tucked neatly into a corner. It’s filled with kitchen scraps, fall leaves, or garden clippings, transforming waste into black gold. The lid keeps odors contained, and a vent allows airflow for efficient decomposition. The rich, earthy smell and dark compost inside signal a healthy, active process. It’s a small setup with a big impact.
Choose from countertop or floor models, depending on space. Use decorative bins with labels or paint them to match your greenhouse decor. Incorporate a compost aerator or turning tool for faster decomposition. During colder months, insulate or move the bin indoors for continued activity. Keep a small container nearby for kitchen scraps, making composting part of your daily routine.
Select a container with good drainage and ventilation. Layer browns (dry materials) and greens (kitchen scraps) in the bin for optimal composting. Turn or mix the compost regularly to aerate and speed up decomposition. Keep the bin moist but not soggy, and monitor temperature. When ready, use the rich compost in your beds or containers. Maintain by removing finished compost and adding fresh materials.
Decorate with painted designs or plant-themed labels. Add small tools or scoops for easy transfer of compost. Incorporate decorative stones or mulch around the bin for aesthetics. Personalize with a small sign or chalkboard to track composting progress. Making it attractive encourages regular use and pride in sustainable gardening.
A small compost bin makes your gardening more eco-friendly and self-sufficient. It transforms waste into a valuable resource, fostering a sense of accomplishment. As your plants thrive on the enriched soil, your confidence in sustainable practices grows. It’s a simple step toward greener gardening—are you in?
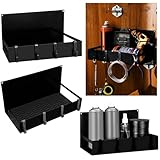
17. Use of Magnetic Tool Holders
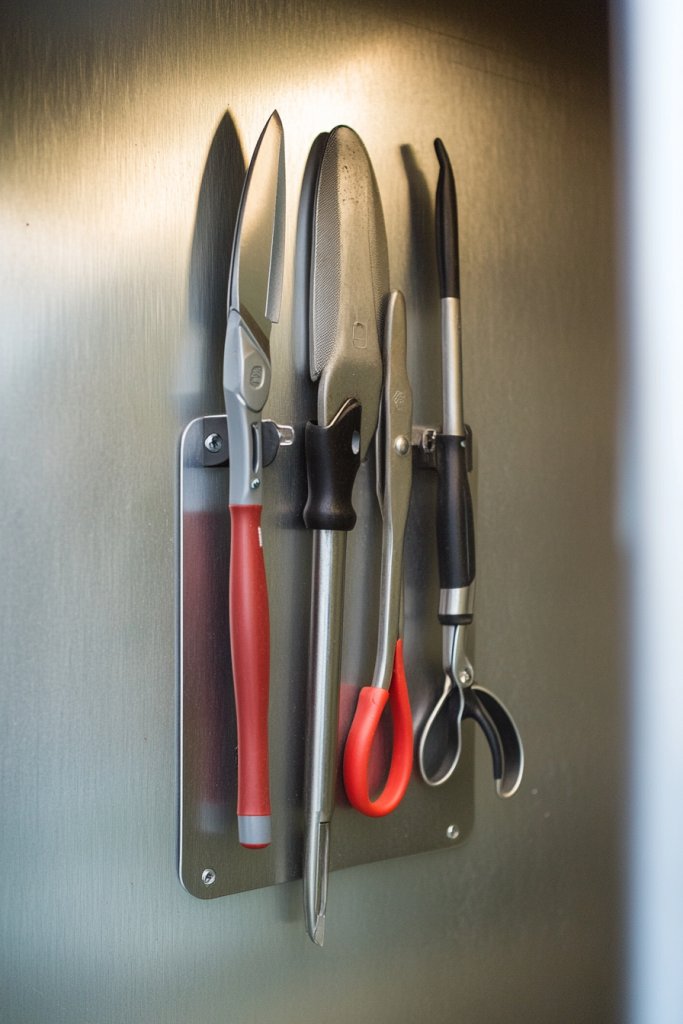
Tools scattered everywhere can make gardening frustrating, wasting time hunting for the right implement. Magnetic tool holders keep essentials within arm’s reach and organized, transforming chaos into convenience. Who doesn’t want a tidy, efficient workspace?
Recommended Products to replicate this idea
| # | Preview | Product | |
|---|---|---|---|
| 1 |

|
Magnetic Storage Organizer Tool Holder, Magnetic Tool Holder Strip, 6-Pack Magnetic Tool Bar,1-Pack... | Buy on Amazon |
| # | Preview | Product | |
|---|---|---|---|
| 1 |
|
Lineshading 3 Pack Magnet Garage Organizer Magnetic Spice Rack for Refrigerator 20 lb Capacity Shelf... | Buy on Amazon |
Imagine a magnetic strip mounted on a wall or inside a cabinet door, holding a variety of small tools—pruners, trowels, scissors—in an orderly fashion. The magnets keep tools secure yet easy to grab, reducing clutter and preventing lost items. Brightly colored or metallic tools pop against the magnetic strip, adding a modern industrial touch. The setup streamlines your workflow, making gardening less of a chore and more of a pleasure.
Choose from different magnet strengths and strip lengths to suit your tool collection. Mount on walls, inside cabinets, or under shelves for maximum accessibility. Use decorative magnetic strips with sleek finishes or painted accents to match your decor. Combine with small containers or hooks for larger or heavier tools. Seasonal or modular setups allow flexibility as your tool collection evolves.
Securely attach the magnetic strip to your chosen surface using screws or strong adhesive. Arrange your tools for quick access, grouping similar items together. Regularly clean the strip and tools to prevent dust buildup and maintain magnet strength. For larger tools, consider heavier-duty magnetic holders or additional supports. Keep a small toolbox nearby for items that don’t magnetize well, like hoses or delicate tools.
Decorate the magnetic strip with paint, stickers, or labels for easy identification. Add small decorative accents like vintage tags or painted patterns. Incorporate a small chalkboard or label holder for tool names and maintenance notes. Use color-coded magnets or strips to categorize tools by function or frequency of use. It’s a simple upgrade that keeps your workspace clean and inspiring.
Magnetic tool holders turn a messy shed or corner into a sleek, professional-looking station. They save time and reduce frustration, making gardening more enjoyable. Once organized, you’ll feel more confident tackling projects and maintaining your tools. It’s a small change with a big payoff—are you ready to magnetize your workspace?
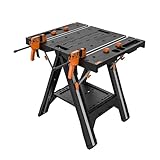
18. Multi-Purpose Folding Work Table
A cluttered workspace hampers productivity and makes gardening feel chaotic. A folding work table offers a versatile, space-saving solution that can serve as a potting station, prep area, or display surface. Who doesn’t want a flexible workspace that can hide away when not in use?
Recommended Products to replicate this idea
| # | Preview | Product | |
|---|---|---|---|
| 1 |
|
Worx Pegasus 2-in-1 Folding Work Table & Sawhorse, Easy Setup Portable Workbench, 31" W x 25" D x... | Buy on Amazon |
| # | Preview | Product | |
|---|---|---|---|
| 1 |

|
Merry Garden Folding Utility Table & Potting Bench, Natural Stained with Adjustable Shelf | Buy on Amazon |
Visualize a sturdy, lightweight table with foldable legs tucked neatly underneath. When opened, it provides ample space for repotting, mixing soil, or organizing tools. The surface is smooth and durable, made from wood, plastic, or metal. When folded, it collapses into a slim profile, stored against a wall or in a closet, freeing up space. It’s like a secret weapon for small or multifunctional greenhouses.
Choose different materials—natural wood for warmth, metal for industrial chic, or plastic for easy cleanup. Add a lip or edge to contain soil and water. Use adjustable or lockable legs for uneven surfaces. When not in use, fold and store it away, or set it up temporarily for special projects. Personalize with paint, decals, or protective finishes for a custom look.
Purchase or build a sturdy folding table with reliable hinges and locks. Set it up in a convenient spot near your planting or storage areas. Use it for potting, seed starting, or tool organization. When finished, fold the legs and slide it into storage or against a wall. Keep the surface clean by wiping after messy jobs. Regularly check hinges and locks for wear.
Decorate the table with stickers, stencils, or painted patterns. Add small storage bins or hooks underneath for tools or supplies. Use a waterproof coating or sealant for outdoor durability. Incorporate a portable organizer or caddy to keep small items handy. Personal touches make this versatile piece uniquely yours.
A foldable work table adapts to your needs, turning any corner into a functional zone. It encourages you to take on projects without clutter or setup stress. Once you experience the convenience, your confidence in managing your greenhouse increases. It’s a space-efficient upgrade that makes gardening easier—and more fun. Ready to fold your way to better gardening?
19. DIY Water Catchment System
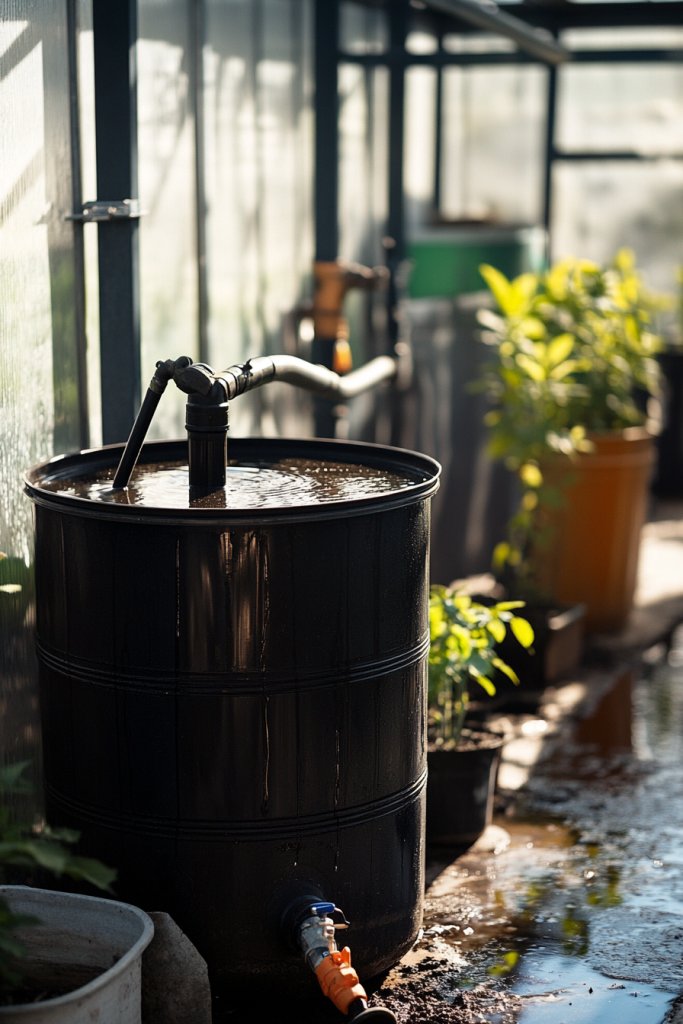
Watering your greenhouse with tap water isn’t just expensive—it’s also environmentally wasteful. Capturing rainwater or runoff is a smart, sustainable way to irrigate your plants. A DIY water catchment system is easy to set up and reduces reliance on municipal water supplies. Who doesn’t want to save money and be eco-friendly?
Recommended Products to replicate this idea
| # | Preview | Product | |
|---|---|---|---|
| 1 |
|
Rain Wizard 50 Gallon Rain Barrel with Diverter Kit - Khaki | Buy on Amazon |
| # | Preview | Product | |
|---|---|---|---|
| 1 |

|
Laicky 10 Pack Gutter Downspout Guards 3.5 Inch Adjustable Aluminium Filter Strainer, Expandable... | Buy on Amazon |
Imagine a large barrel or trough positioned beneath a downspout or gutter system, collecting rainwater naturally. The container is fitted with a spigot or hose for easy access. The water is clean, fresh, and free, ready to hydrate your plants. The setup blends into your garden landscape, almost like a decorative feature. The sound of water trickling into the barrel adds a soothing, natural ambiance.
Choose from simple barrels, vintage tanks, or sleek modern containers to match your style. Install a mesh screen on top to keep debris out. Add a spigot or hose for easy watering, and consider a small pump for higher elevation or larger systems. During dry seasons, supplement with stored water or build multiple catchment points. Connect multiple barrels with hoses or pipes for increased capacity.
Position the catchment system in an optimal spot where rain naturally flows—near roofs or gutters. Install the collection containers securely and connect gutters or downspouts with flexible piping or fittings. Add a filter or screen at the inlet to prevent debris. Attach a spigot or watering system, and test for leaks. Regularly clean the containers and check for mosquito breeding or algae growth. It’s a simple, effective way to harvest nature’s gift.
Paint or decorate the barrels to match your greenhouse decor. Add a rain gauge or level indicator for monitoring. Incorporate a small overflow system to prevent flooding. Use eco-friendly materials or recycled containers for added sustainability. Personal touches like engraved plaques or plant-themed decals make it charming and functional.
A DIY water catchment system makes your gardening more sustainable and cost-effective. It connects you to natural cycles and minimizes waste. Once you see your plants thriving on rainwater, your confidence in eco-practices will grow. It’s a simple, impactful upgrade—ready to start harvesting?
20. Selection of Low-Maintenance, High-Yield Crops
Growing food can be rewarding but sometimes overwhelming, especially when plants demand constant care. Selecting low-maintenance, high-yield crops is the perfect way to maximize harvests with minimal effort. Who doesn’t want to grow more while stressing less? It’s gardening made easy.
Recommended Products to replicate this idea
| # | Preview | Product | |
|---|---|---|---|
| 1 |

|
Tiny Tim Tomato Seeds - Dwarf Cherry Tomatoes for Planting Indoors or Patio, Compact Heirloom... | Buy on Amazon |
| # | Preview | Product | |
|---|---|---|---|
| 1 |

|
Back to The Roots 100% Organic Seed Packet Blue Lake Bush Bean | Buy on Amazon |
Visualize lush beds of crisp lettuce, peppery radishes, and fragrant basil thriving in your greenhouse. These plants grow quickly, resist pests, and require minimal pruning or feeding. Their vibrant greens and reds brighten up your space, creating a lively, productive environment. The ease of care means you spend more time enjoying harvests and less time battling problems.
Choose crops suited to your climate and season—think leafy greens, root vegetables, or herbs. Mix fast-growing varieties with more resilient options for a continuous harvest. During off-seasons, use cold frames or grow lights to extend your growing window. Focus on plants that thrive in your soil and lighting conditions to reduce intervention. Crop rotation and companion planting can boost yields further.
Research crops known for high yields and low maintenance, such as lettuce, radishes, chard, or basil. Prepare your beds or containers with quality soil, and sow seeds or transplant seedlings as per instructions. Water consistently but avoid overwatering, and thin plants to ensure proper growth. Use mulch to retain moisture and suppress weeds. Harvest regularly to encourage continuous production.
Create a planting schedule or chart to track crop cycles. Decorate containers or beds with labels or artistic markers. Incorporate companion plants that naturally repel pests or improve growth. Use organic fertilizers or compost teas to boost yields without fuss. Personal touches make your garden both productive and enjoyable.
Focusing on low-maintenance, high-yield crops ensures a steady supply of fresh produce without overwhelming effort. It boosts your confidence, encouraging more ambitious projects. Watching your green space flourish with minimal fuss proves that good gardening is possible even in busy lives. Now, who’s ready to harvest?
21. Use of Colorful Planter Labels and Markers
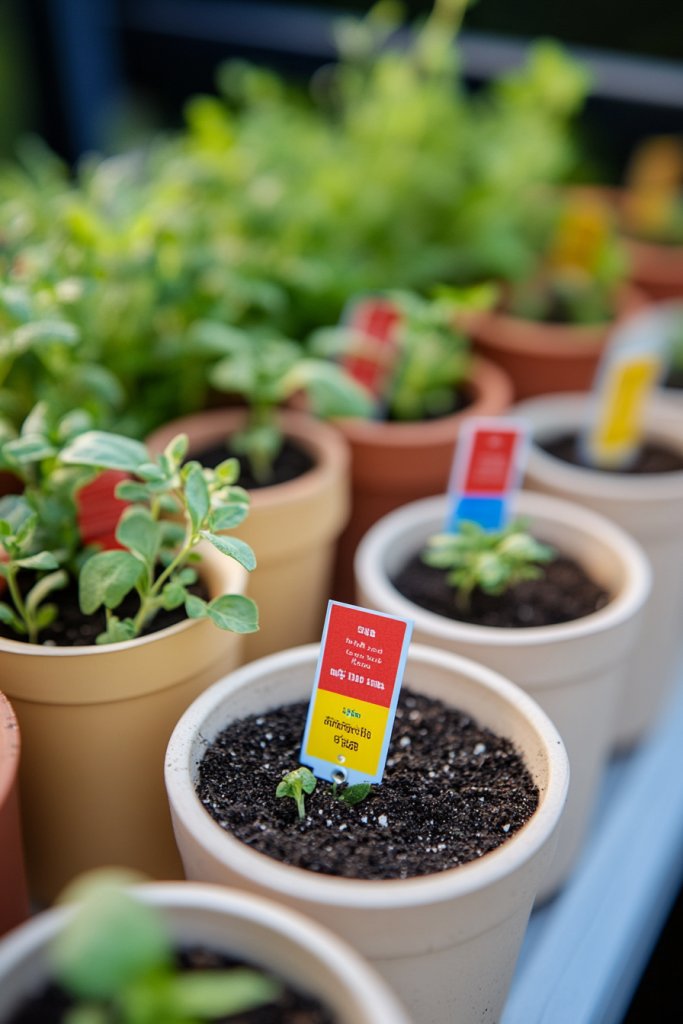
Keeping track of different plants, their care needs, and harvest times can quickly become confusing. Colorful labels and markers help you identify plants at a glance, making your greenhouse more organized and visually appealing. Who doesn’t love a splash of color that also keeps things tidy?
Recommended Products to replicate this idea
| # | Preview | Product | |
|---|---|---|---|
| 1 |

|
Plant Labels Tags 200Pcs T-Type Plant Markers Plastic Plant Label Garden Labels Tags Plant Labels... | Buy on Amazon |
| # | Preview | Product | |
|---|---|---|---|
| 1 |
|
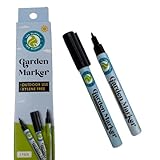
133 SUPPLY - 2 Pack Garden Marker Pen Permanent Markers Black (UV Fade Resistant Marker Pens for... | Buy on Amazon |
Imagine vibrant labels made from weatherproof materials, attached to pots, containers, or beds. Bright colors or artistic designs differentiate plant types or growth stages. Markers with erasable surfaces or chalkboard finishes allow for quick updates. This colorful coding creates a cheerful, lively atmosphere that inspires confidence and pride in your gardening efforts. It’s both functional and decorative.
Choose labels in various shapes—round, rectangular, or custom shapes—to match your style. Incorporate decorative elements like painted patterns or engraved designs. Use dry-erase markers or chalk for flexibility. Organize labels by color codes indicating watering schedules, plant types, or harvest dates. Seasonal or thematic labels can keep your setup fresh and engaging.
Select weather-resistant or waterproof labels suitable for outdoor or humid environments. Write clear, legible plant names and care instructions. Attach labels securely using clips, ties, or adhesive backings. Replace or update labels as needed to reflect plant growth or new plantings. Keep extra markers or pens nearby for quick changes. Regularly clean labels to maintain visibility and neatness.
Decorate labels with stickers, stamps, or hand-drawn artwork to add personality. Use themed colors or patterns matching your greenhouse decor. Personalize with handwritten notes, reminders, or quotes. Incorporate small decorative tags or charms for added charm. These touches make organization both practical and inspiring.
Colorful labels turn your greenhouse into an inviting, organized space that motivates you to care better for your plants. They simplify maintenance and make harvesting more efficient. Seeing a well-organized, vibrant garden boosts your confidence and enthusiasm. Ready to brighten up your plant labels?
Conclusion
Exploring these diverse greenhouse ideas showcases just how versatile and rewarding greenhouse gardening can be. From compact setups to elaborate structures, there’s a solution for every space and budget. Don’t hesitate to try these ideas and transform your gardening dreams into reality—your lush, productive greenhouse awaits!
Last update on 2026-03-01 / Affiliate links / Images from Amazon Product Advertising API