A beautifully designed backsplash can transform the entire look of your kitchen, and herringbone subway tile is a trend that never goes out of style. Its intricate pattern adds a touch of sophistication and visual interest, making it a favorite among homeowners and designers alike.
In this article, you’ll uncover a variety of inspiring herringbone backsplash ideas that suit every taste and space. Whether you prefer classic elegance or modern flair, these creative concepts will motivate you to elevate your kitchen’s style and make a stunning statement.
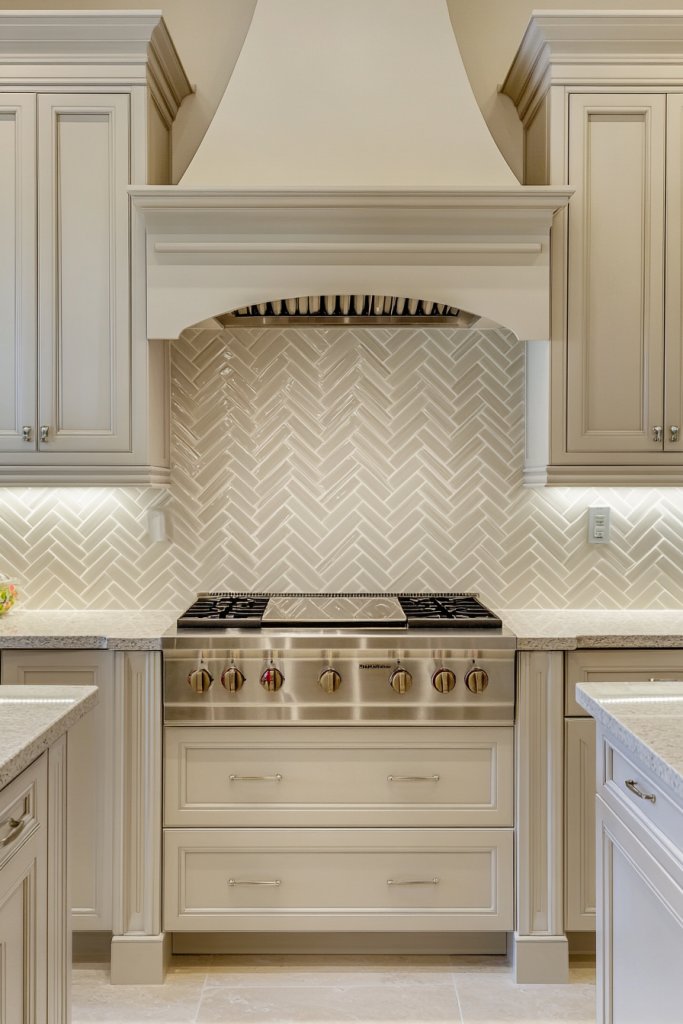
1. Classic White Herringbone Subway Tiles for a Bright, Airy Kitchen
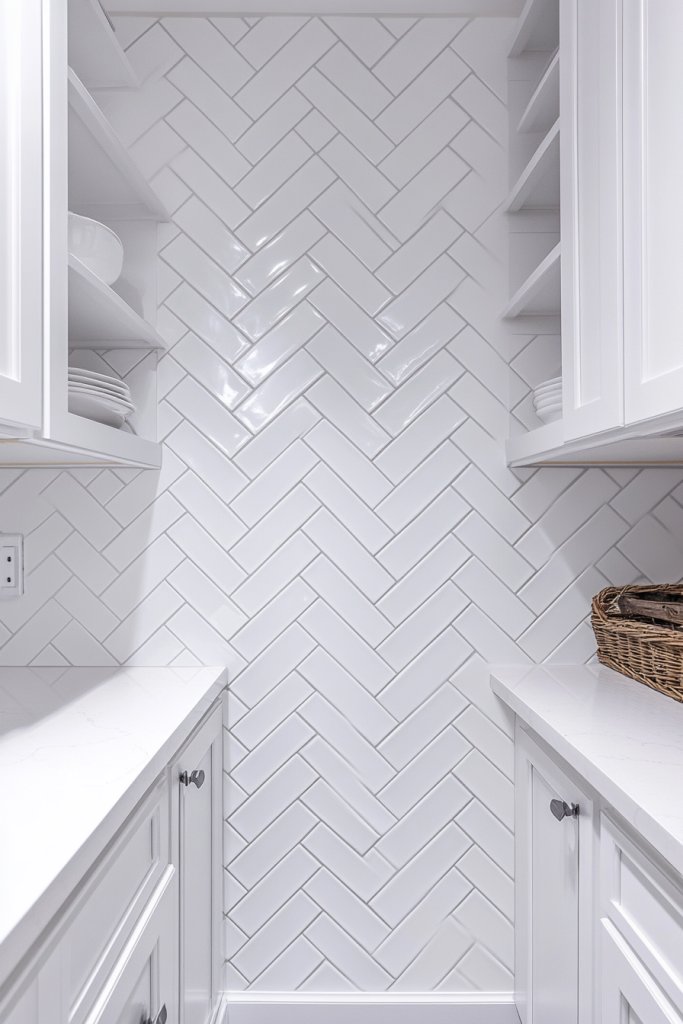
Ever wish your small kitchen could feel bigger and brighter without knocking down walls? White subway tiles in a herringbone pattern are the perfect trick to open up any space. They bring a timeless charm that never feels outdated, making your kitchen feel fresh and inviting. Plus, who doesn’t love a clean, crisp look that complements any decor style?
Imagine walking into a kitchen where the light bounces off glossy white tiles arranged in a zigzag pattern. The subtle texture of the grout lines adds just enough contrast to highlight the pattern, giving depth without chaos. The smooth surface reflects light, creating a luminous atmosphere that feels both calming and energizing. It’s like a breath of fresh air right on your backsplash.
This classic look adapts easily, whether your style leans minimalist or farmhouse. For a cozy feel, layer with warm wood accents or vintage accessories. If you prefer a sleek modern vibe, pair with stainless steel appliances and matte finishes. You can also switch up grout colors — a darker shade makes the pattern pop, while a matching tone creates a seamless look.
Start by measuring your space and selecting high-quality white subway tiles that suit your budget. Use a level and spacers for precise alignment, ensuring the herringbone pattern stays sharp. Apply a primer and use a tile adhesive suitable for your surface, then carefully lay out your pattern before affixing tiles. Grout the tiles once dry, wiping away excess to keep the surface tidy. Seal the grout to prevent stains and moisture damage.
Add a personal touch by choosing textured or matte tiles if you want a softer feel, or high-gloss for extra shine. Consider installing a thin metallic or colored grout line for a subtle pop of contrast. You could also incorporate decorative trim or a painted border to frame the pattern. Incorporate textured textiles or unique hardware to complement the tile’s simplicity.
This timeless white herringbone tile instantly elevates your kitchen’s look while remaining easy to clean and maintain. It’s a versatile choice that works with any color palette or style shift you might pursue later. Trust in its classic appeal to give your space a fresh, bright vibe that lasts for years.
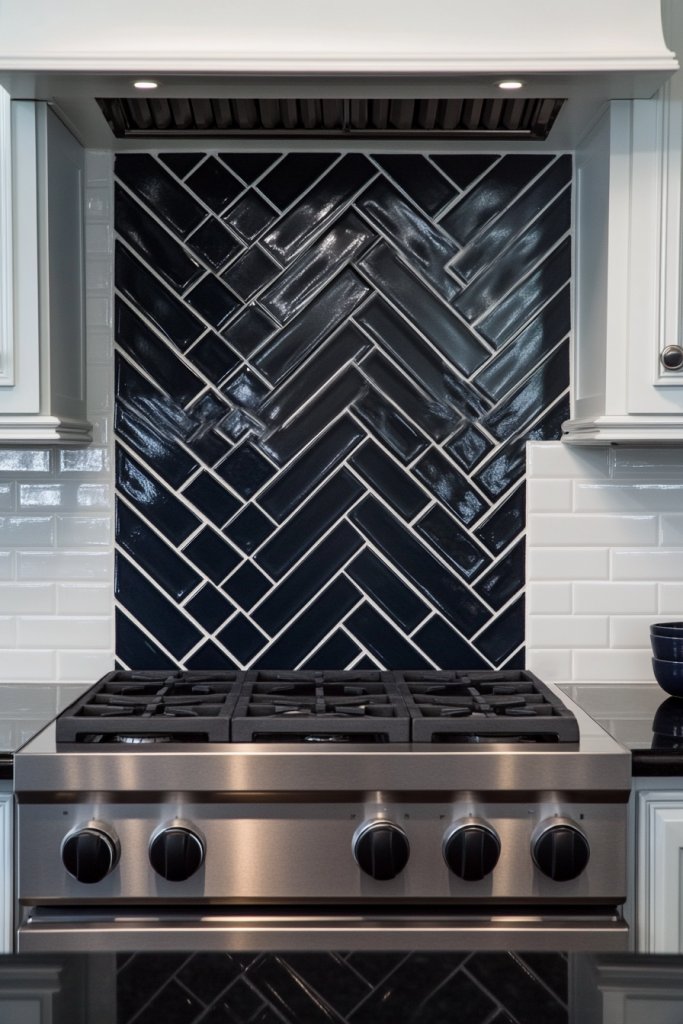
2. Bold Black Herringbone Tiles for Modern Elegance
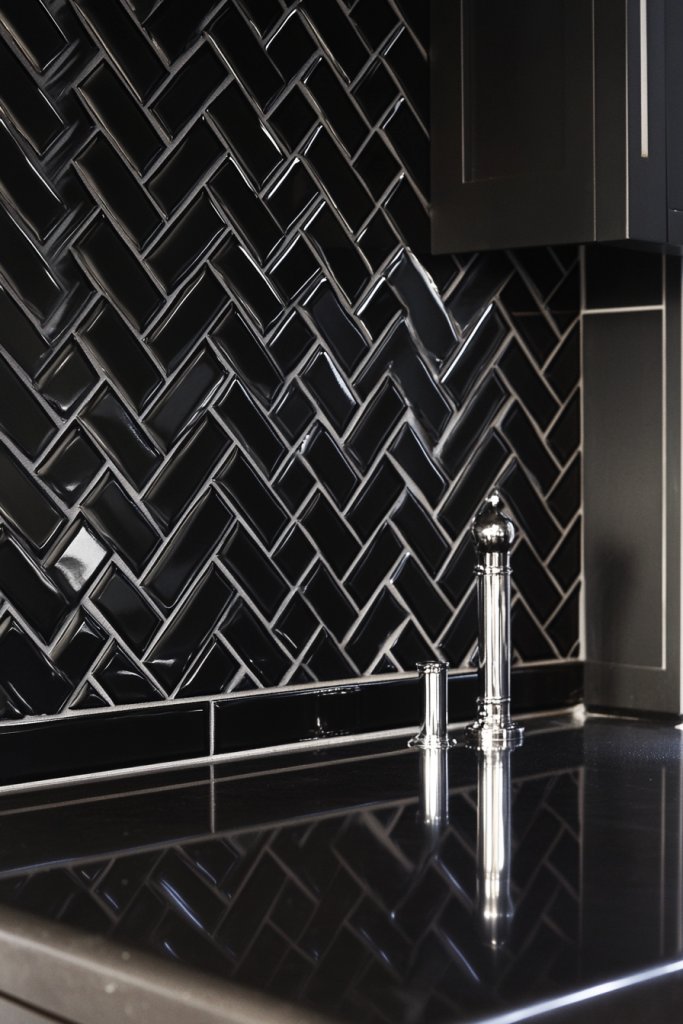
Tired of the same old backsplash? Looking to make a statement without going overboard? Black herringbone tiles deliver a sleek, modern edge that instantly transforms your kitchen or bathroom into a sophisticated space. They add drama and depth, especially in a minimalist setting.
Visualize a wall of rich, matte black tiles arranged in a sharp herringbone pattern. The dark surface absorbs light, creating a moody, luxurious vibe. When illuminated by subtle lighting, these tiles reveal subtle textures and variations in the finish, adding complexity to an otherwise simple color palette. The pattern draws the eye and anchors the room with bold confidence.
Pair black tiles with contrasting light cabinetry or countertops for maximum impact, or go monochrome for a sleek, seamless look. Add metallic fixtures or hardware to enhance the modern aesthetic. For a softer approach, combine with warm wood accents or neutral tones to balance the darkness. You can also experiment with gloss or matte finishes depending on your preferred vibe.
Choose high-quality black tiles that resist chipping and staining. Use a level and spacers for precise pattern alignment, especially since dark tiles show imperfections more readily. Prepare your wall by cleaning and priming it thoroughly. Mix the adhesive properly, then lay out your tiles in a diagonal or herringbone pattern, pressing firmly into place. Grout with a matching dark color to keep the look cohesive, and seal to prevent any staining or moisture issues.
Add visual interest with textured or patterned black tiles, or incorporate metallic or reflective finishes for a glam touch. Consider installing LED strip lighting underneath cabinets or along the backsplash to play with light and shadow. Use decorative hardware or accessories in gold or silver to elevate the overall aesthetic. Keep it minimal or add a few statement pieces to reflect your personality.
Black herringbone tiles create an unmistakably modern vibe that’s both timeless and daring. They pair well with various styles, from ultra-modern to industrial. Trust that their boldness will never go out of style, making your space look polished and effortlessly chic.
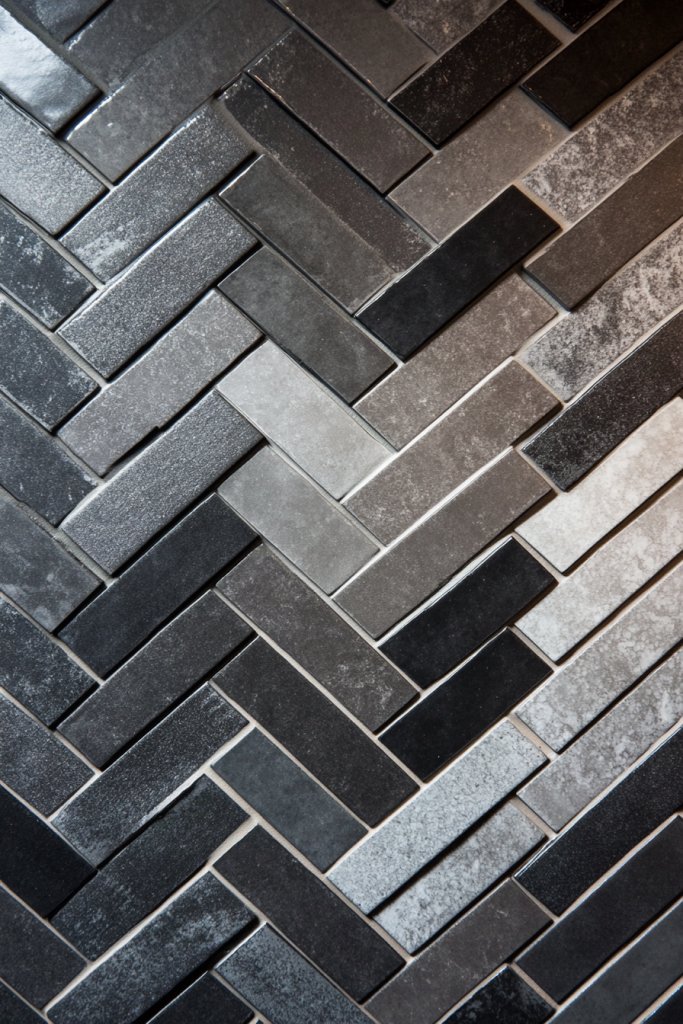
3. Subtle Gray Herringbone with Textured Finish for Depth
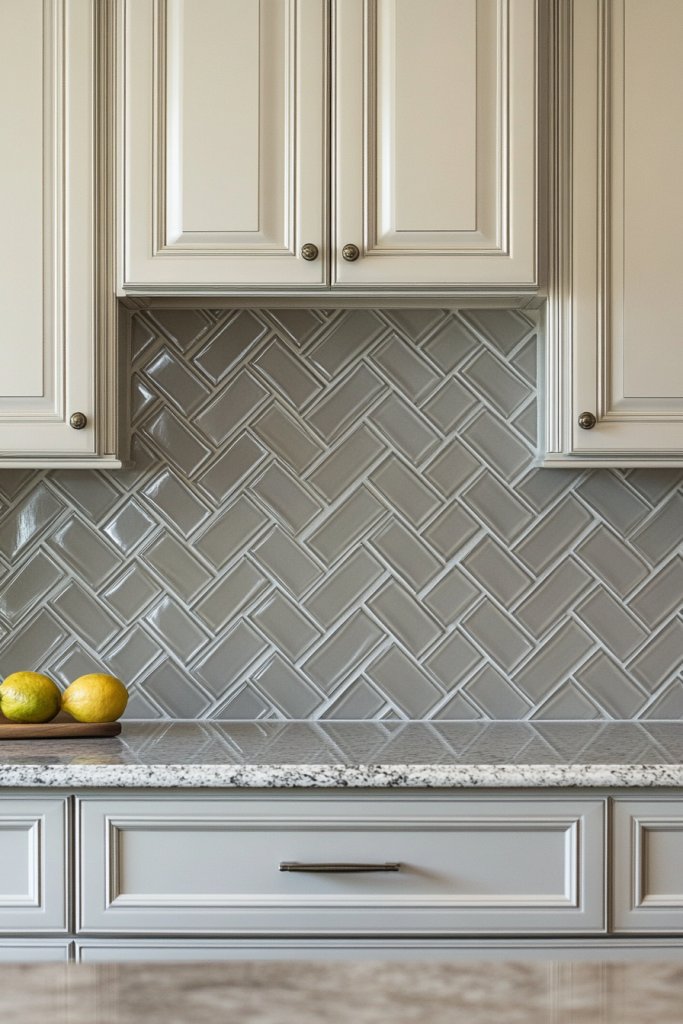
Searching for a versatile backsplash that adds interest without overpowering your space? Gray herringbone tiles offer a perfect balance of neutrality and texture, bringing depth and sophistication. They serve as a subtle backdrop that complements a wide range of color schemes and decor styles.
Picture soft gray tiles with a textured surface that catches light at different angles, creating gentle shadows and highlights. The textured finish adds tactile appeal and visual complexity, making the pattern more engaging. The subtle variation in tone helps hide smudges or water spots, keeping your kitchen looking fresh longer. It’s like a quiet hero of design.
Combine with white or pastel cabinetry for a light, airy feel, or pair with darker tones for contrast. Incorporate warm metallic accents or natural wood elements to soften the coolness. You can also select tiles with matte or slightly glossy finishes depending on your preferred ambiance. Seasonal decor can be easily layered with textiles, plants, or decorative accessories.
Select high-quality textured gray tiles and measure your space carefully. Use a laser level for precise alignment, especially since textured surfaces need careful placement. Prepare your wall by cleaning and priming it. Mix your adhesive and lay out the tiles, following the herringbone pattern meticulously. Once set, grout with a matching or slightly darker tone to emphasize the texture. Seal the grout for durability.
Introduce warmth with natural wood shelves or soft-colored textiles. Play with different grout shades to subtly alter the depth perception. Consider adding decorative tiles or borders for a custom look. Textured ceramic or porcelain tiles are available in various shades, letting you tailor the ambiance to your taste.
Gray textured herringbone tiles strike a perfect balance between classic and contemporary. They provide a timeless appeal that adapts to changing trends and personal styles. Choosing this pattern means investing in a durable, low-maintenance feature that will elevate your space for years to come.
4. Marble Herringbone Subway Tiles for Luxurious Appeal

Ever dream of adding a touch of luxury to your kitchen or bathroom? Marble subway tiles arranged in a herringbone pattern can instantly elevate your space with elegance and class. The natural veining and rich textures create a high-end look that’s hard to beat.
Imagine a wall of creamy marble tiles with striking gray or gold veins, meticulously laid out in a zigzag pattern. The polished surface reflects light beautifully, enhancing the veining and making the room feel more expansive. The subtle variations in each tile give the space a unique, sophisticated character. It’s like having a piece of art on your wall.
Pair marble tiles with minimalist cabinetry and sleek fixtures for a modern look, or combine with vintage brass hardware for a classic aesthetic. For a more dramatic effect, contrast with dark countertops or wall paint. You can also choose honed or polished finishes depending on whether you prefer a matte or shiny appearance. Seasonal accents like lush greenery or soft textiles complement the luxurious feel.
Select high-quality marble tiles suited for wet environments, ensuring durability and stain resistance. Use a level and spacers to maintain precision in your herringbone layout. Prepare your wall by cleaning thoroughly and applying a primer if necessary. Mix a premium adhesive, then carefully lay out your tiles, pressing firmly into place. Grout with a color that enhances the veining—white or light gray generally works best—and seal the surface to protect against stains.
Add a decorative border or trim in contrasting metal or wood for a custom touch. Incorporate metallic or brushed fixtures to complement the veining. Use elegant textiles or sculptural accents nearby to highlight the luxurious vibe. Regular maintenance with marble-safe cleaners keeps the surface pristine and beautiful.
Marble herringbone tiles deliver timeless elegance that instantly upgrades your space. They are a statement of sophistication, suitable for both contemporary and traditional styles. When you choose marble, you’re investing in a feature that’s both durable and endlessly stylish—an enduring symbol of luxury.
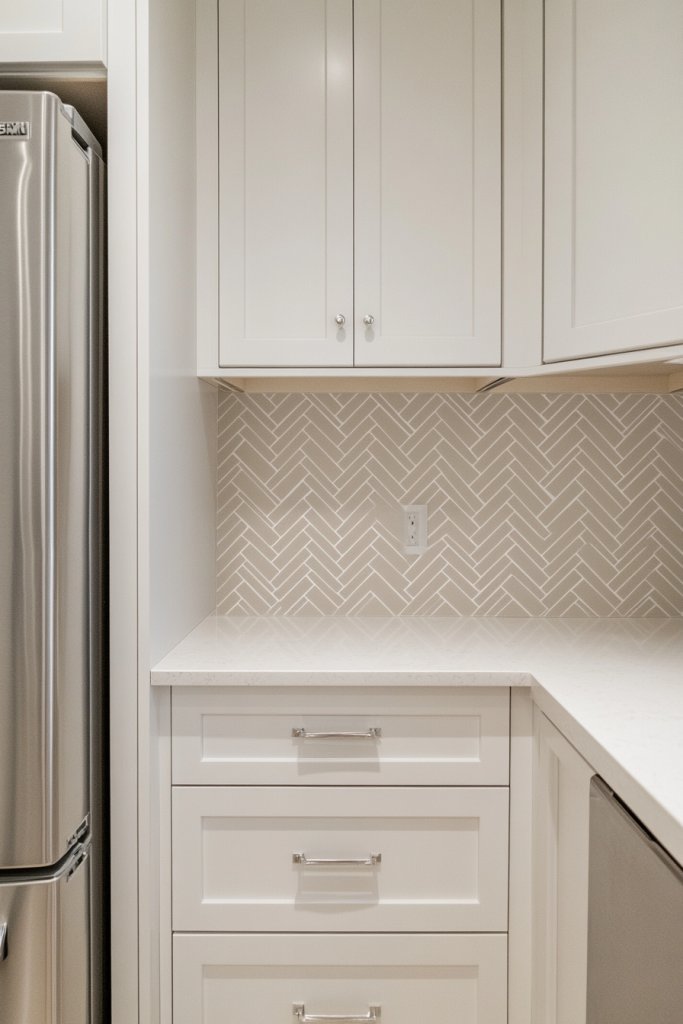
5. Vintage-inspired Cream and Biscuit Herringbone Tiles
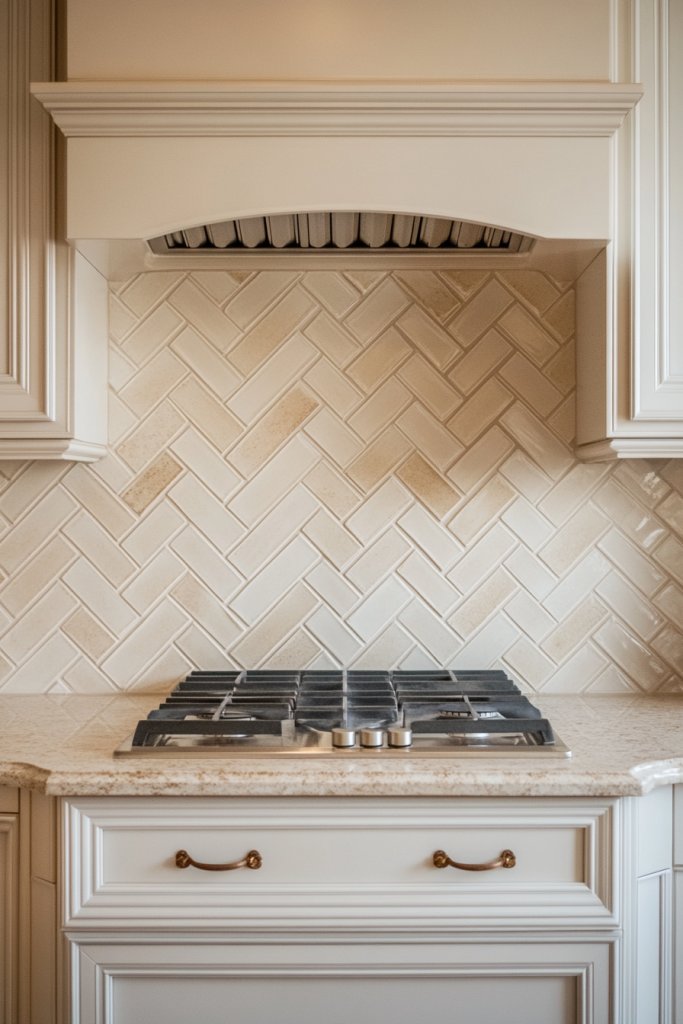
Craving a cozy, nostalgic vibe in your kitchen? Vintage-inspired cream and biscuit-colored tiles in a herringbone pattern evoke warmth and charm reminiscent of farmhouse or cottage styles. They create a welcoming atmosphere that feels timeless and inviting.
Visualize a backsplash of soft, warm-toned tiles with a slightly textured surface, laid out in an intricate zigzag. The gentle hues reflect ambient light softly, enhancing the cozy feel. Pairing with distressed wood cabinets or vintage hardware amplifies the nostalgic charm. The pattern adds visual interest without overwhelming the space.
Combine these tiles with rustic wood accents, open shelving, and vintage-inspired fixtures for an authentic look. For a brighter, more modern twist, add pops of color through textiles or painted accessories. Seasonal decor such as woven baskets or linen curtains complements the warm tones. You can also opt for matte finishes to enhance the vintage feel.
Choose durable, cream or biscuit-colored ceramic or porcelain tiles with a slightly textured finish. Measure and plan your layout precisely, ensuring the pattern stays consistent. Use a level and spacers for alignment, and prepare your wall surface thoroughly. Apply an appropriate adhesive, then lay the tiles in your desired pattern, pressing firmly. Grout with a matching or slightly darker shade to deepen the vintage appeal, then seal for longevity.
Incorporate decorative borders or accent tiles with floral or geometric motifs to add character. Use aged or brushed hardware and fixtures to enhance the vintage aesthetic. Layer with soft textiles like linen or wool, and add a few decorative items like antique jars or woven baskets nearby. These touches personalize the space and reinforce the cozy, nostalgic theme.
Cream and biscuit herringbone tiles evoke a sense of warmth and familiarity that makes any space feel like home. They blend effortlessly with a variety of decor styles, from rustic to shabby chic. Choosing this pattern guarantees a timeless, welcoming vibe that ages beautifully and remains stylish for years.
6. Matte Finish Herringbone Tiles in Soft Pastels for Subtle Charm
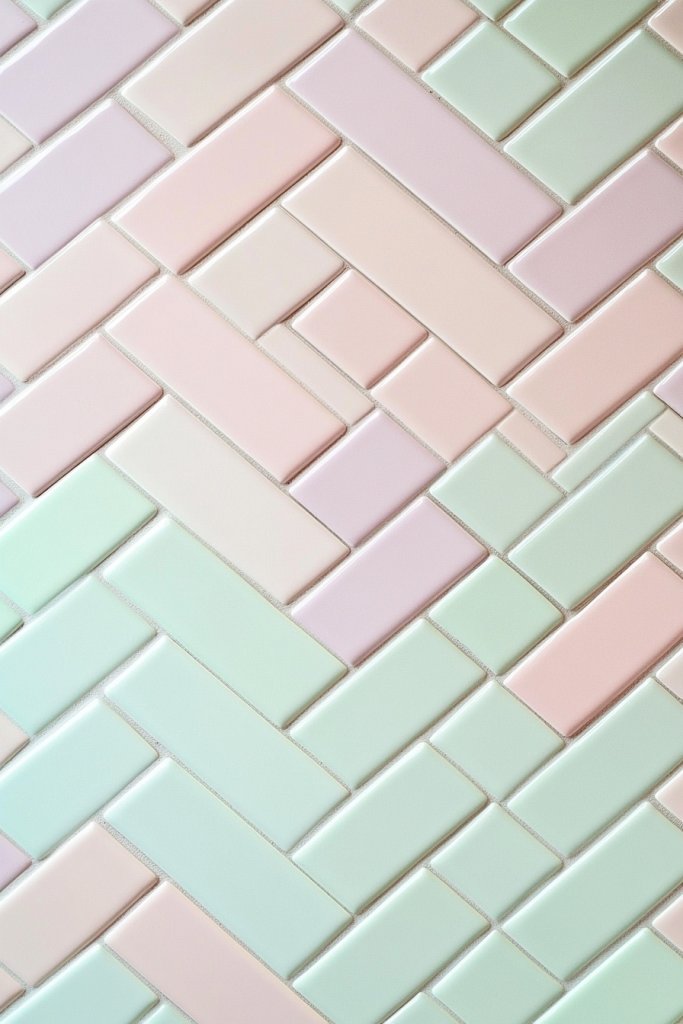
Looking for a gentle, understated backdrop that still makes a stylish statement? Matte pastel herringbone tiles offer a soft, calming aesthetic perfect for creating a serene kitchen or bath. They add just enough color and texture without overwhelming the senses.
Picture delicate blush pink, powder blue, or mint green tiles with a velvety matte finish, arranged in a refined zigzag pattern. The matte surface absorbs light, reducing glare and enhancing subtle hues. The textured grout lines add tactile appeal, inviting you to run your fingers along the pattern. It’s a quiet but impactful design feature.
Combine these tiles with crisp white cabinets and soft textiles for a fresh, airy look. For a cozy vibe, layer with plush towels or cushions in coordinating pastel shades. Incorporate natural wood or brass accents to warm up the space. You can also vary the tile shades slightly for a nuanced, layered effect that adds depth.
Select matte-finish ceramic or porcelain tiles in your chosen pastel hues. Measure your area carefully, and plan the layout to ensure the pattern remains consistent. Use a tile level and spacers for precision, especially since matte finishes can highlight imperfections. Apply a suitable adhesive, then lay out the tiles, pressing firmly. Grout with a matching or slightly darker tone to enhance the soft, muted palette, then seal thoroughly.
Add visual interest with textured textiles, such as linen or boucle, nearby. Incorporate small decorative elements like ceramic bowls or fabric baskets in similar pastel shades. Layering different textures and subtle color variations creates a calming, sophisticated ambiance. Keep maintenance simple with gentle cleansers suited for matte finishes.
Matte pastel herringbone tiles bring a peaceful, charming vibe that’s both trendy and timeless. They suit various decor styles, from coastal to shabby chic, and age gracefully. These tiles prove that subtlety can be stunning, adding a touch of elegance to any space.
7. Glossy Herringbone Tiles for a Shine-Through Effect
Ever want your backsplash to be the focal point of the room? Glossy herringbone tiles deliver a high-impact, vibrant look that immediately catches the eye. They reflect light beautifully, making your space feel lively and expansive.
Imagine a wall of shimmering tiles that catch every flicker of light, creating a dynamic play of reflections. The glossy surface enhances the intricate zigzag pattern, adding depth and dimension. When illuminated by ambient lighting, the tiles seem to glow, energizing the entire room. It’s like a mini disco on your wall, but much classier.
Pair glossy tiles with matte or textured finishes in cabinetry or countertops for contrast. Metallic or chrome fixtures complement the reflective surface, amplifying the modern vibe. For a more subdued look, combine with neutral tones and subtle decor. Seasonal accents like candles or decorative metals work well with the shimmer.
Choose high-quality glossy ceramic or glass tiles designed for wet environments. Use a level and spacers to ensure perfect alignment, especially since reflections highlight imperfections. Prepare your wall by cleaning thoroughly and applying a primer if necessary. Carefully lay the tiles, pressing firmly and evenly. Grout with a matching or slightly contrasting color to enhance the shine, then seal to preserve the finish.
Create focal points with LED backlighting or under-cabinet lighting to make the glossy surface pop. Incorporate metallic or glass accessories nearby to complement the shine. Use decorative metallic hardware or fixtures to tie the look together. Keep the surface pristine with regular polishing to maintain its reflective brilliance.
Glossy herringbone tiles turn your backsplash into a statement piece that radiates energy and style. They work perfectly in contemporary kitchens or bathrooms aiming for a luxe feel. Trust in their reflective magic to instantly brighten and elevate your space.
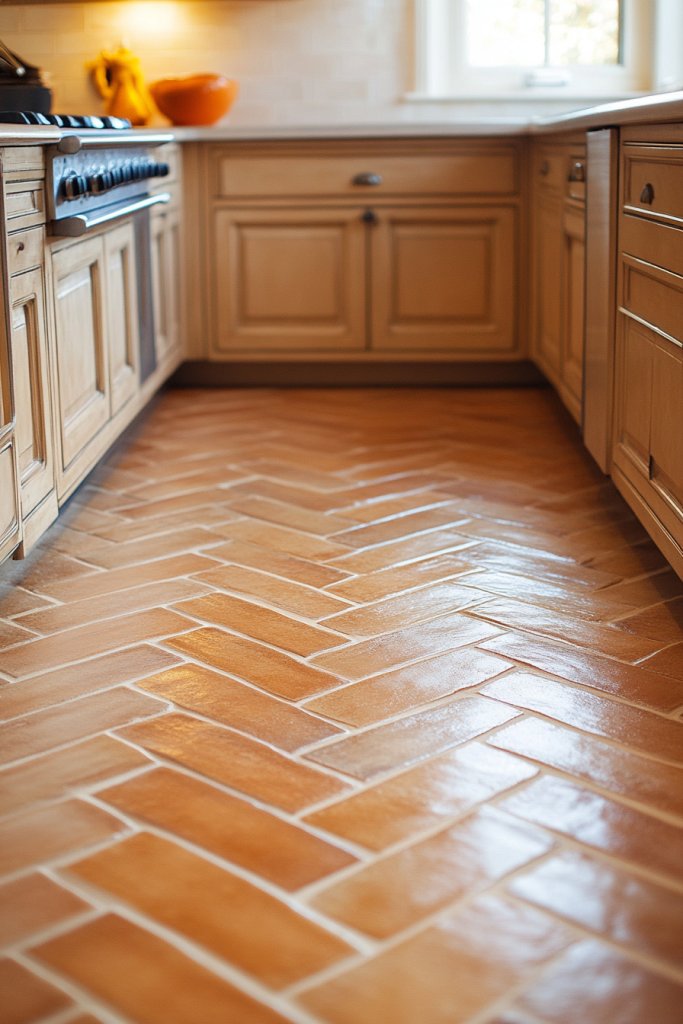
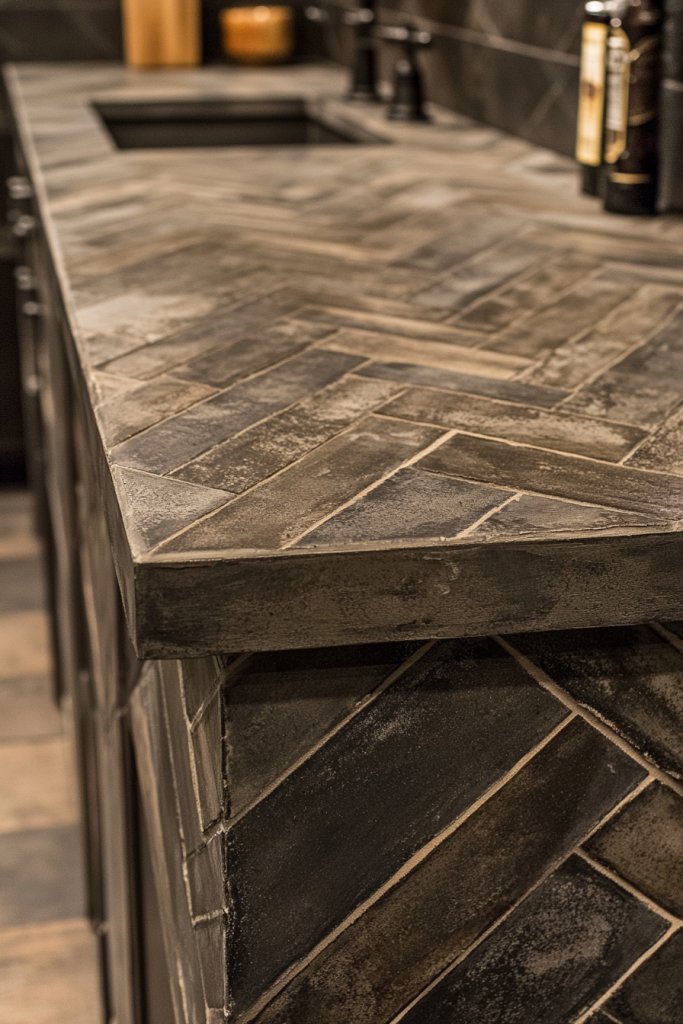
8. Brick-Style Herringbone Pattern with Textured Clay Tiles
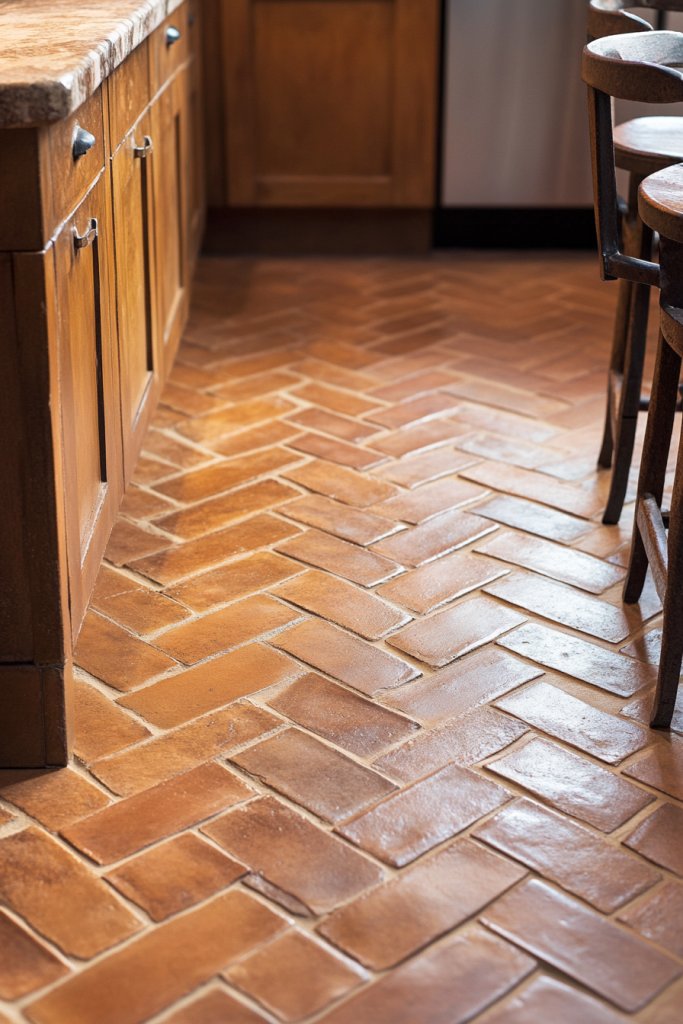
Craving a rustic, earthy vibe that feels warm and inviting? Textured clay tiles laid in a herringbone pattern can give your space a handcrafted, Mediterranean charm. They add tactile richness and a sense of tradition to any room.
Visualize warm terracotta or textured clay tiles with irregular surfaces, arranged in a zigzag pattern that mimics traditional bricklaying. The textured surface adds depth, catching shadows and highlights that enhance the rustic appeal. The natural variation in color and texture creates an authentic, vintage feel. It’s like bringing a piece of the countryside right into your home.
Pair these tiles with wrought iron fixtures or distressed wood accents for an Old World charm. Combine with neutral or earthy tones to keep the rustic vibe cohesive. For a more refined look, integrate glazed or patterned clay tiles as decorative inserts. Seasonal decor with woven textiles or dried botanicals complements the look.
Select high-quality textured clay or terracotta tiles suitable for walls or backsplashes. Prepare your wall surface by cleaning and priming it thoroughly. Use a flexible adhesive suitable for textured surfaces, and lay out your tiles in a herringbone pattern, pressing gently to set the texture. Mix matching grout, preferably in warm tones, and apply carefully to fill all gaps. Seal the surface to protect against moisture and staining.
Add decorative insets or border tiles with intricate patterns to personalize your design. Incorporate vintage-style fixtures, or complement with woven baskets and natural fibers nearby. Use warm-toned lighting to emphasize the earthy textures and colors, creating a cozy, inviting atmosphere. Seasonal touches like dried flowers or rustic accessories enhance the theme.
Textured clay tiles in a herringbone pattern bring warmth and character that’s hard to replicate with modern materials. They evoke a handcrafted, vintage vibe that will age beautifully. Trust in their rustic charm to give your space a unique, cozy personality that lasts.
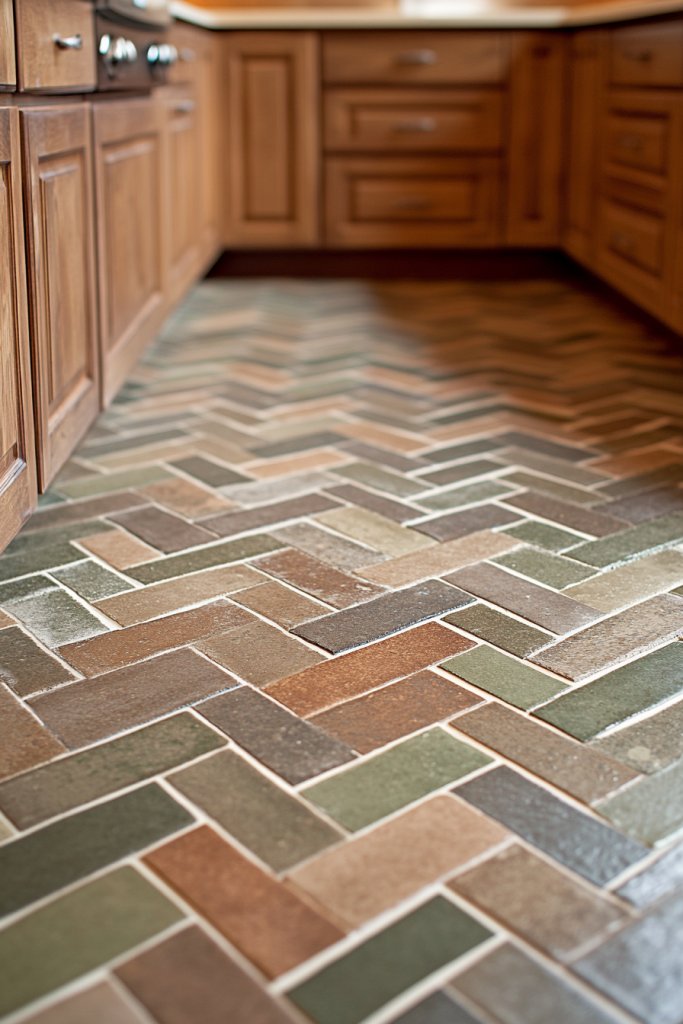
9. Monochrome Herringbone with Varying Tile Sizes for Visual Interest
Want to add a touch of sophistication and playfulness to your backsplash? Monochrome tiles in various sizes arranged in a herringbone pattern create dynamic visual interest without sacrificing elegance. It’s a clever way to keep things simple yet captivating.
Picture small, medium, and large tiles in shades of the same color, laid out in a zigzag pattern that emphasizes texture and size contrast. The variation in tile sizes adds depth and movement, making the wall feel more alive. The consistent color palette keeps the look cohesive while still drawing the eye across different scales.
Combine with neutral cabinetry and minimal hardware for a sleek, modern look. For a more eclectic vibe, mix in different textures like matte, gloss, or textured finishes. You can also experiment with contrasting grout colors to highlight the size differences or unify the pattern. This approach adapts well to small or large spaces alike.
Select a range of tile sizes that fit your space and style preference. Measure carefully to plan your layout, ensuring the pattern flows smoothly. Use a level and spacers to keep everything aligned, especially since differing tile sizes require extra attention. Start by laying out the tiles without adhesive to visualize the pattern, then fix them gradually. Grout in a neutral tone to unify the look, and seal for durability.
Highlight the pattern with contrasting grout or add decorative accents in a different color or material. Incorporate sleek metallic or matte hardware to keep the sophisticated vibe. Use accessories like textured fabrics or decorative pottery nearby to complement the pattern’s subtle complexity. The goal is to create a curated, artful space.
Using varying tile sizes in a monochrome palette adds a layer of visual intrigue that elevates your entire room. It’s a design trick that looks high-end but remains accessible. Trust in the simplicity of the color scheme combined with the complexity of pattern and size to make a bold statement.
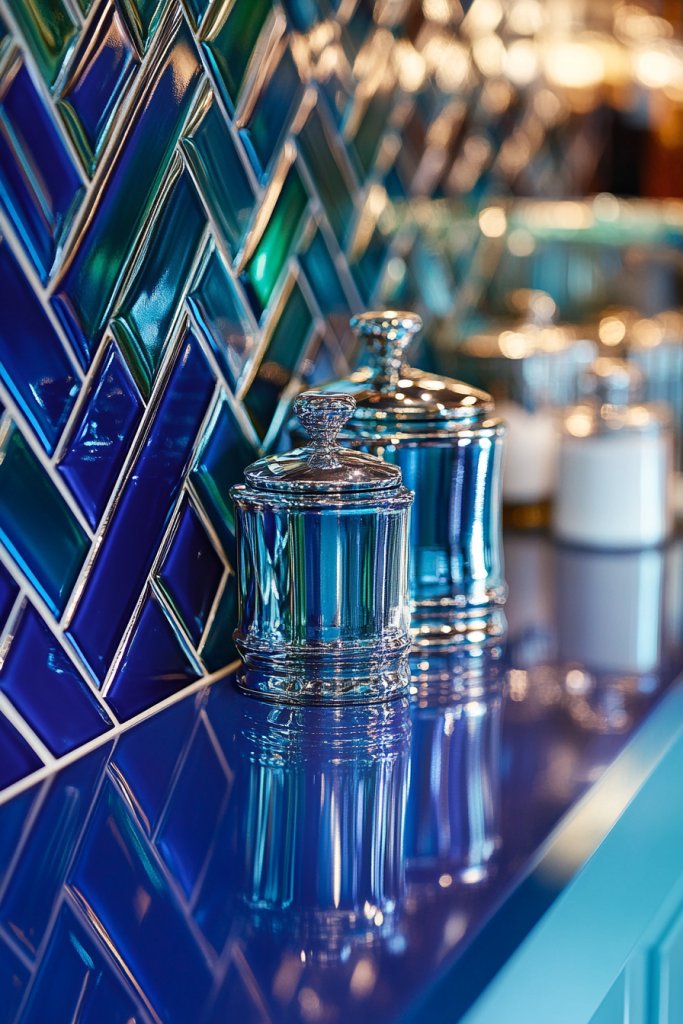
10. Metallic Accented Herringbone Tiles for a Glamorous Touch
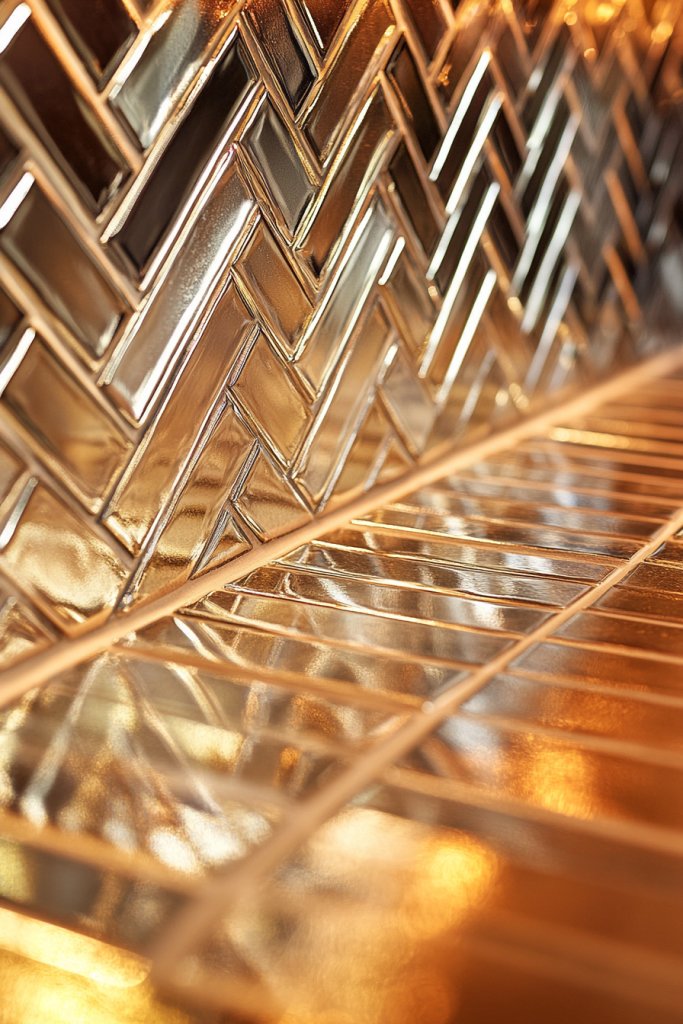
Looking to add a touch of luxury and sparkle? Metallic accented herringbone tiles offer a glamorous upgrade that turns your backsplash into a showstopper. They catch light from every angle, creating a dazzling focal point in any room.
Imagine a wall of tiles with subtle metallic veining or accents woven into the pattern. The reflective surfaces shimmer under lighting, adding depth and movement. Whether in gold, silver, or copper, these tiles radiate sophistication and richness. The intricate pattern combined with metallic highlights makes the space feel opulent and vibrant.
Pair metallic tiles with matte or textured finishes to balance shine with subtlety. Combine with sleek modern fixtures or warm wood accents for contrast. Use metallic or colored grout to tie in the accents or create a layered effect. Incorporate decorative hardware or accessories in matching metals to unify the look.
Choose high-quality metallic or metallic-finish tiles that resist tarnishing or fading. Lay out your tiles in the herringbone pattern, ensuring alignment with a level. Prepare your wall thoroughly, then apply a suitable adhesive, pressing tiles firmly in place. Grout with a matching or contrasting color to make the metallic accents pop. Seal the surface to protect and preserve the metallic shine.
Add LED lighting or accent lighting to amplify the metallic shimmer. Incorporate metallic fixtures, handles, or decorative pieces nearby to enhance the glam effect. Use textiles or accessories in complementary metallic tones for a cohesive look. Regular cleaning with appropriate cleaners will keep the metallic surfaces gleaming.
Metallic accented tiles bring a luxe, high-end feel that can redefine your space. They work well in contemporary, glam, or eclectic settings, proving that a little shimmer goes a long way. Trust their eye-catching appeal to make your kitchen or bath truly stand out.
11. Two-tone Herringbone Pattern for a Modern Geometric Look
Want to make your backsplash pop with bold contrast? Two-tone herringbone patterns introduce a modern, geometric twist that commands attention. They provide a striking visual impact while maintaining a clean, organized aesthetic. Perfect for those who love a bit of edge in their design.
Visualize alternating tiles in two contrasting colors—like navy and white or charcoal and cream—laid in a zigzag pattern. The sharp contrast emphasizes the pattern’s geometry, creating a sense of movement and depth. When illuminated, the alternating colors enhance the dynamic feel, energizing the space. It’s a sophisticated take on classic subway tile.
Combine with minimalist cabinetry and sleek fixtures for a contemporary vibe. For a softer look, choose colors that are close on the color wheel or incorporate textured tiles. Use contrasting grout to define each color block or match grout for a more seamless appearance. This pattern works equally well in small or large spaces.
Select two high-quality tiles in your chosen shades. Measure and plan your layout carefully, visualizing the pattern before laying. Use spacers and a level for accuracy, especially at color transitions. Begin from the center or a focal point to ensure symmetry. Apply adhesive uniformly, then lay tiles in your desired two-tone zigzag pattern. Grout in matching or contrasting colors, and seal for longevity.
Incorporate decorative trims or borders to frame the pattern. Mix in textured or matte finishes for added interest. Use hardware or accessories in complementary or matching hues to reinforce the theme. Seasonal decor can be layered easily to change the look without altering the pattern.
Two-tone herringbone tiles redefine modern style with their bold, graphic appeal. They add a vibrant, energetic feel that suits contemporary or eclectic decor. Trust in their striking contrast to make a statement that’s both timeless and fresh.
12. Subway Tiles with a Subtle Glitter Finish for a Soft Sparkle
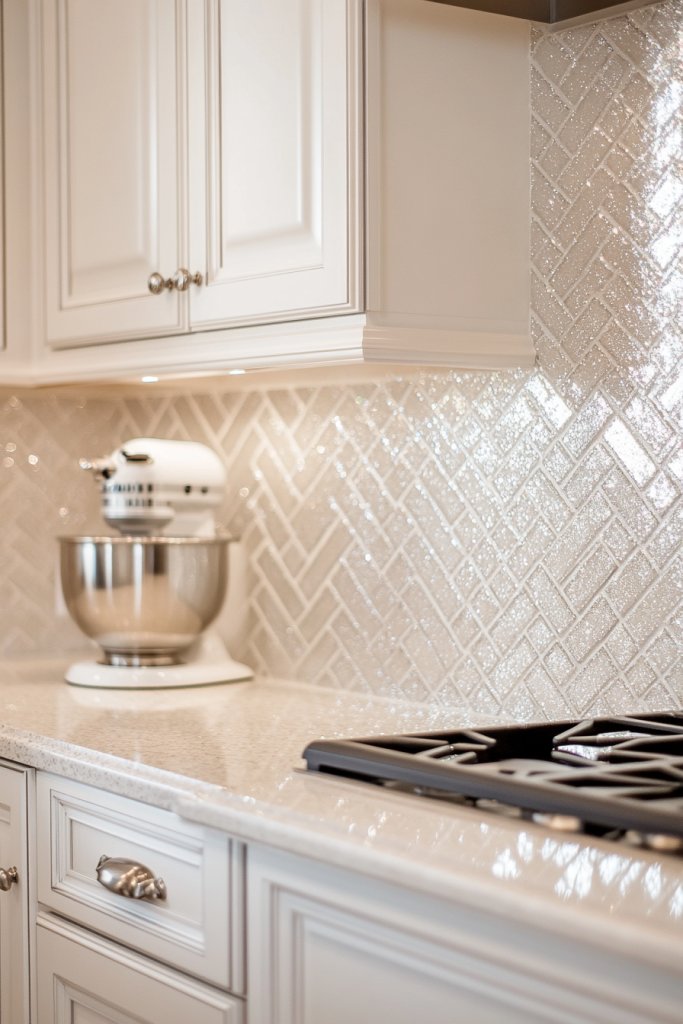
Looking for a backsplash that whispers elegance without screaming? Subway tiles with a subtle glitter finish add just a hint of sparkle, perfect for those who want a touch of glam without overdoing it. They elevate the space with a soft shimmer that catches the eye.
Imagine tiles that shimmer gently under ambient light, with tiny flecks of glitter embedded in the surface. The zigzag pattern brings a sense of movement, while the glitter adds depth and subtle luminosity. When light hits the surface at different angles, it creates a delicate glow that makes your space feel more vibrant and lively.
Pair these tiles with neutral cabinetry and soft textiles for a balanced look. For a more luxurious feel, incorporate metallic fixtures or accessories. Use a clear or lightly tinted grout to enhance the glitter effect without overpowering it. This pattern works well in both minimalist and more ornate settings.
Choose tiles with a fine glitter finish, ensuring the sparkle is subtle but visible. Measure your wall, and plan the layout to keep the pattern consistent. Use a level and spacers to ensure straight lines. Apply a waterproof adhesive suitable for glossy surfaces. Lay out the tiles carefully, then grout with a clear or matching neutral tone. Seal the surface to preserve the glitter.
Add decorative elements like textured fabrics or metallic accents nearby to reflect the sparkle. Incorporate LED or soft lighting to make the glitter stand out even more. Keep the overall color palette neutral to let the subtle shimmer be the star. Regular cleaning with gentle cleaners maintains the subtle glow.
Subtle glitter finishes bring just enough glam to make your backsplash special without overwhelming the space. They suit a variety of decor styles, from modern to vintage-inspired. Trust that a touch of sparkle adds personality and brightness, making your space feel fresh and elegant.
13. Large-format Herringbone Tiles for Minimalist Sophistication
Craving a sleek, uncluttered look that feels modern and spacious? Large-format herringbone tiles create a clean, minimalist aesthetic that’s both sophisticated and easy to maintain. They make a bold statement with fewer grout lines and a streamlined appearance.
Visualize expansive tiles with a subtle pattern, laid out in a zigzag formation that emphasizes scale. The fewer grout lines give the illusion of a continuous surface, adding to the room’s sense of openness. The natural variations in the tile surface add texture without cluttering the visual flow. The overall effect is a seamless, high-end look.
Combine with simple cabinetry and modern fixtures for a contemporary vibe. Use neutral or monochrome color schemes to keep the look cohesive. For added interest, consider matte or satin finishes that reduce glare. Large tiles also work well with open shelving or minimal decor to enhance the minimalist aesthetic.
Choose large-format tiles that fit your space, typically 12×24 inches or bigger. Measure carefully to plan your layout, considering the pattern’s flow. Use a heavy-duty adhesive and a notched trowel to ensure full coverage. Install in a straight or running bond pattern, aligning the tiles precisely. Use a flexible grout to accommodate slight movements and seal thoroughly to prevent stains.
Keep accessories minimal to emphasize the tile’s scale. Incorporate sleek hardware and simple decor elements to maintain the clean look. Use lighting strategically to highlight the surface’s texture or sheen. Regular cleaning preserves the smooth, minimalist appearance and prevents grout discoloration.
Large-format tiles in a herringbone pattern offer a timeless, modern appeal that enlarges your space visually. They’re perfect for contemporary homes seeking elegance with minimal fuss. Trust in their ability to create a sophisticated, streamlined environment that feels fresh for years.
14. Herringbone Pattern with Glass Tiles for a Light-reflecting Effect

Want to brighten up your space with a touch of modern elegance? Glass tiles in a herringbone pattern reflect light beautifully, creating a luminous, airy atmosphere. They instantly add a sleek, contemporary vibe that’s perfect for kitchens and bathrooms.
Picture transparent or lightly tinted glass tiles arranged in a zigzag pattern that captures and reflects every bit of light. The smooth, glossy surface amplifies brightness and adds depth, making the room feel more expansive. The pattern’s clean lines give it a crisp, sophisticated look that enhances any decor style. It’s like having a mirror on your wall, but way more stylish.
Pair glass tiles with matte or textured finishes in cabinetry and fixtures for contrast. Incorporate metallic or chrome accents to maximize the reflective quality. Use clear or lightly colored grout to keep the focus on the tiles’ transparency and shine. This pattern suits contemporary, minimalist, or even eclectic interiors.
Select high-quality glass tiles with a smooth or textured surface depending on your style preference. Measure your wall carefully and plan the pattern to ensure alignment. Use a waterproof adhesive suitable for glass, and lay the tiles with a level, following the herringbone pattern. Grout with a clear or matching color to enhance the reflective effect. Seal thoroughly to protect the surface.
Add backlighting or LED strips behind or beneath the tiles to amplify their luminous effect. Use metallic fixtures or transparent accessories nearby for a cohesive, reflective environment. Keep the space clutter-free to allow the glass to shine and breathe. Regular cleaning with a glass-safe cleaner maintains their pristine look.
Glass tiles with a herringbone pattern turn your backsplash into a glowing feature. They make small spaces feel larger and brighter, perfect for urban apartments or modern homes. Trust their versatility and luminous appeal to elevate your decor effortlessly.
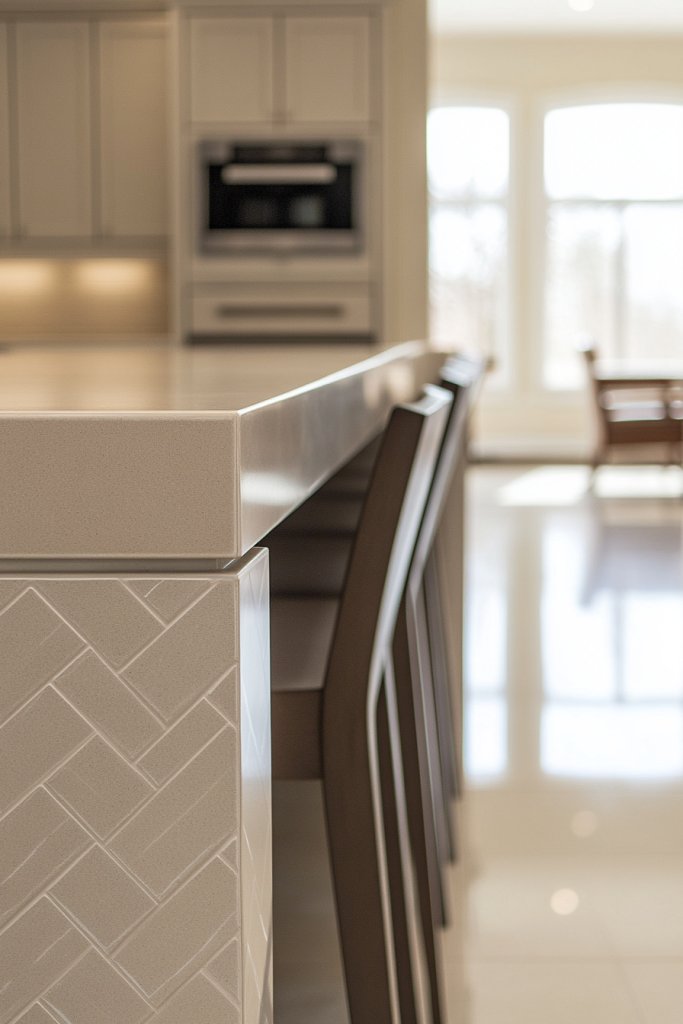
15. Textured Ceramic Herringbone Tiles for Visual and Tactile Interest
Looking to add depth and dimension to your walls? Textured ceramic tiles in a herringbone pattern provide a tactile experience that’s visually engaging. They bring a handcrafted feel that adds warmth and personality to any space.
Imagine tiles with embossed patterns, ripples, or subtle relief, arranged in a zigzag layout. The textured surface creates shadows and highlights, making the pattern pop even in subdued lighting. Running your fingers over the tiles reveals a rich, layered surface that invites curiosity. It’s like a piece of functional art.
Combine textured tiles with smooth, matte, or gloss finishes for contrast. Use them in rustic, Mediterranean, or eclectic styles to add character. Incorporate warm or neutral tones to highlight the texture, or go bold with contrasting colors. Seasonal accents like woven textiles or ceramics enhance the tactile vibe.
Choose high-quality textured ceramic tiles that are durable and easy to clean. Measure your wall carefully, and plan the layout to maintain pattern consistency. Use a flexible adhesive suitable for textured surfaces, and lay the tiles with a level and spacers. Grout with a matching or contrasting color to emphasize the pattern’s depth. Seal the surface for protection against stains and moisture.
Layer the textured wall with soft textiles, sculptures, or decorative ceramics nearby to boost the tactile appeal. Incorporate warm lighting to accentuate shadows and relief. Use accessories like woven baskets or textured fabrics to complement the surface. Regular cleaning will maintain the tactile richness and visual interest.
Textured ceramic tiles bring a handcrafted, artisanal touch that elevates your space. They are perfect for adding warmth, character, and a sense of craftsmanship. Trust their ability to create a cozy, inviting environment that ages beautifully.
16. Eco-friendly Recycled Material Tiles in a Herringbone Design
Want to make your home more sustainable without sacrificing style? Recycled material tiles arranged in a herringbone pattern offer an eco-friendly solution that’s both stylish and responsible. They prove you can be eco-conscious while still enjoying high-end design.
Picture tiles crafted from reclaimed glass, ceramic, or composite materials, laid out in a zigzag pattern. The mix of colors and textures creates a unique, mosaic-like effect that showcases the material’s history. The subtle variations and imperfections add charm and authenticity, making each piece a conversation starter. It’s a sustainable statement with serious style.
Pair recycled tiles with natural wood or other sustainable finishes for a cohesive eco-friendly look. Use neutral or earthy tones to emphasize sustainability and warmth. Mix textures and finishes to add visual interest, or keep it simple for a modern, minimalist vibe. Incorporate eco-friendly decor elements nearby for a fully sustainable aesthetic.
Source high-quality recycled tiles from reputable suppliers specializing in eco-friendly materials. Measure your space carefully and plan the layout to highlight the pattern. Use a suitable adhesive that’s also environmentally friendly. Lay the tiles in the herringbone pattern, ensuring alignment and consistency. Grout with a natural or neutral color, then seal with eco-safe sealants to protect against moisture.
Personalize with natural fiber textiles or reclaimed wood shelves to enhance the sustainable theme. Incorporate decorative accents in recycled or natural materials. Use lighting that highlights the varied textures and colors of the tiles. Regular maintenance with eco-friendly cleaners sustains their beauty and integrity.
Choosing recycled material tiles demonstrates your commitment to sustainability without compromising style. They add character and a story to your space, reflecting eco-conscious values. Trust that your choice supports a healthier planet while making your home uniquely beautiful.
17. Multi-colored Mosaic Herringbone for Artistic Flair
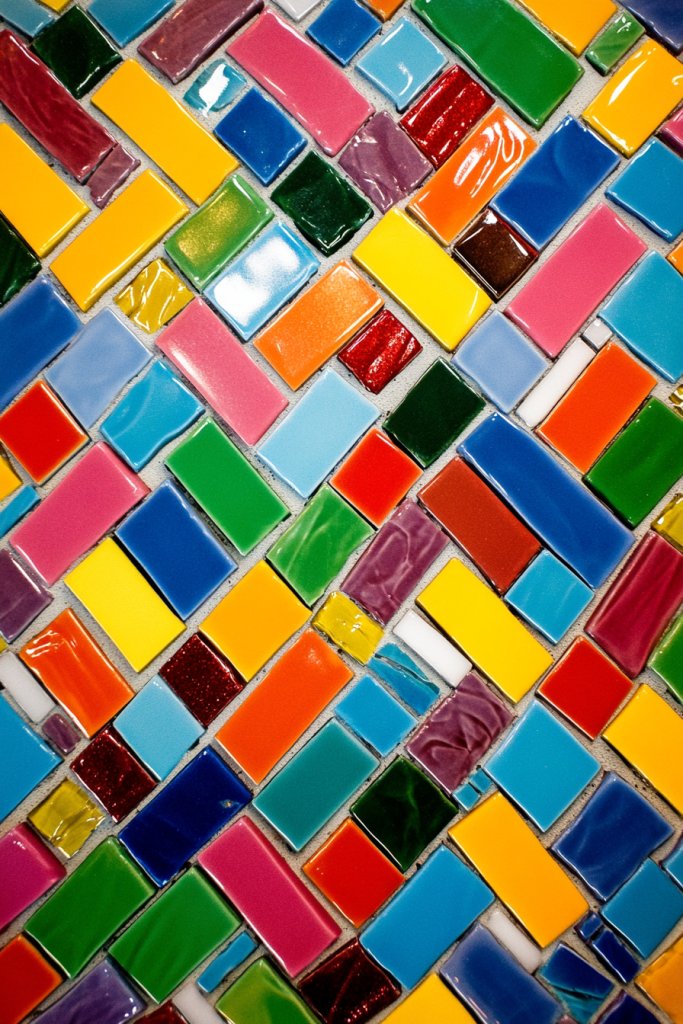
Want to turn your backsplash into a piece of art? Multi-colored mosaic herringbone tiles bring vibrancy and personality, creating a playful yet sophisticated focal point. They’re perfect for those who love color and want to showcase their artistic side.
Imagine a tapestry of small tiles in various hues—blues, reds, greens—laid out in a zigzag pattern that feels dynamic and lively. The mosaic arrangement creates a textured, layered effect that adds depth and movement. The mix of colors can be tailored to your favorite palette, making the space uniquely yours. It’s like a visual symphony on your wall.
Combine with neutral cabinetry and minimal accessories to let the colors shine, or go bold with contrasting wall paint. Use the mosaic as an accent in a larger design or as the main feature. Incorporate complementary decor like colorful textiles or art pieces nearby. This pattern adapts well to eclectic, boho, or artistic interiors.
Choose small mosaic tiles in a variety of colors and ensure they are suitable for walls or backsplashes. Measure your space and plan the pattern carefully to balance the colors. Use a flexible adhesive and a level, then lay out the mosaic tiles in the herringbone pattern, pressing firmly. Grout with a neutral or color-enhancing tone to unify the design. Seal for protection.
Create a custom color story by selecting tiles that represent your personality. Incorporate metallic or iridescent tiles for extra flair. Use nearby textiles or art in similar hues to enhance the artistic vibe. Layer with lighting that highlights the variety of textures and colors.
A mosaic herringbone backsplash offers endless opportunities for creativity and self-expression. It’s a bold choice that will spark conversations and admiration. Trust in its vibrant, artistic appeal to make your space feel lively and personal.
18. Herringbone Pattern with Subway Tiles and Contrasting Grout
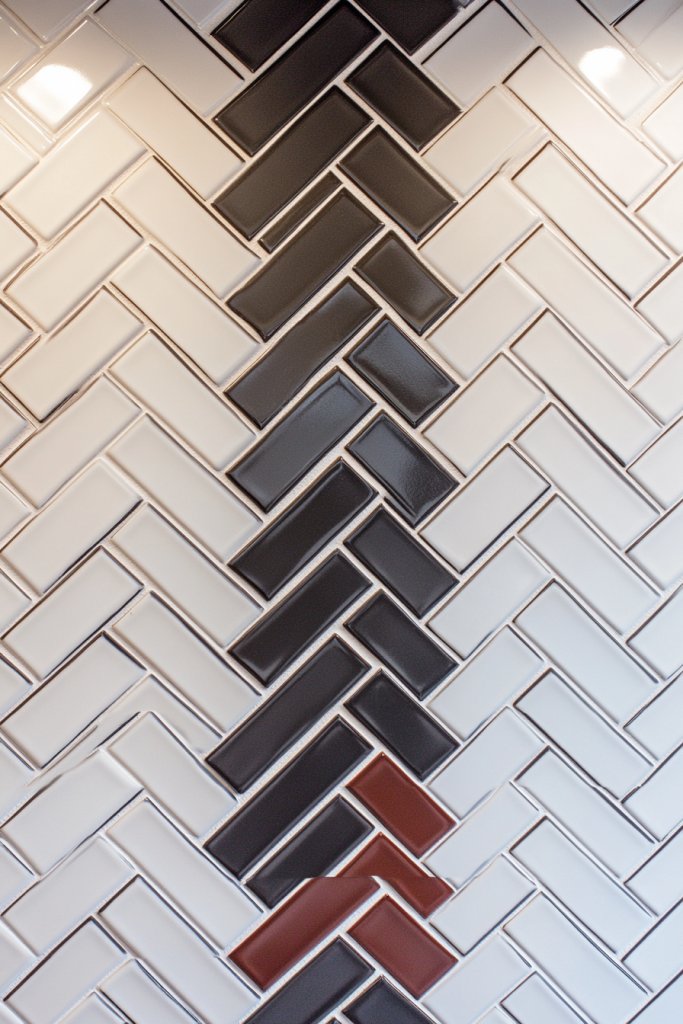
Looking to add definition and depth to your backsplash? Using contrasting grout with subway tiles in a herringbone pattern creates a striking visual effect. It emphasizes the pattern’s geometry and adds a modern touch that instantly elevates the space.
Imagine crisp subway tiles arranged in a zigzag pattern, with dark grout lines that sharply define each tile. The contrast makes the pattern stand out, giving a layered, textured appearance even in simple tile choices. When illuminated, the grout lines cast subtle shadows, adding dimension and interest. It’s a simple trick that packs a visual punch.
Pair with sleek, minimalist cabinetry for a contemporary look, or use vintage-inspired fixtures for a more eclectic vibe. Play with different grout colors—white on dark tiles or black on light tiles—to customize the effect. Keep the overall palette neutral for maximum impact, or introduce bold accents nearby.
Choose high-quality subway tiles suitable for wall installation. Measure your space and plan the layout to ensure the pattern stays aligned. Use a level and spacers to maintain even grout lines. Apply adhesive carefully, then lay tiles in your chosen pattern. Once dry, grout with a contrasting color, wiping away excess, and seal for durability.
Add decorative trims or metallic accents to frame or highlight the pattern. Use lighting to enhance shadow play along the grout lines. Incorporate accessories or textiles in colors that complement the grout for a cohesive look. Regular cleaning keeps the contrast crisp and fresh.
Contrasting grout elevates a simple subway tile into a design feature that commands attention. It’s a versatile technique that suits many decor styles, from modern to rustic. Trust in the power of color contrast to make your backsplash truly stand out.
19. Narrow Subway Tiles in a Herringbone for a Slim, Elegant Look
Want a delicate, refined look that enhances small or narrow spaces? Narrow subway tiles in a herringbone pattern create an elegant, elongated effect that visually lifts and expands the room. This subtle detail can make a big difference in tight spots.
Imagine sleek, slender tiles arranged in a precise zigzag, emphasizing verticality and length. The fine lines draw the eye upward and across, making ceilings feel higher and walls more expansive. The pattern’s subtlety adds sophistication without overwhelming the space. It’s like a piece of jewelry for your walls.
Combine with light-colored cabinetry and minimalist fixtures for a contemporary feel. Use gloss or satin finishes to reflect light and enhance the slim profile. Incorporate decorative trims or borders to frame the pattern, or pair with textured textiles to add softness. This pattern adapts well to bathrooms, kitchens, or even laundry rooms.
Select narrow, elongated tiles that fit your space’s dimensions. Measure carefully and plan the layout, starting from the center or a focal point. Use a level and spacers for precise alignment, especially since narrow tiles can highlight unevenness. Apply adhesive, then lay the tiles in the herringbone pattern, pressing firmly. Grout with a matching or subtle contrasting color, then seal to protect.
Frame the pattern with decorative trim or paint to enhance its delicate quality. Add small decorative elements like metallic or glass accents nearby for a refined look. Use lighting that emphasizes the pattern’s elegance and length. Keep accessories minimal to let the tiles shine.
Narrow tiles in a herringbone pattern create a sleek, refined environment that feels upscale and thoughtful. They maximize visual space and add a whisper of luxury. Trust this subtle pattern to elevate your design with timeless charm.
20. Textured Cement Tiles in a Herringbone Pattern for an Industrial Edge
Craving an edgy, industrial vibe that’s durable and stylish? Textured cement tiles in a herringbone pattern combine toughness with artistic flair. They add character and a vintage-inspired touch that stands out in any space.
Picture rough-textured cement tiles with embossed geometric or organic patterns, laid out in a zigzag formation. The textured surface creates shadows and highlights, emphasizing the pattern’s depth. The muted, earthy tones enhance the industrial look, giving your space a raw, authentic feel. It’s like urban art made functional.
Pair with metal fixtures, exposed pipes, or reclaimed wood for maximum industrial impact. Use neutral, gray, or earth-tone palettes to keep the look cohesive. Incorporate vintage or antique accessories nearby to enhance the vibe. Textured cement tiles also work well as a statement wall or accent.
Choose durable cement tiles designed for high-traffic or moisture-prone areas. Measure your space meticulously, and plan the pattern carefully. Use a strong adhesive suitable for textured surfaces. Lay the tiles in the herringbone pattern, pressing firmly and evenly. Grout with a matching or slightly darker tone to emphasize the texture, then seal with a penetrating sealer for protection.
Complement with industrial fixtures, vintage lighting, or metallic accents. Incorporate open shelving or repurposed furniture to highlight the raw materials. Use lighting that casts shadows to accentuate the textured surface. Regular maintenance with appropriate cleaners preserves the surface’s rugged charm.
Textured cement tiles in a herringbone pattern fuse durability with design edge. They add an authentic, vintage touch that ages gracefully. Trust their strong visual presence to give your space a bold, industrial personality that lasts.
21. Herringbone Pattern with Peel-and-Stick Tiles for Easy Installation
Want a stylish backsplash without the mess and hassle of traditional tile installation? Peel-and-stick tiles in a herringbone pattern offer a DIY-friendly solution that’s quick, affordable, and mess-free. Perfect for renters or anyone eager for an instant upgrade.
Imagine peeling away the backing and pressing colorful or neutral tiles into place, creating a zigzag pattern that instantly transforms your space. The adhesive backing ensures a secure fit, while the lightweight design makes installation a breeze. The pattern’s sharp lines add visual interest without the need for grout or tools. It’s a simple way to get a high-end look fast.
Choose from a variety of colors, textures, and finishes to match your decor. Mix and match tiles for a custom mosaic effect, or keep it uniform for a sleek, modern look. Replace or reposition tiles easily if you want to change the pattern or refresh the look later. Ideal for small projects, renters, or quick updates.
Measure your wall and plan your layout, starting from the center or a corner. Peel the backing and carefully press each tile into place, aligning edges precisely. Use a level or straight edge for accuracy, especially in a herringbone pattern. Smooth out air bubbles with a squeegee or a credit card. No grout is needed; just ensure the tiles are fully adhered and sealed at edges.
Add decorative elements like painted borders or metallic accents around the tiles for a custom touch. Layer with textiles or accessories to personalize your space further. Use lighting to highlight the pattern, and consider removable options for renters or temporary setups. Keep the surface clean with gentle wipes.
Peel-and-stick tiles make decorating stress-free and accessible. They allow you to experiment with bold styles or patterns without permanence, giving you confidence to try new looks. Trust in their ease and versatility to refresh your space quickly and affordably.
Conclusion
Exploring these diverse herringbone backsplash subway tile ideas demonstrates just how versatile and timeless this pattern can be. From subtle neutrals to bold color combinations, there’s a perfect fit for every home. Don’t hesitate to try these ideas and turn your kitchen into a captivating space that reflects your unique style and personality. Let your creativity shine and inspire your next home upgrade!