Transforming a kids’ bedroom into a fun, inspiring haven is one of the most exciting decorating adventures! Kids bedroom decor ideas are wildly popular because they turn everyday spaces into magical worlds where imagination can run free. From whimsical themes to clever storage solutions, these designs make children feel special and help foster their creativity and growth.
In this article, you’ll discover a variety of playful and practical decor ideas that cater to different styles and ages. Whether you’re looking for bold colors, cozy reading corners, or themed accents, there’s something to spark your inspiration. Get ready to transform a simple room into a joyful space that encourages your child’s personality and dreams to flourish!
1. Colorful Wall Murals for Imaginative Play
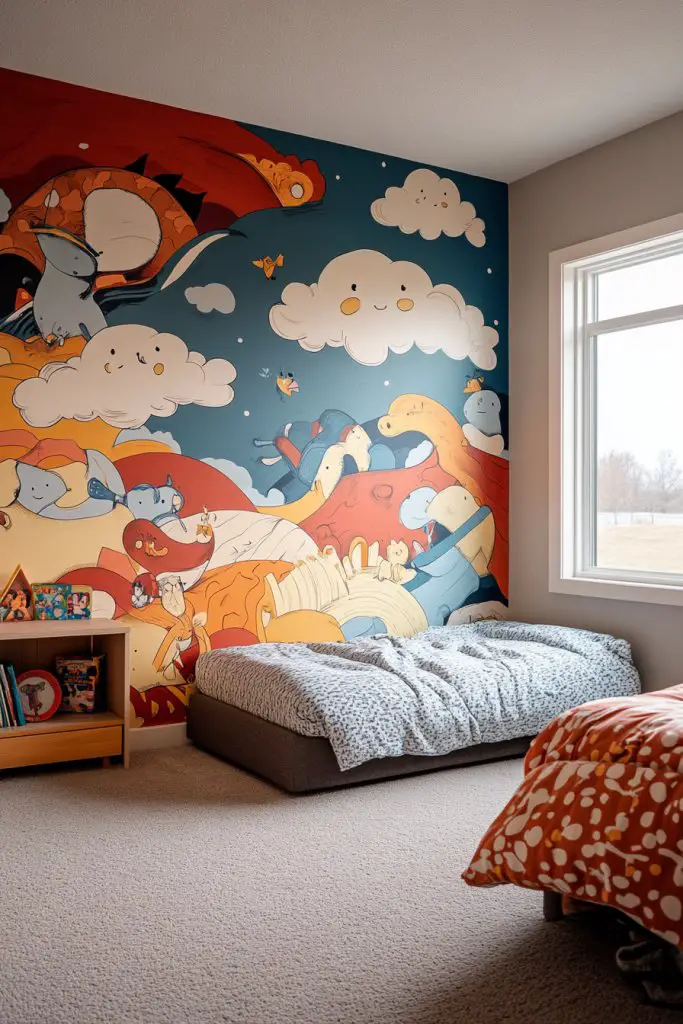
Kids often seem to outgrow their bland, boring walls faster than you can say ‘redecorating’. Parents crave a space that sparks imagination without constantly repainting or redecorating. A dull wall can leave a room feeling uninspired and lifeless, making playtime less magical.
Imagine a wall bursting with vibrant, removable murals depicting enchanted forests, outer space adventures, or whimsical animals. The colors pop against neutral backgrounds, creating a lively backdrop for storytelling and role-play. Textured decals add depth, while matte finishes keep glare at bay, inviting kids to lose themselves in fantasy.
Opt for themes matching your child’s interests, from fairy tales to dinosaurs. Seasonal murals change the vibe—bright and cheerful for summer, cozy and warm for winter. For small rooms, vertical murals can elongate the space, while larger walls can handle expansive scenes. Use removable decals for easy updates as tastes evolve.
Start by selecting high-quality, removable wall decals or murals designed for kids’ rooms. Measure wall dimensions to ensure perfect fit and ease of application. Smooth out bubbles with a squeegee or credit card, and avoid placing murals in high-humidity areas to prevent peeling. For a DIY touch, paint sections with chalkboard or magnetic paint, then add themed decals over it.
Add your child’s name within the mural for a personalized touch, or incorporate favorite characters using custom stickers. Layer with textured fabrics like plush cushions or themed bedding to complement the mural. Consider integrating glow-in-the-dark elements for nighttime storytelling magic. Keep it fun and flexible to adapt as your kid’s interests grow.
A vibrant mural transforms a plain room into an imaginative haven, boosting your child’s creativity. It’s a simple upgrade with enormous impact—proof that small touches make a big difference. Your child’s room can become a canvas of endless adventures, inspiring confidence and joy every day.
2. Modular Storage Cubes as Playful Book Nooks
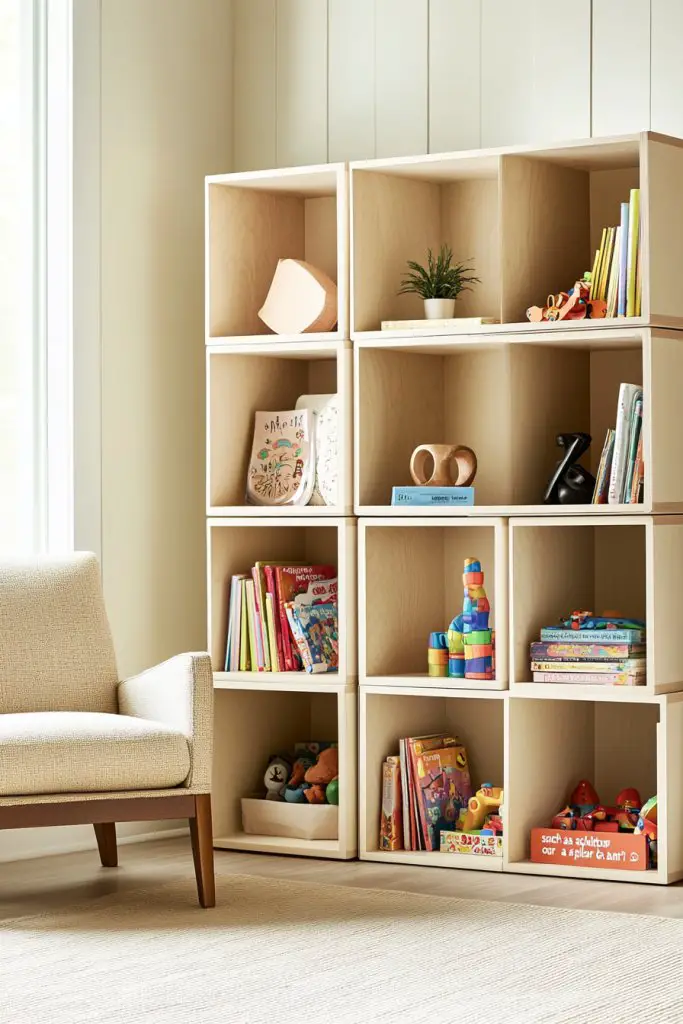
Cluttered rooms with toys and books scattered everywhere can make even the most organized parent want to scream. Kids need accessible storage that encourages independence but doesn’t turn the space into chaos. Finding the right balance between function and fun is the key.
Picture colorful cubes stacked in a playful arrangement, forming a mini library or toy corner that invites kids to browse and pick their favorites. Open-faced bins with rounded edges make grabbing books or toys effortless. Bright hues like turquoise, yellow, and coral add cheer while keeping the space lively.
Use stacking and configuring cubes to suit small or large rooms—create a tall tower or a low, accessible shelf. Mix and match colors for a playful look or stick to one tone for a sleek, modern vibe. For older kids, add labels with fun fonts or icons to encourage organization. Incorporate a few larger bins for bulky toys or stuffed animals.
Choose stackable, durable storage cubes made from lightweight plastic or wood. Position them at kid-friendly heights to promote independence. Secure stacks with safety brackets or wall anchors to prevent tipping. Use labels or decorative stickers to identify contents easily. Arrange the cubes in a pattern that’s both functional and visually appealing—consider symmetry or asymmetry for style.
Add a fabric or cushioned top to some cubes to create a comfy seating area. Personalize with kid’s favorite colors or themes, and incorporate a few open shelves for decorative items or awards. Change labels or rearrange cubes as your child’s interests evolve, making the setup adaptable and fun.
Organized, accessible storage helps children develop responsibility and pride in their space. Plus, a vibrant, playful setup makes tidying up feel like a game rather than a chore. Watch as your kid learns to take ownership of their belongings, turning clutter into a creative display of their personality.
3. Wall-Mounted Activity Boards for Hands-On Fun
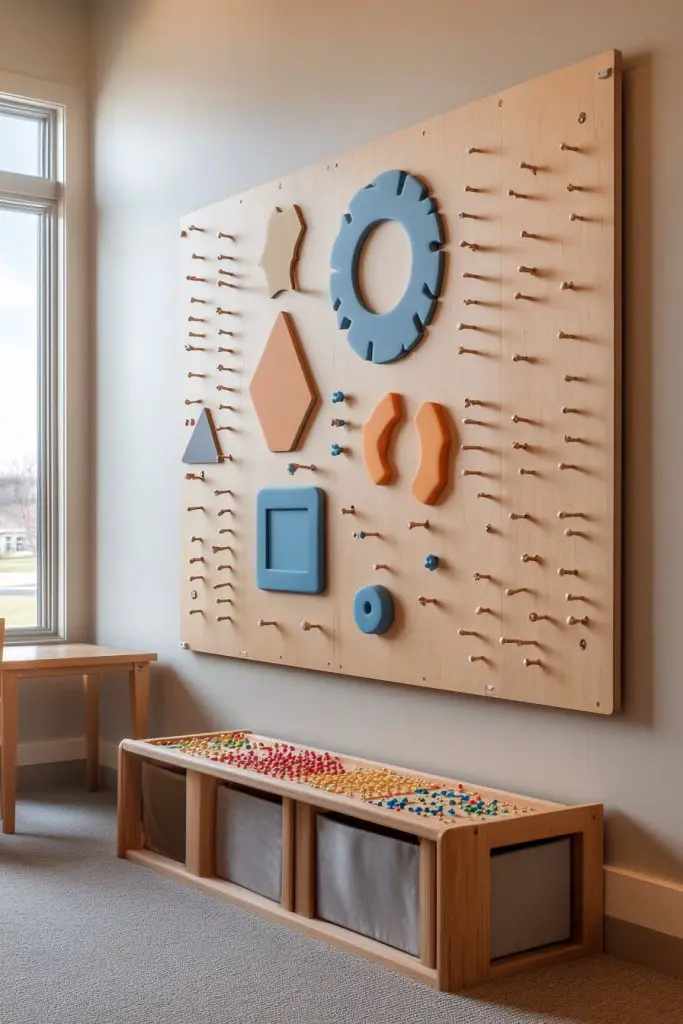
Kids often get bored quickly, especially when their walls are just blank canvases. Parents want to create engaging spaces that stimulate their child’s mind and keep them entertained without screens. An activity board combines fun and learning all in one place.
Visualize a colorful corkboard filled with pinned drawings, magnetic letters, and tactile fabric patches. A chalkboard section invites doodling, while small hooks hold mini puzzles or tools. The entire board is a vibrant patchwork of textures, colors, and shapes that beckon little hands to explore.
Design activity boards themed around favorite hobbies or characters, using removable accessories for versatility. For small spaces, opt for compact, multi-functional boards that combine several activities. For older kids, include sections for goals, schedules, or creative projects. Use durable, washable materials to handle energetic play.
Start by selecting a sturdy backing board, like plywood or MDF. Attach different elements—chalkboard paint, cork, magnetic sheets, fabric patches—carefully to create varied textures. Add hooks or clips for easy rearrangement of toys or tools. Ensure all parts are securely fixed to withstand tugging or pulling. Keep the board at a height accessible to your child.
Encourage your child to customize their board regularly with new drawings, notes, or small craft projects. Use themed decals or stickers to match their current interests. Incorporate a small pocket for art supplies or a mini calendar for routines. This setup promotes independence and boosts confidence in managing their space.
An activity board transforms a plain wall into a hub of creativity, helping kids develop fine motor skills and problem-solving abilities. It makes learning interactive and fun, giving your child a sense of ownership. Over time, they’ll look forward to updating and personalizing their mini workspace daily.
4. Floating Shelves for Display and Storage
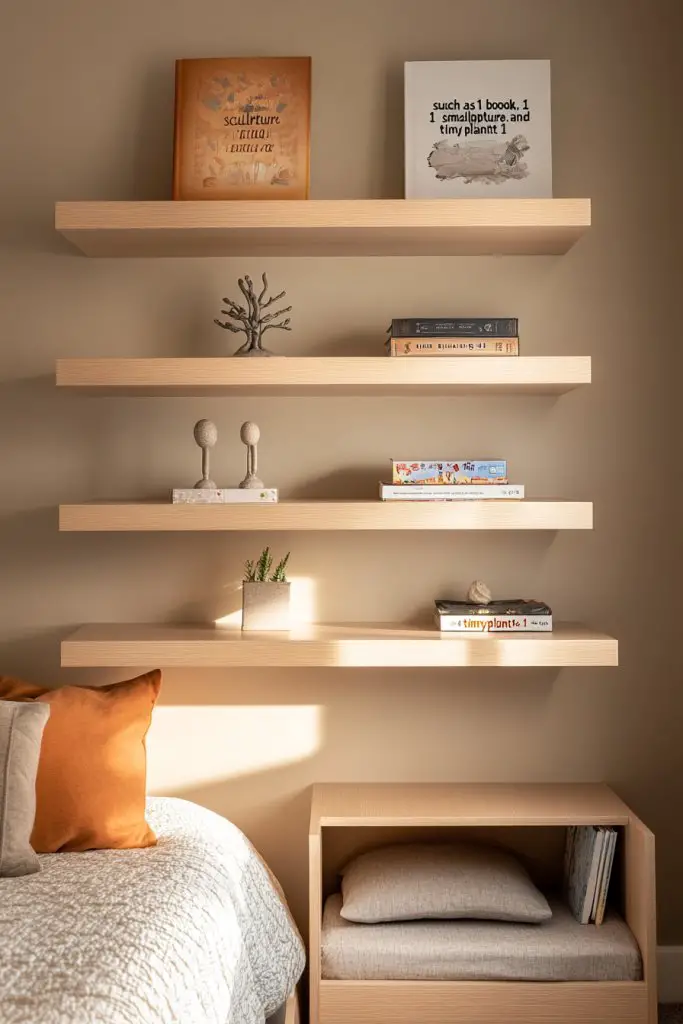
Cluttered surfaces and overflowing toy boxes make organizing a nightmare. Kids need a neat, accessible way to display their favorite items without sacrificing style. Floating shelves offer a sleek, functional solution that keeps essentials within reach.
Imagine low, matte-finish shelves floating along a colorful wall, showcasing a curated collection of toys, trophies, or books. Decorative brackets or hidden mounting hardware give a clean, modern look. Items are arranged in an eye-catching, layered display that invites kids to explore and choose.
Use multiple small shelves for a playful, staggered effect or a single long shelf for a minimalist vibe. Paint or stain shelves to match room decor, or leave natural wood for a warm touch. Incorporate fun shapes like clouds or stars for a whimsical feel. Adjust height and spacing based on your child’s height and needs.
Measure wall space carefully before installation. Use a level and studs to secure shelves firmly—safety first! Choose sturdy materials like solid wood or high-quality MDF. Decorate with a mix of practical items and decorative pieces, being mindful not to overcrowd. Regularly clean and reorganize to keep the display fresh.
Personalize shelves with painted motifs or labels. Mix in decorative storage boxes or baskets for smaller items, keeping the look tidy. Rotate displayed items seasonally or as new favorites emerge. Add LED strip lighting underneath for a subtle glow that highlights their treasures.
A well-organized display boosts pride in their space and encourages responsibility. It teaches kids to care for their belongings while creating a personalized showcase. When they see their favorite things beautifully arranged, confidence and ownership flourish, making tidying up feel rewarding.
5. DIY Rope Ladder or Climbing Wall for Active Growth
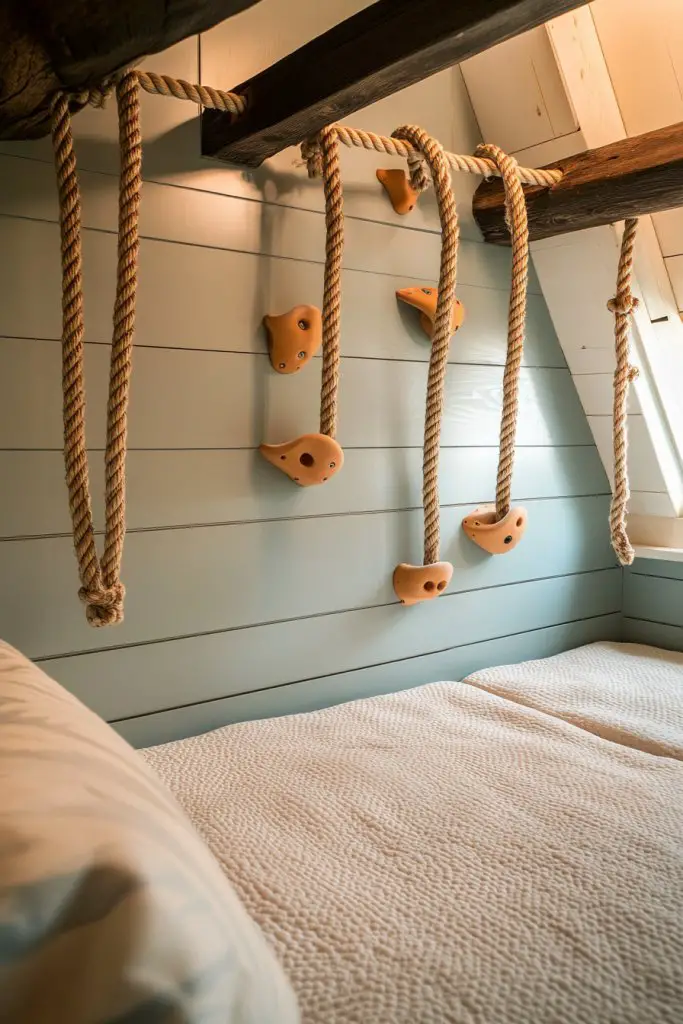
Kids need movement and challenge to develop motor skills, but most rooms lack dedicated active zones. Parents want to promote healthy activity without sacrificing space or style. A DIY climbing feature can turn a wall into a fun, functional playground.
Picture a sturdy rope ladder hanging beside a bed or a colorful climbing wall painted with chalkboard sections. The textured ropes or grips invite kids to climb, swing, and explore safely. Bright colors and playful designs make the feature both functional and fun, encouraging physical activity.
Use natural jute or nylon ropes with wooden rungs for a rustic look, or opt for foam grips for extra comfort. Install on a blank wall or behind a door for space efficiency. Combine with colorful wall decals or murals to create an energetic, lively environment. Adjust height and difficulty based on age and ability.
Securely anchor mounting brackets or hooks into wall studs, following manufacturer instructions carefully. Use high-quality, weight-tested ropes and grips designed for climbing. Regularly inspect for wear and tear, replacing worn parts immediately. Keep the area below padded with mats or rugs for safety. Engage in proper installation to prevent accidents.
Paint the wall with motivational quotes or fun patterns around the climbing zone. Add colorful banners or fabric strips to make it lively. Encourage your child to decorate their climbing spot with stickers or drawings, fostering ownership. Rotate the difficulty level as they grow stronger.
A climbing wall or rope ladder builds confidence, strength, and coordination. It transforms play into a skill-building activity that kids look forward to daily. Watching them conquer new challenges boosts their self-esteem and motivates active, healthy habits.
6. Personalized Name Banners or Letter Art
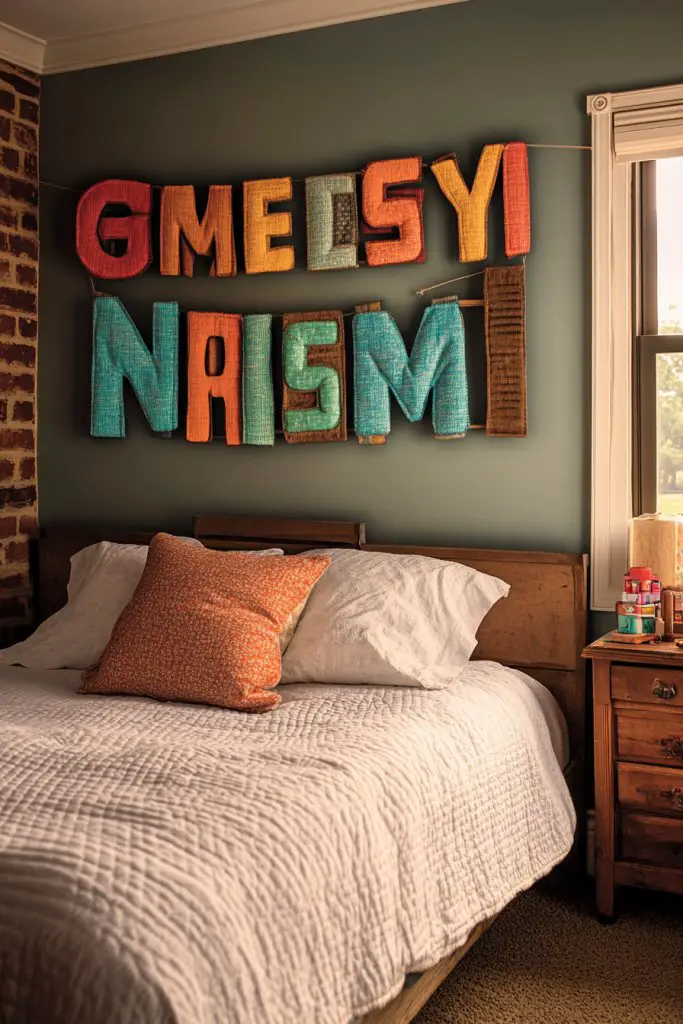
Rooms can feel generic and lack personality, especially when siblings share spaces. Kids love seeing their name or initials displayed proudly, which boosts their sense of belonging. A personalized banner or letter art makes their space uniquely theirs.
Imagine a bright, colorful banner spelling out your child’s name across a wall, with playful fonts and decorative elements like stars or hearts. Alternatively, individual wooden or fabric letters hang in a fun arrangement, adding texture and dimension. The effect is cheerful and welcoming, making the room instantly personalized.
Choose from fabric banners, paper garlands, or wooden lettering based on decor style. Use themes matching their interests—pirates, princesses, animals—to add character. Hang the banner at eye level or above the bed for maximum impact. Incorporate metallic or glitter accents for extra sparkle.
Order custom banners or DIY with colorful fabric and sturdy rope or string. Attach letters with clips, hooks, or sewing, ensuring they hang securely. Use wall hooks or adhesive strips to avoid damage. Position at eye level or above furniture for visibility. Consider layering with other decor items for a cohesive look.
Add LED backlighting or fairy lights behind the banner for a glowing effect. Swap out letters seasonally or for special occasions. Incorporate small decorative elements like plush toys or framed photos nearby to tell a story. Make it a fun project to involve your child in creating or decorating their name.
A personalized banner boosts pride and ownership over their space, fostering confidence. It helps children feel special and celebrated, reinforcing their identity. Seeing their name in bright colors every day reminds them they belong, and that they’re uniquely valued.
7. Soft Area Rugs for Comfort and Creativity
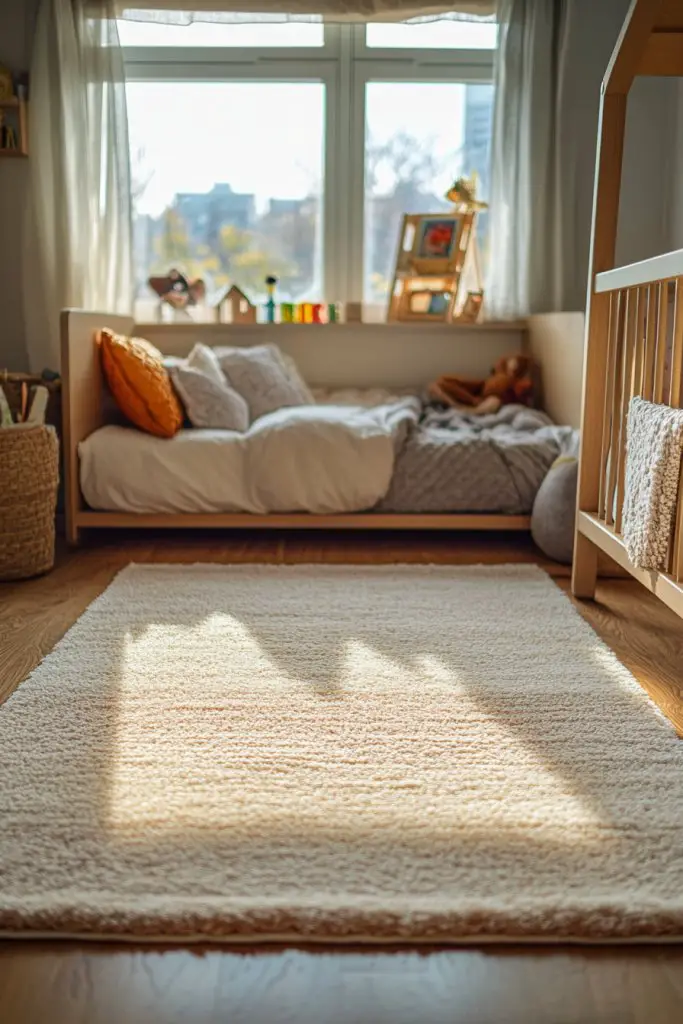
Hard floors can be uncomfortable for kids and often lead to chilly, uninviting spaces. Parents want a soft, cozy spot where their children can sit, play, or read comfortably. An inviting rug transforms a cold room into a warm, playful haven.
Visualize a plush, patterned rug in bright colors or gentle pastels, covering a designated play zone. Textured fabrics like shag or chunky knits add tactile interest, making the space inviting for bare feet. The rug anchors the room, defining a cozy corner for fun and relaxation.
Choose rugs with fun patterns—stars, animals, geometric shapes—or solid colors to match decor. Layer multiple smaller rugs for a boho look or opt for a large, single piece for simplicity. For easy cleaning, select machine-washable options. Use non-slip pads underneath for safety.
Measure the designated area before purchasing to ensure proper fit. Look for durable, stain-resistant materials that withstand daily wear. Lay the rug flat and secure with non-slip pads, especially on smooth floors. Keep it clean with regular vacuuming and spot cleaning for spills. Consider seasonal updates with different patterns to keep the room fresh.
Add decorative cushions or bean bags on the rug for extra seating. Incorporate matching or contrasting colors with bedding or curtains for harmony. Use the rug as a base for building block towers or pretend kitchen setups. Change accessories seasonally to keep the space lively.
A soft rug creates a welcoming environment that encourages children to settle in and play independently. It promotes comfort and a sense of ownership over their space. Plus, a cozy corner becomes their personal retreat, boosting confidence and independence every day.
8. Under-Bed Storage Drawers for Clutter-Free Floors
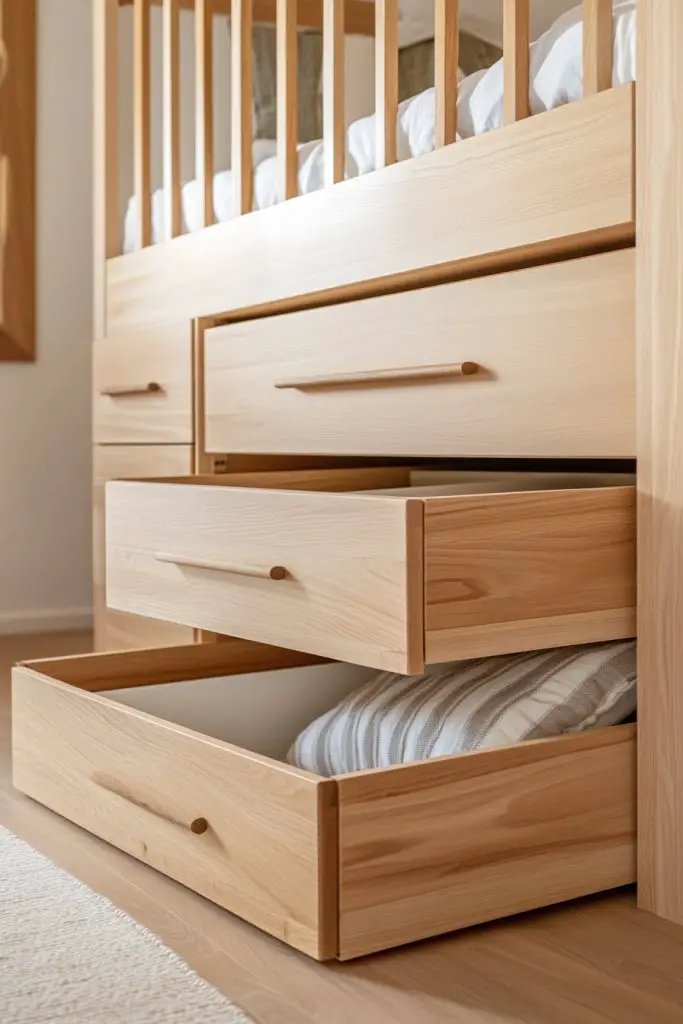
Clutter under the bed often becomes a black hole for toys, clothes, and miscellaneous clutter. Parents want a neat, organized space that hides mess without sacrificing accessibility. Under-bed storage drawers are the secret weapon for keeping floors clean and tidy.
Picture sleek, spacious drawers sliding smoothly beneath a cozy bed frame. The drawers are made from durable materials, with colorful fronts that match the room’s decor. Kids can easily pull them out to find their favorite toys or clothes, turning clutter management into a game.
Choose from rolling, stacking, or built-in drawer options based on room layout. Use colorful or patterned fronts to add a playful touch. Label the drawers with stickers or fabric tags for easy identification. For small spaces, opt for slim-profile drawers that maximize space without bulk.
Measure the clearance under the bed to select appropriately sized drawers or bins. Install rolling or slide-out mechanisms for easy access. Keep the area clean and dust-free, and periodically reassess contents to prevent overstuffing. Use labels or color coding to help kids sort their belongings. Consider DIY options with repurposed furniture or storage bins.
Add decorative touches to drawer fronts—paint, stickers, or fabric overlays—to match room themes. Encourage your child to organize their items, fostering responsibility. Rotate stored items seasonally or as interests change. Use stacking drawers to create modular storage towers if space allows.
Under-bed storage teaches kids responsibility and organization, making them proud of their tidy space. It reduces stress for parents and keeps the room looking clean. With everything neatly stored out of sight, kids can enjoy a more relaxing, clutter-free environment, boosting their confidence in managing their things.
9. Themed Bedding Sets for Visual Harmony
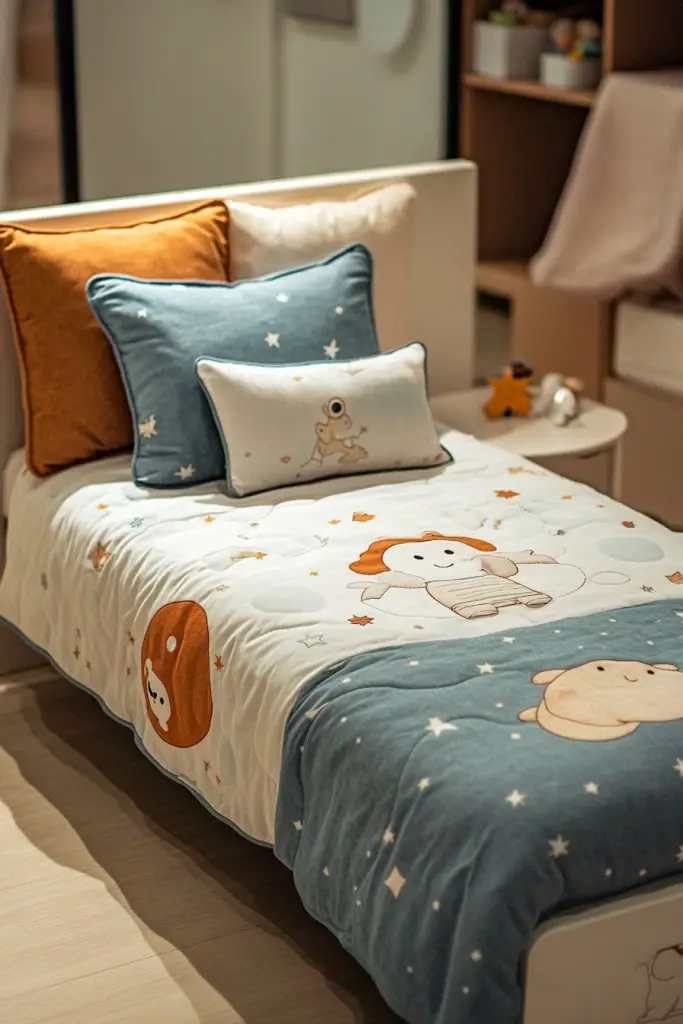
Bedding often feels like an afterthought, but it’s a key piece in setting the room’s tone. Kids love bedding that reflects their favorite characters or themes, making bedtime more exciting. Coordinated bedding creates a harmonious, stylish space that feels complete.
Envision bright, playful bedding featuring characters from movies, animals, or geometric patterns that tie the room together. Layer with matching pillowcases, throws, and curtains for a cohesive look. Textured fabrics like quilted or embroidered designs add depth and comfort, transforming the bed into a focal point.
Switch themes seasonally—space exploration in winter, floral patterns in spring—keeping the room fresh. Mix and match bedding with different textures and colors for variety. For a subtle look, select neutral tones with pops of color in accessories. Use themed sheets or duvet covers for versatility.
Choose high-quality, breathable fabrics that are easy to wash and durable. Measure your bed to pick the right sizes—twin, toddler, or bunk. Layer with decorative pillows or plush throws to add comfort and style. Keep spare sets for quick swaps and seasonal updates. Match with coordinating curtains and rugs for a unified look.
Add embroidered names or custom patches for a personal touch. Incorporate your child’s favorite colors or motifs to boost their excitement. Change bedding to reflect holidays or milestones. Consider reversible covers for easy refreshes, making the room adaptable and fun.
Themed bedding sets turn a simple bed into a personal sanctuary that sparks joy. It encourages children to take pride in their space and makes bedtime something they look forward to. A well-coordinated room boosts confidence and creates a sense of ownership—your kid’s very own stylish retreat.
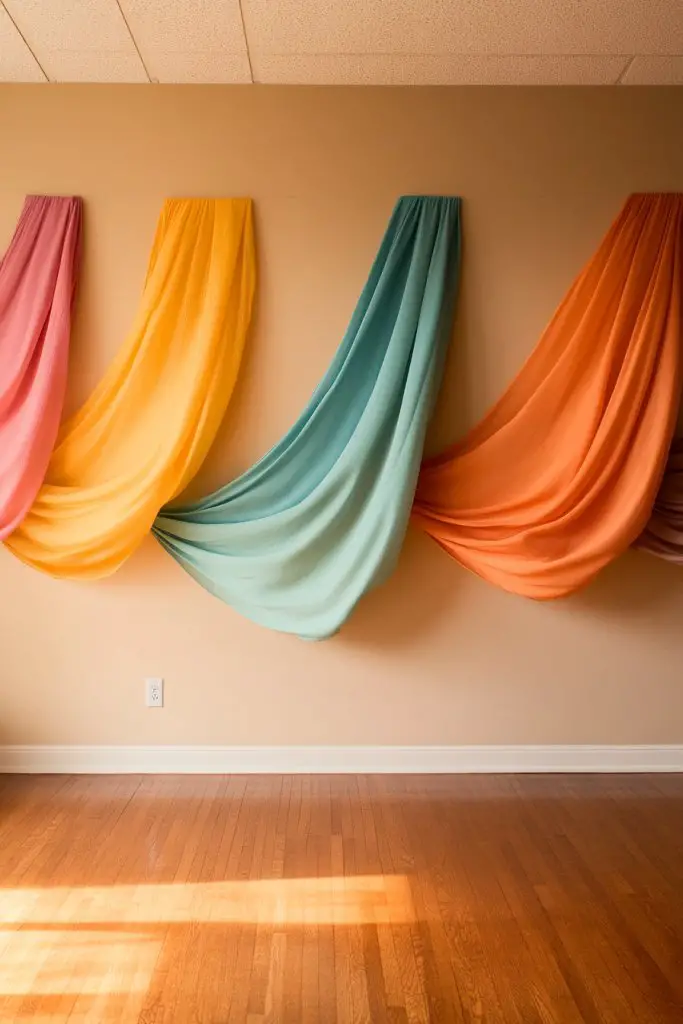
10. DIY Curtain Tunnels for Secret Hideouts
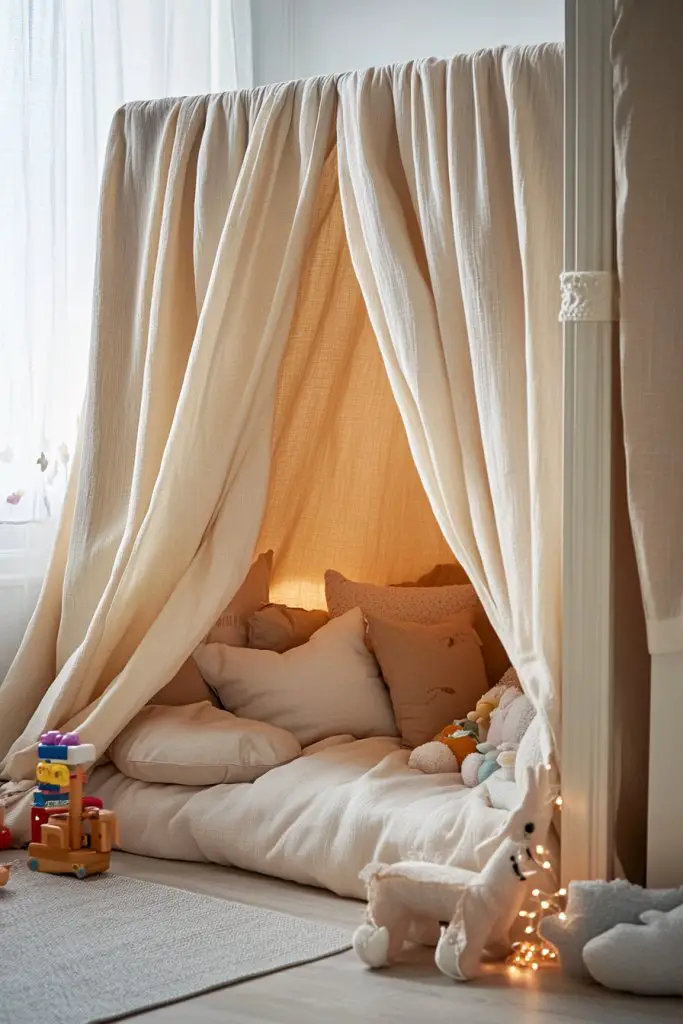
Kids love having their own secret spaces, but building a hideout often sounds complicated or expensive. Imagine turning a boring corner or bed into a magical hideaway without breaking the bank. Every child dreams of a cozy nook where they can escape, create, and feel special. The challenge is making it feel fun and effortless to build.
Picture a soft fabric tunnel in bright rainbow colors draped around a bed or a corner, creating a hidden sanctuary. The tunnel’s material is plush and lightweight, with playful patterns that catch the eye. Inside, a cushy mat and a few plush toys turn the space into a cozy retreat. String lights or glow-in-the-dark stars can be added outside to make it inviting at night.
You can customize the tunnel with different themes—pirate ship, fairy forest, or space adventure—matching your child’s favorite interests. Use lighter fabrics for summer months or thick, fleece-lined ones for winter warmth. For smaller rooms, make a shorter tunnel that doubles as a reading nook or play area. Change colors seasonally to keep the space fresh and exciting.
Start by choosing a lightweight, durable fabric like cotton or polyester with fun patterns. Measure the space and cut the fabric into two panels with an opening in the middle for easy access. Sew or use fabric ties to create a tunnel shape, adding a flexible frame like PVC pipes or flexible rods inside. Secure the structure to the walls or ceiling with hooks or adhesive strips, ensuring stability. Add a soft rug or cushions inside for extra comfort. You can even DIY a simple tunnel with a large cardboard box covered in fabric for an ultra-budget option.
Add personalized touches like name banners on the outside or attach small fabric pockets for treasures. Incorporate themed decorations, such as pirate flags or fairy lights, to match their current obsession. Change the fabric pattern every few months to keep the hideout feeling new. You can also add small shelves or clip-on holders for books and toys inside.
Creating a secret hideout boosts your child’s imagination and independence. Plus, it’s a fun project you can do together, making it even more special. Once finished, your kid will have a space that’s uniquely theirs, encouraging creativity and play. Ready to turn that unused corner into a magical escape?
11. Colorful Wall Hooks for Hanging Toys and Accessories
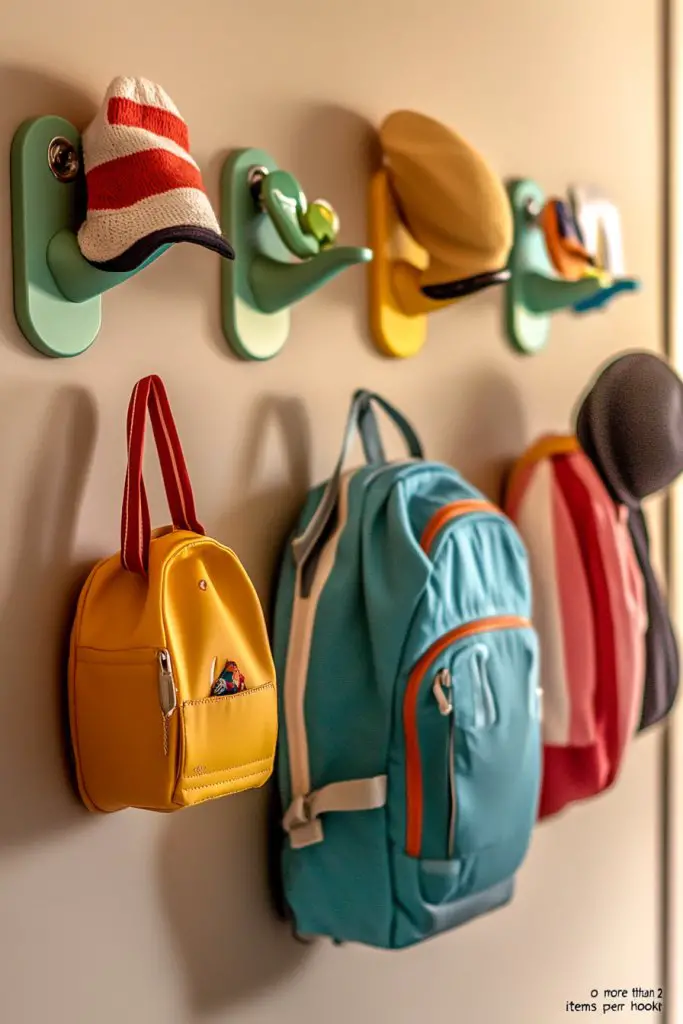
Messy floors and cluttered surfaces are a common headache for parents and kids alike. Finding a stylish way to keep toys, hats, or backpacks organized can seem impossible without sacrificing decor. Kids also love having their accessories within easy reach, fostering independence. The goal is to keep everything tidy while adding a playful touch.
Imagine a wall lined with cheerful hooks shaped like animals, stars, or clouds in bright, fun colors. Each hook holds a favorite toy, backpack, or hat, making everything look intentional and lively. The hooks are mounted at kid-friendly heights, so little hands can easily hang and grab their belongings. The wall behind is painted in a lively hue that complements the hooks, transforming an ordinary space into a playful display.
Mix and match different shapes and sizes to create an eclectic gallery wall. For a more subdued look, choose pastel or neutral tones with subtle shapes. For themed rooms, pick hooks that match the motif—dinosaurs, princesses, or space explorers. Mount the hooks above a low shelf or seating area for quick access and visual cohesion. Seasonal color schemes or themed sets can also refresh the look periodically.
Select sturdy, non-slip hooks made from durable plastic or painted wood, ensuring they can hold weight without falling. Measure and mark the spots where each hook will go, spacing them evenly for visual appeal. Use a level to keep everything straight. Drill small pilot holes, then attach the hooks securely with screws or adhesive strips for lighter options. Organize items by type or frequency of use to streamline daily routines. You might want to add labels or decorative stickers for extra personality.
Create a theme by choosing hooks in shapes or colors that reflect your child’s interests. Add a custom name plate or initials above the hooks for a personalized touch. Incorporate removable decals or wall art around the hooks to tie the design together. Regularly swap out hooks or rearrange to match evolving tastes or new collections.
This simple upgrade makes tidying up fun and encourages kids to take responsibility for their space. It also adds a pop of color and personality to the room, making it feel lively and welcoming. Plus, it’s a quick DIY project that shows your child how organization can be playful. Ready to turn those blank walls into a functional art piece?
12. Floating Desk or Activity Table for Creative Projects
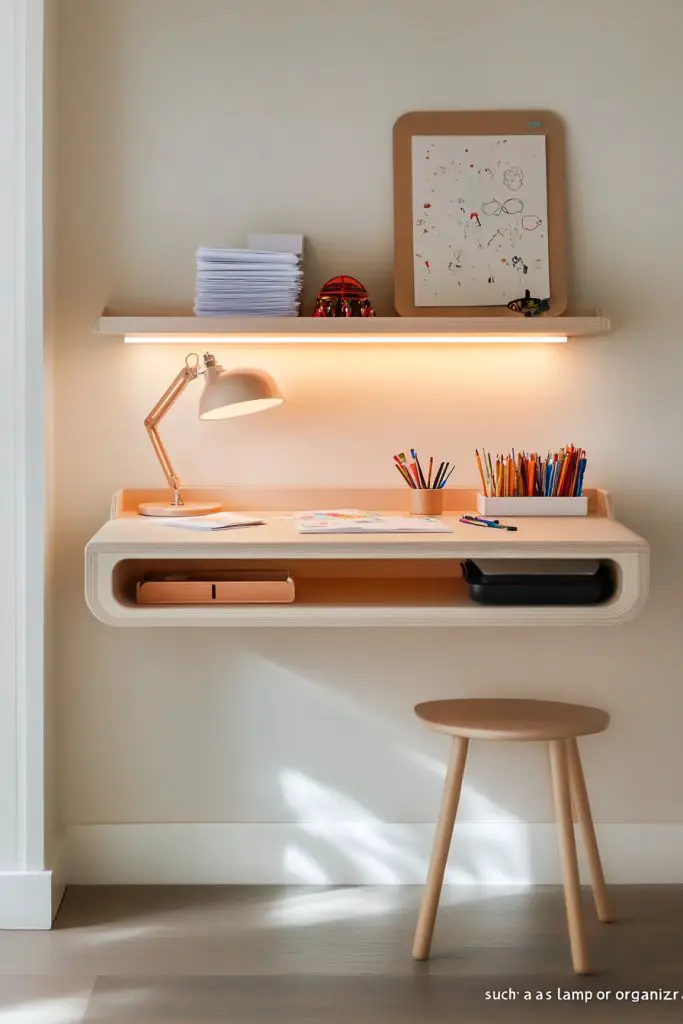
Limited space in kids’ rooms often makes it hard to find a dedicated spot for arts and crafts or homework. A cluttered table can be overwhelming and discourages creativity. The trick is to create a functional workspace without sacrificing precious floor space. Every parent wants a neat area where their child can express themselves and do homework comfortably.
Picture a sleek, wall-mounted fold-away desk in a cheerful color, tucked neatly against the wall when not in use. When pulled down, it reveals a smooth surface perfect for drawing, writing, or assembling puzzles. The desk features storage compartments or clipboards for supplies, keeping everything organized. Nearby, a small stool or cushion ensures comfort, and the entire setup looks modern and unobtrusive.
Choose a fold-down desk in bright or pastel tones to match your child’s personality. For small spaces, opt for a corner-mounted version that maximizes room. For older kids, a larger surface with integrated storage makes sense. You can also incorporate a bulletin board or magnetic strip on the wall above for notes and inspiration. Seasonal accessories like themed decals or stickers can make the workspace more inviting.
Start by measuring the available wall space to determine the right size. Select a sturdy, easy-to-install wall mount or fold-down desk kit. Securely attach the mounting brackets with appropriate anchors, preferably into wall studs for stability. Use a level to ensure the desk folds down evenly. Add small containers or magnetic strips for organizing supplies, and include a comfortable chair or cushion. Finish by decorating the area with your child’s favorite colors or themes to inspire creativity.
Personalize the space with custom decals or a chalkboard panel on the wall. Add a name plaque or colorful storage bins to make it special. Rotate seasonal or themed accessories to keep the area fresh and motivating. You can also incorporate a small bookshelf nearby for quick access to favorite books or craft materials.
A dedicated, space-saving desk boosts independence and responsibility. It shows your child that their creative or study space is a priority. Plus, it keeps the main room tidy while encouraging organization. Your kid will love having their own mini studio or homework station—ready to unleash their imagination?
13. Inspirational Quote Posters for Motivation
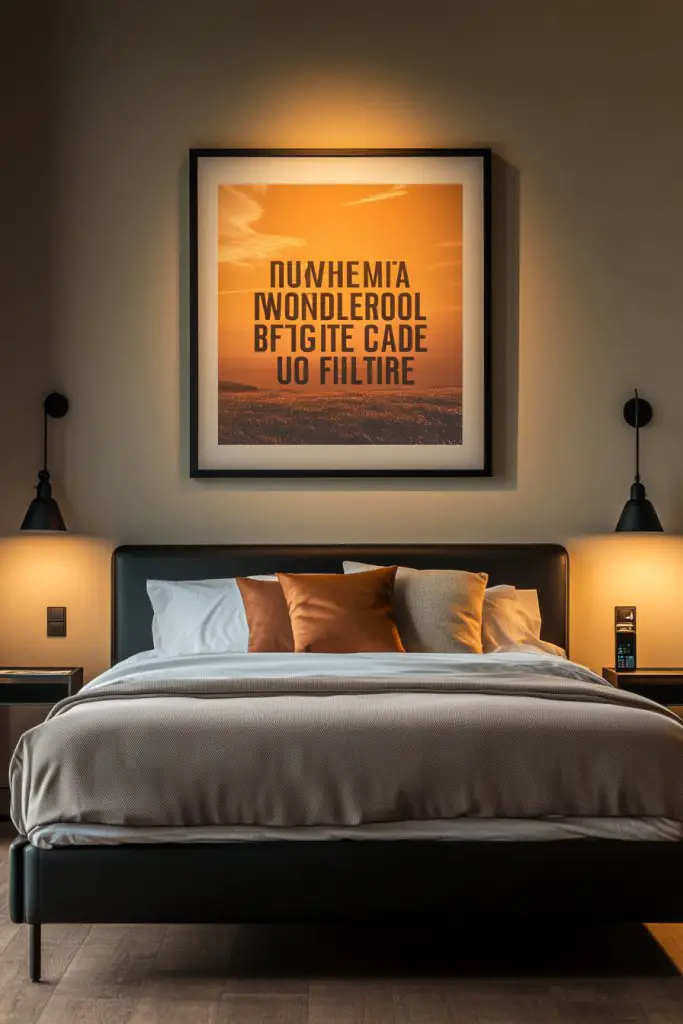
Kids can sometimes lose focus or confidence, especially when faced with new challenges or daily routines. Motivational quotes can boost their mood and remind them of their potential. The challenge is to incorporate inspiring messages without making the space feel overly serious or dull. The goal is to create a positive, uplifting environment that encourages growth.
Imagine vibrant posters with bold, playful fonts displaying quotes like ‘You Can Do Anything’ or ‘Dream Big’. They’re placed strategically at eye level, surrounded by cheerful colors and simple graphics that energize the room. The posters are made from durable, removable material that won’t damage walls. When the sunlight hits, the colors pop, creating a lively and encouraging atmosphere.
Choose quotes that resonate with your child’s personality or current milestones. For a calming vibe, select softer colors and gentle fonts. For more energetic spaces, go for bold, contrasting hues with dynamic typography. Mix and match different styles to create a gallery wall or feature a single large quote as a statement piece. Change the quotes seasonally or as your child’s interests evolve.
Pick high-quality print material that’s easy to peel and stick without residue. Use painter’s tape or removable adhesive strips to affix the posters at the right height. For a cohesive look, frame them with inexpensive picture frames or mount them directly on the wall. Arrange multiple quotes in a creative layout, ensuring good spacing. Consider adding small decorative elements like stars or smiley faces around the quotes for extra fun.
Create custom quotes that reflect your child’s goals or favorite sayings. Incorporate their name into the design for a personalized touch. Pair posters with themed accessories, like a soft cream throw blanket with chunky knit texture, to tie the room together. Rotate quotes periodically to keep the space fresh and motivating.
These visual affirmations serve as daily reminders of their strengths and dreams. They foster a growth mindset and resilience, making the room an inspiring haven. Your child will feel empowered and ready to tackle any challenge with a positive attitude. It’s a simple yet powerful way to boost confidence every day.
14. Fabric Wall Banners or Garlands for Festive Flair
A plain wall can feel boring and uninspired, especially in a kids’ room full of energy and personality. You want to add a splash of color and texture without cluttering the space. Fabric banners and garlands are an easy way to bring a festive, lively vibe that feels welcoming and fun. The challenge is making it look intentional and stylish.
Visualize a string of cheerful fabric banners in bright, cheerful patterns—polka dots, stripes, or floral prints—spanning across the wall. The banners flutter gently with air movement, adding movement and life to the room. They’re hung at different heights with colorful mini clothespins or loops, creating a layered, textured look. The overall effect is playful and cozy, transforming a wall into a celebration of color.
Choose fabrics that match your room’s theme or seasonal colors—for example, pastel banners for spring or bold patterns for a birthday party vibe. For a more subtle look, opt for neutral tones with delicate prints. Layer the banners with fairy lights or ribbon accents for extra flair. Vary the length and shape of banners to add visual interest, or create themed sets for special occasions.
Cut fabric into strips or shapes, then attach them to a sturdy string or twine using clips, sewing, or fabric glue. Use a measuring tape and level to ensure even spacing and straight hanging. Secure the ends of the string to the wall with removable hooks or adhesive strips, avoiding damage. For a more polished look, you can sew or glue the banners onto a fabric strip or ribbon for extra durability. Add small decorative elements like tassels or pom-poms to enhance the festive feel.
Create banners with personalized messages or initials for your child. Use fabrics in favorite colors or patterns to reflect their personality. Incorporate themed elements like mini flags, stars, or character patches for special occasions. Swap out banners seasonally to keep the decor feeling fresh and exciting.
These colorful fabric banners add energy and personality to any space, making it feel alive and welcoming. They’re a simple DIY project that can be customized endlessly, giving your child a sense of ownership. Every time they see their personalized decor, it boosts their confidence and joy. Ready to make your room more festive?
15. DIY Mobile or Hanging Decor for Visual Stimulation
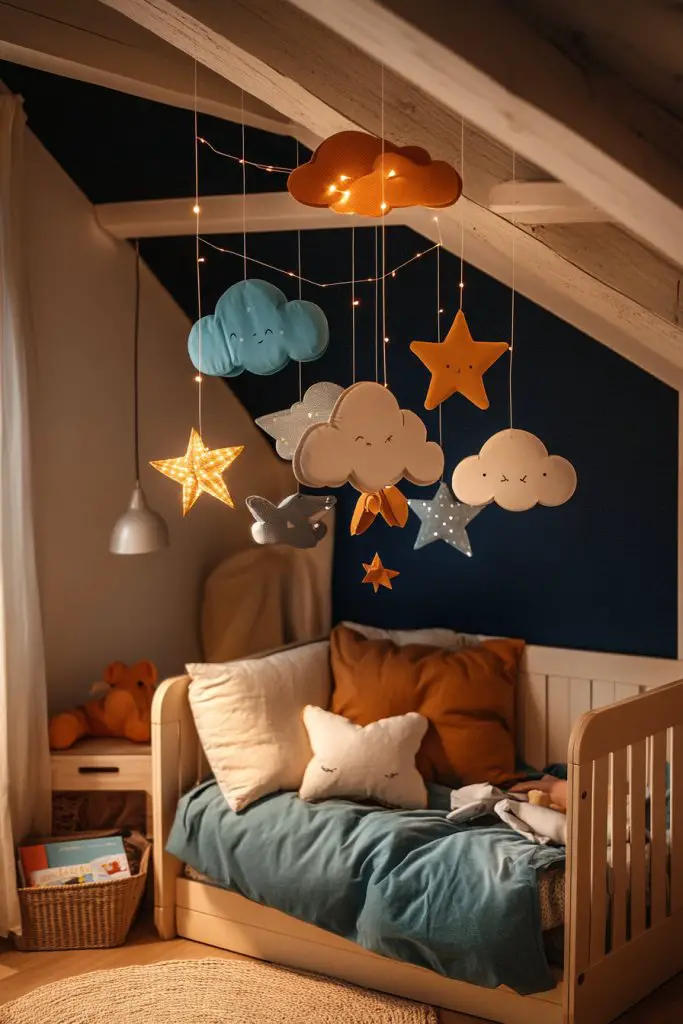
Kids love having their own visual spectacles, but store-bought mobiles can be pricey and generic. Making your own allows you to customize colors, shapes, and themes that captivate your little one’s attention. The challenge is creating something mesmerizing without it being a cluttered distraction.
Imagine a handcrafted mobile hanging above the bed, with colorful paper lanterns, felt shapes, or lightweight fabric elements gently spinning with air currents. The movement creates a calming, hypnotic effect, while the vibrant colors stimulate visual development. It’s lightweight enough to sway softly without making noise and adds a whimsical charm to the room.
Use themes that match the room’s decor—stars, animals, planets, or abstract shapes. For a calming vibe, stick to soft pastel shades and simple designs; for a lively feel, opt for bold hues and layered textures. Vary the length of hanging elements to add dimension. Consider incorporating sensory elements like crinkle fabric or shiny surfaces for added stimulation.
Gather lightweight materials such as paper, felt, or foam sheets. Cut shapes into your desired designs and punch holes for hanging. Use embroidery hoops or wire to string the elements together, attaching them with fishing line or thread. Hang the mobile from a sturdy ceiling hook, ensuring it’s out of reach but within view. Balance the elements to prevent tipping and test the movement before final placement.
Personalize with your child’s name or favorite characters, using stickers or fabric paint. Add small, textured elements like beads or feathers for tactile interest. Change the shapes or colors seasonally for variety. Incorporate subtle scents or sounds if desired, like a small bell or scented sachet, for multi-sensory appeal.
A handmade mobile shows your child that creativity and effort matter, boosting confidence. It also offers a calming focal point for naps or quiet time. The process of making it together can be a bonding experience, making the decor even more meaningful. Ready to craft a mesmerizing visual treat?
Conclusion
With a mix of vibrant colors, clever organization tips, and themed decor ideas, this collection offers plenty of ways to create a playful and nurturing environment for kids. Feel inspired to try out these ideas in your own home and watch your child’s room become a favorite retreat. Remember, a thoughtfully decorated space can boost your child’s happiness and imagination—so start decorating and make their dreams come to life!