Your kitchen is more than just a place to cook; it’s the heart of your home where memories are made and daily routines unfold. A fresh, functional kitchen can dramatically boost your space’s appeal and efficiency, making everyday tasks more enjoyable.
In this article, you’ll find a diverse array of renovation ideas designed to enhance both the look and usability of your kitchen. Whether you’re seeking a modern upgrade, clever storage solutions, or stylish accents, there’s inspiration here to transform your space into a beautiful, practical haven.
1. Incorporate Open Shelving for Easy Access and Stylish Display
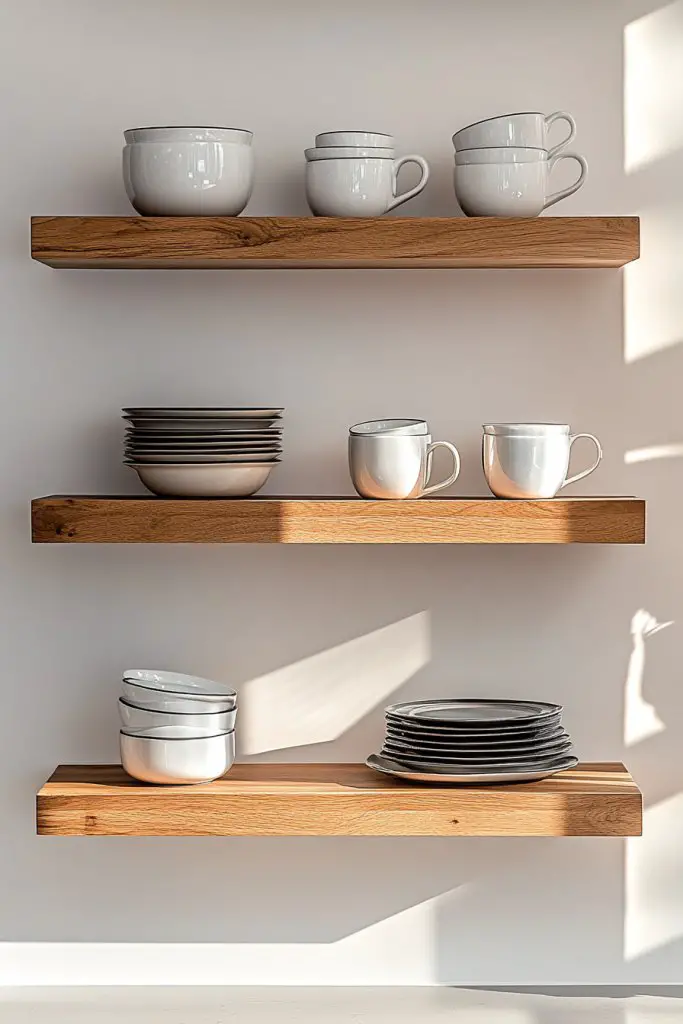
Ever tried digging through a mountain of dishes just to find that one mug? Cluttered cabinets make cooking and cleaning feel like a chore. Plus, traditional closed cabinets hide your cute dishware, making your kitchen look dull. Open shelving offers a solution that’s both practical and pretty, so why not show off your favorite pieces?
Imagine sleek wooden shelves mounted on a crisp, white wall. Brightly colored plates and glassware sit neatly aligned, catching the light and adding vibrancy. A soft glow from under-cabinet LEDs highlights your artful arrangement. Textured ceramics and minimalist bowls create a layered, inviting display. It’s a blend of function and art that transforms your space.
You can opt for rustic reclaimed wood or glossy lacquered panels depending on your style. Small kitchens benefit from slim, adjustable shelves that maximize vertical space. For a cozy cottage vibe, incorporate open cubbies with woven baskets. Seasonal decor, like autumn leaves or holiday mugs, can be swapped easily for festive flair. The key is balancing display with accessibility.
Start by measuring your wall space and selecting sturdy brackets compatible with your shelves. Choose durable materials like hardwood, metal, or high-quality MDF. Install brackets at regular intervals for stability, ensuring they can support the weight of your items. Arrange your dishware and decor thoughtfully, mixing heights and textures for visual interest. Regular dusting keeps open shelves looking fresh and inviting.
Personalize with a mix of practical and decorative items—think vintage teapots, colorful mugs, or handcrafted ceramics. Add small LED puck lights or fairy lights for ambiance. Incorporate decorative labels or tags for a quirky touch. You can also paint the back wall a bold color or pattern to make your display pop. This makes your kitchen uniquely yours.
Open shelving not only makes your kitchen more functional but also adds personality. It’s a simple upgrade that can completely change the vibe of your space. Your friends will admire your curated display, and you’ll enjoy the easy access during busy mornings. Ready to turn your cabinets into a stylish showcase?
2. Install Under-Cabinet Lighting to Enhance Visibility and Ambiance
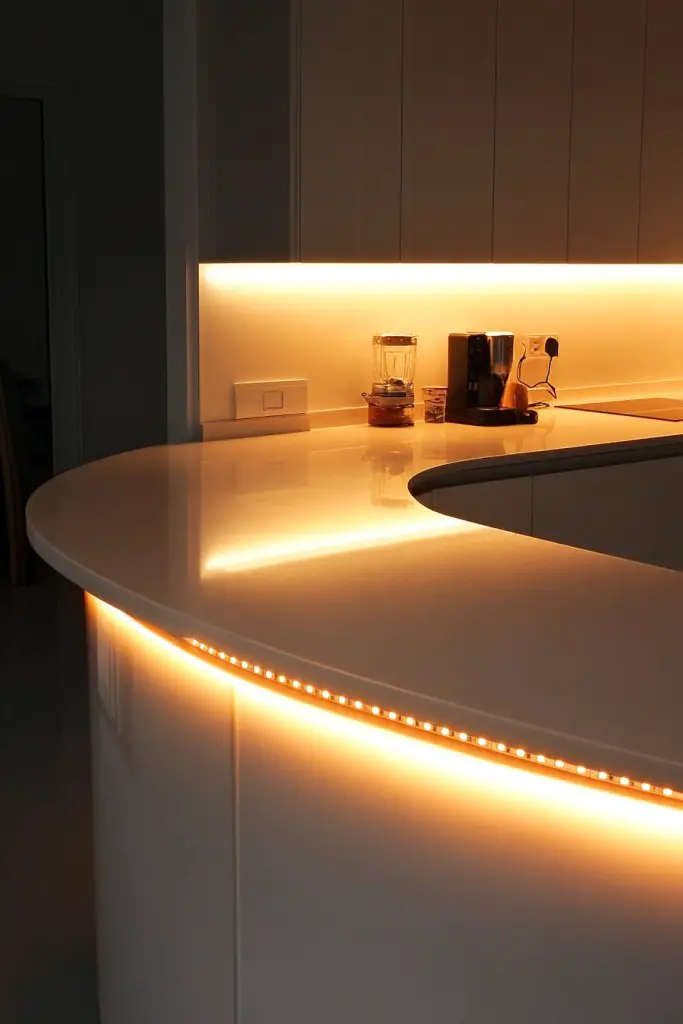
Ever felt like your countertops are a black hole during evening prep? Poor lighting can turn cooking from a joy into a frustration. Overhead lights often cast harsh shadows, making it hard to see what’s in front of you. Under-cabinet lighting solves this by brightening work surfaces without blinding glare.
Picture warm LED strips hugging the underside of your cabinets, casting a gentle, consistent glow. The light accentuates your backsplash and countertop textures, creating a cozy yet functional atmosphere. Small puck lights pinpoint specific areas, like your knife block or spice jar collection. It’s like turning your kitchen into a mini stage for your culinary performances.
Choose between flexible LED tape lights or fixed puck fixtures based on your space. For modern kitchens, sleek aluminum profiles with dimmable LEDs work beautifully. Vintage or rustic styles may prefer warm filament bulbs or copper finishes. Seasonal setups could include color-changing LEDs for festive moods. Adapt the lighting intensity to match your daily routines.
Measure the length of your cabinets and select compatible LED strips or puck lights. Ensure your power source is accessible and consider installing a dimmer switch for mood control. Use adhesive backing or mounting clips for easy installation. Connect the lights to a reliable power supply, hiding wires with cable channels or inside cabinets. Test different settings to find the perfect ambiance.
Customize with smart lighting options that sync with your voice or phone. Dim the lights during dinner or brighten them for morning prep. You can also add colored LEDs for themed celebrations. Incorporate a timer feature for automated lighting at certain hours. Small touches like these make your kitchen more interactive and inviting.
Proper lighting boosts not only functionality but also mood. It transforms your kitchen into a welcoming space for family and friends. Plus, it’s a quick, affordable upgrade with a big impact. Soon, you’ll wonder how you ever cooked without it!
3. Upgrade to a Multi-Functional Island with Built-In Storage
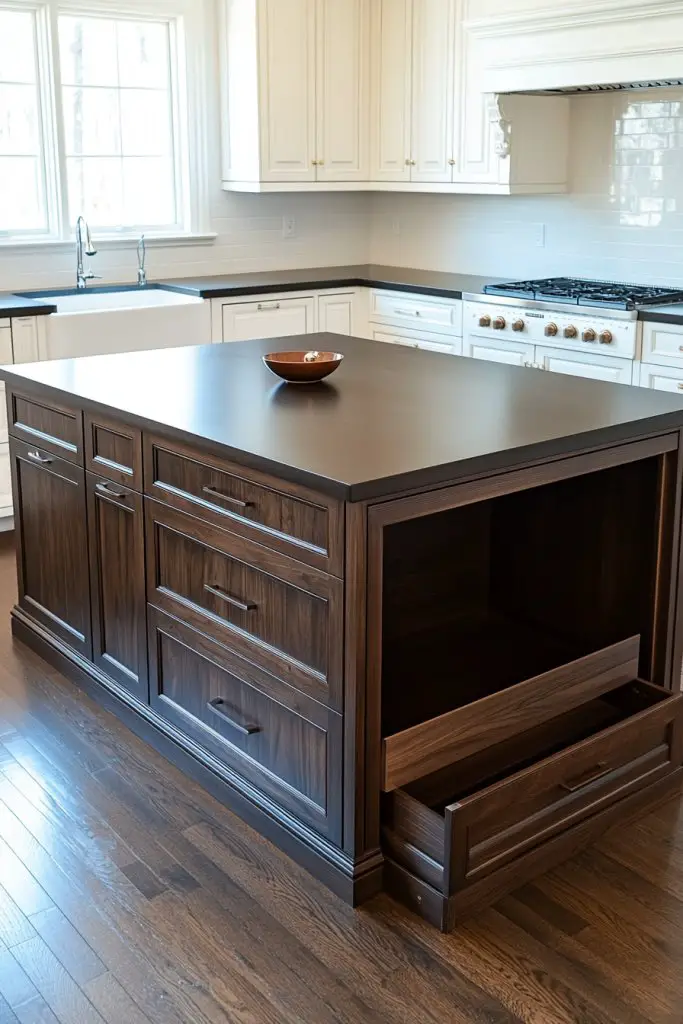
Tired of your kitchen island just being a big empty surface? An island should be more than a place to chop vegetables—it needs to work for you. If your current setup feels like a wasted space, a multi-functional island can turn it into the heart of your kitchen. More storage, prep area, and even seating all in one?
Envision a sleek island with a quartz top, surrounded by comfy bar stools. Integrated drawers and cabinets keep your pots, pans, and utensils hidden yet accessible. Some islands feature open shelving or wine racks for added flair. The design blends clean lines with practical storage, making your kitchen look modern and organized. It’s the centerpiece that combines style and substance.
Opt for a large, single-level surface for open-plan spaces or a two-tiered design for zoning zones. Add a built-in wine cooler or microwave drawer to save counter space. For small kitchens, choose a compact island with fold-away leaves. Seasonal accents like a soft cream finish or bold black can match your decor theme. The options are endless.
Start by measuring your available space and considering your storage needs. Choose a durable, easy-to-clean material for the countertop. Incorporate drawers, cabinets, or open shelving based on what you need to store. Install on a sturdy base or casters for mobility if needed. Attach electrical outlets if you want to add small appliances. Finish with a protective sealant for longevity.
Personalize with a pop of color on the cabinetry or decorative hardware. Add a small fold-down section for extra prep space when needed. Use baskets or bins inside cabinets to organize utensils or ingredients. You can also incorporate a built-in cutting board or spice rack for added convenience. These touches make your island uniquely yours.
A multi-functional island boosts your kitchen’s efficiency and style. It becomes a gathering spot for family and friends, making cooking more social. Plus, it’s an investment that adds value to your home. Ready to upgrade your kitchen’s core?
4. Add Pull-Out Pantry Shelves for Seamless Food Storage
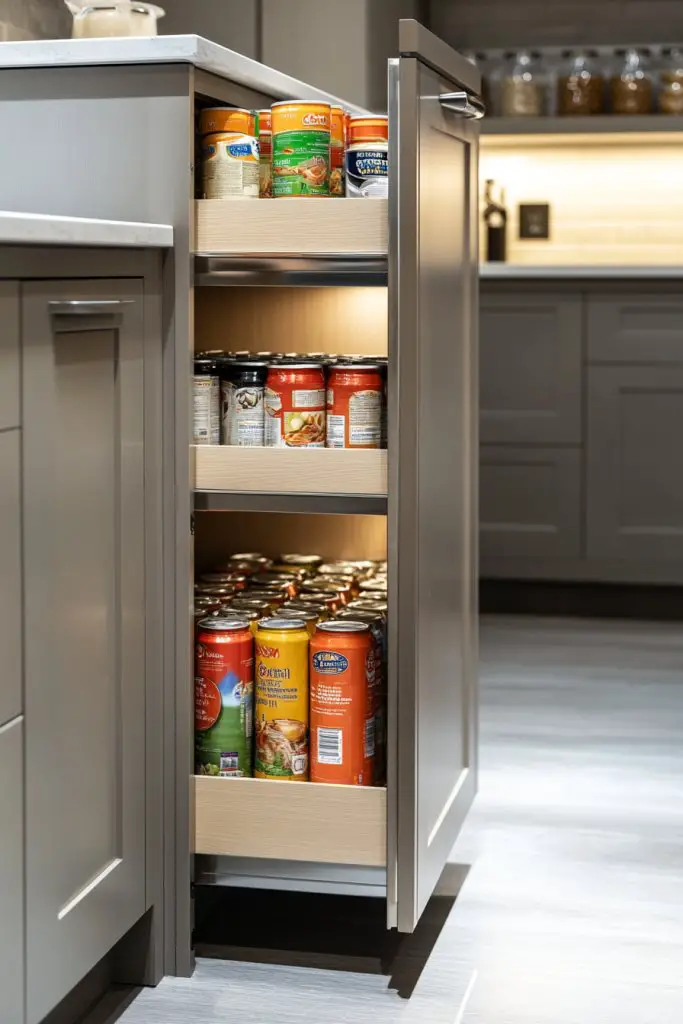
Ever struggled to find that elusive bag of rice or a can of beans shoved to the back of a deep cabinet? Traditional pantry setups often lead to clutter and wasted space. Pull-out shelves transform your food storage, making everything easy to see and reach. No more digging through stacks of cans!
Visualize a tall, sleek cabinet with smooth-gliding pull-out shelves filled with labeled jars and neatly stacked boxes. The shelves extend fully, giving you instant access to every item. Bright LED lighting inside illuminates your pantry, making organization effortless. The result? A clean, efficient space that invites you to cook with confidence.
Choose adjustable wire racks or solid wood shelves depending on your needs. Incorporate vertical dividers for baking sheets or trays. For smaller spaces, install slim pull-out units beside existing cabinets. Use matching finishes for a seamless look or contrasting colors for a statement. Seasonal labels or decorative containers can add a personal touch.
Start by measuring your pantry dimensions and selecting compatible pull-out systems. Install sturdy side panels and secure rails for smooth operation. Organize items by frequency of use or type, using bins or dividers for smaller items. Label shelves for quick identification. Regularly check for debris or wear to maintain smooth function.
Add decorative touches like coordinated containers or vintage-inspired labels. Use clear bins to display your snacks or baking ingredients. Incorporate a small step stool nearby for high shelves. Regularly refresh your labels and reorganize to suit changing needs. Customizing your pantry keeps it functional and fun.
Pull-out shelves turn chaos into order, saving time and reducing stress. They make your kitchen look more organized and inviting. Plus, you’ll love how easy it is to find what you need—no more fridge raids! Get ready to enjoy a clutter-free cooking experience.
5. Incorporate a Dedicated Coffee Station or Beverage Center
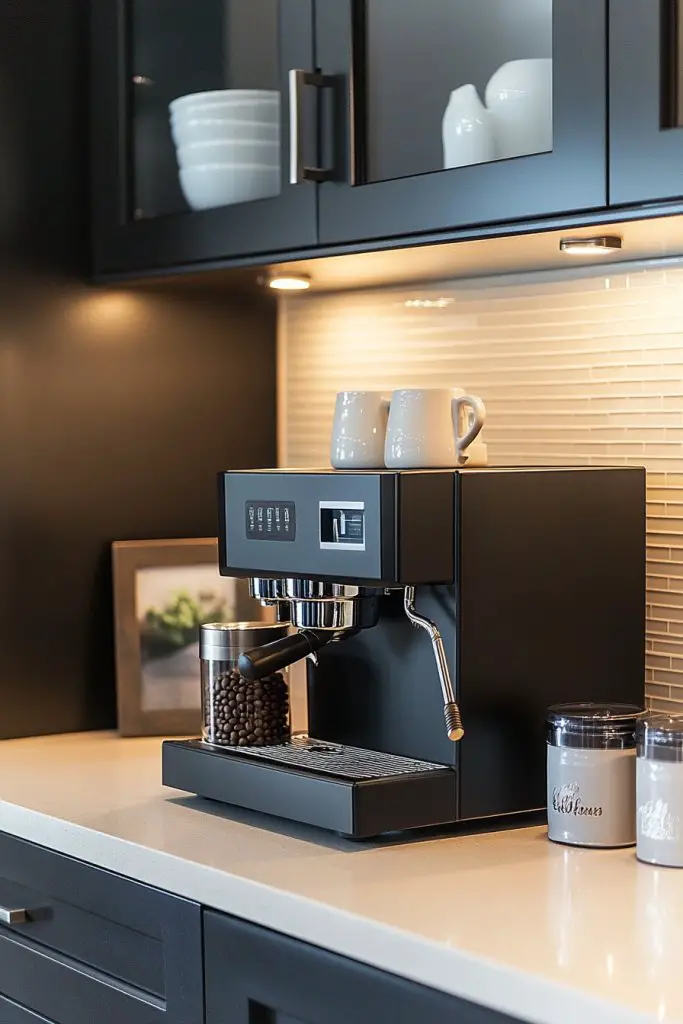
Do you find yourself juggling mugs, coffee beans, and brewing equipment every morning? A dedicated coffee station simplifies your routine and keeps your counters clutter-free. It’s the perfect way to start your day with style and efficiency. Who says you can’t have a mini café right in your kitchen?
Imagine a compact nook with a sleek countertop, a stylish coffee machine, and neatly arranged mugs. Shelves above hold jars of beans and tea leaves, while a small drawer stores filters and accessories. Soft lighting casts a warm glow, inviting you to relax and enjoy your brew. A personalized chalkboard or menu adds a fun, creative touch.
Choose a corner countertop or a custom-built cabinet with dedicated space. Incorporate a pull-out tray for cups or a built-in grinder for fresh beans. For small kitchens, opt for vertical storage solutions to maximize space. Seasonal decor like cozy textiles or themed mugs can add charm. Personalize with labels or custom signage for a unique vibe.
Start by selecting a dedicated spot close to your main prep area. Install shelves or drawers to organize mugs, beans, and brewing tools. Consider a compact, all-in-one coffee maker or traditional drip machine depending on your preference. Add electrical outlets or power strips for convenience. Keep everything within arm’s reach for quick mornings. Regularly clean and refresh your setup for optimal flavor.
Incorporate a small chalkboard for daily specials or inspirational quotes. Use decorative jars or tins to store coffee beans and tea leaves. Add a soft cloth or cozy mat underneath for a welcoming feel. Rotate seasonal accessories like holiday-themed mugs or fabric coasters. These details encourage a warm, inviting atmosphere.
A dedicated beverage station turns a mundane kitchen corner into a personal retreat. It’s a small upgrade that makes mornings smoother and more enjoyable. Plus, hosting friends becomes easier with a stylish setup ready for coffee and conversation. Time to brew up some happiness!
6. Install a Water-Efficient, Stylish Kitchen Faucet with Pull-Down Spray
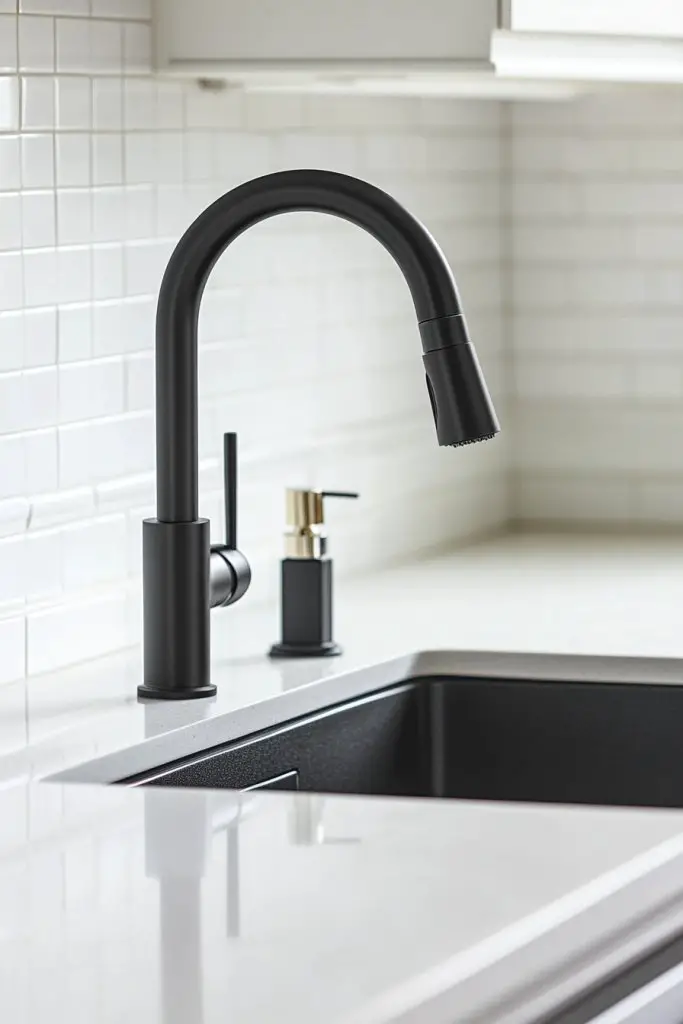
Are you still struggling with a drippy, archaic faucet that wastes water and looks out of place? A modern, water-efficient faucet doesn’t just save your utility bills—it also upgrades your entire kitchen aesthetic. Plus, the pull-down spray feature makes rinsing and cleaning a breeze. Who knew a faucet could be so transformative?
Visualize a sleek, high-arc faucet in brushed nickel or matte black, with a flexible hose that extends effortlessly. The pull-down head offers multiple spray options, from steady stream to powerful rinse. Its minimalist design complements any style, from farmhouse to modern. The smooth surface resists fingerprints and water spots, keeping your sink area pristine.
Choose finishes like stainless steel, matte black, or bronze based on your decor. Select a model with touchless activation for a high-tech feel. For small spaces, compact designs with a swivel spout work best. Seasonal or themed finishes can add a playful or elegant touch. Compatibility with existing plumbing is key, so check measurements.
Measure your current faucet and confirm the fitting specifications. Turn off the water supply and remove the old fixture carefully. Follow manufacturer instructions for installing the new faucet, ensuring all seals and connections are tight. Use plumber’s tape to prevent leaks. Test for proper water flow and spray function before finishing. Regular cleaning prevents mineral buildup.
Add a soap dispenser or a matching side sprayer for convenience. Opt for a finish that complements your sink hardware. Use a silicone or rubber mat beneath the faucet for extra grip and noise reduction. Personalize with a custom handle or engraving if available. These small details elevate your kitchen’s style.
A stylish, efficient faucet enhances both form and function, making daily chores easier. It’s an upgrade that pays off in water savings and visual appeal. Soon, washing dishes will feel less like a task and more like a luxury.
7. Use Modular Storage Solutions for Custom Organization
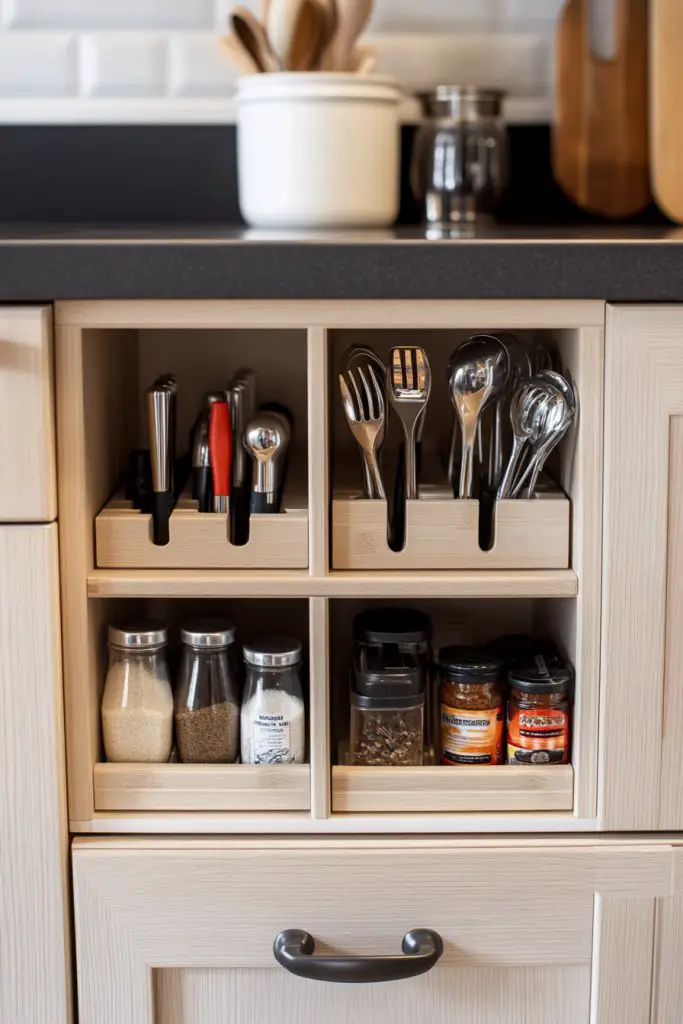
Is your kitchen a chaotic jumble of utensils, spices, and gadgets? Standard cabinets often fail to adapt to your unique storage needs. Modular storage solutions let you customize your space, making everything easy to find and access. Say goodbye to clutter and hello to efficiency.
Picture stackable containers, adjustable dividers, and lazy Susans that fit perfectly into your cabinets. These pieces can be rearranged as your needs change, creating a tailored storage system. Clear containers make it easy to spot ingredients, while deep drawers hide bulky items. The result is a neat, organized space that looks as good as it functions.
Choose from minimalist plastic bins, elegant wooden trays, or sleek metal dividers. For small spaces, slim stackable containers maximize vertical storage. Use adjustable shelves or turntables for corner cabinets. Incorporate labels or color-coding for quick identification. Seasonal or themed containers can add a playful touch.
Assess your storage needs and measure available space. Select modular units that fit your layout and material preferences. Install dividers or adjustable shelves to customize compartments. Use clear, airtight containers for perishables, and keep seldom-used items in lesser-accessible spots. Regularly review and reorganize to maintain efficiency. Proper labeling simplifies daily routines.
Decorate containers with labels or decals that match your style. Incorporate decorative baskets or woven trays for a cozy look. Use color themes to organize different categories—red for pasta, blue for grains, etc. Add small hooks inside cabinet doors for hanging utensils or measuring spoons. These touches personalize your storage system.
Modular storage turns chaos into calm, saving you time and effort. It gives your kitchen a polished, professional feel. Plus, customization means your setup evolves with your cooking habits. Ready to create your perfect organized kitchen?
8. Optimize Corner Spaces with Lazy Susans or Corner Drawers
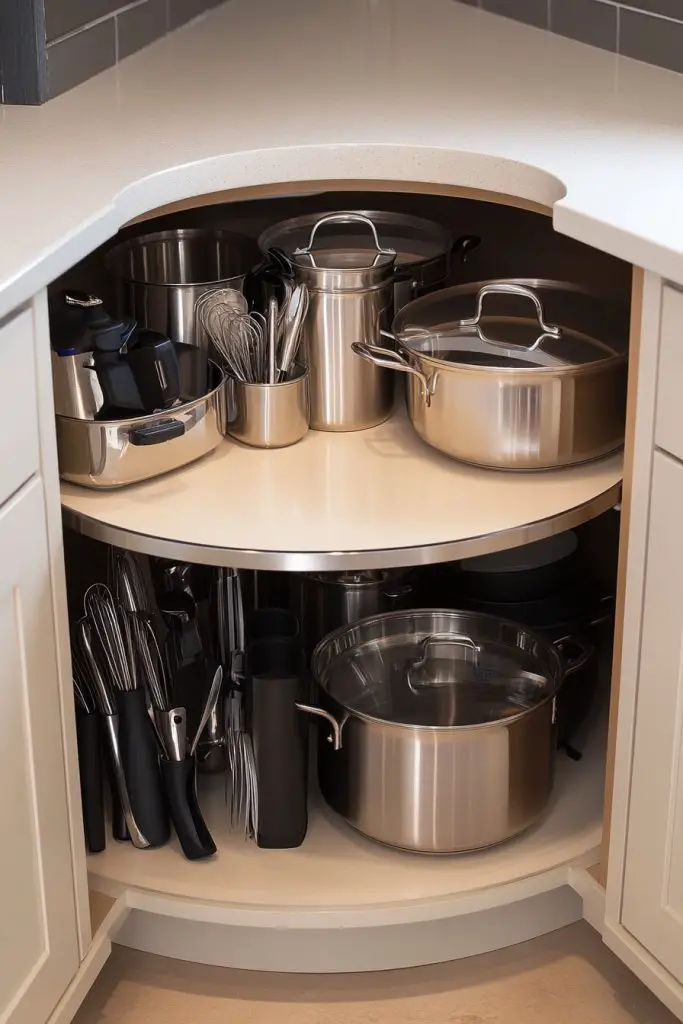
Corner cabinets often become black holes where pots, pans, and utensils go to hide forever. Frustrating, right? Optimizing these awkward spaces can dramatically improve your kitchen’s functionality. Lazy Susans or corner drawers turn dead space into a treasure trove of accessible storage.
Imagine a deep corner cabinet with a smooth-rotating Lazy Susan filled with neatly stacked pots and lids. Alternatively, a sleek, deep drawer pulls out smoothly to reveal organized utensils, cleaning supplies, or baking sheets. Bright LED lighting inside highlights the contents, making everything easy to find. These solutions seamlessly blend into your cabinetry, transforming chaos into order.
Choose traditional wood or modern metal Lazy Susans depending on your style. For smaller corners, slim pull-out drawers maximize space. Incorporate adjustable shelves or dividers for versatile organization. For a more minimalist look, opt for integrated, flush-mounted solutions. Seasonal accessories like colorful liners or handles can add personality.
Measure your corner cabinet’s dimensions and select a Lazy Susan or corner drawer system compatible with your setup. Install the rotating tray on sturdy hinges or slides, ensuring smooth operation. Organize your items by frequency of use or category, using bins or dividers. Test the mechanism to prevent jams or wobbling. Regular maintenance keeps it running smoothly.
Decorate the interior with peel-and-stick liners or labels. Add small hooks or clips inside drawers for utensils or tools. Customize with color-coordinated storage bins. Consider a small step stool nearby for accessing high shelves. These details make the space both functional and inviting.
Optimized corner storage boosts your kitchen’s efficiency and reduces clutter. It’s a smart update with immediate visual and practical payoff. Plus, it’s surprisingly easy to implement and maintain. Get ready to reclaim every inch of your kitchen!
9. Incorporate a Durable, Easy-to-Clean Quartz or Solid Surface Countertop
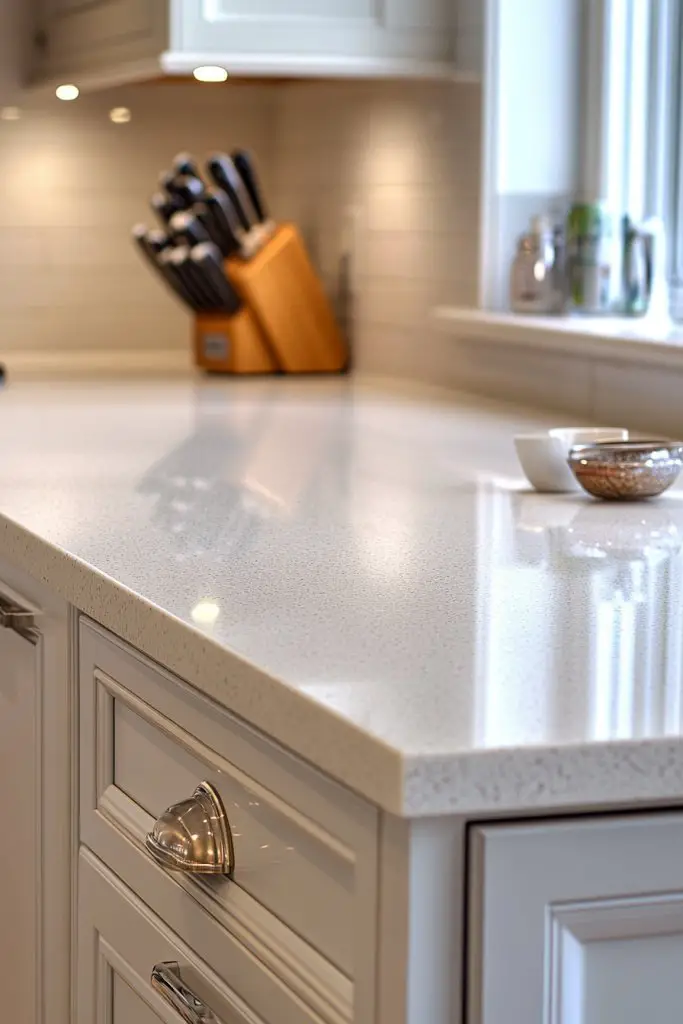
Are your countertops scratched, stained, or constantly needing maintenance? Choosing the right surface can make your kitchen look stunning and simplify cleanup. Quartz and solid surface materials combine durability with low fuss, making them perfect for busy households. Who doesn’t want a beautiful yet practical workspace?
Picture a sleek quartz countertop in a neutral tone, with subtle flecks that catch the light. Its smooth surface resists stains and scratches, maintaining its pristine look over years. The seamless appearance creates a modern, minimalist vibe. Pair with matching backsplash and cabinetry for a cohesive aesthetic. It’s like having a high-end finish without the high-maintenance worries.
Choose from a variety of colors, patterns, and textures to suit your style—marble-like veining, matte finishes, or glossy surfaces. For rustic or industrial themes, opt for concrete-look solid surfaces. Small kitchens benefit from light colors that open up space, while darker shades add drama in larger areas. Seasonal accessories or protective mats can be added for functionality.
Work with a professional for precise measurements and installation. Ensure your cabinets are level and sturdy before installing the countertops. Seal any seams properly to prevent water infiltration. Use compatible cutting boards and trivets to protect the surface. Regular cleaning with gentle, non-abrasive cleaners keeps it looking new. Maintenance is minimal but vital for longevity.
Add decorative edge profiles or custom inlays for a unique touch. Incorporate built-in drainage grooves or integrated sinks. Use color-coordinated accessories like cutting boards or utensil holders. Seasonal decor items like colorful silicone mats or textured trivets can add personality. These small upgrades personalize your space.
A durable countertop elevates your kitchen’s style and lifespan. It reduces daily stress over stains and scratches, giving you more time to enjoy cooking. It’s an investment that combines form and function, making your kitchen truly stand out. Time to upgrade to a surface that works as hard as you do.
10. Add a Breakfast Nook or Small Dining Area for Versatile Functionality
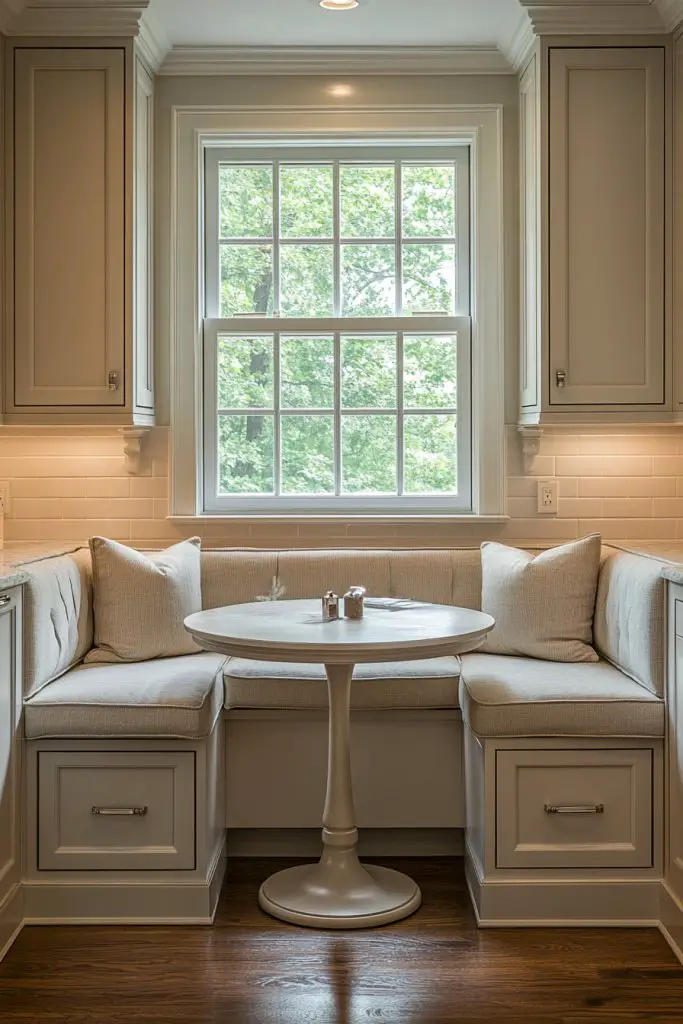
Does your kitchen lack a cozy spot for casual meals or quick chats? A breakfast nook creates a dedicated space for daily dining without sacrificing room. It adds charm and functionality, making your kitchen more inviting. Who says you need a formal dining room for family dinners?
Imagine a built-in bench with plush cushions, paired with a small round table. Bright cushions and a textured throw blanket invite comfort. Large windows frame the space, filling it with natural light. A few decorative accents like a centerpiece or patterned rug complete the cozy vibe. It’s a perfect spot for morning coffee or afternoon snacks.
Choose from built-in banquettes or freestanding corner seating. For small kitchens, a fold-down table or wall-mounted drop-leaf design saves space. Use colorful upholstery or patterned fabrics to match your decor. Seasonal throws or decorative pillows can refresh the look. Adapt the size and shape based on your family’s needs.
Start by selecting a corner or wall that gets good natural light. Build or purchase a bench with storage underneath for extra functionality. Choose a compact table that can be easily moved or folded away. Decorate with cushions and a tablecloth that complements your style. Keep the area clutter-free for a relaxed atmosphere. Regularly update textiles to reflect seasons.
Add personal touches with artwork, decorative placemats, or themed tableware. Incorporate a small shelf or wall hooks nearby for quick-access essentials. Use a mix of textures—like a woven rug or velvet cushions—to add depth. Change accessories seasonally to keep the space fresh. Personalization makes every meal feel special.
A breakfast nook transforms your kitchen into a welcoming retreat. It encourages family bonding and casual gatherings. Plus, it’s a smart way to maximize small spaces without sacrificing style. Get ready to enjoy your new favorite spot in the house.
11. Use Color-Contrasted Cabinets for Visual Interest and Clear Zoning
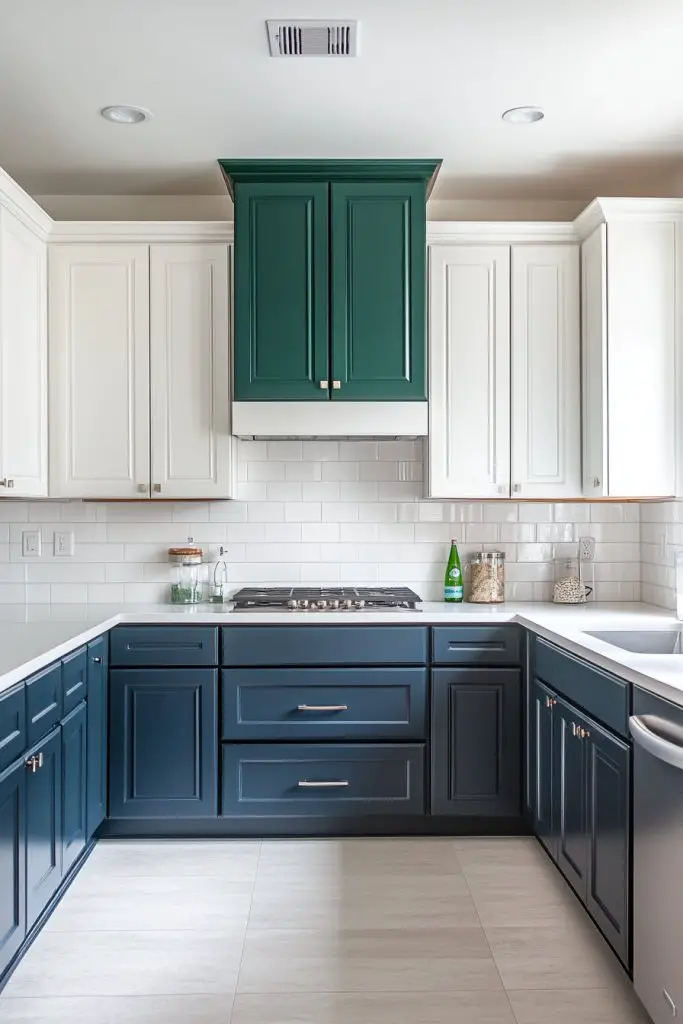
Feeling like your kitchen lacks personality? Standard all-in-one cabinetry can look dull and unify spaces too much. Contrasting colors create visual interest and help define different zones within your kitchen. It’s an easy way to add drama and style with minimal effort. Why settle for boring when you can make a statement?
Picture dark navy lower cabinets paired with crisp white uppers, or sleek black bases with light gray tops. The contrast highlights functional zones like prep and storage areas. Textured finishes or matte paint add depth, while glossy accents bring a modern touch. Bright hardware or trim pops against bold colors, completing the look. It’s a timeless style that turns heads.
Mix and match colors based on your space—deep hues for a dramatic effect or pastel shades for a softer vibe. Two-tone cabinetry works well in open-concept kitchens to delineate zones. Consider different textures, like matte for lower cabinets and gloss for uppers. Seasonal accents or decorative hardware can further personalize your color palette.
Plan your color scheme carefully, balancing bold with neutral tones. Choose durable, high-quality paint or veneer finishes. Prepare surfaces by cleaning and priming thoroughly. Use painter’s tape for clean lines between contrasting colors. Finish with a clear sealant for longevity. Coordinate hardware to complement the overall palette. Regular touch-ups keep the look fresh.
Add decorative trim or edge details for extra flair. Incorporate open shelving in contrasting colors for visual anchor points. Use colorful or patterned backsplashes to enhance the color contrast. Personalize with unique hardware or custom-painted panels. These details ensure your kitchen reflects your style.
Contrasting cabinetry creates a dynamic, personalized kitchen space. It’s a bold move that adds personality and helps organize visually. Plus, it’s surprisingly easy to execute with the right planning. Prepare to enjoy a kitchen that’s as unique as you are.
12. Integrate Modern, Space-Saving Appliances for a Clutter-Free Look
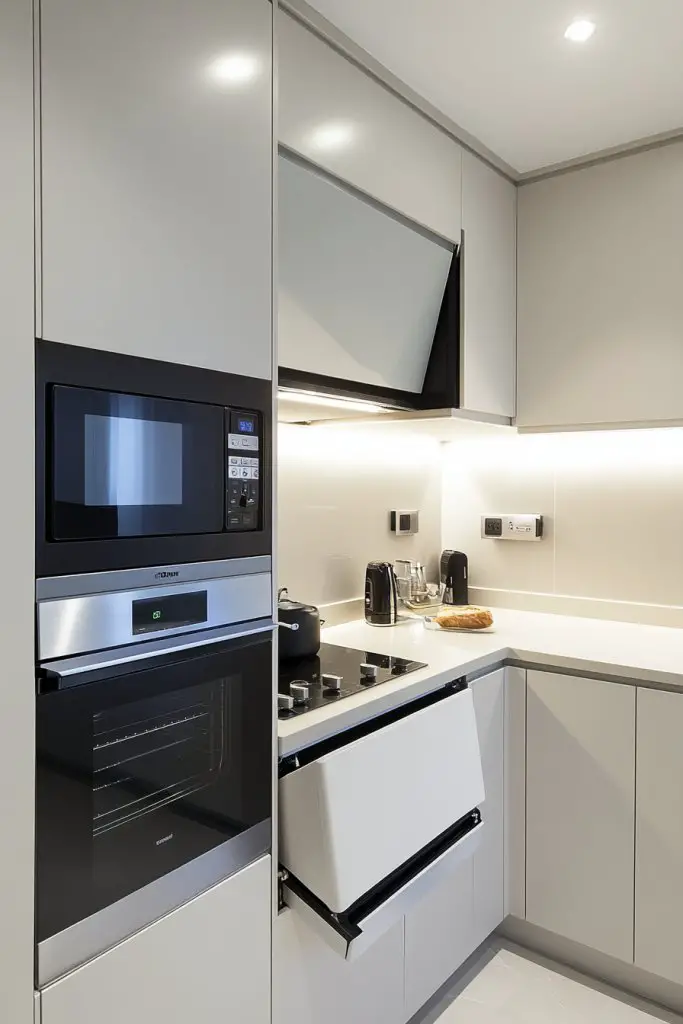
Are bulky appliances making your counters look crowded and chaotic? Modern, space-saving appliances can clear your workspace and give your kitchen a sleek, minimalist vibe. They’re not just functional—they’re designed to blend seamlessly into your cabinetry. Who says high tech can’t look good?
Imagine built-in microwave drawers, compact dishwashers, and slim refrigerators tucked neatly into cabinetry. Hidden appliances hide clutter and create clean lines. Touch-controlled induction cooktops and under-counter wine coolers add a touch of luxury. The overall look is streamlined, with appliances integrated into the design, not fighting against it.
Choose from fully integrated models that blend into your cabinets or free-standing units with a sleek profile. For small spaces, look for appliances with multi-functionality or fold-away features. Match finishes like stainless steel, black matte, or panel-ready options to your decor. Seasonal or themed appliances—like a retro toaster—can add a personal touch.
Measure your available space and select appliances designed for compact living. Work with a professional to ensure proper installation, especially for built-in units. Plan your electrical and plumbing connections carefully. Use panel kits or custom fronts for a uniform look. Regular maintenance keeps everything running smoothly.
Add stylish handles or trim for a custom look. Use matching or contrasting colors to highlight key appliances. Incorporate smart home features for remote control and energy efficiency. Personalize with decorative magnets or labels on appliances if they are visible. These touches make your kitchen both functional and fashionable.
Space-efficient appliances streamline your kitchen’s appearance and improve daily routines. They make cooking more enjoyable and less cluttered. Plus, you’re investing in a modern look that adds value to your home. It’s time to embrace sleek, integrated technology.
13. Install a Pot Filler Above the Stove for Convenience
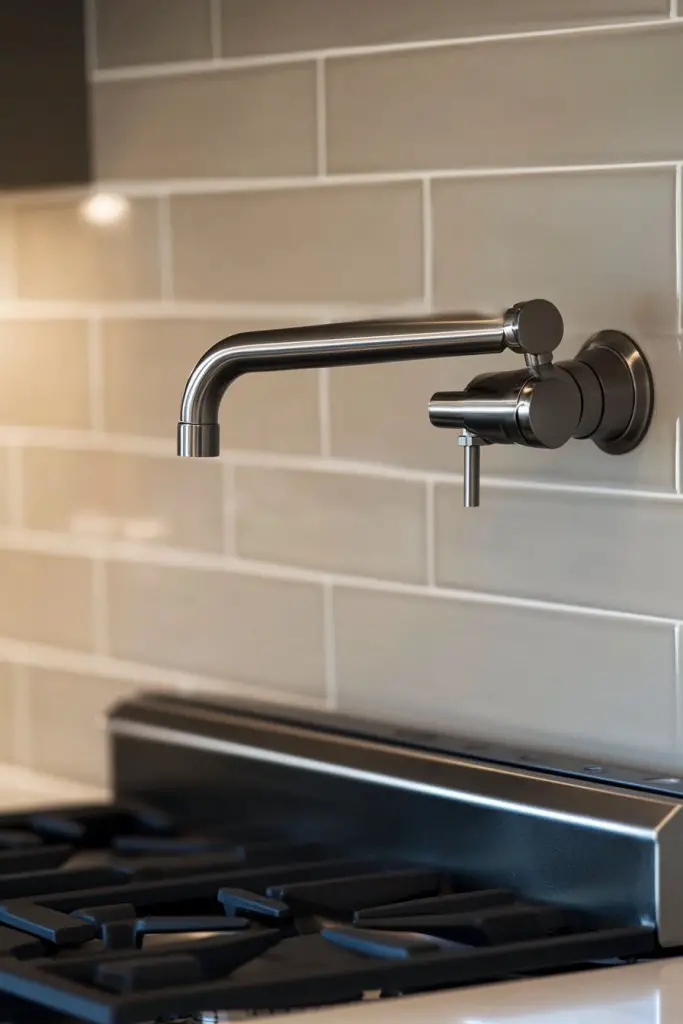
Long trips across the kitchen to fill pots are a hassle—especially when you’re multitasking or cooking for a crowd. A pot filler mounted above the stove makes filling large pots quick and easy. It’s a small upgrade with a big impact on your cooking efficiency. Who wouldn’t want that?
Picture a sleek, gooseneck faucet mounted directly above your cooktop. It’s a statement piece that adds a professional touch. The finish matches your other fixtures for a cohesive look. When not in use, it retracts neatly, keeping your space clean. It’s both functional and stylish—a true kitchen upgrade.
Opt for finishes that match your faucet or hardware—stainless, matte black, or brushed nickel. Choose a model with a swivel or extendable spout for maximum flexibility. For smaller kitchens, a compact design that extends only when needed works best. Seasonal or themed finishes can add a fun touch.
Work with a plumber to install a dedicated water line directly from your main supply. Mount the faucet securely above the stove, ensuring it clears the burners safely. Check for proper water pressure and test for leaks. Use a protective cover or trim to conceal the pipes. Regular maintenance prevents drips and ensures smooth operation.
Add a matching handle or decorative trim to match your decor style. Use a high-arc design for added clearance. Incorporate a small soap dispenser or spice rack nearby for convenience. Personal touches like custom engraving or color accents personalize the fixture.
A pot filler makes cooking more efficient and less messy. It’s a subtle upgrade that amplifies your kitchen’s professional vibe. Once installed, you’ll wonder how you ever cooked without it. Time to fill those pots with ease!
14. Incorporate a Recessed or Drop-Down Cutting Board for Extra Prep Space
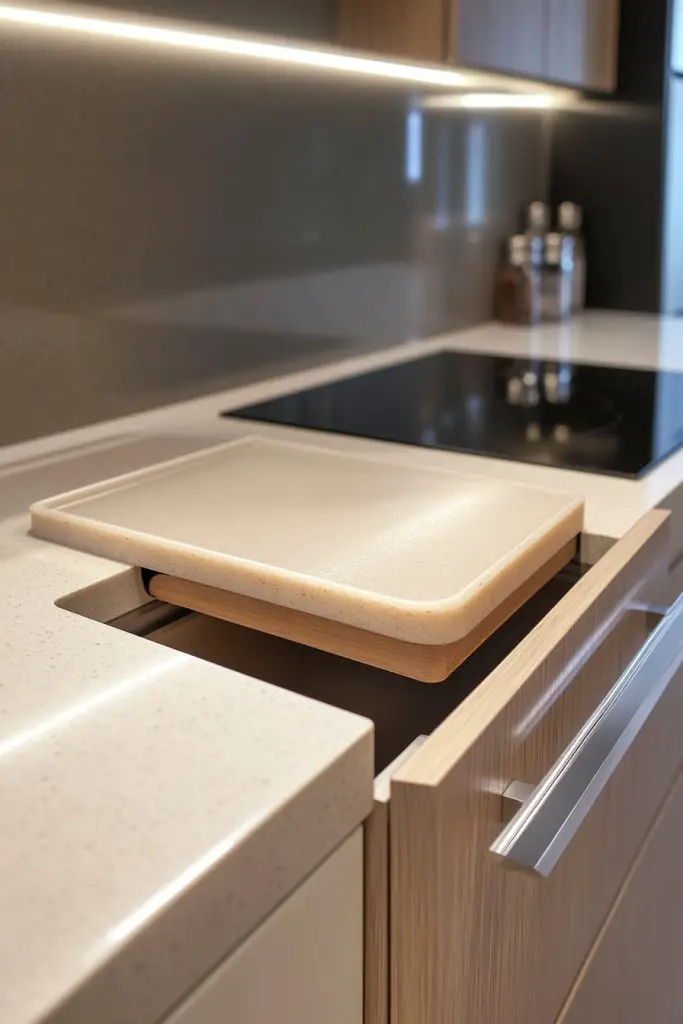
Limited counter space makes meal prep feel cramped and stressful. A recessed or drop-down cutting board creates extra workspace exactly when you need it. When not in use, it tucks away seamlessly, keeping your counters tidy. Who knew space-saving could be so smart?
Imagine a sleek panel integrated into your island or countertop. When lowered, it reveals a sturdy wood or composite cutting surface. Its flush design blends into your cabinetry, maintaining a clean look. When raised, it acts as a regular countertop extension. The smooth operation makes meal prep more fun and less cluttered.
Choose from materials like bamboo, butcher block, or composite for durability and style. Install in various locations—inside islands, beneath cabinets, or along countertops. For multi-use spaces, select a unit with integrated storage or a fold-away design. Match the finish to your existing cabinetry for a seamless look.
Hire a professional to measure and cut the opening, ensuring precise fit. Secure the drop-down panel with sturdy hinges or slide mechanisms. Seal edges to prevent water infiltration. Use the space beneath for storing knives or utensils. Regularly check the mechanism for smooth operation and stability.
Add a decorative trim or edge detail for a custom finish. Use contrasting colors or patterns for a visual pop. Incorporate a small magnetic strip or hooks nearby for utensils. Rotate cutting boards seasonally or with your decor themes for freshness.
A recessed or drop-down board maximizes space and functionality. It makes meal prep quicker and more organized. Plus, it’s an innovative feature that impresses guests. Ready to elevate your kitchen prep game?
15. Use Sliding or Pocket Doors to Save Space and Improve Traffic Flow
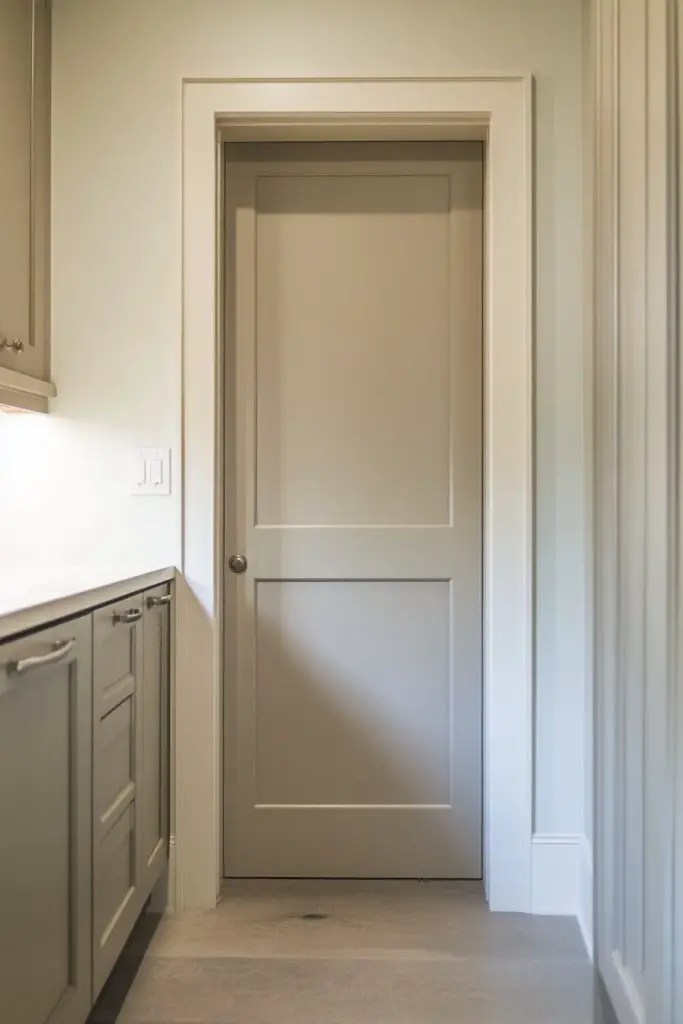
Traditional swinging doors can block your walkway and make small kitchens feel cramped. Sliding or pocket doors slide neatly into the wall, freeing up space and improving traffic flow. It’s a simple swap that makes your kitchen more accessible and open. Who wants doors that get in the way?
Visualize a sleek, flush-mounted sliding door that disappears into the wall when open. The door’s finish matches your cabinetry or wall color for a seamless look. When closed, it creates a clean, minimalist partition. This setup not only saves space but also adds a modern, streamlined aesthetic.
Choose from barn-door styles, flush-mounted pocket doors, or contemporary glass sliders depending on your decor. For rustic themes, opt for wood paneling with exposed hardware. Modern designs favor smooth, minimal tracks with hidden mechanisms. Seasonal or themed hardware can add personality.
Hire a contractor to modify wall framing and install the track system. Ensure the door is properly aligned and slides smoothly. Seal edges to prevent drafts or noise. Consider adding a soft-close mechanism for quiet operation. Test frequently during installation for proper fit and function.
Decorate the door with paint, decals, or hardware accents that match your style. Add a frosted or textured glass panel for privacy and light. Use decorative handles or pulls to enhance visual appeal. Regular cleaning keeps tracks free of dust and debris.
Sliding or pocket doors open up your space and make your kitchen more functional. They’re an elegant, space-saving solution that adds a contemporary touch. Once installed, you’ll wonder how you ever managed without them.
16. Enhance Ventilation with a Stylish Range Hood or Ventilation System
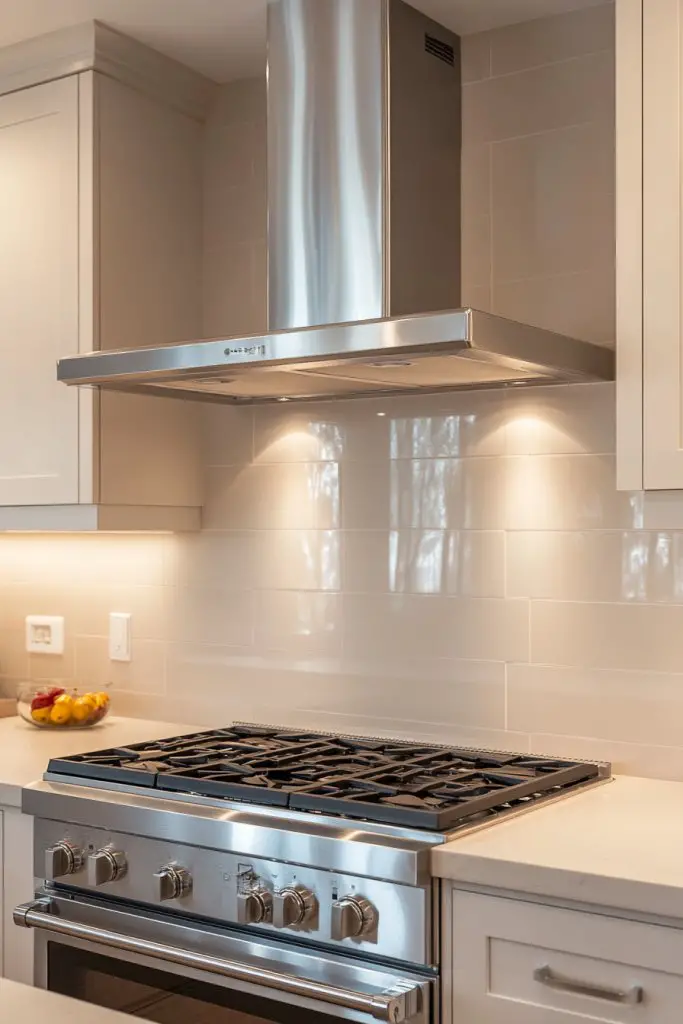
Cooking fumes, smoke, and odors can quickly turn your kitchen into a stifling environment. Proper ventilation is essential for fresh air and a clean space. A stylish range hood not only improves airflow but also becomes a focal point. Who says functional can’t be fabulous?
Imagine a sleek stainless steel or matte black range hood mounted above your stove, with clean lines or ornate details. It vents cooking fumes efficiently while complementing your decor. LED lighting inside the hood illuminates your cooktop, making every meal prep safer and more precise. The design elevates the entire kitchen aesthetic.
Choose from wall-mounted, island, or downdraft styles depending on your layout. Modern, minimalist hoods with hidden vents blend seamlessly into cabinetry. For more decorative options, consider ornate metal or custom-painted designs. Seasonal lighting or accents can add a personal touch.
Ensure proper placement above the cooktop for maximum efficiency. Work with a professional to vent exhaust outside or through a high-quality recirculating system. Secure mounting brackets and connect ductwork or filters as specified. Regularly clean filters and exterior surfaces for optimal performance. Keep the area around the hood free of grease buildup.
Add LED accent lighting or decorative trim to match your kitchen style. Use customizable vent covers or paint the hood to coordinate with cabinets. Incorporate smart controls for remote operation or voice activation. These details boost both function and style.
A good range hood improves air quality and elevates your kitchen’s look. It’s an investment in comfort and health, creating a more pleasant cooking environment. Time to clear the air and enjoy your culinary space!
17. Add a Dedicated Recycling and Composting Station for Eco-Friendly Living

Cluttered countertops filled with recyclables and compost bins make your kitchen look messy and unorganized. A dedicated station streamlines waste management and encourages eco-friendly habits. It’s a smart, responsible upgrade that’s easy to implement. Want to make a difference while keeping your kitchen tidy?
Picture a sleek, concealed cabinet with labeled bins for recyclables, compost, and trash. The bins are stackable or side-by-side for efficient use of space. A pull-out mechanism makes sorting effortless, while a counter-height countertop keeps everything accessible. The design blends seamlessly into your cabinetry, maintaining a clean look.
Opt for built-in pull-out units or standalone carts that can be tucked away. Use eco-themed labels and color coding for clarity. For small kitchens, incorporate slim, vertical bins inside a cabinet door. Decorate with eco-friendly materials like bamboo or recycled plastics. Seasonal or themed labels can make the system fun.
Choose durable, easy-to-clean containers that fit your space and waste volume. Install a pull-out mechanism or a dedicated drawer inside your cabinetry. Position the station near your main prep area for convenience. Ensure proper ventilation if needed. Regularly empty and clean bins to prevent odors and pests. Educate household members for consistency.
Decorate with labels or decals that reflect your eco-conscious values. Use attractive containers or bins that match your kitchen decor. Incorporate a small composting guide or tips nearby for motivation. Consider adding a small indoor compost bin if outdoor space is limited. Personal touches make sustainability easy and fun.
A dedicated recycling and composting station promotes eco-friendly living and reduces waste clutter. It shows your commitment to sustainability and inspires others. Once set up, it becomes second nature to sort waste properly. Feel good about making a positive impact every day.
18. Incorporate Soft-Close Cabinets and Drawers for Quiet, Smooth Operation
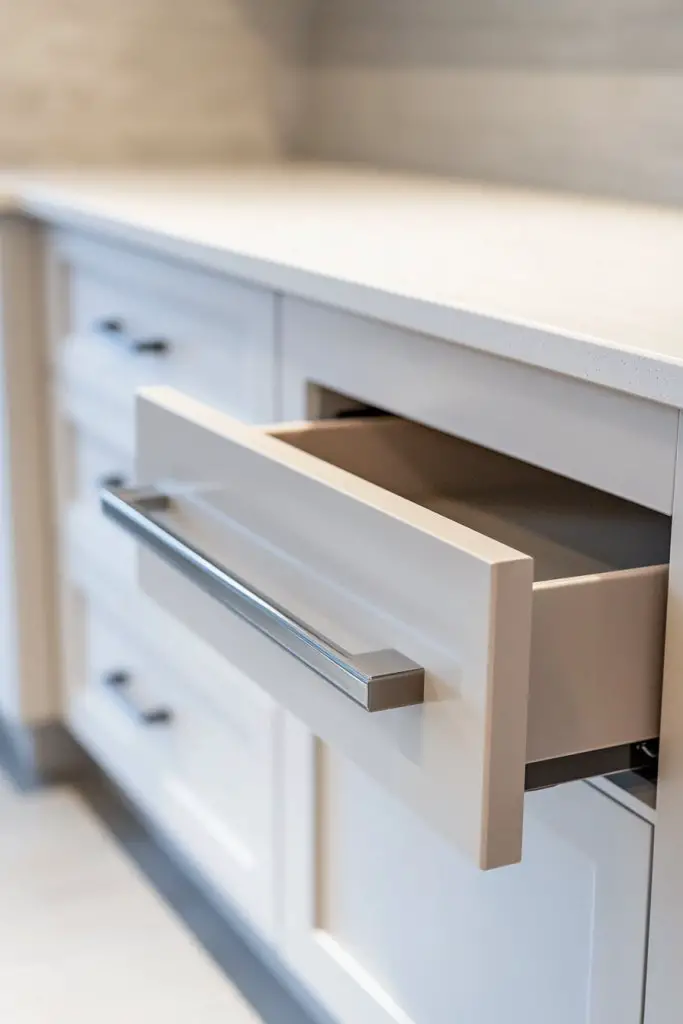
Ever opened a cabinet door that slammed shut with a bang? Noisy, abrupt closures are annoying and can damage your cabinets over time. Soft-close mechanisms make opening and closing smooth and silent. It’s a small upgrade that adds a touch of luxury and preserves your cabinetry.
Imagine gently closing a cabinet door that softly slides shut without a sound. The hardware’s sleek, unobtrusive design blends into your cabinetry. The smooth action feels satisfying and refined, elevating your kitchen’s overall aesthetic. It’s the subtle detail that makes a big difference.
Choose from soft-close hinges, slides, or both based on your cabinet type. For a cohesive look, select finishes that match your existing hardware—stainless, matte black, or brushed nickel. For a vintage or rustic style, opt for concealed mechanisms with decorative hardware. Seasonal upgrades, like colorful knobs, can add personality.
Replace standard hinges or slides with soft-close versions, following manufacturer instructions. Ensure proper alignment for smooth operation. Test frequently during installation to avoid misalignment or sticking. Use a screwdriver or drill for quick swaps. Regularly lubricate mechanisms to maintain quiet, smooth function.
Add decorative hardware that complements your style. Use contrasting colors or textured finishes for visual interest. Incorporate soft-close features into existing furniture or new pieces for consistency. Label drawers or cabinets for organization and ease of use. These small touches enhance both function and style.
Soft-close cabinetry creates a peaceful, refined kitchen environment. It’s a practical upgrade that reduces noise and wear, extending cabinet life. Once you experience the quiet operation, you’ll wonder how you ever managed without it. It’s the little luxury that elevates daily life.
19. Use Durable, Non-Slip Floor Tiles for Safety and Style

Slippery, cracked, or worn-out flooring can turn your kitchen into a safety hazard and a visual eyesore. Durable, non-slip tiles protect your family and add style. They’re a practical upgrade that lasts for years and keeps your space looking sharp. Ready to step up your flooring game?
Imagine textured ceramic or porcelain tiles in a pattern that complements your decor—like classic subway, herringbone, or mosaic. The surface provides grip even when wet, reducing slips. Choose warm tones or bold colors to set the mood. The tiles’ durability withstands heavy foot traffic, spills, and stains, maintaining their beauty over time.
Select from matte, textured, or glazed finishes based on your style and safety needs. Patterned tiles can create visual interest, while solid colors keep it simple and modern. For high-traffic areas, opt for thicker, reinforced tiles. Seasonal rugs or mats can add comfort and color without sacrificing safety.
Prepare the subfloor thoroughly, ensuring a flat, clean surface. Use high-quality adhesive and spacers for even installation. Seal grout lines properly to prevent staining and water infiltration. Regular cleaning and resealing prolong the life of your tiles. Professional installation ensures a flawless, durable finish.
Mix tile patterns or colors to create a custom look. Incorporate decorative borders or accents for visual flair. Use textured or anti-slip mats in specific zones, like near the sink or stove. Seasonal or themed mats can add a playful or festive touch.
Durable, non-slip tiles provide safety without sacrificing style. They make your kitchen a more secure and attractive space for everyone. Plus, they’re an investment that pays off in longevity and peace of mind. Step confidently into your upgraded kitchen!
Conclusion
From innovative storage solutions to stylish design upgrades, these kitchen renovation ideas provide a wealth of options to elevate your space. Feel empowered to try out new concepts and tailor them to your home’s unique style. Take the first step today—your dream kitchen is within reach, waiting to be brought to life!