Ever dreamed of transforming your home into a stylish haven without breaking the bank? Low budget home decorating ideas have surged in popularity because they prove that you don’t need to spend a fortune to create a beautiful, inviting space. Whether you’re a renter or just looking for a budget-friendly refresh, clever DIY projects and simple swaps can make all the difference.
In this article, you’ll find a diverse range of ideas that will inspire your next home makeover. From upcycling furniture to affordable decor hacks, each tip is designed to help you achieve a chic look on a dime. Get ready to unleash your creativity and see how small changes can make a big impact!
1. Transform Walls with Removable Wallpaper or Decals
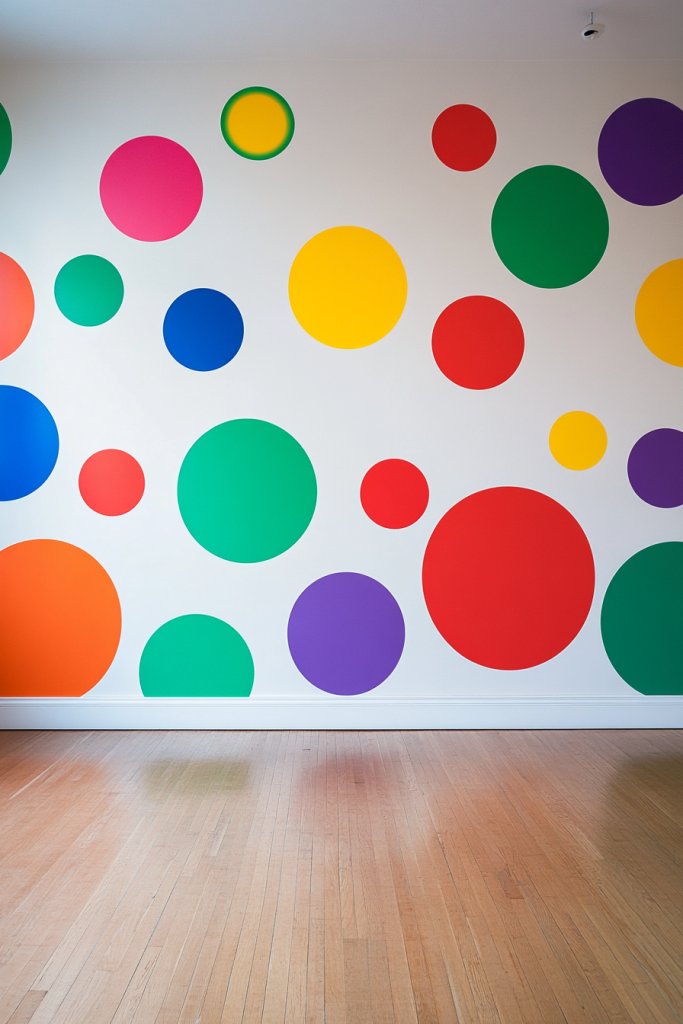
Ever looked at your blank walls and felt they just don’t pop? Maybe you crave personality without the commitment or expense of traditional wallpaper. It’s frustrating when your space feels bland, especially when you want to impress guests or just enjoy a cozy vibe. Luckily, there’s a way to jazz up your walls without permanent changes or breaking the bank.
Recommended Products to replicate this idea
| # | Preview | Product | |
|---|---|---|---|
| 1 |
|
Art3d Smoothing Tool Kit for Applying Peel and Stick Wallpaper, Vinyl Backsplash Tile | Buy on Amazon |
| # | Preview | Product | |
|---|---|---|---|
| 1 |

|
RoomMates Bluey Family and Friends Peel and Stick Wall Decals, RMK5457SCS | Buy on Amazon |
Imagine peeling back a plain wall to reveal a vibrant pattern of geometric shapes or botanical prints. The peel-and-stick wallpaper clings smoothly, creating a seamless, modern look that transforms your room instantly. Or picture fun decals—like playful quotes or whimsical motifs—adding personality to a nursery or home office. The textures are matte or gloss, depending on your style, and they stick well without damaging paint.
Choose bold, large-scale patterns for a statement wall, or subtle textures for a more understated effect. Seasonal decals can add festive charm during holidays, then come off easily afterward. For renters, removable decals are perfect—they won’t leave marks or residue. You can also experiment with metallic finishes for a touch of glam or matte for a more subdued tone, adapting to your aesthetic.
Start by selecting your preferred peel-and-stick wallpaper or decals from a local store or online. Measure your wall carefully, then cut the wallpaper slightly larger than your space. Clean the surface thoroughly to ensure adhesion. Peel off the backing slowly, smoothing the material from top to bottom to avoid bubbles. For decals, simply peel and position, pressing firmly. Use a credit card or smoothing tool to eliminate air pockets. When removing, peel gently and clean the surface with soap and water.
Create a gallery wall with a mix of decals and framed photos, adding a layered look. Customize decals with your own quotes or designs for a truly personal touch. Incorporate metallic or textured decals for depth and interest. You can also combine different patterns on adjacent walls for a curated, eclectic feel. This approach lets you reflect your personality without the permanence.
Removable wallpapers and decals let you experiment fearlessly, giving your space a fresh vibe whenever you want. They’re budget-friendly and easy to update, so your home can evolve with your taste. Whether you’re renting or just like changing things up, this idea keeps your decor dynamic and fun. Ready to give your walls some personality without the fuss?
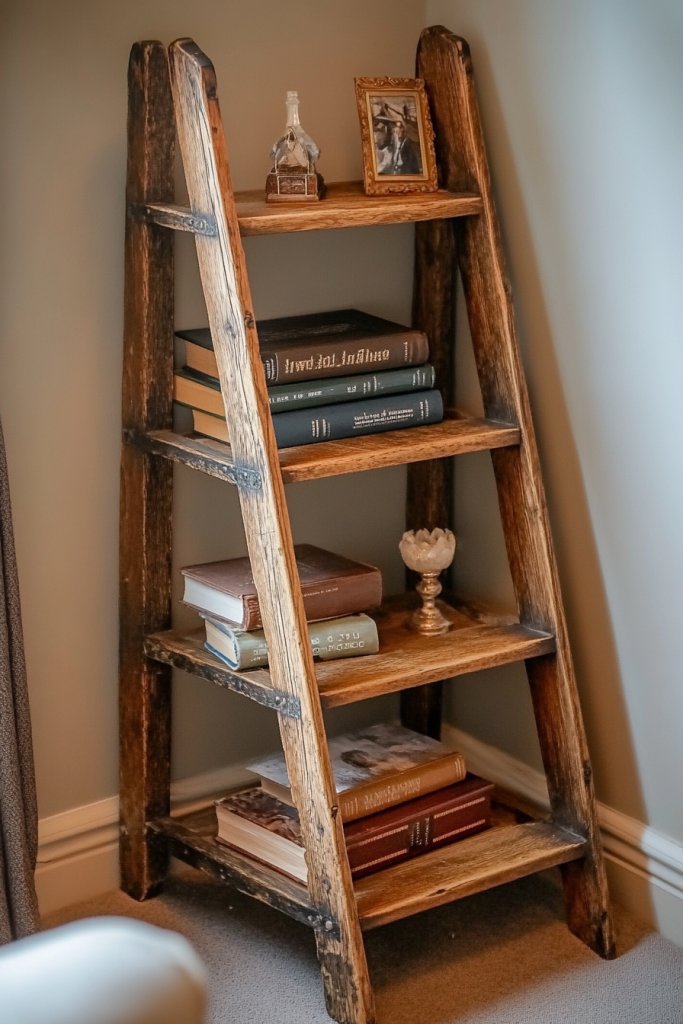
2. Repurpose Vintage or Thrifted Finds into Statement Decor
Tired of cookie-cutter decor that everyone else has? Want to add unique charm without spending a fortune? Thrift stores and flea markets are treasure troves of vintage goodies waiting to be transformed. Finding one-of-a-kind pieces can make your space stand out and tell a story. Plus, it’s eco-friendly and budget-conscious—what’s not to love?
Recommended Products to replicate this idea
| # | Preview | Product | |
|---|---|---|---|
| 1 |

|
Kangce Vintage Picure Frames 8x10 Antique Victorian Gold Bronze Picture Frames for Tabletop and Wall... | Buy on Amazon |
| # | Preview | Product | |
|---|---|---|---|
| 1 |

|
Signature Design by Ashley Kettleby Vintage Wood Storage Trunk or Coffee Table with Lift Top 19",... | Buy on Amazon |
Picture a vintage metal tray with peeling paint, now serving as a stylish wall-mounted organizer or centerpiece. Or imagine a collection of colorful, mismatched bowls stacked on your shelves, each with its own history. A weathered wooden ladder becomes a quirky bookshelf, or an antique mirror adds character to your entryway. The imperfections and history give each piece personality, making your decor truly unique.
Mix old and new for an eclectic look—pair vintage trays with modern textiles or furniture. Use items like decorative bowls or trays as trays for candles or plants (avoiding restricted items, of course). Seasonal updates are simple: swap out textiles or add seasonal accessories to your vintage finds. These pieces can fit into farmhouse, shabby chic, boho, or industrial styles, depending on how you style them.
Start by setting a budget and scouting local thrift shops, flea markets, or online marketplaces. Look for items that are sturdy and clean, with potential for upcycling. Use basic tools like sanders, paint, or polish to refresh the pieces—don’t be afraid to get creative. For example, repaint a tray in your favorite color or distress wood for rustic charm. Arrange your finds in groups or as focal points, balancing scale and color for visual harmony.
Add personal touches like stenciled patterns, new hardware, or a fresh coat of paint to adapt each piece to your style. Combine vintage items with modern elements—such as sleek vases or minimalist picture frames—for contrast. Use these pieces as conversation starters or to showcase your personality. Keep an eye out for pieces that can serve multiple functions, like a vintage trunk as both storage and coffee table.
Upcycling thrifted finds not only saves money but also makes your home more meaningful. You create a space filled with stories and history, making it more inviting. Plus, each item is a conversation piece that shows off your creativity. Dive into your local flea markets and start building a decor collection that’s as unique as you are.
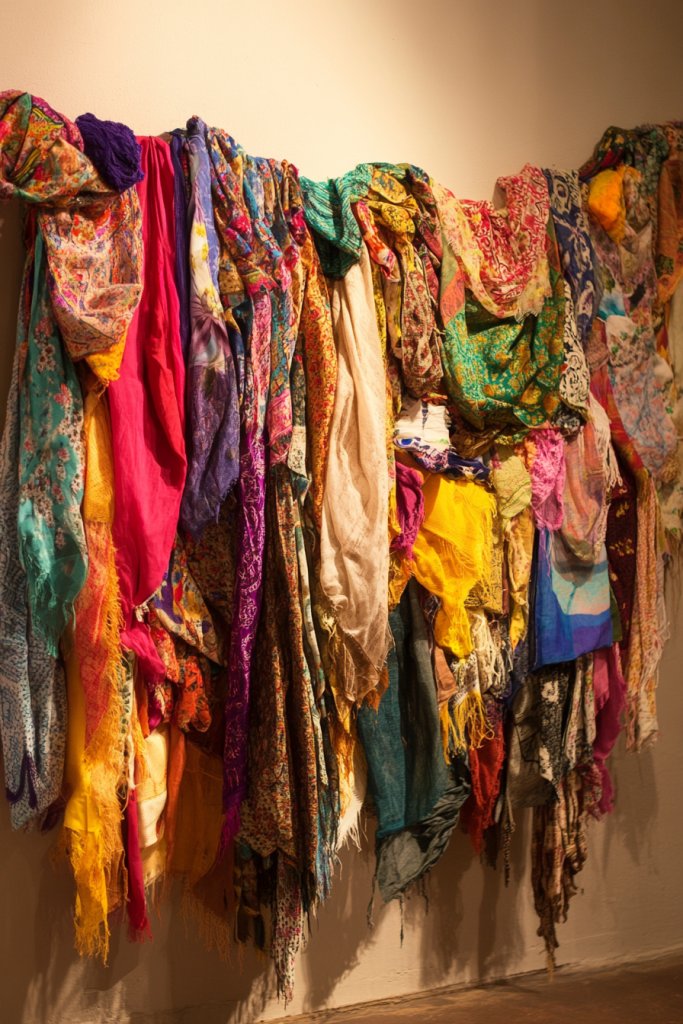
3. Use DIY Textile Art with Fabric Scraps or Scarves
Feeling bored with plain walls but not ready to invest in expensive art? Sometimes, all your space needs is a splash of color or texture. DIY textile art is a fun, affordable way to add personality without breaking the bank. Plus, it’s a creative outlet that lets you showcase your style and resourcefulness.
Recommended Products to replicate this idea
| # | Preview | Product | |
|---|---|---|---|
| 1 |

|
Faithworks Embroidered Wall Art - Wooden Hoop Boho Farmhouse Wall Décor, 8" x 8", Wild & Free | Buy on Amazon |
| # | Preview | Product | |
|---|---|---|---|
| 1 |

|
ABoby Hanging Posters, Decorative Wall Art Prints, Fabric Tapestries With Wood Frames, Ready to Hang... | Buy on Amazon |
Visualize a vibrant wall hanging made from colorful fabric scraps layered in a patchwork pattern. Or imagine a soft, neutral-toned tapestry crafted from old scarves, draped artfully to add warmth. Textured pillows and fabric banners can also double as decor, bringing a tactile element to your space. The textures and colors create a cozy, inviting atmosphere that’s totally customizable.
Choose fabrics in your favorite colors, patterns, or textures—think velvet, linen, or cotton—to match your decor theme. For a boho vibe, layer different textures and patterns; for modern minimalism, stick to monochrome and sleek lines. Seasonal fabrics, like cozy flannel or light linen, let you adapt your art for different times of year. You can also create fabric banners for celebrations or everyday decor.
Gather fabric scraps, scarves, or old textiles from your wardrobe or thrifted finds. Cut them into strips or shapes, then sew or glue onto a backing fabric or canvas. Use a simple embroidery hoop or frame for a quick wall hanging, or staple fabric to a wooden dowel for a banner. Layer different fabrics for visual interest, and add embellishments like tassels or beads for extra flair. Hang with hooks or tension rods, avoiding damage to walls.
Create a themed textile collage—say, a collection of fabrics from trips or special events. Incorporate your favorite colors or sentimental pieces to make it meaningful. Mix textures like silky, matte, and rough fabrics to add depth. You can also add embroidery or hand-stitched details for a handcrafted look. This DIY art can evolve over time as you find new fabrics and ideas.
Textile art is a budget-friendly way to infuse your home with warmth and personality. It’s incredibly adaptable, letting you change styles easily. Plus, making your own wall decor is a rewarding experience that sparks creativity. Start experimenting with scraps—you might surprise yourself with what you create!
4. Build Simple Floating Shelves with Reclaimed Wood
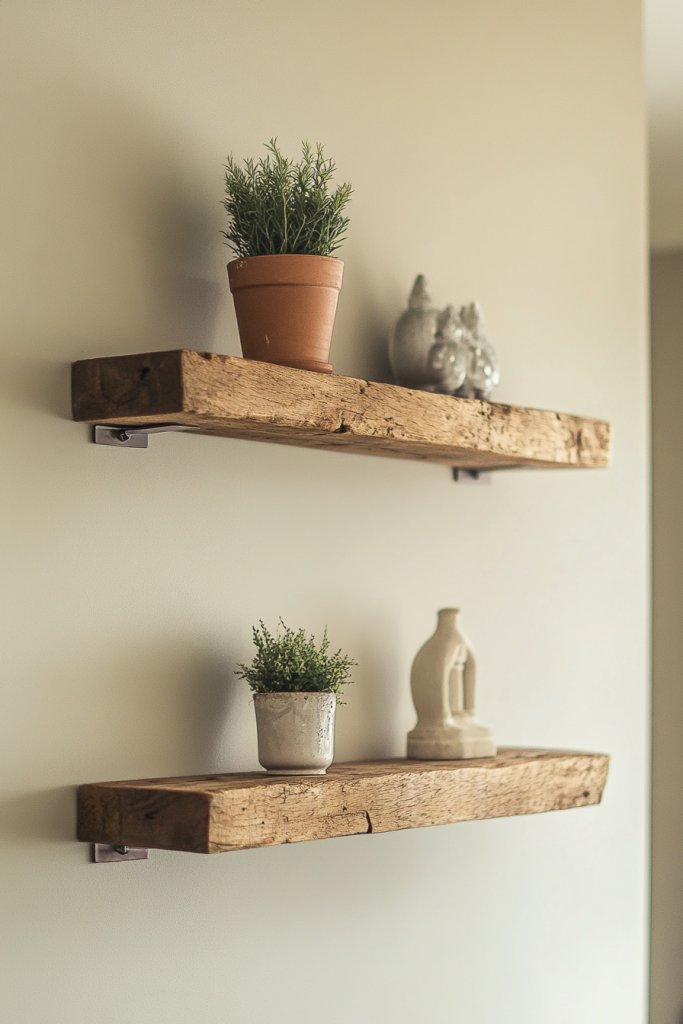
Ever wish your walls could do more than just hold up paint? Floating shelves are a sleek, budget-friendly way to add storage and style without taking up floor space. They’re perfect for showcasing your favorite items—minus the clutter. Plus, they’re easy to install and customize, making your walls work harder for you.
Recommended Products to replicate this idea
| # | Preview | Product | |
|---|---|---|---|
| 1 |
|
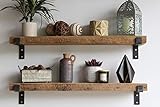
Urban Legacy Accent Shelves | Reclaimed Barn Plank | Set of 2 with Full Brackets (Natural, 36"x 7"x... | Buy on Amazon |
| # | Preview | Product | |
|---|---|---|---|
| 1 |

|
LEOPO 12-Pack 6 inch Floating Shelf Brackets, Hidden Shelf Bracket for Wood, Concealed Blind... | Buy on Amazon |
Picture a set of reclaimed wood shelves running along a wall, holding potted plants, books, or decorative objects. The natural grain and imperfections add character, creating a warm, rustic vibe. You might see them in a cozy living room or a minimalistic kitchen, blending function and aesthetics effortlessly. The simplicity of floating shelves keeps the focus on what’s displayed, not on bulky furniture.
Use different wood stains or paint to match your decor—light for airy spaces, dark for dramatic contrast. Vary the length and spacing of shelves to suit your storage needs or aesthetic preference. For small spaces, a single shelf can display a few key pieces; in larger rooms, create a gallery of shelves for a more dramatic effect. You can also angle or stagger shelves for visual interest.
Start by sourcing reclaimed wood from local suppliers or your own garage. Cut the wood to desired lengths, then sand and finish for a smooth surface. Mount brackets or cleats inside the wall, ensuring they are level and secure. Attach the shelves onto the brackets, adjusting for even spacing. Use a level during installation for precision. Finish by decorating with lightweight items—avoid excessive weight that could compromise stability.
Add small decorative objects like vintage collectibles, framed photos, or candles that fit your theme. Incorporate LED strip lighting underneath for a subtle glow. Paint or stain the shelves in colors that complement your wall or furniture. You can also create a themed display—seasonal items, favorite books, or DIY crafts—to keep it fresh.
Reclaimed wood shelves are a sustainable, stylish way to upgrade your decor. They showcase your eco-conscious side and add warmth to any room. With simple tools and a bit of effort, you can craft a custom storage solution that looks professionally done. Get creative with arrangements and enjoy a space that’s uniquely yours.
5. Refresh Furniture with Budget-Friendly Paint or Contact Paper
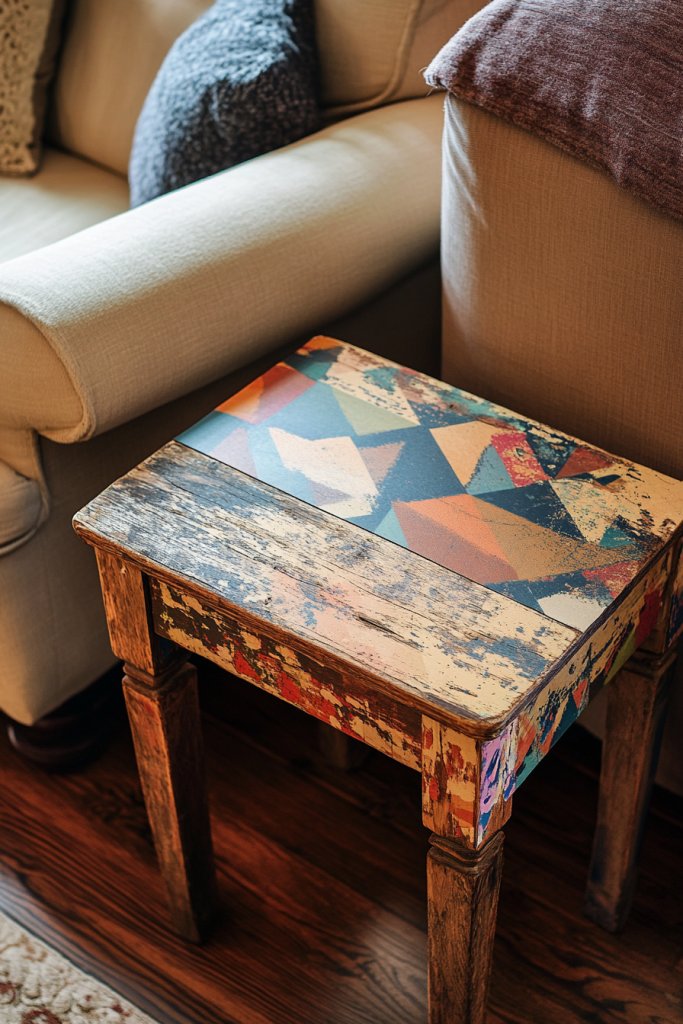
Getting bored with old furniture but don’t want to spend a ton on new pieces? A fresh coat of paint or contact paper can work wonders, giving tired furniture a new life. It’s a cost-effective way to update your space and add personality without shopping spree stress. Plus, it’s surprisingly easy to do, even for beginners.
Recommended Products to replicate this idea
| # | Preview | Product | |
|---|---|---|---|
| 1 |
|
Art3d Smoothing Tool Kit for Applying Peel and Stick Wallpaper, Vinyl Backsplash Tile | Buy on Amazon |
| # | Preview | Product | |
|---|---|---|---|
| 1 |

|
Rust-Oleum Linen White Chalked All-in-One Ultra Matte Paint | One Coat Coverage | No Primer,... | Buy on Amazon |
Imagine transforming a drab dresser into a statement piece with a bold, colorful paint job. Or covering a scratched table with patterned contact paper for a quick, stylish upgrade. The matte or glossy finish of paint, along with patterned or textured contact paper, instantly changes the vibe of your furniture. The result? A space that looks cohesive, fresh, and full of character.
Choose trendy colors or classic neutrals depending on your decor style. Use contact paper with modern geometric patterns, vintage florals, or metallic accents for an eclectic look. For seasonal updates, switch colors or patterns to reflect holidays or moods. Apply paint or contact paper to cabinets, side tables, or even kitchen islands for a unified look.
Start by cleaning and lightly sanding the furniture to ensure good adhesion. For paint, apply a primer if needed, then use a brush or roller for smooth coverage. Multiple thin coats work best, and finishing with a sealant prolongs durability. For contact paper, carefully measure and cut pieces before peeling and sticking, smoothing out air bubbles with a credit card or smoothing tool. Trim edges for a clean look. For best results, work in a well-ventilated area.
Add decorative hardware like new knobs or handles for extra flair. Mix painted or contact-papered furniture with other textures—wood, metal, or textiles—to create contrast. Use colors that complement your wall and accent pieces. Personalize with stenciled patterns or decals to add visual interest. This approach allows you to craft a signature style on a budget.
Updating furniture with paint or contact paper is a game changer—bringing new energy to your home without a big expense. It’s a DIY project that yields professional-looking results, boosting your confidence. Embrace the process, and soon your furniture will look like designer pieces. Ready for a furniture makeover?
6. Incorporate Stylish Storage Baskets and Bins
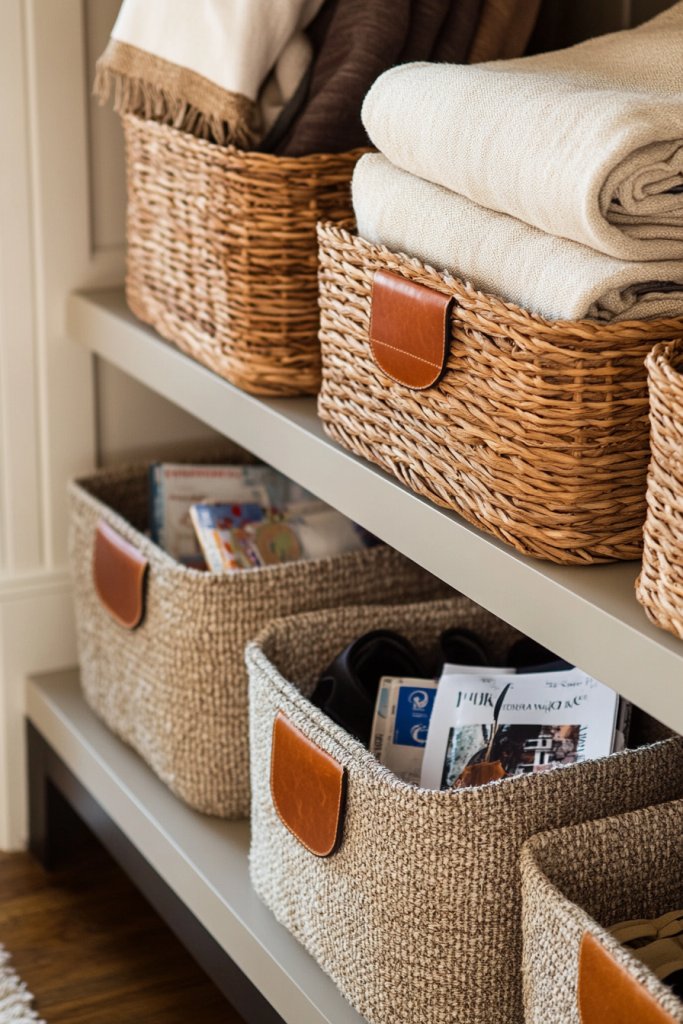
Clutter can turn a beautiful space into chaos in seconds. But bulky storage solutions often ruin the look you’re going for. The trick? Stylish baskets and bins that hide mess while adding to your decor. They’re functional, affordable, and versatile—perfect for any room.
Recommended Products to replicate this idea
| # | Preview | Product | |
|---|---|---|---|
| 1 |

|
Posprica Woven Storage Baskets for Organizing 6 Pack, Large&Small Storage Cube Bins Set for... | Buy on Amazon |
| # | Preview | Product | |
|---|---|---|---|
| 1 |

|
4 Pack Large Closet Storage Baskets Bins for Shelves | Fabric Closet Organizers and Storage with... | Buy on Amazon |
Visualize woven or fabric baskets stacked neatly in a corner, holding throw blankets or magazines. Fabric bins with leather handles sit under a console table, hiding shoes or toys. The textures—rattan, cotton, or jute—bring warmth and depth, making storage feel like part of the design. They can match your color scheme or add a pop of contrast.
Choose baskets in neutral tones for a minimalist look or vibrant colors for a playful vibe. Use different sizes to create visual interest—small for jewelry or keys, large for blankets or laundry. Incorporate decorative lids or liners for a polished finish. Seasonal swaps can refresh the look—replace summer with cozy, plush options as needed.
Select baskets and bins based on your storage needs and aesthetic. Place them in open shelves, under tables, or in closets. Use labels or tags for organization, especially in shared spaces. For a cohesive look, pick a set in matching materials or colors. Keep the inside clean by lining with fabric or plastic if needed. Regularly declutter to maintain neatness.
Personalize your storage with decorative touches—tie a ribbon around a basket, or add a faux plant on top (avoiding restricted items, of course). Mix and match textures and patterns for an eclectic style. Use these baskets to display seasonal decor, or fill them with items for easy access. They can turn functional storage into focal points.
Stylish storage baskets make tidying up less of a chore and more of a design statement. They help you keep clutter out of sight while enhancing your decor. Once you see how much neater and more put-together your space feels, you’ll wonder why you didn’t do it sooner. Ready to get organized stylishly?
7. Make Your Own Statement Lighting with String or Fairy Lights
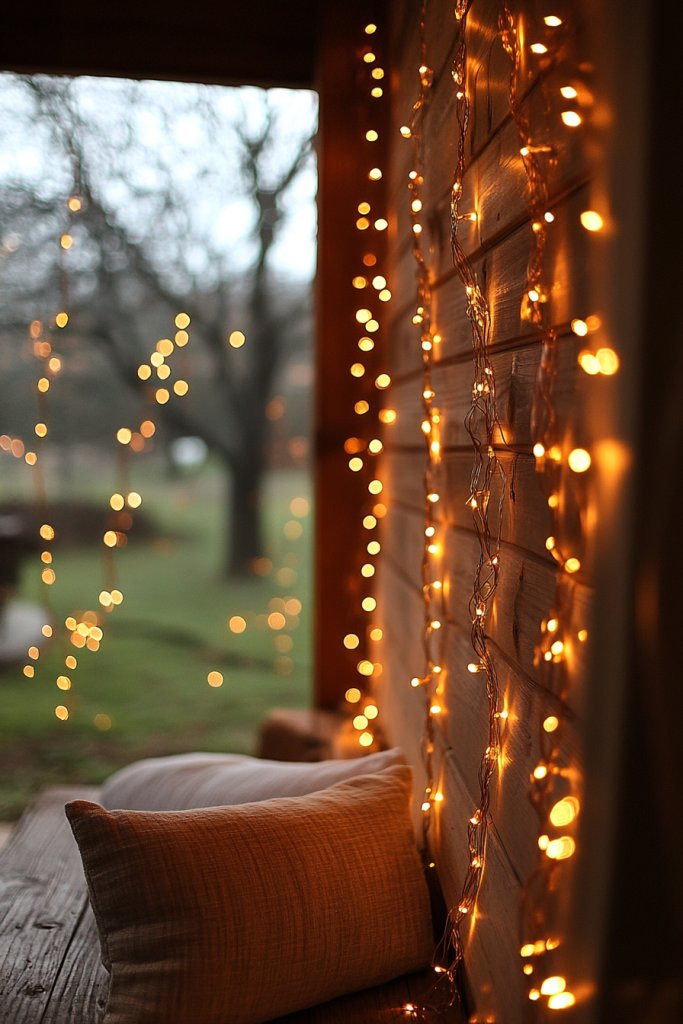
Lighting can make or break the vibe of a room, but expensive fixtures aren’t always budget-friendly. Want to add a warm, inviting glow without the hefty price tag? DIY string or fairy lights are your friends—they’re inexpensive, easy to install, and instantly cozy up any space.
Recommended Products to replicate this idea
| # | Preview | Product | |
|---|---|---|---|
| 1 |

|
Minetom Fairy Lights Plug in, 33Ft 100 LEDs Waterproof Silver Wire Firefly Lights, Adaptor Included,... | Buy on Amazon |
| # | Preview | Product | |
|---|---|---|---|
| 1 |

|
Command Indoor Mini Light Clips, 45 Clear Clips and 54 Command Strips, Damage Free Hanging Christmas... | Buy on Amazon |
Imagine hanging fairy lights along a headboard or outlining a mirror with tiny bulbs for a magical effect. Or drape string lights across a ceiling or along a wall to create a starry night ambiance. The soft glow creates a relaxed, intimate atmosphere, perfect for movie nights or romantic dinners. Plus, they come in various shapes—heart, star, globe—that add playful charm.
Choose warm or cool light bulbs depending on your mood—warm for cozy, cool for modern. Use colored bulbs or dimmable options for versatility. Wrap lights around furniture, frame windows, or hang from ceiling hooks for different styles. You can also combine with other lighting types like candles or lanterns for layered lighting effects.
Start by purchasing inexpensive string or fairy lights from a hardware store or online. Decide where you want the lighting to go and plan your layout. Use hooks, clips, or adhesive strips—just ensure they won’t damage your walls. Drape the lights loosely to avoid tension and tangling. Plug them in and adjust for the desired effect. For a professional look, hide cords behind furniture or along moldings.
Create themed displays—like a fairy light canopy over a bed or a photo wall backdrop. Incorporate decorative elements like paper lanterns or fabric drapes for added texture. Use colored or vintage-style bulbs for personality. Switch up the arrangement seasonally or for special occasions to keep the decor fresh.
DIY lighting instantly elevates your home’s ambiance, making your space more inviting and stylish. It’s a small investment with a big impact—plus, it’s fun to install! Soon, your home will feel warmer, more personal, and ready for relaxing evenings or lively gatherings. Give it a try—you might never want to turn them off.
8. Decorate Windows with DIY Curtain Tiebacks or Tapestry Panels
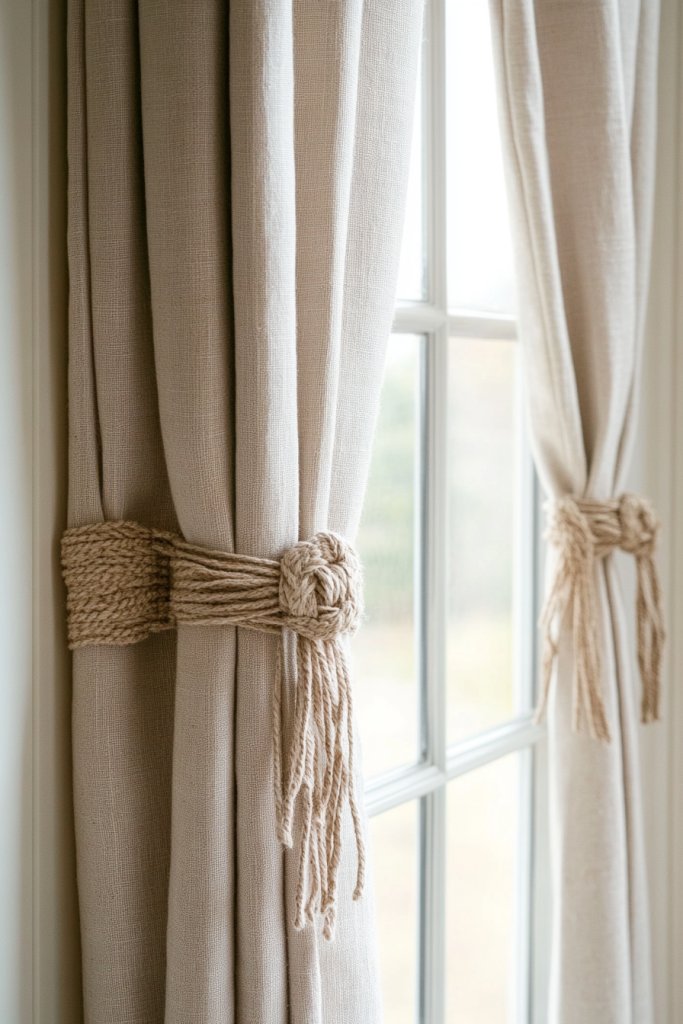
Plain windows can make a room look dull and uninviting, especially without the right treatment. Investing in expensive curtains isn’t always feasible, but DIY solutions can add charm and functionality. Creative tiebacks or tapestry panels instantly elevate your window decor while keeping things budget-friendly.
Recommended Products to replicate this idea
| # | Preview | Product | |
|---|---|---|---|
| 1 |

|
Rierdge 4 Pack Black Curtain Tieback Hooks, Curtain Holdback Holders for Wall Mounted, Decorative... | Buy on Amazon |
| # | Preview | Product | |
|---|---|---|---|
| 1 |

|
KHOYIME Large Macrame Wall Hanging Boho Woven Tapestry, Chic Home Decor Modern Bohemian Handmade... | Buy on Amazon |
Picture a curtain pulled back with a braided fabric tieback decorated with beads or tassels. Or imagine a colorful tapestry panel hung as an alternative to traditional curtains, adding texture and pattern. These options create visual interest and control light, making your room feel cozy and curated. The textures and colors can complement your overall decor scheme.
Use decorative cords, ropes, or fabric strips to tie back curtains in style. For tapestry panels, opt for bold prints, ethnic patterns, or neutral fabrics depending on your vibe. Layer sheer fabrics with heavier textiles for depth. You can also sew simple fabric loops or decorative rings for a more polished look. Change them seasonally for fresh updates.
Gather fabric or decorative cords in colors or patterns that match your decor. For tiebacks, sew or tie fabric strips around the curtains, adding beads or tassels if desired. For tapestry panels, hang using curtain rods, clips, or even command hooks—no damage to walls. Secure the fabric in position with knots or clips for easy adjustment. Ensure the curtain length is appropriate for your window.
Create themed tiebacks—like nautical ropes for coastal decor or metallic cords for industrial style. Embellish fabric tiebacks with pom-poms, feathers, or charms for extra flair. Use tapestry panels with meaningful patterns or artwork to reflect your personality. These small touches make your windows a focal point rather than an afterthought.
DIY window decor gives your space a custom, high-end look without the cost. It’s simple, quick, and adaptable to any style. When you see how much more inviting your room becomes, you’ll wonder why you didn’t do it sooner. It’s a small change with a big impact—time to get crafty!
9. Add Color with Budget-Friendly Rugs and Floor Cushions
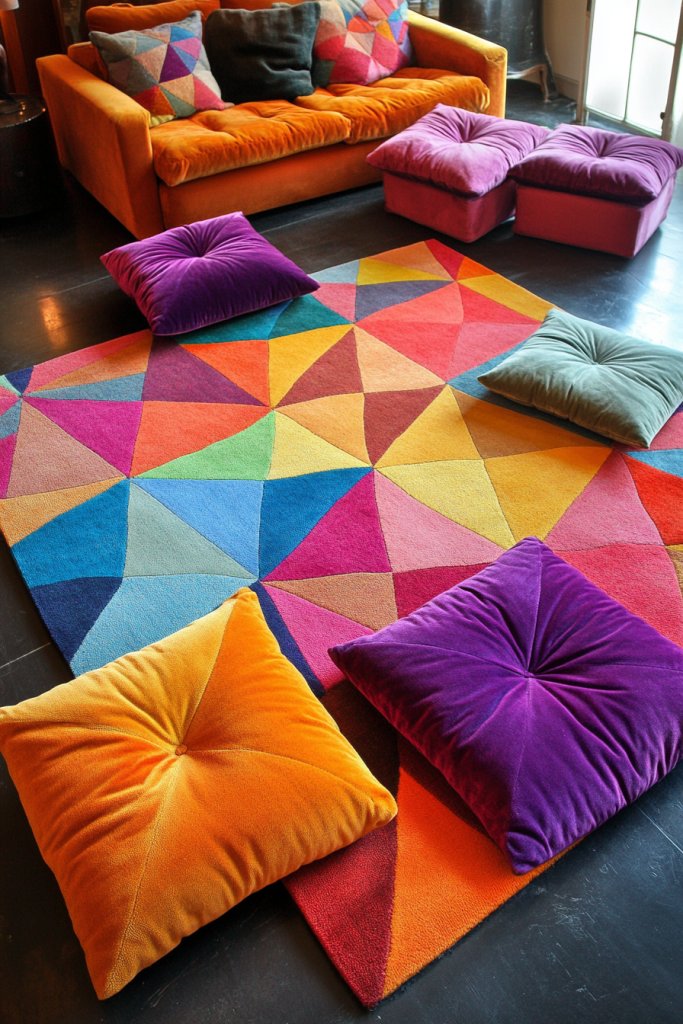
Floors often get overlooked but can dramatically influence the room’s vibe. A plain rug or worn-out floor cushion can make a space feel dull or cold. The good news? Affordable rugs and cushions can instantly add color, comfort, and personality. It’s a quick fix that transforms your space from blah to wow.
Recommended Products to replicate this idea
| # | Preview | Product | |
|---|---|---|---|
| 1 |

|
SAFAVIEH Monaco Collection Area Rug - 8' x 10', Pink & Multi, Non-Shedding & Easy to Clean,... | Buy on Amazon |
| # | Preview | Product | |
|---|---|---|---|
| 1 |

|
Codi Round Floor Pillow Insert, Large Thick Meditation Cushion, 32 Inch Circular Seating Cushions,... | Buy on Amazon |
Imagine a vibrant geometric rug anchoring your living room, complemented by plush floor cushions in bold hues. Or picture a neutral-toned rug layered with a textured, patterned floor cushion for a cozy reading nook. These elements define spaces, add warmth, and invite people to relax. The textures—soft wool, woven jute, or plush velvet—make it tangible and inviting.
Mix bright and neutral colors based on your mood or season—think sunny yellows in summer or cozy reds in winter. Use different shapes and sizes for visual interest—round cushions or rectangular rugs. Layer rugs over existing flooring for added style or warmth. Choose washable materials for easy maintenance, especially in high-traffic areas.
Pick rugs in sizes that suit your space—large for under the sofa, smaller for entryways or corners. Look for budget-friendly options at discount stores, online marketplaces, or clearance sales. For floor cushions, sew or buy pre-made ones in your preferred fabric. Layer and arrange for balance, mixing patterns and textures for a curated look. Secure cushions with non-slip pads if needed.
Coordinate colors with your decor or choose contrasting shades for a pop. Add decorative trims or tassels for extra flair. Use cushions to introduce seasonal themes or patterns. You can even DIY your own cushions using leftover fabrics—there’s no limit to creativity here. These accents make your space more inviting and personalized.
Colorful rugs and cushions are an easy, affordable way to refresh your floors and overall decor. They add layers of comfort and style, making your home feel more welcoming. Once you see the difference, you’ll want to keep experimenting with different colors and textures. It’s your home—make it vibrant!
10. Personalize Spaces with Printable Quotes or Art
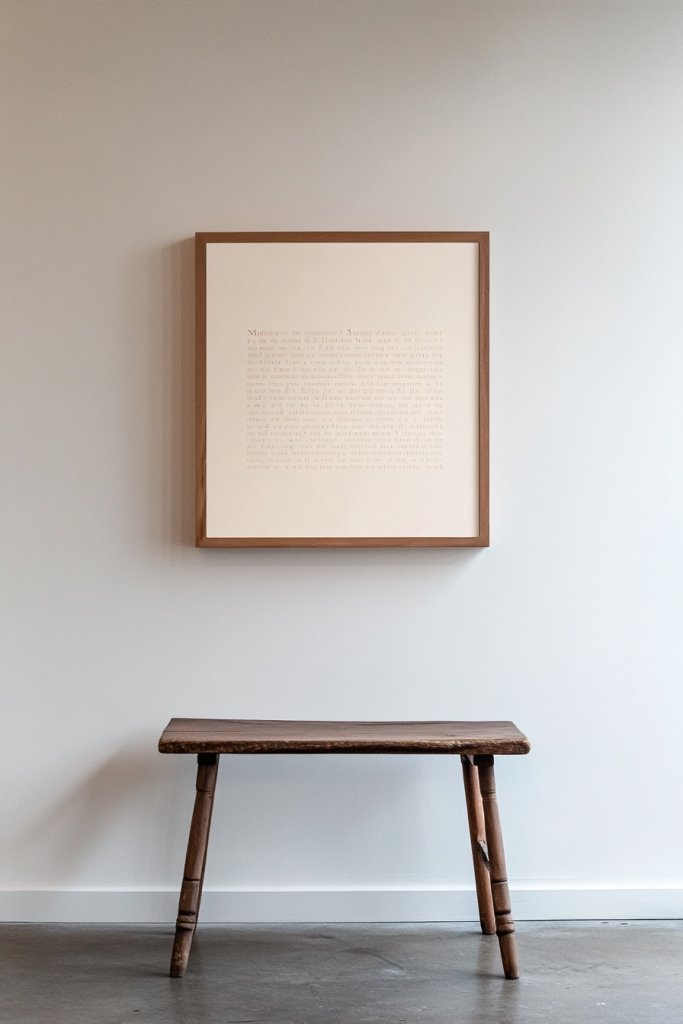
Sometimes, all a room needs is a little inspiration or a personal touch to feel complete. But high-end art can be pricey and impersonal. Printing quotes or modern art at home is an inexpensive way to add character and motivation. It’s a simple project that instantly elevates your decor.
Recommended Products to replicate this idea
| # | Preview | Product | |
|---|---|---|---|
| 1 |

|
HPINUB Sage Green Framed Canvas Prints Wall Art Set, Abstract Botanical Boho Wall Decor, Minimalist... | Buy on Amazon |
| # | Preview | Product | |
|---|---|---|---|
| 1 |

|
Picrit A4 Picture Frame Set of 12, Display 6x8 with Mat or 8.3x11.7 without Mat, Photo Frames for... | Buy on Amazon |
Picture a wall adorned with framed prints of your favorite sayings or abstract designs you printed yourself. The images can be in black-and-white or vibrant color, depending on your mood. The frames—simple or ornate—frame your chosen art, making it look polished. It’s a flexible way to showcase your taste and add a focal point.
Select quotes that resonate personally or inspire you daily—affirmations, favorite lyrics, or motivational phrases. For abstract or minimalist art, use printable templates from online sources. Change prints seasonally or as your mood shifts. Mix different frame styles or colors for an eclectic look or keep uniform for a sleek, modern vibe.
Design or download your chosen images from free online resources or create your own in editing apps. Print on quality paper or canvas at home or through a local print shop. Frame with inexpensive frames from dollar stores or thrift shops. Hang using hooks or adhesive strips, ensuring they’re level. Rotate or swap out prints to keep the space fresh.
Create a themed gallery with quotes, family photos, or favorite artwork. Add decorative elements like washi tape or washi tape borders for a handmade look. Use mats or colorful borders to highlight specific prints. Incorporate your favorite colors or motifs to make the space truly yours.
Printable quotes and art are a budget-friendly way to make your home more inspiring and personal. They’re easy to update, allowing your decor to evolve with your taste. Seeing your favorite words or images daily can boost your mood and motivation. It’s a simple, effective upgrade for any room.
11. Use Adhesive Hooks and Tapes for Easy Wall Decor

Hanging things on walls often feels like a hassle—nails, hooks, damage, and holes everywhere. But what if you could decorate without the drama? Adhesive hooks and tapes are a game-changer, letting you hang lightweight decor quickly and damage-free. Perfect for renters or anyone who hates wall punches.
Recommended Products to replicate this idea
| # | Preview | Product | |
|---|---|---|---|
| 1 |
|
Command Indoor Mini Light Clips, 45 Clear Clips and 54 Command Strips, Damage Free Hanging Christmas... | Buy on Amazon |
| # | Preview | Product | |
|---|---|---|---|
| 1 |

|
Scotch-Mount Multi-Purpose Gel Tape, Double-Sided Tape for Heavy Duty Applications, Removable... | Buy on Amazon |
Imagine hanging a fabric banner or lightweight art piece with adhesive hooks, creating a playful or elegant display. Or picture sticking decorative tapes in geometric patterns to add visual interest. These options are versatile—they can be removed easily without damaging surfaces, making decorating flexible and fuss-free. The hooks and tapes come in various styles and strengths, suiting your needs.
Use clear or colored hooks to blend seamlessly into your decor. Hang lightweight fabrics, banners, or small art pieces—just avoid heavy frames or bulky items. For seasonal decor, switch out items and reposition hooks easily. Combine multiple hooks or tapes to create layered or symmetrical arrangements. Make sure to follow weight limits for each adhesive product.
Clean the wall surface thoroughly before applying adhesives. Select hooks or tapes designed for your wall type—painted, textured, or smooth surfaces. Follow the manufacturer’s instructions for application and removal. Use a level or measuring tape for precise placement. Hang lightweight items like paper crafts, fabric banners, or small art pieces. When removing, pull gently to avoid wall damage, and clean residue with rubbing alcohol if needed.
Create themed displays—like seasonal banners or motivational quotes—using adhesive hooks and tapes. Mix different styles for a curated look. Use decorative tapes or washi tapes for borders or framing effects. Combine with other DIY decor elements to craft a personalized gallery or feature wall. Change arrangements often to keep your space lively.
Adhesive hooks and tapes make decorating quick, damage-free, and adaptable. They give you the freedom to experiment with layout and style without fear of wall damage. Once you see how easy it is, you’ll be more confident trying new ideas. Your home becomes a constantly evolving showcase of your creativity.
12. Style with DIY Mantel or Shelf Decor Arrangements
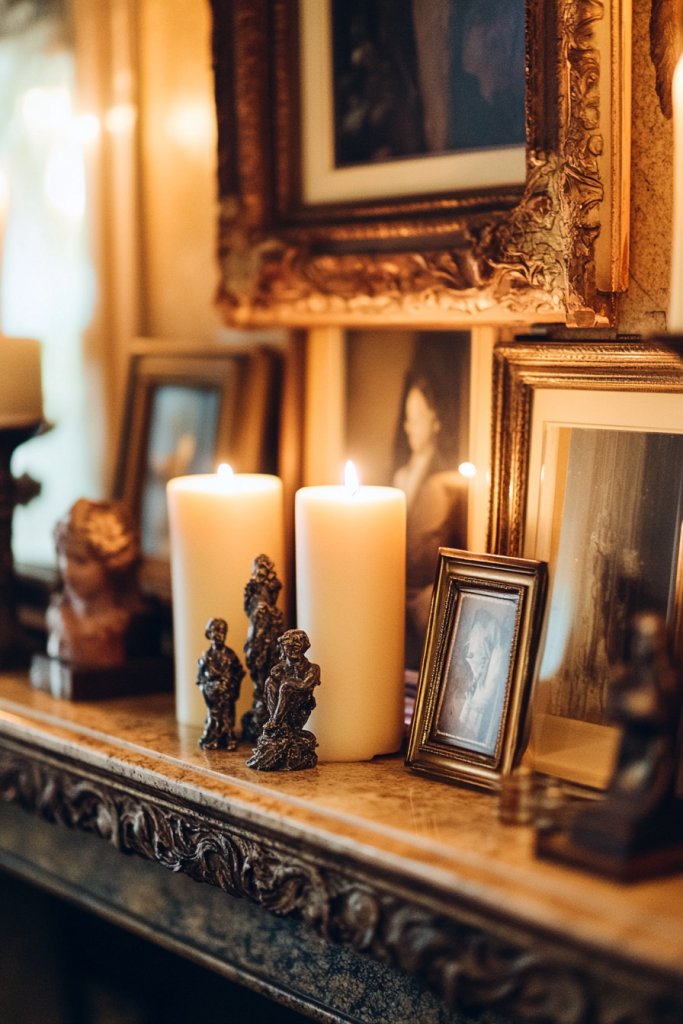
Mantels and shelves often sit empty or cluttered, leaving your space feeling unfinished. But professional-looking arrangements don’t require expensive decor or dozens of accessories. A simple, thoughtful DIY arrangement can elevate your space and showcase your personality. It’s an easy way to create a focal point.
Recommended Products to replicate this idea
| # | Preview | Product | |
|---|---|---|---|
| 1 |
|
DearHouse Faux Eucalyptus Garland Plant, 2 Pack Artificial Vines Hanging Eucalyptus Leaves Greenery... | Buy on Amazon |
| # | Preview | Product | |
|---|---|---|---|
| 1 |
|
Rustic Wooden Tray with 8 Brown Glass Votive Candle Holders, Decorative Tea Light Holder Set for... | Buy on Amazon |
Visualize a mantel decorated with a mix of candles, small sculptures, and framed photos arranged in varying heights for visual interest. Or imagine a shelf layered with colorful boxes, books, and decorative objects like ceramic bowls or textured vases—no vases, remember! The key is balance and harmony, creating a curated, intentional look. The arrangement guides the eye and adds warmth.
Use a mix of heights, textures, and colors to match your decor style—rustic, modern, eclectic. For a seasonal update, swap out objects or change the color scheme. Incorporate personal items like souvenirs, handmade crafts, or favorite books (styled, not cluttered). Keep it simple for minimalist spaces, or go bold with layered clutter for maximalist tastes.
Start with a clean surface and gather objects you love or want to highlight. Use risers, stacks of books, or small boxes to create different levels. Balance items on either side of the central focus for symmetry or asymmetry based on your preference. Use painter’s tape to plan the layout beforehand. Adjust spacing and height as needed before fixing items permanently.
Add seasonal elements—like faux pumpkins, pinecones, or festive ornaments—without overdoing it. Incorporate textures like woven baskets or fabric-covered boxes for variety. Personalize with small handcrafted objects or souvenirs. Change the arrangement periodically to prevent it from feeling stale.
A well-styled mantel or shelf creates a sense of order and personality in your home. It’s a simple project that can be as minimal or elaborate as you like. When your decor reflects your taste, your space feels more welcoming and authentic. Get creative, and enjoy the process!
13. Incorporate DIY Macramé or Knotted Wall Hangings
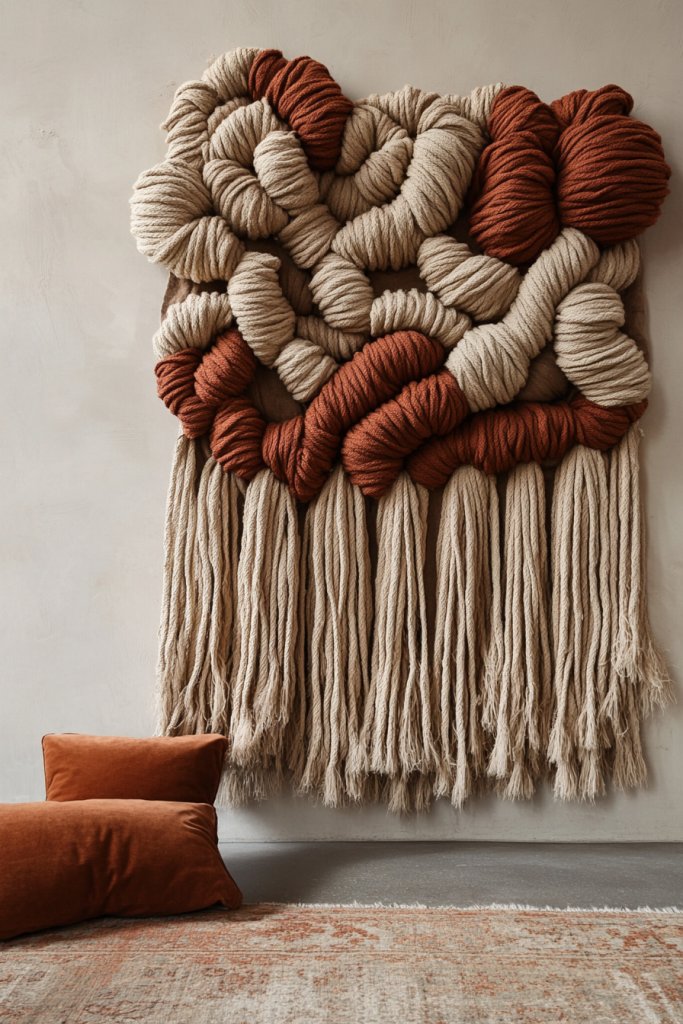
Looking for a boho touch or texture on your walls? Commercial wall hangings can be pricey, but DIY macramé or knotted art is affordable and customizable. It’s a relaxing craft that adds visual interest and a handcrafted vibe. Plus, it’s easier than you think—no weaving experience needed.
Recommended Products to replicate this idea
| # | Preview | Product | |
|---|---|---|---|
| 1 |

|
FREEBLOSS DIY Macrame Leaf Wall Hanging Beginners Macrame Kit Leaf Woven Tapestry Feather Wall... | Buy on Amazon |
| # | Preview | Product | |
|---|---|---|---|
| 1 |
|
HOPELF 25PCS Wooden Dowel Rods - 1/4 x 12 Inch Bamboo Sticks - for Crafts, Cake Dowels and DIY... | Buy on Amazon |
Picture a large, intricate wall hanging with knots, tassels, and fringes in earthy tones. Or imagine a simple knotted panel made from thick cotton cords, creating a textured backdrop. The tactile quality and layered knots bring warmth and personality to any space. It’s a statement piece that’s both artistic and cozy.
Use different cord materials—cotton, jute, or hemp—for varied textures. Choose neutral tones for a minimalist look or dye cords in your favorite colors. Incorporate beads, shells, or feathers for added flair. Hang your piece from a dowel or driftwood for a natural look. Adjust size and complexity based on your skill level and space.
Start with simple knotting techniques like square knots or half-hitches. Use a ruler or tape to measure and cut cords to your desired length. Practice on a small sample before starting the full piece. Attach cords to a dowel or branch, then knot, braid, or fringe as desired. Hang with nails, hooks, or command strips, ensuring it’s secure. Trim uneven ends for a polished look.
Create themed hangings—think celestial, botanical, or abstract patterns—by varying knot styles and colors. Add decorative elements like beads or charms. Mix different sizes or layers for depth. Incorporate personal symbols or initials for a custom touch. Your handcrafted wall hanging becomes a meaningful decor piece.
DIY macramé or knotted art offers a fun challenge and a stunning focal point. It’s a craft that rewards patience and creativity, and the results are uniquely yours. As you experiment, your confidence grows—soon, you’ll be making multiple pieces for different rooms. Get knotting and enjoy your new art!
14. Create a Cozy Nook with Budget-Friendly Seating and Textiles
Every home needs a little sanctuary—a cozy nook to relax, read, or escape. But plush armchairs and designer sofas aren’t always budget-friendly. The good news? You can create a comfy corner with inexpensive seating and textiles that invite you to unwind without overspending.
Recommended Products to replicate this idea
| # | Preview | Product | |
|---|---|---|---|
| 1 |

|
Avocahom Folding Floor Gaming Chair 14-Poistion Cushioned Adjustable Floor Lazy Sofa Chair... | Buy on Amazon |
| # | Preview | Product | |
|---|---|---|---|
| 1 |

|
L'AGRATY Chunky Knit Blanket Throw,Soft Chenille Yarn Throw Blanket 50x60,Handmade Cable Knit... | Buy on Amazon |
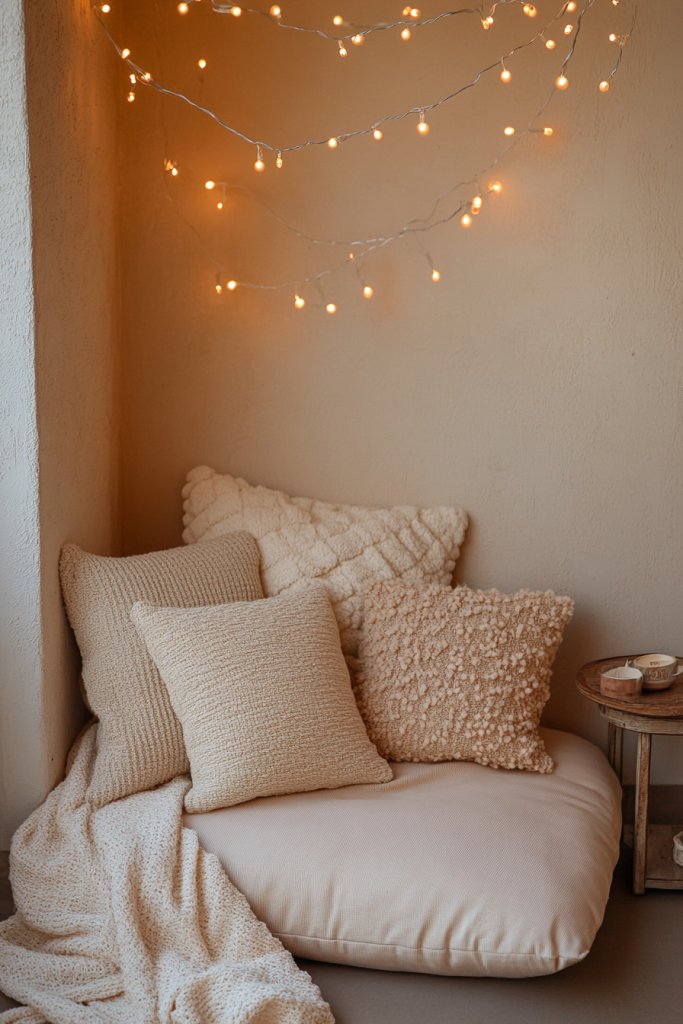
Picture a small corner with a simple floor cushion layered with a soft cream throw blanket and a few textured pillows. A small side table with a string of fairy lights overhead completes the scene. The space feels warm, inviting, and perfect for curling up with a book or enjoying your morning coffee. It’s all about making a little spot feel special.
Use cushions and throws in colors and textures that complement your decor—think cozy knits, chunky weaves, or velvets. For small spaces, a single floor cushion or pouf works; larger rooms can host multiple cushions for a layered look. Seasonal textiles—faux fur, plaid, or lightweight cotton—can refresh the vibe. Add a small rug or soft mat for extra comfort.
Choose a corner or alcove that’s underused or awkward. Gather inexpensive cushions, throws, and small accent furniture from thrift stores or budget shops. Layer cushions of different sizes and textures on the floor or a simple bench. Decorate with string lights or fairy lights hung overhead for ambiance. Keep the setup portable and flexible—add or remove items as needed. Use storage baskets underneath for extra blankets.
Add a personal touch with a DIY pillow cover or blanket using leftover fabric. Incorporate favorite colors or patterns that brighten your mood. Use a small tray or basket to hold books, candles, or snacks—whatever makes your nook inviting. Seasonal touches like fairy lights or plush toys can keep it fresh and fun.
A cozy nook is a small investment that creates big comfort. It’s a personal retreat where you can relax anytime, and it adds charm to your home. When you see how simple and inexpensive it is, you’ll want to craft more little retreats throughout your space. Time to make your home more inviting, one corner at a time.
15. Decorate with Upcycled Mason Jars or Glass Bottles
Plain jars and bottles are so common, yet they hold untapped potential for stylish decor. Instead of tossing or ignoring them, upcycling can turn these everyday items into charming accents. It’s an eco-friendly, budget-friendly way to add a rustic or vintage touch to your space. Who knew glass could be so versatile?
Recommended Products to replicate this idea
| # | Preview | Product | |
|---|---|---|---|
| 1 |
|
Hanging Glass Jars (Pack of 12) | Buy on Amazon |
| # | Preview | Product | |
|---|---|---|---|
| 1 |

|
Colorful Acrylic Glass Paint Set with 6 Brushes, 1 Palette, 12 Colors Stain Glass Paints for Wine,... | Buy on Amazon |
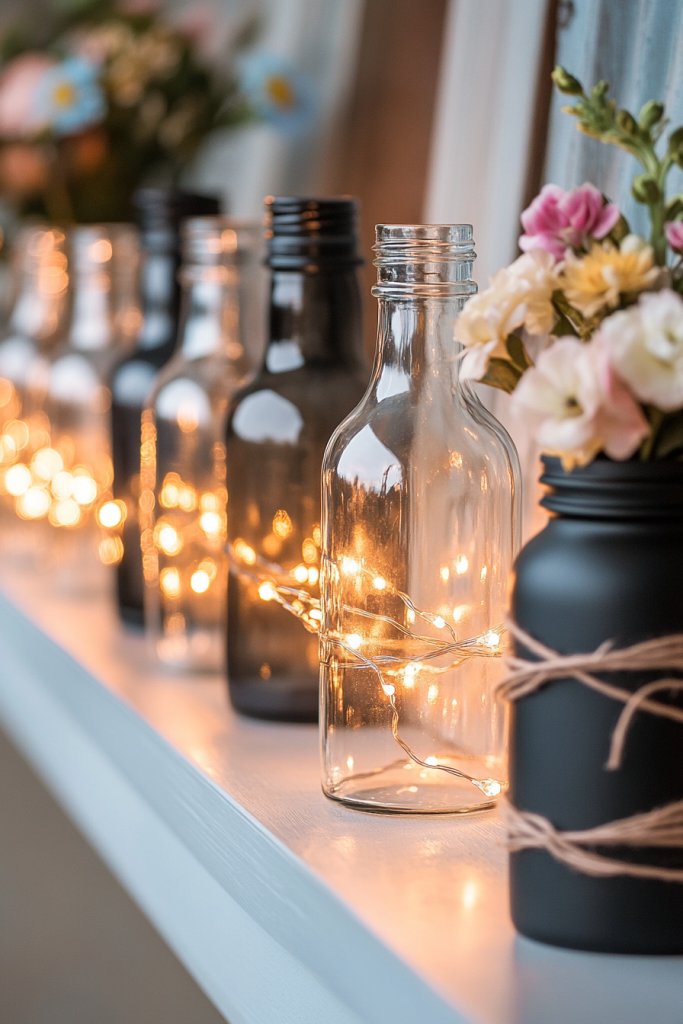
Imagine glass jars painted in matte black or wrapped in twine, serving as candle holders or storage containers. Or picture a row of clear bottles with fairy lights inside, glowing softly on a shelf. You might also use Mason jars as flower vases, painted or left clear, with fresh or faux blooms. The result is a collection of personalized decor pieces that add warmth and character.
Decorate jars with painted patterns, chalkboard paint for labels, or metallic foil accents. Use them as storage for kitchen staples, craft supplies, or bathroom accessories—no vases necessary. Wrap twine, ribbon, or washi tape around the necks for added detail. Change decorations seasonally or for special occasions—think glitter for holidays or fresh herbs for kitchen displays.
Collect jars or bottles from your pantry, thrift stores, or garage. Clean thoroughly and remove labels if needed. Decorate with paint, fabric, or natural materials like twine and corks. For lighting, fill with fairy lights or candles—safely, of course. Arrange them on shelves, windowsills, or tables to create visual interest. Mix sizes and shapes for an eclectic, curated look.
Create themed displays—like a rustic kitchen with herbs in jars or a cozy living room with candle holders. Add tags or labels for a functional touch—chalkboard stickers work well. Personalize with meaningful objects like family heirlooms or travel souvenirs. Keep the color palette consistent for a cohesive look or mix for an eclectic vibe.
Upcycled jars and bottles are a simple, inexpensive way to add charm and personality. They showcase your creativity and can adapt to any decor style. Plus, they’re a great conversation starter—everyone loves a good DIY project. Start collecting and decorating—your home will thank you.
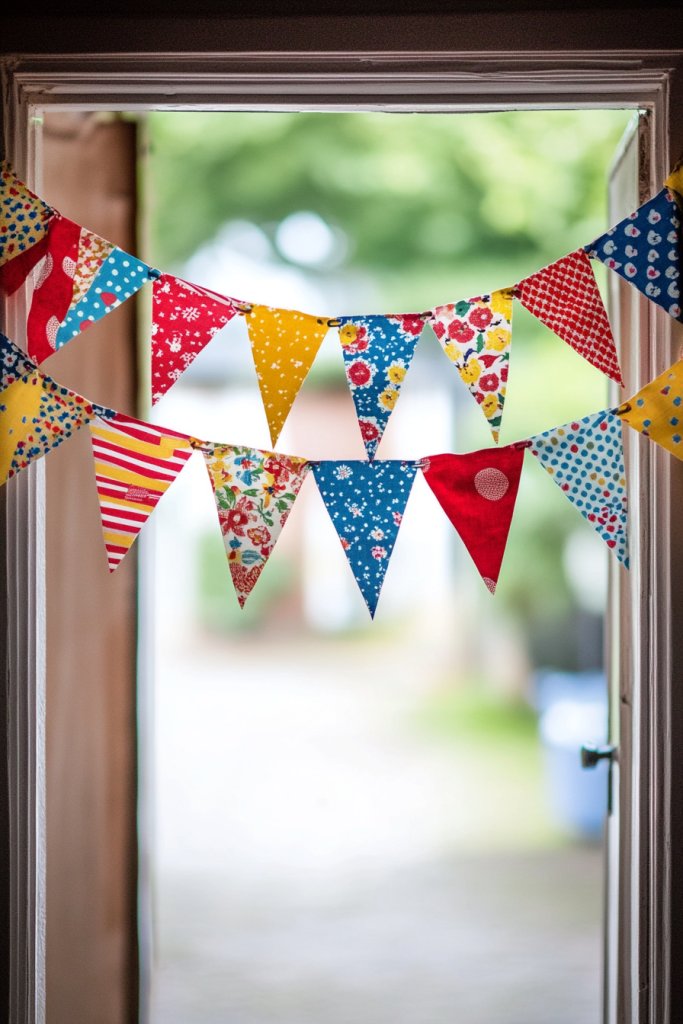
16. Incorporate Seasonal or DIY Fabric Banners and Garlands
Banners and garlands instantly add color and festivity but buying ready-made versions can be pricey and repetitive. DIY fabric banners are a budget-friendly alternative that you can customize for any season or mood. They’re perfect for celebrations or everyday decor, bringing a playful touch to your home.
Recommended Products to replicate this idea
| # | Preview | Product | |
|---|---|---|---|
| 1 |

|
15 PCS Burlap Banner DIY Kit With 27 PCS Letter Stencil Banner Burlap Painting For Party Decorations... | Buy on Amazon |
| # | Preview | Product | |
|---|---|---|---|
| 1 |

|
10M/32Ft Triangle Bunting Banner, 36 Pcs Cotton Fabric Flags Pennant Garlands for Birthday Party,... | Buy on Amazon |
Picture a string of colorful fabric triangles hanging across a doorway or window. Or imagine a layered garland of different fabrics and textures draped over a mantel or wall. These banners add movement and vibrancy, making your space feel lively and inviting. The textures and patterns create visual depth, enhancing your overall decor.
Use inexpensive fabrics like cotton, burlap, or felt—cut into shapes like triangles, pennants, or circles. Sew or glue the shapes onto twine or ribbon. Change colors and patterns seasonally to keep things fresh—think pastels for spring, metallics for New Year’s. For special occasions, add embellishments like tassels, pom-poms, or beads. DIY banners are versatile and easy to adapt.
Cut fabric into your preferred shapes and sizes. Sew or glue each piece onto a length of twine or ribbon, spacing evenly. Hang with removable hooks or thumbtacks, ensuring they’re taut for a clean look. For a more polished look, add decorative elements like fringe or tassels at the ends. Adjust placement as needed for the perfect visual flow. Use clips or clothespins for easy swapping.
Create themed banners—say, floral for spring or metallic for parties—by choosing appropriate fabrics. Embellish with hand-stitched details or attach small decorative items. Mix and match patterns for a boho vibe or keep it uniform for a modern look. Personalize with initials or messages for special occasions. It’s a simple way to make your decor more fun and personal.
DIY fabric banners are a cheerful, inexpensive way to add color and personality. They’re easy to make and adapt, giving you control over your decor. Plus, they’re perfect for celebrating milestones or just brightening your everyday space. Get creative with fabrics and enjoy crafting your own cheerful accents.
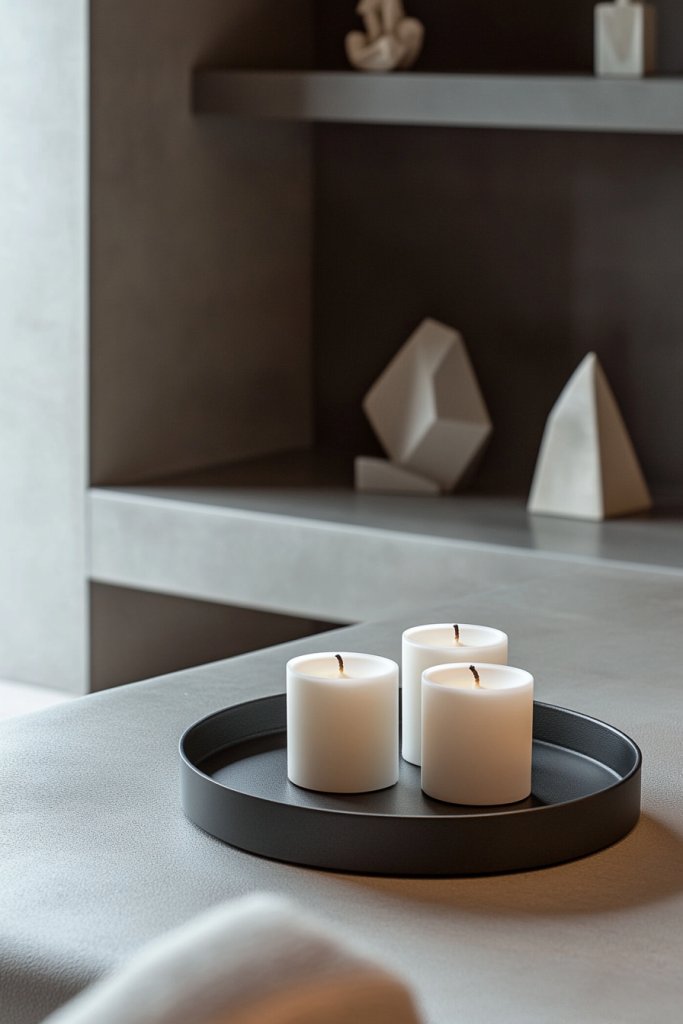
17. Refresh Your Space with Small, Affordable Accent Pieces
Sometimes, all your home needs are small touches to feel fresh and new. Big renovations aren’t always feasible on a budget, but tiny accents can make a huge difference. Think trays, candles, or sculptures—items that add personality and style without overwhelming your space. The key is choosing affordable pieces that speak to you.
Recommended Products to replicate this idea
| # | Preview | Product | |
|---|---|---|---|
| 1 |

|
Hanobe Round Wooden Decorative Tray: White Washed Bead Tray Decor for Coffee Table Centerpiece... | Buy on Amazon |
| # | Preview | Product | |
|---|---|---|---|
| 1 |

|
500 Ceramic Sculptures: Contemporary Practice, Singular Works (500 Series) | Buy on Amazon |
Imagine placing a trendy tray with candles and small decorative objects on your coffee table or sideboard. Or picture a few modern sculptures or figurines on your shelves, adding visual interest. These small accents draw attention and create a curated, intentional look. They’re like the jewelry of your decor—finishing touches that elevate the whole look.
Mix metallic, matte, or textured accents to suit your style—gold, black, or ceramic. Use trays to organize your everyday items or display collectibles. Change out accent pieces seasonally or for special occasions to keep things lively. Incorporate personal items or souvenirs for added meaning. Keep the scale appropriate—small enough to be subtle, large enough to make an impact.
Scout affordable decor stores or online shops for trending items. Group similar pieces together for a cohesive look, or scatter contrasting items for variety. Use trays and bowls to corral small objects and maintain organization. Place accessories where they’ll catch the eye—tables, shelves, or entryways. Rotate or refresh pieces periodically to keep your decor feeling fresh.
Choose accent pieces that reflect your personality—quirky, elegant, or minimalist. Add small personal touches like engraved initials or custom colors. Use seasonal or themed accents—pumpkin-shaped candles for fall, or star-shaped sculptures for holidays. These tiny updates keep your space dynamic and engaging.
Small, affordable accents are a simple way to make your home feel complete. They’re easy to update and can reflect your evolving style. When your space feels more curated and intentional, you’ll love spending time there even more. Small touches, big impact—go ahead, spoil your home a little!
Conclusion
With a variety of affordable decorating ideas at your fingertips, you can effortlessly elevate your home’s style without overspending. From creative DIY projects to clever budget-friendly decor swaps, these tips are perfect for any space. Don’t be afraid to experiment and put your personal touch on each idea—your dream home is within reach. Start today and turn your living space into a stylish retreat you love!
Last update on 2026-03-01 / Affiliate links / Images from Amazon Product Advertising API