Revamping your home doesn’t have to break the bank! Low cost home improvement ideas are gaining popularity because they allow you to refresh your space without the stress of expensive renovations, making it accessible for everyone.
In this article, you’ll discover a variety of creative and budget-friendly updates that can make a big impact. From simple DIY projects to clever organizational tips, these ideas will inspire you to transform your home into a more functional and beautiful space—without overspending.
1. Transform Cluttered Corners with DIY Storage Nooks
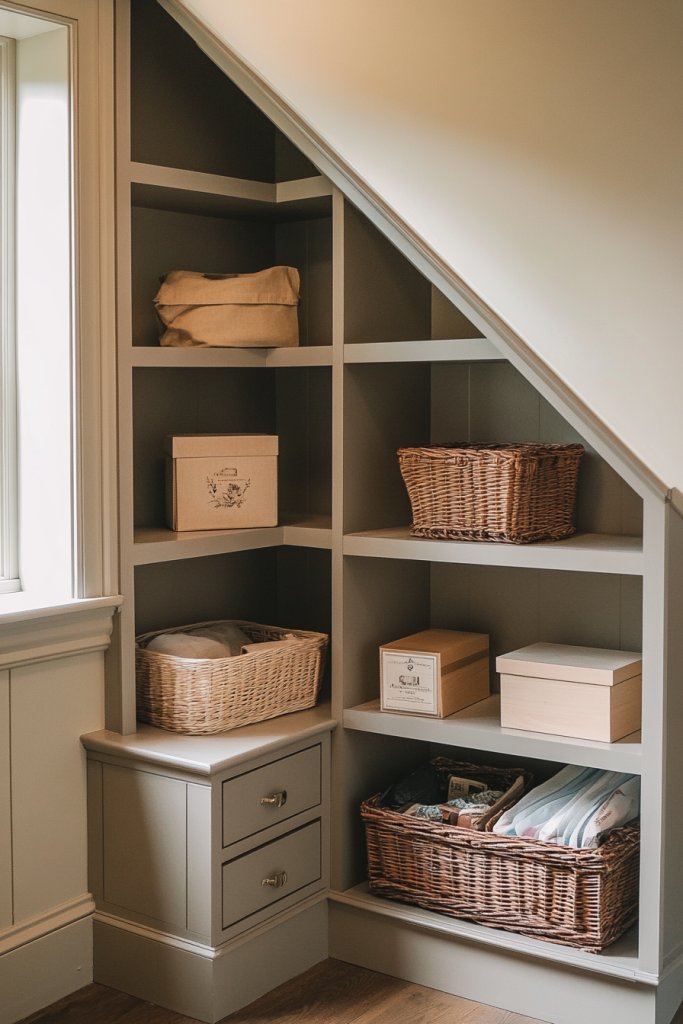
Ever find yourself tripping over piles of random stuff in those awkward corner spots? Cluttered corners make your room look chaotic and feel cramped, even if the space is decent-sized. The good news? You can turn those neglected nooks into practical storage spots without blowing your budget. It’s all about clever solutions that keep your space tidy and your mind at ease.
Recommended Products to replicate this idea
| # | Preview | Product | |
|---|---|---|---|
| 1 |

|
Rolanstar Bookshelf 5 Tier with 4 Hooks, Reversible Corner Bookshelf, 65" Industrial Wooden Bookcase... | Buy on Amazon |
| # | Preview | Product | |
|---|---|---|---|
| 1 |

|
BLUEWEST Water Hyacinth Storage Baskets (Set of 6) – Woven Hyacinth Organizer with Carrying... | Buy on Amazon |
Picture a corner filled with colorful fabric bins stacked neatly on built-in shelves, or a cozy nook with a repurposed wooden crate turned into a mini cabinet. Imagine the texture of reclaimed wood, the pop of bright paint, and the clever use of space that blends seamlessly with your decor. You see a small corner transformed into a functional, charming hideaway that sparks joy and organization. It’s like discovering hidden treasure in your own home.
Depending on your style, you could opt for sleek floating cubbies for a modern look or rustic crates for a farmhouse vibe. Small spaces benefit from vertical stacking, while larger corners can accommodate custom-built shelves or corner cabinets. For seasonal flair, paint or decorate the storage units with fun colors or patterns. These ideas also scale well—whether in a tiny apartment or a spacious living room.
Start by measuring the corner’s dimensions to plan your storage solution. Gather inexpensive materials like wood crates, repurposed furniture, or inexpensive plywood. Secure shelves or crates with brackets or adhesive strips depending on weight and permanence. Use paint, contact paper, or fabric to customize the look. Organize items inside baskets or small containers to keep everything accessible and neat. For a polished finish, add wall anchors or brackets for stability.
Add labels with fun fonts or stickers to categorize stored items. Incorporate decorative elements like small potted plants (if you’re into greenery), or cozy textiles like a soft throw blanket draped over a crate. You could also install a small mirror or a piece of art nearby to make the nook feel inviting. Personal touches turn a simple storage corner into a reflection of your personality.
Transforming those cluttered corners proves that you don’t need fancy or expensive solutions to create a tidy space. With a little creativity, you can reclaim every inch of your home. Plus, a well-organized corner makes daily routines smoother and your home more welcoming. Ready to tackle those awkward spots and turn them into functional gems?
2. Refresh Cabinets with Peel-and-Stick Vinyl Wraps

Tired of your dull, outdated cabinets but hesitant to spend a fortune on replacements? A full remodel can be costly and messy. Luckily, peel-and-stick vinyl wraps offer a quick, affordable way to breathe new life into tired cabinetry. It’s like giving your kitchen or bathroom a fresh facelift without the demolition drama.
Recommended Products to replicate this idea
| # | Preview | Product | |
|---|---|---|---|
| 1 |

|
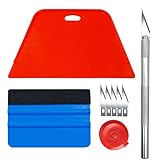
tiptopcarbon Wallpaper Kit Wallpaper Smoothing Tool Wallpaper Tools for Peel and Stick on Contact... | Buy on Amazon |
| # | Preview | Product | |
|---|---|---|---|
| 1 |
|
Wallpaper Smoothing Tool Kit Include red Squeegee,Medium-Hardness Squeegee, blue Tape Measure,snitty... | Buy on Amazon |
Imagine a set of plain white cabinets transformed into a rich wood grain look, or bold matte colors that instantly brighten the space. The textured vinyl feels smooth yet realistic under your fingertips, mimicking real materials with ease. Visualize a sleek, modern kitchen with glossy black or matte pastel cabinets that stand out without overwhelming. The effect is striking yet totally DIY-friendly.
Choose from a variety of finishes—wood, stone, metallic, or vibrant colors—to match your decor style. For small spaces, high-contrast colors can make cabinets pop, while neutral tones blend seamlessly for a calming vibe. Seasonal updates are simple: swap wraps for different colors or textures. Suitable for kitchen cabinets, bathroom vanities, or even furniture like dressers or desks.
Start by thoroughly cleaning your cabinets to remove grease or grime. Measure each surface carefully and cut the vinyl wrap accordingly. Peel off the backing and carefully apply it, smoothing out air bubbles with a squeegee or credit card. Use a craft knife to trim edges neatly. For curved surfaces or intricate details, gently heat the vinyl with a hairdryer to mold it into shape. No glue needed—just patience and precision for a flawless finish.
Add decorative edge trims or molding tape to hide seams or rough edges. Consider pairing with new hardware to further upgrade the look. For extra flair, add decals or stencils for personalized patterns. You can also layer different finishes, like matte and gloss, for a more unique, custom look. These small details make your cabinets truly one-of-a-kind.
Peel-and-stick vinyl wraps make DIY cabinet upgrades accessible for everyone. You don’t need experience or fancy tools—just a little patience and a steady hand. Imagine impressing friends with your revamped space, all on a shoestring budget. It’s proof that small changes can have a big impact on your home’s style.
3. Install Floating Shelves for Instant Display & Storage

Cluttering up your surfaces with stacks of books, decor, or everyday essentials? Floating shelves are the perfect solution to declutter and add visual interest. They create an illusion of more space and make your belongings look curated instead of chaotic. Plus, installing them is way easier and cheaper than building traditional cabinets.
Recommended Products to replicate this idea
| # | Preview | Product | |
|---|---|---|---|
| 1 |
|
BAYKA Floating Shelves for Wall, Wall Mounted Rustic Wood Shelves for Bathroom, Bedroom, Living... | Buy on Amazon |
| # | Preview | Product | |
|---|---|---|---|
| 1 |

|
8pcs Wall Shelf Brackets Heavy Duty Floating Shelf Bracket Hidden,Invisible Black Shelving Brackets... | Buy on Amazon |
Picture sleek, minimalist shelves made of wood or metal, floating seamlessly against your wall. They hold a curated collection of colorful ceramics, framed photos, or decorative boxes. The clean lines and open space give your room a modern, airy feel. Think of the warmth of natural wood contrasting with the cool metal brackets, creating a balanced, stylish vignette.
Use different lengths and thicknesses of shelves to add depth and interest. For a cozy nook, install a small shelf above a reading chair or workspace. For a larger wall, create a gallery-like arrangement with staggered shelves. Seasonal styling can include small faux plants, candles, or themed decor—without cluttering your space.
First, locate wall studs or use appropriate anchors based on your wall type. Mark your desired shelf heights and lengths with a pencil. Drill pilot holes and attach brackets securely, ensuring they are level. Slide the shelves onto the brackets and tighten any screws. For a seamless look, choose shelves that fit snugly into the brackets or wall mounts. Finish by styling with your favorite items.
Paint or stain shelves to match your decor, or leave their natural finish for an organic vibe. Add small hooks underneath for hanging keys or utensils. Combine with decorative baskets or storage boxes for a tidy appearance. You can also add LED strip lights underneath for subtle illumination that highlights your display.
Floating shelves instantly elevate your space’s style while providing practical storage. They’re versatile, affordable, and customizable—perfect for renters and homeowners alike. Once installed, you’ll wonder how you ever lived without them. Ready to create a more open, organized, and stylish home?
4. Repaint Walls with Trendy or Neutral Shades

Are your walls looking dull or outdated? A fresh coat of paint can completely transform a room without the hefty price tag. Choosing the right color can brighten your space, set the mood, or even make small rooms feel larger. It’s an easy upgrade that makes your entire home feel renewed and stylish.
Recommended Products to replicate this idea
| # | Preview | Product | |
|---|---|---|---|
| 1 |

|
spot. Touch-Up Paint | Matte Finish for Cabinets, Walls, Doors & Furniture | Multi-Tone Green Repair... | Buy on Amazon |
| # | Preview | Product | |
|---|---|---|---|
| 1 |

|
Mister Rui Foam Paint Roller, 4 inch Paint Roller 8 Pack, Small Paint Roller, High Density Foam... | Buy on Amazon |
Imagine walls painted in a soft, calming beige or a bold, trendy navy hue. The smooth, even finish reflects light beautifully, making the room feel more spacious and inviting. Visualize the contrast of a matte wall paired with glossy trim, creating a chic, modern look. The color palette can evoke feelings of tranquility or energy, depending on your mood.
Opt for neutral tones for a timeless look that adapts to any decor style. Bright, trendy shades like mustard yellow or emerald green can add personality and vibrance. For seasonal updates, choose warmer hues in winter and cooler shades in summer. Use accent walls or subtle color gradients to add depth and visual interest.
Start by cleaning walls thoroughly to remove dust and grease. Tape off edges and trim for crisp lines. Use a quality, washable paint suited for your room’s needs—matte, eggshell, or satin finish. Apply primer if necessary, especially over darker or stained walls. Use a roller for large areas and a brush for corners and edges. Two coats usually ensure even coverage.
Add decorative painter’s tape in geometric patterns or stripes for a creative touch. Incorporate textured paints or sponging techniques for accent walls. Coordinate with your furnishings by choosing colors that complement or contrast effectively. Small DIY stencils can add subtle patterns without overwhelming the space.
A fresh coat of paint is one of the most cost-effective ways to refresh your home. It’s a quick project that yields big results and boosts your confidence as a DIYer. Plus, a newly painted room can inspire new decor ideas and a renewed sense of pride in your space.
5. Upgrade Lighting with Budget-Friendly Fixtures and DIY Hacks
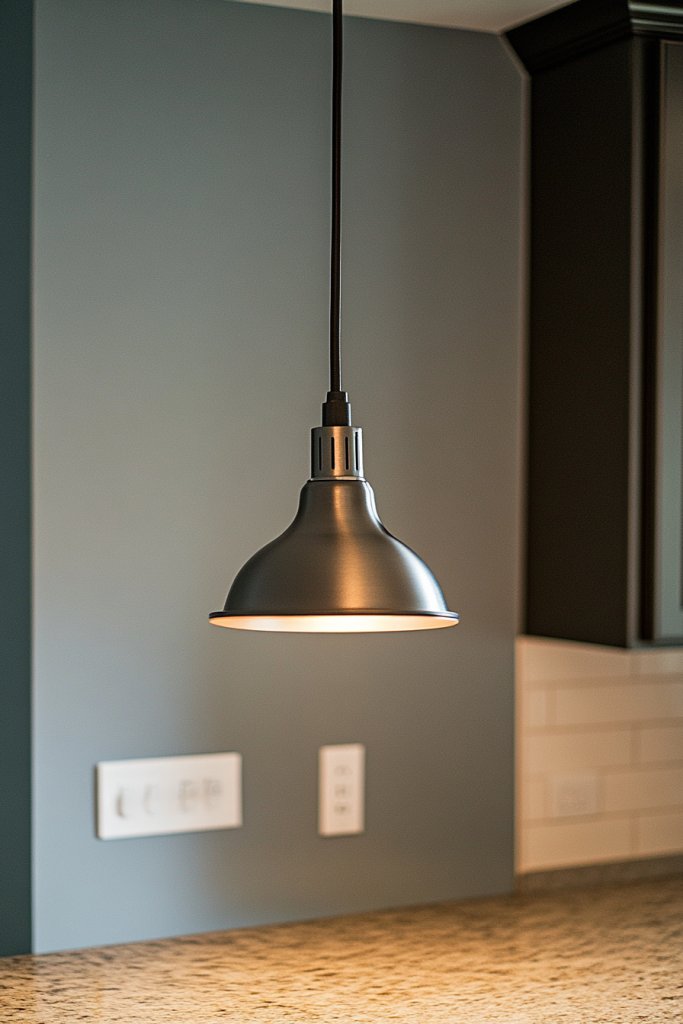
Dim, outdated lighting can make even the most beautiful rooms feel dull and uninspired. Upgrading your fixtures doesn’t have to mean expensive rewiring or hiring an electrician. Budget-friendly options and clever DIY hacks can add warmth and personality to your space without breaking the bank.
Recommended Products to replicate this idea
| # | Preview | Product | |
|---|---|---|---|
| 1 |

|
Zarnicy Plug in Light Socket - 16Ft Pendant Light Cord Kit E26/E27 Light Socket Hanging Lantern Lamp... | Buy on Amazon |
| # | Preview | Product | |
|---|---|---|---|
| 1 |
|
Homoyoyo Easy Install Lampshade Edge DIY Lampshade Strips Repair Tape Easy Peel and Stick for Table... | Buy on Amazon |
Imagine installing a sleek pendant light made from a painted jar or a string of LED strip lights hidden behind crown molding. Visualize the warm glow bouncing off freshly painted walls, creating cozy zones perfect for relaxing or entertaining. Think of the ambiance that a few well-placed fixtures can produce—transforming a mundane room into a welcoming retreat.
Choose affordable fixtures like Edison bulb pendants, clip-on spotlights, or battery-operated puck lights. For a rustic look, DIY lanterns from metal cans or wood with simple wiring work well. Seasonal switches can include fairy lights or portable LED lamps for added versatility. These options work in kitchens, bedrooms, or living rooms, adapting to your style.
Switching fixtures often involves turning off the power and disconnecting the old hardware. For DIY pendant lights, attach a light socket to a decorative element like a painted jar or basket. Secure the fixture to the ceiling with appropriate anchors, ensuring stability. For LED strips, measure and cut to fit under cabinets or along shelves, then connect to a power source. Use a dimmer switch for adjustable mood lighting if desired.
Customize fixtures with paint, fabric shades, or decorative cords. Create your own pendant covers from materials like paper or woven textiles for a unique touch. Add remote-controlled LED strips for easy ambiance changes. Layer different light sources—task, accent, and ambient—for a balanced, cozy effect.
Upgrading your lighting is a quick, affordable way to dramatically enhance your home’s vibe. DIY hacks empower you to get creative and save money, proving that small changes lead to big results. Brighten your space and mood with simple upgrades—you’re capable of transforming your home.
6. Create a Functional Entryway with DIY Hooks and Baskets
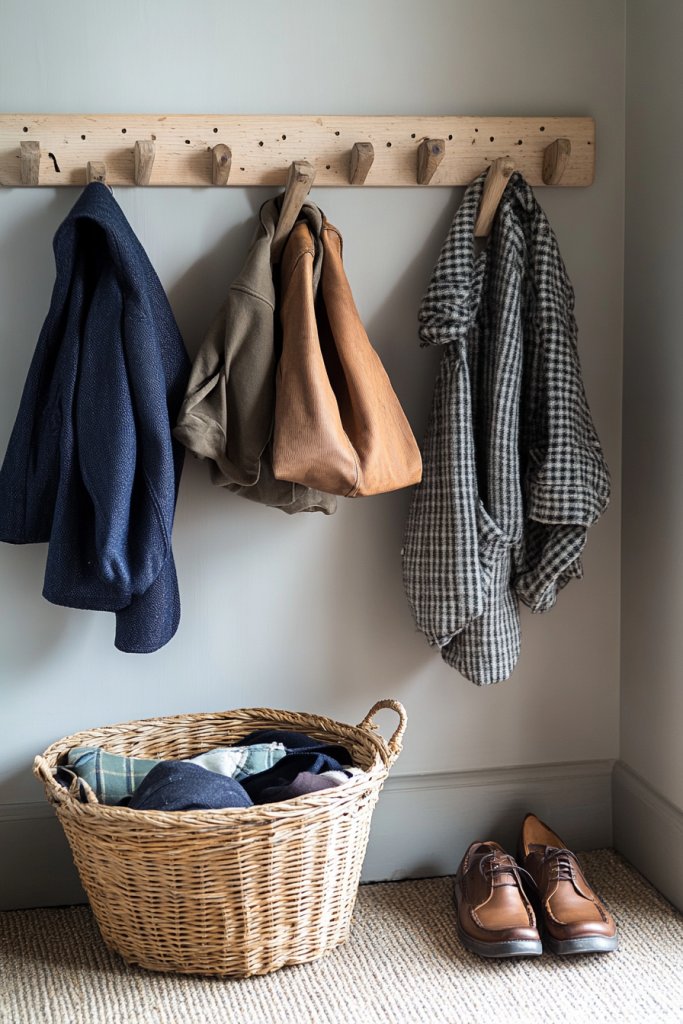
Is your entryway a chaotic dumping ground for shoes, bags, and coats? A cluttered entrance makes every trip in and out stressful. The solution? DIY hooks and baskets turn your entry into a tidy, welcoming zone. It’s a simple fix that instantly improves both function and vibe.
Recommended Products to replicate this idea
| # | Preview | Product | |
|---|---|---|---|
| 1 |

|
Kuhome 32.2'' Large Coat Rack Wall Mount Coat Hooks Coat Hanger with 8 Metal Black Triple- Hooks... | Buy on Amazon |
| # | Preview | Product | |
|---|---|---|---|
| 1 |

|
Yilobi 5 Pack Woven Storage Baskets for Shelves, Decorative Basket Organizer Storage Bins for Toys,... | Buy on Amazon |
Imagine a wall-mounted wooden plank with painted hooks, holding coats and umbrellas neatly. Below, woven baskets contain shoes and accessories, keeping everything organized. The textures of the wood, fabric, and metal create a warm, inviting feel. Visualize a space where everything has a place, and the chaos stays out of sight.
Opt for vintage hooks for a rustic look or sleek metal for a modern vibe. Install a small shelf above for keys or mail, or add a mirror for quick check-ins before leaving. Use colorful baskets or labels for a playful touch or stick to neutral tones for a minimalist aesthetic. Seasonal accessories like wreaths or decorative accents keep the space fresh.
Start by choosing a sturdy wall or door to mount your hooks and baskets. Measure spacing to ensure accessibility and balance. Secure hooks with appropriate anchors; consider using a level for perfect alignment. Attach baskets with brackets or hooks, ensuring they can handle the weight of shoes or bags. Add a small bench or stool if space permits for sitting or sorting.
Paint or stain wood hooks and shelves to match your decor. Label baskets with words or icons for quick identification. Incorporate seasonal decor like a small floral arrangement or themed cushions on the bench. Personal touches help make the entryway uniquely yours, encouraging family members to keep it tidy.
Creating a functional entryway proves that organization starts at the doorstep. With a few DIY tricks, you can turn chaos into calm and impress visitors with your style sense. It’s an easy, practical upgrade that sets a positive tone for your home.
7. Revamp Furniture with Chalk Paint or Furniture Paste
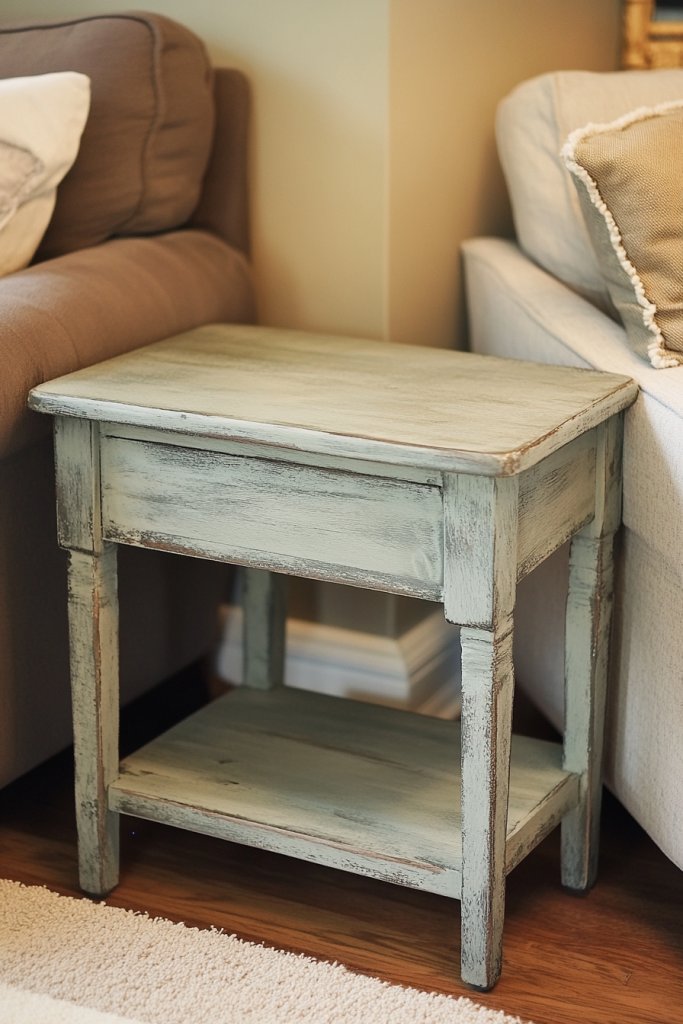
Got tired, worn-out furniture that no longer fits your style? Rejuvenate old pieces with chalk paint or furniture paste instead of buying new. It’s an affordable way to refresh your home’s look and add a personal touch. Plus, it’s surprisingly simple and fun!
Recommended Products to replicate this idea
| # | Preview | Product | |
|---|---|---|---|
| 1 |

|
Rust-Oleum Linen White Chalked All-in-One Ultra Matte Paint | One Coat Coverage | No Primer,... | Buy on Amazon |
| # | Preview | Product | |
|---|---|---|---|
| 1 |

|
Minwax Paste Finishing Wax, 16 oz., Natural Finish | Buy on Amazon |
Imagine a vintage dresser painted in a soft pastel with distressed edges for a shabby chic vibe. Or a plain wooden chair transformed into a bold statement piece with vibrant, glossy paint. The matte or chalky finish feels velvety to the touch, adding character and charm. Visualize how a single coat of paint can completely change a piece’s personality.
Choose colors that match your decor—neutral shades for versatility or bright hues for a statement. Use different techniques like dry brushing or wax finishes for texture and depth. Apply on small furniture pieces, decorative accents, or even picture frames for a cohesive look. Seasonal updates? Just switch out the color scheme.
Clean and lightly sand furniture before painting to ensure adhesion. Use painter’s tape to protect areas you want to keep untouched. Stir your chalk paint or furniture paste thoroughly and apply with a brush or roller in thin coats. Allow each coat to dry completely before adding another. Finish with a clear wax or sealant for durability. For best results, work in a well-ventilated area.
Add decorative hardware or new knobs for an extra flair. Mix colors or create patterns for a customized look. Use stencils or freehand painting for decorative accents. Layering different finishes—matte, gloss, or matte—is also an option for a textured effect.
Revamping furniture with paint is a cost-effective way to express your style and breathe new life into old pieces. It’s a satisfying project that boosts confidence and creativity. Your home can look designer-made without the designer price tag.
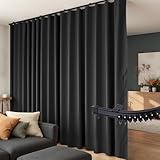
8. Make a Multi-Functional Room Divider with Curtains or Folding Screens
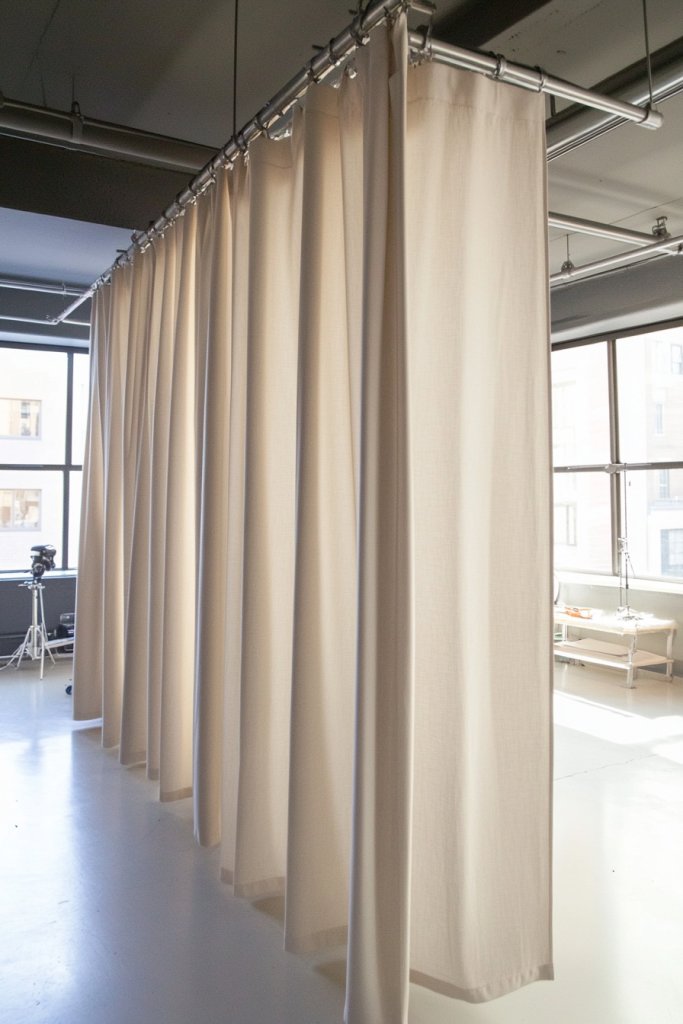
Open-plan spaces can feel chaotic, especially when you need some privacy or to define different zones. An inexpensive, stylish room divider can create separate areas without permanent walls. Curtains or folding screens are flexible, affordable options that add a touch of elegance and function.
Recommended Products to replicate this idea
| # | Preview | Product | |
|---|---|---|---|
| 1 |
|
Room Divider Curtains Flexible Ceiling Tracks Set Curtain Track Ceiling Mount Blackout Curtain for... | Buy on Amazon |
| # | Preview | Product | |
|---|---|---|---|
| 1 |

|
SUNALLY Room Divider 6FT Folding Privacy Screens with Lockable Wheels, 4 Panel Room Partition for... | Buy on Amazon |
Picture a sheer, flowing curtain in a soft neutral, gently dividing a living area from a workspace. Or a colorful, patterned folding screen that adds personality and acts as a focal point. Visualize how these elements add depth and texture to your space while providing privacy at a moment’s notice. They’re like magic curtains—transforming openness into coziness.
Choose lightweight fabric curtains for a breezy, casual look or heavier, textured fabrics for more privacy and warmth. Folding screens come in various styles—wood, metal, or fabric-covered—allowing you to match your decor. For seasonal changes, switch fabrics or styles to keep things fresh.
Select a sturdy curtain rod or tension wire for quick installation. Hang curtains with brackets or hooks, ensuring they slide smoothly. For folding screens, position them where needed, and secure if necessary for stability. Use brackets or hinges for larger screens. Ensure the divider doesn’t block doorways or pathways. Adjust height and placement for optimal privacy and aesthetics.
Decorate curtains with tiebacks, tassels, or fabric paint for a custom look. Use decorative trims or fringes along the edges of folding screens. Layer with rugs or furniture to enhance the zone separation. Personalize by matching the divider’s style with your overall decor theme.
A simple room divider elevates your home’s functionality and style. It’s a smart, budget-friendly way to adapt your space for work, relaxation, or guests. With a little creativity, you can easily reconfigure your home to fit your needs.
9. Add Peel-and-Stick Backsplash for a Stylish Kitchen Update

Does your kitchen look dull or outdated? A backsplash can make a huge difference but installing traditional tiles is messy and expensive. Peel-and-stick backsplash tiles give you a quick, affordable facelift without the hassle. It’s perfect for renters or anyone wanting a fresh kitchen look.
Recommended Products to replicate this idea
| # | Preview | Product | |
|---|---|---|---|
| 1 |

|
Art3d 102-Piece Peel and Stick Wall Tile for Kitchen Backsplash, Bathroom, Fireplace, 3in. × 6in.... | Buy on Amazon |
| # | Preview | Product | |
|---|---|---|---|
| 1 |
|
2 Rolls Caulk Tape Self Adhesive, Bathroom Waterproof White Caulking Sealant Strip Peel & Stick... | Buy on Amazon |
Imagine a wall transformed with geometric or subway-patterned tiles in bold colors or sleek neutrals. The textured surface catches the light, adding depth and interest. Visualize how the new backsplash creates a focal point that ties your entire kitchen decor together. It’s like giving your kitchen a designer upgrade on a DIY budget.
Choose from a variety of patterns, textures, and colors to match your style. For a subtle upgrade, pick neutral or metallic finishes; for a bold statement, go for vibrant hues or intricate mosaics. Seasonal updates are easy—simply peel off the old and apply new styles. Suitable for backsplashes behind stoves, sinks, or open shelving.
Clean the wall thoroughly and ensure it’s dry. Measure and cut the tiles to fit your space, leaving a small gap for expansion. Peel off the backing and carefully place the tiles, smoothing out bubbles as you go. Use a utility knife to trim excess. For best results, press firmly and allow adhesive to set for 24 hours. No grout needed—just a clean, professional look.
Add metallic or textured accents for a luxe feel. Mix different styles or colors for a custom mosaic effect. Frame the edges with trim for a polished look. Incorporate matching accessories like utensils or storage jars to complete the kitchen makeover.
Peel-and-stick backsplashes make kitchen updates accessible and fun. They prove that small upgrades can dramatically improve your home’s style. Once installed, your kitchen will feel modern, fresh, and uniquely yours without the heavy costs.
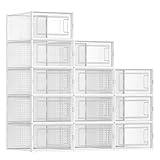
10. Reorganize with DIY Closet Systems and Storage Hacks

Is your closet a jumble of clothes, shoes, and accessories? A cluttered closet makes mornings stressful and wastes valuable space. DIY closet systems and smart storage hacks turn chaos into order, making everything easy to find and access. It’s an affordable way to upgrade your wardrobe organization.
Recommended Products to replicate this idea
| # | Preview | Product | |
|---|---|---|---|
| 1 |

|
ClosetMaid ShelfTrack Wire Closet Organizer System, Adjustable from 4 to 6 Ft., with Shelves,... | Buy on Amazon |
| # | Preview | Product | |
|---|---|---|---|
| 1 |
|
SONGMICS Shoe Boxes, Pack of 12 Shoe Storage Organizers, Stackable Clear Plastic Boxes for Closet,... | Buy on Amazon |
Imagine a closet with wire baskets holding folded sweaters, tension rods hanging scarves, and shoe racks neatly aligned. Visualize clear bins labeled with DIY tags and custom-designed dividers creating zones. The space feels open and organized, with everything in its place. It’s a tidy, functional sanctuary that makes getting dressed a breeze.
Use inexpensive wire baskets, hooks, and tension rods tailored to your space and needs. For small closets, maximize vertical space with hanging organizers or over-the-door racks. For larger closets, add DIY shelves or a small island for folding. Adjust storage solutions seasonally—store off-season items in labeled bins or vacuum bags.
Start by decluttering to identify what needs to be stored. Measure your closet’s dimensions to plan your layout. Install tension rods and hooks at different heights for versatility. Use inexpensive bins or DIY fabric boxes for small items. Create zones for shoes, accessories, and clothing. Label everything clearly for easy maintenance. Regularly reassess to keep the system functional.
Decorate bins with fabric covers or paint labels for a cheerful look. Incorporate a DIY jewelry organizer from scrap wood or an old frame. Use decorative hooks or knobs for added style. Personal touches like framed photos or a small mirror can make the closet more inviting.
A well-organized closet simplifies your mornings and frees up space for new outfits or storage. It’s a project that pays off immediately, boosting your confidence and sense of control. Plus, it’s a fun way to get creative with budget-friendly DIY ideas.
11. Enhance Walls with Textured Paint Techniques or Wall Coverings
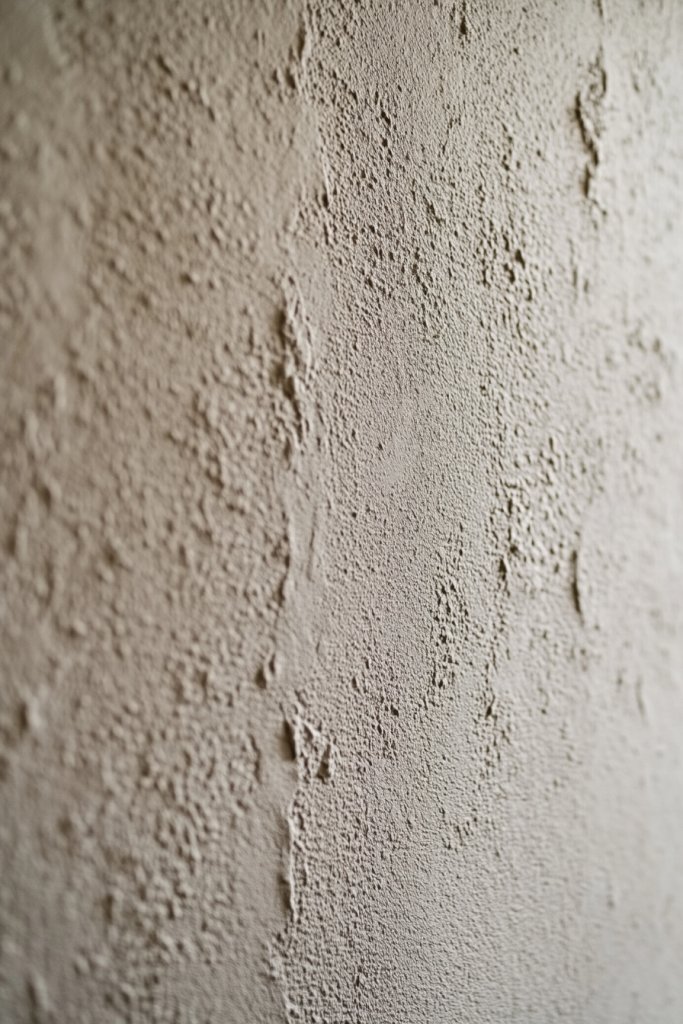
Are your walls feeling flat and uninspiring? Boring walls can dampen even the most beautiful decor. Textured paint techniques and removable wall coverings provide an affordable way to add depth, pattern, and personality. It’s a simple upgrade that transforms your space from dull to dynamic.
Recommended Products to replicate this idea
| # | Preview | Product | |
|---|---|---|---|
| 1 |

|
Pro Grade - Paint Roller Covers - 1/2 X 9 Inch Microfiber 5 Pack | Buy on Amazon |
| # | Preview | Product | |
|---|---|---|---|
| 1 |
|
Art3d Smoothing Tool Kit for Applying Peel and Stick Wallpaper, Vinyl Backsplash Tile | Buy on Amazon |
Imagine a wall with a soft sponge finish creating a gentle, mottled texture that adds warmth. Or a subtle geometric pattern created with painter’s tape and contrasting paints. Visualize peel-and-stick wallpaper with bold patterns or textured wall decals that instantly create visual interest. The tactile quality of textured finishes invites the eye and the touch.
Choose techniques like sponging, rag rolling, or stenciling to match your style. For seasonal updates, removable wallpaper or decals make switching designs effortless. Use textured paints in focal areas like behind your bed or sofa. Keep the rest of the room simple to let the wall treatments stand out.
Prepare the wall surface by cleaning and sanding if necessary. Use painter’s tape to create patterns or protect edges. Apply textured paint with a sponge, brush, or roller, following the product instructions. For wallpaper, measure carefully and smooth out bubbles with a squeegee. Seal with a clear topcoat if needed for durability. Regular touch-ups keep the texture looking fresh.
Mix textures or paint colors for a layered effect. Add metallic or pearl accents to textured paints for a subtle shimmer. Incorporate DIY wall art or fabric panels for extra flair. Play with lighting to highlight textured surfaces, creating shadows and depth.
Textured walls show that a little creativity goes a long way. They make your home feel more curated and personalized. With a few simple techniques, you can elevate your decor and boost your DIY confidence.
12. Install Under-Cabinet LED Lighting for Better Functionality

Cooking in a dimly lit kitchen feels like a chore, right? Under-cabinet LED lighting brightens your workspace and adds a modern touch. It’s an inexpensive upgrade that enhances functionality and style. Plus, it saves you from accidentally chopping your fingers or burning toast.
Recommended Products to replicate this idea
| # | Preview | Product | |
|---|---|---|---|
| 1 |
|
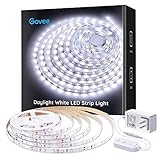
Govee White LED Strip Lights, Upgraded 16.4ft Dimmable LED Light Strip 6500K Bright Daylight White,... | Buy on Amazon |
| # | Preview | Product | |
|---|---|---|---|
| 1 |

|
MCGOR 10inch Under Cabinet Lighting, 2 Pack Rechargeable Motion Sensor Light Indoor, 5 Levels... | Buy on Amazon |
Imagine sleek, strip LED lights casting a bright, even glow over your countertops. The clean, white light makes colors pop and surfaces shine. Visualize your kitchen transformed into a high-end culinary studio, all with a simple strip of lights. The reflection of light on shiny surfaces creates a fresh, inviting atmosphere.
Choose from different LED strips—warm white for cozy vibes or cool white for task lighting. Install on underside of upper cabinets or inside open shelves. Flexible strips can bend around curves or corners, fitting any space. For seasonal flair, sync lights with smart home systems for color-changing effects.
Measure the length of your cabinets to determine how much lighting you need. Cut LED strips to size and attach adhesive backing for easy mounting. Connect to a power source, and if desired, install a dimmer switch for adjustable brightness. Ensure wiring is hidden for a clean look. Test the lights before final attachment.
Choose color-changing or dimmable options for added versatility. Frame the lighting with decorative molding or paint the wiring to match your cabinetry. Use remote controls or smart apps for easy adjustments. Combine with under-cabinet outlets or USB chargers for maximum utility.
LED under-cabinet lighting proves that small tech upgrades can make a big difference. It’s a straightforward project that instantly modernizes your kitchen. Once installed, you’ll wonder how you ever cooked without it.
13. Update Window Treatments with Cost-Effective Curtains or Blinds
Old, sagging blinds or dull curtains can make your rooms look tired. Updating window treatments is an easy way to boost style and control light. Affordable options like rod-pocket curtains or faux wood blinds can dramatically change your space’s vibe with minimal effort.
Recommended Products to replicate this idea
| # | Preview | Product | |
|---|---|---|---|
| 1 |
|
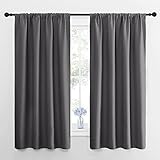
NICETOWN Blackout Curtains Panels for Bedroom - Thermal Insulated Rod Pocket Window Blackout... | Buy on Amazon |
| # | Preview | Product | |
|---|---|---|---|
| 1 |

|
Lotus & Windoware Cordless, 2 Inch Faux Wood Blind, 34" Wide x 60" Long, Window Blinds, Blinds &... | Buy on Amazon |
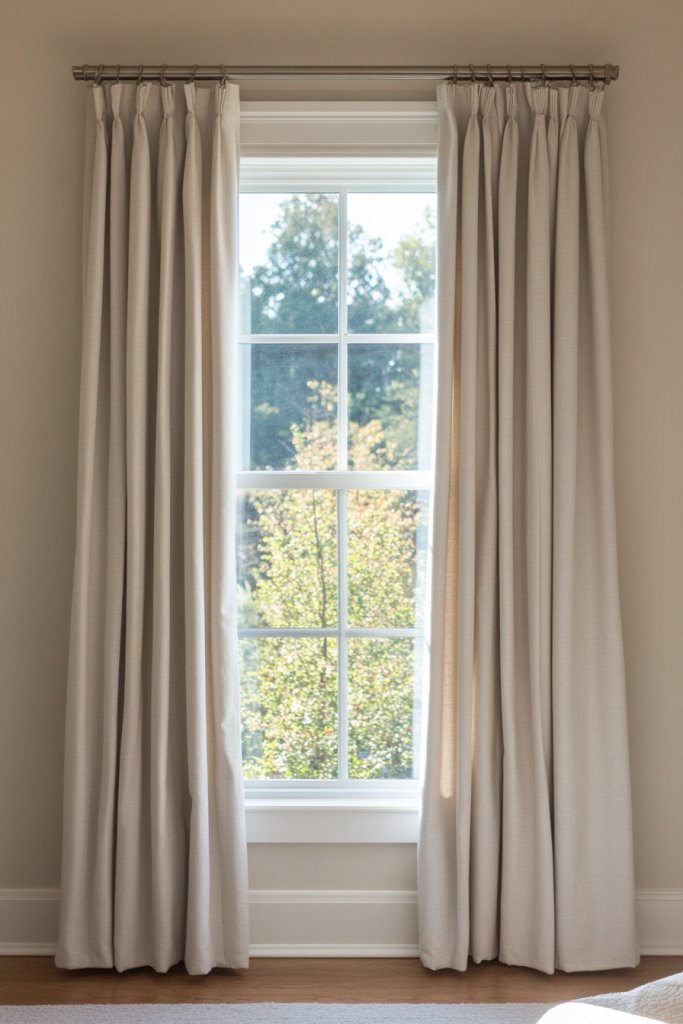
Picture flowing, lightweight curtains in a soft linen or cotton fabric framing your window, adding softness and elegance. Or sleek faux wood blinds matching your furniture, creating a cohesive look. Visualize sunlight filtering through, casting gentle shadows that make your room feel warm and inviting.
Select curtains in neutral tones for a classic look, or bold patterns for a statement. Layer sheer curtains with heavier drapes for versatility. For smaller windows, simple roller blinds or Roman shades work well. Change styles seasonally or for special occasions to keep your decor fresh.
Measure your window carefully, including the rod length and curtain length. Install a sturdy curtain rod or track, making sure it’s level. Hang your curtains or blinds, adjusting for proper length and fullness. Use brackets and anchors for stability, especially for heavier fabrics. Finally, style the fabric neatly or add decorative tiebacks.
Choose curtain hardware in finishes that complement your hardware or furniture. Add decorative trim or tiebacks for a custom touch. For a DIY upgrade, sew or glue embellishments onto plain curtains. Seasonal fabric swaps can keep your decor lively and fresh.
New window treatments elevate your room’s style instantly. They’re a simple, budget-friendly way to refresh your decor and control privacy. Once done, you’ll enjoy a more polished, cozy space that reflects your personal taste.
14. Create a DIY Headboard Using Repurposed Materials
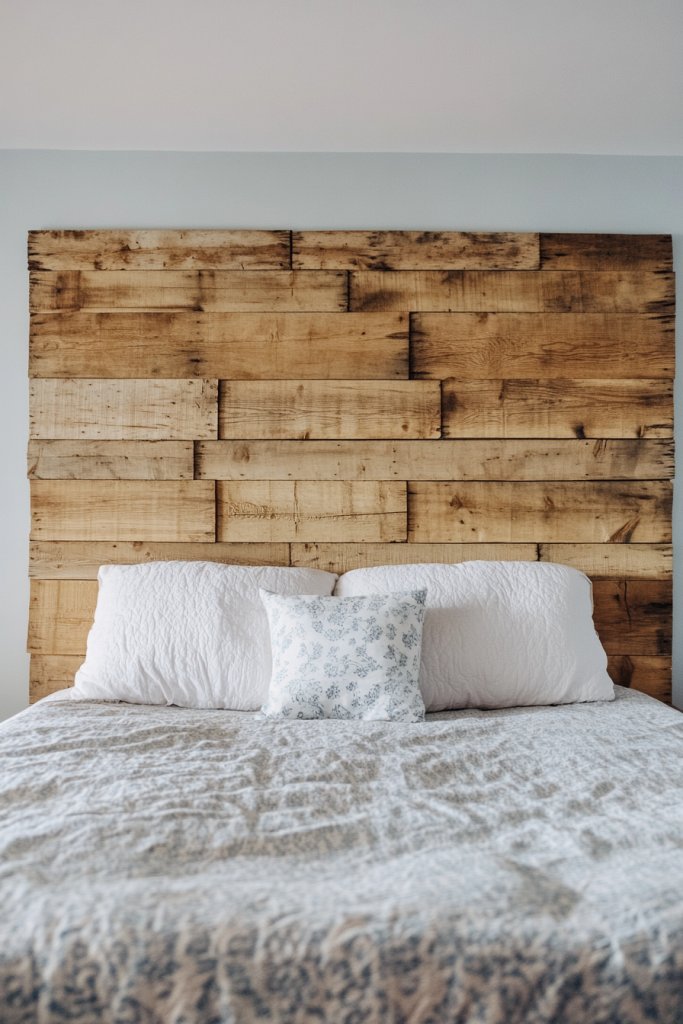
A boring, generic bed frame can make your bedroom feel uninspired. Creating a DIY headboard with repurposed materials adds personality and style without the hefty price. It’s a fun project that transforms your bedroom into a cozy, stylish retreat.
Recommended Products to replicate this idea
| # | Preview | Product | |
|---|---|---|---|
| 1 |

|
Rockin' Wood Real Wood Nail Up Application Rustic Reclaimed Naturally Weathered Barn Wood Accent... | Buy on Amazon |
| # | Preview | Product | |
|---|---|---|---|
| 1 |
|
Madison Park Amelia Upholstered Headboard | Nail Head Trim Wingback Button Tufted | Queen, Cream | Buy on Amazon |
Imagine a headboard crafted from reclaimed wood pallets, painted in a soft hue, or upholstered with fabric-covered foam board. Visualize the texture of weathered wood or soft fabric against your wall, creating a focal point that anchors the room. It’s a statement piece that shows off your creativity and taste.
Use pallet wood for rustic charm, or a large piece of plywood decorated with paint or fabric for a modern look. For a boho vibe, cover a wooden frame with tapestry or macrame. Seasonal changes? Swap out fabrics or paint colors to keep your bedroom fresh.
Start by measuring your bed width and selecting suitable materials. Sand and paint or stain wood for a polished finish. If upholstering, cut foam to size and cover with fabric, securing with staples. Attach the headboard securely to the wall or bed frame with brackets or screws. Add decorative touches like nailhead trim or painted patterns.
Incorporate string lights or LED strips around the headboard for a cozy glow. Personalize with stenciled initials or patterns. Use textured fabrics like chenille or velvet for added luxury. Mix and match materials for a one-of-a-kind look.
Building your own headboard proves that DIY can be both affordable and stylish. It’s a project that adds a warm, personalized touch to your space. Once finished, you’ll feel proud of creating a unique centerpiece that elevates your bedroom’s vibe.
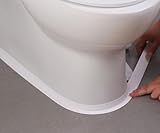
15. Refresh Bathroom Fixtures with Spray Paint

Outdated or tarnished bathroom fixtures can drag down the whole space. Replacing faucets, towel bars, or hardware can be costly and time-consuming. Spray paint offers a quick, budget-friendly way to update fixtures and give your bathroom a fresh, modern look.
Recommended Products to replicate this idea
| # | Preview | Product | |
|---|---|---|---|
| 1 |
|
Rust-Oleum 7718830 Stops Rust Bright Coat Metallic Spray Paint, 11 Oz, Chrome (Pack of 1) | Buy on Amazon |
| # | Preview | Product | |
|---|---|---|---|
| 1 |

|
Fixmend Caulk Tape, 3 Roll Self Adhesive Caulk Strip Waterproof, Caulking Sealant Tape for Kitchen,... | Buy on Amazon |
Picture shiny chrome faucets transformed into matte black or brushed nickel finishes. Visualize towel bars and handles with a sleek, uniform color that complements your vanity or tiles. The smooth, even finish of spray paint instantly elevates the hardware’s appearance, making your bathroom feel polished and coordinated.
Choose from metallic, matte, or textured spray paints to match your decor. For a trendy industrial look, opt for black or dark gray; for a spa vibe, go for soft metallics. Use different colors for fixtures and hardware to create contrast or harmony. Seasonal updates? Just spray a new color for a quick refresh.
Clean fixtures thoroughly to remove soap scum and grease. Mask surrounding areas with painter’s tape and newspaper to avoid overspray. Shake the spray paint can well and apply in light, even coats, holding the can about 12 inches away. Allow each coat to dry before applying the next one. For durability, finish with a clear sealant if needed. Reassemble once dry.
Add decorative touches like contrasting colors or metallic accents. Replace worn or outdated hardware with inexpensive new knobs or pulls for a fresh look. Use spray paint to coordinate fixtures with other accessories like mirrors or vanity tops. Personalize by adding stencils or decals for a unique touch.
Spray painting fixtures is a surprisingly simple way to update your bathroom without a full renovation. It’s empowering to refresh your space with just a can of spray paint. Your bathroom will look more cohesive and modern, and you’ll have the satisfaction of a DIY victory.
16. Build a Custom Gallery Wall Using Affordable Frames and Prints
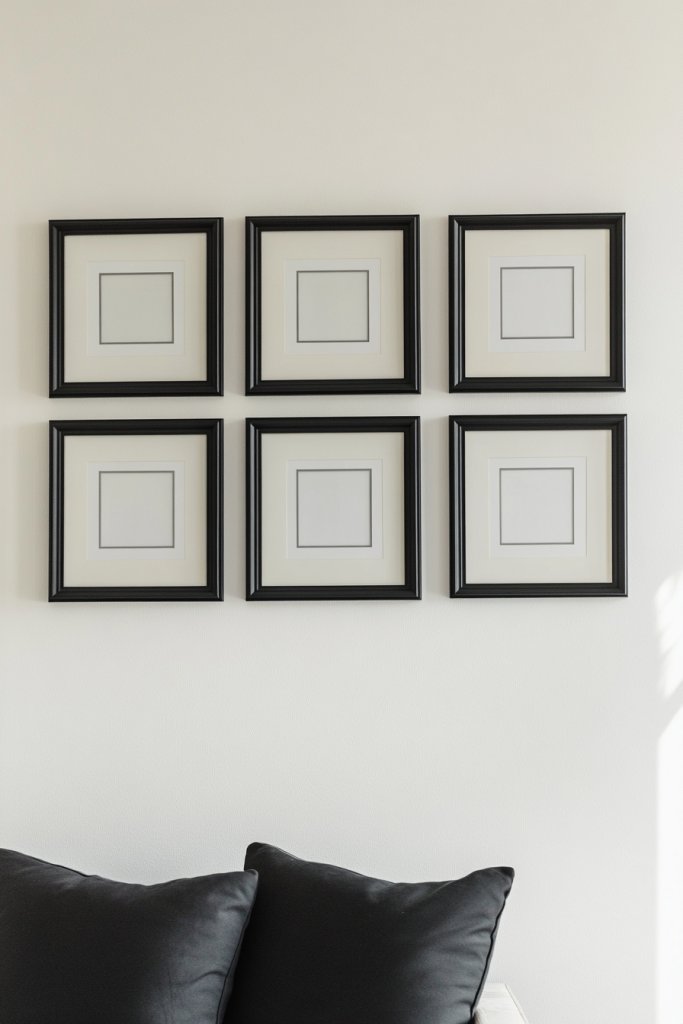
Looking to add personality to your walls without breaking the bank? A gallery wall is an easy, impactful way to showcase your favorite photos, prints, or artwork. Creating your own allows for customization that suits your style and space, all on a budget.
Recommended Products to replicate this idea
| # | Preview | Product | |
|---|---|---|---|
| 1 |

|
Golden State Art, Aluminum Gallery Wall Frame Set of 7 - Includes One 11x14, Two 8x10, and Four 5x7... | Buy on Amazon |
| # | Preview | Product | |
|---|---|---|---|
| 1 |

|
Wildflowers Bouquet Posters Prints Set Of 4, Boho Flowers Wall Art Decor For Bedroom Living Room... | Buy on Amazon |
Visualize a wall filled with an eclectic mix of framed prints, quotes, and photographs in various sizes and styles. The frames range from sleek black to vintage wood, arranged with deliberate spacing for visual balance. It’s a curated collection that tells your story and adds warmth to the room. The overall effect is both personal and stylish.
Mix different frame styles and finishes for a curated, boho look, or stick to a uniform color palette for a modern aesthetic. Use printable artwork or personal photos for authenticity. Arrange your frames in a grid, linear, or freeform layout depending on your space and vibe. Seasonal updates? Swap out prints for new favorites.
Plan your layout on the floor or tape templates to the wall first. Use affordable frames from thrift stores, discount outlets, or DIY frames made from painted cardboard or wood scraps. Hang with nails, Command hooks, or adhesive strips, ensuring level placement. Mix and match sizes for dynamic visual interest. Keep your collection balanced but not symmetrical.
Add personal touches with handwritten quotes, doodles, or decorative mats. Incorporate DIY art projects or printable quotes to fill gaps. Use themed collections—travel photos, family memories, or favorite quotes—for a cohesive story. Frame your kids’ artwork or doodles for a sentimental touch.
A gallery wall proves that you can create a high-impact feature with affordable materials. It’s an easy project that boosts your decorating confidence and showcases your personality. Once finished, your wall becomes a conversation starter and a reflection of your unique style.
17. Repurpose Old Furniture with New Hardware
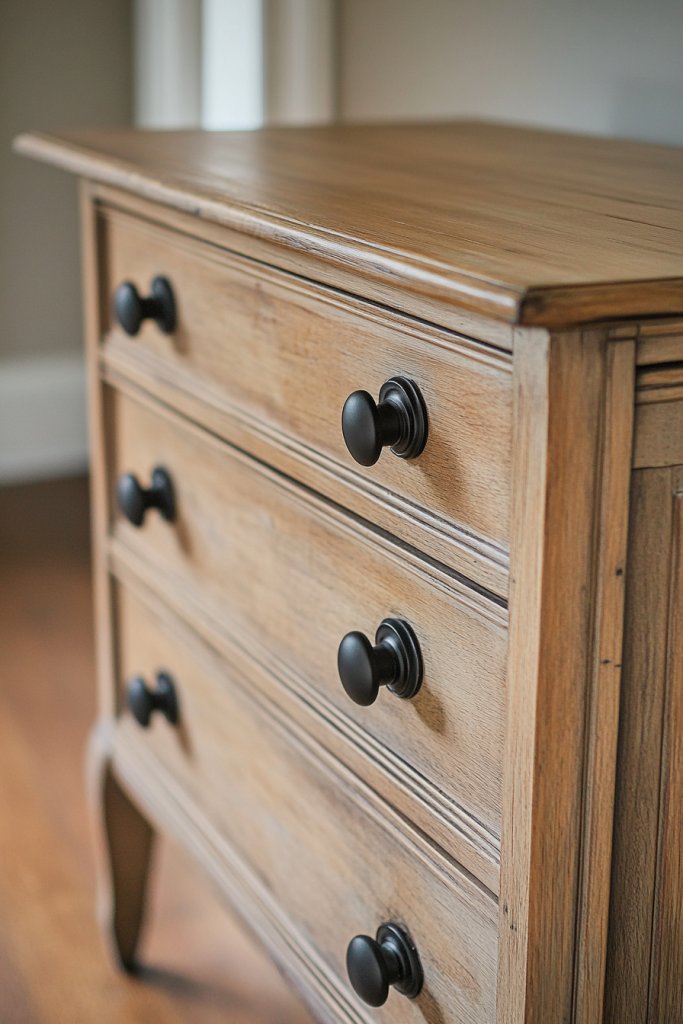
Does your old furniture look tired or mismatched with your current decor? Swapping out hardware like knobs and pulls can give basic pieces a fresh, modern vibe. It’s a quick, inexpensive upgrade that instantly boosts style and personality.
Recommended Products to replicate this idea
| # | Preview | Product | |
|---|---|---|---|
| 1 |
|
Ravinte 30 Pack Solid Knobs Kitchen Cabinet Round Pulls Dresser Handles Gold Cupboard Hardware... | Buy on Amazon |
| # | Preview | Product | |
|---|---|---|---|
| 1 |
|
Ravinte 30 Pack | 5 Inch Cabinet Pulls Matte Black Stainless Steel Kitchen Drawer Pulls Cabinet... | Buy on Amazon |
Imagine replacing generic drawer pulls on a vintage dresser with sleek black or brass knobs. Visualize a worn-out table transformed with new handles that match your aesthetic—rustic, glam, or industrial. The small hardware change adds a polished, intentional look that elevates the entire piece. It’s amazing how such tiny details make a big difference.
Choose hardware that complements your room’s style—vintage glass knobs, matte black handles, or metallic pulls. For a cohesive look, match hardware across furniture pieces or mix metals for an eclectic feel. Seasonal updates? Switch hardware colors or styles to reflect trends or moods. Don’t forget to measure hole spacing for a perfect fit.
Remove the existing hardware with a screwdriver, keeping screws for reuse if possible. Clean and prep the surface to ensure good adhesion. Align new hardware with existing holes or drill new ones if necessary. Secure with screws tightly, but avoid overtightening to prevent damage. Reassemble and check for stability. It’s a straightforward upgrade anyone can do.
Paint or stain hardware for a custom finish—antique, matte, or metallic. Add decorative elements like ceramic or glass knobs for a touch of elegance. Mix and match hardware styles for a curated, personalized look. Label drawers or add small decorative stickers for extra flair.
Swapping hardware proves that a small change can redefine your furniture’s style. It’s a budget-friendly DIY that builds confidence and sparks creativity. Your home will look more intentional and cohesive, all while feeling accomplished.
18. Add a DIY Rug or Floor Covering from Recycled Materials
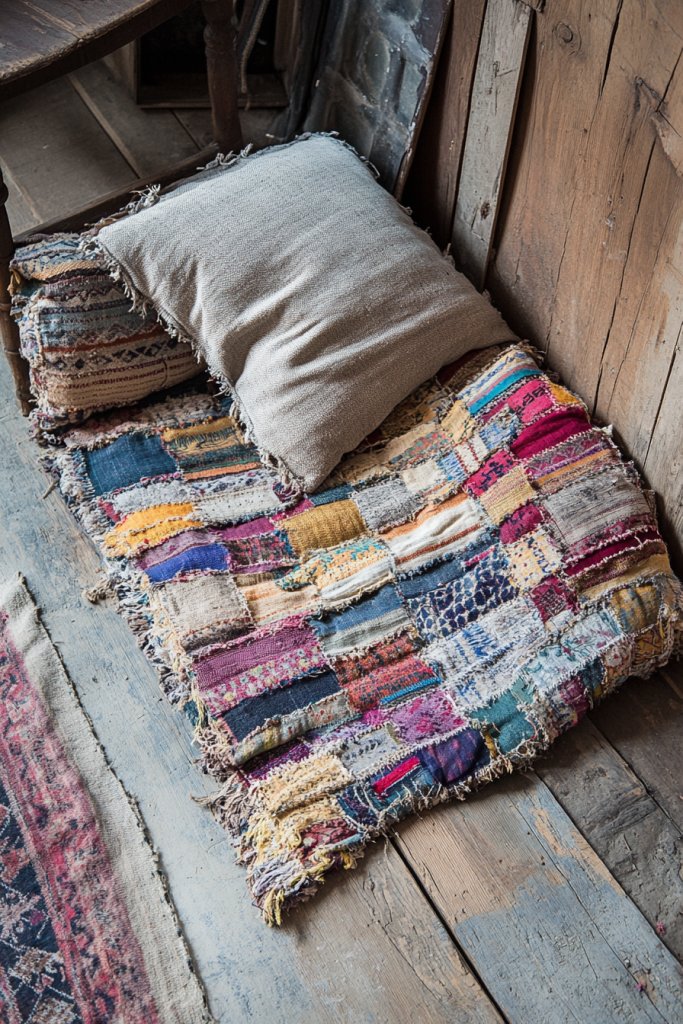
Bare floors can feel cold and uninviting, but new rugs can be pricey. Creating your own using recycled or repurposed materials is a budget-friendly way to add warmth and personality. Plus, it’s a fun project that sparks your creativity and helps the environment.
Recommended Products to replicate this idea
| # | Preview | Product | |
|---|---|---|---|
| 1 |

|
COTTON CRAFT Jute Chindi Braid Rag Rug - Boho Farmhouse Rustic Area Accent Throw Rug - Handwoven... | Buy on Amazon |
| # | Preview | Product | |
|---|---|---|---|
| 1 |
|
GORILLA GRIP Strong Rug Pad Gripper, US Designed, Grips Help Keep Area Rugs Safe and in Place, Slip... | Buy on Amazon |
Imagine a braided rug made from strips of old T-shirts or fabric, or a painted drop cloth with bold geometric patterns. Visualize textures that range from soft and plush to rustic and rough, depending on your materials. These DIY rugs add color, texture, and personality to any space, transforming a plain room into a cozy haven.
Use recycled fabric, old sweaters, or even scrap carpet pieces for a textured look. Braided or woven styles work well for rustic or boho aesthetics. For a modern touch, paint or stenciled patterns on canvas or drop cloths add visual interest. Perfect for living rooms, bedrooms, or entryways.
Start by gathering materials—old clothes, fabric scraps, or drop cloths. Cut strips or pieces into uniform sizes. For braided rugs, braid strips and stitch or glue ends together; for painted ones, lay out your design and use fabric or acrylic paints. Seal the surface with a clear protectant for durability. Lay your new rug on the floor, and enjoy your creative, eco-friendly upgrade.
Add embellishments like tassels or fringe, or incorporate different colors for a layered look. Personalize with stenciled designs or patterns. Use non-slip backing or rug pads for safety. The possibilities are endless—your floor, your style.
Making your own floor covering from recycled materials proves that sustainability and style go hand in hand. It’s a rewarding project that adds warmth and character to your home. You’ll be proud of a unique, eco-conscious floor that’s both functional and fun.
19. Incorporate Functional DIY Window Seats or Benches
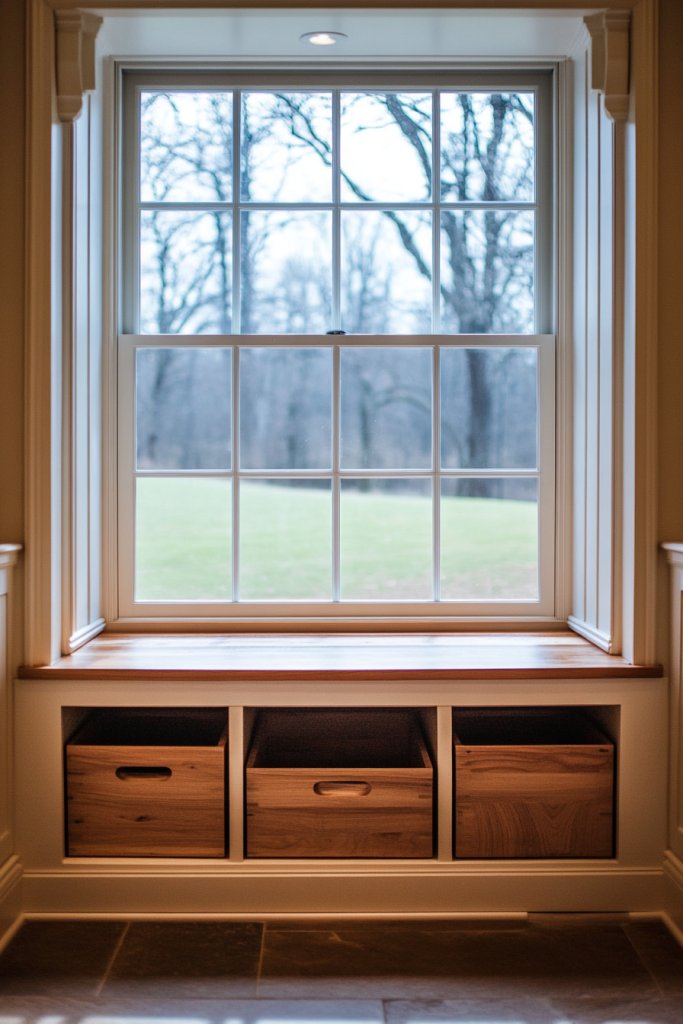
Lack of seating or storage in your home? A DIY window seat or bench adds cozy seating and hidden storage, making your space more functional. It’s a simple project that can turn an awkward nook into a charming focal point. Plus, it’s an affordable way to maximize your space.
Recommended Products to replicate this idea
| # | Preview | Product | |
|---|---|---|---|
| 1 |

|
baibu 36 Inch Classic Solid Color Bench Cushion with Ties, Non-Slip Indoor Rectangle Bench Seat... | Buy on Amazon |
| # | Preview | Product | |
|---|---|---|---|
| 1 |

|
HOOBRO Storage Bench, 39.3" Retro Wooden Storage Chest, Wooden Storage Trunk, Toy Chest with Lift... | Buy on Amazon |
Picture a sturdy wooden bench with a soft cushion on top, nestled under a window. The seat opens to reveal storage for blankets, books, or toys. Visualize a minimalist design with clean lines, or a rustic look with distressed paint and natural wood. The combination of seating and storage creates a practical, inviting corner.
Use inexpensive wood or pallets for a rustic look, or assemble a simple frame from MDF or plywood for a sleeker appearance. Add a cushion or upholstered top for comfort. For small spaces, keep the dimensions compact; larger rooms can accommodate a larger, more elaborate piece. Decorate with throw pillows or blankets for extra coziness.
Measure your space, especially the height and width of the window area. Build or assemble a frame using screws and brackets, ensuring stability. Add a hinged lid or lift-up top for easy access to storage. Sand and paint or stain to match your decor. Secure the bench in place if needed, and add a cushion for comfort. Fill the interior with your stored items.
Decorate the bench with stencils, paint, or fabric for a custom look. Use decorative trim or buttons for a tailored finish. Personalize with your favorite colors or patterns. Layer with cozy textiles like throws or pillows to create a welcoming spot.
A DIY window seat is a practical project that boosts your home’s style and functionality. It’s a satisfying way to add seating and storage without a big investment. Once finished, you’ll enjoy a charming nook that reflects your creativity and clever thinking.
Conclusion
With a diverse range of budget-friendly ideas, you now have the tools to enhance your home’s style and functionality without breaking the bank. Whether you choose to update your decor, improve storage, or add personal touches, these ideas are easy to try and rewarding to see come to life. Take action today and turn your home into a space that’s both stylish and practical—your dream home is within reach!
Last update on 2026-02-11 / Affiliate links / Images from Amazon Product Advertising API