Imagine transforming your home into a stunning oasis with just a few creative touches—this is the magic of a DIY accent wall! Mama’s amazing DIY accent wall ideas have gained popularity because they allow for personalized, budget-friendly updates that truly reflect your style and personality.
In this article, you’ll find a variety of inspiring ideas to help you craft the perfect accent wall, whether you love bold patterns, textured finishes, or subtle elegance. Get ready to discover simple step-by-step projects and clever tips that will make your space uniquely yours, turning any room into a captivating focal point.
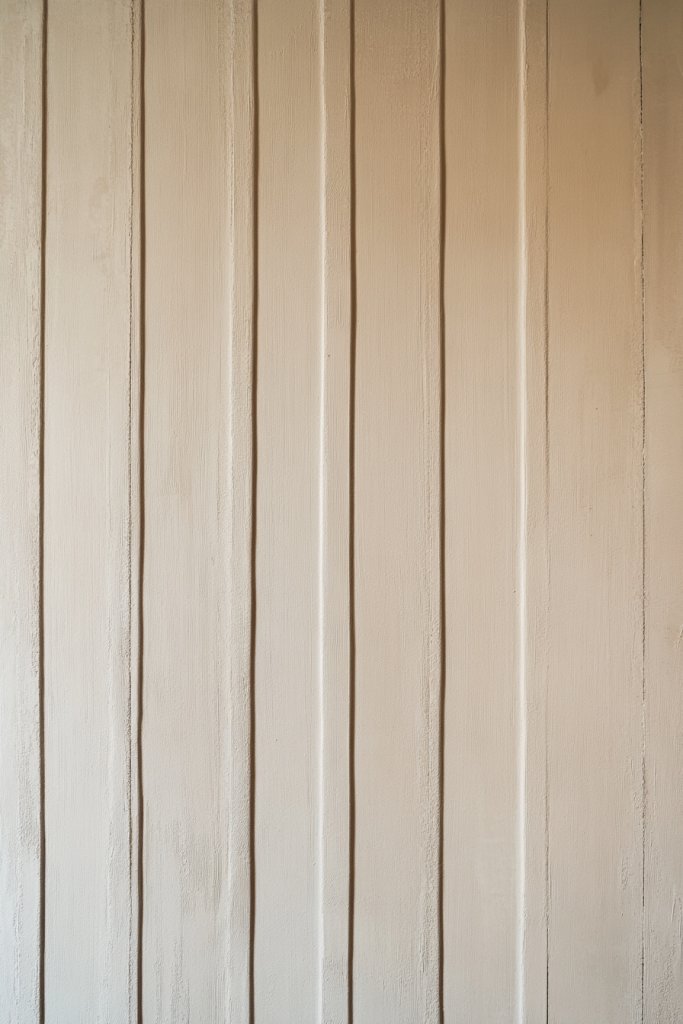
1. Chic Shiplap Wall with Reclaimed Wood for Rustic Elegance
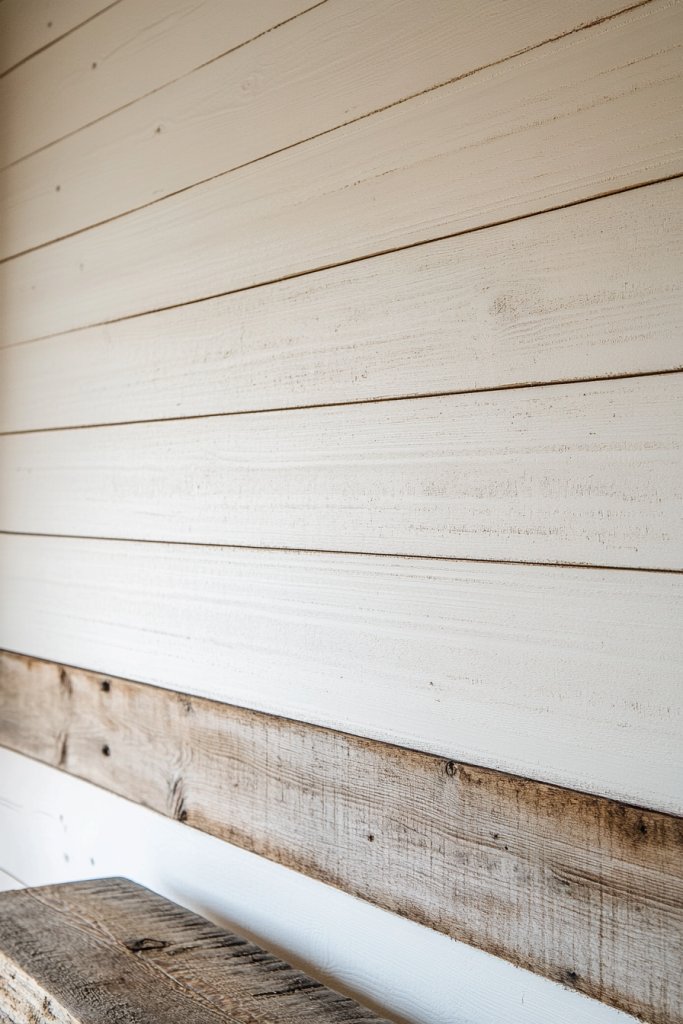
Ever feel like your walls are just plain blank canvases begging for a bit of personality? A shabby, uninspired wall can make even the coziest space feel cold and unfinished. If you’re craving that warm, inviting rustic vibe but don’t want to tear down walls or hire a contractor, this idea is perfect. It’s all about adding texture and character effortlessly.
Imagine walking into a room where the wall is clad in horizontal reclaimed wood planks, each piece telling its own story. The rich, weathered tones contrast beautifully with modern decor, creating a cozy yet stylish focal point. The rough texture invites touch, adding depth to your space. Warm light hits the wood, making every grain pop with personality.
You can opt for lighter, bleached wood for a Scandinavian look or go for darker, stained planks for a more traditional feel. Seasonal accents like cozy throw blankets or vintage accessories can enhance the rustic charm. For smaller spaces, a single accent wall works wonders, while larger rooms can handle full wall paneling. It adapts easily to both contemporary and farmhouse styles.
Start by sourcing reclaimed wood from salvage yards or online marketplaces, ensuring the pieces are safe and untreated if you plan to stain or paint. Measure your wall and cut the planks accordingly, using a saw and level to ensure straight lines. Mount the wood using nails or heavy-duty adhesive, making sure each piece aligns properly. Finish with a clear sealant if you want added durability or a matte finish for a natural look.
Add small decorative elements like vintage hooks, shelves, or hooks for hanging accessories directly on the shiplap for a functional touch. Consider staining or painting some planks in accent colors to create a unique pattern or highlight certain areas. Incorporate lighting such as wall sconces or LED strips behind the planks for a glow that emphasizes the texture. Personal touches make the rustic charm truly your own.
This DIY project transforms a plain wall into a statement piece that exudes warmth and character. Plus, it’s budget-friendly and forgiving for beginners. Your friends will think you hired a pro, but you’ll know it’s all you. Ready to add that cozy farmhouse vibe to your home?
2. Bold Geometric Tape Art for Modern Flair
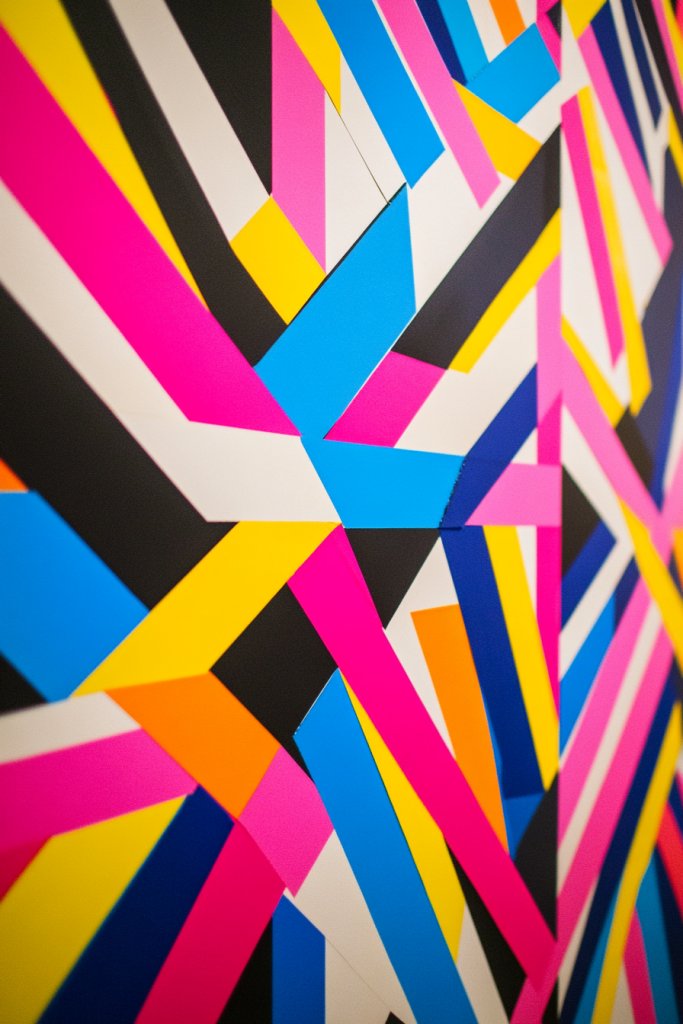
Tired of the same old wall paint? Looking for a way to make your space pop without committing to permanent changes? Geometric tape art offers a quick, customizable solution that screams modern chic. It’s perfect for renters or anyone wanting a bold upgrade with minimal fuss.
Visualize sharp, crisp lines forming triangles, chevrons, or abstract shapes across your wall, all created with painter’s tape. Bright, contrasting colors peek through, giving a vibrant, energetic vibe. The tape’s clean edges create a sense of order and precision, transforming a blank wall into a gallery of geometric patterns.
Choose bold color combos like black and white for classic contrast or neon shades for fun, playful energy. You can keep the shapes simple for a minimalist look or layer complex patterns for more visual interest. This technique works in living rooms, bedrooms, or even kids’ play areas. It’s easy to adapt for different room sizes or personal styles.
Start by sketching your design lightly with a pencil or masking tape. Use painter’s tape to outline your geometric shapes, pressing firmly to prevent paint bleed. Fill in the shapes with your chosen colors using a small foam roller or brush. Once dry, carefully peel back the tape to reveal sharp, professional-looking lines. Clean up any edges with a steady hand or touch-up paint.
Mix and match different shapes and sizes to create a bespoke mural. Incorporate metallic or glitter paints for a bit of shimmer. For a dynamic look, change colors seasonally or add metallic accents. Use the tape to create borders around artwork or furniture for a cohesive appearance.
This project proves that bold design doesn’t require a big budget or expert skills. You control the scale and complexity, making it perfect for beginners and experts alike. Plus, it’s reversible—peel off the tape for a clean slate anytime. Ready to turn your wall into a modern masterpiece?
3. Textured Chalk Paint Stripes for Subtle Sophistication
Looking to add a touch of elegance to your walls without overwhelming the space? Stripes are timeless, but flat paint can feel dull. Chalk paint offers a soft, matte finish that adds subtle texture and depth. Stripes made with chalk paint create a refined look that’s both understated and sophisticated.
Imagine horizontal or vertical bands running across your wall, their matte surface catching the light gently. The textured finish adds a tactile element, inviting you to run your fingers along the stripes. The muted tones create a calming atmosphere, perfect for bedrooms or living rooms aimed at relaxation.
Use contrasting shades for a bold statement or keep it monochrome for a minimalist vibe. Wide or narrow stripes can dramatically change the room’s feel—broad stripes for a bold look, narrow for subtle refinement. This technique works well with vintage, modern, or rustic decor styles and can be tailored for small or large walls.
Start by applying painter’s tape along the lines where you want your stripes to be. Use chalk paint and a flat brush or roller, applying it smoothly for even coverage. For added texture, lightly sand or stipple the paint while still wet. Remove the tape carefully once the paint dries to reveal crisp, textured lines. Consider sealing with a matte clear coat for longevity.
Customize your stripes by varying the width or adding metallic or pastel accents within the chalk paint. You can also layer different textures, like adding a slightly raised stripe with a thicker application. Personalize the palette to match seasonal decor or your mood.
Subtle stripes can elevate any space with a touch of class. It’s a simple project that instantly upgrades your walls without major renovation. Plus, chalk paint’s forgiving nature makes touch-ups easy if you want to tweak your design later. Get ready to impress with your understated elegance!
4. DIY Wall Paneling with Foam Boards and Decorative Molding
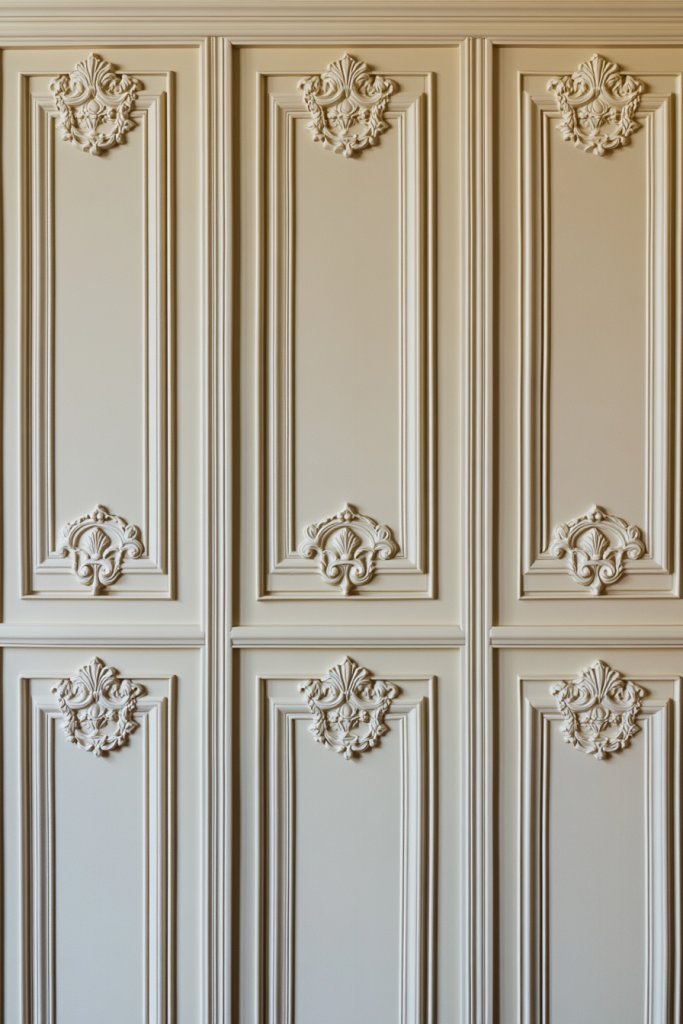
Want the look of classic wall paneling but without the hefty price tag or construction mess? Foam boards coated with decorative molding can mimic the sophisticated architectural detail you see in high-end homes. It’s an easy way to add depth and dimension to any wall.
Picture a wall divided into rectangular or square sections, each framed with ornate or sleek molding. The foam boards are lightweight but sturdy, creating a layered effect that plays with shadows and light. The moldings come in various styles, from simple trims to intricate carvings, giving you options to match your aesthetic.
Choose molding styles that complement your decor, whether modern, vintage, or eclectic. For smaller rooms, vertical or horizontal paneling can elongate or widen the space. You can paint the foam boards and moldings in neutral shades or bold colors for contrast. It’s flexible enough to suit any room size or style.
Cut foam boards to size using a utility knife, then attach them to your wall with strong adhesive or double-sided tape. Apply decorative molding along the edges with construction glue or nails, ensuring they’re level. Fill any gaps or nail holes with spackle, then sand smooth. Finish with a coat of paint or stain for a refined look. Seal the foam for durability if desired.
Add visual interest by painting different sections in contrasting shades or creating a pattern with molding. Incorporate metallic or gloss finishes for a contemporary twist. For a more vintage feel, distress the paint or add faux aging effects. Personal touches like small hooks or shelves can turn your paneling into both decor and storage.
This DIY paneling instantly elevates your walls without the hassle of traditional carpentry. It’s perfect for renters or DIY newbies who want a luxe look. With a few simple tools, you can craft a space that feels custom and polished, boosting your confidence in home projects.
5. Color Blocked Wall with Painter’s Tape for Vibrant Impact
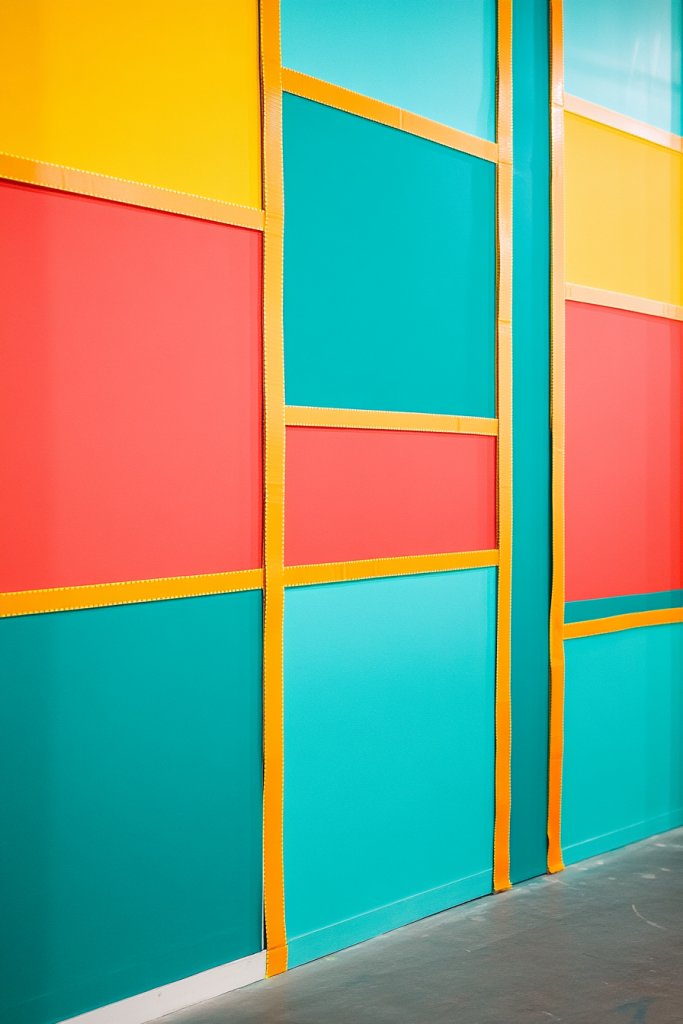
Feeling bored with your monochrome walls? Want to inject some fun and personality into your space? Color blocking is an easy, impactful way to energize any room. It’s like wearing bold stripes—only on your walls, and way more fun.
Visualize a wall divided into large, bold sections of contrasting colors, separated sharply by painter’s tape. The colors can be vibrant hues like turquoise and coral or muted pastels for a softer vibe. The clean lines and large color blocks make the space feel modern and lively. It’s a fresh, playful backdrop that can highlight furniture or decor.
Experiment with different shapes—horizontal, vertical, or geometric patterns—to suit your style. Use accent colors on one section and neutral tones on others for a balanced look. This technique adapts well to all room sizes and styles, from minimalist to eclectic. Seasonal color swaps keep the look fresh and aligned with your mood.
Start by sketching your design lightly with a pencil. Use painter’s tape to mark each section, pressing firmly to prevent bleed. Paint each block with high-quality wall paint, applying multiple coats if necessary. Carefully peel off the tape after the paint dries to reveal crisp, sharp edges. Touch-up any imperfections for a perfect finish.
Incorporate metallic or glitter paints in certain sections for shimmer and shine. Change color combinations seasonally or for special occasions. Add textured finishes like matte or satin to different blocks for more depth. Incorporate small decals or patterns within the blocks for extra flair.
Color blocking is a bold statement that’s surprisingly easy to do and customize. It instantly transforms dull walls into eye-catching focal points. Plus, it’s reversible—peel off the tape and repaint if you want a new look. Get ready to impress everyone with your creative flair!
6. DIY Faux Brick Wall Using Peel-and-Stick Wallpaper
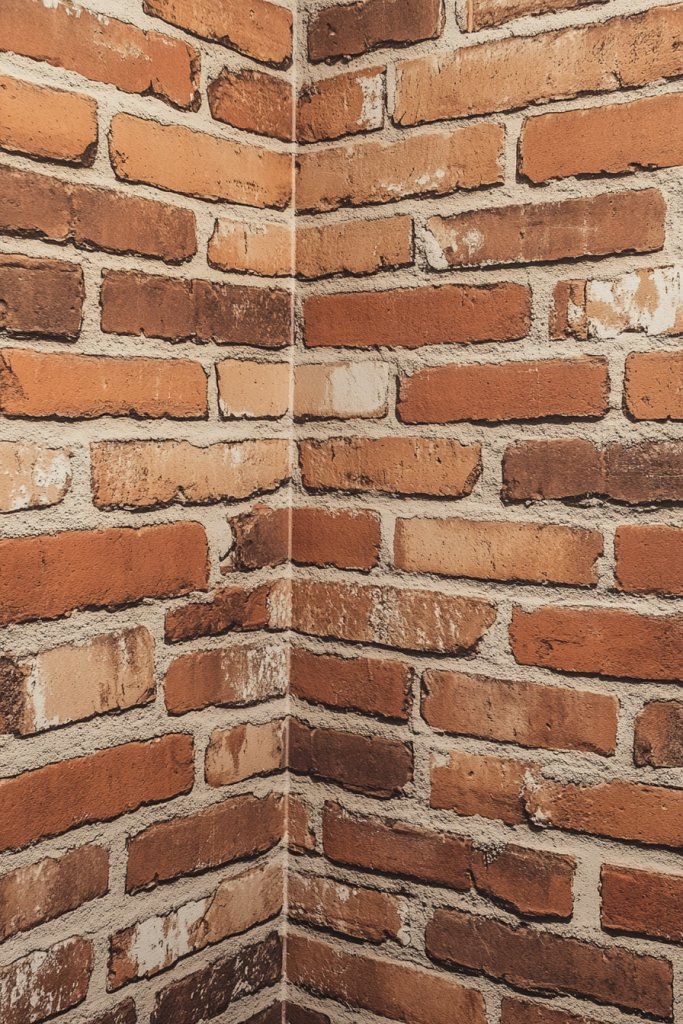
Ever wanted that trendy industrial brick look but dread the mess and expense? Faux brick peel-and-stick wallpaper offers an instant upgrade without the demolition. It’s the perfect hack for renters or anyone craving a bold, textured feature wall.
Imagine a wall that looks like exposed brick, with textured, realistic patterns in warm reds or cool grays. The wallpaper’s surface mimics rough mortar and uneven bricks, adding depth and interest. It creates a striking backdrop that makes your space feel urban and edgy. A quick peel and stick transforms the room instantly.
Choose from various brick styles, from classic red to modern whitewashed or distressed finishes. You can cover an entire wall or create a feature panel behind a bed or sofa. Pair with industrial, rustic, or modern decor for a cohesive look. It’s easy to change for seasons or style updates.
Start by thoroughly cleaning your wall surface to ensure adhesion. Carefully peel the backing and align the wallpaper, smoothing out air bubbles with a squeegee or credit card. Trim excess edges with a utility knife for clean lines. Overlap or connect pieces seamlessly for larger walls. No tools or mess—just a steady hand and patience.
Layer with lighting, such as LED strips or sconces, to highlight the brick texture. Paint or stain certain bricks for a custom look. Combine with other textured materials like wood or metal for a mixed-media effect. Keep it simple or add decorative accents that complement the brick’s urban vibe.
This DIY faux brick wall boosts your space’s style quotient without breaking the bank. It’s a quick, satisfying project that can be done in a few hours. Your home will look modern and polished, and you’ll feel like a pro in interior design. Time to get brick-inspired!
7. Ombre Paint Gradient for Soft, Artistic Depth
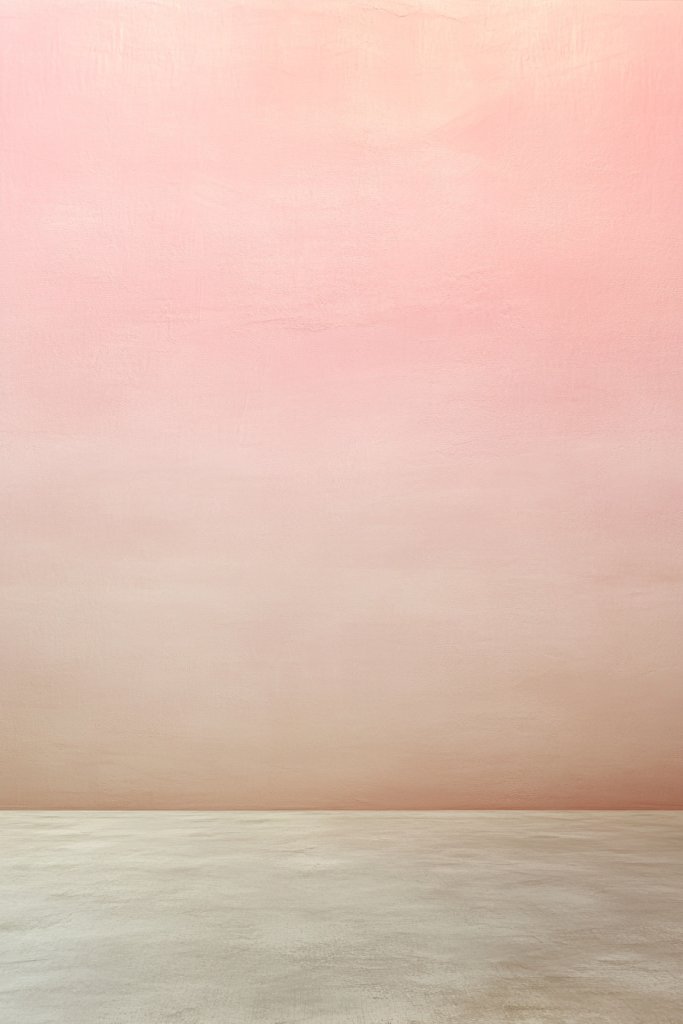
Feeling like your walls lack personality and depth? An ombre paint gradient adds a soft, artistic touch that elevates any space. It’s perfect if you want a subtle, sophisticated backdrop that’s both calming and visually interesting. Plus, it’s a fun way to showcase your painting skills.
Picture a smooth transition from a deep, rich hue at the bottom to a light, airy shade at the top. The gradient creates a sense of movement and depth, making your wall appear more dynamic. The blended colors catch the light differently throughout the day, adding a luminous glow. It’s like a watercolor painting come to life on your wall.
Use contrasting shades for a more dramatic effect or stay within a monochrome palette for subtle elegance. Horizontal or vertical gradients can change the room’s vibe—vertical elongates, horizontal widens. This technique suits bedrooms, living rooms, or even hallways. Adjust the intensity and angle to match your decor.
Start by choosing your color palette and mixing your paints with a binder for smooth blending. Use a large sponge, roller, or brush to apply the darker shade at the base of the wall, then gradually lighten as you move upward. Blend the colors while wet for seamless transitions. Use painter’s tape to protect edges and create clean lines where needed. Work in sections, feathering the paint for a soft gradient.
Add metallic or shimmer paints within the gradient for a luminous effect. Incorporate different textures, such as matte and gloss, to enhance depth. Consider using stencils or masks to add subtle patterns over the gradient. Personal touches like a statement piece of furniture or textiles will complement the artistic background.
An ombre wall is a creative statement that’s surprisingly doable and endlessly customizable. It’s a great way to add a personal touch without permanent fixtures. Your friends will be wowed by your artistic skills, and you’ll love the calming atmosphere it creates. Ready to blend some magic into your walls?
8. Upcycled Door or Window Frame as a Statement Accent
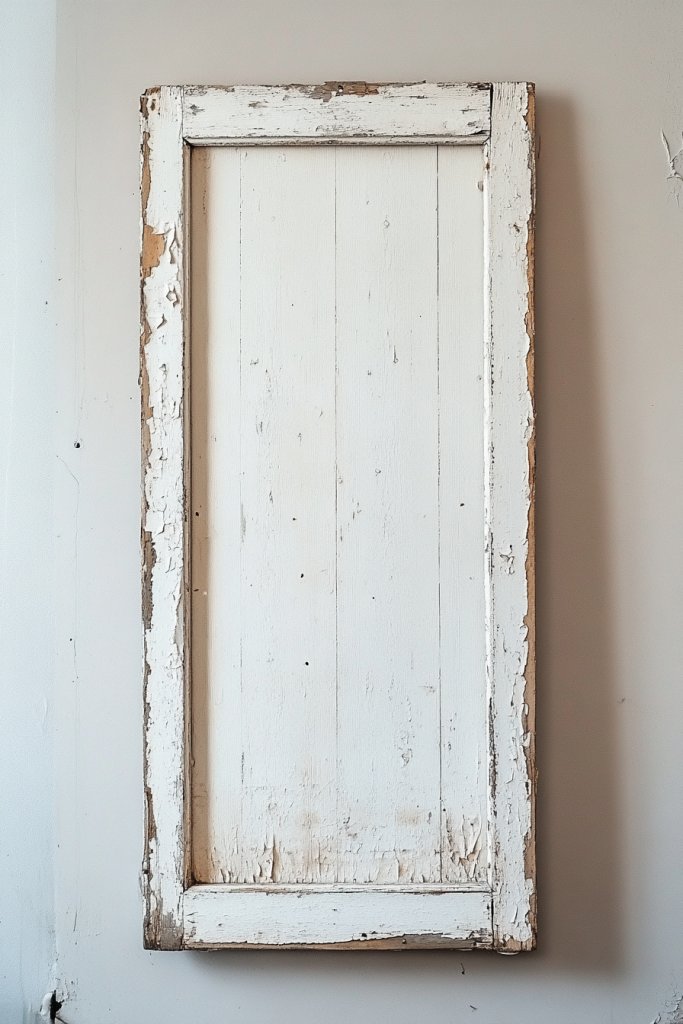
Looking for a way to add instant vintage charm without buying new decor? Repurposing old door or window frames can turn everyday objects into stunning wall accents. It’s a clever, eco-friendly way to bring history and character into your space. Plus, it’s a project that’s both fun and rewarding.
Imagine a weathered window frame mounted on your wall, with peeling paint and charming imperfections. It becomes a focal point, adding texture and a sense of nostalgia. You can hang a mirror, string lights, or even fabric within the frame for different effects. The frame’s irregularities tell a story, making your decor uniquely yours.
Choose frames with interesting shapes or distressed finishes for a rustic look, or sleek, painted frames for a more modern vibe. Incorporate multiple frames in a gallery-style arrangement or keep it simple with a single statement piece. It works well in living rooms, bedrooms, or hallways and can be combined with other vintage items.
Source old frames from flea markets, thrift stores, or salvage yards. Clean and repair any loose joints or peeling paint. Mount the frame securely with appropriate hooks or brackets, ensuring it’s level. Decorate inside the frame with mirrors, fabric, or DIY art, depending on your style. Seal or paint the frame for a finished look if needed.
Add a personal touch by painting or distressing the frame yourself. Decorate the inside with fabric, photos (if you ignore the wall decor rule, but if not, use alternative materials), or small shelves for accessories. Combine different textures and finishes for a layered, eclectic look. It’s all about making it uniquely yours.
Upcycled frames are a perfect way to incorporate vintage charm with minimal expense. They add architectural interest and a sense of history. Your friends will admire your creative reuse, and you’ll love how it elevates your decor with personality and charm.
9. Patterned Wall Using DIY Stenciling for Artistic Detailing
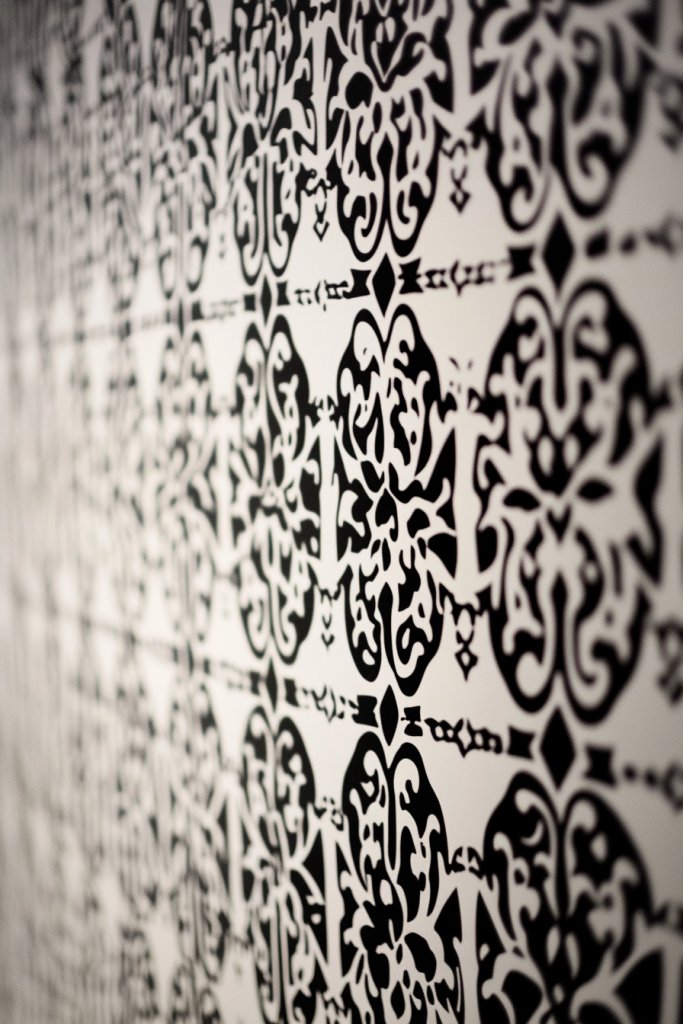
Craving a feature wall that’s full of personality but don’t want the commitment of wallpaper or murals? DIY stenciling offers a creative, customizable way to add intricate patterns and details. It’s a great project for beginners and artists alike, giving your wall a personal touch.
Picture delicate floral motifs, bold geometric shapes, or abstract designs repeated across your wall. The stencil’s crisp edges create a professional look, while the patterns add visual interest. Whether it’s a subtle background or a statement focal point, stenciling transforms plain walls into art.
Choose patterns that match your decor style—modern, vintage, boho, or eclectic. Mix and match different stencil designs for a layered effect. Use metallic, matte, or gloss paints to alter the mood. This technique adapts to any room size or style and can be as simple or elaborate as you like.
Secure your stencil with painter’s tape or spray adhesive to prevent slipping. Use a stencil brush or sponge, dabbing off excess paint to achieve sharp, clean edges. Apply paint in a stippling or blotting motion, building up layers as needed. Carefully lift the stencil before the paint dries to avoid smudges, then repeat across your wall.
Add metallic or contrasting highlights within the pattern for extra dimension. Incorporate personalized motifs or symbols that reflect your personality. Combine with textured paints or layered colors for depth. You can also add a border or framing to contain the pattern for a finished look.
Stenciling allows you to create detailed, artistic walls without advanced skills or expensive materials. It’s a fun way to develop your DIY confidence and craft a truly unique space. Your walls will look like they belong in an art gallery, and you’ll feel proud every time you see your handiwork. Ready to get stenciling?
10. Hanging Fabric Panel Wall for Cozy Texture
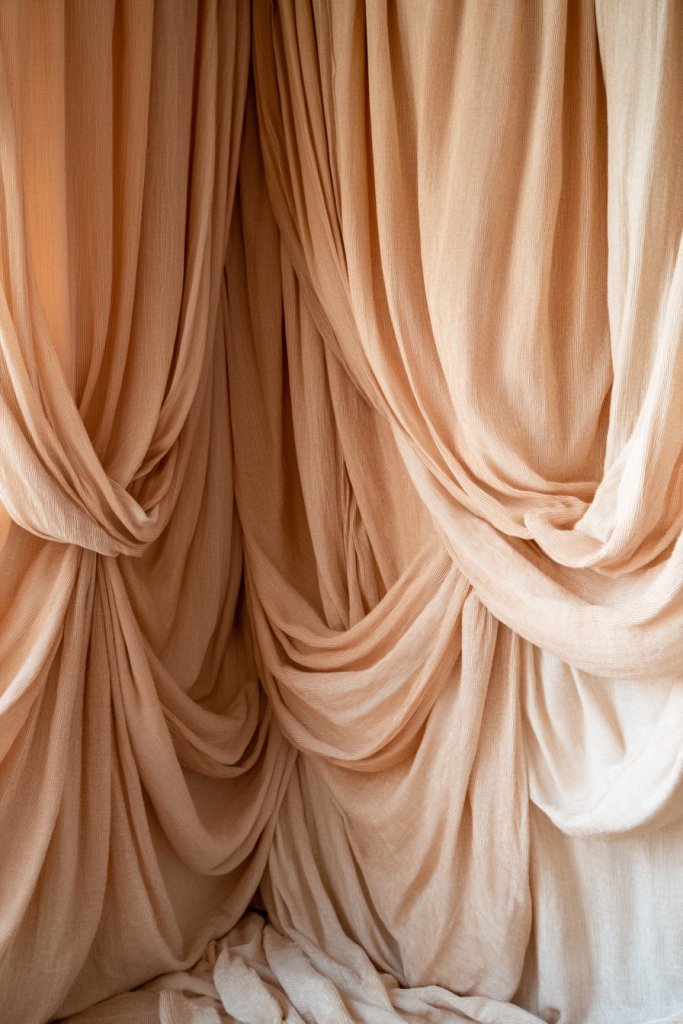
Want to add warmth and softness to your walls without heavy or permanent fixtures? Hanging fabric panels or tapestries create a cozy, inviting atmosphere instantly. It’s a versatile decor idea that’s easy to change and perfect for softening modern or minimalist spaces.
Imagine large, plush textiles draped or hung gracefully across your wall, their textures creating depth and visual interest. The fabric’s patterns, colors, and textures can complement or contrast your decor, adding layers of comfort. Soft folds and flowing materials bring a relaxed, bohemian vibe that invites touch and admiration.
Choose fabrics like linen, velvet, or embroidered textiles based on your style. Hang them using rods, clips, or directly pinning to the wall with removable hooks. Layer multiple panels for a textured, gallery-like appearance or keep it simple with a single large piece. Change out fabrics seasonally for fresh looks.
Select your fabric size and type, then mount a curtain rod or install hooks along the top edge. Secure the fabric with clips, ties, or sewing loops for easy removal. For a more polished look, add trim or decorative tassels. Wash and care for the textiles as needed to keep them looking fresh. Incorporate padding or lining if you want added volume.
Customize your fabric wall by incorporating different textures, patterns, or colors. Use tie-dye, embroidery, or painted designs to add a personal touch. Layer with fairy lights or string lights behind the fabric for a warm glow. Mix and match textiles to reflect your personality and style.
This DIY fabric wall is a simple way to add a tactile, warm element to any room. It’s inexpensive, removable, and endlessly customizable. Plus, it’s a great project for beginners, letting you craft a cozy space that’s uniquely yours. Ready to hang your new favorite feature?
11. DIY Metal Wall Art with Cut-Out Shapes for Industrial Charm
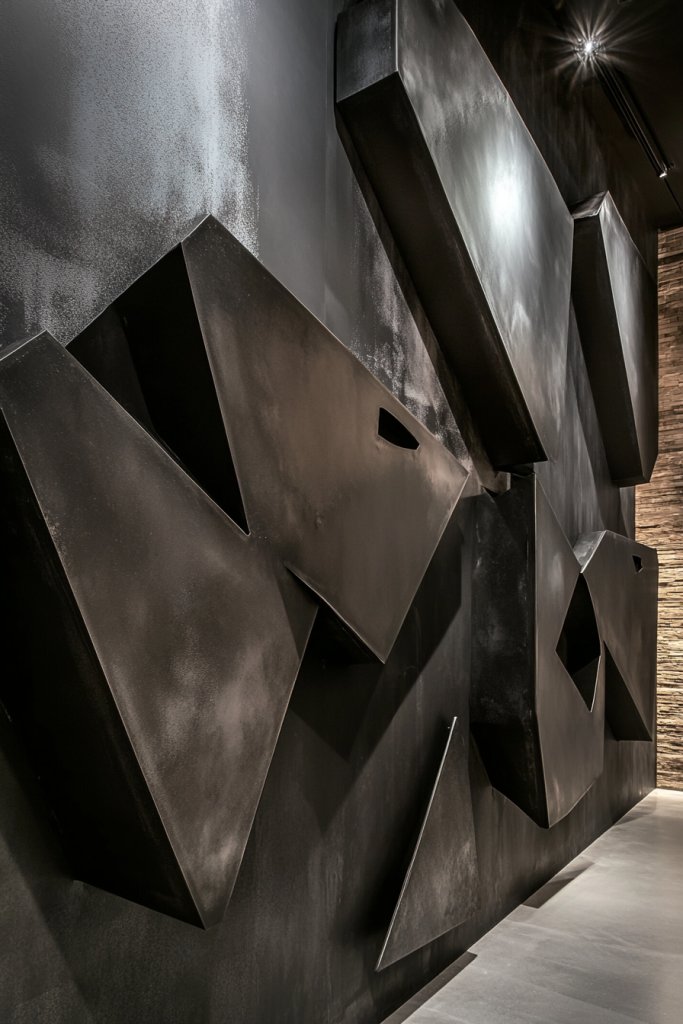
Wish your walls had that edgy, industrial vibe without spending a fortune? DIY metal wall art, especially with cut-out shapes, offers a bold and modern statement. It’s a creative project that turns scrap or inexpensive sheets into striking decor pieces. Perfect for adding a touch of industrial chic.
Visualize geometric or abstract shapes cut from sheets of metal, arranged in a layered or freeform layout. The raw, metallic surface reflects light and adds texture, creating a dynamic focal point. The cut-outs cast interesting shadows and patterns, making your wall come alive with movement and depth.
Use different metals—copper, brass, or aluminum—for varied finishes. Incorporate geometric patterns, cityscapes, or organic shapes based on your style. Combine multiple pieces for a gallery wall or keep it minimal with a single large piece. It suits modern, minimalist, or gritty industrial interiors.
Cut your shapes from thin sheet metal using tin snips, a jigsaw, or a rotary tool. Clean and smooth the edges with a file or sandpaper. Mount the pieces with heavy-duty adhesive or screws, ensuring they’re level and secure. Finish with a clear sealant or paint if desired. Arrange the art on your wall before fixing to ensure a balanced composition.
Add color or patina to the metal for a vintage or artistic look. Incorporate LED backlights or spotlights to highlight the shapes and textures. Layer with other industrial materials like wood or concrete for a mixed-media effect. Personalize your design with symbols or initials for a custom touch.
Creating metal art is a satisfying way to add industrial edge and sophistication. It’s an affordable DIY that looks professional and bold. Your space will feel modern and artistic, and you’ll gain confidence in working with unconventional materials. Time to craft your own metal masterpiece!
12. DIY Mosaic Tile Wall Using Colored Glass or Broken Ceramics
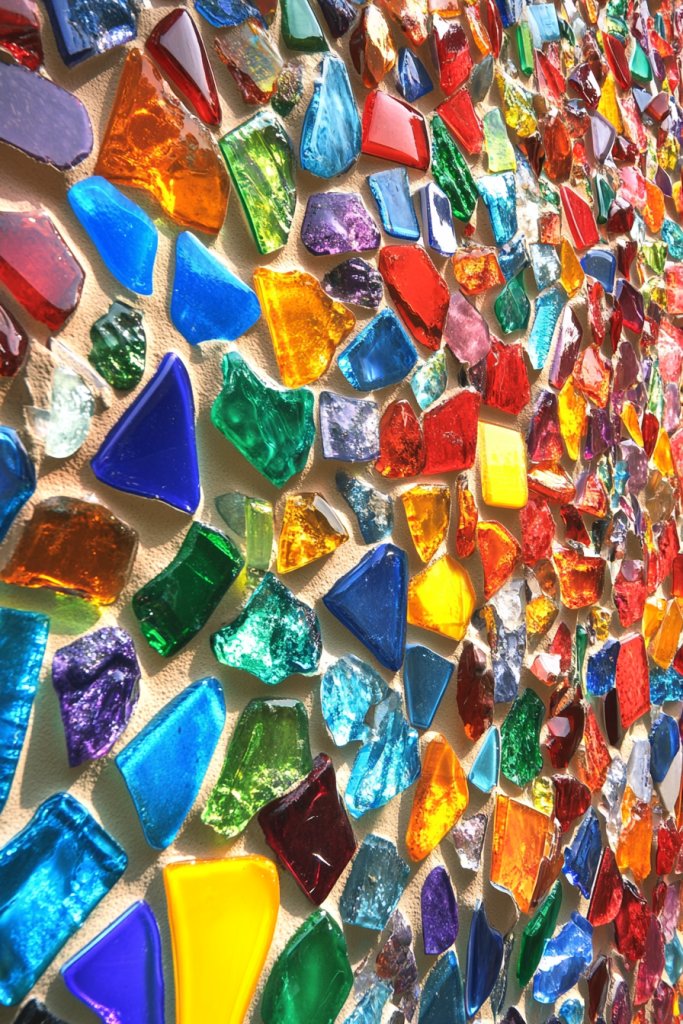
Craving a vibrant, artistic focal point but don’t want the hassle of professional tile work? A DIY mosaic wall offers a colorful, custom masterpiece that’s surprisingly simple to create. It’s a bold way to add personality and art to any space.
Visualize tiny glass pieces or broken ceramics arranged in intricate patterns or abstract designs. The glossy, colorful fragments catch the light and create a textured surface full of movement. The mosaic’s random beauty adds a lively, handcrafted charm, turning your wall into a piece of art.
Choose a color scheme that complements your decor—bright and eclectic or muted and sophisticated. Create a repeating pattern or a freeform design for artistic flair. Use different shapes and sizes for variety. It’s flexible enough for small accent walls or large statement panels.
Start by preparing your base— plywood or cement board works well. Arrange your glass or ceramic pieces in a design before gluing them down with thinset mortar or strong adhesive. Fill gaps with grout, wiping excess with a damp sponge. Seal the surface for durability. Take your time to ensure a neat, cohesive finish.
Add metallic or pearl accents within the mosaic for extra shine. Incorporate personal memorabilia or themed images by embedding small tiles or charms. Use different textures within the mosaic for a tactile experience. Frame the mosaic with a border for a polished look.
Creating a mosaic is a rewarding artistic process that elevates your decor instantly. It’s a creative project that’s accessible and customizable. Your wall will be a one-of-a-kind piece that sparks conversation and admiration. Time to get colorful!
13. Vertical Garden Wall with Faux or Real Greenery (Sans Houseplants)
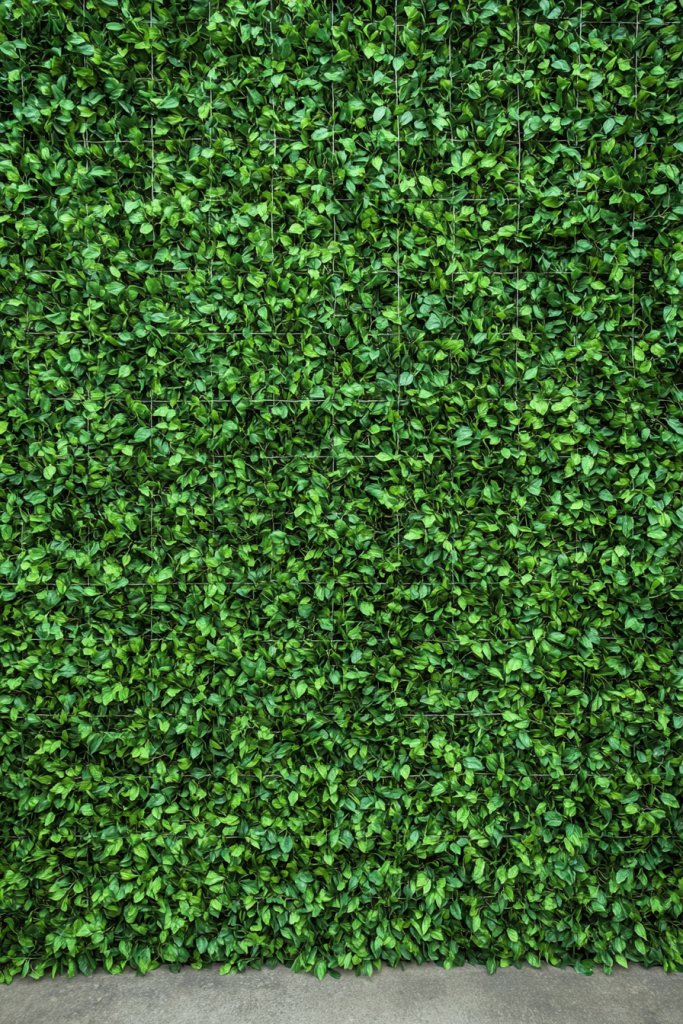
Want the lush look of a garden without the ongoing care of real plants? A faux green wall offers a vibrant, maintenance-free alternative that adds life and freshness. It’s perfect for those who love the aesthetic but dislike watering or pruning.
Imagine a wall covered in dense, leafy foliage, mimicking a garden in full bloom. The textured greenery creates a calming, natural atmosphere, even in the middle of an urban apartment. The variety of leaf shapes and shades adds depth, making the space feel alive and inviting.
Choose between lush faux foliage, moss panels, or decorative panels with embedded greenery. Arrange in large sheets or smaller patches for a curated look. Incorporate decorative elements like sculptural planters or geometric frames to add structure. It’s adaptable for small accent walls or larger feature sections.
Install wall mounts or frames to hold your faux greenery panels securely. For larger setups, use strong adhesives or hooks to ensure stability. Place the panels close together for a seamless look or stagger for a more natural effect. Clean occasionally to maintain freshness, especially in high-traffic areas.
Add decorative elements like fairy lights, decorative stones, or faux flowers to enhance realism. Incorporate textured materials like bark or woven elements for variety. Change the arrangement seasonally or for special occasions to keep the look fresh. Personalize with custom shapes or embedded accessories.
A faux greenery wall offers a lush, inviting backdrop with virtually no upkeep. It’s an easy way to bring nature-inspired decor into any room. Plus, it’s DIY-friendly and customizable to your space and style. Your walls will feel fresh and vibrant, inspiring a natural vibe wherever you place it.
14. Textured Wall Using DIY Plaster or Joint Compound Techniques
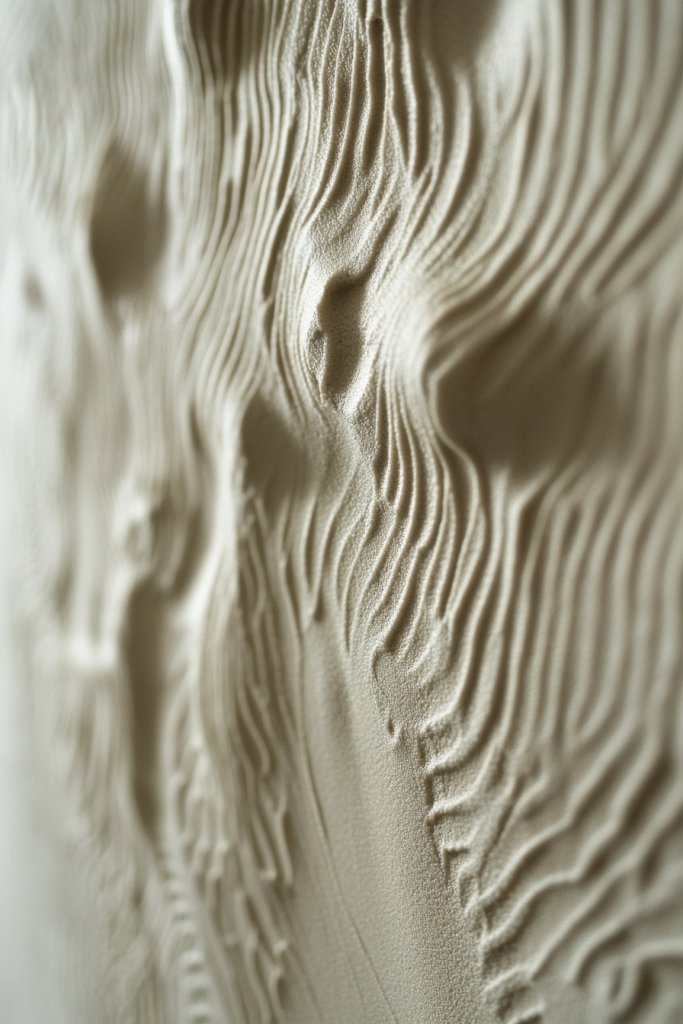
Looking to add a tactile, sculptural element to your walls that’s totally customizable? DIY plaster or joint compound techniques offer a way to create textured, artistic surfaces that turn plain walls into conversation starters. It’s perfect for adding depth and personality.
Picture a wall with swirling, layered textures, or raised patterns that catch the light in interesting ways. The surface feels organic and dynamic, inviting touch and exploration. You can create a variety of effects, from subtle ripples to bold, sculptural designs, all with simple tools.
Use different tools—combs, sponges, trowels, or brushes—to create various textures. Incorporate embedded objects like beads or shells for added interest. Choose neutral tones or bold colors to enhance the textures. It suits both modern and rustic decor styles and works well as a feature wall.
Apply a base coat of primer or paint. Mix joint compound or plaster with water to the desired consistency. Use spatulas or trowels to spread and sculpt the surface, creating patterns or waves. Once dry, sand lightly for a smooth finish or leave raw for a rougher look. Seal with a clear protective coat if needed.
Highlight textures with contrasting paint or metallic finishes. Incorporate layered colors or faux aging for a vintage effect. Use stencils or masks to add subtle patterns over the textured surface. Personalize with embedded elements that reflect your style.
Creating textured walls with plaster or joint compound is a fun, creative project that adds major impact. It’s a way to showcase your artistic side without major renovations. Your wall becomes a piece of sculptural art, boosting your DIY confidence and style. Ready to sculpt your space?
15. Painted Murals or Large-Scale Artwork with DIY Techniques
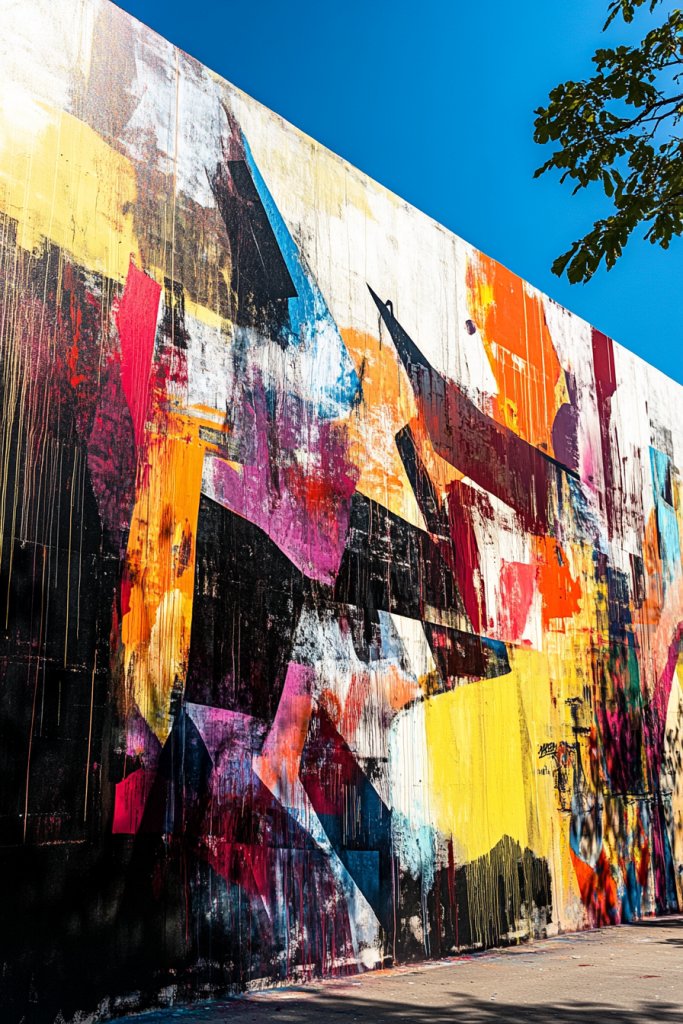
Want a truly unique statement piece that reflects your personality? Painting a mural or large-scale artwork on your wall turns a blank canvas into a personal masterpiece. It’s a rewarding project that transforms your space and boosts your artistic confidence.
Imagine a sweeping landscape, abstract design, or whimsical scene stretching across your wall. The bold colors and large scale create a dramatic focal point that draws the eye. The mural’s style can be anything from minimalist line art to detailed scenes, making your space unmistakably yours.
Use stencils, projectors, or freehand techniques depending on your skill level. Choose colors and themes that match your decor or mood. Large murals work well in bedrooms, living rooms, or even entryways. Adapt the scale and subject matter to suit your space and personality.
Prep your wall by cleaning and priming it. Sketch your design lightly with pencil or use a projector for accuracy. Use acrylic or chalk-based paints for easy blending and quick drying. Layer colors and details gradually, allowing each layer to dry thoroughly. Finish with a protective clear coat for longevity.
Add personal touches by incorporating favorite quotes, symbols, or themes. Use textured paints or metallic accents to add depth. You can also integrate mixed media, like fabric or paper, into your mural for further interest. Change or update the artwork seasonally to keep it fresh.
Creating your own mural is a bold, satisfying way to showcase your personality. It elevates your decor and makes your home truly one-of-a-kind. Plus, it’s a fantastic way to develop your artistic skills and confidence. Time to unleash your inner artist!
16. Minimalist Monochrome Wall with Subtle Textural Variations
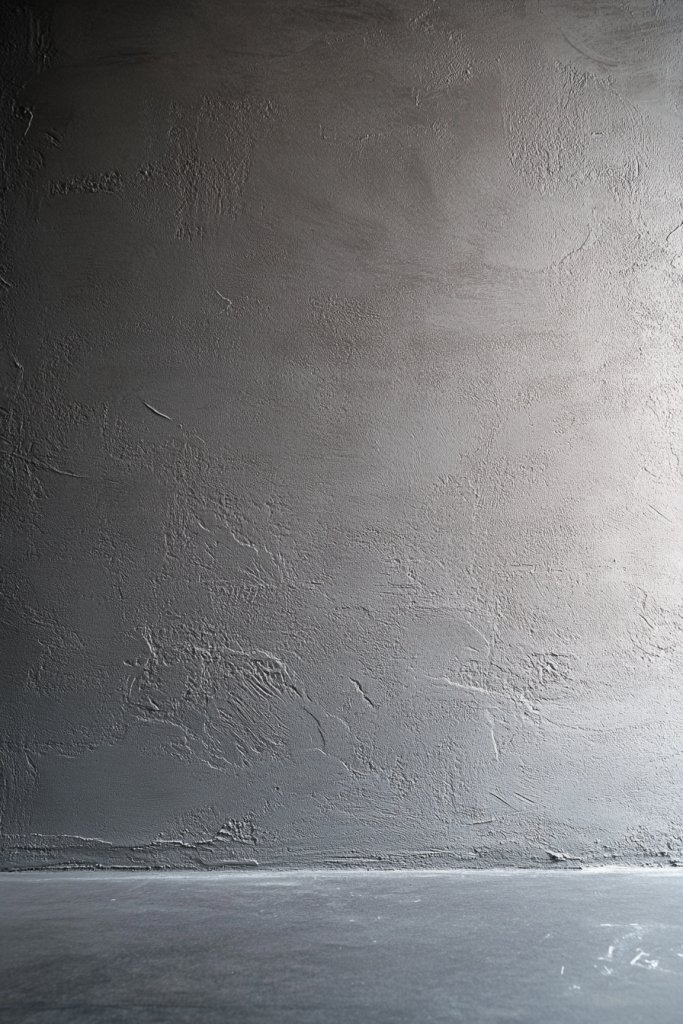
Craving a sophisticated, understated wall that adds depth without clutter? A monochrome palette with subtle textures offers a chic, modern look that’s versatile and timeless. It’s perfect for creating a calm, elegant environment that doesn’t overwhelm.
Visualize a wall painted in a single color, but with variations in finish—matte, gloss, or textured. These subtle differences catch light differently, adding visual interest without breaking the minimalist aesthetic. The textured surfaces invite touch and create a layered, refined backdrop.
Stick to shades within the same color family for a harmonious look, or play with slightly contrasting neutrals for depth. Use different application techniques—stippled, brushed, or sponged—to create varied textures. It suits any room, from sleek bedrooms to contemporary living spaces.
Paint the wall with a high-quality primer and base color. Use sponges, brushes, or rollers to apply different finishes, creating a textured effect. For added depth, incorporate subtle patterns or embossing techniques with stencils or tools. Finish with a matte or satin topcoat for durability.
Add personalized details with metallic accents or subtle patterns that blend into the monotone palette. Use textured wall coverings or panels for more tactile interest. Incorporate lighting such as wall sconces or directional spotlights to highlight the different surfaces. It’s all about refined simplicity.
A monochrome textured wall is a statement of elegance and restraint. It’s an easy, stylish project that elevates your decor with minimal effort. Your space will feel calm yet sophisticated, and you’ll love the effortless chic it adds. Ready to embrace understated style?
Conclusion
With a wide array of DIY accent wall ideas at your fingertips, you’re empowered to transform your home into a reflection of your creativity and style. Whether you opt for playful patterns, chic textures, or eye-catching colors, these projects are perfect for adding personality and charm. Dive in, get inspired, and start creating a beautiful, personalized space that everyone will admire—your home transformation begins now!