Ever feel overwhelmed by the mountain of toys cluttering your child’s play area? Minimizing and organizing kids’ toys has become a popular trend because it not only declutters your space but also encourages better play habits and independence for children.
In this article, you’ll discover a variety of creative and practical ideas to transform chaotic toy zones into playful, organized havens. From clever storage solutions to space-saving tips, these ideas will help you create a fun, functional environment that both kids and parents will love.
1. Use Clear Stackable Storage Bins for Easy Toy Sorting
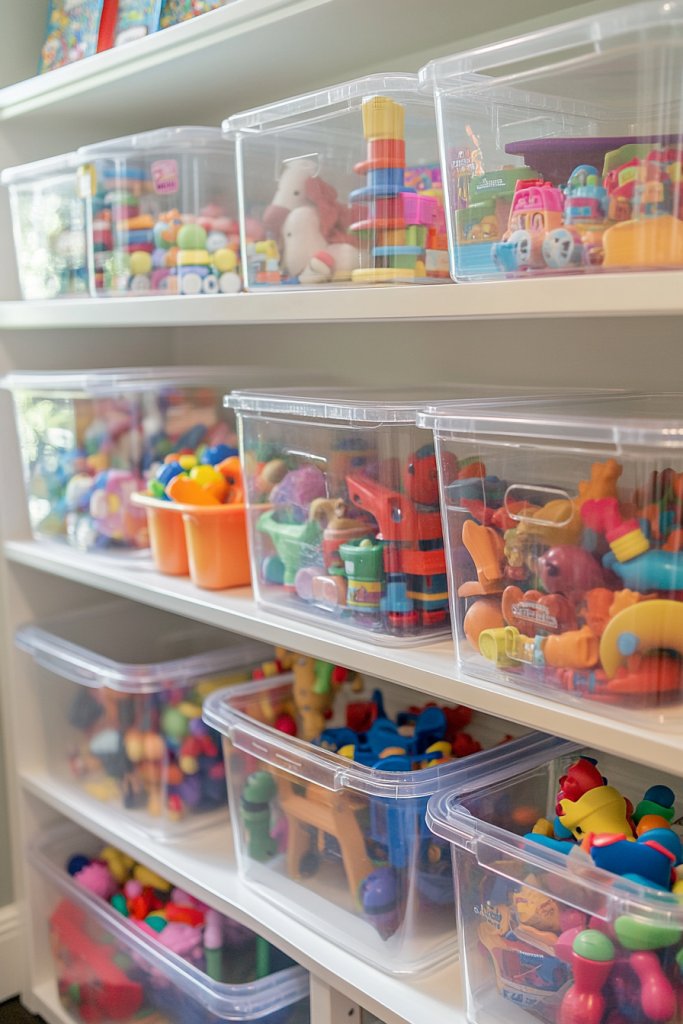
Ever feel overwhelmed trying to find a specific toy among a mountain of clutter? Kids’ toys tend to multiply overnight, turning your living space into a chaotic playground. The dream? Easily accessible, neatly sorted toys without the stress of digging through piles. Who doesn’t want a clutter-free zone that still feels fun?
Imagine transparent plastic bins stacked like a colorful tower, each labeled with playful fonts. Bright hues like turquoise, sunny yellow, or bubblegum pink make it visually appealing. Inside, toys are sorted by type—soft plush animals in one, building blocks in another—making everything instantly recognizable. The labels and clear sides turn toy sorting into a game of visual discovery.
You can choose bins that match your decor—minimalist neutrals for sleek spaces or vibrant patterns for a playful vibe. For small rooms, vertical stacking maximizes space, while in larger areas, mixing open bins with storage baskets adds variety. Seasonal color schemes or themed bins for holidays keep things fresh and engaging. Think about integrating decorative labels or chalkboard tags for easy updates.
Start by assessing your toy collection and grouping similar items. Purchase clear, stackable bins with lids—preferably with handles for easy carrying. Allocate a dedicated storage area, like a closet or corner, to keep everything accessible. Label each bin clearly with a permanent marker or printable labels. Encourage your kids to sort toys into the correct bins during cleanup, making it a fun routine. Regularly review and declutter to keep things manageable.
Add personalized labels with your child’s name or favorite characters to motivate cleanup. Incorporate decorative elements like washi tape borders or themed stickers. Use color-coding to help kids identify categories faster—think red for action figures, blue for puzzles. You might even design a reward system for keeping bins tidy, turning organization into a game.
This simple system transforms chaos into order, making cleanup less of a chore and more of a fun activity. Kids learn valuable sorting skills while enjoying a visually pleasing space. Plus, it’s easy to expand as their collections grow. Who knew that something as straightforward as clear bins could bring such peace of mind?
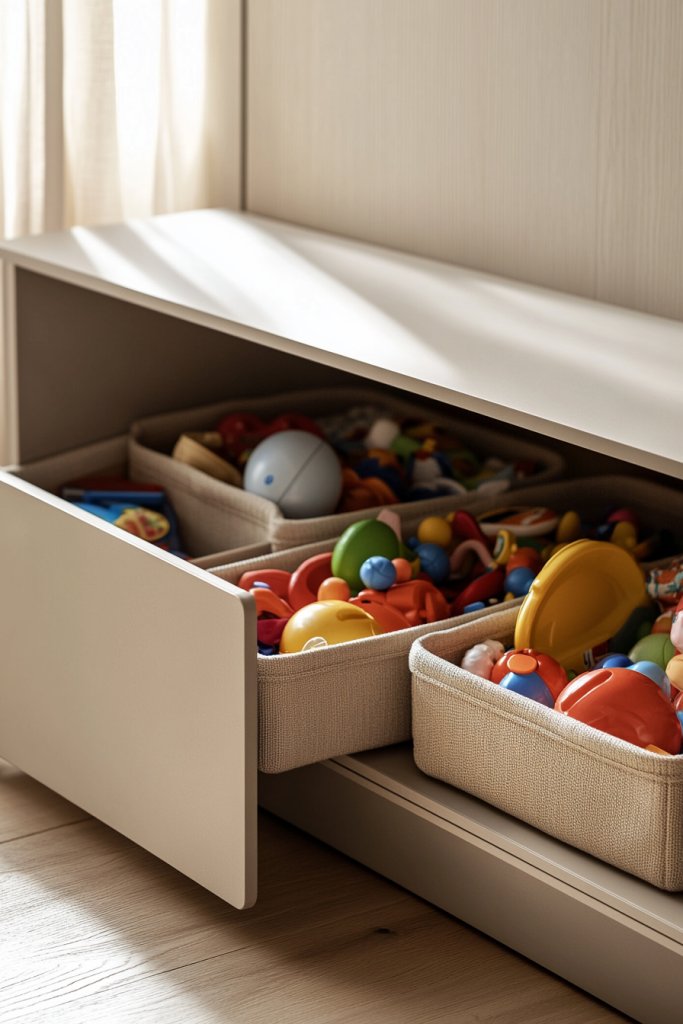
2. Incorporate Under-Bed Storage Drawers for Hidden Toy Solutions
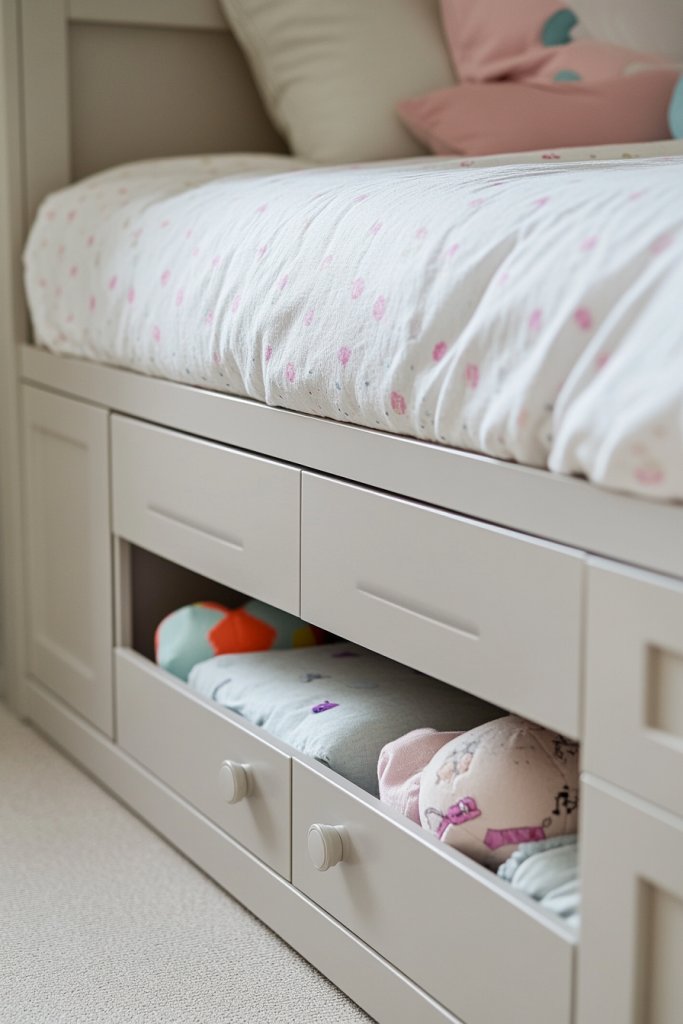
Tired of toys taking over every inch of your home? The solution lies beneath the bed, where space often goes unused. Hidden storage drawers turn your child’s room into a clutter-free haven without sacrificing style. Plus, it keeps toys out of sight but still within reach for those quick cleanup sessions.
Picture sleek, low-profile drawers tucked neatly under a bed frame, matching the room’s decor. They slide smoothly, revealing a treasure trove of hidden toys—stuffed animals, action figures, or art supplies. Soft, textured fabrics or smooth painted surfaces seamlessly blend with the flooring or bed frame. When closed, they’re virtually invisible, maintaining a clean aesthetic.
Choose drawers that complement your child’s room style—wood finishes for cozy warmth or sleek plastics for modern minimalism. For smaller bedrooms, opt for narrow drawers that maximize vertical space. Seasonal adaptations include adding labeled bins for holiday-themed toys or special collections. You can even install foldable or pull-out trays for easy access.
Measure the space beneath the bed to select appropriately sized drawers. Invest in sturdy, smoothly gliding drawers with handles or push-to-open features for convenience. Organize toys inside with smaller containers or dividers to prevent shifting. Ensure the drawers are easy for kids to open and close—safety and accessibility matter. Regularly review contents to prevent clutter buildup.
Label drawers with fun stickers or paint names on the front for independent cleanup. Customize with decorative touches like colorful knobs or themed handles to match room decor. Use fabric liners inside drawers for a softer look and easier cleanup. Incorporate a routine where kids help rearrange or tidy the drawers, fostering responsibility.
Utilizing under-bed storage turns unused space into a functional, hidden toy trove. It reduces visible clutter, making rooms look tidier instantly. Kids gain a sense of ownership over their organized space and learn to manage their belongings. It’s a smart, stylish way to keep play areas neat and inviting.
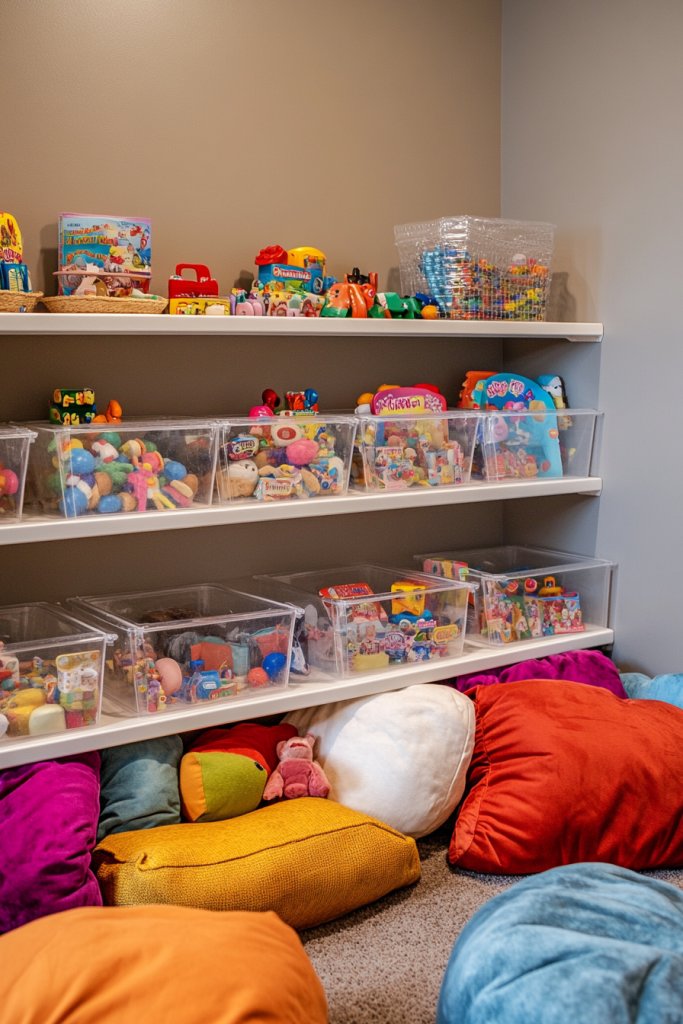
3. Install Wall-Mounted Shelves for Display and Easy Access
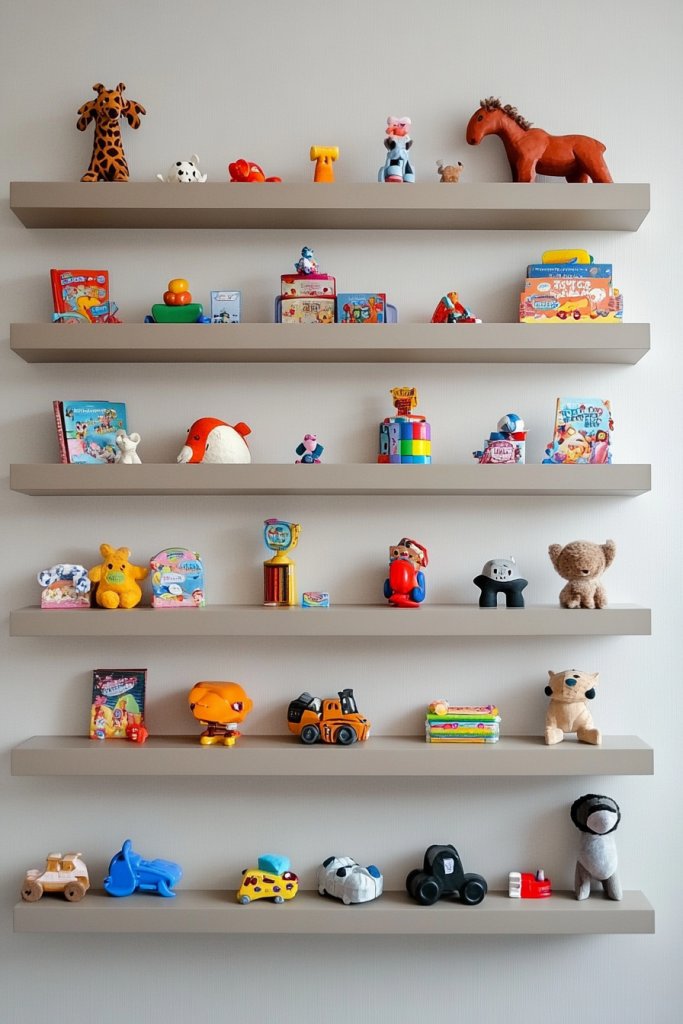
Ever feel like your child’s toys are sprawled everywhere, turning the room into chaos? Wall-mounted shelves offer a stylish solution, turning clutter into curated displays. They keep favorite toys within easy reach while maintaining a tidy look. Plus, they add a decorative touch that reflects your child’s personality.
Imagine floating shelves painted in cheerful pastel shades or bold primary colors, mounted at different heights. Toys like action figures, small cars, or collectibles are displayed neatly, creating a mini gallery. Soft plush toys can be stored in woven baskets on the shelves, giving the space a cozy, curated vibe. The shelves themselves become part of the decor, adding dimension and interest.
Mix open shelves with closed cabinets for a balanced look—display your kid’s favorites, hide the rest. Use adjustable or modular shelving units to grow with your child’s collection. For smaller rooms, install shelves higher up to keep the floor clear. Seasonal or themed displays can be swapped out easily, keeping the space fresh and engaging.
Select sturdy floating or wall-mounted shelves with secure mounting hardware suited for your wall type. Arrange brackets or supports at varying heights for visual interest. Use decorative baskets or small containers on the shelves to organize tiny toys or accessories. Encourage your kids to choose what to display, fostering a sense of pride. Regularly rotate items to keep the display exciting.
Paint or decorate the shelves with your child’s favorite colors or themes. Add labels or small signs to identify different toy categories. Incorporate soft textiles, like fabric or faux fur, on the shelves for texture. Let your kids help arrange their display, turning it into a fun decorating activity.
Wall-mounted shelves turn a clutter problem into a creative showcase, making tidying up a proud moment. They teach kids to organize and appreciate their possessions. Plus, they make the room feel more personalized and lively. It’s a simple upgrade with a big impact!
4. Create a Rotating Toy Chest System to Minimize Clutter
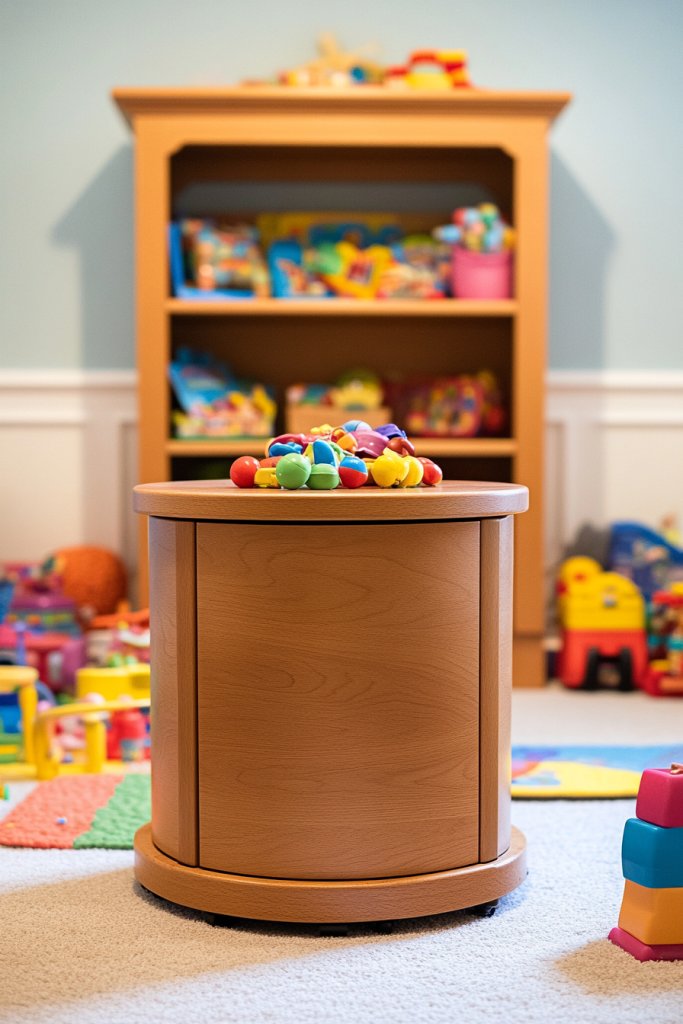
Are your kids overwhelmed by a mountain of toys they can’t even see? A rotating toy chest system keeps things fresh and manageable. It limits the number of toys available at once, reducing overstimulation and clutter. Plus, it makes cleanup feel less like a chore and more like a game.
Imagine a spacious, sturdy toy chest with removable trays or compartments. Every few weeks, you swap out a handful of toys for new ones stored away, creating a sense of novelty. The chest itself can be painted in bright, cheerful colors or adorned with stickers for personalization. When opened, it reveals a neatly organized collection that feels exciting to explore.
Opt for modular chests with removable sections that suit your child’s interests—blocks one month, dolls the next. Store off-season or less-used toys in labeled bins elsewhere to rotate regularly. For smaller spaces, choose compact chests with multiple compartments. Seasonal themes or color schemes can make the system more engaging.
Choose a durable, child-safe toy chest with smooth edges and a secure lid. Inside, organize toys into smaller bins or trays to facilitate rotation. Establish a routine—every few weeks, swap out toys to keep things fresh. Involve your children in selecting which toys to rotate, making it a fun activity. Label storage bins to streamline the process and prevent clutter from sneaking back.
Personalize the chest with your child’s name or favorite characters. Add decorative touches like colorful knobs or themed stickers. Incorporate a reward system for keeping the collection organized or for helping with rotations. Use fabric liners inside the bins to protect toys and make cleaning easier.
Rotating toys prevents overwhelm and keeps playtime exciting. Kids learn to value and care for their toys, fostering responsibility. This system also teaches patience and organization skills. Who knew that a simple rotation could make cleanup more fun and less stressful?
5. Use Multi-Purpose Furniture with Built-In Storage
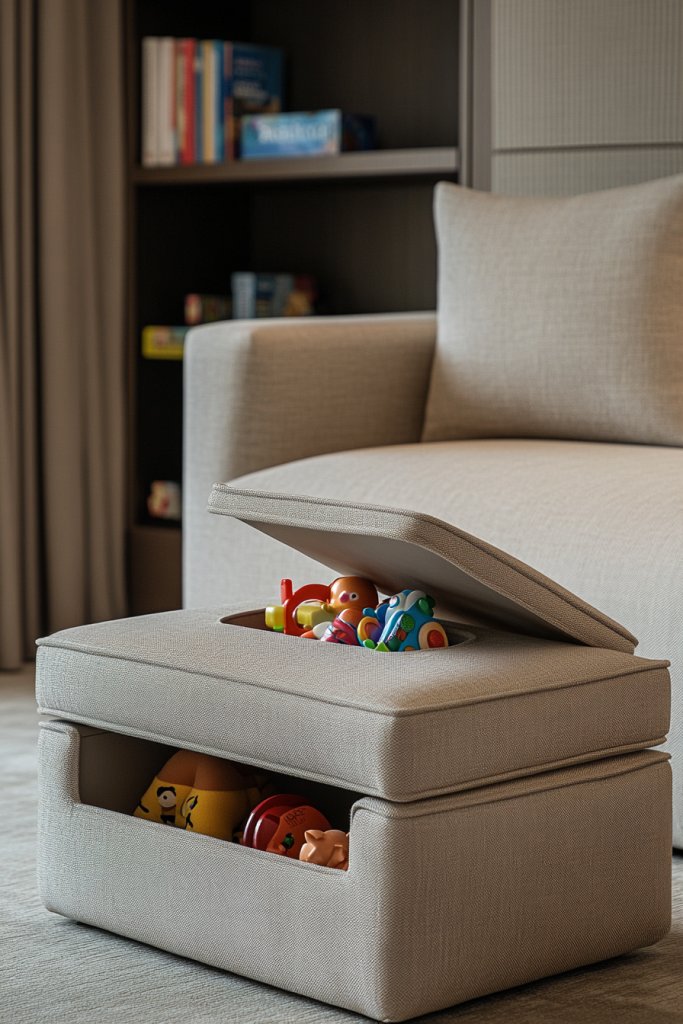
Living in a small space with kids means every inch counts. Multi-purpose furniture with built-in storage is a clever way to combine function and style. It reduces clutter while providing cozy, versatile spots for play and relaxation. Who doesn’t want furniture that does double duty?
Picture a plush ottoman that opens to reveal hidden compartments filled with toys or blankets. Or a bed frame with drawers underneath, neatly hiding away clutter while still looking sleek. The furniture’s soft textiles or smooth finishes add a warm touch, making it inviting for kids and adults alike. These pieces blend into your decor seamlessly, turning storage into a design feature.
Choose furniture that matches your overall aesthetic—minimalist, rustic, or playful. For small rooms, select space-efficient pieces like fold-out beds with drawers. Seasonal decor can be added through colorful cushions or slipcovers, changing the look without major overhaul. Adjustable or modular furniture options grow with your child’s needs.
Identify your storage needs and pick versatile pieces like beds, benches, or coffee tables with built-in compartments. Measure your space carefully and select items that fit well without crowding the room. Organize toys or supplies inside with small baskets or dividers. Make sure the furniture is sturdy and easily accessible for kids to use independently. Regularly review contents to avoid clutter buildup.
Add personal touches such as custom cushion covers, or paint details that match your child’s favorite colors. Incorporate decorative hardware like fun handles or knobs. Use labels or small signs to identify storage areas. Encourage your kids to help decorate or rearrange, making the furniture truly their own.
Multi-purpose furniture turns cluttered spaces into organized retreats. It teaches kids to value tidy spaces and take responsibility for their belongings. Plus, it’s a smart investment that pays off in long-term functionality. Who knew clever furniture could make such a difference?
6. Implement Toy Bouchés or Cubbies with Color-Coded Baskets
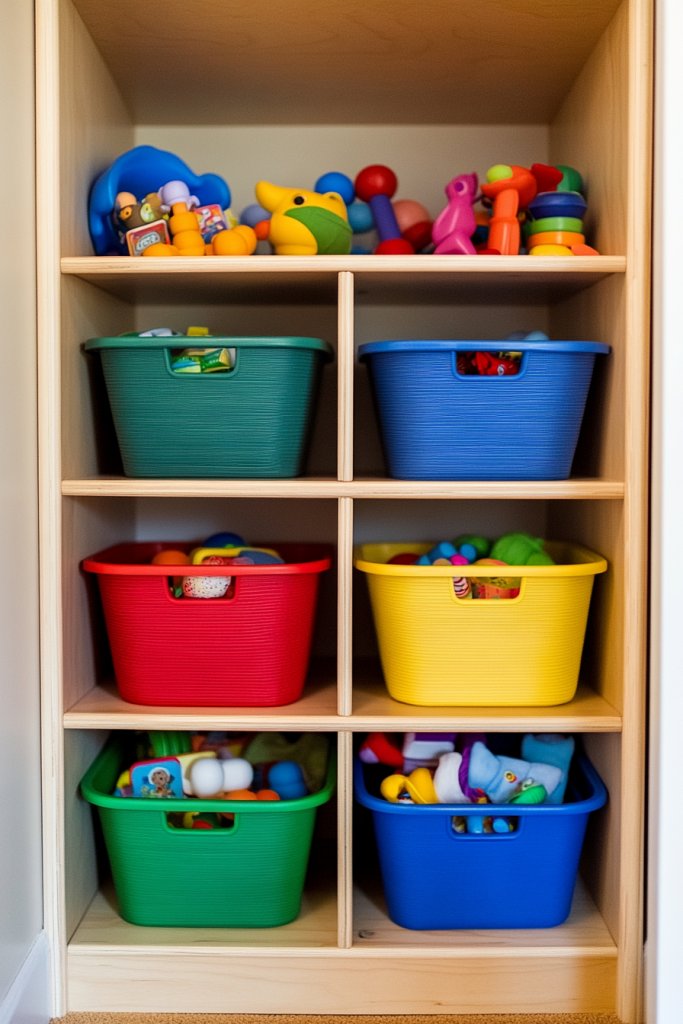
Messy toy piles make cleanup stressful and time-consuming. Toy bouchés or cubbies with color-coded baskets simplify sorting and encourage kids to tidy up independently. It’s an organized system that turns chaos into clarity, making playtime more enjoyable for everyone.
Imagine open wooden or plastic cubbies mounted at kid-friendly heights, each filled with baskets in different colors—red, yellow, blue, green. Toys are grouped by type—art supplies, small figurines, cars—each category assigned a specific color. When it’s time to clean up, kids simply find the matching basket, making the process quick and satisfying. The vibrant organization transforms the room into a cheerful, functional space.
Choose cubbies with adjustable shelves or modular units to grow with your child. Incorporate baskets with fun patterns or labels for easier identification. For small spaces, stackable units maximize vertical storage. Use seasonal or themed baskets to keep things fresh and engaging. The key is to make cleanup intuitive and visually appealing.
Select sturdy cubbies or open shelving units that are mounted securely at a kid’s height. Use durable, lightweight baskets that are easy for small hands to handle. Label each basket with words or icons to help kids identify contents without frustration. Encourage kids to return toys to their designated baskets after play. Regularly review and rotate contents to prevent clutter.
Personalize baskets with your child’s name or favorite characters. Mix and match basket patterns or add decorative trim for extra flair. Use clear labels or icons to improve independence in cleanup. Incorporate small decorative elements like stickers or fabric ties to make the system more inviting.
Color-coded cubbies foster independence and responsibility in kids. They learn to categorize and tidy up with minimal guidance. It creates a playful, organized environment that makes everyone happier. Who knew sorting could be so colorful and fun?
7. Design a Low, Accessible Toy Wall with Baskets or Hooks
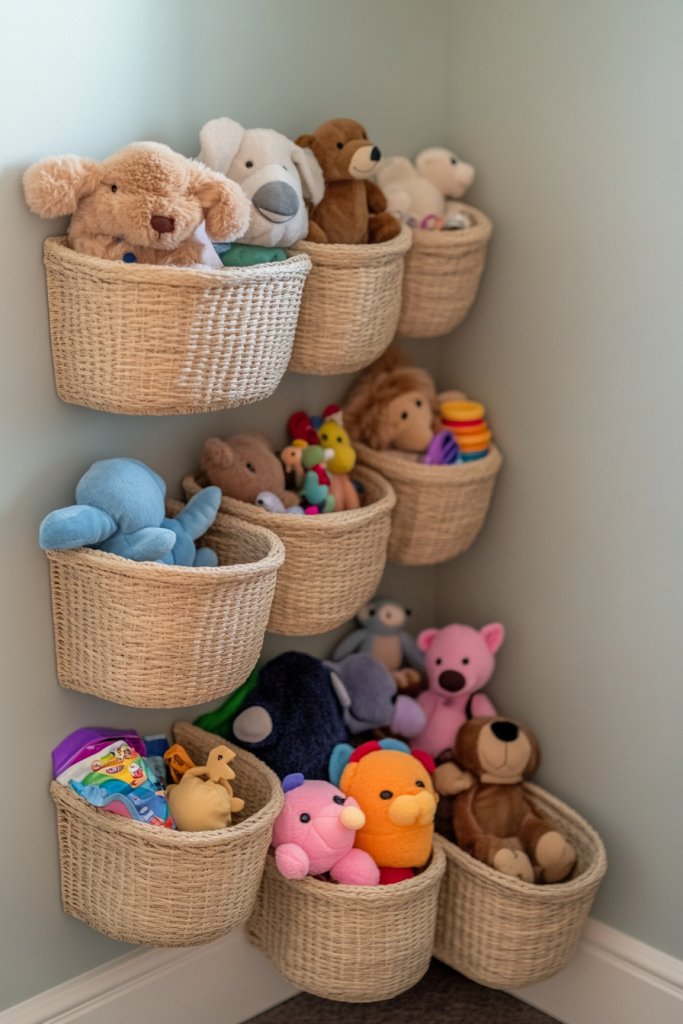
Toys scattered across the floor turn playtime into chaos and cleanup into a chore. A low, accessible toy wall with baskets or hooks keeps favorite items within reach and encourages kids to tidy up on their own. It’s a fun, functional way to maintain order without sacrificing playfulness.
Visualize a wall painted in bright, cheerful colors or soft pastels, with sturdy hooks and baskets mounted at kid height. Plush toys hang from hooks, while baskets hold smaller items like cars or figurines. The wall becomes a playful display, turning clutter into a curated mini-gallery. The variety of textures and colors makes the space inviting and stimulating.
Use open baskets for easy access or fabric bins with fun patterns for added personality. Incorporate hooks for hanging items like plush toys or costume accessories, making cleanup quick. For small rooms, mount the wall higher or use multi-tiered setups. Seasonal or themed accessories can refresh the display, keeping it engaging.
Choose a sturdy wall and install hooks and baskets securely—preferably with anchors for drywall. Arrange the hooks at a height your child can reach comfortably. Use labeled or color-coded baskets to categorize toys, making it intuitive for kids. Teach them to hang or place toys after play, establishing a routine. Regularly rotate items to keep the wall fresh and interesting.
Decorate the wall with your child’s favorite themes or colors. Add decorative hooks shaped like animals or stars for extra fun. Personalize baskets with labels or stickers for easy identification. Let your child help arrange the wall, fostering ownership and pride in their organized space.
A toy wall at kid height makes cleanup accessible and fun, empowering children to be responsible. It turns clutter into a decorative feature that adds personality to the room. Kids develop sorting and organizational skills naturally, setting the stage for lifelong habits. It’s a simple idea with a big impact!
8. Create a DIY Toy Sorting Station with Labels and Compartments
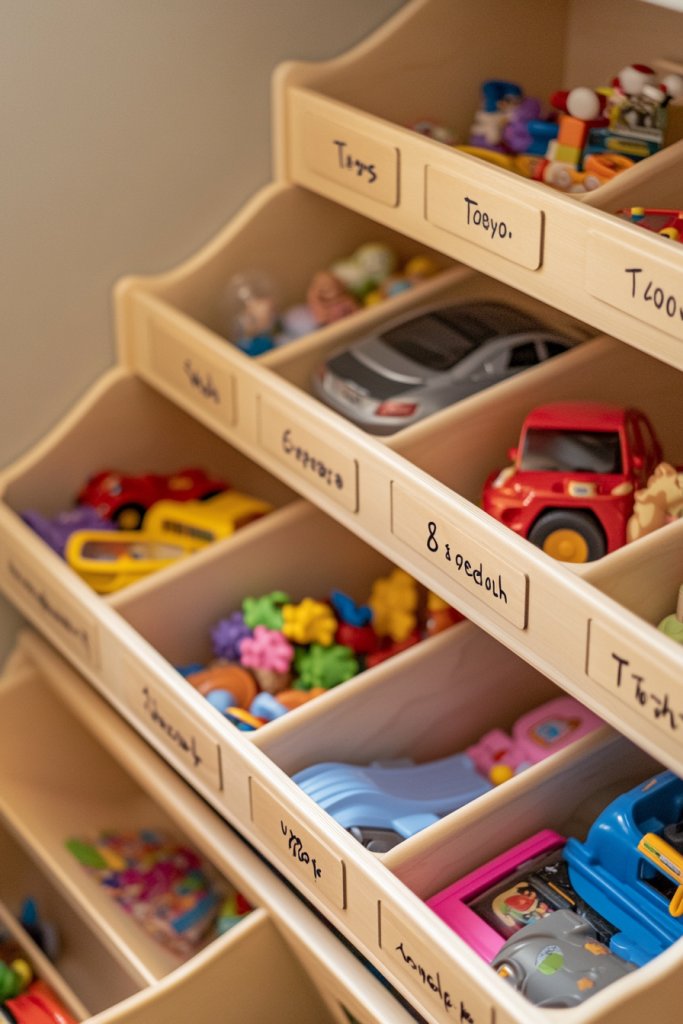
Messy toy messes often lead to frustration and wasted time during cleanup. A dedicated DIY toy sorting station with labeled compartments transforms chaos into order. It encourages kids to develop independence and responsibility in managing their belongings. Plus, it makes tidying up a quick, satisfying task.
Picture a compact table or shelf with multiple compartments, each labeled with words or icons—Puzzles, Action Figures, Art Supplies, etc. Clear containers or baskets hold the toys, making it easy to see everything. Brightly colored labels or chalkboard tags add a playful touch, turning organization into a learning experience. When kids see everything neatly arranged, cleanup feels less like a chore and more like a game.
Use adjustable or stackable storage containers for flexibility. Incorporate different label styles, from handwriting to printed stickers, based on your child’s age. For small rooms, create a portable station with wheels or a foldable design. Seasonal or thematic labels can add variety and keep the system engaging. The goal is to make it simple and adaptable.
Start with a sturdy table or wall shelf that fits your space. Organize toys into smaller containers with labels indicating their category. Use a permanent marker or printable labels for clarity. Teach your kids to return toys to their designated compartments after play. Regularly review and update labels as their collection evolves. Keep the system within easy reach for independent use.
Let your child decorate the labels with stickers or drawings to foster ownership. Use colorful or themed containers that match their interests. Incorporate a reward or sticker chart to motivate ongoing tidiness. Make it a fun activity for kids to help set up or reorganize the station periodically.
A personalized sorting station makes cleanup quick and rewarding. Kids learn categorization and responsibility early on, setting habits that last. It reduces frustration and encourages pride in their organized space. Who knew that a simple station could transform your chaos into calm?
9. Utilize Over-the-Door Organizers for Small Toy Accessories
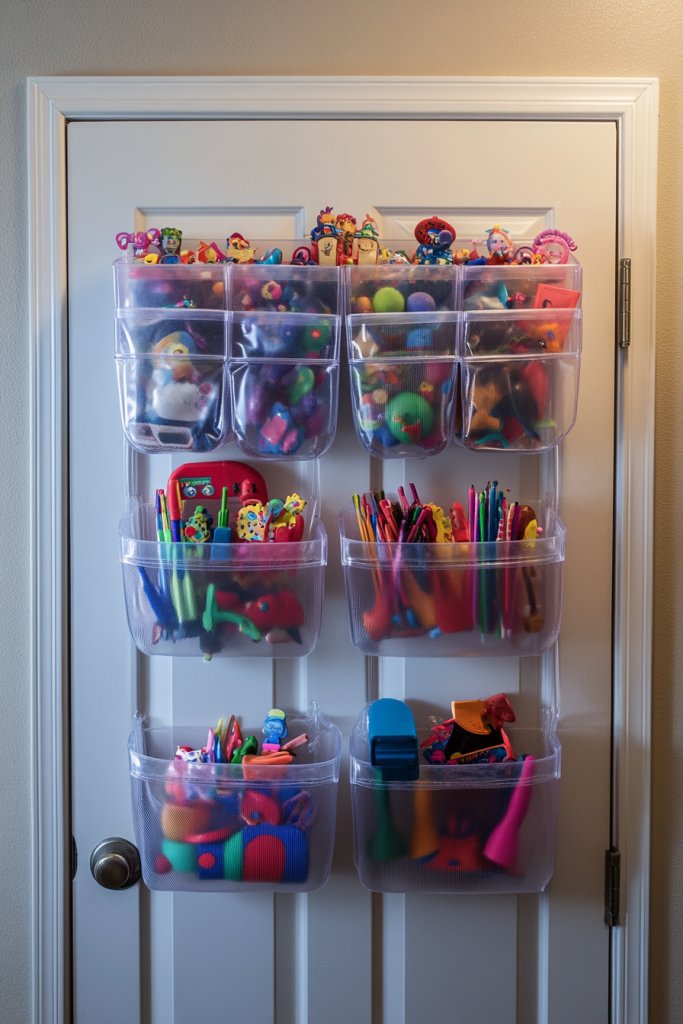
Small toy accessories and art supplies often get lost in the clutter, making cleanup a nightmare. Over-the-door organizers with clear pockets provide an easy solution, turning a forgotten space into an organized storage zone. It’s a space-saving hack that keeps tiny items visible and accessible.
Envision a transparent pocket organizer hanging on the back of a door, filled with small toys, jewelry, or craft supplies. Each pocket holds a specific category—tiny figurines, hair accessories, stickers—making everything easy to find. The clear pockets make it easy for kids to see and grab what they need, while keeping clutter off surfaces. It’s a simple, effective way to declutter.
Choose multi-pocket organizers with different-sized pockets to accommodate various items. For added fun, select designs with colorful patterns or themed prints. Use it in bedrooms, playrooms, or even closets for versatile storage. For larger collections, hang multiple organizers or combine with small bins on shelves.
Pick a sturdy over-the-door organizer designed for heavy use. Hang it at a height your child can easily access. Sort toys or accessories into individual pockets, and label them if needed. Teach your kids to put items back after play, encouraging independence. Regularly review the contents to remove unused or broken items. Keep the system simple and durable.
Decorate the organizer with stickers or fabric paint to match your child’s personality. Add labels with fun icons or words for easier identification. Encourage your kids to customize their own organizer, making cleanup a fun routine. Incorporate a reward system for keeping everything tidy.
Over-the-door organizers turn tiny clutter into a manageable, visible system. Kids learn to sort and manage their belongings independently. It keeps small toys organized and accessible, reducing frustration. A simple, clever hack that makes a big difference!
10. Incorporate Modular Storage Units that Grow with Your Child
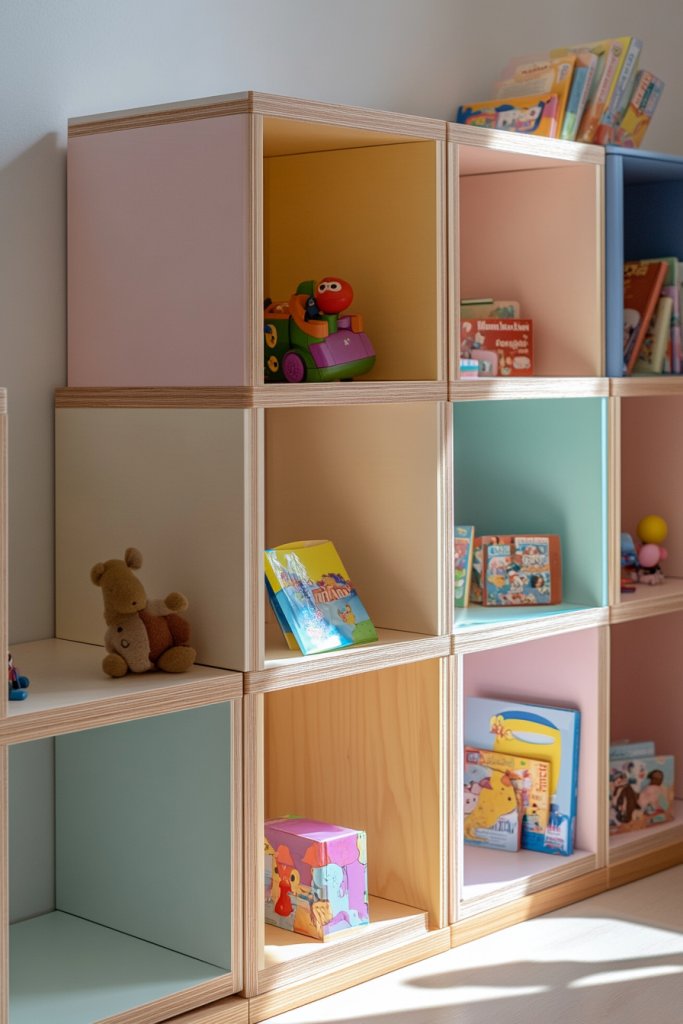
Kids’ collections grow faster than you can keep up, making static storage solutions quickly outdated. Modular storage units offer flexibility, allowing you to customize and expand as needed. They help maintain order without constant replacement, making organization a long-term investment. Who wants to keep buying new furniture every year?
Imagine a set of sleek, stackable cubes or shelves that can be configured in various ways—vertical towers, L-shapes, or extended rows. These units come in neutral or bright colors, fitting any room decor. As your child’s collection expands, add more modules or reconfigure existing ones. The result is a dynamic, adaptable storage system that evolves with your kid’s needs.
Choose units made from durable, lightweight materials—plastic, wood, or metal—that are easy to assemble and reassemble. Incorporate open cubes for display and closed compartments for hidden storage. Seasonal or themed accessories can be added to personalize the setup. Use different sizes to accommodate various toy types and room sizes.
Start by assessing your space and the types of toys you need to store. Select modular units that fit your room layout and toy collection. Assemble the units according to your preferred configuration, and organize toys inside with baskets or dividers. As your child’s collection grows, simply add more modules or reconfigure to suit new needs. Maintain a regular review to keep clutter at bay.
Personalize the units with stickers, labels, or paint to match your child’s interests. Incorporate themed accessories or decorative elements like LED strips or fabric covers. Let your child participate in arranging or expanding the storage, fostering ownership. Use color coding or numbering systems for easy organization.
Modular storage systems grow with your child, reducing ongoing costs and hassle. They teach flexibility, planning, and responsibility—valuable skills for life. Your kid’s collection becomes a curated display rather than a chaotic mess. It’s a smart, adaptable solution for busy parents and creative kids.
11. Use Clear Plastic Canisters for Arts and Craft Supplies
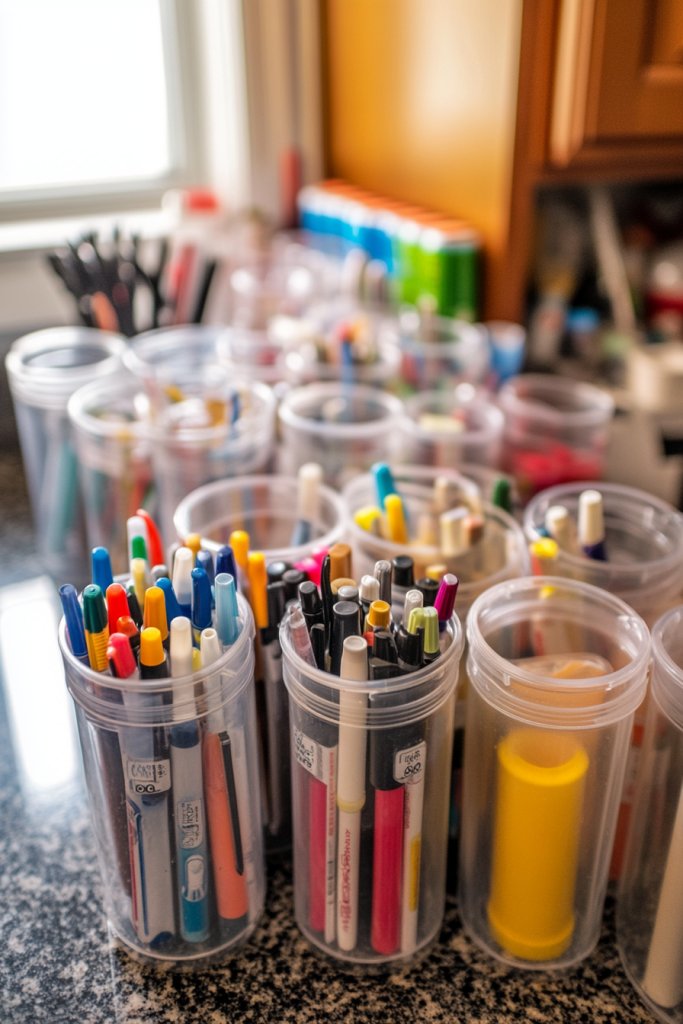
Arts and crafts supplies often turn into a colorful, chaotic mess, discouraging creativity. Clear plastic canisters offer a simple way to organize and showcase materials, encouraging independent access. It turns clutter into an inspiring, functional art station.
Visualize uniform transparent canisters filled with crayons, markers, beads, or small stickers, lined up on a shelf. Their see-through nature makes it easy for kids to find what they need without rummaging. Label each container with words or icons, adding a playful touch. The uniformity creates a neat, inviting workspace that sparks creativity.
Choose containers with different sizes to suit various supplies—small jars for beads, larger ones for paper or paints. Stackable designs maximize vertical storage, perfect for limited spaces. Decorate the lids with stickers or paint to add personality. Incorporate a dedicated arts corner or storage cabinet for easy access.
Gather a set of clear, durable canisters with secure lids. Sort supplies into categories—pencils, brushes, embellishments—and fill the containers accordingly. Label each with waterproof stickers or printouts. Arrange on a shelf or inside a drawer for quick access. Encourage your child to put supplies back after use, fostering responsibility. Regularly review and replenish supplies to keep the station inspiring.
Decorate canister lids with stickers, paint, or washi tape to reflect your child’s personality. Use color-coding for different types of supplies—red for paints, yellow for markers. Incorporate small decorative charms or themed labels for added fun. Let your child help organize and decorate their art space.
Clear containers make art supplies inviting and easy to find, inspiring your child’s creativity. They learn to organize and care for their materials, building responsibility. The neat setup reduces frustration and mess, encouraging more frequent, confident art sessions. A simple system that nurtures imagination!
12. Invest in Low Toy Cabinets with Push-to-Open Doors
Clunky, heavy doors can be hard for little hands and often get left open, turning your tidy space into chaos. Low toy cabinets with push-to-open doors combine sleek design with functional ease. They hide clutter effortlessly while adding a modern touch to the room.
Think of a low-profile cabinet in a soft matte finish, seamlessly blending into the room. When closed, it looks like a piece of minimalist furniture, but a gentle push opens the doors to reveal neatly stored toys. Inside, toys are organized in baskets or compartments for quick cleanup. The clean lines and hidden storage keep the space looking fresh and uncluttered.
Select cabinets in neutral or bold colors to match your decor. For smaller rooms, opt for slim, vertical designs or wall-mounted options with push-to-open mechanisms. Incorporate decorative knobs or handle-less fronts for a streamlined look. Use inside dividers or baskets to organize different toy types and accessories.
Choose a sturdy, child-safe cabinet with a reliable push-to-open system. Place it at a height accessible to your child, encouraging independence. Organize toys inside with labeled bins or dividers. Teach your kids to push gently to open and close the doors, making cleanup easy and intuitive. Regularly declutter to maintain an organized appearance.
Add decorative elements like colorful magnets or stickers around the edges that your child can change. Customize the interior with fabric liners or themed bins. Use labels or icons to help younger kids identify where things go. Involve your child in decorating or rearranging the cabinet to foster ownership.
Sleek, push-to-open cabinets make tidying effortless, helping kids develop independence and responsibility. They keep the room looking polished and modern, reducing visual clutter. Kids learn organization skills naturally, gaining confidence in managing their belongings. It’s a simple upgrade with lasting benefits.
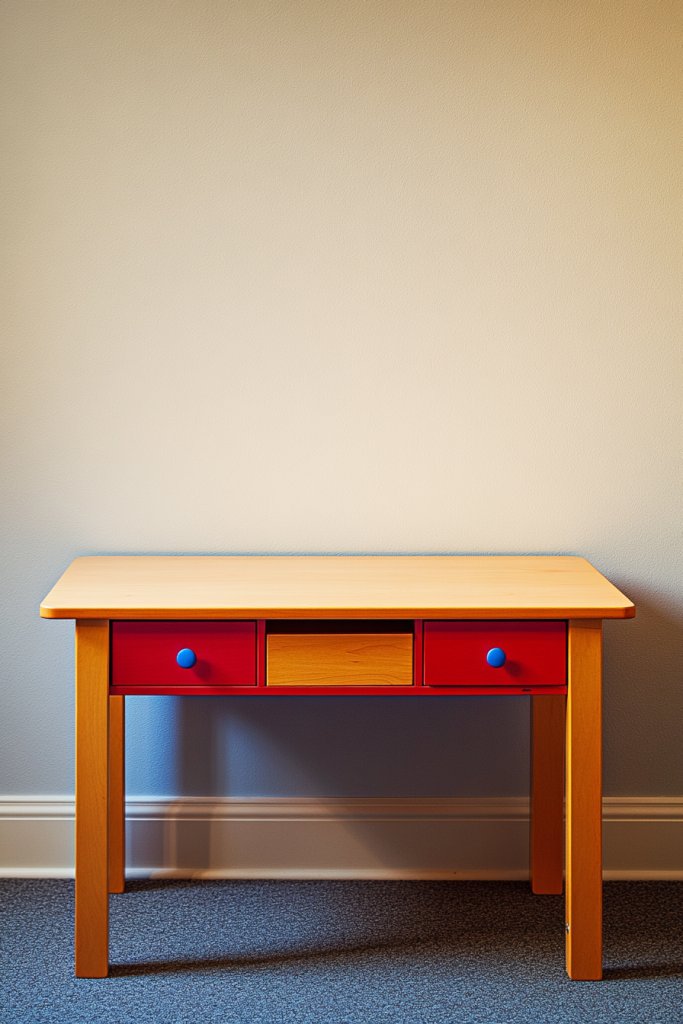
13. Design a Play Table with Built-In Storage Drawers
Messy play areas disrupt the flow of a busy household, making cleanup a chore. A play table with built-in storage drawers combines fun and function, keeping all essentials in one place. It encourages kids to tidy up after their creative sessions without fuss.
Picture a sturdy wooden or plastic play table, topped with a smooth surface for drawing or building. Below, spacious drawers hold building blocks, art supplies, or puzzles, neatly organized and easily accessible. The table’s design invites kids to create and clean up with minimal effort. Bright colors or themed details add personality and fun.
Select tables with multiple drawers, adjustable compartments, or removable trays. Use vibrant or neutral finishes to match your decor. For small spaces, opt for compact, foldable designs. Incorporate themed accents like race cars, princess motifs, or nature scenes to inspire creativity.
Choose a sturdy, child-safe table with smooth-gliding drawers. Organize toys or art supplies inside with smaller containers or dividers. Teach your kids to put everything back after play, establishing routines. Regularly review and reorganize drawers to keep things tidy and prevent clutter. Consider adding labels or icons for easy identification.
Decorate the table with your child’s favorite themes or colors. Add personalized name tags or stickers on drawers. Incorporate fun accessories like small figurines or themed mats to enhance the play experience. Let your kids help reorganize or customize their storage to foster ownership.
A well-organized play table makes cleanup quick and fun, encouraging responsibility. Kids develop organizational skills and pride in their space. It fosters independent play and helps maintain a neat, inviting environment. A simple solution that boosts creativity and order.
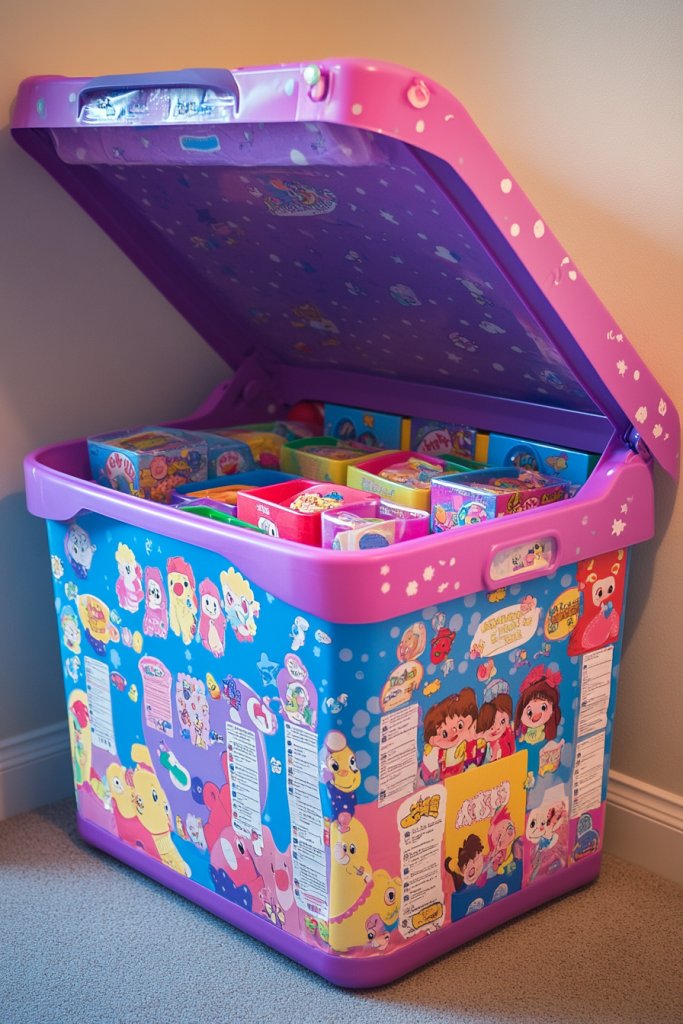
14. Create a Surprise Toy Bin for Rotational Play
Toys lose their appeal after a while, leading to boredom and clutter. A surprise toy bin keeps playtime exciting by rotating toys periodically. It prevents overwhelm and renews interest, making cleanup feel like a reward rather than a chore.
Imagine a large, attractive bin filled with toys that are periodically swapped out. When you open it, a new set of toys—hidden away in labeled boxes or bags—appears, sparking curiosity. The bin itself could be decorated with fun patterns or your child’s favorite characters, adding to the excitement. This surprise element keeps boredom at bay and play fresh.
Choose a sturdy, easy-to-open bin with a lid or drawstring closure. Store different toy sets in separate labeled containers inside the bin. Rotate toys monthly or seasonally, keeping the collection manageable. For smaller spaces, use multiple bins or baskets for different categories or themes.
Fill the bin with a curated selection of toys, removing some to rotate in later. Keep a schedule—monthly or quarterly—to swap toys out for new ones stored elsewhere. Involve your kids in choosing which toys to rotate, making it a fun, collaborative activity. Label or color-code containers to simplify the process. Regularly review the collection to avoid clutter.
Decorate the bin with your child’s artwork or favorite themes. Add labels with fun fonts or icons for easy identification. Incorporate small rewards or stickers to motivate ongoing participation. Use decorative tape or paint to match room decor, making the bin a fun focal point.
Rotational play keeps toys feeling new and exciting, fostering curiosity and responsibility. Kids enjoy the element of surprise, making cleanup and organization part of the fun. It teaches patience and decision-making skills, all while maintaining a tidy space. Who knew that a simple bin could do so much?
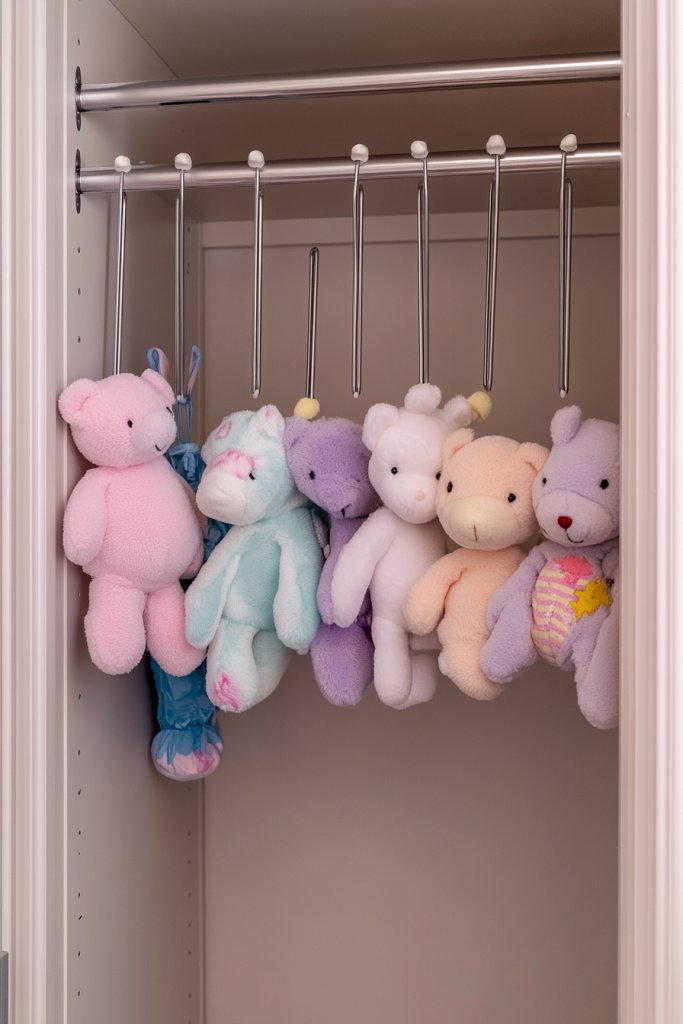
15. Use Tension Rods for Hanging Storage of Lightweight Toys
Lightweight toys like plush animals or costume accessories often clutter shelves or floors, making cleanup a hassle. Tension rods provide a simple, versatile solution for hanging and organizing these items. They turn unused space into an efficient storage area, reducing mess and frustration.
Picture adjustable tension rods installed inside closets, behind doors, or in corners. Soft plush toys hang neatly from hooks or loops attached to the rods. The rods can be easily moved or adjusted, accommodating different toy sizes. The setup is unobtrusive, keeping toys off the floor and within easy reach.
Use multiple rods at different heights to maximize vertical storage. Incorporate fabric loops, S-hooks, or clips to hang toys securely. For themed rooms, match the rods and hooks with room decor—bright colors or neutral finishes. This system adapts well for seasonal or special collections, adding or removing rods as needed.
Install tension rods in closet spaces, behind doors, or in corner areas where space is limited. Use S-hooks or fabric loops to hang lightweight toys, plush, or costume accessories. Ensure the rods are tightly secured to prevent slipping. Teach your kids to hang toys properly and to keep the rods organized. Periodically review to prevent overloading or tangling.
Decorate the hooks or rods with stickers or paint for a personalized touch. Use color-coded hooks for different toy types, making it easier for kids to put items away. Incorporate themed or seasonal hooks to keep things fun. Let your kids help design their hanging system, fostering ownership.
Using tension rods for hanging toys maximizes vertical space and keeps clutter off surfaces. It teaches kids to organize and care for their belongings. The system is flexible, affordable, and easy to update as collections grow. A simple trick with big benefits!
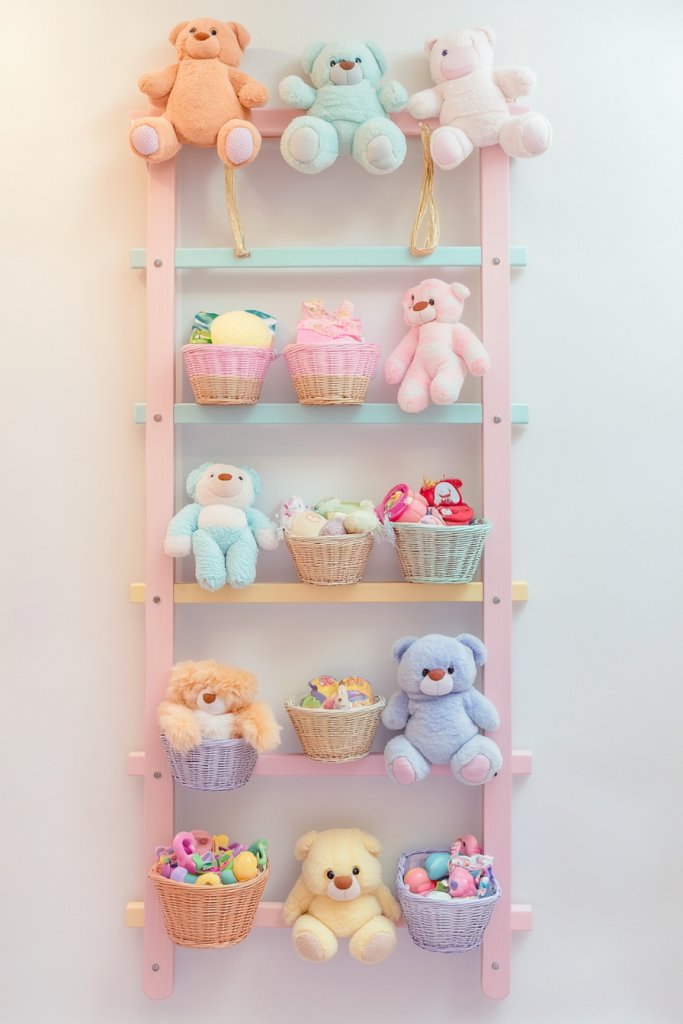
16. Incorporate a Vertical Toy Ladder for Display and Access
Toys scattered on the floor make your space look messy and uninviting. A vertical toy ladder offers a fun, decorative way to display and access toys at kid-friendly heights. It turns clutter into a playful feature and encourages kids to tidy up on their own.
Imagine a decorative wooden or metal ladder mounted vertically on the wall, with plush toys or small baskets hanging from rungs. The design can be painted in bright or pastel colors, adding personality. Toys like stuffed animals or small accessories are displayed neatly, making the space lively and organized. The ladder becomes a focal point that combines function with style.
Use a sturdy, lightweight ladder with rungs or hooks suited for hanging toys. Choose materials and colors that match your decor—wood for warmth, metal for a modern look. Incorporate baskets or pouches for storing smaller items or collectibles. For small rooms, mount the ladder higher up or on a corner to save space.
Select a durable, wall-mounted ladder with secure mounting hardware. Arrange toys or accessories on the rungs, using hooks, clips, or baskets. Teach your kids to hang and retrieve toys respectfully. Regularly rotate or refresh displayed items to keep the space exciting. Ensure the ladder is safely anchored and easily accessible.
Decorate the ladder with your child’s favorite colors, stickers, or painted patterns. Add personalized name tags or small decorative elements. Involve your child in decorating or rearranging the toys on the ladder, making it a fun collaborative activity. Use themed accessories for special occasions or seasons.
A vertical toy ladder makes organization fun and accessible, fostering independence. It showcases your child’s collection as a decorative feature, building pride. The system is adaptable and grows with their interests. It’s a playful, stylish way to keep toys tidy.
17. Set Up a Play Corner with Open Shelving and Soft Bolders
A cluttered, chaotic play area makes it hard for kids to focus and enjoy their activities. Creating a dedicated play corner with open shelving and soft bolders transforms any space into an inviting, organized zone. It encourages independent play and easy cleanup.
Picture a cozy corner with low, open shelves filled with neatly arranged toys and books. Soft, colorful boulders or cushions define the space, inviting kids to settle in. The shelves hold clear containers or baskets for small toys, making everything easy to access. The combination of open storage and comfy seating creates a playful yet tidy environment.
Choose shelving units that match your decor—wood for warmth, bright colors for fun. Use soft cushions, mats, or bean bags for seating, making the space cozy. Incorporate themed decor or rugs to personalize the corner. For limited space, use corner shelves or foldable cushions that can be stored away.
Arrange open shelves at a low height for easy access. Use transparent or labeled baskets inside the shelves to organize toys and craft supplies. Add soft boulders or cushions for comfort and define boundaries. Teach your kids to put toys back after playing, turning cleanup into part of the fun routine. Regularly rotate toys to keep the space engaging.
Decorate the space with your child’s favorite themes or colors—add wall decals or themed cushions. Incorporate their artwork or photos to make it special. Invite your kids to help organize or decorate, fostering ownership. Use fun, themed storage containers or cushions that match their interests.
A dedicated play corner makes tidying up straightforward and enjoyable. Kids learn to organize, care for their space, and develop independence. It creates a peaceful, inviting environment that promotes imaginative play. A well-designed corner turns clutter into a creative sanctuary.
18. Use Overhead Ceiling Storage for Large or Infrequently Used Toys
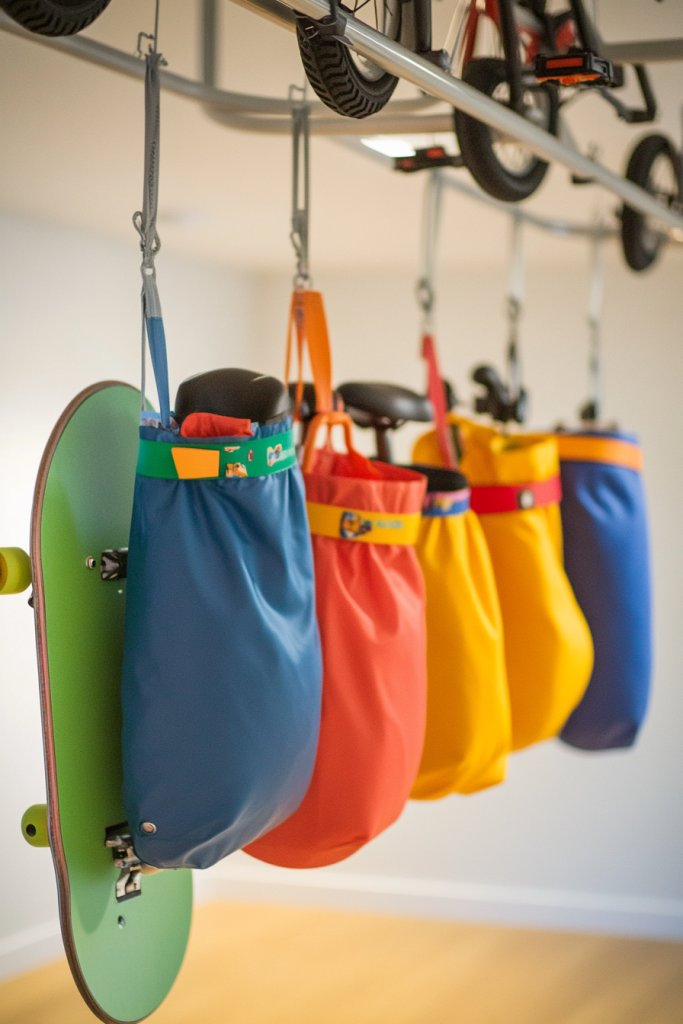
Large toys like ride-on vehicles or seasonal equipment often clutter up the floor and take up valuable space. Overhead ceiling storage offers a clever way to keep these items out of sight but still accessible when needed. It declutters your space and makes room for everyday play.
Picture sturdy hooks or ceiling-mounted racks suspending large toys or seasonal gear, like bikes or skateboards. Bright straps or colorful covers organize the items, making them easy to identify. When not in use, these toys hang neatly above, freeing up floor space. The setup feels like a smart, industrial-inspired storage solution that keeps everything tidy.
Choose ceiling hooks, racks, or pulley systems that support heavy loads. Opt for bright or neutral finishes to match your decor. Use labeled storage bags or covers for seasonal items. For rooms with high ceilings, take advantage of vertical space by adding multiple levels of storage.
Securely install heavy-duty hooks or ceiling mounts, ensuring they are anchored into joists or beams. Use durable straps or cables to suspend large toys, checking weight limits. Teach your kids to place toys carefully and safely. Maintain a regular schedule to rotate or remove items to prevent overcrowding. Keep safety as a top priority during installation.
Decorate storage bags with your child’s name or favorite colors for easy identification. Add fun labels or stickers to the hanging items. Incorporate themed covers or fabric wraps to match room decor. Involve your kids in organizing or decluttering seasonal toys, fostering responsibility.
Ceiling storage keeps large or seasonal toys out of the way, making the room feel spacious and organized. Kids learn to respect and manage their belongings responsibly. It’s a practical, space-saving hack that teaches planning and care. Who knew overhead storage could be so smart?
19. Implement a Toy Donation or Swap Station to Minimize Accumulation
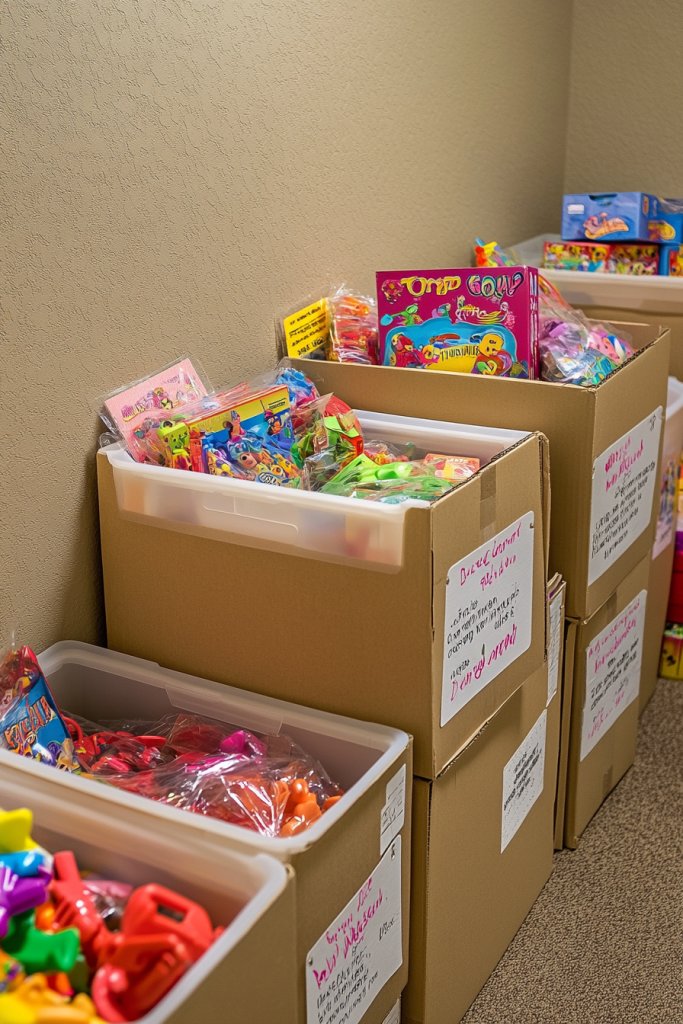
Your child’s toy collection can quickly become overwhelming, leading to clutter and guilt over unused items. A toy donation or swap station encourages mindful decluttering and sharing. It helps manage the collection while teaching kids about generosity and responsibility. Who doesn’t want a clutter-free home and a generous heart?
Imagine a dedicated corner in your home with labeled boxes or bins for toys to donate or swap. Bright, inviting signs encourage your kids to pick out toys they no longer use. When filled, these items are either donated to charity or swapped with friends, making decluttering a community activity. The station feels rewarding and purposeful, turning clutter into kindness.
Use colorful bins, baskets, or boxes to make the station inviting. Incorporate a calendar or schedule for regular donation or swap days. For larger collections, add a bulletin board or digital schedule for tracking swaps. Seasonal themes or motivating signs can keep kids engaged and excited about giving.
Designate a specific area for the donation or swap station—like a corner or closet. Use labeled bins or boxes for different types of toys. Regularly go through the collection with your kids, encouraging them to choose items for donation or exchange. Arrange for local charities or friends to pick up or swap toys. Teach your children about gratitude and sharing through simple conversations and routines.
Decorate the station with fun stickers or artwork to make it inviting. Involve your kids in setting up and maintaining the space, giving them ownership. Use motivational signs or quotes about giving and sharing. Celebrate milestones—like donating a certain number of toys—to build a positive habit.
A donation or swap station reduces clutter and instills values of generosity and mindfulness. Kids learn to evaluate their belongings critically and responsibly. It creates a sense of community and purpose, making decluttering meaningful. An organized, thoughtful space that benefits everyone!
20. Incorporate a Mesh Toy Hammock for Plush and Soft Toys
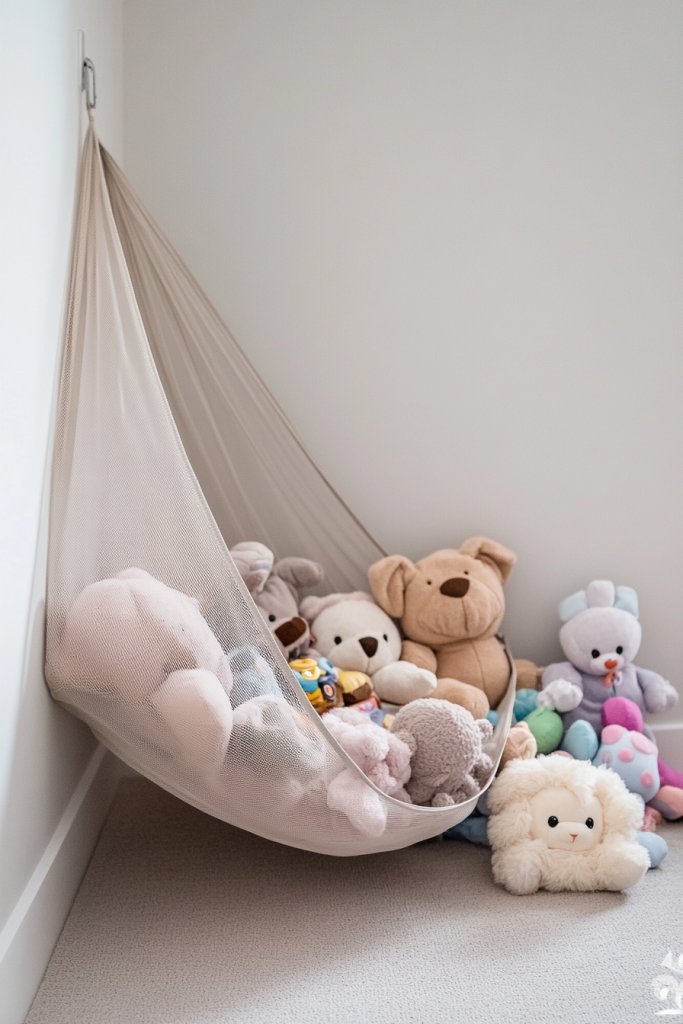
Soft plush toys and stuffed animals can quickly take over every corner, turning your home into a soft, squishy chaos. A mesh toy hammock offers a breathable, stylish way to store and contain these cuddly companions. It keeps plush toys off the floor and within easy reach, making cleanup a breeze.
Picture a large, neutral-colored mesh hammock hanging in the corner or off a wall, filled with a pile of plush toys. The breathable fabric allows air circulation, preventing mustiness. When filled, it creates a soft, textured focal point that’s both functional and decorative. Kids can easily toss toys in or pull them out, turning storage into a fun part of their routine.
Choose from different sizes or shapes—circular, rectangular, or hammock-style with multiple compartments. Use matching or contrasting colors to suit your decor. For a more playful look, add decorative ribbons or fabric trims. Mount the hammock at a height accessible for your child, or in a cozy nook.
Securely attach the mesh hammock to walls or ceiling hooks, ensuring it can support the weight of numerous plush toys. Teach your kids to toss toys into the hammock after play, making cleanup quick and satisfying. Regularly check the attachment points for stability and wear. Periodically review the toys inside, removing any that are worn or no longer loved.
Decorate the mounting points with stickers or painted accents that match your child’s room theme. Incorporate small decorative elements like bows or fabric tabs. Invite your kids to help organize or rearrange the plush toys inside, fostering a sense of ownership. Consider adding labels or small signs for different plush categories.
A mesh hammock keeps plush toys organized and off the floor, making the room more inviting. Kids develop responsibility for their belongings and enjoy the fun of tossing toys in. It’s a breathable, stylish solution that’s easy to maintain. Who knew plush storage could be both functional and cute?
21. Design a Minimalist Toy Basket System with a Single Visual Focus
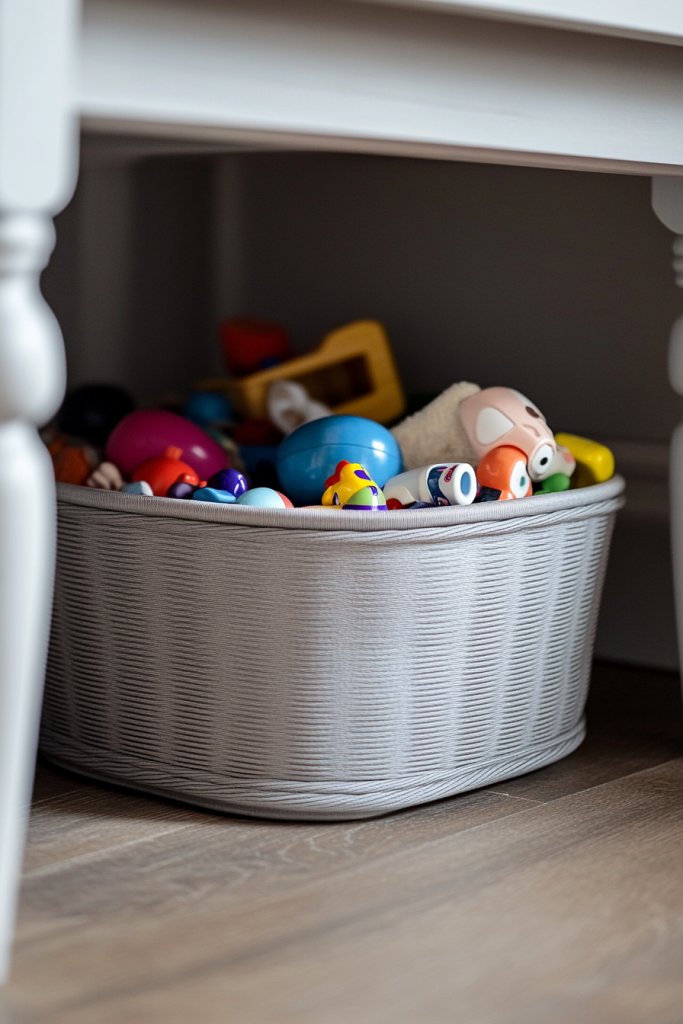
Cluttered toy baskets look chaotic and distract from a clean, modern aesthetic. A minimalist toy basket system with a single visual focus creates a sleek, organized look that complements contemporary decor. It simplifies cleanup and adds a touch of sophistication to any room.
Imagine a uniform, stylish basket in a neutral tone—think soft gray, beige, or black—placed in a corner or under a table. All toys are gathered into this single, elegant container, creating a visual focal point. The basket’s clean lines and simple design keep the space feeling calm and uncluttered. When the basket is full, it signals a cleanup, and when empty, it maintains a sleek look.
Choose baskets made from natural fibers, woven materials, or smooth fabrics to match your decor style. Incorporate subtle accents like leather handles or monochrome patterns for a minimalist vibe. Use a single basket or a set of identical baskets for different rooms or toy categories, keeping the look cohesive. Seasonal or themed baskets can add variety without cluttering the space.
Select a high-quality, durable basket with a simple, modern design. Place it in a strategic spot—near play areas or under tables—to encourage quick cleanup. Teach your kids to toss toys into the basket, emphasizing minimalism. Regularly review and remove broken or unused toys to keep the system tidy. Consider pairing with a matching storage lid or liner for a polished finish.
Add subtle decorative elements like a monogram, a small tag, or a textured trim to personalize the basket. Incorporate a small, matching mat or tray underneath for added style. Use labels sparingly—perhaps a discreet tag—if needed for older kids. Let your child participate in choosing or decorating their basket, fostering ownership.
A minimalist basket system elevates toy organization into a stylish statement. It teaches kids about simplicity and responsibility without sacrificing aesthetic appeal. The clean look makes tidying up less burdensome and more rewarding. It’s a modern, chic solution for clutter-free living.
Conclusion
These diverse ideas for minimizing and organizing kids’ toys demonstrate how simple changes can lead to a more joyful and tidy space. By trying out these clever storage and organization tips, you can create a playful environment that fosters creativity and order. Take action today and turn your kid’s space into an organized oasis of fun and learning!