Imagine stepping into a shower that feels like a luxurious retreat—sleek, stylish, and effortlessly elegant. Porcelain slabs for showers have taken the design world by storm, thanks to their stunning appearance, durability, and easy maintenance. They offer a seamless, modern look that elevates any bathroom into a spa-like oasis.
In this article, you’ll uncover a variety of creative porcelain slab shower ideas that cater to different tastes and spaces. Whether you prefer minimalist chic, bold textures, or intricate patterns, these ideas will inspire you to reimagine your bathroom with a touch of modern luxury and sophistication.
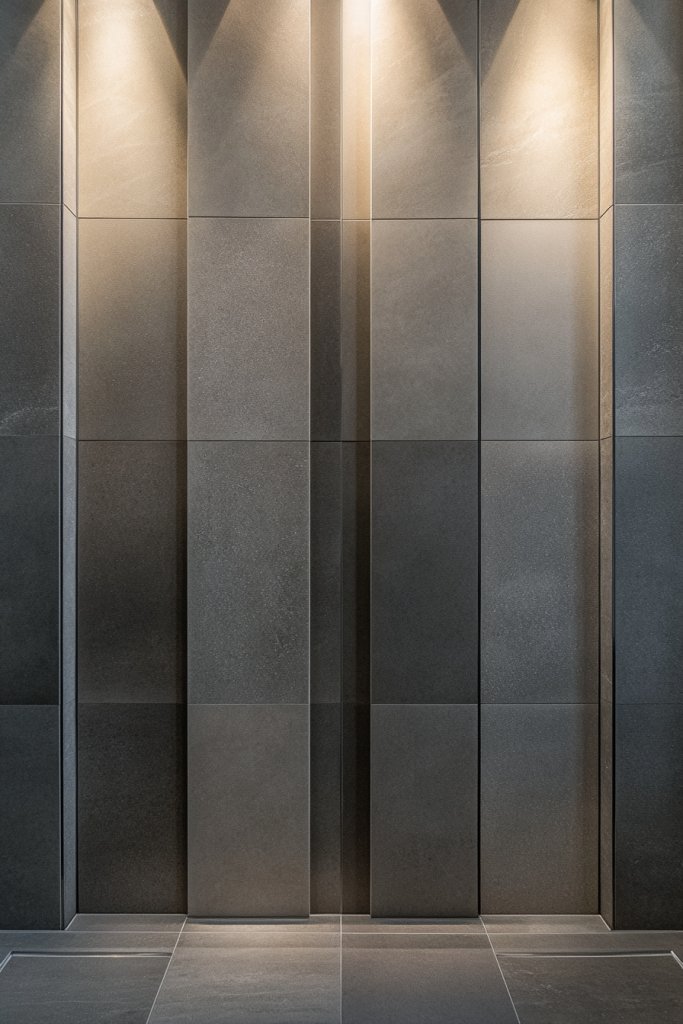
1. Monochrome Matte Finish for Sleek Sophistication
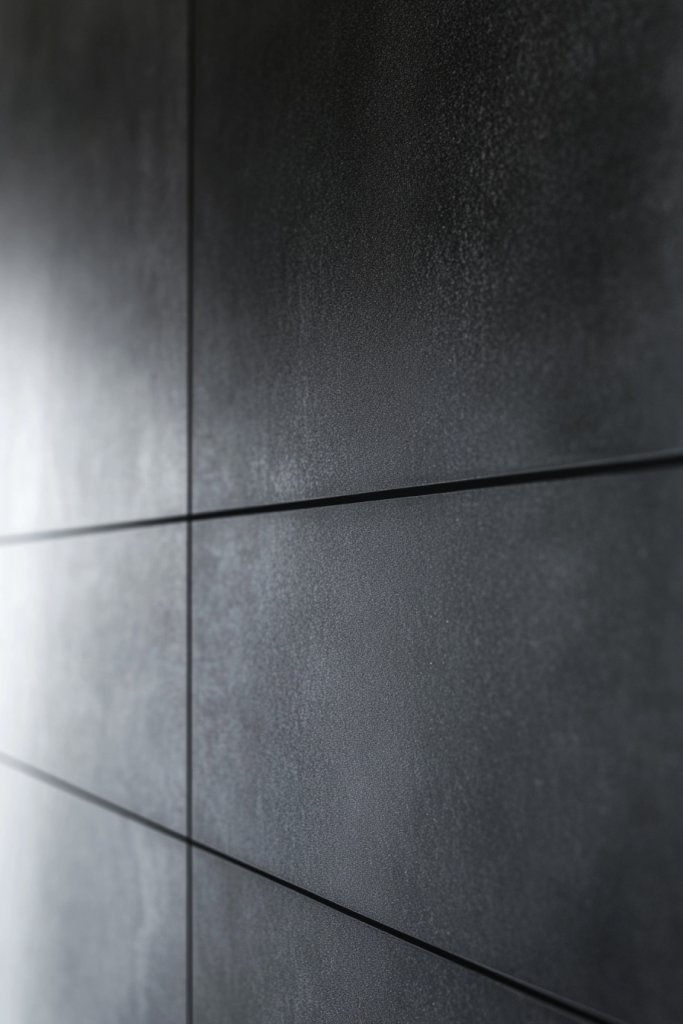
Ever wish your shower could feel like a high-end spa without the hefty price tag? A monochrome matte finish on porcelain slabs offers that sleek, modern vibe everyone dreams of. It provides a clean, uncluttered look that makes a bathroom feel instantly more luxurious. If you’re tired of busy patterns or shiny surfaces, this minimalist approach might just be your answer.
Imagine large, matte porcelain slabs in a single neutral tone like charcoal, soft gray, or creamy beige enveloping your shower walls. The matte surface absorbs light rather than reflecting it, giving off a velvety, sophisticated feel. The seamless look makes your space appear larger and more cohesive, with the textured finish adding depth. No distracting grout lines—just smooth, continuous surfaces that invite touch.
You can customize this look with warm tones for a cozy feel or cool hues for a crisp, modern aesthetic. Pair matte slabs with textured towels or soft textiles to add contrast. For smaller bathrooms, sticking to a monochrome palette maximizes space. Seasonal updates could include changing accessories or adding warm lighting to enhance the matte finish’s richness. It’s a versatile style that adapts effortlessly.
Start by selecting large-format porcelain slabs with a matte surface finish. Measure your shower space carefully to choose slabs that minimize grout lines. Use a high-quality adhesive suitable for porcelain and ensure an even application to prevent gaps or uneven surfaces. Consider hiring a professional for precise installation, especially for large slabs, to prevent cracking. Seal the joints with matching grout or silicone for a sleek, waterproof finish. Regular cleaning with gentle, non-abrasive products keeps the matte surface looking pristine.
Add subtle touches like a textured, plush towel in a complementary shade or a soft, fabric shower curtain with matte accents. Incorporate minimalist shelving or hidden niches behind the slabs for storage that keeps the sleek aesthetic intact. You could also experiment with different textures—like a matte stone-effect slab paired with smooth fixtures—to create visual interest. A touch of matte black hardware can further elevate the modern vibe.
This style embodies simplicity with sophistication—perfect for anyone wanting a timeless, elegant shower. It’s a statement of restraint, letting quality materials do the talking. Plus, the low-maintenance surface resists fingerprints and water spots better than glossy finishes. Ready to upgrade your bathroom and feel like you’re in a luxury hotel each morning? This look makes it easy.
2. Vertical Panel Installation for Height Enhancement
Feeling like your bathroom’s ceiling is closing in? Vertical panel installation of porcelain slabs can create the illusion of soaring height. It’s a clever trick to make even small showers feel more spacious and open. If you love dramatic architecture but don’t want major remodeling, this is a simple fix.
Imagine tall, slender porcelain slabs installed from floor to ceiling, emphasizing vertical lines. The elongated shapes draw your eye upward, giving a sense of grandeur. Choose subtle tones or textured surfaces to add depth without overwhelming the space. The seamless look of large panels adds to the minimalist aesthetic, making the room appear taller and more airy.
This technique works well in bathrooms with high ceilings or in rooms where you want to create a feature wall. For a softer look, opt for textured or matte finishes; for a sleek modern vibe, go glossy or polished. Incorporate vertical elements in adjacent decor, such as elongated mirrors or narrow shelving, to reinforce the upward movement. Seasonal touches like contrasting accessories or lighting can change the mood easily.
Choose large, vertical porcelain slabs that fit your wall dimensions. Use a high-quality adhesive suited for large-format tiles, applying with a notched trowel for an even spread. Start from the base and work upward, ensuring each slab is perfectly aligned with a level. Use spacers to maintain even joints if needed, but for a seamless look, opt for minimal grout. Consider a professional installation for precision, especially with large panels. Finish with waterproof sealant in joints for durability and moisture resistance.
Accent the height with LED strip lighting along the top edge or behind a narrow shelf in the same porcelain to add drama. Play with tonal variations—darker slabs against lighter walls or vice versa—to create contrast. Incorporate sculptural elements or architectural moldings nearby for a cohesive, impressive look. Personalize with subtle textures or matte finishes that reflect your style.
Vertical panel installation is a simple way to add luxury without major renovation. It instantly elevates the entire space, making your shower feel like a custom design. The clean lines and tall surfaces inspire confidence in your decorating skills. Ready to make your bathroom feel larger and more refined? Vertical porcelain panels are a game-changer.
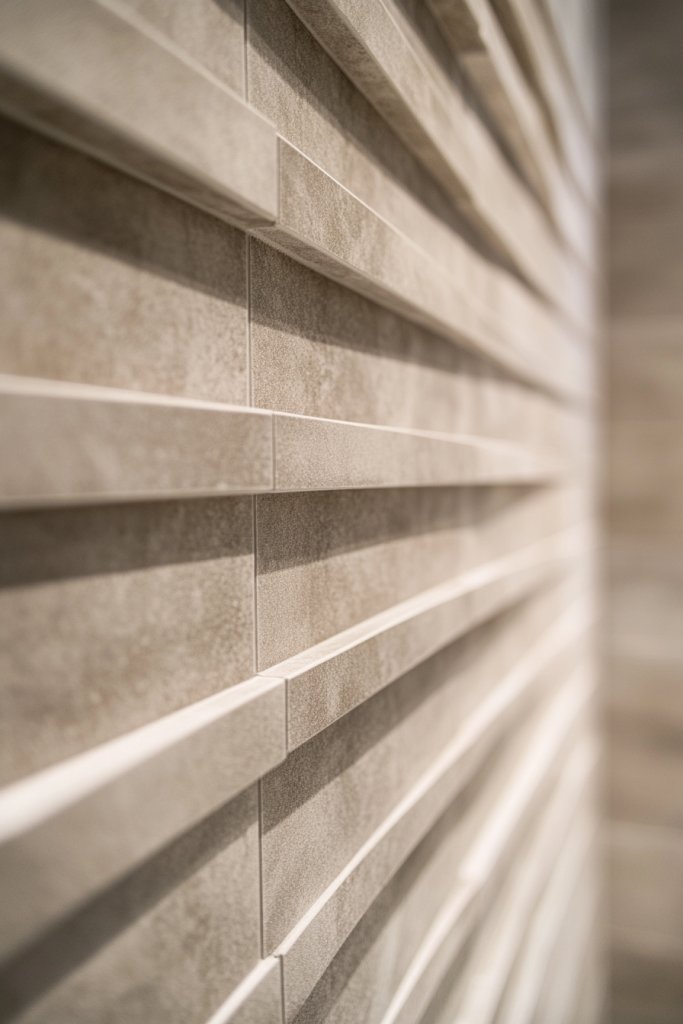
3. Textured Porcelain Slabs for Tactile Depth
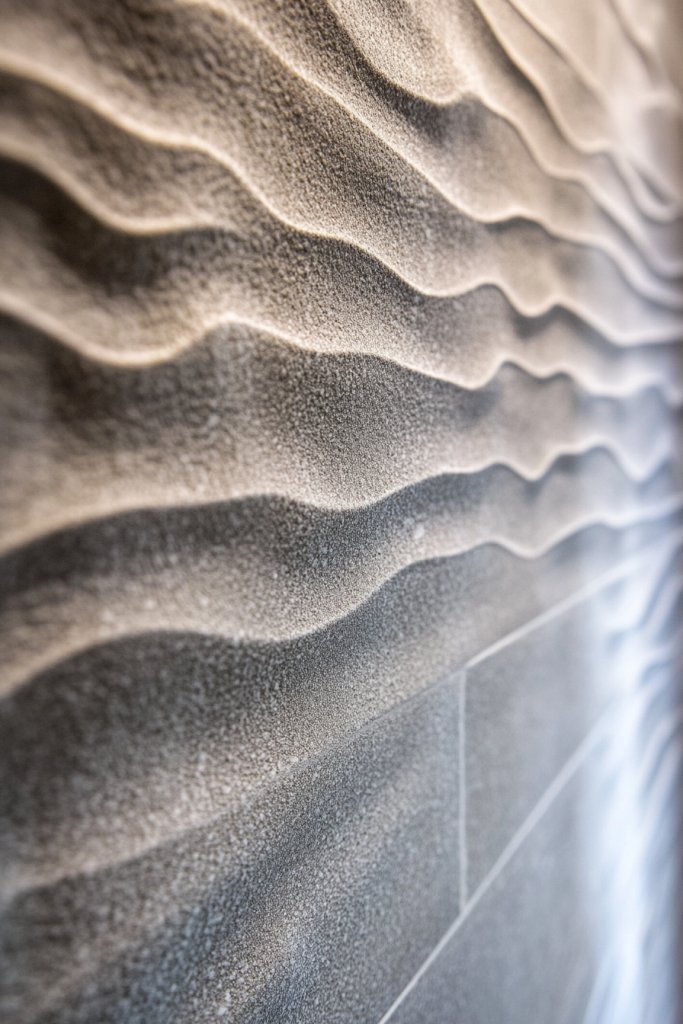
Ever feel like your shower walls are too flat or lifeless? Textured porcelain slabs can add that much-needed tactile dimension, making your shower feel more inviting and interesting. They’re perfect if you love a bit of sensory richness in your design. Plus, textures can cleverly hide water spots and minor imperfections.
Imagine porcelain slabs with subtle ripples, embossed patterns, or rough-hewn finishes that invite your fingertips. The textured surface catches light differently depending on the angle, creating shadows and highlights that enhance depth. Choose from options like pebble-inspired surfaces, linen finishes, or geometric embossments. These textures add a layer of visual complexity without overwhelming the space.
Mix textured slabs with smooth surfaces for contrast, or use a single textured wall as a feature. Textures work equally well in modern, rustic, or eclectic styles. Seasonal updates might involve adding soft textiles or matte fixtures to complement the tactile theme. For a more dramatic look, combine multiple textures within the same space for a layered effect.
Select textured porcelain slabs with a finish that suits your style—whether matte, semi-gloss, or rough-hewn. Prepare your surface thoroughly, ensuring it’s clean and flat. Use a high-quality adhesive designed for textured surfaces, applying evenly to avoid bubbles or unevenness. During installation, handle slabs carefully to prevent damaging delicate textures. Seal the joints with matching silicone or grout, and avoid abrasive cleaners to preserve the surface.
Incorporate sculptural shelves or niches in the same textured porcelain for functional decor. Use lighting that accentuates the surface’s shadows and highlights. Complement textures with soft, plush towels or textured textiles in complementary colors. Personalize your space with subtle color accents or layered materials that enhance the tactile experience.
Textured porcelain adds a layer of luxury and comfort to your shower. It’s a smart way to create a spa-like feel that’s both stylish and practical. The variety of textures available makes it easy to find a look that matches your personality. Ready to add depth and interest to your bathroom? Textured slabs are a fantastic choice.
4. Contrasting Borders for a Modern Frame

Want to give your shower a polished, framed look without heavy renovations? Contrasting borders around porcelain slabs can add a crisp, modern edge to your design. They define the space and add an element of visual interest. It’s a simple detail that elevates the overall style effortlessly.
Picture a clean, large porcelain slab with a sleek, dark border running along the edges. The contrast draws the eye outward, framing the shower walls with a subtle yet striking outline. Alternatively, use a lighter border to soften the transition between walls and ceiling. The borders can be in matte or glossy finish, matching fixtures or hardware for a cohesive look. This framing technique creates a gallery-like effect that feels both modern and refined.
Experiment with different border widths or multiple layers for a more elaborate frame. Combining contrasting colors, like black with white or bronze with cream, creates a high-impact look. Borders can be applied at the top, bottom, or around niches for added customization. Seasonal updates could include changing the border color or texture to match new decor themes.
Choose porcelain slabs and border strips in complementary or contrasting colors. Install slabs first, then carefully add the border strips with a precise adhesive, ensuring perfect alignment. Use spacers to keep the border flush and level. Seal the joints with waterproof silicone, especially at corners and edges, to prevent water infiltration. Finish by cleaning excess adhesive and inspecting for evenness. Regular maintenance involves wiping down the borders for a pristine look.
Add decorative corner accents or small, matching tiles within the border for visual variety. Incorporate hardware like sleek handles or trims that match the border color. For a personal touch, integrate subtle metallic or textured borders that reflect your style. This simple framing can also be used to highlight special features or niches within the shower.
Contrasting borders are a subtle but powerful way to frame and elevate your shower design. They combine practicality with style, creating a finished, professional look. It’s a small detail that makes a big impact, giving you confidence in your decorating choices. Ready to add that perfect finishing touch? Borders are a smart, stylish solution.
5. Floating Shower Walls with Hidden Mounting
Dreaming of a bathroom that feels open and airy, with no visual clutter? Floating porcelain slabs with hidden supports can create that sleek, minimalist vibe. It’s a modern approach that makes your shower look like it’s suspended in space. Plus, it’s easier to clean underneath—no grout lines or tricky corners.
Imagine large porcelain slabs mounted just above the floor, seemingly floating without visible brackets. The support system is concealed behind the slabs, giving a seamless, weightless appearance. The gap between the floor and the slabs allows for easy cleaning and prevents water from pooling. The design creates a sense of depth and sophistication, perfect for contemporary bathrooms.
This look works well with monochrome tones or contrasting textures. For added drama, choose slabs with a textured or matte finish. Incorporate LED lighting underneath or along the edges for a glow that emphasizes the floating effect. You can also add discreet niches or shelves that appear to be part of the slabs, maintaining the clean look.
Select large porcelain slabs with a thickness suitable for floating installation—usually 1.5 inches or more. Use a concealed mounting system designed for heavy tiles, with brackets or mounting plates hidden behind the slabs. Precise measurement and professional installation are recommended to ensure stability and levelness. Attach the supports securely to the wall and floor, then carefully mount the slabs. Seal all joints with waterproof silicone for safety and durability. Regularly check stability over time.
Add soft lighting or backlit features beneath the floating slabs to create a dramatic effect. Incorporate textured or patterned slabs for visual interest. Use minimalist fixtures in matte black or brushed nickel to keep the focus on the floating effect. Personalize with built-in niches or shelves that blend seamlessly into the design.
Floating walls showcase modern craftsmanship and design confidence. They give your shower an upscale, luxurious feel while making cleaning easier. It’s a bold look that can redefine your entire bathroom aesthetic. Ready to elevate your shower with this innovative style? The floating wall is the way to go.
6. Geometric Shapes and Asymmetric Arrangements
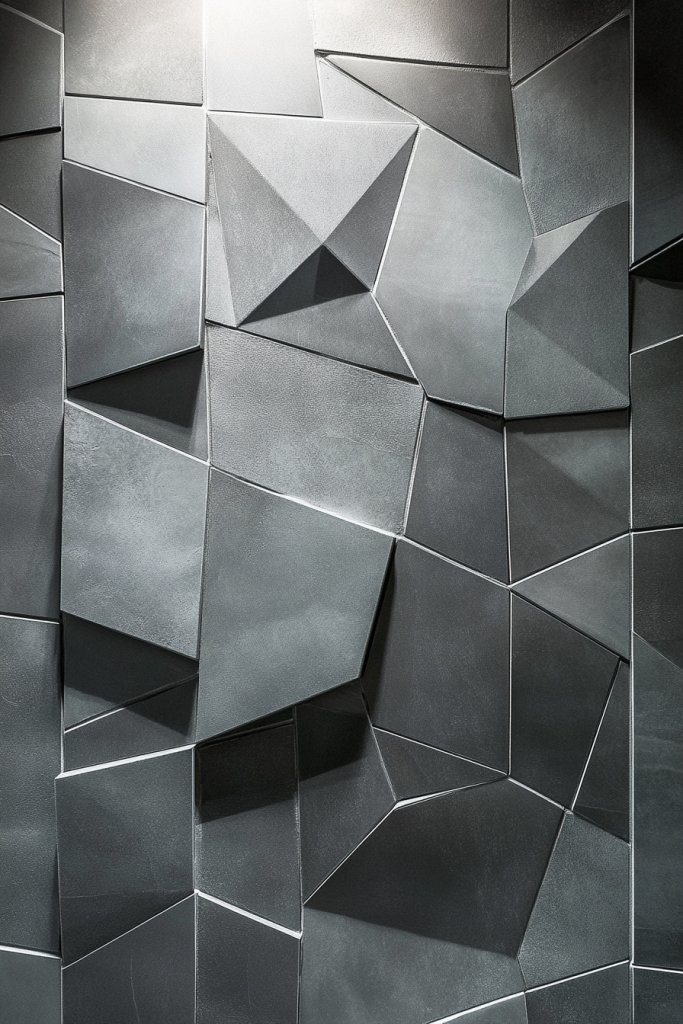
Looking to break free from traditional tile patterns? Geometric shapes and asymmetric arrangements inject personality and modern flair into your shower. They turn a functional space into a striking design statement. If you’re bored with uniform layouts, this approach adds a fresh, artistic touch.
Visualize porcelain slabs cut into triangles, trapezoids, or irregular shapes, arranged in a seemingly random yet carefully curated pattern. The asymmetry creates movement and visual interest, drawing the eye around the space. Mix finishes—matte, gloss, textured—to enhance the geometric effect. The varied shapes and angles give your shower a custom, edgy appearance.
Use bold colors or contrasting textures to emphasize the geometric design. For a subtle look, opt for tonal variations in neutral shades. Incorporate metallic or matte fixtures that complement the shapes. Seasonal updates might include colorful accessories or accent lighting to highlight the angles and textures. This style adapts well to eclectic, modern, or art-inspired decor.
Choose porcelain slabs that can be cut into your desired shapes—either pre-cut or custom-cut at a fabrication shop. Plan your layout carefully, perhaps creating a mock-up or using digital design tools. Use a strong adhesive suitable for irregular surfaces, and lay out your shapes before fixing them permanently. Ensure each piece is level and aligned for a cohesive look. Finish with waterproof sealant or matching grout, depending on the design.
Highlight the shapes with directional lighting or contrasting grout lines. Incorporate decorative fixtures with geometric motifs or angular profiles. Use accessories like sculptural shelves or wall-mounted art pieces that echo the geometric theme. Personal touches can include custom-cut glass or resin accents embedded within the pattern.
Geometric and asymmetric arrangements showcase your creativity and bold style. They add a contemporary edge that makes your shower stand out. This look reflects confidence in design and a willingness to experiment. Want your bathroom to be a conversation starter? Go geometric.
7. Combining Porcelain Slabs with Glass Panels
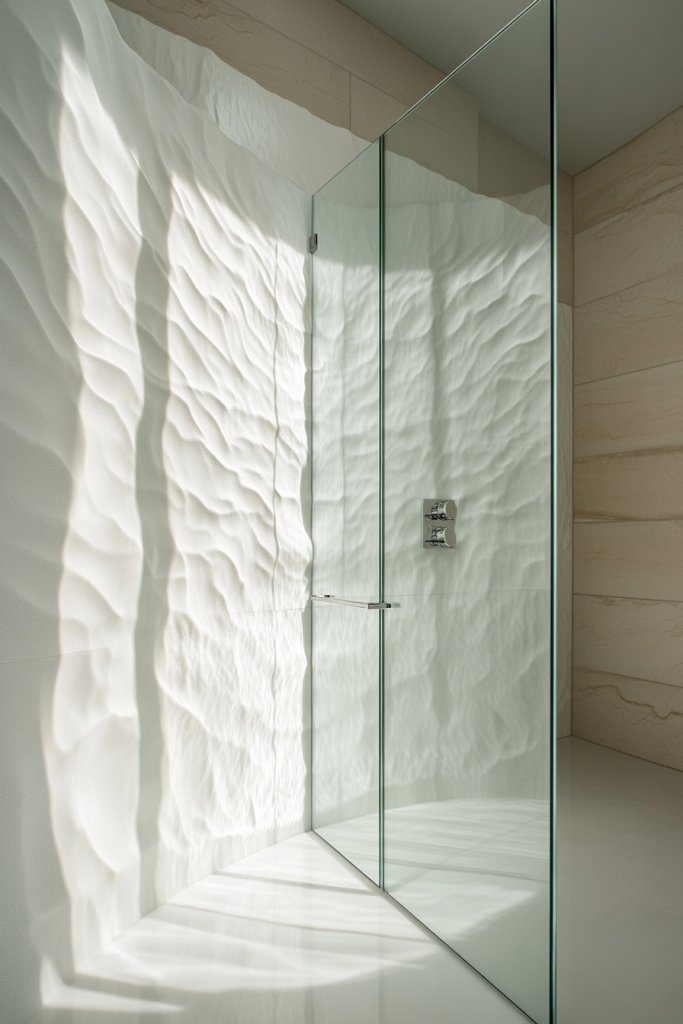
Ever wish your shower felt more open and luminous? Combining porcelain slabs with glass panels creates a seamless, airy environment that floods your space with light. It’s a perfect blend of solid and transparent elements that makes your bathroom feel bigger and brighter. Plus, it’s a sleek, modern look that’s hard to beat.
Picture large porcelain slabs forming the walls of your shower, paired with clear or frosted glass panels that serve as doors or partitions. The contrast between the opaque and transparent surfaces adds depth and dimension. Light filters through the glass, bouncing off the porcelain, creating a bright, inviting atmosphere. The clean lines and minimal hardware give a minimalist, spa-like vibe.
Use tinted or frosted glass for privacy or a softer look. Combine textured porcelain slabs with smooth glass for tactile interest. Incorporate frameless glass for a seamless appearance, or add metal frames for a more industrial feel. Seasonal updates could include decorative glass etching or colored glass panels. It’s highly adaptable to different decor styles.
Install porcelain slabs using a waterproof adhesive, ensuring they are perfectly aligned and level. Attach glass panels with heavy-duty, waterproof hardware, sealing all joints properly. Use silicone sealant around glass edges to prevent leaks and enhance durability. Consider professional installation for precision, especially with frameless glass. Regularly clean glass with non-abrasive cleaners to maintain clarity and shine.
Add decorative film or etching to glass for privacy or artistic flair. Incorporate built-in niches or shelves in porcelain behind the glass for a seamless look. Use lighting fixtures that highlight both materials—like LED strips along the edges or recessed lighting. Personalize with fixtures and hardware in finishes that complement your overall bathroom theme.
Combining porcelain with glass elevates your shower to a refined, contemporary level. It’s a design choice that maximizes natural light and spatial perception. You’ll love how this combination makes your bathroom feel more expansive and luxurious. Ready to embrace a modern, luminous shower? This style is a winning move.
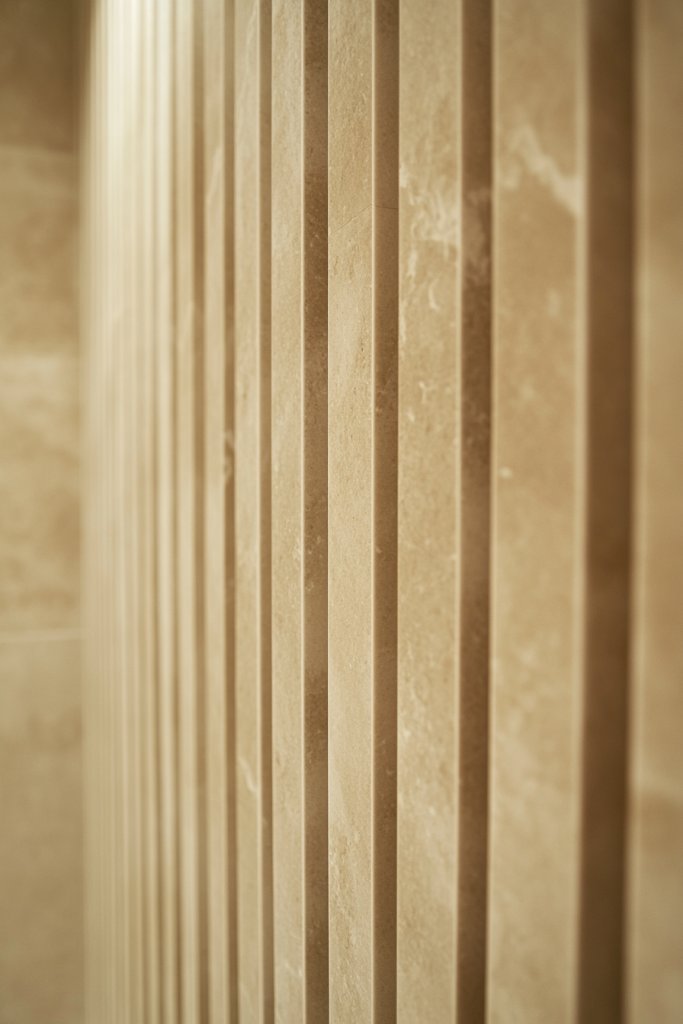
8. Vertical Stripes via Narrow Slabs for Visual Height
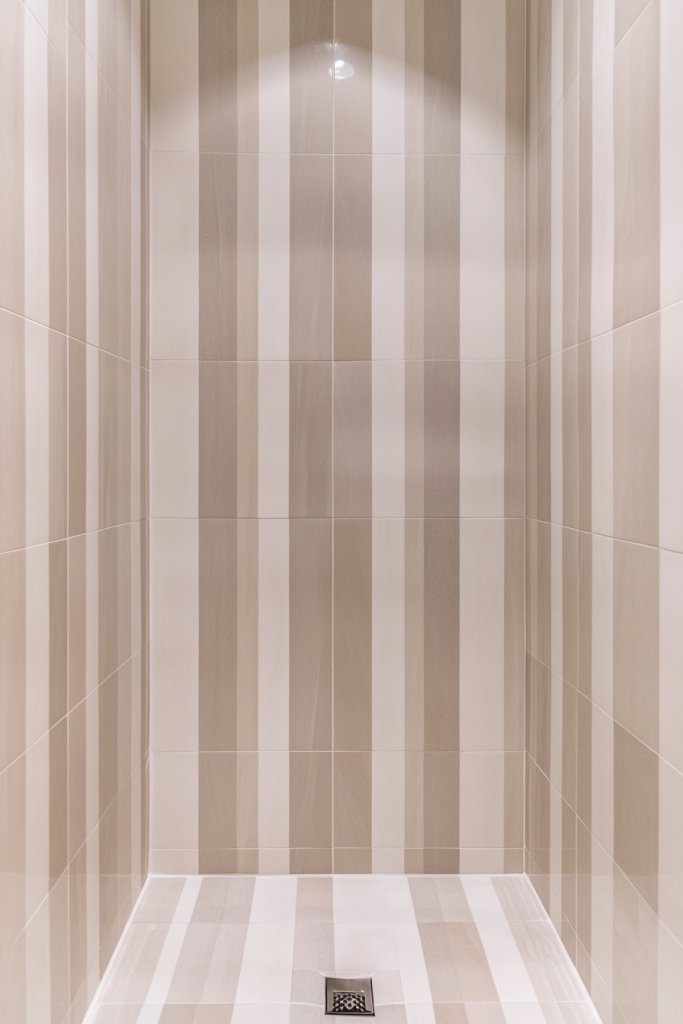
Feeling like your bathroom needs a boost of height and energy? Narrow, vertically oriented porcelain slabs create a striking striped effect that elongates your walls. It’s an easy visual trick to make your shower feel taller and more dynamic. If you’re tired of flat, wide surfaces, this pattern adds a fresh twist.
Imagine thin porcelain strips stacked vertically from floor to ceiling, creating bold or subtle stripes depending on your color choices. The vertical lines draw the eye upward, emphasizing height and adding a sense of movement. Alternating finishes like matte and gloss can add further depth and interest to the stripes. This pattern turns a simple shower into a statement of modern design.
Use contrasting colors for high impact or similar shades for a more subdued, tonal effect. Incorporate metallic or textured strips for added dimension. Seasonal updates could include changing the color of the stripes or adding accent lighting to highlight the vertical lines. It works well in both small and large spaces, making every inch feel intentional.
Select narrow porcelain slabs in your desired finish and color. Carefully plan the layout, starting from the bottom or a central point for symmetry. Use spacers and a level to ensure straight, even strips. Apply a high-quality waterproof adhesive and press each slab firmly into place. Seal all joints with matching silicone or grout, and clean excess material promptly. Regular maintenance keeps the stripes crisp.
Add LED strip lighting along the edges of the stripes or behind a narrow shelf to emphasize the vertical pattern. Play with different color schemes or metallic accents that match your fixtures. Incorporate subtle textured finishes or gloss contrasts for extra visual interest. Personal touches like unique hardware or small sculptural elements can also enhance the overall look.
Vertical stripes are a clever way to add height and a modern edge without major renovation. They showcase your eye for detail and willingness to experiment. The pattern’s simplicity makes it versatile for various decor styles, from minimalist to eclectic. Want your bathroom to feel taller and more energetic? Vertical stripes are your go-to.
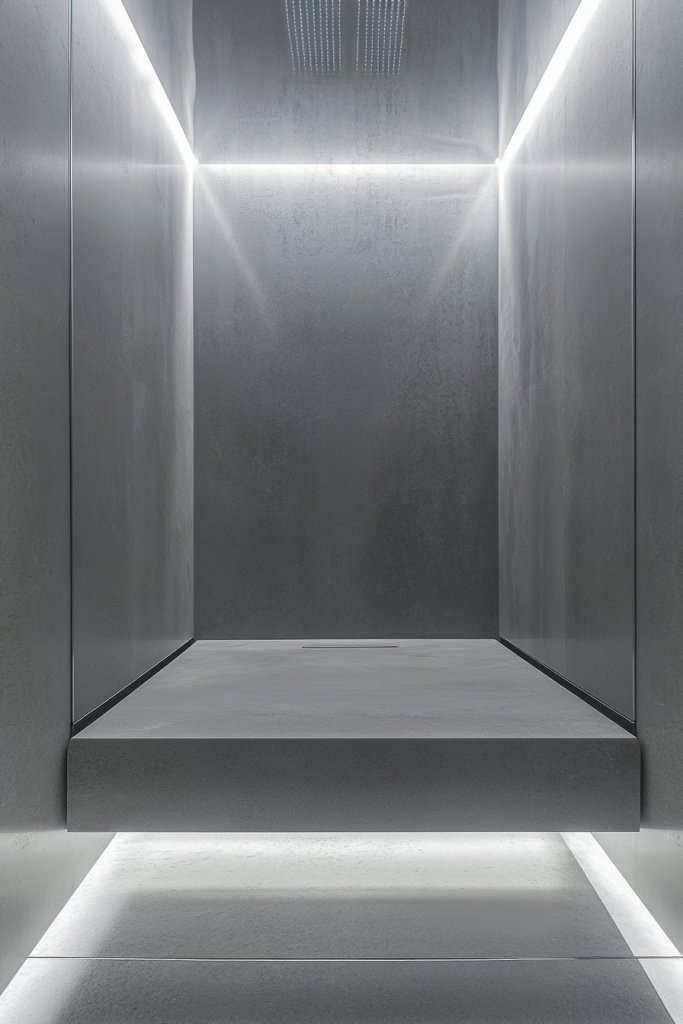
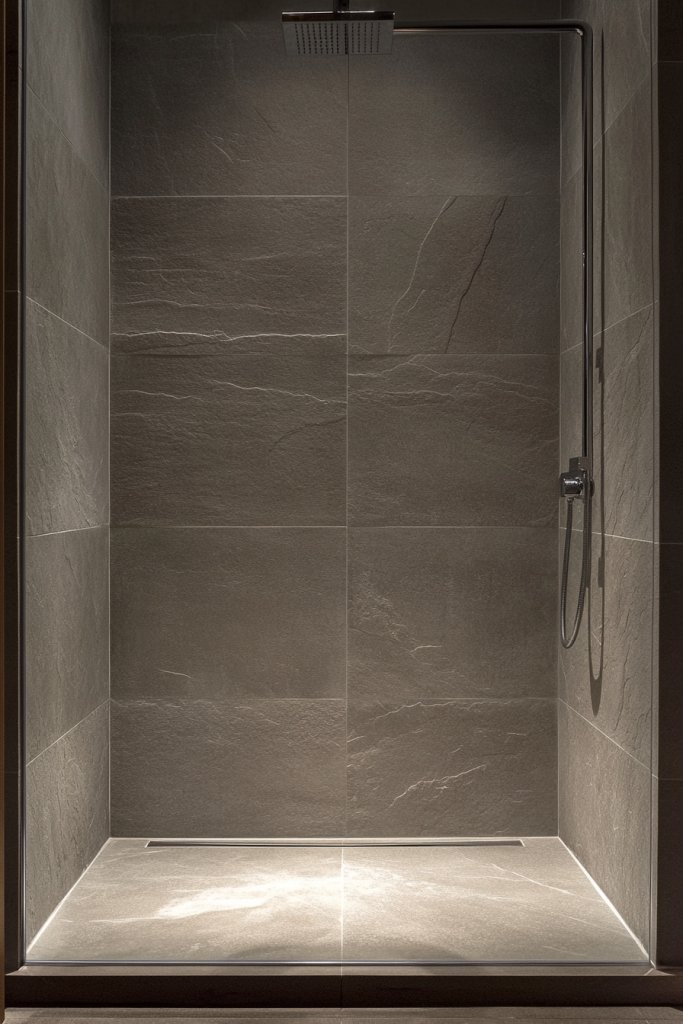
9. Floor-to-Ceiling Porcelain Walls for a Seamless Look
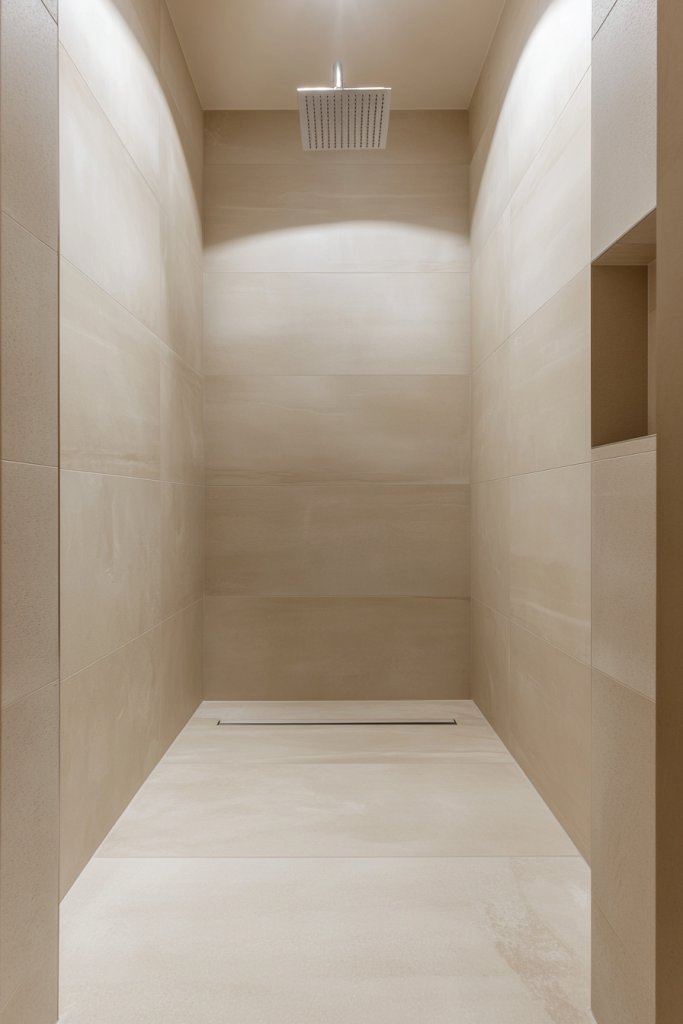
Ever wish your shower was more immersive, like stepping into a luxury spa? Floor-to-ceiling porcelain walls create a seamless, continuous surface that envelops your space. It’s a bold choice that elevates the entire bathroom aesthetic and minimizes visual clutter. If you love sleek, modern designs, this might be your dream come true.
Picture large porcelain slabs installed from the floor all the way to the ceiling, with no joints breaking the surface. The uniformity creates an endless, enveloping feeling that makes the shower space feel larger. The subtle play of light on the large panels adds depth and elegance, especially with polished or semi-gloss finishes. It’s a simple yet dramatic transformation.
This approach works beautifully with neutral tones, marble effects, or textured finishes. Pair with minimalist fixtures and hidden niches to maintain the sleek look. For seasonal updates, add textured textiles or decorative elements elsewhere in the bathroom to offset the uniformity. It suits both small bathrooms for a spacious feel and large baths for a grand, opulent vibe.
Choose large porcelain slabs, ideally with minimal joints, and measure carefully to fit your space. Use a professional to ensure perfect alignment and avoid cracks or uneven surfaces. Apply a waterproof adhesive, starting from the bottom and working upward, with spacers for evenness. Seal all joints with waterproof silicone and finish with a high-gloss or semi-gloss top coat if desired. Regular cleaning maintains the seamless appearance.
Incorporate hidden LED lighting behind the panels or along the edges for a glow effect. Use fixtures with sleek, modern finishes that match the slabs. Personalize with subtle decorative elements such as textured towels or sculptural accessories in neutral tones. Keep the look clean and uncluttered for maximum impact.
Floor-to-ceiling porcelain walls create a luxurious, spa-like environment that feels custom-designed. They emphasize height and space, making your bathroom feel grander. The seamless surface is easy to clean and maintain, offering both beauty and practicality. Ready to turn your shower into a masterpiece? This is the way to do it.
10. Mix of Matte and Glossy Finishes for Textural Contrast
Bored of uniform surfaces? A mix of matte and glossy porcelain slabs introduces subtle contrast and visual interest into your shower. It’s a sophisticated way to add depth without overwhelming the senses. If you want a space that’s both modern and layered, this technique is perfect.
Imagine large porcelain panels, some with a velvety matte finish, others with a reflective gloss. The interplay of textures catches and reflects light differently, creating a dynamic surface that invites touch. The contrast emphasizes architectural lines and highlights certain features, such as niches or borders. The varied finishes make your shower feel multi-dimensional and luxurious.
Combine finishes within the same color palette for a harmonious look or play with contrasting hues for a bold statement. Seasonal updates could include adding textured textiles or matte fixtures to balance the glossy surfaces. Incorporate lighting that enhances the differences, such as directional spotlights or soft ambient lights. It’s adaptable to any decor style, from ultra-modern to transitional.
Select porcelain slabs with the desired finishes and plan your layout. Use a strong, waterproof adhesive to install each slab carefully, ensuring proper alignment. Consider mixing finishes within the same wall or creating designated zones for each texture. Seal all joints with waterproof silicone or matching grout. Regular cleaning with gentle products preserves the integrity of both finishes and prevents staining.
Highlight the contrast with directional lighting or backlit niches. Incorporate fixtures with matte or glossy finishes that echo the wall surfaces. Add textured or plush textiles in complementary shades for tactile richness. Personalize with sculptural accessories or decorative shelving that stands out against the mixed finishes.
The combination of matte and glossy surfaces demonstrates sophistication and confidence in your design choices. It creates a balanced, layered environment that’s visually engaging. This style offers a perfect blend of high-end appeal and practical durability. Want your shower to speak of style and substance? Mixing finishes is the way to go.
11. Minimalist Corner Shower with Continuous Slabs
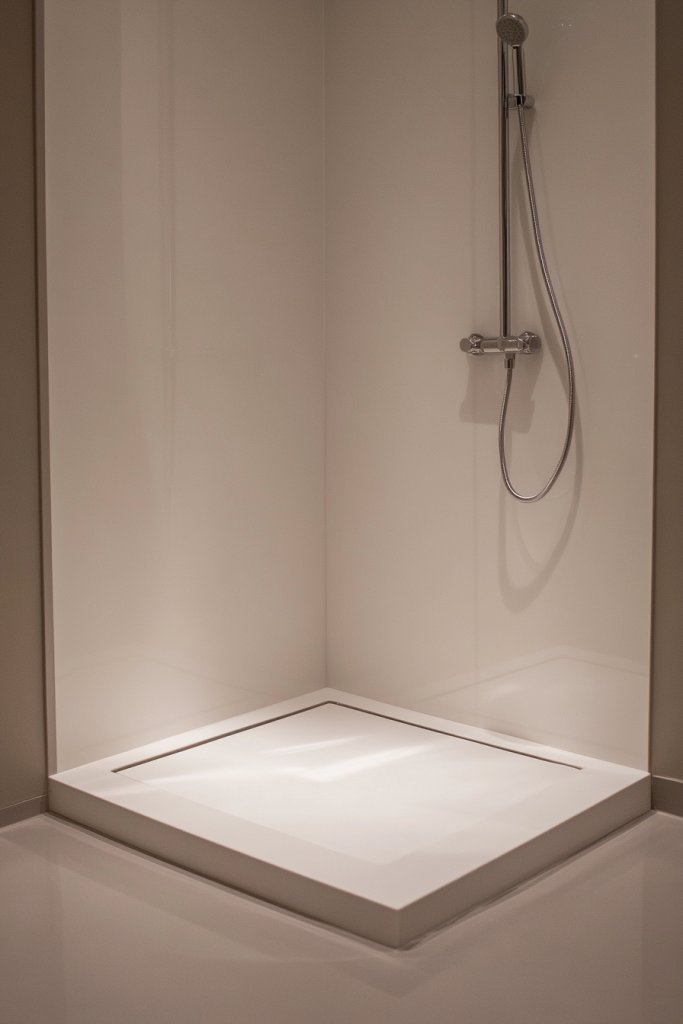
Looking to make the most of a small bathroom? A minimalist corner shower with continuous porcelain slabs maximizes space and minimizes visual clutter. It’s a sleek, functional solution that feels open and uncluttered. If you love clean lines and simple design, this setup is ideal.
Picture large porcelain slabs wrapping around the corner with no visible joints or grout lines—just seamless surfaces. The corner installation opens up the room, making the space feel larger. The continuous surface creates a calming, unified look that emphasizes simplicity and elegance. The subtle textures or finishes add depth without distraction.
Opt for neutral tones like white, beige, or soft gray for a calming effect. Incorporate minimal hardware—think sleek, matte fixtures or hidden supports. Seasonal updates could include textured textiles or subtle lighting accents to enhance the minimalist vibe. It’s adaptable to various space sizes and styles, from ultra-modern to Scandinavian.
Choose large porcelain slabs that can be cut to fit the corner dimensions precisely. Use a professional to ensure perfect alignment and a seamless appearance. Apply waterproof adhesive, starting at the bottom and working upward, to secure the slabs firmly. Seal all joints with waterproof silicone for durability. Consider hidden supports or mounting brackets that are concealed behind the slabs. Regular cleaning keeps the minimalist look pristine.
Add discreet niches or shelves in matching porcelain for storage. Use lighting to subtly highlight the continuous surface or create a soft glow. Incorporate textured or patterned slabs for a bit of visual interest without breaking the minimalist theme. Personal touches like sleek hooks or handles complete the look.
A corner shower with continuous slabs exemplifies modern elegance and efficient use of space. It’s perfect for smaller bathrooms, making them feel larger and more open. The minimalist aesthetic appeals to those who appreciate clean design and functionality. Ready to transform your corner into a sleek retreat? This is your answer.
12. Incorporating Subtle Color Variations for Natural Look
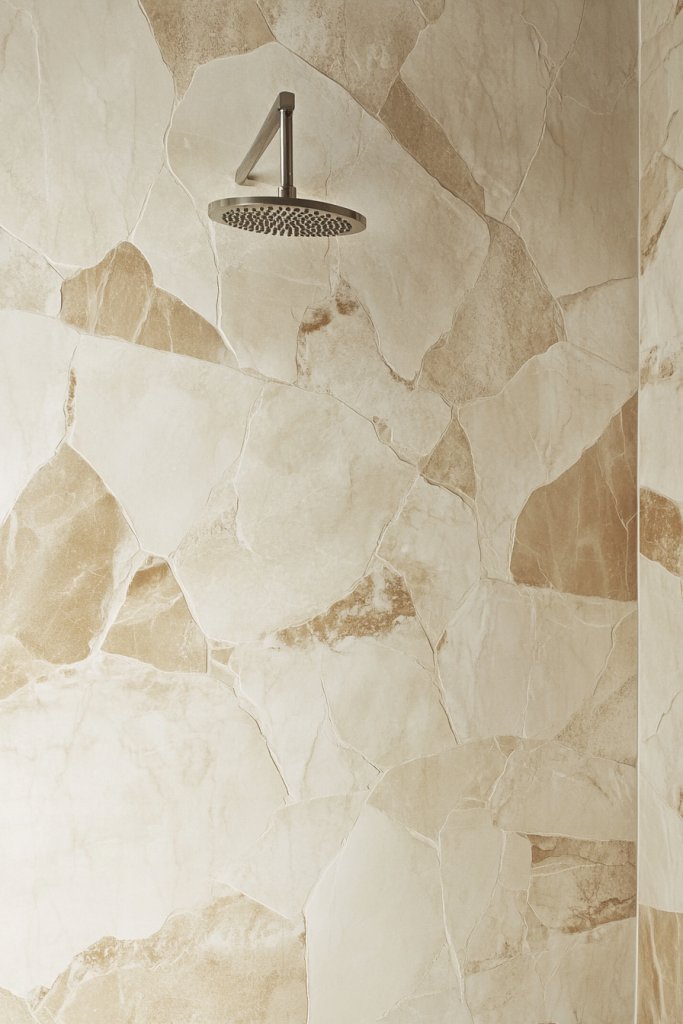
Craving the beauty of natural stone but wary of its maintenance? Porcelain slabs with subtle color variations mimic the organic look of real stone while offering durability and ease of care. It’s a smart way to bring warmth and authenticity into your shower without the mess.
Envision porcelain slabs with gentle shifts in color—warm creams, soft grays, or earthy browns—creating a nuanced, natural appearance. The slight variations in tone and pattern replicate the randomness of natural stone, making each slab unique. The matte or semi-gloss finish enhances the organic feel, inviting touch and appreciation. The overall effect is a harmonious, earthy vibe that grounds the space.
Pair with textured or matte fixtures in warm metals or wood tones for a cozy, natural aesthetic. Incorporate accessories like woven baskets or linen textiles to reinforce the organic theme. Seasonal updates could include earthy-colored towels or accent pieces. It’s adaptable to rustic, bohemian, or modern decor styles, adding a layer of authenticity.
Select porcelain slabs with subtle color shifts, ensuring consistency in finish and texture. Measure your wall carefully and plan your layout to minimize cuts and seams. Use a high-quality waterproof adhesive and install slabs carefully to align the subtle variations naturally. Seal joints with matching silicone or grout, emphasizing the natural look. Maintain with gentle cleaners that preserve the matte or semi-gloss finish.
Add natural wood accents or textured textiles to enhance the earthy feel. Incorporate decorative elements like stone-inspired accessories or sculptural details in matching tones. Use lighting that mimics natural daylight to highlight the variations and textures. Personal touches like handcrafted soap dishes or organic-shaped shelves can add character.
Subtle color variations in porcelain celebrate the beauty of natural materials with less fuss. They create a warm, inviting shower environment that feels both authentic and stylish. This approach proves you can enjoy the charm of natural stone without its drawbacks. Ready to embrace earthy elegance? Subtle variations are your answer.
13. Accent Wall with Patterned or Decorative Porcelain Slabs
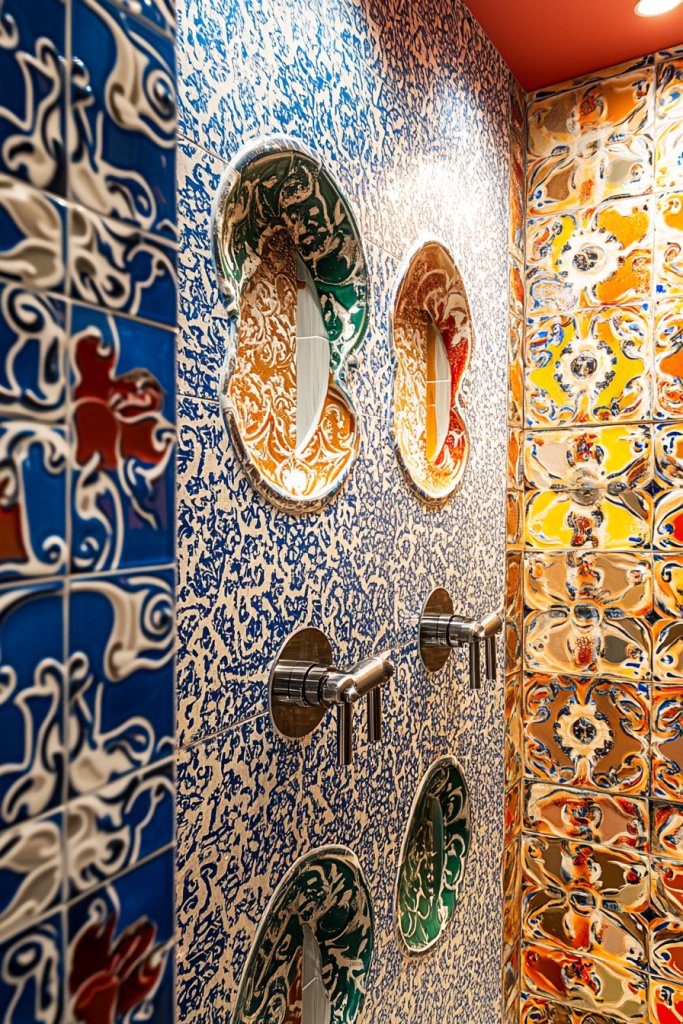
Want to turn your shower into a bold design statement? An accent wall with patterned or decorative porcelain slabs can create a stunning focal point. It’s a simple way to add personality and elevate your entire bathroom aesthetic. If you love a bit of drama, this is your chance.
Imagine one wall covered in porcelain slabs with intricate patterns, geometric motifs, or artistic textures. The contrast with plain walls draws attention and creates a visual centerpiece. Patterns like Moroccan tiles, floral motifs, or abstract designs add character and charm. Using a glossy or textured finish enhances the visual impact and invites touch.
Choose a bold pattern for the entire wall or a smaller section as a feature. Mix patterned slabs with plain ones for a more subtle effect. Incorporate fixtures and accessories in complementary colors or finishes to tie the look together. Seasonal updates can involve changing accessories or lighting to highlight the patterns.
Select patterned porcelain slabs with the desired motifs and finishes. Plan your layout carefully, especially if the pattern needs to align precisely. Use a strong, waterproof adhesive and install in sections, ensuring pattern continuity. Seal joints with matching silicone or grout, and clean excess immediately. For a seamless look, consider professional cutting and installation.
Add decorative trims or contrasting grout to emphasize the pattern. Incorporate lighting fixtures that cast shadows to enhance textures or patterns. Personalize with accessories that echo the motif or color scheme. You can also add a matching decorative border or niche to complement the accent wall.
An accent wall in patterned porcelain slabs creates a wow factor that reflects your bold style. It’s a memorable feature that can transform your shower into a luxurious retreat. This approach shows confidence in your design choices and a flair for the dramatic. Ready for a statement piece? Patterned porcelain is the way to stand out.
14. Installing Slabs at Different Heights for Dynamic Design
Feeling bored with uniform wall heights? Installing porcelain slabs at varying heights introduces a layered, dynamic look that keeps your shower visually interesting. It’s a modern twist that breaks the monotony of traditional designs. If you’re ready to experiment with dimension, this approach is perfect.
Imagine slabs installed at different levels—some reaching the ceiling, others stopping midway—to create a staggered effect. This layered approach adds depth and movement, drawing the eye around the space. Using contrasting textures or finishes at different heights enhances the visual complexity. It’s like turning your shower into a piece of contemporary art.
Play with heights to suit your needs—install niches or shelves at different levels for functionality. Use contrasting colors or finishes to highlight the variation. Seasonal updates could involve changing accessories or lighting to emphasize the layered design. This technique works well in both small and large bathrooms, adding personality without clutter.
Plan your layout carefully, marking the different height levels on your wall. Use precise measurements and a level to ensure clean, straight lines. Install slabs at each height, securing with waterproof adhesive, and ensure a secure, level placement. Seal all joints with waterproof silicone or grout, especially at transitions. Regular cleaning helps maintain the layered look.
Add lighting that highlights the varying heights—such as recessed lights or wall washers. Incorporate decorative or textured finishes at different levels to create contrast. Use accessories like sculptural hooks or small shelves at different heights for practicality and style.
Installing slabs at different heights turns an ordinary shower into a dynamic space full of visual interest. It demonstrates creative thinking and confidence in design. The layered effect can make your bathroom feel more spacious and personalized. Want to break the mold? This technique is a perfect choice.
15. Eco-Friendly Porcelain with Recycled Content for Sustainability
Concerned about your environmental footprint but still want a stylish bathroom? Eco-friendly porcelain slabs made from recycled materials offer a sustainable choice without sacrificing aesthetics. It’s a feel-good upgrade that aligns with eco-conscious living. Who says you can’t have beauty and sustainability?
Imagine porcelain slabs with subtle variations in color or texture that come from recycled content, mimicking natural stone or concrete. The finishes range from matte to semi-gloss, with some displaying tiny inclusions or flecks that tell a story of recycled origin. The look is modern, raw, and authentic—perfect for eco-chic designs. The visual complexity adds depth and character to your shower.
Pair with fixtures in matte black, brushed nickel, or raw metals for an earthy, modern vibe. Incorporate natural textiles or organic-shaped accessories to enhance the eco-friendly theme. Seasonal updates could include biodegradable or recycled accessories and textiles. It’s versatile enough for rustic, industrial, or contemporary styles.
Select porcelain slabs labeled as recycled or eco-friendly, ensuring they meet environmental standards. Measure your wall space and choose slabs accordingly. Install with suitable waterproof adhesive, taking care to handle the slabs gently to avoid damaging any inclusions. Seal joints with eco-friendly sealants that are low in VOCs. Regular cleaning with gentle, non-abrasive products preserves the material’s integrity.
Add natural elements like reclaimed wood shelves, or incorporate biodegradable or recycled accessories for a complete eco-friendly look. Use lighting that emphasizes the natural or raw qualities of the slabs. Personalize with handcrafted or sustainable decor items that reflect your values. Every detail reinforces the environmentally conscious aesthetic.
Choosing recycled porcelain slabs shows your commitment to sustainability and style. It proves that eco-conscious choices can be chic and sophisticated. This approach not only enhances your bathroom’s look but also your lifestyle. Ready to make a positive impact? Eco-friendly porcelain is the stylish solution.
Conclusion
With such a diverse range of porcelain slab shower ideas, there’s something to suit every style and space. These designs can transform your bathroom into a modern haven that combines beauty with practicality. Don’t hesitate to try these inspiring ideas and create the bathroom of your dreams—your perfect retreat is just a renovation away!