Dreaming of a stylish kitchen upgrade without the hassle of permanent changes? Renter-friendly kitchen makeover ideas are gaining popularity because they allow you to personalize your space without risking your security deposit or making costly renovations. These clever solutions help you create a functional, beautiful kitchen that reflects your style while remaining removable and non-invasive.
In this article, you’ll find a variety of creative ideas to transform your kitchen effortlessly. From colorful peel-and-stick backsplashes to portable storage solutions and decorative accessories, these tips will inspire you to craft a space that feels uniquely yours—all without the need for a lease-breaking overhaul.
1. Peel-and-Stick Backsplash Tiles for a Modern Look
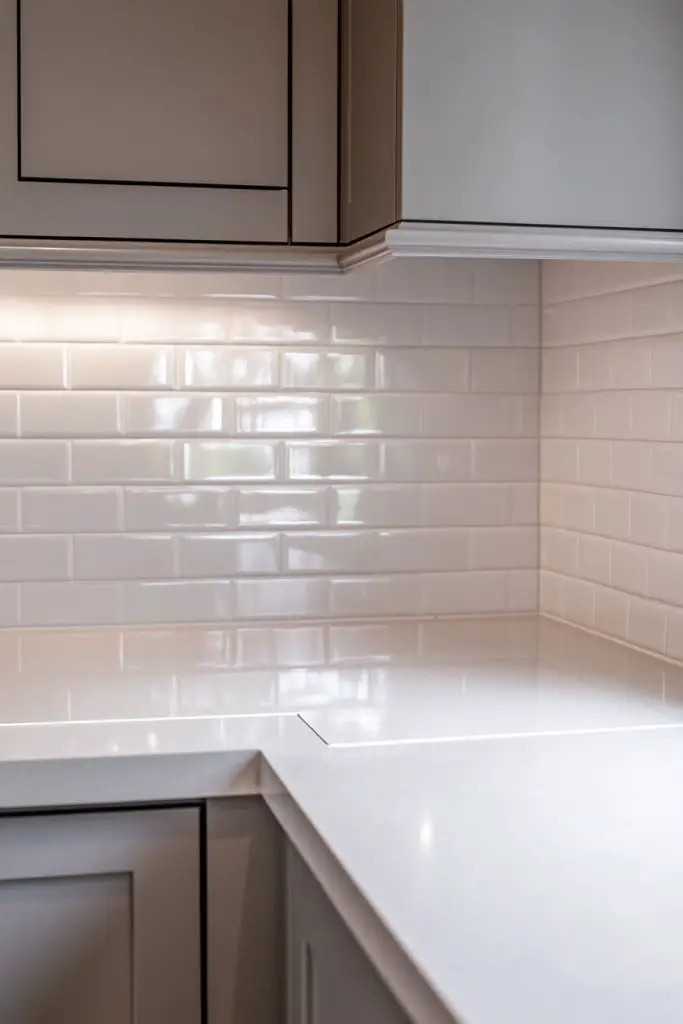
Ever wish your kitchen could look like a magazine shoot without the hassle and damage? Peel-and-stick backsplash tiles are the perfect quick fix for renters craving style without commitment. They turn boring walls into eye-catching features and hide imperfections effortlessly. Plus, they save you from long-term regrets and costly renovations.
Imagine a sleek, glossy tile with a modern subway pattern stretching behind your stove, reflecting warm light as you cook. The textured surface mimics ceramic or stone, yet it’s lightweight and easy to handle. As you run your fingertips over the surface, you feel the subtle ridges and smooth finishes that elevate your space instantly. It’s like giving your kitchen a fresh, designer facelift overnight.
Choose from a variety of designs—geometric, herringbone, or classic subway—depending on your style. For seasonal updates, swap out neutral tones for bold colors or metallic finishes. These tiles work well in small kitchens or open-plan spaces, and you can even create patterns or borders for a custom look. The flexibility makes it perfect for modern, rustic, or eclectic themes.
Start by cleaning your wall thoroughly to ensure adhesion. Measure the area and cut tiles precisely, using a utility knife for clean edges. Peel the backing and carefully align the tiles, pressing firmly to eliminate air bubbles. Use a level or straight edge for perfect lines. No grout needed—just stick and smooth. For corners and edges, cut tiles to fit snugly. When done, smooth out any wrinkles and admire your handiwork.
Add a touch of personality by mixing tile patterns or layering with peel-and-stick decals for borders. Consider coordinating with countertop accessories or small decorative elements to tie the look together. You can even overlay a transparent sealant for extra durability if needed. Personal touches like custom color combinations make your space uniquely yours.
This easy upgrade proves that you don’t need to be a pro to achieve a high-end look. It’s budget-friendly, damage-free, and reversible—perfect for renters or anyone hesitant to commit. Soon, your kitchen will feel brand new, boosting confidence in your decorating skills. Ready to transform your space without breaking the bank?
2. Temporary Wallpaper for a Bold Accent Wall
Tired of dull walls that don’t inspire your culinary creativity? Temporary wallpaper is your solution for adding vibrant personality without the permanence. It’s ideal for renters who crave statement walls but fear the damage or commitment. Plus, it’s a fun way to experiment with bold patterns and colors.
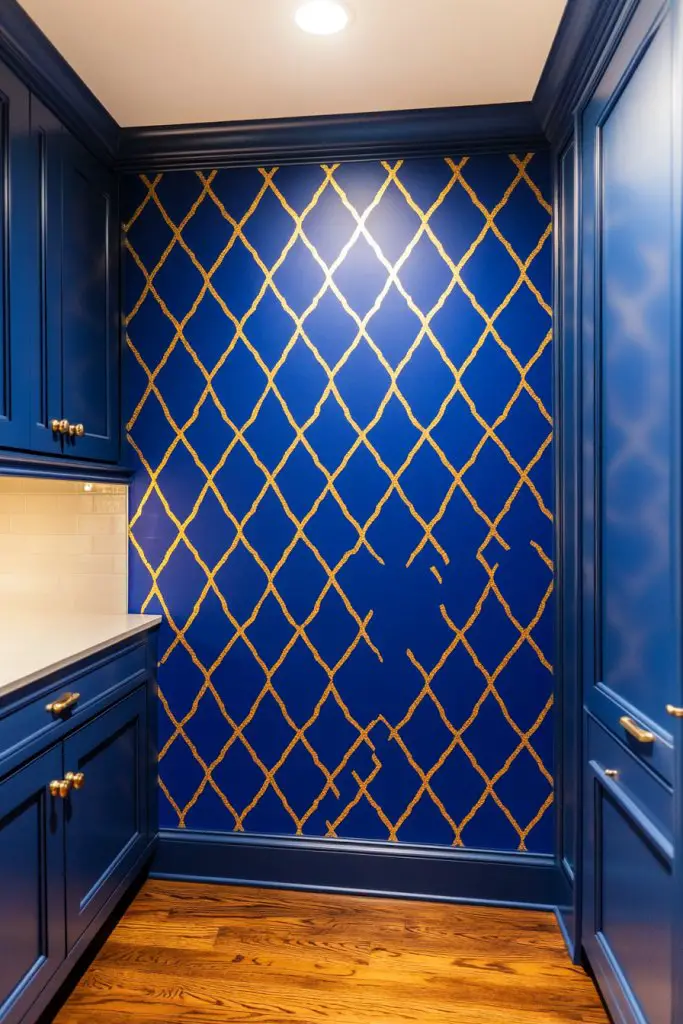
Picture a striking floral pattern in deep jewel tones or a geometric design in metallic hues covering one wall. The wallpaper’s matte or gloss finish creates a stunning backdrop for your kitchen antics. As sunlight hits the surface, it dances with the pattern, giving your space a lively, sophisticated vibe. You can even layer it with textured paint or fabric accents for extra dimension.
Choose from peel-and-stick or removable adhesive options to suit your needs. Patterned wallpaper can be used to highlight a specific area—like behind the sink or dining nook. Seasonal options include tropical prints for summer or cozy plaid for winter. For small spaces, a single accent wall makes a big impact without overwhelming the room.
Start by preparing your wall—clean, dry, and smooth. Measure the wall carefully, then cut wallpaper strips slightly longer than needed. Peel the backing gradually, smoothing the paper as you go to avoid bubbles. Use a plastic smoothing tool or credit card for a flawless finish. For corners and edges, fold and trim carefully. When finished, remove or reposition easily if needed.
Personalize your accent wall with coordinating accessories—like a colorful clock, decorative shelving, or themed kitchen tools. Combine with textured curtains or fabrics to soften the space. You can also add removable decals or stencils to further customize the design. Play with layering different patterns for a curated, eclectic look.
This approach empowers you to create a bold statement with minimal risk. It’s perfect for renters who want change without damage or permanence. Plus, it’s a conversation starter and a visual boost for your daily routine. Ready to turn your wall into a piece of art?
3. Magnetic Spice Racks on Refrigerator Doors
Messy spice jars cluttering your countertop? Looking for a space-efficient, stylish storage solution? Magnetic spice racks are a renter’s dream—they keep spices front and center without drilling or permanent fixtures. Plus, they add a touch of industrial chic to your kitchen.
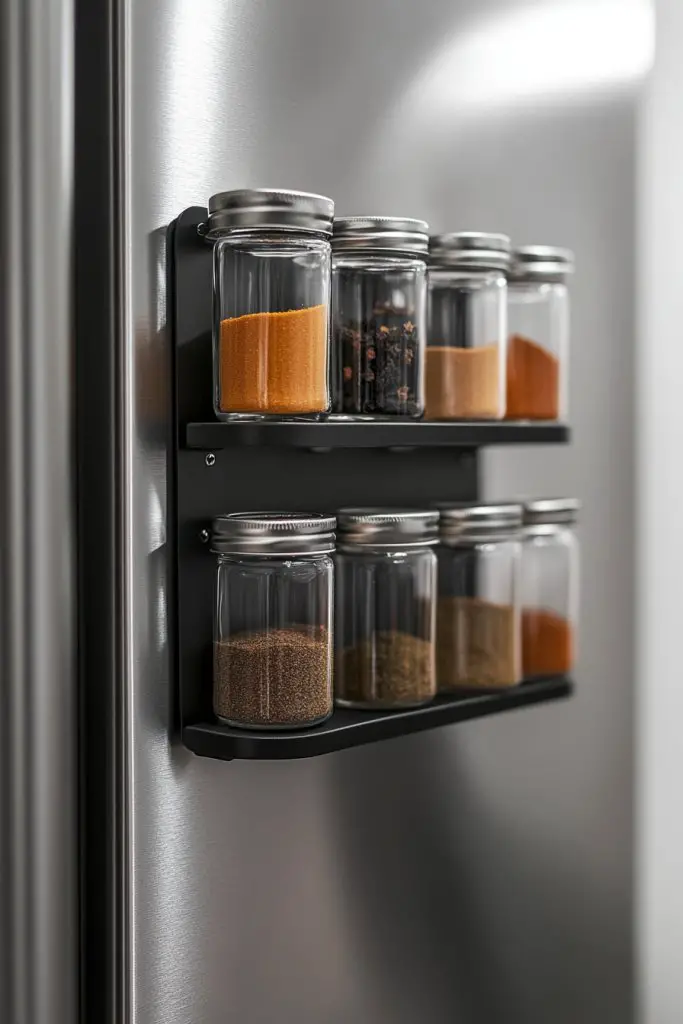
Visualize a sleek metallic rack attached to your fridge, holding colorful spice containers in a tidy row. The jars’ labels peek out, making it easy to find what you need while cooking. The magnetic backing keeps everything secure, even during busy meal prep. It’s a simple upgrade that transforms clutter into order and adds a modern touch.
Choose from various sizes and styles—open, closed, or with labels—to suit your aesthetic. For a more personalized look, swap standard jars for vintage glass bottles or painted containers. You can also cluster spices by cuisine or frequency of use. This system works well in small kitchens or as a stylish feature in open-concept spaces.
Start by cleaning the fridge surface thoroughly. Select a magnetic rack that fits your space and style. Arrange your spices and label them clearly for quick access. Attach the rack firmly to a clean, dry metal surface, pressing out air bubbles if applicable. No tools needed—just peel, stick, and organize. Repositioning is easy if you decide to change the layout later.
Add decorative elements like mini chalkboards for labeling or small hooks for utensils. Use color-coded jars or themed containers to match your kitchen decor. Incorporate small plants or decorative accents around the jar bases for additional flair. This setup encourages creativity and organization simultaneously.
This simple hack proves that smart storage can elevate your entire kitchen vibe. It’s a DIY win that saves space and adds functionality, all without damaging walls. Soon, cooking will feel more fun and less chaotic—confidence booster included!
4. Over-the-Door Hooks for Utensils and Towels
Cluttering your counters with utensils and towels? Over-the-door hooks are the renter-friendly fix for keeping essentials within reach. They turn unused door space into a functional storage zone without drilling or permanent fixtures. Plus, they add a charming, rustic touch to your kitchen.
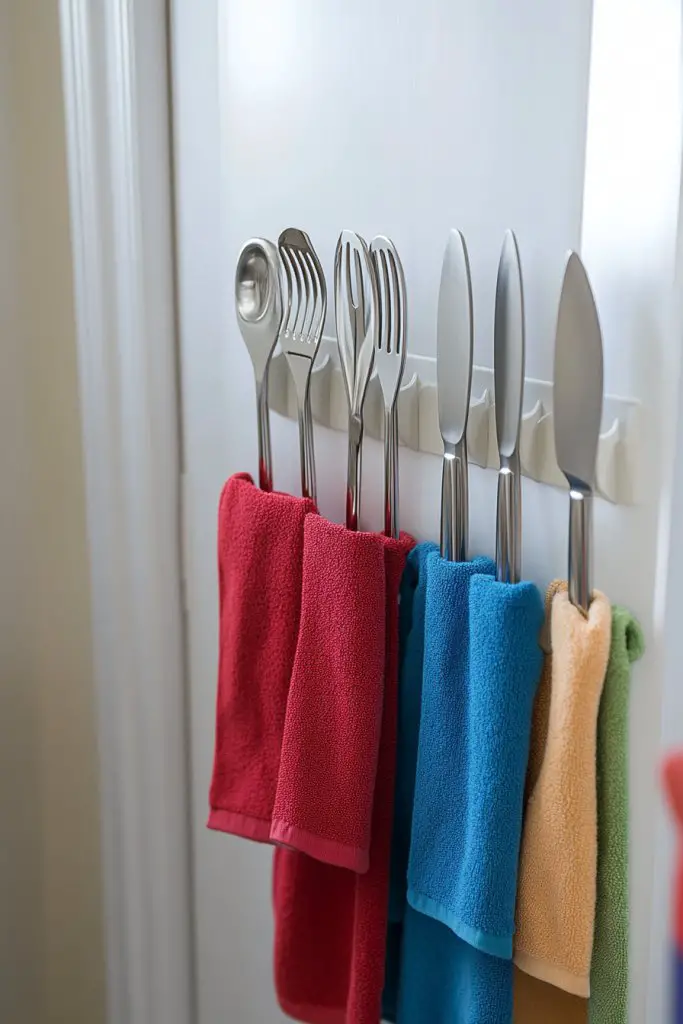
Imagine a row of black metal hooks hanging on the inside of your pantry or cabinet door, holding spatulas, oven mitts, or dishcloths. The hooks’ sleek design contrasts beautifully with your cabinets’ finish, creating a tidy, organized look. The space behind the door stays open and free of clutter, making your kitchen feel larger and more inviting.
Use different hook styles—S-hooks, clip hooks, or decorative hooks—to match your decor. Hang small baskets or pouches for additional storage of spices or cleaning supplies. Change the arrangement seasonally or when you redecorate to keep things fresh. These hooks work in narrow spaces or small apartments, making every inch count.
Select sturdy hooks that fit over your door without causing damage. Clean the door surface to ensure a good grip. Hang your utensils, towels, or small baskets securely on the hooks. For heavier items, choose reinforced hooks designed for weight. Adjust positioning for easy access and visibility. Keep the hooks clean and check regularly for stability.
Decorate hooks with colorful ribbons or themed tags to add personality. Use matching or contrasting colors to coordinate with your kitchen palette. Incorporate decorative fabric pouches or small trays for a boutique look. Personal touches make organizing a fun part of decorating.
This simple trick turns a plain door into a smart storage solution, proving that small changes can make a big difference. It’s quick to implement and easy to adjust, giving you control over your space. Soon, you’ll wonder how you ever managed without them.
5. Freestanding Open Shelving Units
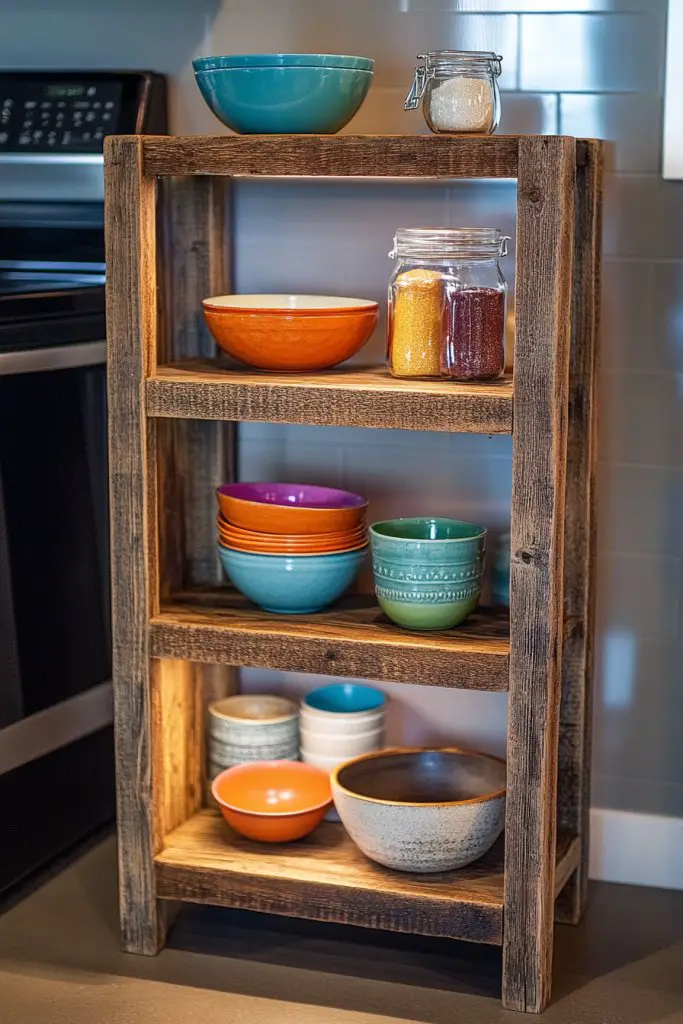
Tired of cluttered countertops and hidden storage? Freestanding open shelves offer a stylish, versatile solution that’s perfect for renters. They add visual interest and extra storage without damaging walls or requiring permanent installation. Plus, they’re easy to move and reconfigure.
Picture a rustic wooden shelf unit standing in a corner, holding colorful bowls, jars, and decorative canisters. The open design allows easy access and displays your favorite kitchen essentials. The natural textures contrast beautifully with modern appliances, creating a cozy yet functional vibe. Soft lighting underneath adds warmth and highlights your curated collection.
Choose from metal, wood, or mixed-material shelves to match your style. Use baskets or decorative boxes to contain smaller items, maintaining a tidy look. Change the arrangement seasonally by swapping out decor or adding new containers. These units work well in small kitchens or as room dividers in open spaces.
Select a sturdy, no-drill shelf that fits your space and style preference. Assemble according to the manufacturer’s instructions, typically with minimal tools. Arrange your dishware, jars, and decorative accents thoughtfully to balance functionality and aesthetics. Position the unit where it’s most accessible and visually appealing. Regularly check stability and clean dust or spills promptly.
Add decorative labels or tags to organization containers for easy identification. Incorporate textiles like a soft rug or cloth runner on the shelves for extra texture. Use themed decor or seasonal accents to keep the space lively. Personal touches turn a simple shelf into a statement piece.
Open shelving encourages creativity and makes your kitchen feel more open and inviting. It’s a flexible, affordable way to display what you love while staying organized. Your space will feel more curated and personalized—proof that style and function can coexist effortlessly.
6. Adhesive Command Strips for Hanging Light Decor
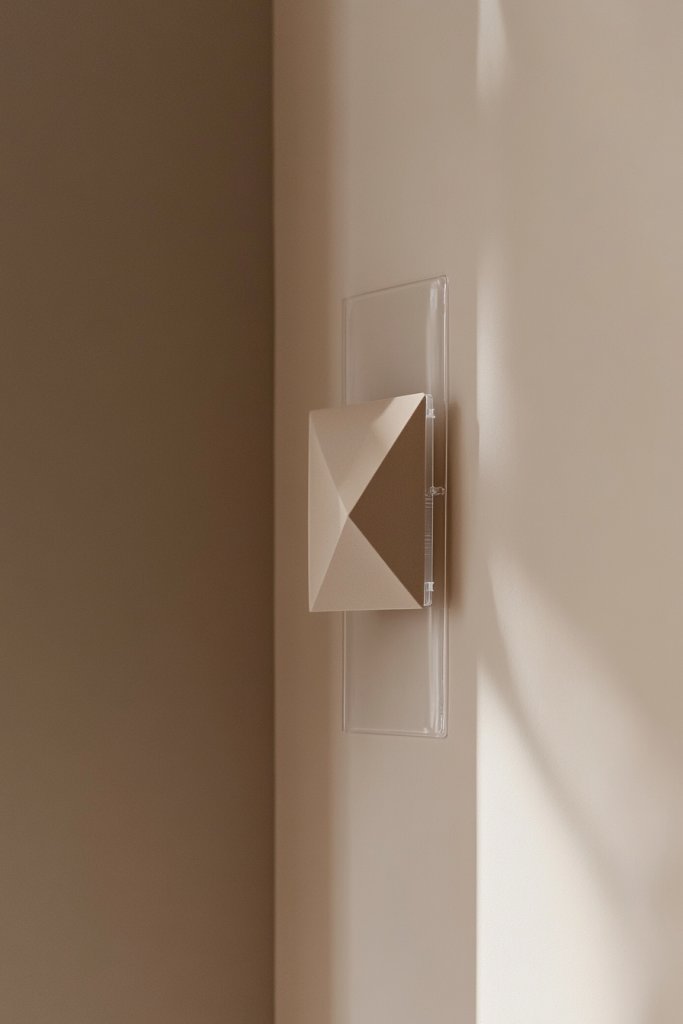
Hanging decorative elements in a rental without damaging walls? Command strips are your best friend—they hold up lightweight decor without leaving holes or sticky residue. They make your walls more interesting and your space more personalized, all without risking your security deposit.
Imagine mounting a chalkboard or a simple geometric wall hanging using clear command strips. The lightweight decor adds a modern touch against a neutral wall, instantly elevating the space. The strips’ discreet design keeps the focus on your stylish pieces, not the hardware. It’s a clean, minimalist look that blends seamlessly into any decor.
Use command strips to hang lightweight fabric banners, decorative signs, or even small mirrors. Switch out decor seasonally or for special occasions without hassle. For a layered look, combine multiple strips for different elements, creating a gallery effect. Adjust placement easily as your style evolves.
Select the appropriate size and weight capacity of command strips. Clean the wall surface thoroughly to ensure adhesion. Attach the strips according to the package instructions, pressing firmly for at least 30 seconds. Mount your decor, then gently test stability before hanging more items. Avoid overloading—check weight limits regularly.
Create themed displays with coordinating decor pieces—like seasonal banners or motivational quotes. Incorporate small hooks or clips for additional functionality, such as hanging keys or utensils. Use decorative tapes or washi tapes to add color and interest around the strips for a playful touch.
This method unlocks endless decorating possibilities without risking wall damage. It’s perfect for renters, students, or anyone who loves changing their decor often. Soon, your walls will reflect your personality, all while keeping your deposit safe and sound.
7. Removable Drawer and Cabinet Liners
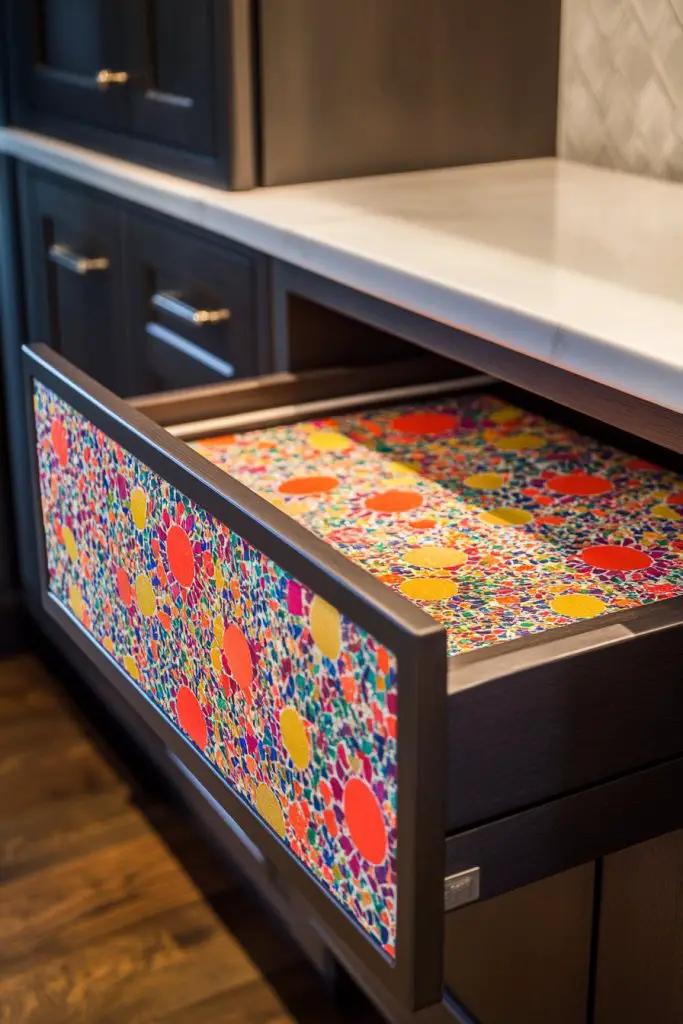
Tired of dull, stained cabinet interiors? Removable liners are a quick, affordable way to refresh your kitchen and protect your surfaces. They add a splash of color or texture while preventing scratches and spills. Best of all, they’re easy to install and remove without damage.
Imagine sliding a patterned, textured liner into your drawers, transforming a mundane storage space into a cheerful, inviting area. When you open the cabinet, a vibrant mosaic of colors greets you. The liners’ smooth surface makes cleaning easy, and the patterns add a touch of personality to your storage zones.
Choose from a wide range of patterns—floral, geometric, or abstract—to match your decor. Seasonal liners can be swapped out to reflect holidays or moods. Use liners to delineate sections within drawers or cabinets for better organization. They’re perfect for small upgrades that make a big visual impact.
Measure your drawers and cabinets carefully, then cut liners to size with scissors or a utility knife. Clean surfaces thoroughly before placing liners to ensure stickiness. Lay the liners flat, smoothing out bubbles as you go. No adhesive needed—just peel and stick. For curved or tricky corners, trim carefully for a seamless fit.
Combine liners with small labels or tags to organize utensils or spices. Mix different patterns for an eclectic look, or keep it uniform for a sleek appearance. Incorporate textured fabrics or soft mats on top of liners for added comfort and style. Personal touches turn functional upgrades into design statements.
This simple update proves that a small effort yields a fresh, polished look. It’s a DIY project that anyone can do, instantly elevating your storage game. Soon, every drawer and cabinet will feel like part of a thoughtfully curated kitchen.
8. Stylish, Non-Permanent Countertop Storage Solutions
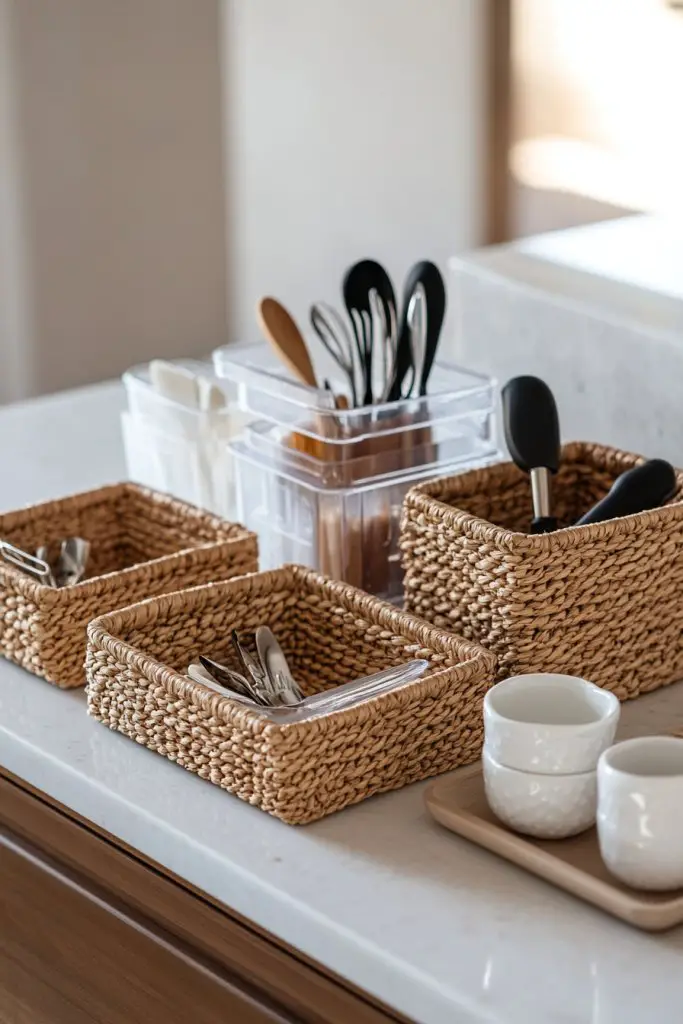
Cluttered countertops make cooking stressful and space feel cramped. Stylish, temporary storage solutions help keep essentials organized and accessible. They add visual appeal while being easy to move and remove—perfect for renters or those who love change.
Picture a set of woven baskets, ceramic trays, and acrylic organizers neatly arranged on your counter. Each container holds utensils, spices, or small appliances, creating a tidy, inviting workspace. The natural textures and sleek shapes complement your decor, transforming chaos into calm. When you entertain, simply shift or remove items to clear space.
Opt for decorative baskets or trays in materials like wood, metal, or ceramic to match your style. Use clear acrylic containers for a minimalist look or woven baskets for a rustic vibe. Change the arrangement seasonally or for different tasks, like baking or prep work. These solutions work in kitchens of all sizes and styles.
Gather containers in various sizes based on your needs. Arrange them in a way that maximizes space and accessibility. Group similar items together and label containers for quick identification. Use stacking or tiered stands to save space. Regularly declutter and clean to maintain a fresh look. No permanent installation required—just place and enjoy.
Decorate containers with custom labels or wraps to add personality. Incorporate seasonal accents—like a festive cloth or themed tags—to keep things fresh. Use decorative cloths or runners underneath for added color and texture. Personal touches turn a functional setup into an expressive element of your kitchen.
This approach makes your kitchen more functional and beautiful without permanent changes. It’s adaptable, affordable, and simple to update whenever your style evolves. Soon, your countertop will be both practical and Instagram-worthy—ready for your next cooking adventure.
9. Colorful, Non-Permanent Cabinet Handles and Knobs
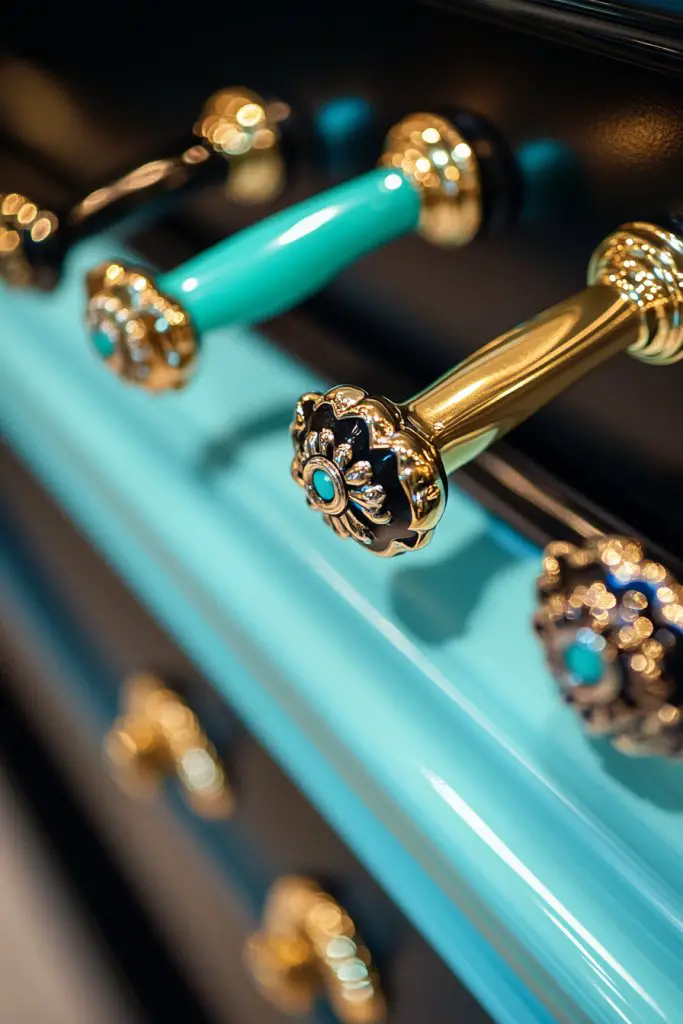
Dull, outdated cabinet hardware drags down your kitchen’s vibe. Swapping in colorful or trendy handles is a quick, inexpensive way to refresh your space. Best of all, it’s totally non-permanent—no drilling needed—and perfect for renters craving a style upgrade.
Imagine opening your cabinets to reveal vibrant knobs in turquoise, gold, or matte black. The new hardware instantly modernizes cabinets, drawers, or pantry doors. The shiny or matte finishes catch the light, adding a subtle touch of luxury. It’s a small detail that makes a surprisingly big impact.
Mix and match handle styles—bar pulls, round knobs, or geometric shapes—to create a custom look. Coordinate with other accents like light fixtures or accessories for a cohesive style. Seasonal swaps, like pastel handles in spring or metallics for holidays, keep your kitchen feeling fresh. This simple update fits any decor style.
Remove existing handles carefully using a screwdriver. Measure hole centers and choose handles that fit or use adhesive clip-ons if available. Attach new handles by aligning with existing holes or using double-sided tape for temporary fixes. Tighten screws securely without overtightening. Clean up any debris for a polished finish. Reversible and damage-free, it’s a no-brainer.
Add decorative elements like tassels, beads, or custom-painted handles for a personalized touch. Coordinate handle colors with accessories or kitchen textiles. Use creative hardware in unexpected places—like spice drawers or appliance fronts—for a cohesive look. Personal touches make your kitchen uniquely yours.
Small hardware swaps can dramatically change your kitchen’s personality. They’re quick, affordable, and reversible, making them ideal for renters or anyone hesitant to commit long-term. Soon, your cabinets will look designer-created—proof that tiny tweaks matter.
10. Portable Kitchen Island or Cart for Extra Prep Space
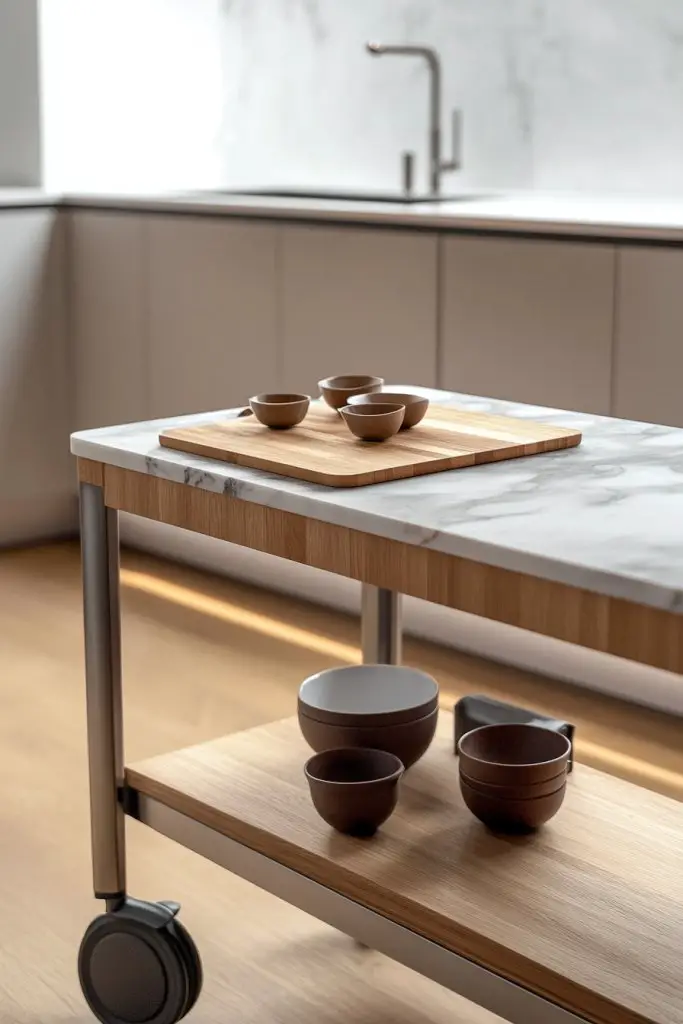
Limited counter space turning your kitchen into a chaotic zone? A portable kitchen island or cart provides extra prep area without the permanence or damage. It’s a flexible solution that adapts to your needs and lifestyle. Plus, it adds a stylish focal point to your space.
Imagine a sleek metal or wooden cart with wheels, topped with a marble or butcher block surface. It holds cutting boards, bowls, or small appliances, ready for action. When not in use, you can wheel it away or tuck it into a corner. The mobility allows you to reconfigure your kitchen layout easily, making cleanup or hosting effortless.
Choose from styles that match your decor—industrial, rustic, or modern. Use baskets or trays underneath for additional storage of utensils or linens. Change the top surface seasonally or for special projects. It’s ideal for small apartments, outdoor kitchens, or as an extra serving station during parties.
Select a sturdy, lightweight model with locking wheels for safety. Assemble following the manufacturer’s instructions, then add your favorite accessories. Use it to prep meals, serve drinks, or hold extra dishes. Position it where it’s most useful, and keep it clean for durability. Regular maintenance ensures longevity.
Decorate the cart with colorful liners, themed accessories, or decorative towels. Use removable labels to organize utensils or ingredients. Add a small chalkboard or message board for notes. Personal touches turn a functional piece into a statement of style.
This versatile piece boosts your kitchen’s functionality without permanent changes. It’s perfect for entertaining or daily cooking, making your space more efficient. Soon, you’ll wonder how you ever managed without this mobile helper.
11. Creative Door-Mounted Storage Solutions
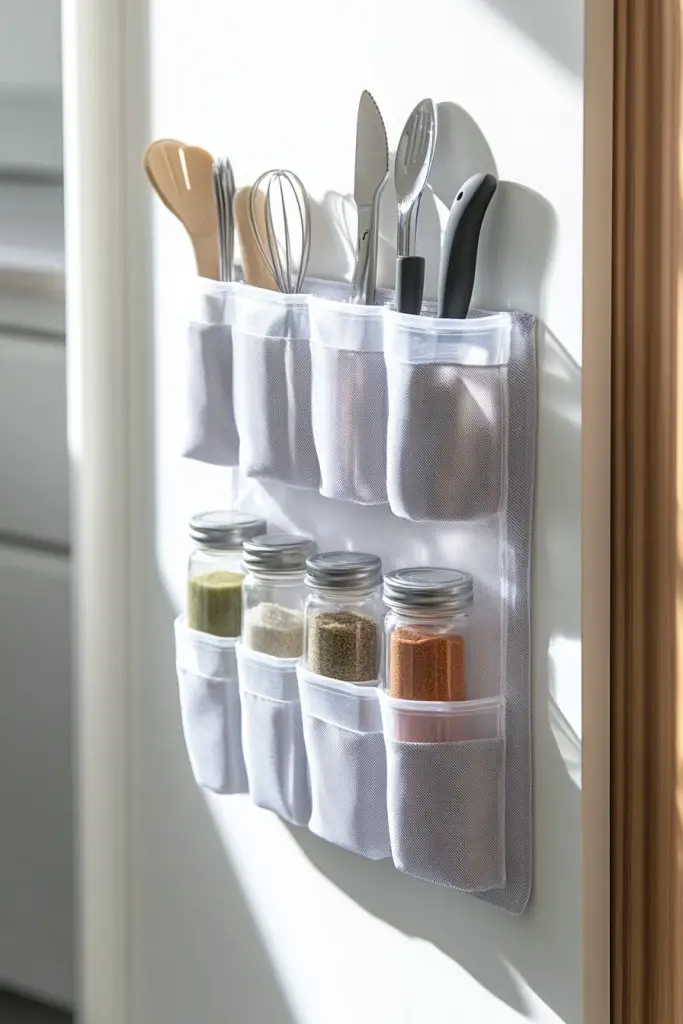
Cluttered cabinets and limited storage space? Door-mounted racks and pockets are a clever solution to maximize every inch. They keep spices, cleaning supplies, or small tools organized and easily accessible—no drilling required. Ideal for renters who want extra storage without damage.
Visualize a slim, fabric or plastic pocket organizer hanging on the inside of your pantry door, filled with spice jars or small utensils. The transparent pockets make it easy to see contents at a glance. The door’s surface remains clean and uncluttered, while storage capacity doubles instantly.
Use different sizes and materials—mesh, fabric, or plastic—to suit your needs. Attach small hooks or clips for additional items like towels or utensils. Change the contents seasonally or for different cooking themes. This solution works well in narrow spaces or small kitchens.
Choose a rack or pocket organizer that fits your door’s dimensions. Clean the surface with alcohol or soap to ensure adhesion. Hang the organizer securely, then fill with your items. Adjust positioning as needed for easy reach. Regularly empty and clean to keep it fresh and functional.
Decorate with fabric covers or labels to match your decor. Incorporate themed tags or color coding for quick identification. Add small decorative elements like charms or stickers. Personal touches make this a custom, charming addition to your kitchen.
This innovative storage hack helps you reclaim cluttered space and stay organized. It’s simple, portable, and easy to update. Soon, you’ll enjoy a neater, more efficient kitchen environment, boosting your confidence as a home decorator.
12. Removable Wall Decals and Vinyl Art
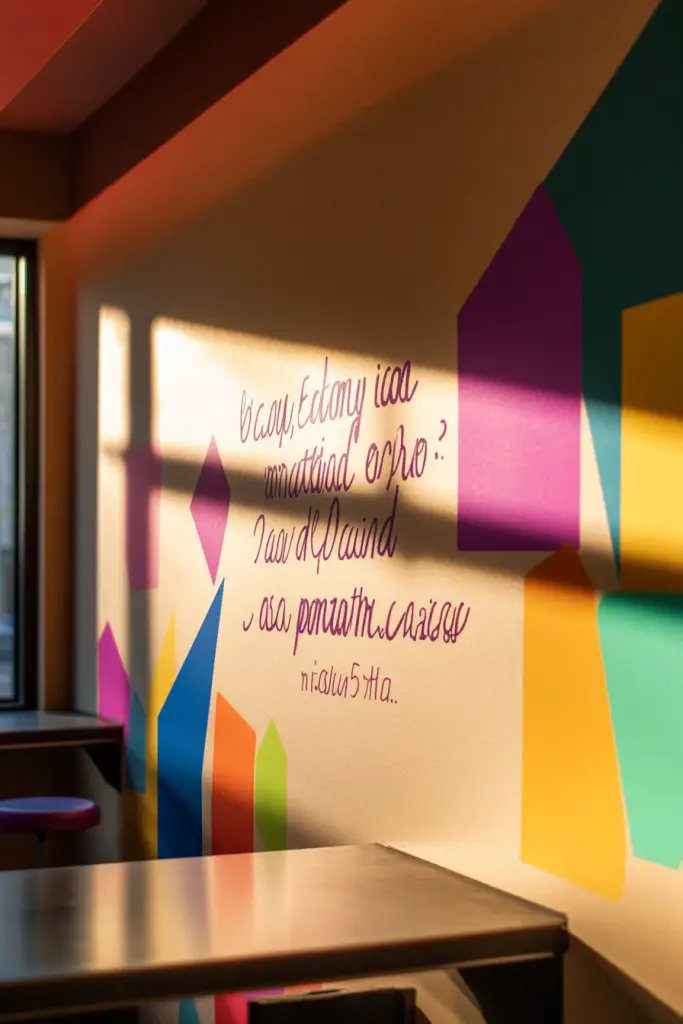
Bored with plain walls that lack personality? Removable wall decals and vinyl art let you personalize your kitchen without damage or mess. They’re perfect for renters who want to reflect their style and make a statement. Plus, they’re easy to change when you get tired of the look.
Imagine a playful quote or a geometric design in bold colors adorning your backsplash or empty wall. The decals are smooth and matte, creating a seamless look that complements your decor. When sunlight hits them, they cast subtle shadows, adding depth and interest. You can layer multiple decals for a gallery effect.
Choose from a wide array of designs—nature motifs, abstract patterns, or motivational quotes—to match your mood. Seasonal or themed decals make it easy to refresh your space. Use them to highlight a specific wall or to create a focal point in your kitchen.
Clean the wall thoroughly to remove dust and grease. Measure and position the decal carefully, using a level or masking tape as a guide. Peel off the backing slowly, smoothing the decal with a squeegee or credit card to avoid bubbles. Reposition if necessary before pressing down firmly. When installed, they look like painted murals but are completely removable.
Combine decals with painted accents or removable wallpaper for a layered look. Frame or border decals with painter’s tape for a polished finish. Add small decorative hooks or clips nearby to display lightweight kitchen tools or accessories. Personal touches make your wall a reflection of your personality.
Removable decals empower you to create a stylish, dynamic space that evolves with your taste. They’re a cost-effective way to keep your decor fresh and personal. Soon, your kitchen will feel more lively and inviting, inspiring your culinary adventures.
13. Use of Colorful or Patterned Area Rugs
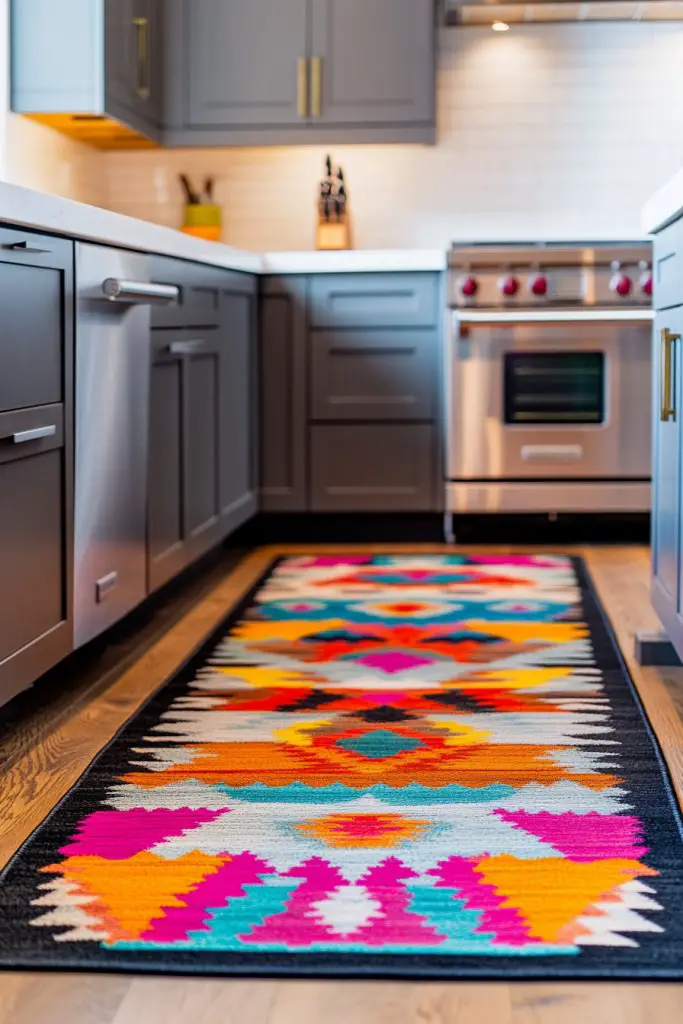
A dull kitchen floor can make your entire space feel uninspired. Colorful or patterned area rugs add warmth, personality, and comfort—without permanent installation. They’re a simple way to define zones and hide imperfections, perfect for renters.
Visualize a vibrant, geometric rug anchoring your kitchen, contrasting beautifully with sleek cabinets and appliances. The soft fibers cushion your steps and add a cozy texture underfoot. When you walk in, the colors energize the space, making it more inviting and lively. It’s like adding a piece of art on the floor.
Choose washable, non-slip rugs that suit your decor—think bold patterns, subtle textures, or neutral tones. Seasonal rugs in festive or warm colors can refresh the look whenever you like. Layer rugs or add runners along walkways for a dynamic, personalized effect. They work especially well in open-plan kitchens or small spaces.
Measure your space accurately, then select a rug size that complements your layout. Ensure the rug has a non-slip backing or add a rug pad underneath for safety. Lay the rug flat and adjust positioning until perfect. Regular vacuuming and spot cleaning keep it looking fresh. Swap out rugs seasonally for variety.
Coordinate the rug with your kitchen textiles—like matching towels or curtains—for a cohesive look. Add decorative cushions or small accents nearby to enhance the ambiance. Use rugs to highlight a specific area, such as a breakfast nook or prep zone. Personal touches make the space more comfortable.
A well-chosen rug can instantly transform your kitchen’s vibe. It’s an affordable, easy upgrade that adds style and comfort. Soon, you’ll love stepping onto your colorful floor—proof that small details make a big difference.
14. Temporary Open Shelving with Stylish Containers
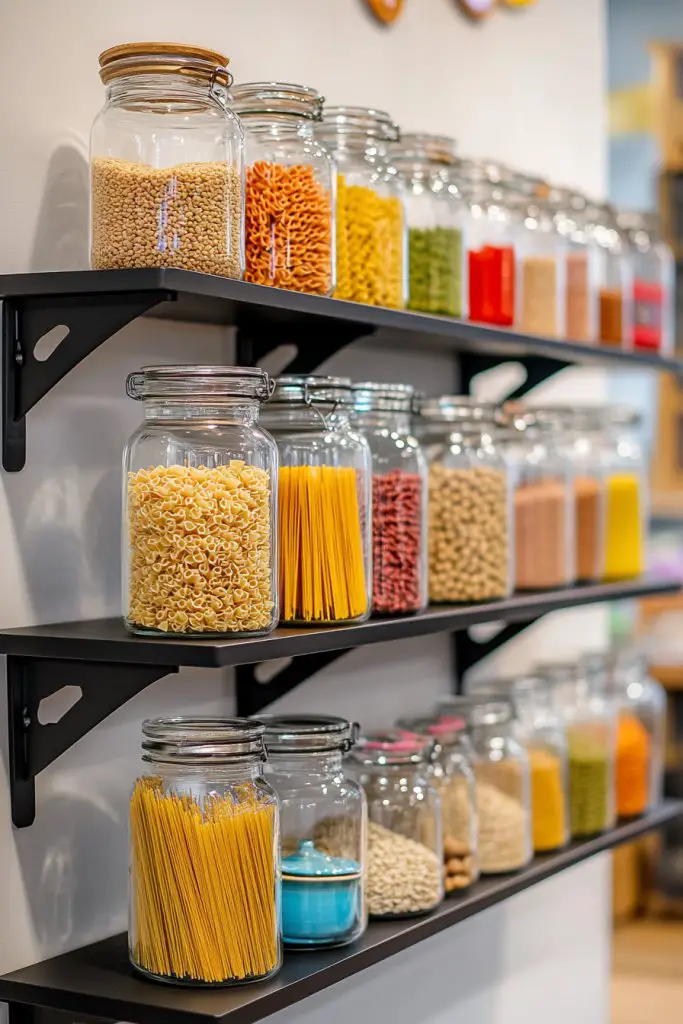
Cluttered countertops and lack of storage making your kitchen feel cramped? Temporary open shelving offers a stylish, flexible solution. It’s perfect for displaying and organizing your essentials without damaging walls or committing long-term. Plus, it adds a modern, curated look.
Picture sturdy, no-drill shelves mounted on your wall, holding glass jars filled with colorful pasta, grains, or spices. The open design invites you to showcase your favorite items and creates a sense of order. Paired with decorative containers, the shelves become a focal point that’s both functional and beautiful.
Choose from wood, metal, or acrylic materials to match your decor. Use uniform containers for a clean look or mix textures for an eclectic vibe. Change the display seasonally or as your collection grows, and incorporate labels for easy identification. These shelves suit kitchens of all sizes and styles.
Install the shelves using no-drill mounting brackets or adhesive strips designed for weight. Arrange your containers thoughtfully, balancing color and size. Fill with dry goods or decorative items to keep the space tidy. Regularly wipe down surfaces and reorganize to keep the look fresh. It’s a DIY project anyone can handle.
Decorate containers with labels or custom wraps. Incorporate small LED lights underneath for ambiance. Personalize with themed accessories—like vintage spoons or rustic tags—that reflect your personality. These touches turn practicality into a statement.
Open shelving encourages creativity and makes your kitchen feel more open and inviting. It’s easy to update and adapt over time, matching your evolving style. Your curated collection of jars and containers will be a source of pride and inspiration.
15. Reversible or Removable Window Treatments
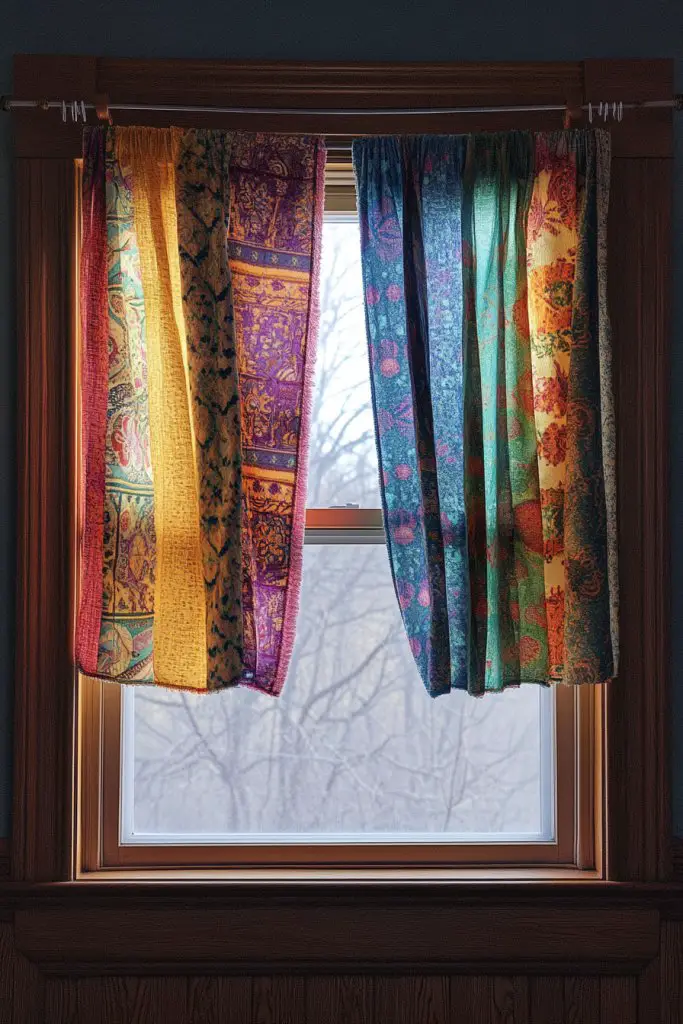
Ever tried to change your room’s vibe but felt stuck because of permanent curtains or blinds? Window treatments can dramatically alter a space, but in rentals, permanent fixtures are a no-go. So, how do you add color, pattern, or privacy without risking your security deposit? The answer is quick, reversible solutions that let you customize effortlessly.
Imagine a tension rod stretching across your window, draped with a soft, patterned fabric that adds warmth and personality. Or think of adhesive film that mimics frosted glass, diffusing light softly without any drilling. In the daytime, sunlight filters through vibrant or textured textiles, casting colorful patterns on your walls. At night, you can slide a sleek, reversible cover in place for privacy, transforming your space instantly.
Choose fabrics that suit your decor style, from boho prints to minimalist neutrals. For seasonal changes, swap out lighter fabrics in summer for warmer textiles in winter. For a more modern look, opt for adhesive films with geometric patterns or metallic accents. You can also layer different treatments, like a sheer curtain under a decorative film, to create depth and flexibility.
Start by measuring your windows accurately to select the right tension rod or adhesive film size. Use lightweight fabrics like linen or cotton for easy handling and removal. For adhesive film, clean the glass thoroughly to ensure a smooth application. Attach the tension rod securely, or stick the film carefully, avoiding air bubbles. You can easily remove or reposition these treatments without damaging the glass or frame, making them perfect for renters.
Add a personal touch by choosing fabrics or films that reflect your personality—think bold patterns, monochrome designs, or textured textiles. Incorporate decorative trim or tassels for a handcrafted feel. You could also layer different treatments for a unique look, like a sheer panel with a bold blackout curtain behind it. Experiment with colors and textures to match your mood or seasonal themes.
These temporary window solutions empower you to personalize your space without any permanent changes. They boost your confidence to experiment with decor styles and colors, knowing you can revert anytime. Ready to make your rental feel like home without risking your deposit? These treatments are your quick fix for stylish, flexible windows that impress.
16. Creative Use of Baskets for Storage and Decor
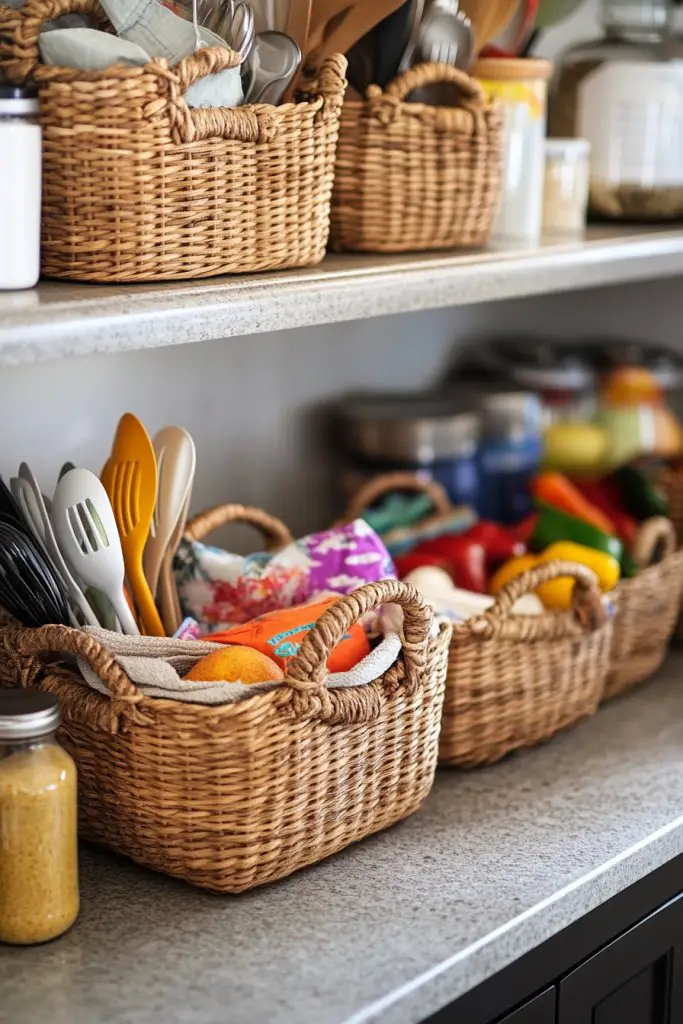
Clutter in the kitchen can turn a beautiful space into chaos faster than you can say ‘where’s that spoon?’ Baskets are the unsung heroes of stylish organization, but they’re often overlooked as decor. Want a simple way to tidy up while adding a cozy, curated vibe? Baskets might just be your new best friends.
Picture woven rattan baskets stacked neatly on open shelves, holding everything from utensils to snack supplies. Imagine fabric-lined baskets with leather handles sitting on the countertop, containing fresh produce or cleaning supplies. The textures add warmth and interest, breaking up the hard lines of cabinets and appliances. When filled with colorful dish towels or seasonal items, they instantly elevate the space’s charm.
Use different sizes and shapes to cater to your storage needs, from small caddies for cutlery to large baskets for bulkier items. Seasonal baskets can hold holiday or summer essentials, swapped out as needed. Mix natural materials like wicker with sleek metal or acrylic baskets for a modern touch. For added fun, choose baskets in colors or patterns that match your overall decor theme.
Start by assessing what items need organizing and select baskets accordingly. Look for durable materials—wicker, seagrass, or fabric—easy to clean and maintain. Place baskets in open shelving, on countertops, or inside cabinets to hide clutter. Use labels or tags for quick identification, especially with multiple similar baskets. Regularly review and swap contents to keep your kitchen looking fresh and tidy.
Personalize baskets with decorative trims, fabric linings, or painted designs. Incorporate different textures like burlap or velvet for variety. You can also add custom tags or labels for a boutique feel. To make storage more functional, add stackable or modular baskets that maximize vertical space. These touches make organization both practical and stylish.
Using baskets for storage turns clutter into curated decor, boosting your confidence in your organizational skills. They make your kitchen look intentional and inviting, not chaotic. Whether you prefer rustic charm or modern simplicity, baskets adapt easily. Ready to transform your kitchen into a stylish haven that’s functional and Instagram-worthy? Just start stacking and filling!
17. Multi-Functional Items as Decor and Storage
Ever wish you could kill two birds with one stone in your kitchen? Multi-functional decor items are perfect for maximizing space and style simultaneously. They turn everyday objects into statement pieces that also serve a purpose. The challenge is finding those that blend seamlessly into your aesthetic without looking like clutter.
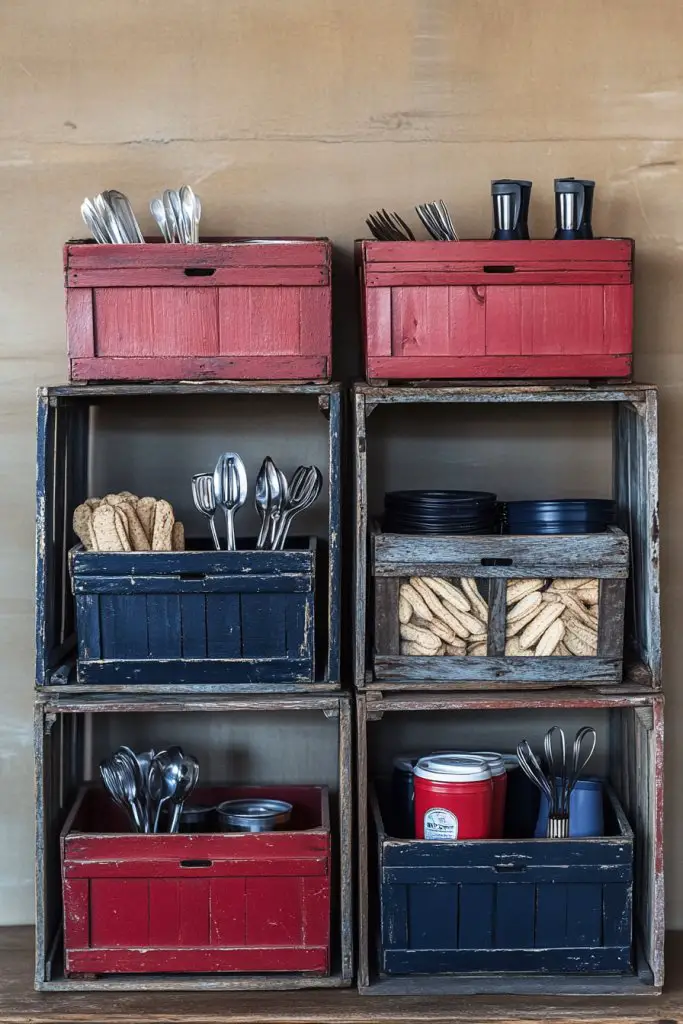
Visualize vintage wooden crates stacked as open shelving, doubling as storage and display. Think of a set of stacking boxes in bold colors that serve as both a decorative element and a place for storing utensils or snacks. Or imagine a decorative ladder leaning against the wall, holding baskets or towels. These items add personality and function, creating a layered, lived-in look.
Choose items that match your decor style—rustic, industrial, boho, or minimalist. Reversible or paintable crates can be customized to suit your color scheme. Use decorative trays or bowls that serve as catch-alls for keys, coins, or small utensils. Seasonal decor can be layered on top, such as a cozy throw blanket or a tray with holiday-themed accents.
Start with versatile, sturdy items like wooden crates, metal baskets, or decorative carts. Arrange them in a way that creates visual interest while providing storage. Use stacking or nesting techniques to save space. Incorporate decorative elements like candles, faux fruits, or textiles for added warmth. Make sure each piece is accessible and easy to move if needed, especially in small spaces.
Paint or stain crates in colors that match your decor. Add fabric liners or decorative hardware for a custom look. Incorporate labels or tags for organization, especially with multiple containers. Mix and match materials and textures to keep the setup visually engaging. These personalized touches make your decor both functional and uniquely yours.
Using multi-functional decor boosts your confidence to experiment with different styles and arrangements. They make your space feel curated and intentional. Plus, they’re easy to change out as your tastes evolve. Ready to turn everyday items into standout decor? Just stack, group, and style—your space will thank you.
18. Incorporate Stylish, Non-Invasive Lighting
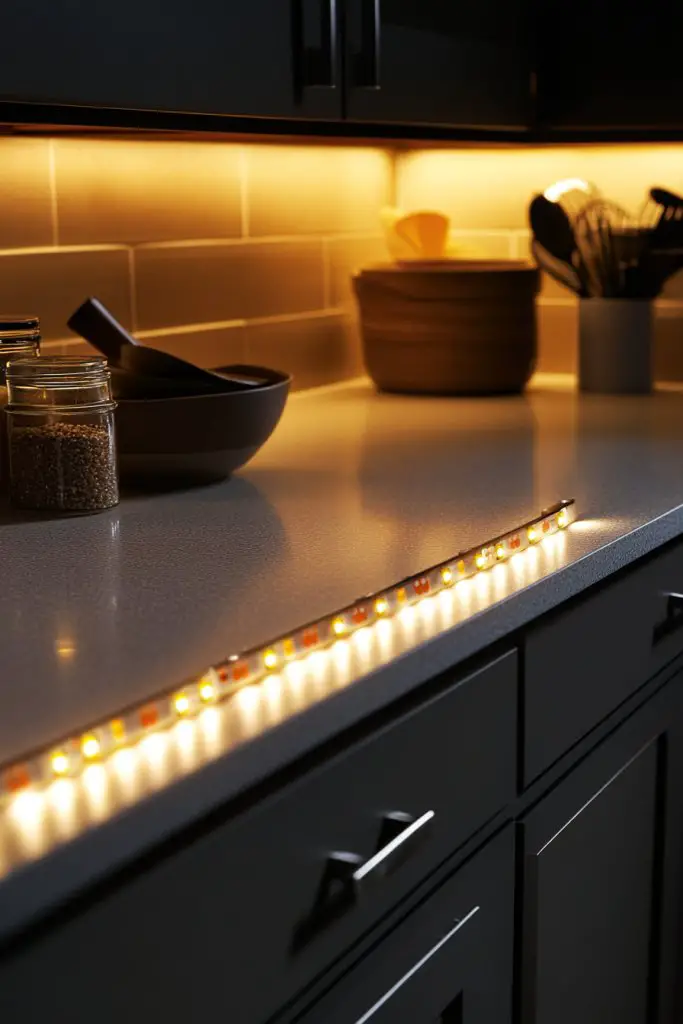
Lighting can make or break a kitchen’s vibe, but in rentals, installing new fixtures can feel like walking a tightrope. You want your space bright enough for cooking but cozy enough to relax. How do you add stylish illumination without damaging walls or ceilings? The answer lies in damage-free lighting solutions that are both functional and chic.
Picture battery-operated under-cabinet LEDs that cast a warm glow over countertops, highlighting culinary creations. Imagine clip-on lights attached to shelves or cabinets, providing focused lighting where needed. These lights are sleek, minimal, and portable, giving your kitchen a modern, high-end feel. The soft light creates a welcoming ambiance, perfect for late-night snacks or entertaining.
Choose lighting options that complement your decor—sleek black or metallic finishes work well with industrial styles, while soft white or pastel hues suit a cozy cottage feel. Use different types of lights—such as puck lights, strip LEDs, or clip-ons—for layered lighting. Seasonal or mood-based lighting can be added with color-changing options or dimmable features. These solutions are easily adaptable to any space.
Start by determining where you need extra light—under cabinets, above islands, or in dark corners. Choose battery-operated or rechargeable options to avoid wiring. Secure clip-on or magnetic lights in place, ensuring they’re easily removable for cleaning or adjustments. Use adhesive hooks or strips to position switches or remote controls conveniently. Regularly check batteries or charging needs to keep the ambiance steady.
Select lights with adjustable brightness or color temperature to suit different moods. Add dimmer switches or remote controls for convenience. Incorporate decorative elements like frosted covers or colored gels to customize the light’s appearance. Using these lights, you can create a cozy atmosphere for dinner parties or a bright workspace for meal prep—all without breaking the lease.
Stylish, non-invasive lighting elevates your kitchen’s aesthetic and functionality in one go. They give you control over mood and ambiance, making your space more inviting. Plus, they’re easy to install and remove, so you can experiment freely. Ready to brighten up your rental with these clever lighting hacks? Just clip, stick, and glow!
19. Use of Colorful or Patterned Placemats and Napkins
Ever felt that your kitchen table looks way too dull or uninspired? Sometimes, all it takes is a splash of color or a bold pattern to make your dining space pop. But you don’t need to invest in expensive decor or permanently alter your setup. The goal is to add personality without the commitment.
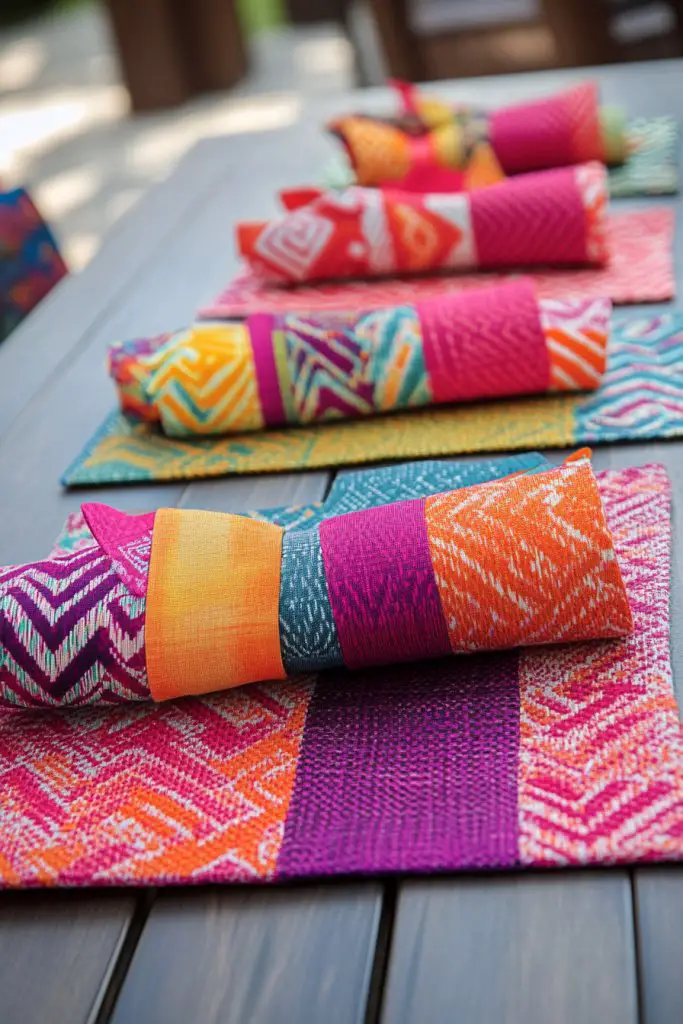
Picture a set of vibrant, patterned placemats paired with contrasting napkins that instantly uplift your table. Imagine a soft, textured fabric in a lively hue or playful geometric design that catches the eye. These accessories create a lively, inviting atmosphere, perfect for both everyday meals and special gatherings. Their washable nature means you can swap them out without fuss, keeping your space fresh.
Choose themes based on seasons — bright florals for spring, warm earthy tones for fall, or cool blues for summer. Mix and match different patterns to add playful charm or keep it uniform for a sleek look. For small kitchens, opt for compact sets that don’t crowd the space, while larger tables can handle bold, oversized designs. Personalize with embroidered initials or custom prints for a unique touch.
Start by selecting durable, washable fabrics that suit your style. Look for sets that are easy to clean and maintain, preferably with stain-resistant finishes. Measure your table to ensure the size fits well but doesn’t hang over too much. Layer multiple sets for variety, and coordinate colors with your kitchen palette. Simple, slip-on designs make setup quick and removal effortless. For added flair, incorporate textured or embroidered options.
Add a personal touch by sewing in initials or matching them with themed accessories like decorative trivets or cloth coasters. Incorporate metallic or contrasting trim for a luxe feel. Use different textures like linen, cotton, or burlap to add tactile interest. You can even create your own custom fabric prints for a truly one-of-a-kind look that reflects your personality.
Vibrant placemats and napkins bring instant cheer and style to your kitchen table, proving that small details matter. They’re a budget-friendly way to refresh your decor without major renovations. Ready to add a pop of color and show off your personality? Your dining space will become a happy, inviting hub in no time!
20. Temporary Open-Frame Pot Racks for Pots and Utensils
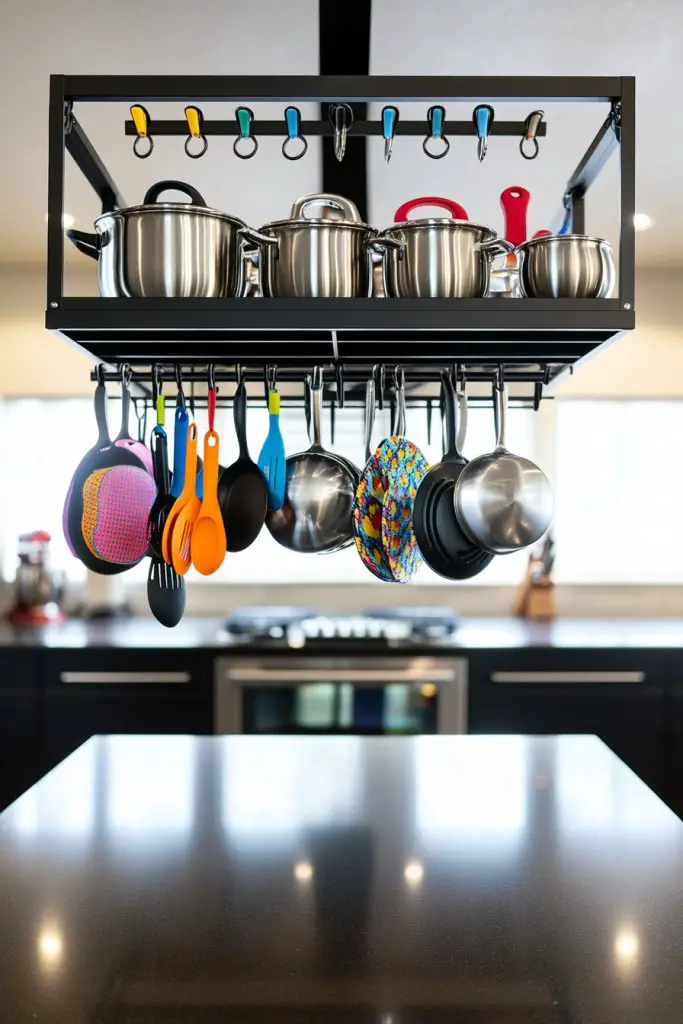
Tired of digging through cluttered cabinets just to find that one pot or pan? Or maybe your utensil drawer has become a black hole? An open-frame pot rack offers a stylish, practical solution that keeps your cookware accessible and your counters clear. Plus, it adds a touch of industrial chic to your kitchen aesthetic.
Imagine a sleek, black metal rack hanging over your stove or island, with pots and pans displayed like artwork. The shiny surfaces catch the light, and colorful silicone handles or textured cookware add visual interest. Hanging utensils from hooks creates a lively, dynamic look, making your kitchen feel more welcoming and functional. The open design also makes everything easy to grab at a moment’s notice.
Choose from different finishes, such as matte black, brushed nickel, or rustic bronze, to match your decor style. Adjust the height and number of hooks based on your collection size and available space. For smaller kitchens, a compact, wall-mounted version works best, while larger spaces can support multiple racks for added storage. Incorporate decorative elements like vintage cookware or colorful spatulas to personalize the display.
Start by measuring your space and selecting a sturdy, lightweight metal rack that can hold your heaviest pots. Install brackets securely into wall studs using appropriate anchors. Use S-hooks or custom hooks to hang your cookware and utensils. Organize by size or color for a cohesive look. Regularly check for stability and clean the rack with a damp cloth to keep it looking sharp. For a DIY touch, consider spray-painting or customizing the hooks.
Add decorative elements like vintage kitchen tools, layered textiles, or colorful silicone grips to showcase your style. Incorporate small potted herbs or decorative jars nearby for added freshness and visual appeal. Use different hook styles to create variety and interest. You can also switch out the rack’s finish or hooks seasonally for a fresh look that reflects your mood.
Open-frame pot racks turn your cookware into a decorative feature, making your kitchen feel more curated and less cluttered. They’re a budget-friendly upgrade that’s easy to install and customize. Your space will look more organized and inviting, inspiring you to cook more often. Ready to ditch the clutter and show off your collection? This simple change can make a big impact!
Conclusion
With a diverse range of renter-friendly kitchen makeover ideas, you can easily customize your space to suit your style and needs. Whether it’s through temporary paint, stylish organizers, or decorative accents, these ideas empower you to create a kitchen that feels like home. Don’t hold back—try these tips and watch your space transform into a beautiful, functional haven. Your dream kitchen is just a few creative moves away!