Ever wish you could give your home a fresh new look without the hassle or hefty price tag? Small home decor fixes are the perfect way to instantly elevate your space with minimal effort, making your home feel more inviting and stylish.
In this article, you’ll find a variety of simple yet effective ideas to update your decor quickly and easily. From clever organization tricks to eye-catching accents, these tips will help you refresh your home and reflect your personal style—all without a major overhaul.
1. Refresh Cabinet Hardware for Instant Style Boost
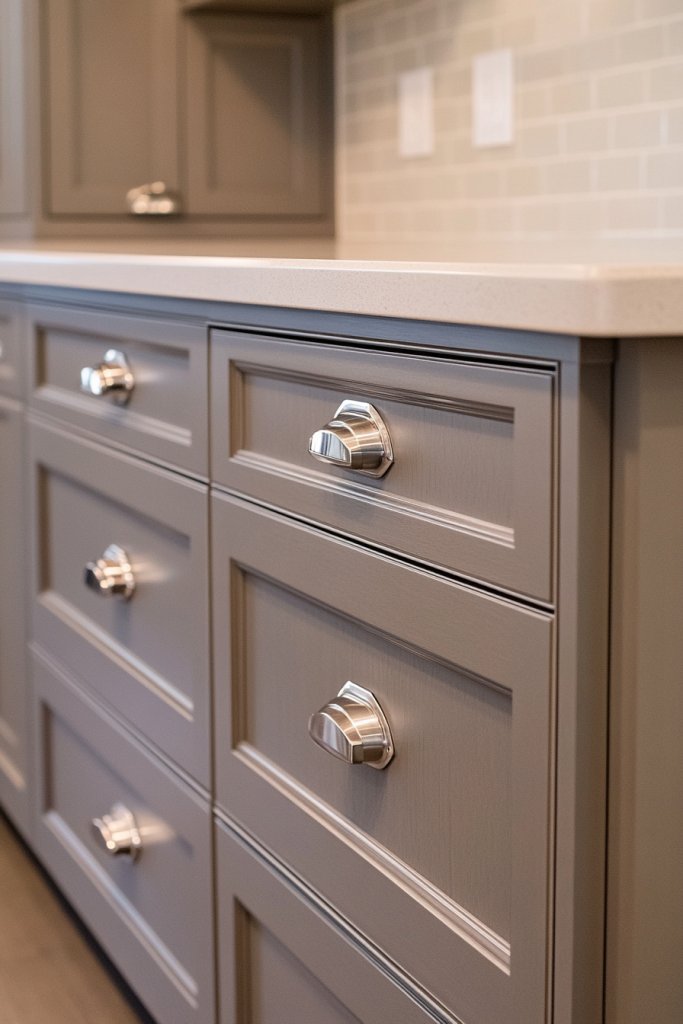
Ever looked at your kitchen or bathroom cabinets and thought they could use a serious upgrade? Outdated knobs and pulls can make the entire space feel tired and neglected. The good news? Replacing hardware is one of the easiest, most budget-friendly ways to breathe new life into your home. Plus, it gives you that instant style boost without any major renovations.
Recommended Products to replicate this idea
| # | Preview | Product | |
|---|---|---|---|
| 1 |

|
Ravinte 30 Pack 5'' Cabinet Pulls Brushed Nickel Stainless Steel Kitchen Drawer Pulls Cabinet... | Buy on Amazon |
| # | Preview | Product | |
|---|---|---|---|
| 1 |
|
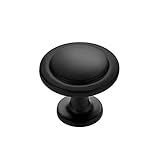
Ravinte 30 Pack 1-1/4 inch Matte Black Zinc Euro-Style Cabinet Knobs, Drawer Pulls & Door Handles | Buy on Amazon |
Imagine swapping out dull, tarnished handles for sleek, matte black or shiny brass options. Visualize the new hardware catching the light as you open and close cabinets, creating a subtle yet impactful sparkle. The fresh hardware transforms plain cabinetry into a focal point, elevating the overall aesthetic. It’s like giving your cabinets a fresh pair of earrings—simple but striking.
Choose modern minimalist handles for a clean look, vintage-inspired knobs for cozy charm, or colorful pulls for a playful vibe. Seasonal swaps, like swapping out shiny hardware for matte or textured finishes, keep your decor feeling fresh. Larger handles work well in spacious kitchens, while smaller knobs suit compact or delicate spaces. Mix and match finishes to create contrast or harmony, depending on your style.
Start by measuring your current hardware to ensure new pieces fit perfectly. Gather a screwdriver and a few spare screws—most hardware comes with them, but it’s good to double-check. Remove the old knobs or pulls, clean the surface, and align the new hardware before tightening. For a uniform look, replace all handles at once, and consider updating drawer pulls separately for visual interest.
Add custom touches like engraved initials or unique shapes to make hardware truly yours. Mix different styles or finishes for an eclectic look that reflects your personality. For a coastal vibe, opt for rope or shell-inspired pulls, while matte black gives an industrial edge. Changing hardware regularly can keep your space feeling dynamic and personalized.
Updating cabinet hardware is a quick win that instantly elevates your decor. It’s the kind of small change that can motivate larger projects or simply boost your everyday mood. Plus, with so many options online and in stores, it’s easy to find a style that suits your vibe. Ready for a simple upgrade that makes a big difference?
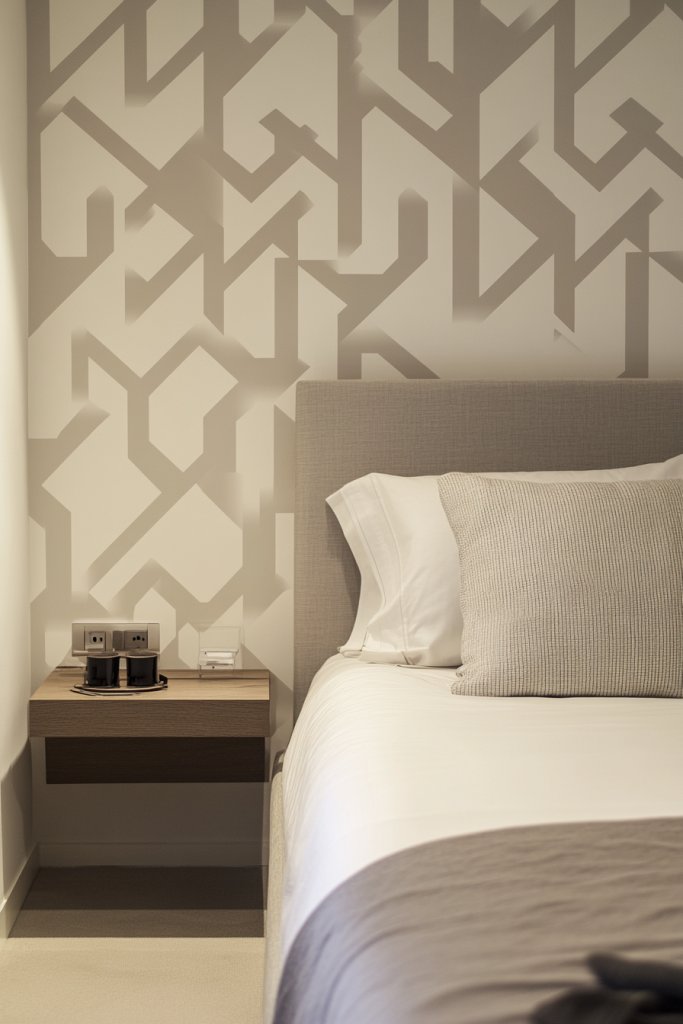
2. Apply Removable Wallpaper to Accent Walls
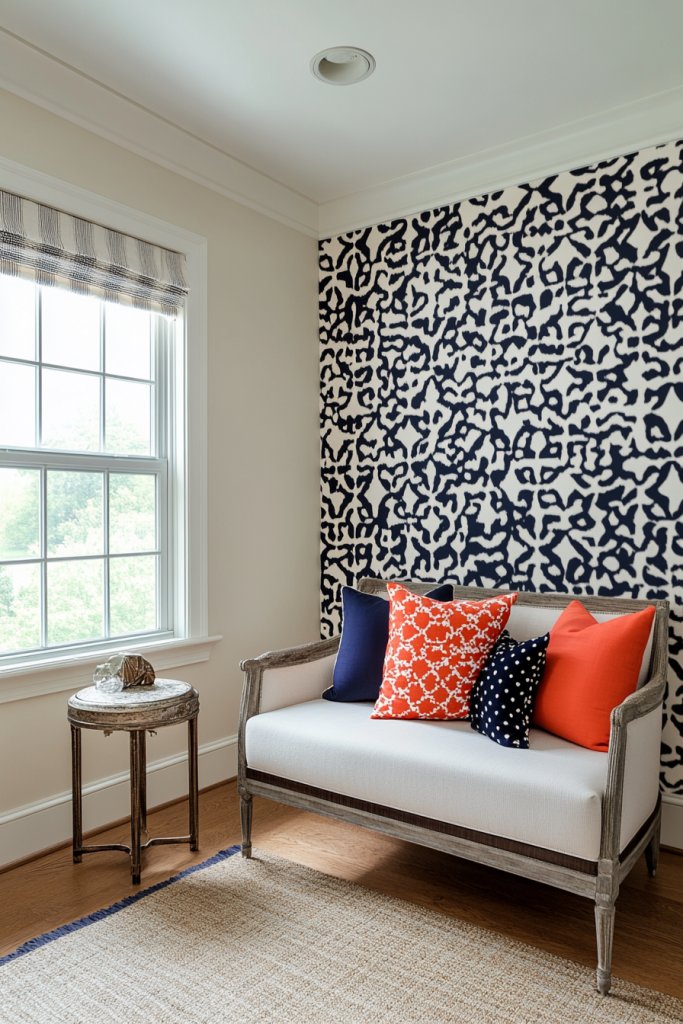
Tired of plain walls that do nothing for your space? An accent wall with bold wallpaper can transform a dull room into a showstopper. The best part? Removable wallpaper lets you experiment without the commitment or damage. It’s perfect for renters or anyone who loves to switch things up.
Recommended Products to replicate this idea
| # | Preview | Product | |
|---|---|---|---|
| 1 |
|
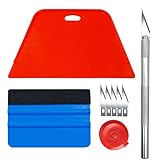
Art3d Smoothing Tool Kit for Applying Peel and Stick Wallpaper, Vinyl Backsplash Tile | Buy on Amazon |
| # | Preview | Product | |
|---|---|---|---|
| 1 |
|
Art3d Smoothing Tool Kit for Applying Peel and Stick Wallpaper, Vinyl Backsplash Tile | Buy on Amazon |
Picture a crisp geometric pattern in black and white behind your bed, or a lush botanical print in your entryway. The wallpaper instantly adds depth and personality, creating a focal point that draws the eye. Textured or matte finishes make the pattern pop even more, giving your walls a layered, tactile feel. It’s like dressing up a plain canvas with vibrant fabric.
Choose from subtle, muted patterns for a sophisticated look or vibrant, large-scale designs for drama. Seasonal updates, like swapping floral prints for icy winter scenes, keep your decor fresh. Use removable wallpaper to cover just one wall or create a full feature area. Combine with coordinated decor pieces to pull the look together seamlessly.
Start by measuring your wall to buy enough wallpaper with a little extra for trimming. Clean the surface thoroughly and ensure it’s smooth and free of dust. Peel and stick the wallpaper, starting from the top corner, smoothing out bubbles as you go. Use a plastic smoothing tool to prevent tearing, and trim excess with a sharp blade. No special tools needed—just patience and a steady hand.
Layer your accent wall with matching textiles, like throw blankets or cushions, to complement the wallpaper. Using different textures in nearby decor enhances the visual impact. For example, pairing a botanical print with natural wood accents creates a cozy, earthy vibe. Personalize your space further by framing small sections or creating a collage effect.
Removable wallpaper is a game-changer for those who crave style without permanence. It’s a simple way to add personality and wow factor to any room. The variety of patterns and textures available makes it easy to find something that reflects your taste. Ready to turn a blank wall into a statement piece?
3. Change Out Throw Pillow Covers for a New Look
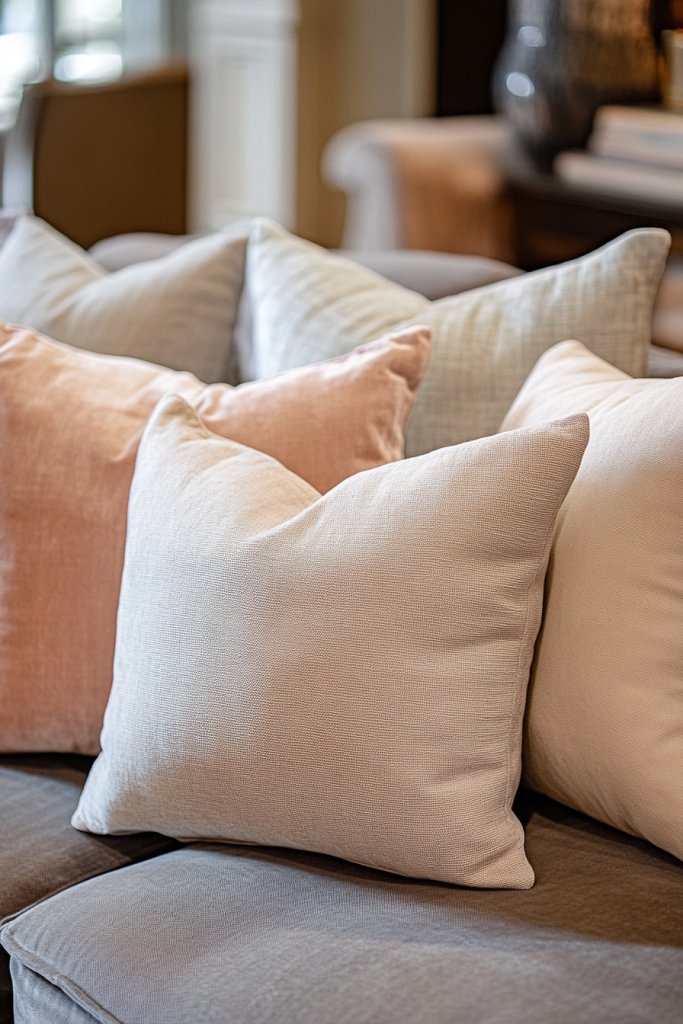
Feeling like your sofa or armchair needs a facelift? Fresh throw pillow covers are an easy way to change the vibe of your living space. No need to buy new furniture—just swap out covers to refresh your decor. Plus, it’s a quick, budget-friendly project that instantly elevates your room.
Recommended Products to replicate this idea
| # | Preview | Product | |
|---|---|---|---|
| 1 |

|
MIULEE Pack of 4 Couch Throw Pillow Covers 18x18 Inch Neutral Soft Decorative Chenille Pillow Covers... | Buy on Amazon |
| # | Preview | Product | |
|---|---|---|---|
| 1 |

|
Utopia Bedding Throw Pillows (Set of 4, White) – 18 x 18 Inches Down Alternative Pillows for Bed,... | Buy on Amazon |
Imagine a cozy nook with a soft cream throw pillow featuring chunky knit texture, paired with a vibrant patterned cover for contrast. Visualize the tactile difference as you run your hand over plush velvets or textured weaves. The right pillow covers add layers of color, pattern, and texture that make your space inviting and lively. It’s like dressing up your furniture in new attire.
Switch to seasonal themes: bright florals for spring, warm velvets for fall, or cool linens for summer. Mix textures like silk, linen, and faux fur for an eclectic look, or keep it simple with monochrome palettes. Match pillow covers to your wall color or curtains for a cohesive feel, or go bold with contrasting hues. The possibilities are endless.
Start by selecting pillow covers that match or complement your existing decor. Remove the old covers and check pillow sizes for accuracy. Fill the pillows with stuffing or inserts if needed for a plump look. Insert the new covers, zip or button them closed, and fluff to shape. For a polished appearance, keep some covers in reserve for quick swaps during seasons or mood changes.
Personalize your covers with embroidery, fabric paint, or patches for a handcrafted touch. Use different patterns and fabrics to create a layered, curated look. Mix sizes and shapes—square, rectangular, or lumbar pillows—to add visual interest. Incorporate your favorite colors or motifs to reflect your personality.
Changing pillow covers is a small step with a big impact, making your space feel fresh and personalized. It’s a simple project that anyone can do, even without sewing skills. Plus, new covers can motivate you to update other decor elements or start larger redecorating projects. Ready to give your sofa a new personality?
4. Add a Tapestry or Fabric Wall Hanging for Texture
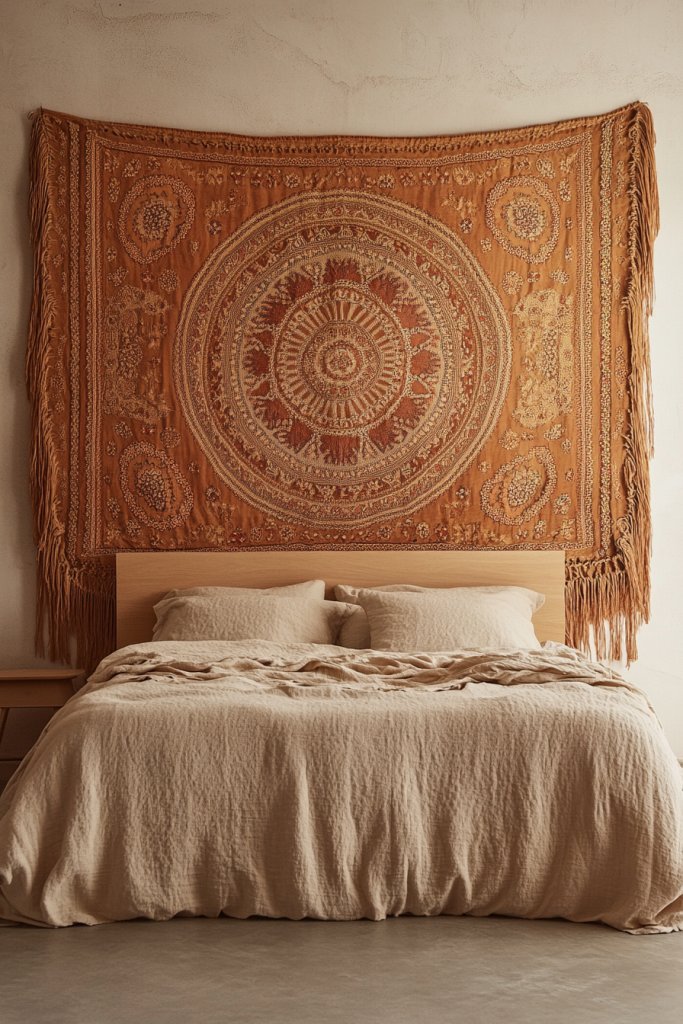
Looking for a way to add warmth and texture to your walls without painting or drilling? A fabric wall hanging or tapestry can instantly create a cozy, boho-chic vibe. It’s an affordable and flexible decor piece that can be swapped out whenever your style evolves. Who said walls have to stay boring?
Recommended Products to replicate this idea
| # | Preview | Product | |
|---|---|---|---|
| 1 |

|
Achart Macrame Wall Hanging Large- Boho Wall Decor- large wall art- Wall Decor Living Room- Macrame... | Buy on Amazon |
| # | Preview | Product | |
|---|---|---|---|
| 1 |
|
YISURE Extra Large Huge Tapestry 120(W) x 90(L) Inch, Nature Mountain Forest Tapestry, Scenic Green... | Buy on Amazon |
Picture a large, intricately woven tapestry in earthy tones draped over a plain wall, softening the space. Imagine the tactile appeal—the rich textures and layered fabrics inviting touch. The tapestry adds depth and dimension, transforming an empty wall into a focal point. It’s like hanging a piece of art that also feels like a warm hug.
Choose lightweight fabrics for easy hanging or heavier textiles for a dramatic effect. Seasonal fabrics like velvet or silk can change the mood, from cozy winter to breezy summer. Hang it over beds, sofas, or empty walls, and layer with string lights or decorative rods for added flair. Mix patterns and colors to match your overall decor theme.
Select a fabric that complements your room’s color palette. Use a curtain rod, decorative dowel, or tension wire to hang the textile. Attach with clips, hooks, or sew a simple pocket at the top. Ensure it’s evenly spaced and straight for a polished look. For larger pieces, secure the fabric with additional hooks or nails at the corners.
Create your own wall hangings with fabric remnants or old scarves, adding patches or embroidery for a personal touch. Incorporate tassels, pom-poms, or fringe for extra texture. You can also layer multiple textiles for a gallery-style effect. Personal touches make your space uniquely yours.
A fabric wall hanging is a simple, creative way to add personality to any room. It’s easy to change or update seasonally, keeping your decor feeling fresh. Plus, it’s a budget-friendly project that can be done in an afternoon. Ready to turn a blank wall into a textured masterpiece?
5. Rearrange Furniture for a Fresh Perspective
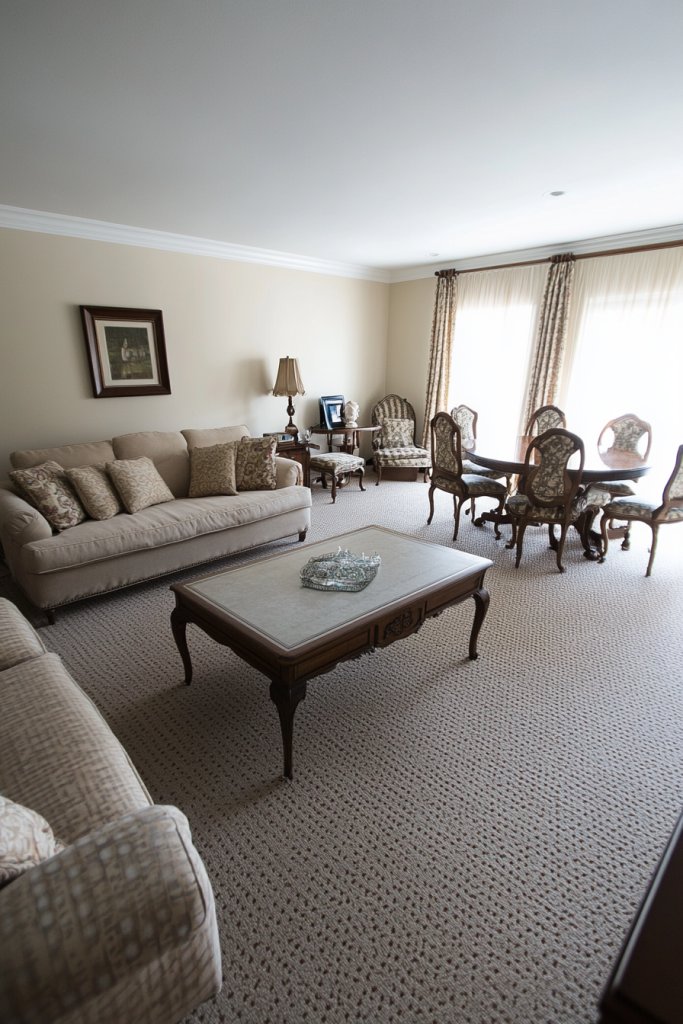
Feeling uninspired by your current layout? Sometimes, all it takes is a simple rearrangement to make your room feel new again. Moving furniture can improve flow, highlight focal points, and even make your space appear larger. Who knew that a shift in position could have such a big impact?
Recommended Products to replicate this idea
| # | Preview | Product | |
|---|---|---|---|
| 1 |

|
COVERCORNER Furniture Sliders for Carpet 8 PCS - 3 1/2 inch Furniture Moving Slider Chair Legs... | Buy on Amazon |
| # | Preview | Product | |
|---|---|---|---|
| 1 |

|
BOSCH GLM100-23 100 Ft Blaze Laser Distance Measure, Includes 2 AA Batteries | Buy on Amazon |
Imagine swapping your sofa from the center of the room to against a different wall, creating an open area where there was once clutter. Visualize your dining table now positioned near a window, inviting natural light and a better view. The new layout highlights your favorite features and creates a more functional space. It’s like giving your room a fresh personality.
Try creating conversation zones by grouping seating differently, or position furniture to maximize views or natural light. For small spaces, floating pieces away from walls can open up the room. In larger rooms, zoning with rugs or furniture arrangements can define distinct areas. Seasonal rearrangements can also reflect changing needs or styles.
Start by measuring your space and sketching different layouts. Use masking tape on the floor to visualize new positions before moving heavy furniture. Consider traffic flow—avoid blocking doorways or windows. If certain pieces are heavy, enlist help or use sliders for easier movement. Play around until you find a layout that feels right and functional.
Use accessories like throw blankets, rugs, or lighting to accentuate your new arrangement. Add personal touches like a statement piece or artwork to draw attention to focal points. Rearranging also offers the chance to declutter, giving your space a cleaner, more organized feel. Keep experimenting until your space feels just right.
A fresh furniture layout can completely change your home’s vibe and your daily experience. It’s a cost-free way to breathe new life into your space without any renovations. Plus, it encourages you to think creatively about your home’s potential. Ready for a new perspective?
6. Incorporate Peel-and-Stick Wall Decals
Looking for a quick way to add personality to your walls without the hassle of paint or nails? Peel-and-stick wall decals offer a versatile and damage-free solution. Whether you want a subtle pattern or a bold motif, these decals let you customize your space easily. Who says walls have to be boring?
Recommended Products to replicate this idea
| # | Preview | Product | |
|---|---|---|---|
| 1 |

|
Star Wall Stickers Girls Room Wall Decals (116pcs) Sparkle Wall Sticker Stick and Peel Stars... | Buy on Amazon |
| # | Preview | Product | |
|---|---|---|---|
| 1 |

|
Ctosree 9 Pcs Vinyl Wall Stickers Inspirational Saying Wall Decals Motivational Saying Murals Large... | Buy on Amazon |
Imagine a delicate constellation of stars or a vibrant geometric pattern in your living room. Visualize peeling the backing off and smoothly applying the decal to a blank wall, instantly creating a focal point. The decals come in various sizes, shapes, and colors, allowing you to craft a custom design. It’s like decorating with giant stickers that look sophisticated.
Use decals to add accents around mirrors, furniture, or in kids’ rooms for a playful touch. Mix and match different patterns for an eclectic look or keep it simple with a single motif for elegance. Seasonal decals, like snowflakes or flowers, make it easy to refresh your decor throughout the year. They work well in bedrooms, offices, or even kitchens.
Start by cleaning the wall thoroughly to remove dust and grease. Measure and mark where you want the decals placed for precision. Peel off the backing and carefully press the decal onto the wall, smoothing out air bubbles with a squeegee or credit card. For larger decals, work from the center outward. Repositioning is possible if done gently, but avoid stretching or tearing.
Create themed murals or custom layouts by combining decals of different shapes and sizes. Use decals to highlight artwork or furniture, drawing attention to specific areas. Incorporate metallic or matte finishes for different effects. Personal touches like initials or quotes can add a unique, personal element.
Peel-and-stick decals are a fun, affordable way to experiment with design ideas. They make decorating accessible for everyone, no matter your skill level. Plus, they’re removable, so you can change your mind anytime. Ready to add some flair without the fuss?
7. Update Storage with Stylish Baskets and Trays
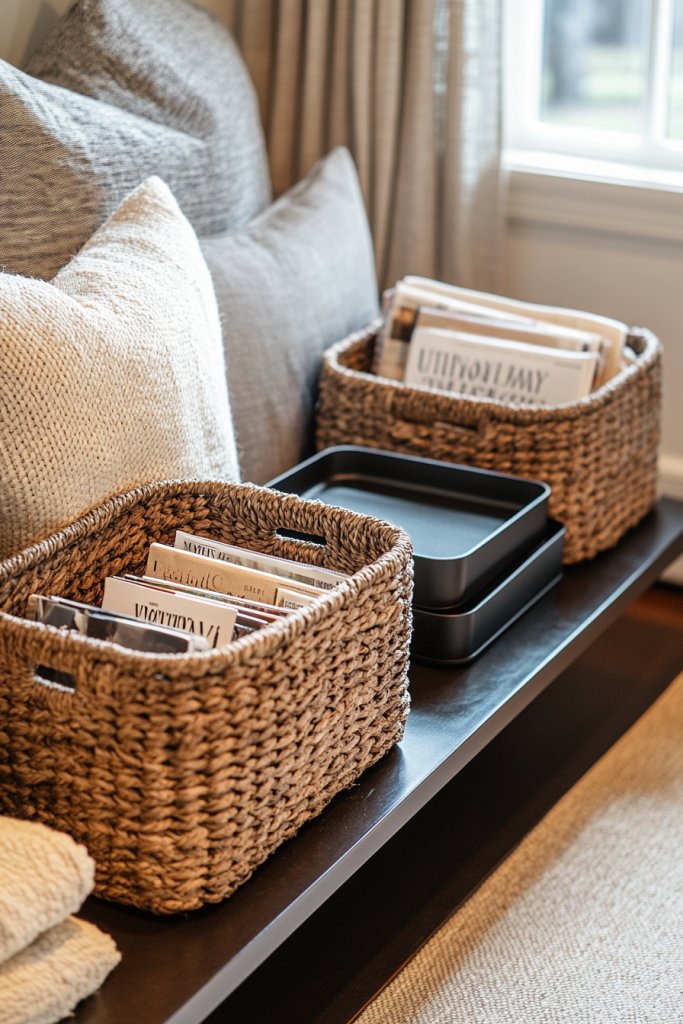
Clutter can turn a beautifully decorated space into chaos real quick. The trick? Stylish baskets and trays can hide messes and add charm simultaneously. They’re functional and decorative, helping you organize while elevating your decor. Who says storage can’t look good?
Recommended Products to replicate this idea
| # | Preview | Product | |
|---|---|---|---|
| 1 |

|
Beautiful Storage Basket Set of 5 - Sturdy Cotton Rope Baskets for Shelves Are Perfect for... | Buy on Amazon |
| # | Preview | Product | |
|---|---|---|---|
| 1 |

|
Yangbaga Serving Tray with Handles,13"*13"Wood Decorative Tray for Living Room,Modern Coffee Table... | Buy on Amazon |
Picture a set of woven baskets on a shelf, filled with cozy throws or magazines. Or a sleek tray on your coffee table holding remotes, candles, and a few decorative accents. These elements add texture and visual interest, transforming clutter into curated displays. It’s like turning everyday storage into art.
Choose materials like rattan, wire, or fabric for different aesthetics—from boho to industrial. Use baskets to organize toys, laundry, or pantry items, or trays to keep small essentials tidy. Seasonal swaps of baskets or trays can refresh your look—think velvet-lined for winter or wicker for summer. They work well in living rooms, kitchens, and bedrooms.
Start by assessing your storage needs and measuring available space. Select baskets or trays that complement your decor style and are proportionate to the items they’ll hold. Use labels or color coding for extra organization. Place baskets on shelves, under tables, or inside closets for maximum impact. Regularly declutter and replace items to keep things tidy.
Add decorative touches like faux greenery or fairy lights inside baskets for a cozy effect. Use liners or fabric inserts to match your color scheme. Personalize with tags or monograms for a custom feel. Combining different sizes and styles creates a layered, dynamic look that’s both functional and beautiful.
Using baskets and trays helps you stay organized while enhancing your decor. It’s a simple upgrade that can make your entire space feel more polished. Plus, it encourages good habits and reduces stress. Ready to organize in style?
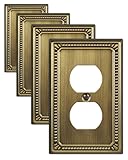
8. Change Light Switch Covers and Outlet Plates

Sometimes, the smallest details make the biggest difference. Swapping out plain, plastic switch covers for decorative or metallic options instantly adds a touch of sophistication. It’s an easy upgrade that costs almost nothing but feels like a million bucks. Who knew that tiny hardware could be so impactful?
Recommended Products to replicate this idea
| # | Preview | Product | |
|---|---|---|---|
| 1 |

|
Colester Direct Brushed Satin Nickel Wall Switch Plate Outlet Cover Toggle Rocker GFI... | Buy on Amazon |
| # | Preview | Product | |
|---|---|---|---|
| 1 |
|
ZILLSEA Metal Wall Plates, Switch Plates and Outlet Covers, Decorative Pearl Design (1 Duplex 4PK,... | Buy on Amazon |
Imagine a shiny brass or matte black switch plate contrasting against a soft wall color. The subtle shine or texture catches your eye each time you flip the switch, adding an unexpected element of design. These small accents can tie together a room’s decor, giving it a more finished, cohesive vibe. It’s like accessorizing your walls.
Choose from metallic finishes like gold, bronze, or chrome, or opt for textured or patterned covers for a more playful look. Match switch covers to cabinet hardware or light fixtures for harmony. Use them in bathrooms, kitchens, or bedrooms to create continuity or contrast. Seasonal or thematic covers can also add a fun, temporary update.
Turn off the power before replacing covers for safety. Use a screwdriver to remove the existing plate, then screw in the new one, ensuring alignment with the switch or outlet. Tighten screws securely but avoid overtightening, which can crack the cover. Double-check that switches and outlets operate smoothly after installation. This quick fix requires minimal tools and effort.
Create custom covers with stencils, paint, or adhesive decals for a personalized touch. Mix different finishes in one room for an eclectic look, or keep everything uniform for a sleek aesthetic. Adding decorative screw covers or small charms can also inject personality into these tiny details. It’s a subtle way to express your style.
Upgrading switch covers is a simple, impactful way to elevate your entire space. These small details show that you pay attention to the finer points of decor. It’s a quick project that yields noticeable results, making your home feel more polished. Ready to make your switches stand out?
9. Add a New Rug or Runner to Define Spaces

Blank floors can make a room feel empty or unfinished. A new rug or runner instantly adds color, pattern, and texture, anchoring your furniture and defining areas. It’s a simple way to add warmth and personality without a major overhaul. Who doesn’t love a cozy, styled space?
Recommended Products to replicate this idea
| # | Preview | Product | |
|---|---|---|---|
| 1 |

|
AMADA HOMEFURNISHING 8x10 Washable Area Rug, Low-Profile with Non-Slip Backing & Durable Edge... | Buy on Amazon |
| # | Preview | Product | |
|---|---|---|---|
| 1 |

|
Ompaa Non Slip, Washable, Soft Abstract Long Carpet Runner Rug with Rubber Backing for Hallways,... | Buy on Amazon |
Imagine a vibrant geometric rug under your dining table or a plush shag in your living room. Visualize the soft fibers underfoot, inviting you to sink in and relax. A well-chosen rug creates a visual boundary, making a space feel cohesive. It also adds tactile interest, making your home more inviting.
Select rugs that complement your color scheme or serve as a statement piece. Use smaller runners in hallways or entryways to add interest and hide traffic wear. Layer rugs for a textured, eclectic look or keep it simple with a single large piece. Seasonal color choices can refresh your decor and mood.
Measure your space carefully and choose a rug size that fits well—either wall-to-wall or area-specific. Opt for rug pads underneath to prevent slipping and damage to floors. Lay the rug flat and smooth out wrinkles or folds. For larger rugs, consider professional installation for a seamless look. Clean regularly to maintain its appearance.
Layer your rug with textiles like throws or cushions that pick up its colors for a harmonious look. Use different textures—jute, wool, synthetic—to add depth. Personalize by adding decorative trims or fringe. Switch out rugs seasonally to keep your space feeling fresh and aligned with your style.
A new rug can completely change the vibe of a room, making it feel warmer and more polished. It’s a straightforward update that can be accomplished in an afternoon. Plus, it’s a versatile way to experiment with patterns and colors without permanent commitment. Ready to define your space?
10. Hang a Mirror in Key Areas to Brighten and Expand
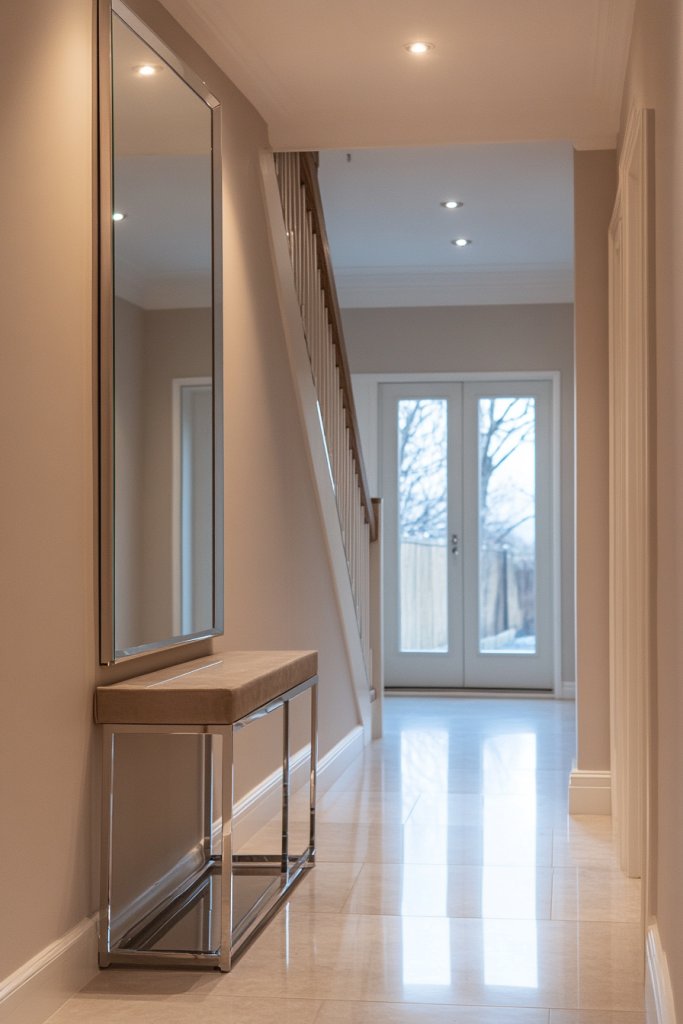
Dark, cramped spaces can drain your energy and make your home feel smaller. Hanging a well-placed mirror reflects light and creates an illusion of more space. It’s a simple trick that instantly brightens and enlarges any room. Who doesn’t want a brighter, more open home?
Recommended Products to replicate this idea
| # | Preview | Product | |
|---|---|---|---|
| 1 |

|
Simple Deluxe Arched Full Length Mirror, 71"x26"Large Floor Mirrors, for Wall Door Bedroom Bathroom... | Buy on Amazon |
| # | Preview | Product | |
|---|---|---|---|
| 1 |
|
Simple Deluxe Arched Full Length Mirror, 71"x26"Large Floor Mirrors, for Wall Door Bedroom Bathroom... | Buy on Amazon |
Picture a large mirror above your sofa or in your hallway, bouncing daylight around the room. Imagine the mirror’s frame adding a decorative touch—metal, wood, or ornate styles—complementing your decor. The reflection doubles the visual interest, making the space feel more lively and inviting. It’s like magic without the magic wand.
Choose frames that match your style—sleek and modern or vintage and ornate. Large, full-length mirrors can serve as functional art, while smaller decorative mirrors add charm. Experiment with multiple smaller mirrors clustered together for a gallery wall effect. Position mirrors to reflect windows or light sources for maximum effect.
Select a sturdy hook or wall anchors suitable for your wall type. Measure and mark the placement to ensure proper alignment and height. Hang the mirror securely, checking for levelness. Consider using anti-slip pads or wire for heavy mirrors. Regularly check hooks and anchors for stability, especially in high-traffic areas.
Decorate your mirror area with small accessories like candles or vases on nearby surfaces. Use decorative frames or paint plain ones to match your aesthetic. Hang multiple mirrors in different shapes and sizes for a layered, dynamic look. Personal touches make the space feel curated and intentional.
Mirrors are a versatile decor tool that boost both function and style. They help you see your space in a new light—literally—and make your home feel airier and more open. It’s a simple addition that delivers big results, perfect for any room. Ready to reflect your style?
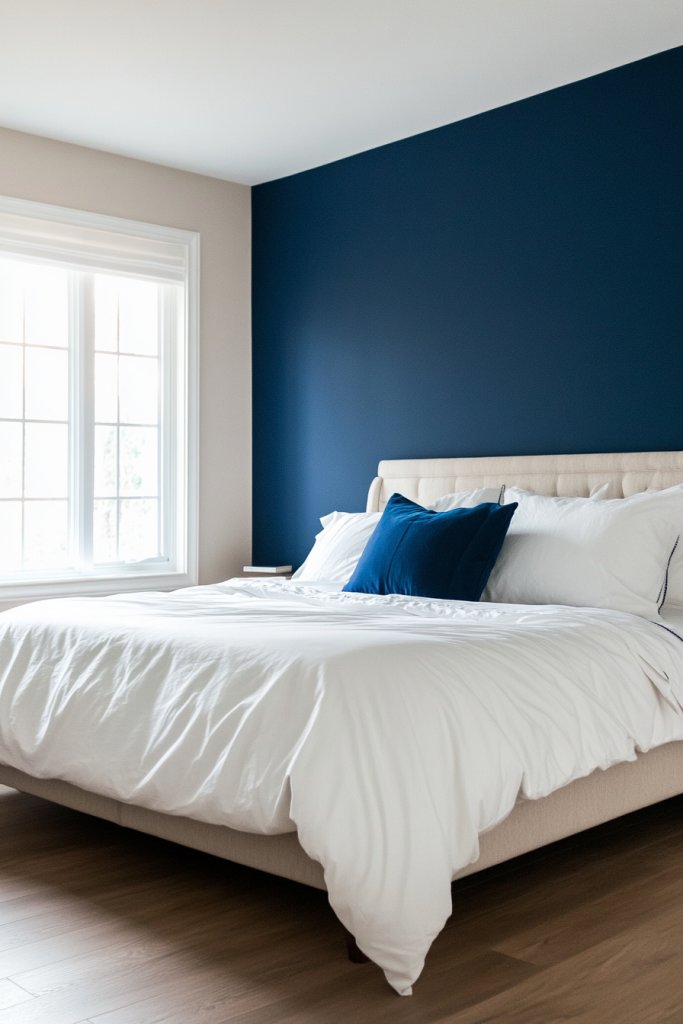
11. Paint an Accent Wall with a Bold Color or Subtle Shade
Neutral walls can sometimes feel boring and uninspired. An accent wall with a bold or subtle color adds depth and personality, creating a focal point in any room. It’s a quick, affordable way to refresh your decor without a full repaint. Who knew a splash of paint could change everything?
Recommended Products to replicate this idea
| # | Preview | Product | |
|---|---|---|---|
| 1 |

|
Zinsser 02774 PERMA-WHITE Mold & Mildew Proof Interior Paint, Quart, Eggshell White | Buy on Amazon |
| # | Preview | Product | |
|---|---|---|---|
| 1 |

|
4 Rolls Premium Painters Tape, Blue Tape, Masking Tape, Paint Tape for Multi-Purpose, Painting,... | Buy on Amazon |
Visualize a deep navy or vibrant terracotta wall behind your bed or sofa, instantly drawing attention. The contrast between the accent and neutral walls highlights architectural features and adds visual interest. The textured surface of the paint or subtle sheen can further enhance the wall’s impact. It’s like giving your room a new outfit.
Choose a color that complements your existing decor—warm tones for coziness, cool shades for calm, or vibrant hues for energy. Use matte or eggshell finishes for a sophisticated look, or semi-gloss for a subtle shine. For small spaces, a single accent wall can make a big difference, while larger rooms benefit from multiple color zones.
Prepare your wall by cleaning and sanding if necessary. Use painter’s tape to define clean edges and protect adjacent surfaces. Choose quality paint and tools—brushes for edges, rollers for large areas. Apply multiple thin coats for best coverage, letting each dry thoroughly. Remove tape carefully for crisp lines. Consider hiring a pro if you’re unsure about DIY.
Layer with textiles, artwork, or decorative furniture that matches or contrasts with your new color. Use lighting to highlight the accent wall—wall sconces, uplights, or even string lights. Personalize further by adding decals or stencils for a custom touch. The right combination can turn your space into a curated retreat.
An accent wall is a bold statement that instantly elevates your decor. It encourages you to experiment with color and create a space that truly reflects your personality. Plus, it’s a project that pays off quickly, giving you a sense of achievement. Ready to make a colorful statement?
12. Install Floating Shelves for Display and Storage

Cluttered surfaces and crowded walls can make your space feel chaotic. Floating shelves offer a sleek solution for displaying essentials and decorative items without taking up floor space. They add both form and function, helping you keep things organized and stylish. Who says storage has to be boring?
Recommended Products to replicate this idea
| # | Preview | Product | |
|---|---|---|---|
| 1 |

|
QEEIG Floating Shelves for Wall Bathroom Shelf Bedroom Kitchen Living Room Hanging Book Shelves... | Buy on Amazon |
| # | Preview | Product | |
|---|---|---|---|
| 1 |

|
12 Pack L12 x H 8" Black Heavy Duty Shelf Brackets with Screws Metal Shelf Brackets Shelf Support... | Buy on Amazon |
Imagine a row of minimalist wooden shelves holding candles, books, or small plants. The clean lines and open design make your walls look taller and more spacious. The shelves become a gallery for your favorite objects, adding interest and personality. It’s like creating a mini museum right in your home.
Choose different materials—natural wood, painted MDF, or metal—to match your decor style. Arrange shelves at varying heights for visual intrigue or keep them uniform for a tidy look. Use them in kitchens, bathrooms, or living rooms to display essentials or hide clutter. Combine with hooks or baskets for extra versatility.
Measure the wall area carefully and mark the desired shelf heights. Use a level and a drill to secure brackets or anchors into studs or drywall. Mount the shelves securely, ensuring they are level. Decorate with your chosen items, balancing height and weight for stability. Regularly check for loose screws or wobbling shelves.
Paint or stain shelves to match your decor, or add decorative edge trims for a custom look. Mix different sizes or styles to create a layered, eclectic display. Incorporate lighting—like LED strips underneath—for a dramatic effect. Personal touches like framed photos or small sculptures make the space uniquely yours.
Floating shelves are a versatile, stylish way to maximize wall space. They help curate your favorite objects and keep your room feeling open and organized. It’s a DIY-friendly project that can dramatically improve your decor. Ready to elevate your walls?
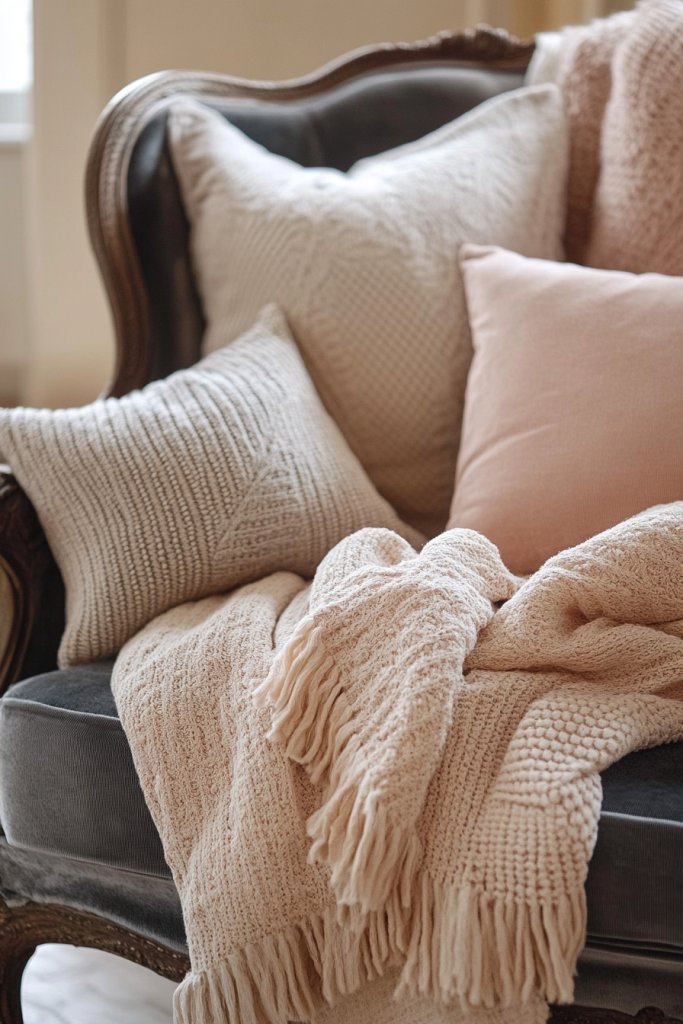
13. Layer Different Textiles for Cozy Visuals
Flat, stark surfaces can make a room feel cold and uninviting. Layering textiles like throws, cushions, and rugs adds warmth and depth, making your space feel cozy and lived-in. It’s an easy way to upgrade your decor and boost comfort. Who doesn’t want a warm, inviting home?
Recommended Products to replicate this idea
| # | Preview | Product | |
|---|---|---|---|
| 1 |

|
L'AGRATY Chunky Knit Blanket Throw,Soft Chenille Yarn Throw Blanket 50x60,Handmade Cable Knit... | Buy on Amazon |
| # | Preview | Product | |
|---|---|---|---|
| 1 |

|
Snycler Boho Throw Pillow Covers 18x18 inch Set of 2 Boho Rug Carpet Double Sided Pattern Cotton... | Buy on Amazon |
Picture a soft cream throw blanket with chunky knit texture draped over a sofa, paired with velvet cushions in rich jewel tones. The layered textiles create visual interest and tactile richness, inviting touch and relaxation. The combination of patterns and textures transforms a plain room into a cozy retreat. It’s like wrapping your space in a warm hug.
Mix textures—wool, faux fur, silk, linen—to create a layered look that’s tactile and inviting. Use seasonal textiles to reflect the time of year—light linens for summer, plush velvets for winter. Play with patterns and colors for contrast or harmony. Layer rugs of different sizes and textures for added depth.
Start with a neutral base—like a plain sofa or bed—and add throws and cushions in different textures. Mix and match sizes and shapes for visual interest. Incorporate textiles with different weights for contrast. Regularly fluff and adjust for a fresh look. Use storage baskets or ottomans to keep extra blankets handy.
Add embroidered or personalized cushions for a bespoke touch. Use decorative trims, tassels, or fringes to enhance the look. Layer your textiles to match your mood or seasons, creating a versatile styling scheme. Incorporate your favorite colors and patterns to express your personality.
Layering textiles is a simple way to add warmth and personality to your space. It encourages creativity and experimentation without major costs. Plus, it makes your home feel warm, welcoming, and uniquely yours. Ready to snuggle up with some cozy decor?
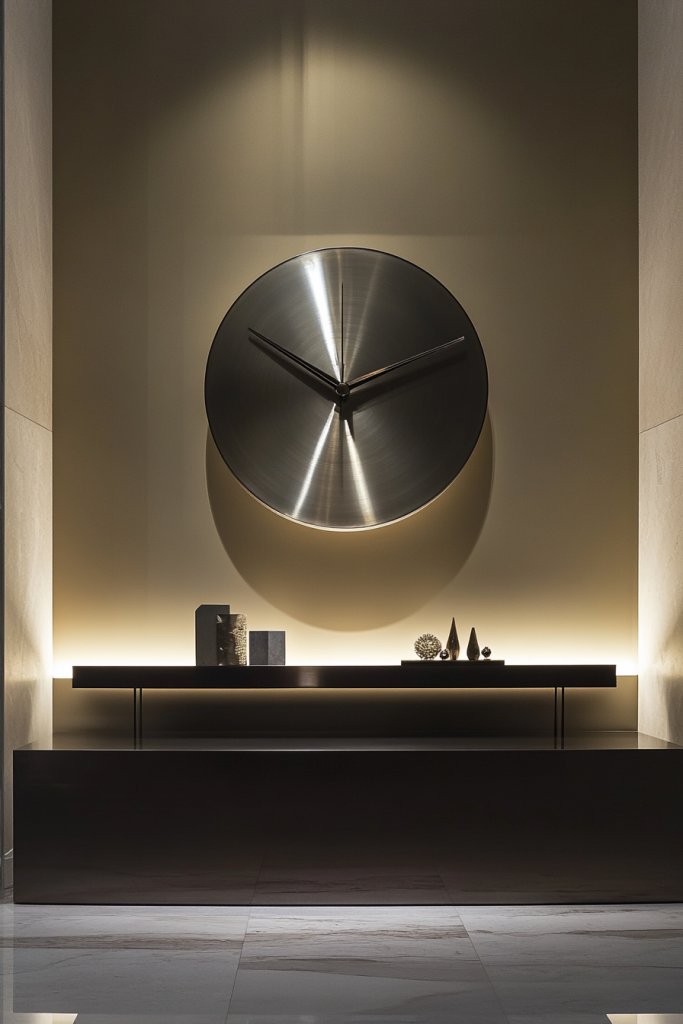
14. Add a Statement Clock or Wall Shelf
A plain wall can feel empty and uninspiring. Adding a statement clock or a sleek wall shelf instantly creates a focal point and enhances your room’s style. It’s a functional decor piece that combines practicality with personality. Who doesn’t love a little extra flair?
Recommended Products to replicate this idea
| # | Preview | Product | |
|---|---|---|---|
| 1 |

|
VEVOR Large Wall Clock, 24 in Wall Clock Roman Numerals, Battery Operated Non Ticking Classic... | Buy on Amazon |
| # | Preview | Product | |
|---|---|---|---|
| 1 |

|
upsimples Floating Shelves for Wall, Wall Shelves for Decor Storage Set of 6, Wall Mounted Wood... | Buy on Amazon |
Imagine a large, modern clock with bold numbers as the centerpiece above your fireplace or sofa. Or visualize a minimalist shelf displaying a few curated objects—books, plants, or decorative boxes. The clock or shelf adds visual weight and anchors your space. It’s like jewelry for your walls.
Choose a clock with a unique shape or finish—metal, wood, or acrylic—to match your decor style. Use a wall shelf to display a mix of decorative objects, keeping it uncluttered. In small spaces, a compact clock or shelf can make a big impact. Layer multiple pieces for a gallery wall effect or keep it simple with one statement piece.
Select the right size and style for your space. Use a level and appropriate anchors or hooks to secure the clock or shelf. Measure carefully to position it at eye level or above furniture for maximum impact. For shelves, arrange your objects thoughtfully, balancing height and weight. Regularly dust or clean to maintain the look.
Paint or customize your shelf with stencils or decals for a personalized touch. Mix different materials—metal, wood, glass—to add texture. Use the shelf to showcase your favorite small collectibles or meaningful items. Change out objects seasonally to keep the display fresh.
A statement clock or shelf adds personality and function to your walls, making your space more dynamic. It’s a simple project that can transform a plain wall into a conversation starter. Plus, it’s a small step toward a more curated, stylish home. Ready to make a statement?
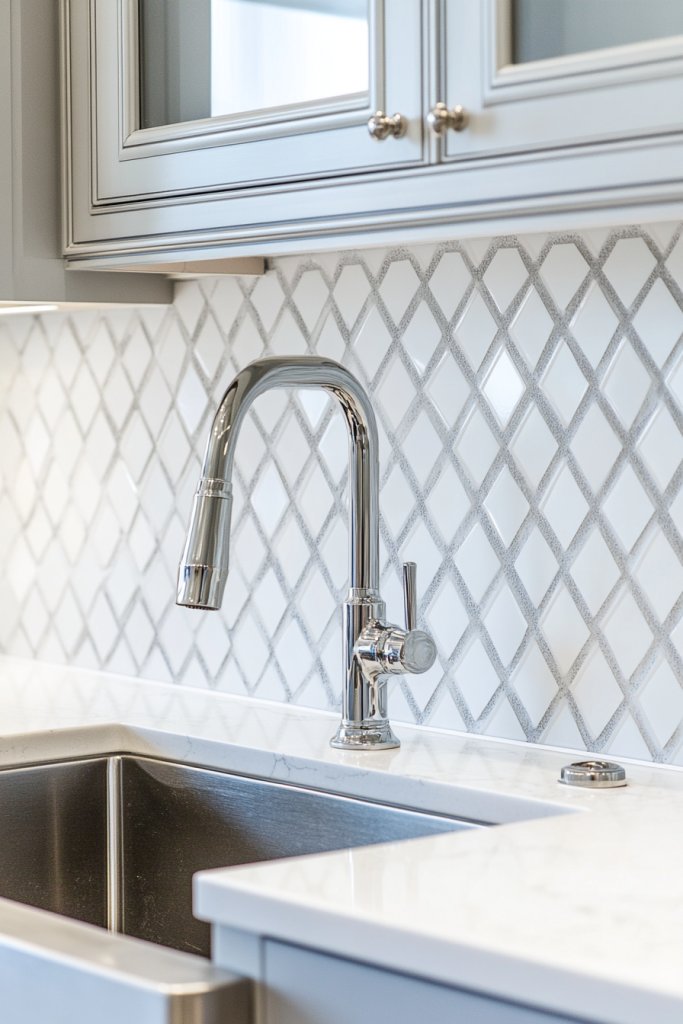
15. Use Decorative Adhesive Tiles or Backsplashes
Boring backsplashes or tile-less walls in kitchens and bathrooms can feel uninspired. Decorative adhesive tiles offer a quick, mess-free way to add texture and pattern. It’s an affordable DIY solution that instantly upgrades your space. Who says you need a full remodel to get a stylish look?
Recommended Products to replicate this idea
| # | Preview | Product | |
|---|---|---|---|
| 1 |

|
Art3d 102-Piece Peel and Stick Wall Tile for Kitchen Backsplash, Bathroom, Fireplace, 3in. × 6in.... | Buy on Amazon |
| # | Preview | Product | |
|---|---|---|---|
| 1 |

|
Mirror Tiles Self Adhesive, 5100 Pieces Mosaic Tiles Sheet, Disco Ball Tile Stickers, Square Mosaic... | Buy on Amazon |
Picture a kitchen with a geometric black-and-white tile pattern behind the stove or a colorful mosaic in the bathroom. The adhesive tiles create a textured, patterned surface that catches the light and adds visual interest. They’re thin, flexible, and come in a variety of designs, making your space look custom and luxe.
Choose from a wide range of designs—from subway tiles to intricate mosaics—to suit your taste. Use them in small areas like a backsplash or extend across an entire wall for a bold statement. Mix and match different patterns for a playful, eclectic vibe. They’re perfect for renters or anyone wanting a quick update.
Clean the surface thoroughly to ensure adhesion. Measure and cut tiles with scissors or a utility knife to fit your space. Peel off the backing and carefully press the tiles onto the wall, smoothing out air bubbles. Use a grout pen or sealant if needed for extra durability. Clean up excess adhesive immediately.
Create custom patterns or borders with different tile designs. Incorporate metallic or matte finishes for varied effects. Use the tiles to highlight a particular area or to add a decorative border. Personalize further with painted accents or decals for a unique touch.
Decorative adhesive tiles are a simple, impactful way to add pattern and texture. They’re perfect for DIYers and renters who want style without permanence. The variety of designs allows you to express your personality creatively. Ready to tile your way to a stunning new look?
16. Place Artistic Candles or Candle Holders Strategically
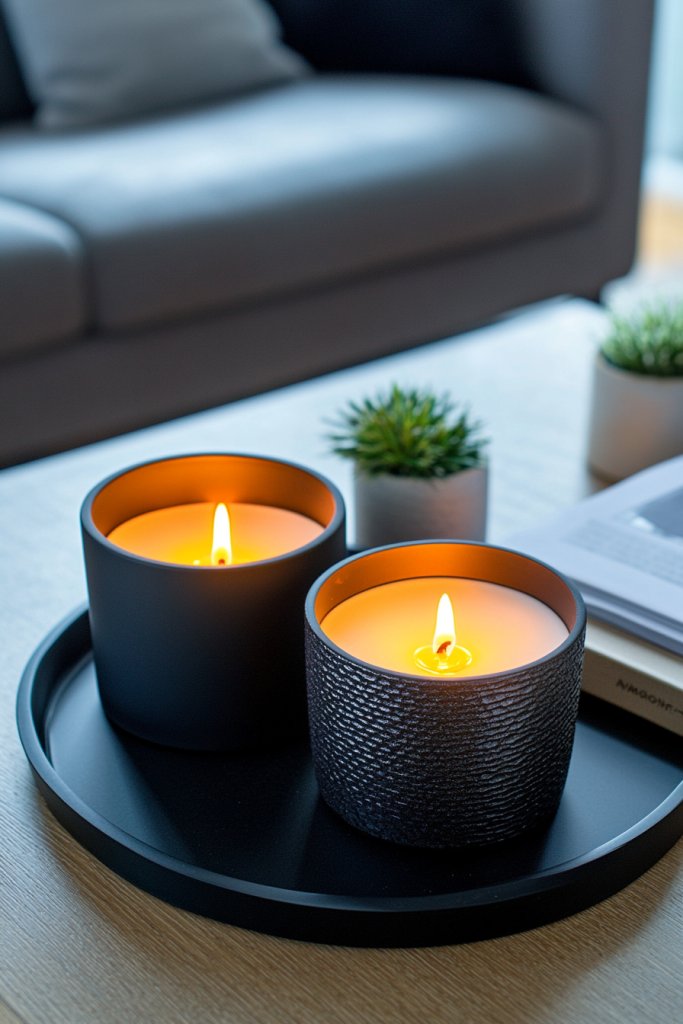
Empty tables and shelves can feel plain and uninspired. Artistic candles or candle holders add a warm glow and an element of sophistication. They’re easy to incorporate and instantly create ambiance. Who doesn’t love a cozy, inviting atmosphere?
Recommended Products to replicate this idea
| # | Preview | Product | |
|---|---|---|---|
| 1 |

|
Conelist Set of 3 White Ribbed Pillar Candles Soy Wax Scented Ribbed Candles Includes 2.8, 4.2 and... | Buy on Amazon |
| # | Preview | Product | |
|---|---|---|---|
| 1 |

|
Vixdonos Brass Gold Taper Candlestick Holders Metal Candle Holders Set of 3 Table Mantel Decorative... | Buy on Amazon |
Imagine a cluster of textured candles in various heights on your coffee table or a sleek metallic holder on your dining sideboard. The flickering light casts soft shadows, creating a calming environment. Artistic candle holders with geometric or sculptural designs serve as decorative focal points even when unlit.
Choose candles in different shapes, sizes, and colors to suit your decor theme—neutrals for minimalism, bold hues for vibrancy. Use decorative holders made of ceramic, metal, or glass to complement your style. Arrange candles in groups or clusters for a more dramatic effect or spread them out for subtlety.
Place candles on trays, coasters, or decorative plates to catch wax drips and add visual layers. Position them at varying heights on shelves or tables for depth. Ensure candles are stable and away from flammable objects. Replace burnt-out candles promptly and trim wicks for a cleaner burn.
Personalize candles with customized labels or scents that match your mood or season. Add decorative elements like dried flowers, beads, or stones inside the holders. Use unscented candles for a clean look or scented ones to enhance your space’s ambiance. Layer with other decor elements for a curated look.
Artistic candles and holders add warmth and personality to your home decor. They’re a simple way to create a cozy vibe and impress guests. Plus, lighting candles is an instant mood booster, especially in the evening. Ready to glow up your space?
17. Use Removable Hooks and Hangers for Flexible Display
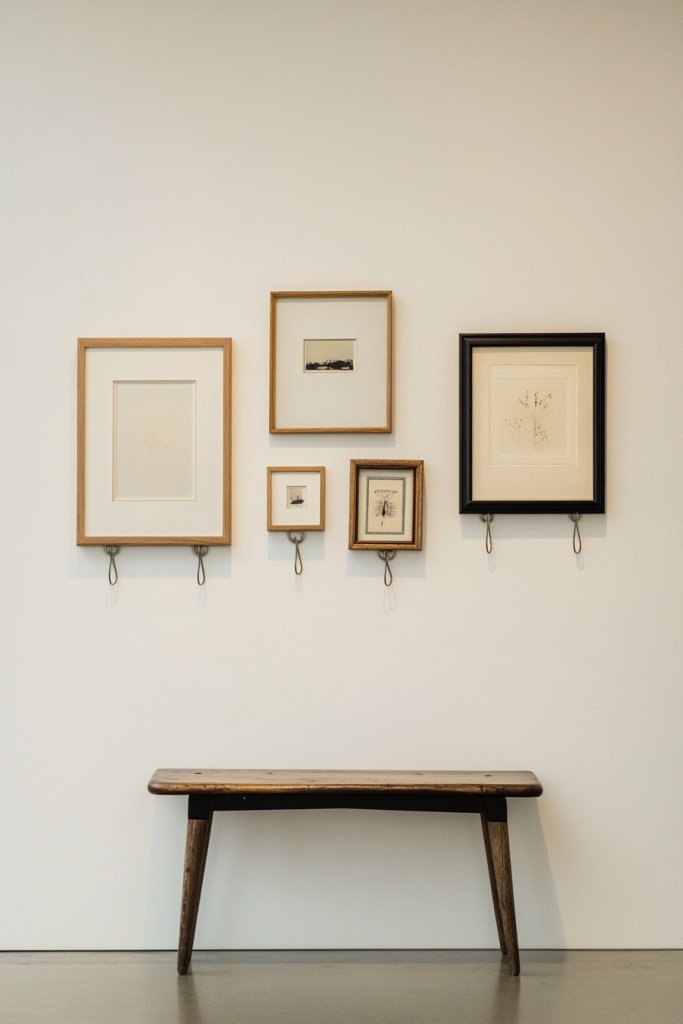
Hanging art or decor can feel permanent and intimidating, especially if you’re unsure about holes in the wall. Removable hooks and hangers provide a stress-free way to display your favorite items and change them easily. It’s the perfect solution for renters or anyone who loves to refresh their decor.
Recommended Products to replicate this idea
| # | Preview | Product | |
|---|---|---|---|
| 1 |

|
Command 15 lb Large Picture Hanging Strips 14 Pairs (28 Strips), Damage-Free Hanging Picture... | Buy on Amazon |
| # | Preview | Product | |
|---|---|---|---|
| 1 |
|
Command 5 lb Large Utility Hooks, 7 Hooks and 12 Strips, Damage-Free Hanging Wall Hook with Adhesive... | Buy on Amazon |
Picture a series of lightweight frames or decorative accessories hanging at varying heights. You can swap out artwork or accessories whenever your mood or style changes. The hooks are discreet and come in a variety of finishes, blending seamlessly with your decor. It’s like a flexible gallery that adapts to your taste.
Use different types of hooks—adhesive, suction, or clip-on—for various surfaces and weights. Create a gallery wall by arranging multiple hooks in a pattern or grid. Hang lightweight textiles, jewelry, or small decorative items with ease. Seasonal changes are simple—just remove and replace items as desired.
Clean the wall area thoroughly before applying adhesive hooks. Follow the manufacturer’s instructions for weight limits and installation. Use a level or measuring tape for precise placement. Hang your decor, then step back to check alignment. Regularly inspect hooks for stability, especially in high-traffic areas.
Personalize your display by mixing different hook styles or adding decorative elements like ribbons or tags. Create themed arrangements for holidays or seasons. Use hooks to organize accessories or small decor items visually. Change your display regularly to keep your space feeling fresh.
Removable hooks make decorating fun and flexible, encouraging you to experiment without fear of damage. They allow you to curate your decor easily and update your style effortlessly. It’s a small step that keeps your home dynamic and expressive. Ready to hang with confidence?
18. Create a DIY Gallery Wall with Framed Prints or Photos
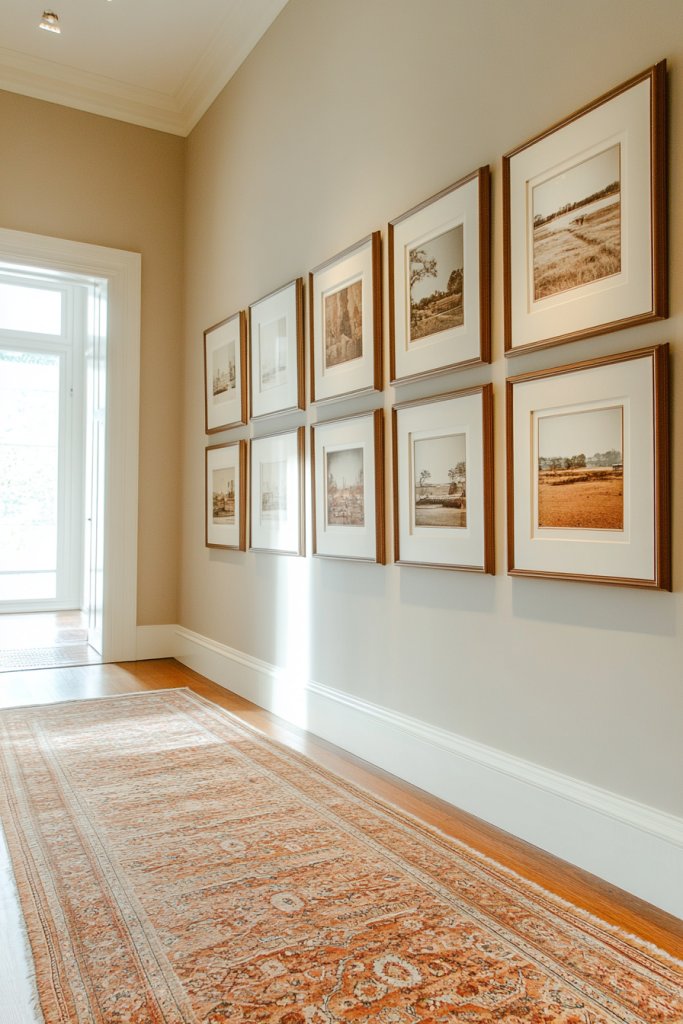
A blank wall can feel empty and uninspired, but creating a gallery wall can change that instantly. Framed prints, photos, or quotes add personality and tell your story. The best part? You can customize it entirely to your taste, making your home uniquely yours. Who’s ready to turn a plain wall into a personal museum?
Recommended Products to replicate this idea
| # | Preview | Product | |
|---|---|---|---|
| 1 |

|
eletecpro 12x12 Picture Frames Set of 9 with Mat for 8x8 Photos or without Mat for 12x12, Square... | Buy on Amazon |
| # | Preview | Product | |
|---|---|---|---|
| 1 |

|
KURUI 303Pcs Picture Hanging Kit, Picture Hangers Assorted Kit with Heavy Duty Picture Hanging... | Buy on Amazon |
Visualize a carefully curated arrangement of black-and-white family photos, colorful prints, and inspiring quotes in mismatched frames. The variety in size and style adds visual interest and a layered effect. The gallery becomes a focal point, drawing attention and sparking conversations. It’s an artful display of your memories and style.
Mix frame styles—wood, metal, or painted—to create an eclectic look. Arrange the frames in a grid, salon style, or freeform for a more relaxed vibe. Incorporate different types of art, from photographs to illustrations or textured prints. Swap out or add new frames seasonally for ongoing freshness.
Start by selecting a theme or color palette. Lay out your frames on the floor or use paper templates on the wall to plan your arrangement. Use appropriate hooks or nails, ensuring they can support the weight. Hang each piece carefully, maintaining even spacing and alignment. Step back regularly to assess the overall balance.
Add personal touches like handwritten quotes or DIY art in custom frames. Incorporate small decorative objects—like plates or textiles—near the gallery for added texture. Mix in memorabilia or travel souvenirs for a personal touch. Keep updating your gallery as your collection grows.
Creating a gallery wall is a fun, creative project that adds character to your home. It encourages you to showcase your personality and memories in a stylish way. Plus, it’s a conversation starter and a reflection of your unique story. Ready to curate your personal art collection?
Conclusion
These small home decor fixes demonstrate that big changes often start with simple steps. By trying out these ideas, you can transform your space into a more vibrant and welcoming environment. Don’t wait—start making those quick updates today and enjoy a home that feels fresh, stylish, and uniquely yours!
Last update on 2026-03-01 / Affiliate links / Images from Amazon Product Advertising API