Ever find yourself frustrated by a tiny kitchen that feels more cluttered than functional? Small kitchen storage solutions are incredibly popular because they unlock the potential of limited space, making your daily routines smoother and more enjoyable.
In this article, you’ll discover a variety of creative and practical ideas to maximize your kitchen storage. From clever cabinet hacks to space-saving shelving, these tips are designed to help you organize with ease and style. Get ready to transform your small kitchen into a clutter-free haven that works as hard as you do!
1. Install Over-the-Door Hooks and Racks for Instant Extra Storage
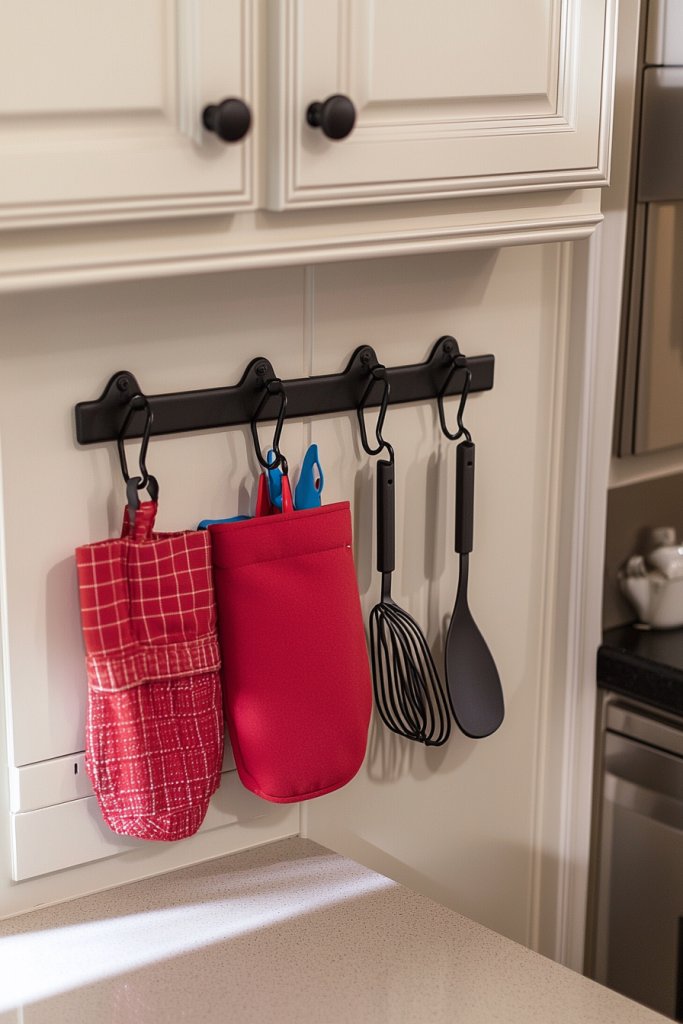
Ever struggle to find space for your kitchen essentials without cluttering countertops or drawers? Small kitchens often feel cramped because every inch counts, and it’s frustrating when you can’t find a home for your utensils or towels. The idea of extra storage that doesn’t eat into your limited space is like a breath of fresh air. Who wouldn’t want a neat, organized kitchen where everything has its place?
Imagine the back of your pantry or cabinet doors transformed into mini storage zones with sleek hooks and racks. Bright-colored silicone hooks hold your spatulas and oven mitts, while sturdy wire racks keep dish towels within arm’s reach. The glossy finish of the hooks contrasts beautifully with your cabinet doors, creating a tidy, organized look. It’s almost like your kitchen is saying, “Hey, I’ve got space for everything!” The extra storage makes your counters look cleaner and your workflow smoother.
You can customize this idea based on your style—go minimalist with matte black hooks or add a pop of color with playful plastic ones. For small spaces, opt for slim, space-saving racks that maximize vertical storage. During holidays or special occasions, swap out hooks for decorative ones that match seasonal themes. If you have kids, use fun-shaped hooks to encourage tidiness and make chores less of a chore. The versatility means you can adapt this system to fit any aesthetic or functional need.
Start by measuring your door spaces to choose appropriately sized hooks and racks. Install using simple nails or adhesive strips—no drilling needed if you prefer a no-damage approach. Hang utensils, oven mitts, dishcloths, or small pots on these hooks, grouping similar items for efficiency. For heavier items, opt for sturdier racks that can handle more weight. Keep frequently used items at eye level for quick access. Regularly review and rearrange the hooks to keep your setup fresh and functional. This solution is inexpensive and easy to maintain.
Add decorative elements like patterned fabric covers for hooks or color-code them to match your kitchen palette. Use labeled baskets or small containers on racks for tiny gadgets or spice packets. Incorporate hooks with unique shapes—like vintage-inspired metal designs—to add character. You could also combine this with magnetic strips for knives, creating a cohesive organized look. Personal touches make your space not just functional but also reflective of your style.
This simple yet effective method transforms clutter into order without sacrificing style. It’s a quick win that boosts your confidence in managing small-space chaos. Once you see how much extra room you gain, you’ll wonder why you didn’t do this sooner. Plus, it’s a trend that’s here to stay—because who doesn’t love a tidy, inviting kitchen? Ready to hang up some hooks and racks and reclaim your countertop space?
2. Use Clear Stackable Containers for Pantry Organization
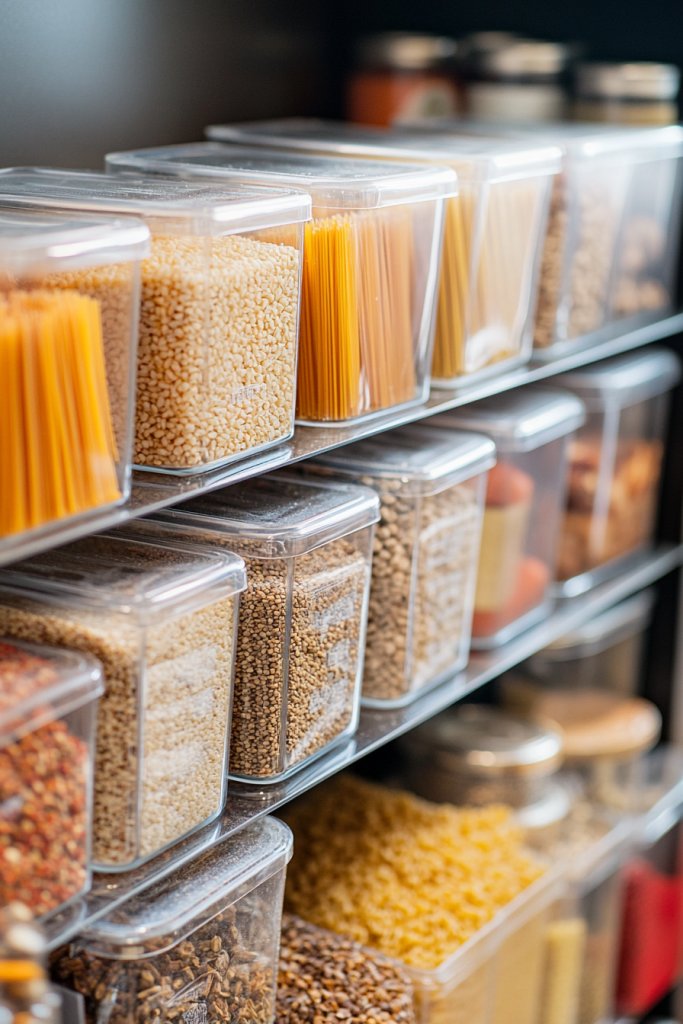
Ever open your pantry and feel overwhelmed by a jumble of bags and boxes? Keeping ingredients fresh and accessible in a small space is a challenge. It’s easy for clutter to take over, making cooking feel like a scavenger hunt. The idea of neat, visible storage that maximizes space and reduces chaos sounds almost too good to be true, right? But it’s totally doable.
Picture a row of transparent, airtight containers stacked neatly on your shelves—each labeled with handwritten tags or sleek modern fonts. You see bright white rice, vibrant red lentils, and a jar of crunchy cereal, all easily visible. The clear plastic or glass catches the light, making your pantry look clean and inviting. As you reach for ingredients, you don’t have to rummage; everything is right there, organized and appealing.
Choose containers that match your style—sleek glass for a modern look or colorful plastic for a playful vibe. For small kitchens, stackable containers save vertical space, while wider ones can be placed side by side in shallow cabinets. Consider nesting smaller containers inside larger ones for extra organization. You can also incorporate different sizes for dry goods, spices, or baking supplies, tailoring your setup to your cooking habits. This flexibility makes it easy to adapt seasonally or as your needs evolve.
Start by emptying your pantry and sorting items into categories. Select containers with secure lids—preferably airtight—to keep food fresh. Use a permanent marker or pre-printed labels to identify contents clearly. Stack containers based on frequency of use: everyday essentials at eye level, less-used items higher or lower. Clean and dry your shelves before placing containers, ensuring stability. Regularly check for expired items and reorganize to keep everything accessible. This approach makes your pantry both functional and visually appealing.
Personalize your containers with colorful labels or decorative stickers that match your kitchen’s theme. Use stackable bins with handles for easy pulling out, especially in deep cabinets. Incorporate small risers or riser inserts to create multi-layered visibility within the containers for tiny items like spices. For a cohesive look, opt for matching containers or add decorative touches like patterned tapes. This way, your pantry becomes not just organized but also a reflection of your style.
Transforming your pantry into a tidy space boosts your cooking confidence and makes meal prep more enjoyable. Seeing everything in plain sight reduces stress and saves time. Plus, it’s satisfying to open a door and find everything perfectly stacked and labeled. Once you experience the ease, you’ll wonder how you ever managed without these containers. Your kitchen will feel more inviting and functional—ready for whatever culinary adventures come your way.
3. Incorporate Magnetic Strips for Knife and Metal Tool Storage

Tired of digging through drawers for your favorite knives or metal gadgets? Small kitchens often lack dedicated storage, and cluttered drawers can be dangerous and frustrating. Mounting magnetic strips on your wall offers a sleek solution that keeps your tools within arm’s reach. Plus, it clears up precious drawer space for other essentials. Who wouldn’t want a safer, more organized kitchen?
Imagine a simple metal strip mounted on the backsplash, with shiny knives and utensils standing upright like soldiers ready for action. The magnetic grip holds each tool securely, preventing accidental slips. The silver contrast of the strip against a colorful tile wall adds a modern, industrial vibe. When you need a knife, just grab it—no more rummaging or jamming your hand into a cluttered drawer. It’s a clean, efficient look that feels both functional and stylish.
Choose magnetic strips in various finishes—brushed nickel, matte black, or even colorful powders coated—to match your decor. For small spaces, opt for a narrow strip that fits neatly along the wall; in larger kitchens, extend it or add multiple strips for different tool groups. You can also combine this with magnetic spice tins or small metal containers for additional storage. The flexibility allows you to tailor the setup to your needs and aesthetic preferences.
Pick a sturdy magnetic strip that can handle the weight of your heaviest knives. Mount it at a comfortable height using screws or adhesive strips, depending on your wall type. Arrange your most-used knives, scissors, and spatulas along the strip for quick access. For safety, keep sharp blades away from edges or high-traffic areas. Regularly clean the strip with a damp cloth to maintain magnetism and appearance. This simple upgrade can drastically improve your workflow and safety.
Add decorative touches by choosing magnetic strips with decorative finishes or shapes. Use color-coded magnets to easily identify different tools or assign specific zones for cooking, baking, or prep utensils. Combine with sleek knife holders for a layered look. You can even personalize with engraved metal tags for a custom feel. This not only enhances functionality but also adds a bit of personality to your kitchen.
A magnetic strip turns your tools into an artful display, making your kitchen look more professional and inviting. It encourages better organization habits and keeps your knives safer. Plus, you’ll love the quick access during busy cooking sessions. Once you see how much easier it is to find everything, you’ll be motivated to keep your entire space tidy and efficient. It’s a small change with a big impact.
4. Add Pull-Out Shelves in Cabinets for Better Accessibility
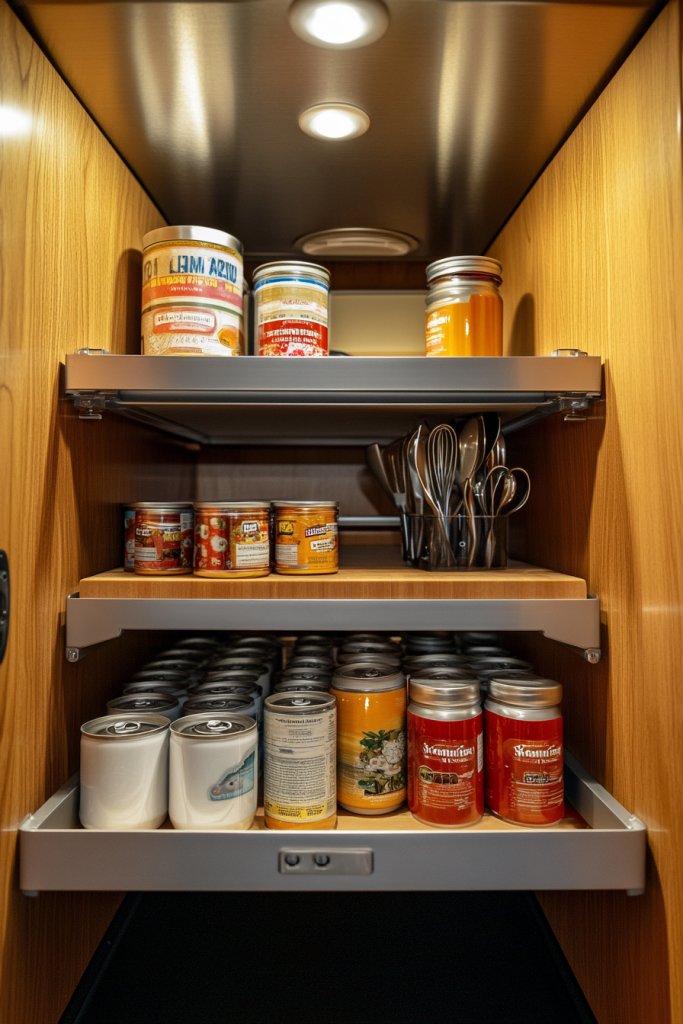
Ever open a cabinet and have to crouch or stick your hand into a deep abyss to find what you need? Small kitchens often have deep, awkward cabinets that hide your essentials, making retrieval a hassle. Installing pull-out shelves transforms these inaccessible spaces into practical storage zones. It’s a game-changer for efficiency and reduces frustration every time you cook.
Visualize sliding shelves smoothly gliding out to reveal neatly organized stacks of plates, spices, or baking supplies. The shiny metal or sturdy plastic runners support heavy loads, while the shelf surfaces are easy to clean. You can see everything at once without crawling inside the cabinet, giving your kitchen a more open, inviting feel. It’s like turning a hidden cave into a well-lit, accessible pantry.
Choose adjustable or fixed pull-out shelves based on your needs. For narrow spaces, opt for slim, space-efficient designs; for larger cabinets, use wider shelves to maximize capacity. Combine with dividers or small containers to keep items sorted. For seasonal adjustments, swap out shelves to accommodate larger or smaller items. This flexibility helps you tailor the storage to your evolving needs.
Begin by measuring your cabinet interior to select compatible pull-out shelf units. Install the runners at appropriate heights, ensuring they’re level and sturdy. Load the shelves with your items, balancing weight and accessibility. Secure the shelves to prevent tipping and test for smooth operation. Regularly clean and lubricate the runners to keep everything sliding effortlessly. This upgrade makes deep cabinets as practical as open shelving.
Decorate the shelves with colorful baskets or liners to add personality and ease of use. Incorporate labels or tags for quick identification of contents. Consider adding soft-close mechanisms for quieter operation. For a more custom look, choose finishes that match your cabinetry hardware or paint color. These small details make organization both functional and beautiful.
Pull-out shelves turn hidden spaces into your best helpers, making daily routines smoother. They help prevent clutter buildup and save you time searching for things. Once installed, you’ll wonder how you ever managed without them. It’s a smart investment that boosts your kitchen’s practicality and your peace of mind. Ready to slide your way to a more organized space?
5. Hang Pots and Pans on Ceiling-Rail Systems or Wall Racks
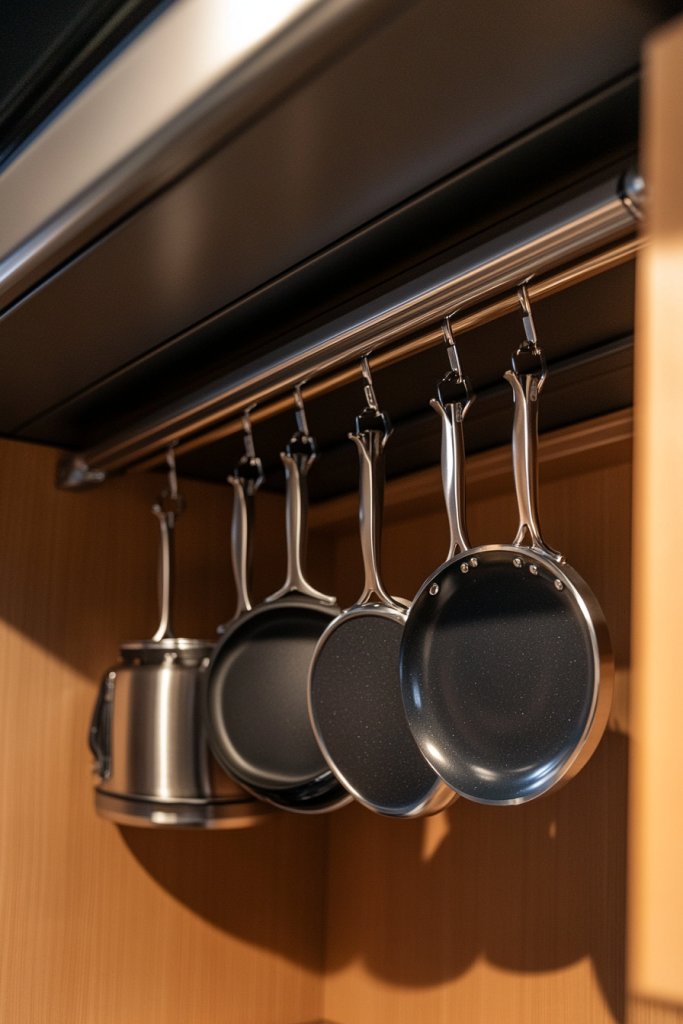
Tired of cluttered cabinets filled with pots and pans that are hard to access? Small kitchens often struggle with storage for bulky cookware, making cabinets crowded and messy. Hanging your pots and pans on ceiling rails or wall racks frees up cabinet space and adds a stylish focal point. It’s a practical solution that keeps your favorite cookware within arm’s reach.
Picture a sleek, black metal rail mounted just below your ceiling, with hooks holding shiny stainless steel pots and pans. The cookware hangs in a tiered arrangement, creating a cascading effect that’s both beautiful and functional. The open display reveals your collection, turning your kitchen into a culinary showcase. The space underneath remains clear for prep work, making cooking more efficient.
Choose from ceiling-mounted rails, wall-mounted racks, or even decorative pot-hanging systems in rustic or modern styles. For small spaces, compact rails with fewer hooks work best; larger kitchens can accommodate multiple levels. Incorporate hooks with decorative elements or paint to match your decor. Seasonal or themed cookware can be swapped out to keep the display fresh and personalized.
Mount the rail or rack securely into studs or wall anchors, ensuring it can handle the weight of your cookware. Arrange your pots and pans with easy access in mind, grouping similar items together. Use sturdy hooks that won’t slip or bend over time. Clean and inspect the mounting regularly to prevent accidents. This setup is simple, affordable, and instantly elevates your kitchen’s style.
Customize the display with decorative hooks or painted finishes that complement your kitchen theme. Add small labels or tags for each pot or pan to identify contents quickly. Incorporate decorative elements like vintage-inspired hooks or minimalist designs for a personalized touch. You can even hang utensils or lids on the same system for a cohesive look.
Hanging your cookware transforms a cluttered cabinet into a functional art piece. It saves space and makes cooking more enjoyable by keeping essentials visible and accessible. Once you see how effortlessly your pots and pans are at hand, you’ll be motivated to keep your entire kitchen organized. It’s a stylish, practical upgrade that pays off daily.
6. Use Corner Shelves or Lazy Susans for Hard-to-Reach Areas
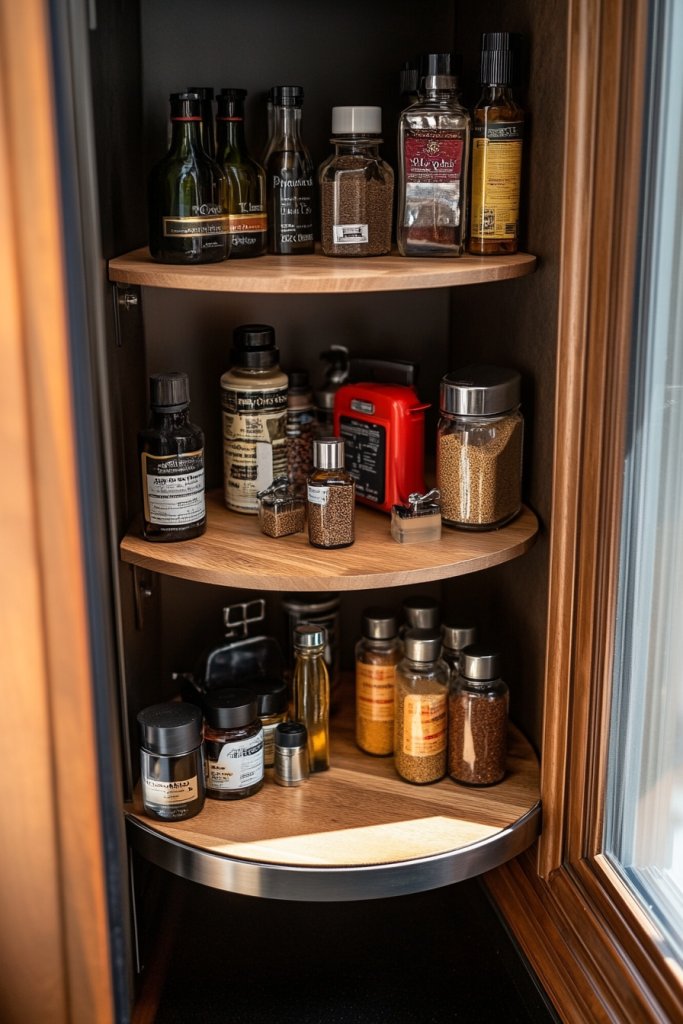
Corners in small kitchens often become neglected black holes where spices, oils, or small appliances hide forever. Reaching into these tight spaces is awkward, and clutter quickly accumulates. Corner shelves or Lazy Susans turn tricky corners into efficient storage zones. Want to make every inch count? This idea is perfect for squeezing extra function out of tight spots.
Envision a sleek Lazy Susan spinning smoothly in the corner, filled with neatly arranged jars of spices and cooking oils. The rotating tray makes access effortless, even in the tightest spaces. Alternatively, tiered corner shelves with soft edges hold small appliances, neatly stacked and easy to see. The overall effect is a tidy, organized corner that feels as spacious as the main kitchen area.
Opt for metal, wood, or plastic shelves to match your decor—modern, rustic, or eclectic. For small or awkward corners, choose narrow or adjustable Lazy Susans that maximize space. Use colorful containers or labels to add personality. You can also incorporate pull-out baskets or hidden compartments for extra storage. Seasonal or functional needs can guide your choice of materials and configurations.
Install corner shelves with sturdy brackets or opt for pre-made Lazy Susans that fit your cabinet dimensions. Ensure they spin smoothly by securing the base firmly. Organize items by frequency of use—most-used spices or oils at the front. Regularly clean and rotate items to keep everything fresh. Use small baskets or containers to keep tiny items from slipping off or getting lost in the corners. This approach turns underutilized space into a practical asset.
Add decorative labels or color-coded containers for quick identification. Incorporate small hooks for utensils or measuring spoons on the shelves’ edges. Use themed storage options—like vintage jars or colorful silicone lids—to add character. Re-arrange seasonally for holiday baking or summer grilling, keeping your setup fresh and functional.
Transforming corners into organized storage boosts your kitchen’s overall efficiency. It’s a simple fix that makes clutter disappear and accessibility improve. Seeing your spices or small gadgets easily available inspires confidence and saves time. Once you master corner organization, every inch of your kitchen becomes a space you love to use. Ready to spin your way to better storage?
7. Implement Under-Shelf Baskets for Additional Storage
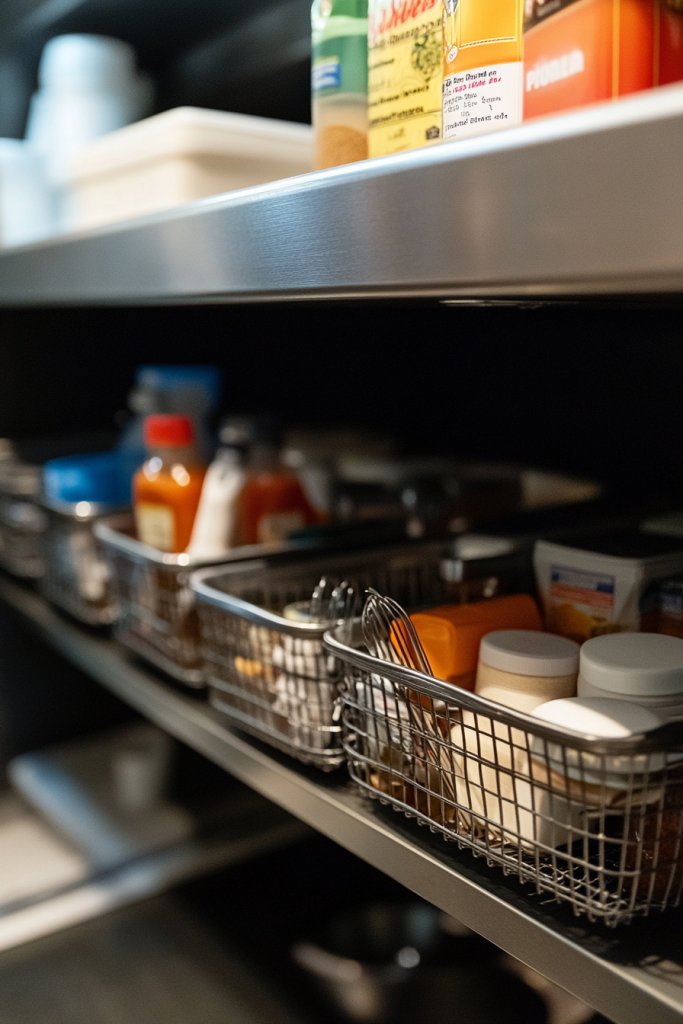
Are your kitchen shelves overflowing, but you still need more space? Small kitchens often suffer from vertical clutter that’s hard to organize. Under-shelf baskets offer a clever way to add extra storage where you least expect it—beneath existing shelves. Imagine turning dead space into a tidy, accessible zone for small items. Who wouldn’t want more storage without remodeling?
Visualize a sturdy wire basket hanging beneath a shelf, filled with dishcloths, cleaning supplies, or snack packs. The basket clips securely and adds a layered look to your shelving. It’s like mini drawers that hang above your workspace, keeping essentials close without cluttering your countertop. The open design ensures you can see everything at a glance, making organization effortless.
Choose baskets in metal, plastic, or coated finishes to match your decor. Size options vary from small compartments for spices to larger baskets for cleaning supplies. Use color coding or labels to distinguish categories easily. For seasonal needs, swap out baskets or contents to keep your system flexible. This method works well in both open shelving and inside cabinets with exposed edges.
Attach baskets securely using clips or hooks designed for shelving. Measure the space carefully to select the right size—too big or small, and they won’t fit or work properly. Fill them with frequently used items for quick access or seasonal supplies for rotating use. Regularly clean and reorganize to prevent dust buildup. This simple addition can turn vertical space into a mini storage unit.
Decorate baskets with fabric liners or decorative tapes to match your kitchen’s style. Label each basket for easy identification—especially helpful for shared kitchens. Use colorful or patterned baskets to add visual interest. Consider stacking or grouping baskets for a cohesive look that makes organization feel intentional and stylish.
Adding under-shelf baskets instantly increases your storage capacity without major changes. It keeps small items organized and visibly accessible, reducing clutter and frustration. Once you see how much more you can store, you’ll be motivated to explore other smart organization hacks. It’s a small upgrade with a big payoff for your kitchen’s functionality.
8. Choose Slim, Vertical Storage Units for Small Footprints
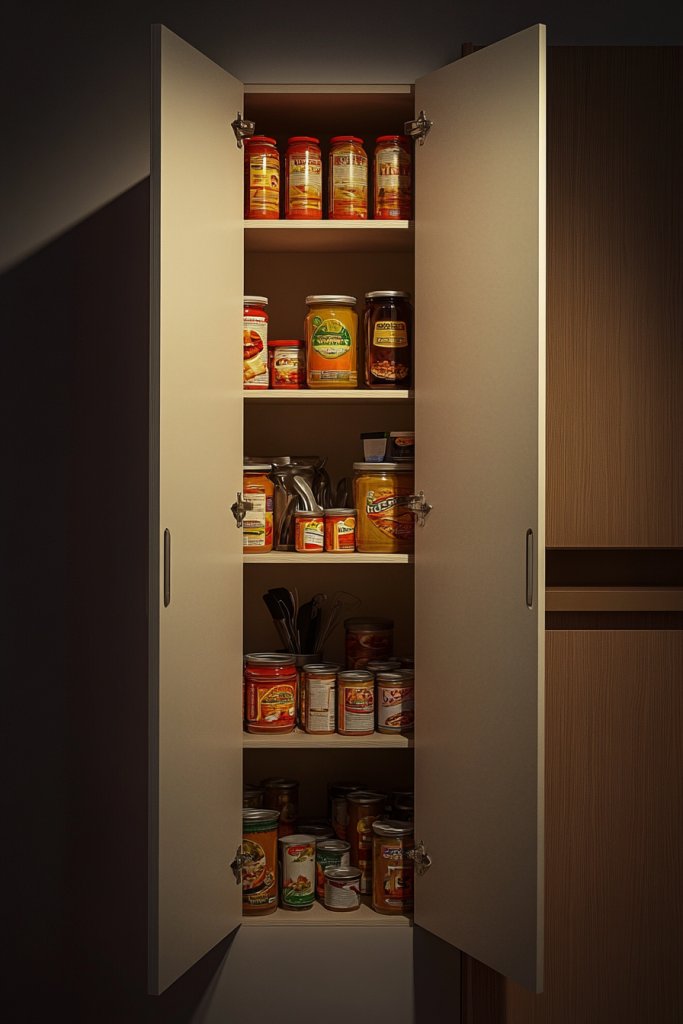
Limited space often means sacrificing storage or having cluttered counters. Finding furniture or storage units that fit narrow gaps and still hold a decent amount can feel like a design puzzle. Slim, vertical storage units solve this problem by making use of otherwise wasted space. They’re perfect for tight spots that need smart, space-efficient solutions.
Imagine a tall, slender cabinet placed in a narrow hallway or beside your fridge. Its multiple shelves hold canned goods, spices, or small appliances, all within easy reach. The sleek finish and minimal footprint create a streamlined look that doesn’t overpower your room. The vertical design draws the eye upward, giving your kitchen a sense of height and openness.
Opt for units with adjustable shelves to customize storage depth. Choose finishes that blend with your cabinetry—white, wood tones, or bold colors for a statement piece. Rolling carts with slim profiles can also serve as versatile, moveable storage stations. Use in small apartments or studio setups where every inch counts, and adapt based on your specific needs or aesthetic preferences.
Measure available gaps carefully before purchasing. Select units with durable construction and easy-to-clean surfaces. Position near your prep area or pantry for maximum efficiency. Fill with lightweight items or organize with baskets or small containers. If using rolling carts, ensure they have locking wheels for stability. Regularly review and reorganize to keep the space functional and looking tidy.
Decorate the units with removable decals or decorative hardware for a personalized touch. Use labels or color-coded bins within to keep categories clear. For a cohesive look, match the unit’s finish with your kitchen hardware or accents. You can also add hooks or small racks on the sides for extra storage—like hanging utensils or towels.
Vertical storage units are a smart way to add capacity without cluttering your space. They help organize your essentials and make everything easily accessible. Once you experience the efficiency, you’ll be inspired to find even more hidden spots for storage. It’s a practical upgrade that makes your small kitchen feel much bigger.
9. Utilize Drawer Dividers and Inserts for Utensil Organization

Do your kitchen drawers turn into chaotic messes with utensils, gadgets, and tools tossed everywhere? Small kitchens often lack dedicated countertop or cabinet space, making drawers the go-to catch-all. Drawer dividers and inserts offer a simple way to create order, saving you time and frustration. Imagine opening a drawer and instantly finding what you need—sounds like a dream, right?
Picture a clean, organized drawer with perfectly separated sections for knives, forks, spoons, and gadgets. The dividers are sleek, adjustable, and fit snugly into the drawer, turning it into a mini filing system. Each utensil has its designated space, making everything easy to pick up and put back. The visual clarity and orderliness make your entire kitchen look tidier and more inviting.
Choose from adjustable or fixed dividers depending on your needs. For a minimalist look, opt for sleek plastic or bamboo inserts that blend seamlessly. For a pop of color, pick vibrant silicone or patterned options. You can customize sections for specific tools like peelers, graters, or measuring spoons, making daily prep smoother. Use in drawers of different sizes or depths for maximum utility.
Measure your drawers carefully to select the right dividers. Install the inserts by snapping or sliding them into place, ensuring they fit securely. Organize utensils by type or frequency of use, placing the most-used items at the front. Regularly clean and reorganize to prevent clutter from creeping back. For added convenience, label sections or use color-coding to quickly identify categories. This simple upgrade transforms clutter into order.
Add decorative touches like patterned liners or custom labels for a personalized feel. Use matching or contrasting colors to complement your kitchen decor. Incorporate small containers within sections for tiny gadgets or accessories. Reconfigure the dividers as your collection of tools grows or changes, maintaining a tidy space. Functional and fun, this method streamlines your cooking prep.
A well-organized drawer reduces stress and makes cooking more enjoyable. It’s an instant upgrade that saves time searching and prevents frustration. Once you see how much easier it is to find your utensils, you’ll be motivated to keep all your spaces tidy. It’s a simple tweak that makes a big difference daily. Ready to give your drawers a makeover?
10. Hang Hooks Under Cabinets for Mugs and Cooking Tools
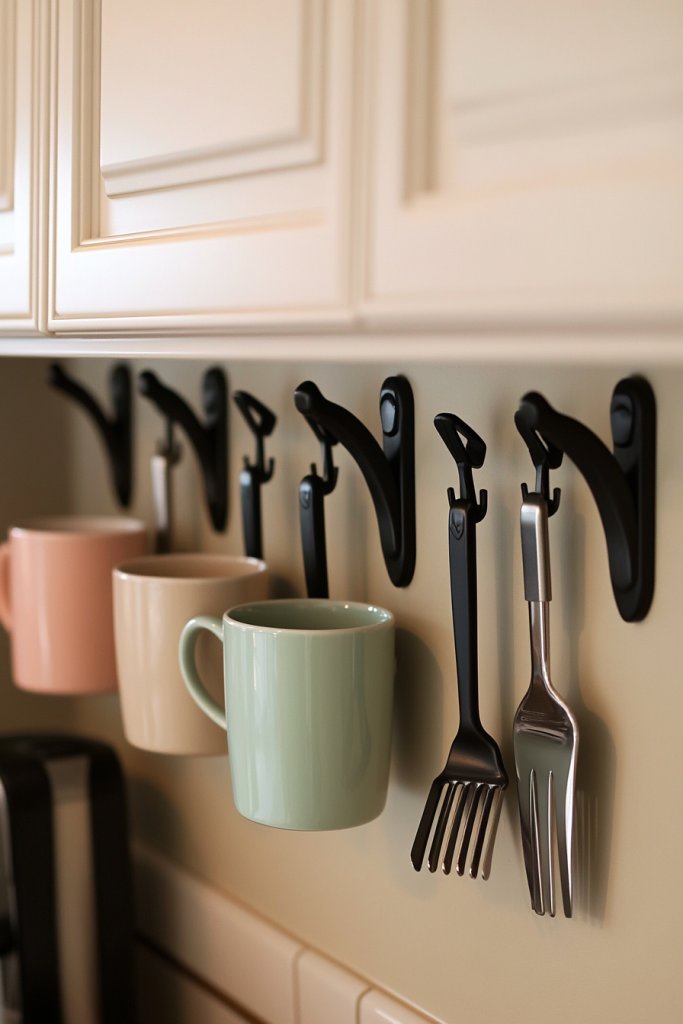
Do your mugs and cooking tools clutter your counters, making your kitchen look chaotic? Small spaces often lack dedicated storage for everyday essentials, leading to clutter and mess. Installing hooks underneath your upper cabinets offers a practical way to keep frequently used items within reach and free up counter space. It’s a simple, stylish fix that makes your kitchen more functional.
Imagine a row of hooks beneath your cabinets, each holding a colorful mug or a spatula, all lined up neatly. The hooks are sturdy and unobtrusive, blending seamlessly with your kitchen decor. The visual display is both charming and efficient, making your space feel more organized. When you need your favorite mug or whisk, just reach up—no more digging through drawers or cluttered counters.
Choose hooks in various finishes—matte black, brushed nickel, or colorful silicone—to match your style. For small kitchens, stick to a few carefully spaced hooks; larger spaces can support more. Combine hooks with decorative racks or small shelves for added flair or extra storage. Seasonal or themed hooks can also add personality and keep your kitchen lively.
Mount the hooks securely underneath cabinets using screws or strong adhesive strips. Measure and mark evenly spaced points to ensure uniform placement. Hang mugs, utensils, or small tools, keeping the most-used items at the front. Check periodically for stability and tighten screws if needed. This setup is quick, affordable, and instantly makes your kitchen more organized.
Add decorative elements like painted hooks or personalized tags to give your kitchen a unique touch. Use color-coordinated hooks for a cohesive look or mix finishes for an eclectic vibe. Incorporate small decorative items like mini plants or themed charms for extra character. Regularly swap out seasonal or themed hooks to keep your space fresh.
Hooking your everyday tools turns clutter into a curated display, elevating your kitchen’s style. It encourages better organization habits and makes cooking more enjoyable. Once you experience the convenience, you’ll be inspired to find more smart storage solutions. It’s a simple upgrade that makes a big difference every day.
11. Use Transparent Bins for Fruit and Vegetable Storage
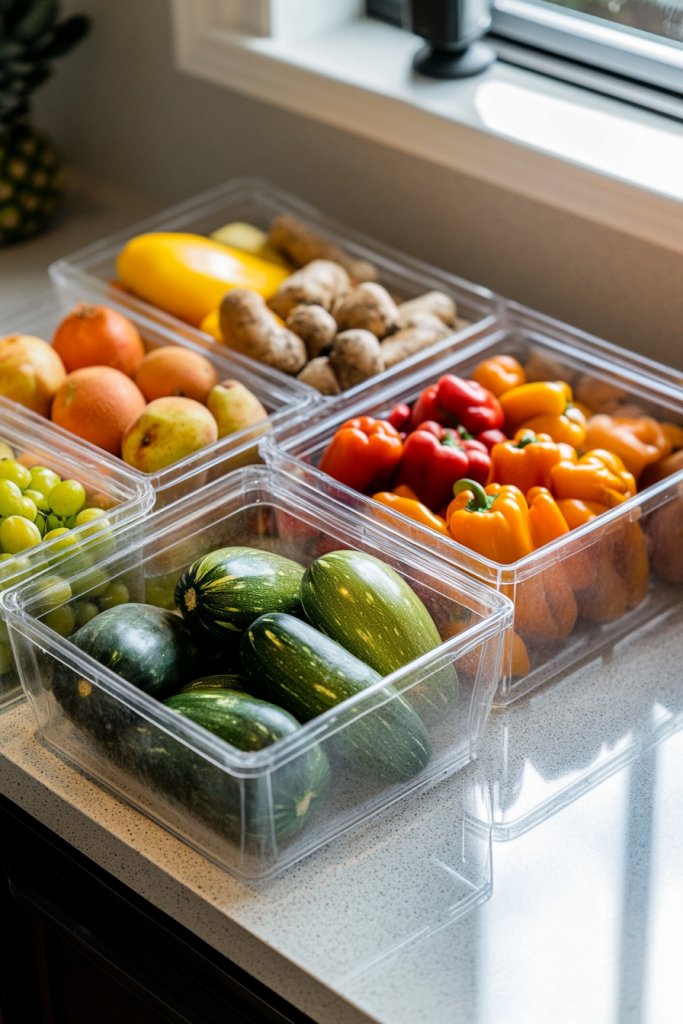
Are your fruits and veggies wilting away in dark cupboards or getting lost in the fridge? Keeping produce fresh and accessible in a small kitchen can be a challenge. Transparent bins make it easy to see what you have, reducing waste and encouraging healthy eating. Plus, they add a colorful, inviting touch to your countertop or open shelving.
Visualize clear, ventilated bins filled with bright apples, leafy greens, and vibrant berries sitting neatly on your countertop. The see-through design allows you to identify items instantly, while the ventilation helps keep produce fresh longer. The organized display brightens up your space and makes healthy choices more tempting. It’s like having a mini farmer’s market right in your kitchen.
Choose bins in various sizes and materials—see-through plastic, bamboo, or wire—to match your decor. For small kitchens, stackable or nesting bins save space; for larger counters, wide shallow trays work well. Use labels or color codes for different produce groups to streamline your grocery routine. Seasonal displays or themed containers can also add a playful or sophisticated touch.
Place the bins on open shelves, countertops, or inside fruit drawers. Arrange for easy access to frequently used produce, and rotate items to prevent spoilage. Clean the bins regularly with soap and water to keep them hygienic. For added style, incorporate decorative liners or small risers to elevate the display. Regularly check and toss spoiled items to keep your space tidy.
Decorate the bins with colorful labels or patterned tapes to add personality. Use different shapes or colors to designate specific produce types—like red for apples or green for greens. Consider layering with small baskets or dividers for additional organization. Seasonal or holiday-themed bins can make your produce display fun and festive.
Storing fruits and vegetables in clear bins transforms produce management into a visually appealing process. It’s easier to see what’s available, reducing waste and encouraging healthier habits. Once you enjoy the ease, you’ll be motivated to keep your entire kitchen organized and lively. Fresh, accessible produce makes every meal more enjoyable.
12. Maximize Space with a Fold-Down or Drop-Leaf Table
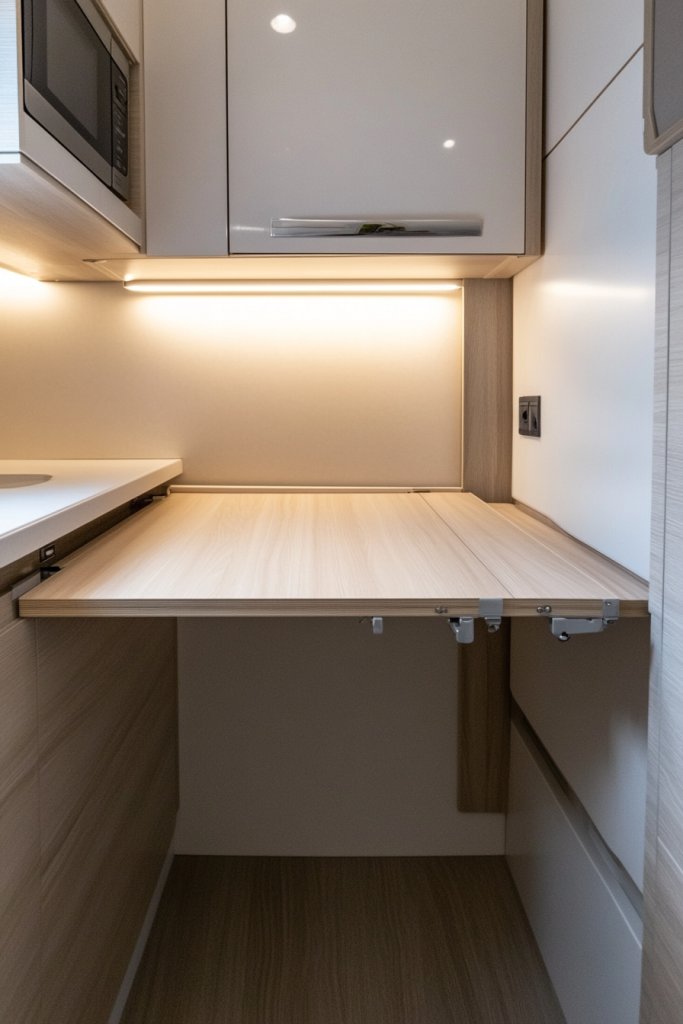
Struggling with limited prep space that seems to disappear when you need it most? Small kitchens often lack a dedicated dining or work area, making every inch feel precious. A fold-down or drop-leaf table offers an elegant solution—an extra surface that disappears when not in use. It’s perfect for creating a versatile, space-smart environment.
Imagine a sleek countertop with a hinged section that folds down easily, revealing a sturdy surface ready for chopping, eating, or working. When you’re done, simply lift or fold it away, leaving a smooth surface. The table’s minimal profile blends seamlessly into your kitchen, maintaining a clean aesthetic. It’s like having a secret extension that’s both functional and unobtrusive.
Choose between wall-mounted or freestanding models, depending on your space. Match the finish to your cabinetry—white, wood tones, or bold colors—to keep the look cohesive. Use decorative hardware or paint to add personality. For seasonal or occasional use, opt for lightweight materials like bamboo or composite wood. This flexibility makes it suitable for any small space or style.
Install the hinges securely into wall studs or a sturdy frame, ensuring smooth operation. Use a level to align the surface perfectly. When needed, unfold or drop the table into position, and lock it if necessary. Keep the folding mechanism clean and lubricated for longevity. Store folding chairs or stools nearby for quick seating. It’s a simple, effective way to add surface area on demand.
Decorate the fold-down surface with a colorful table runner or placemats for a cozy touch. Add small storage hooks or pockets underneath for utensils or napkins. Use decorative hardware or paint the underside of the leaf to add visual interest when it’s folded down. Seasonal fabric covers or decals can make the table fun and inviting.
A fold-down table turns your small kitchen into a multi-use space, making meal prep and dining more practical. It encourages you to utilize every inch efficiently and keeps your environment tidy. Once you see how easily you can create more space, you’ll be motivated to explore other space-saving ideas. It’s a simple upgrade that transforms your kitchen’s functionality.
13. Incorporate Under-Cabinet Lighting with Shelves for Small Items
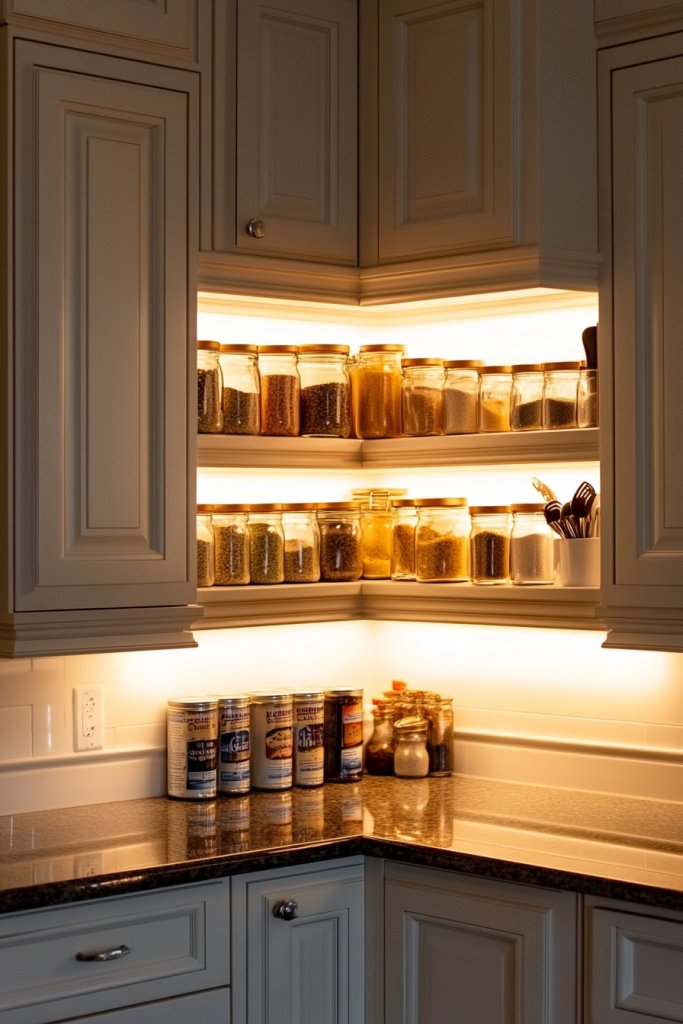
Does your kitchen feel dark or cluttered, especially in tight corners? Small kitchens benefit from good lighting that highlights storage areas and makes everything easier to find. Under-cabinet lighting combined with shallow shelves creates a bright, organized space that feels larger and more inviting. It’s a clever way to showcase your essentials without adding bulk.
Visualize subtle LED strips installed beneath cabinets, illuminating a row of spice jars, small decorative containers, or tools. The warm glow enhances the textures and colors of your stored items, creating a cozy ambiance. The shallow shelves support small jars or decorative accents, adding visual interest without blocking light. The overall effect is a well-lit, stylish display that feels both functional and warm.
Choose from different lighting tones—warm, cool, or daylight—to suit your mood or decor. Combine with clear or decorative shelves made of wood, glass, or acrylic. For seasonal updates, swap out small decorative items or change the shelf layout. Use these shelves to display favorite spices, small jars, or decorative trinkets that add personality.
Attach LED light strips securely beneath your cabinets, following the manufacturer’s instructions. Install shallow shelves in spots that need extra storage or display space. Arrange small jars or containers on the shelves, using labels for easy identification. Connect the lighting to a switch or smart home system for convenience. Regularly dust and check the lighting to maintain brightness and safety. This combo boosts both your kitchen’s style and usability.
Decorate shelves with themed containers, vintage jars, or decorative tapes. Use LED color-changing lights for mood effects or to highlight special items. Add small hooks underneath for hanging utensils or measuring spoons. You can also incorporate decorative trims or painted accents to match your decor theme, making it both practical and pretty.
Proper lighting and thoughtful shelving make your kitchen more functional and visually appealing. It’s a simple upgrade that instantly brightens your space and showcases your favorite items. Seeing how organized and inviting your kitchen becomes encourages ongoing tidiness. It’s an easy way to elevate your cooking environment and boost your confidence.
14. Hang a Pegboard Wall for Versatile Tool Storage
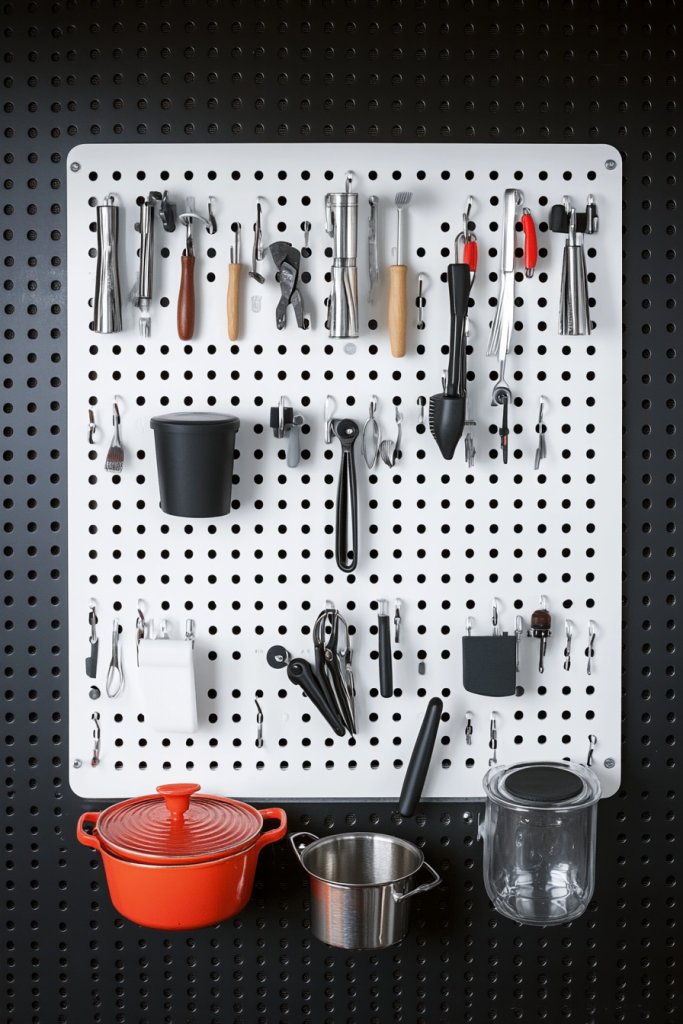
Are your tools and utensils scattered across counters or buried in drawers? Small kitchens often lack dedicated storage options, leading to clutter and inefficiency. A pegboard wall provides a versatile, customizable space to organize and display everything from spatulas to pot lids. It’s a practical, stylish solution that keeps essentials at your fingertips.
Imagine a colorful pegboard mounted on an empty wall, with hooks holding a variety of kitchen tools—whisks, ladles, scissors, and more. Small baskets or clips add extra organization, holding spices or recipe cards. The hooks and accessories are arranged in a balanced, functional pattern that adds visual interest. The overall look is modern, industrial, and highly functional—your new go-to storage system.
Choose pegboards in different colors, materials, or finishes—metal, wood, or painted panels—to match your decor. Customize with hooks, small shelves, or baskets based on your storage needs. For small spaces, keep the layout minimal; larger kitchens can support more complex setups. Seasonal or themed accessories make it easy to refresh the look while maintaining organization.
Securely mount the pegboard into studs or wall anchors, ensuring it’s level and sturdy. Arrange hooks and accessories based on your most-used tools. Organize items logically—frequently used tools at eye level, specialty tools higher or lower. Regularly clean the surface and rearrange as your collection grows. Use labels or tags for added clarity and customization. This setup turns a blank wall into a functional art piece.
Decorate with colorful or patterned hooks for a vibrant look. Incorporate small decorative elements like vintage clips or painted accents. Use labeled containers or tags for specific tools or utensils. Change the layout seasonally or for special occasions to keep your space lively. Personal touches make your pegboard both functional and uniquely yours.
A pegboard transforms cluttered counters into a tidy, organized workspace. It encourages better tool management and makes cooking more efficient. Seeing your tools displayed neatly inspires pride and motivates ongoing organization. It’s a simple, impactful upgrade that improves daily routines and adds a creative flair to your kitchen.
15. Use Stackable or Nesting Small Appliances
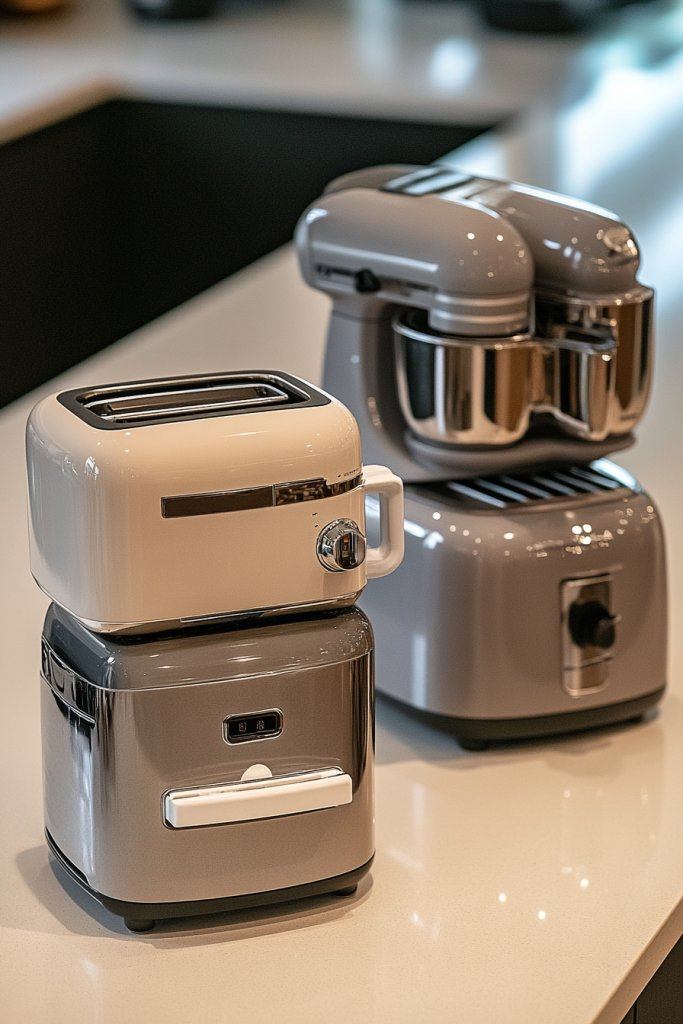
Ever wish your small appliances could take up less counter space or be easier to store? With limited kitchen real estate, stacking or nesting appliances like toasters, mixers, and coffee makers makes life easier. It’s a clever way to keep your countertops tidy and maximize storage without sacrificing convenience. Who says small doesn’t mean smart?
Picture a compact kitchen corner where a sleek toaster stacks neatly atop a matching mini oven, both fitting into a narrow space. When not in use, they nest together, creating a clean, uncluttered surface. The appliances are modern, with smooth finishes and minimalist controls, blending seamlessly into your decor. The visual harmony makes your kitchen look organized and inviting.
Choose appliances designed with nesting features or stacking kits—these often come with interlocking parts for stability. Opt for multi-functional devices that combine functions, like a blender with a built-in chopper. Use matching colors or styles for a cohesive look, or mix and match for an eclectic vibe. The key is to select versatile, space-saving options suitable for your needs.
Arrange appliances on your countertop, stacking or nesting them in order of use. Use stacking kits or accessories that ensure stability and safety. Store rarely used appliances in cabinets or storage closets to free up space. Regularly clean and check connections to ensure safety and functionality. For portability, select lightweight models that can be easily moved for cleaning or seasonal storage. This approach streamlines your workspace and reduces visual clutter.
Decorate with matching or colorful appliance covers or decals for a coordinated look. Use small risers or pads to elevate nested appliances for easier access. Label storage spaces or use decorative containers for accessories like cords and filters. Re-arrange or upgrade appliances seasonally to keep your kitchen fresh and functional. Personal touches make your space both practical and stylish.
Nested appliances make your kitchen look sleek and organized, inspiring better habits. They free up valuable counter space for prep work or décor. Once you see how much easier it is to manage your appliances, you’ll be motivated to keep your entire kitchen tidy. It’s a smart, modern upgrade that enhances your daily cooking routine.
16. Create a Vertical Herb Garden on a Windowsill or Wall Mount
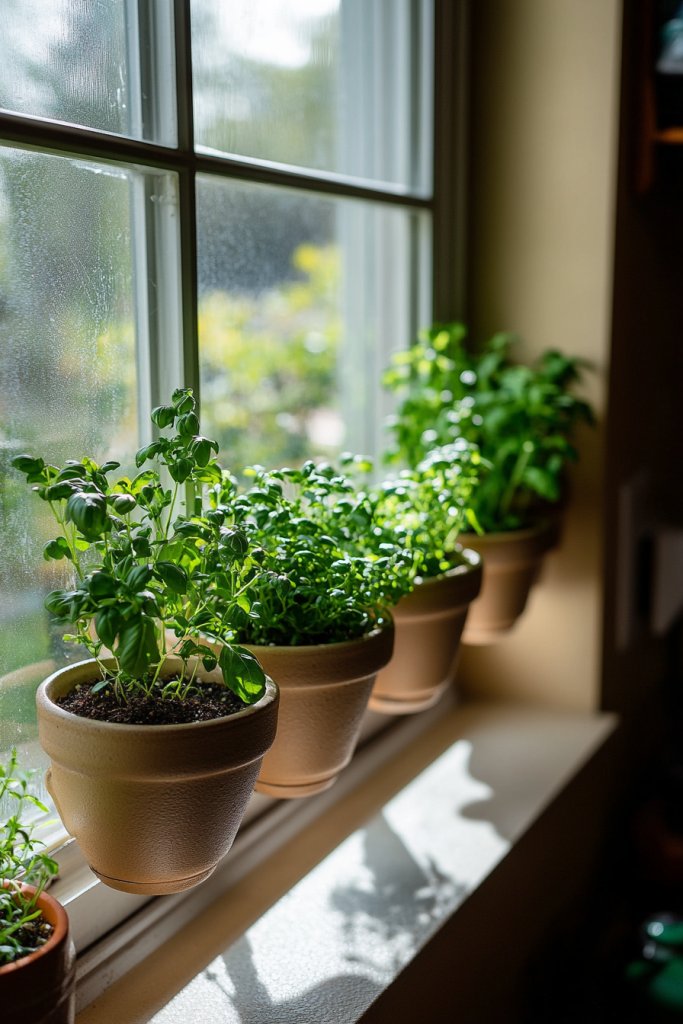
Craving fresh herbs but limited by tiny counter space? Small kitchens often lack dedicated herb gardens, making it hard to keep greens alive and accessible. Vertical gardens on windowsills or walls solve this dilemma by turning empty wall space into a lush, fragrant oasis. It’s a fresh, eco-friendly way to add life and flavor to your cooking.
Envision a series of small, colorful pots or wall-mounted planters filled with basil, parsley, and mint, arranged vertically beside your window. The green leaves contrast beautifully against the wall or window frame, bringing a burst of nature into your kitchen. The plants sway gently with the breeze, filling the space with a fresh aroma. Easy to reach, they turn your cooking into a mini garden adventure.
Select from wall-mounted planters, pocket organizers, or tiered vertical racks—whichever fits your decor and space. Use decorative containers or painted pots to match your style, from rustic to modern. Consider drip trays or self-watering systems for low-maintenance care. Seasonal herbs or flowers can be rotated in for variety, keeping your space lively and colorful. This adaptable garden fits perfectly into any kitchen aesthetic.
Mount planters securely on walls or windowsills using appropriate brackets or hooks. Fill with quality potting soil and plant your herbs, watering regularly. Place the garden where it receives adequate sunlight—preferably near windows. Maintain by trimming and harvesting herbs often, and replace plants as needed. Keep the area tidy by cleaning up fallen leaves or soil spills. This sustainable addition is both practical and beautiful.
Decorate pots with painted designs or labels for easy identification. Incorporate decorative stones or moss for added charm. Use colorful or themed containers to match your kitchen decor. You can even add small fairy lights or decorative accents around the plants for a whimsical touch. Regularly rotate herbs to keep your garden fresh and interesting.
A vertical herb garden makes your kitchen more vibrant and functional, encouraging fresh cooking. It reduces trips to the store and inspires healthy habits. Seeing your green space grow and flourish boosts your confidence in small-space gardening. It’s a simple, rewarding upgrade that makes every meal more flavorful and fun.
17. Incorporate Slim Rolling Carts for Flexible Storage
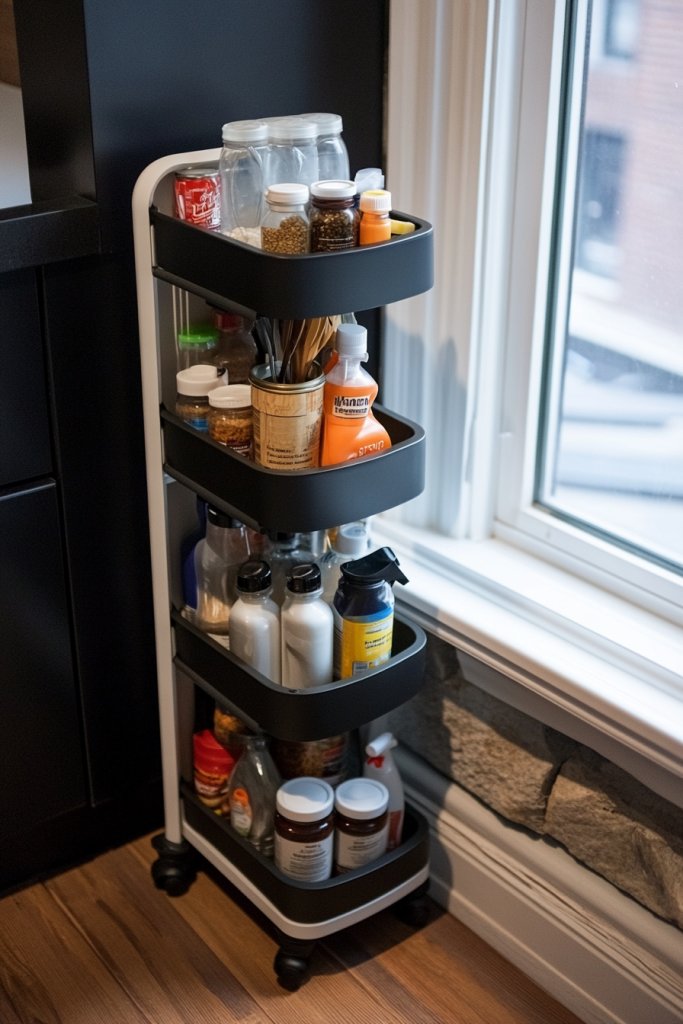
Struggling with limited storage that can’t be moved around? Small kitchens need versatile solutions to maximize space without permanent fixtures. Slim rolling carts fit perfectly into tight gaps, offering flexible storage for pantry items, cleaning supplies, or dishes. Plus, they can be moved out of the way when not needed, making your space adaptable and clutter-free.
Imagine a narrow cart with multiple shelves filled with cans, jars, or dishware, easily rolled into a corner or beside your fridge. The smooth wheels allow you to shift it effortlessly, while the sleek design complements any decor. When entertaining, you can pull it closer for extra serving space or tuck it away for a more open feel. The cart’s minimalist look keeps your kitchen looking clean and organized.
Choose carts with different finishes—metal, wood, or plastic—to match your style. Add baskets or small containers on the shelves for extra organization. Use a collapsible or foldable design if space-saving is your priority. For heavy items, select sturdy, lockable wheels for stability. These carts adapt well to various needs, from extra storage to mobile prep stations.
Place the cart in underutilized areas like narrow hallways, beside appliances, or in corners. Fill with items you use frequently or seasonally swap contents for variety. Lock the wheels when stationary to prevent slipping. Regularly clean the wheels and check for stability. You can also customize with decorative accents or labels for added personality.
Decorate with colorful or patterned baskets, or paint the cart to match your theme. Use labels on containers or shelves for quick identification. Add small hooks or clips on the sides for utensils or cleaning tools. Reconfigure the setup seasonally or as your storage needs change. It’s a versatile solution that adds both function and style.
Rolling carts turn underused spaces into valuable storage hubs, making your kitchen more flexible. They enable you to adapt your space for cooking, cleaning, or entertaining quickly. Seeing how easily they move and organize your items encourages ongoing tidiness. It’s a smart, adaptable upgrade that boosts your kitchen’s efficiency and your confidence.
18. Install Under-Shelf Hooks for Hanging Small Items

Do small items like measuring spoons, oven mitts, or tiny pots clutter your counters or drawers? Small kitchens need smart solutions to utilize every inch efficiently. Installing hooks beneath shelves or cabinets offers a hidden storage spot for these often-misplaced items. It’s a simple trick that keeps things tidy and accessible.
Visualize a row of hooks neatly hanging measuring spoons, oven mitts, and small pots just below a shelf. The hooks are unobtrusive and blend with your decor, providing a clean look. Items hang in an organized, accessible manner, freeing up drawers and counters. This setup turns vertical space into a quick-access storage zone, making your kitchen more efficient.
Opt for hooks in different finishes—matte black, chrome, or painted—to match your style. Use small, decorative hooks for a more personalized look or industrial hooks for a modern vibe. Group similar items together, like all measuring tools, for quick grab-and-go. Adjust the number of hooks based on your collection and space constraints.
Securely attach hooks underneath shelves using screws, nails, or adhesive strips, depending on wall material. Measure evenly to ensure uniform spacing. Hang your items in a way that’s easy to grab, and avoid overcrowding. Regularly clean and reconfigure hooks to keep everything neat. This quick upgrade is inexpensive and highly effective at decluttering.
Decorate hooks with colorful or themed elements to add personality. Label hanging items for quick identification, especially in shared kitchens. Add small decorative charms or painted accents for a fun look. Reorganize seasonally or as your collection grows to maintain order and style.
Under-shelf hooks turn unused space into functional storage, boosting your organizational confidence. They keep your essentials within easy reach, making cooking smoother. Once you see how much tidier your space becomes, you’ll be motivated to explore more organization hacks. It’s a simple, impactful upgrade for any small kitchen.
19. Opt for Multi-Functional Furniture Pieces with Hidden Storage
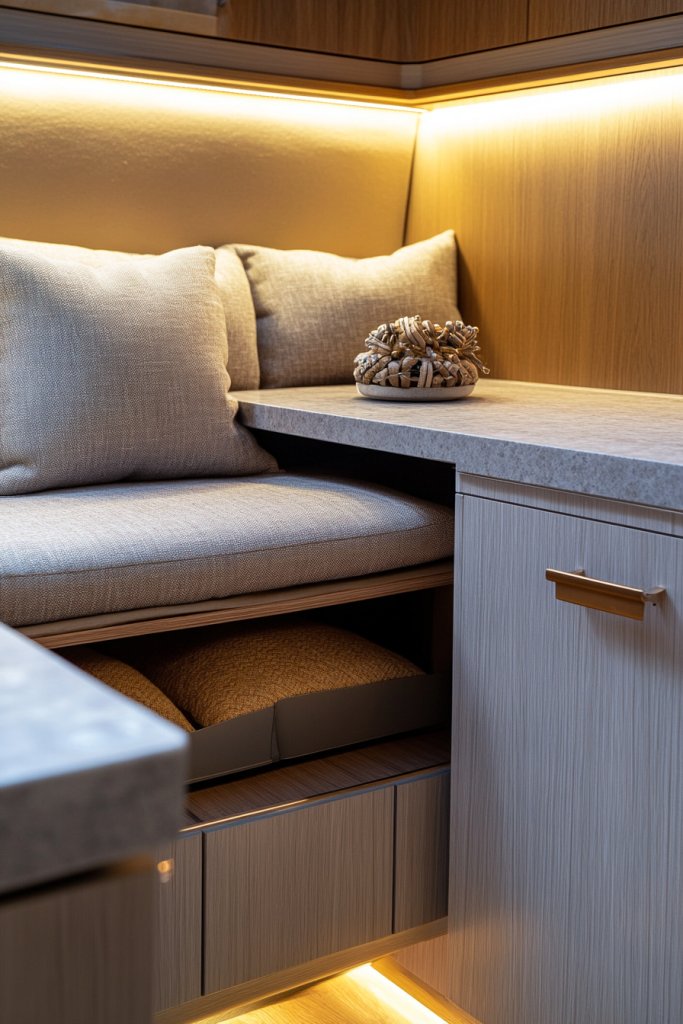
Limited space often means sacrificing comfort or storage in small kitchens. Multi-functional furniture with hidden compartments offers a clever way to combine seating, storage, and style. From benches to stools, these pieces make your space more versatile and clutter-free. Imagine sitting down for a meal or prepping food with extra hidden storage at your fingertips.
Picture a wooden kitchen bench with a lift-up seat revealing a spacious compartment for cushions, tableware, or cleaning supplies. The sleek design blends with your decor, providing both seating and storage without taking up extra space. The hidden compartment keeps your essentials out of sight but easily accessible, maintaining a clean, uncluttered look. It’s a dual-purpose piece that transforms your small kitchen.
Choose furniture with built-in storage in various styles—rustic, modern, or vintage—to match your aesthetic. Opt for lightweight materials or compact designs for easy movement. Select pieces with durable, easy-to-clean surfaces for everyday use. For multi-purpose rooms, combine seating with storage or add fold-out tables for even more flexibility. Seasonal or personal touches can enhance the look, making it uniquely yours.
Place the furniture in high-traffic areas like under windows or against walls. Ensure the hidden compartments are easy to access and secure. Use the storage for seldom-used items or seasonal decorations to keep your space tidy. Regularly clean and inspect hinges or latches for smooth operation. This approach maximizes utility without sacrificing style or comfort.
Add decorative cushions or covers that match your decor to make seating inviting. Use labels or small containers inside the compartments for better organization. Customize with paint, decals, or hardware for a personalized touch. Reconfigure or add furniture pieces as your space and needs evolve, ensuring your small kitchen remains functional and beautiful.
Multi-functional furniture with hidden storage is a smart way to make every inch work harder. It helps keep your kitchen tidy and adds a cozy, welcoming vibe. Seeing how these pieces serve multiple purposes boosts your confidence in small-space living. Ready to invest in furniture that does double duty?
{ “title”: “19 Small Kitchen Storage Ideas to Maximize Space”, “content”: “[This is the article title, not a subheading, so excluded from subheadings list]” }
Conclusion
With a mix of innovative shelving, smart organization hacks, and space-efficient furniture, these small kitchen storage ideas can truly make a difference. Don’t hesitate to try them out and tailor them to your unique space. Embrace these tips, and watch your kitchen become more organized, functional, and inviting—your perfect small-space sanctuary awaits!