Living in a small studio apartment can feel like a challenge, but it also opens up a world of creative decorating possibilities! These compact spaces are increasingly popular because they offer a cozy, affordable, and efficient lifestyle, especially in bustling cities where space is at a premium.
In this article, you’ll find a variety of decor ideas that combine functionality with style, turning your tiny apartment into a chic and comfortable oasis. From clever storage solutions to eye-catching accents, these tips will help you maximize every inch and infuse your personality into your space—all without sacrificing practicality or flair.
1. Multi-Functional Furniture with Hidden Storage Solutions

Living in a small studio feels like playing a constant game of Tetris with your belongings. Clutter piles up faster than you can clean, and finding space for everything becomes a daily challenge. You want furniture that does more than look good—something that helps you keep your sanity and your space tidy. The idea of multifunctional furniture is a breath of fresh air, promising to turn chaos into calm.
Imagine a sleek sofa with built-in drawers underneath, perfect for stashing away blankets or magazines. Visualize a bed that lifts to reveal a cavernous storage compartment, where seasonal clothes and bulky linens hide out of sight. Picture a coffee table that flips open to reveal a mini closet, with textured fabric lining and smooth hinges. These pieces blend seamlessly into your decor while secretly providing extra storage, making your space feel larger and more organized.
Choose minimalist designs with clean lines for a modern vibe or opt for vintage-inspired pieces with ornate details for a cozy charm. You can incorporate fold-out beds with under-storage drawers for guest comfort or select modular units that rearrange based on your needs. Seasonal accents like a soft velvet throw or a woven basket can add warmth or texture without sacrificing functionality. This flexibility allows your furniture to grow with your changing style and space requirements.
Start by measuring your available space to determine the size of furniture that fits comfortably. Look for pieces with built-in compartments, hidden hinges, or slide-out drawers—these are often marketed as space-savers. Choose durable materials like engineered wood or high-quality composites that withstand daily use. Use a level and a drill to secure large pieces to the wall if needed for safety and stability. Assembly instructions vary, but many brands offer easy-to-follow guides or professional setup options. Prioritize versatile designs that serve multiple functions to maximize every inch.
Add personalized touches such as custom drawer liners, decorative handles, or paint to match your decor palette. Incorporate tactile elements like textured fabrics or soft-touch finishes for a luxe feel. You could also integrate small labels or color-coded bins inside drawers for better organization. Think about adding a foldable tray or removable cushions to make multifunctional furniture even more adaptable. These details make your furniture uniquely yours while enhancing practicality.
Embracing multifunctional furniture transforms your small space into a sleek, clutter-free sanctuary. It encourages smarter living and helps you make the most of every square inch. Once you see how cleverly designed pieces can serve dual purposes, you’ll feel empowered to personalize your home with confidence. Your friends will be impressed by your space-smart solutions, proving you don’t need a mansion to live comfortably and stylishly.
2. Space-Saving Wall-Mounted Fold-Down Desk
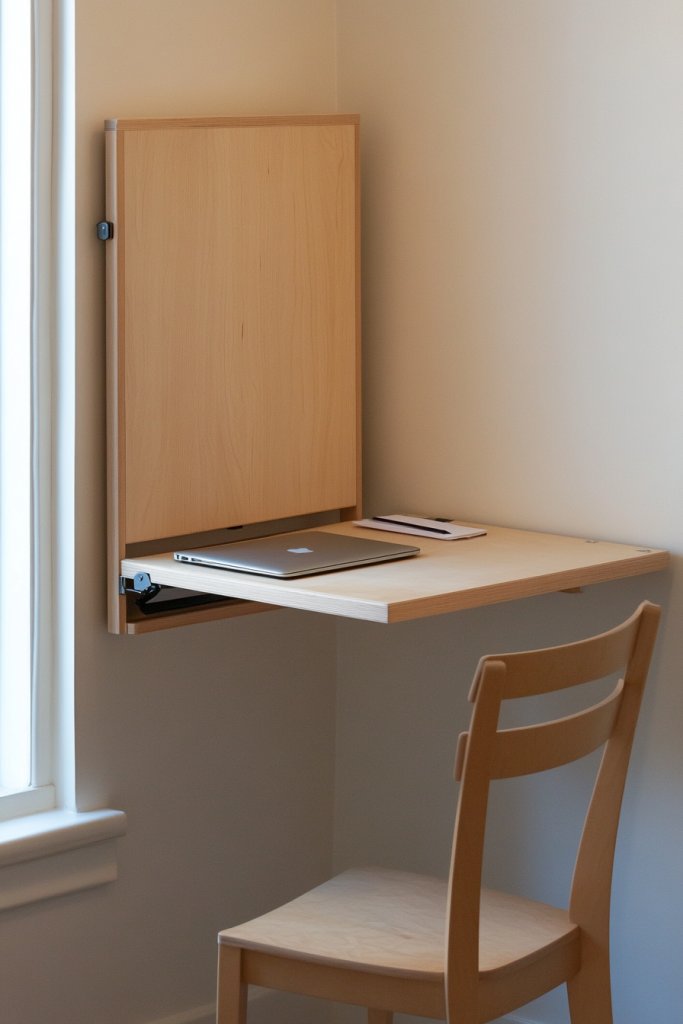
Ever find yourself working from your tiny kitchen table or cramped corner, wishing for a dedicated workspace? Small studios often lack a proper desk, turning productivity into a constant struggle. The idea of a fold-down desk promises to reclaim precious floor space while giving you a functional spot to work or study. It’s like having a secret weapon against clutter and chaos.
Picture a sleek, wall-mounted panel that folds down effortlessly when needed, revealing a smooth work surface in a neutral finish. When not in use, it tucks away neatly against the wall, leaving the room open and airy. Imagine a compact space where you can set up your laptop, jot down notes, or pay bills without sacrificing style. A small shelf above can hold essentials like a notepad or a decorative container, enhancing the overall look.
Opt for a minimalist design in neutral tones for a Scandinavian vibe or choose a bold color to make the desk a statement piece. For a cozy feel, pair it with a soft fabric-covered chair or a cushioned stool that can be tucked away. Consider installing a magnetic or cork board nearby for notes and reminders. Seasonal adaptations might include adding a small, foldable lamp or decorative accents that match your current decor theme.
Start by selecting a wall that can support the weight of your desk—preferably with studs behind. Measure the space carefully to ensure the folded panel clears any obstructions like light switches or outlets. Use high-quality hinges and a sturdy latch to ensure stability during use. Attach the desk at a comfortable height, typically around waist level, for ergonomic comfort. Consider a model with built-in storage or cable management features for a cleaner look. Test the mechanism thoroughly before regular use.
Personalize your fold-down desk with decorative edge molding or painted patterns that match your room’s style. Add a non-slip mat or a small cork pad on the surface to keep your devices stable. Incorporate a fold-away paper organizer or a compact pen holder to keep supplies within reach. For a touch of luxury, choose a finish like matte black or a wood veneer that complements your decor palette. Small tweaks can turn a practical piece into a design highlight.
A wall-mounted fold-down desk proves that you don’t need a big space to work productively. It’s a smart, stylish solution that can adapt to any room’s layout. Once installed, it instantly elevates your home office game without cluttering your living area. With this setup, you’ll feel more organized and motivated—plus, you’ll impress friends with your space-saving genius.
3. Vertical Shelving Units for Organized Storage
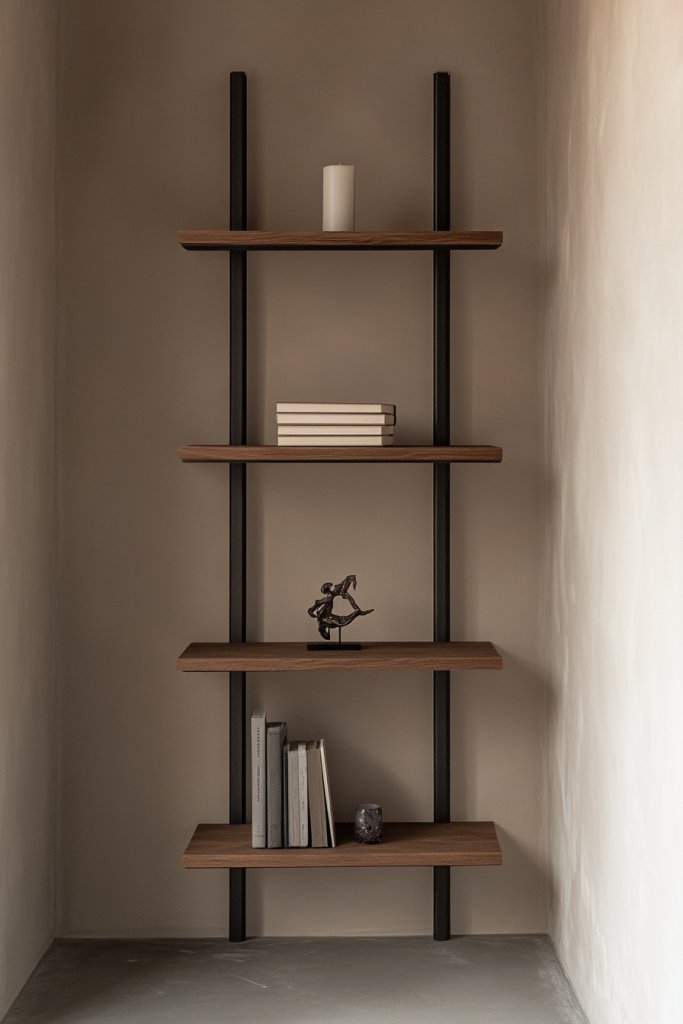
Cluttered surfaces and overflowing drawers make small studios feel chaotic and cramped. You crave a way to keep essentials organized without sacrificing style or space. Vertical shelving units offer a practical solution, turning empty wall space into a designated storage zone. They help maintain a clean aesthetic while providing ample room for your belongings.
Imagine tall, open shelves stretching from floor to ceiling, filled with neatly arranged books, decorative boxes, and everyday essentials. The shelves are made of warm wood or sleek metal, adding texture and visual interest to your walls. Picture a corner where everything is within reach but never cluttered, thanks to clever storage baskets and stylish organizers. The open design creates a sense of height and openness, making your space feel larger.
Mix and match materials like wood, metal, or glass for a contemporary or industrial look. Incorporate baskets, bins, or labeled boxes to categorize items and keep things tidy. For a more personalized touch, add small decorative objects or framed photos on the shelves, balancing function with aesthetics. Use adjustable shelves to accommodate larger items or seasonal decor for a dynamic display. This flexibility allows your storage to evolve with your needs.
Measure your available wall space to determine shelf height and spacing. Choose sturdy brackets and durable shelving materials suited for your intended load. Install the brackets level and secure them into wall studs for maximum support. Arrange your items systematically, grouping similar items together for easy access. Use decorative storage bins to hide clutter and keep the look streamlined. Regularly rearrange or swap out shelves to refresh the decor and optimize function.
Add decorative elements like LED strip lighting underneath shelves for a cozy glow or small tactile accessories like textured containers. Incorporate personal touches like vintage finds or colorful containers that reflect your style. Use labels or tags to create a visually organized system that is also easy to maintain. Changing shelf decor seasonally keeps the space fresh and inviting, making organization a fun part of your routine.
Vertical shelving is an easy way to reclaim your walls and showcase your personality. It elevates your organizational game without sacrificing style, making your studio feel more spacious and welcoming. Once you see how much you can fit vertically, you’ll realize that clutter is a thing of the past. Your home becomes a reflection of your organized, stylish lifestyle, inspiring confidence every time you step inside.
4. Compact Modular Seating for Versatile Living Areas
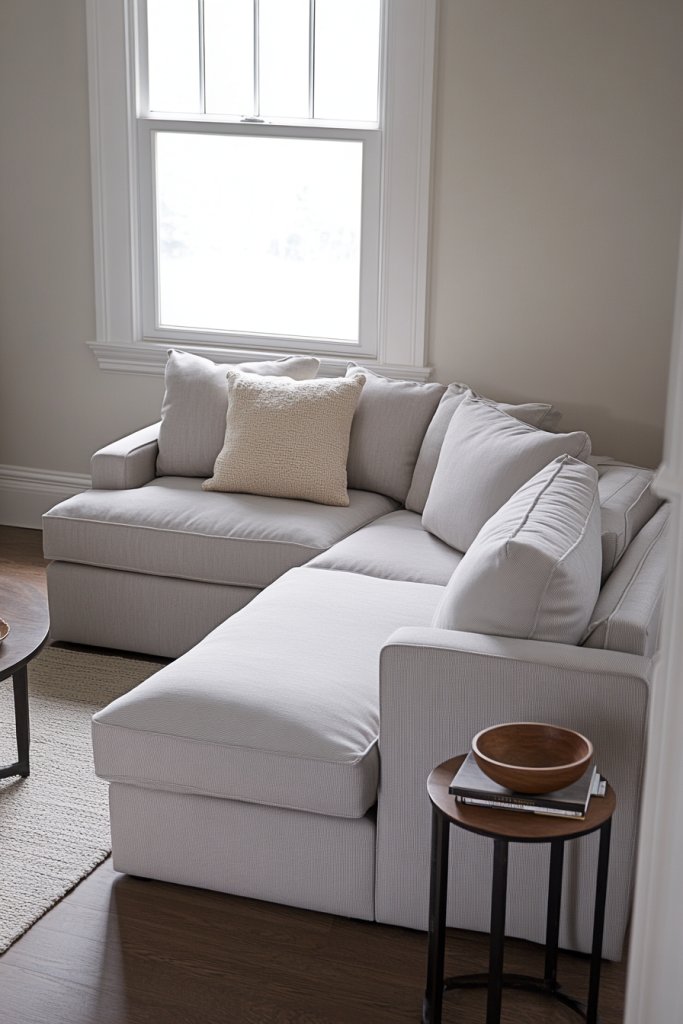
Small spaces often force you to choose between a comfy spot to lounge and a place for guests. Conventional sofas are bulky and take up too much room, leaving little flexibility. Modular seating offers a clever alternative, letting you customize your comfort zone on the fly. It’s about creating a space that adapts to your mood, guests, and activities without feeling cramped.
Picture a set of sleek, lightweight ottomans and modular chairs that can be pushed together or separated at will. Imagine a cozy corner where a plush, textured cushion invites you to relax, or a flexible arrangement that seats a small gathering with ease. The pieces come in neutral fabrics or bold colors, with subtle legs or hidden wheels that make rearranging effortless. The visual effect is a dynamic, inviting space that feels both functional and stylish.
Choose modular pieces with removable covers for easy cleaning and seasonal updates. Mix textures like boucle, velvet, or linen to suit your aesthetic. For a minimalist style, select low-profile units that blend into the background; for a boho vibe, add layered throws and textured pillows. You can also include a small, foldable side table or tray for drinks and snacks, enhancing versatility. Seasonal accents like a soft throw blanket or a decorative pillow can refresh the look.
Start by assessing your space and choosing modular units that fit comfortably without overcrowding. Look for lightweight designs with easy-to-move features like casters or handles. Arrange the pieces in various configurations to suit different needs—forming a sofa, a conversation area, or a single lounge seat. Use durable fabrics that withstand frequent rearrangements and spills. Incorporate hidden storage in some pieces for added functionality. Regularly experiment with layouts to find what works best for your lifestyle.
Customize your seating with decorative cushions in complementary colors or patterns. Add textured throws or layered rugs nearby to create a cozy ambiance. Incorporate small, portable side tables or baskets that can be moved around for convenience. Use contrasting fabrics or unexpected color pops to inject personality into your setup. Seasonal swaps in cushion covers or throws keep your space feeling fresh and inviting.
Modular seating transforms your small studio into a flexible, stylish haven. It proves that comfort and adaptability go hand in hand, even in tight quarters. Once you master the art of rearranging, your space will feel larger and more welcoming. This approach not only saves space but also encourages you to experiment and personalize your environment—making every day feel special.
5. Clever Room Dividers with Built-In Shelves or Curtains
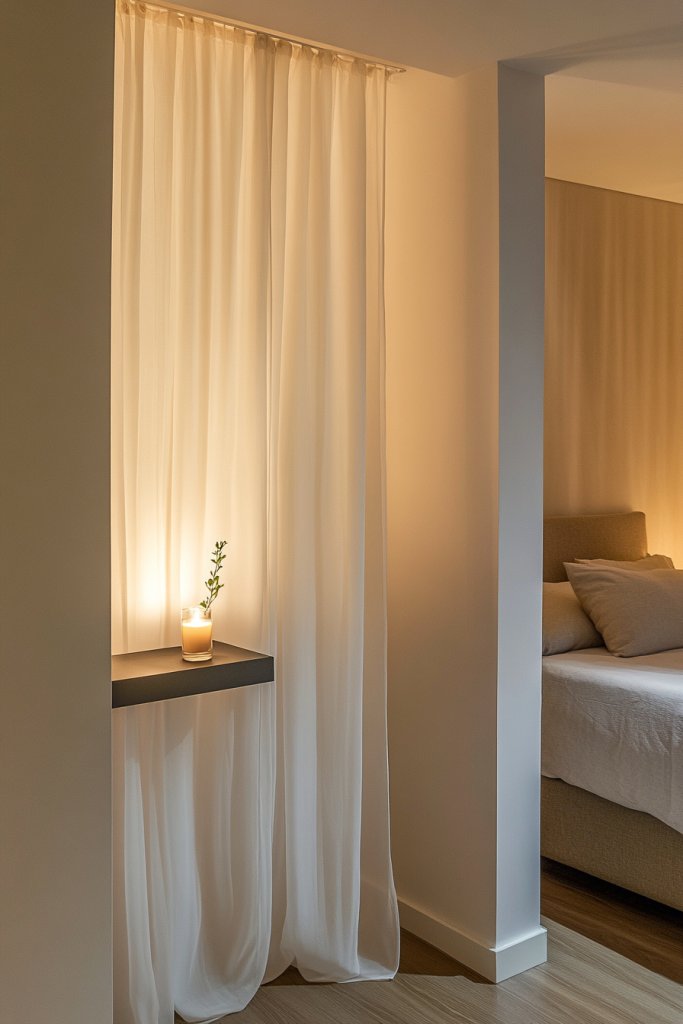
Living in a studio means sharing a single room with multiple functions, which can lead to a cluttered and chaotic vibe. You want to create distinct zones—like sleeping, working, and relaxing—without sacrificing your open feel. Clever room dividers with built-in shelves or curtains are the perfect way to carve out private spaces while maintaining flow and flexibility. They’re the secret sauce to making your studio feel like a proper home.
Visualize a sleek, wooden lattice or a fabric curtain hanging from ceiling to floor, dividing your space into cozy sections. Built-in shelves on either side act as a visual barrier and a storage solution, holding books, decorative boxes, or small accessories. Imagine a lightweight divider that slides open or folds away when not in use, giving you control over your privacy. The combination of textures—wood, fabric, or metal—adds depth and character to your overall decor.
Choose materials that complement your style—rustic wood for a farmhouse look, metallic frames for an industrial vibe, or sheer fabrics for a light, airy feel. Incorporate open shelving for display or hidden compartments for storage, depending on your needs. Curtains can be layered with blackout options for sleep privacy or sheer panels for a softer look. Seasonal updates might include changing curtain colors or adding decorative trims for a fresh look.
Identify the areas you want to divide and measure to determine the best size and type of divider. Install ceiling-mounted tracks for sliding panels or secure freestanding frames for lightweight options. Use brackets, hooks, or mounting hardware appropriate for your wall type and divider material. For curtains, select a rod that fits your window or opening and choose a fabric that matches your decor. Incorporate shelves at varying heights for visual interest and functionality, securing them firmly to avoid accidents. Test stability and adjust as needed.
Decorate shelves with personal mementos, decorative storage baskets, or seasonal accents. For curtains, opt for fabrics with patterns or textures that reflect your personality. Add tiebacks or decorative curtain rings for a polished look. Consider installing LED strip lighting behind the divider or on shelves to create ambiance. Mix and match materials or colors to suit your mood or decor updates over time.
Room dividers turn a single space into a multi-functional home, boosting your confidence in small-space living. They give you control over privacy and organization without feeling boxed in. Once you master this versatile technique, creating zones becomes second nature. Your studio will feel more spacious and personalized, making everyday living feel like a true retreat.
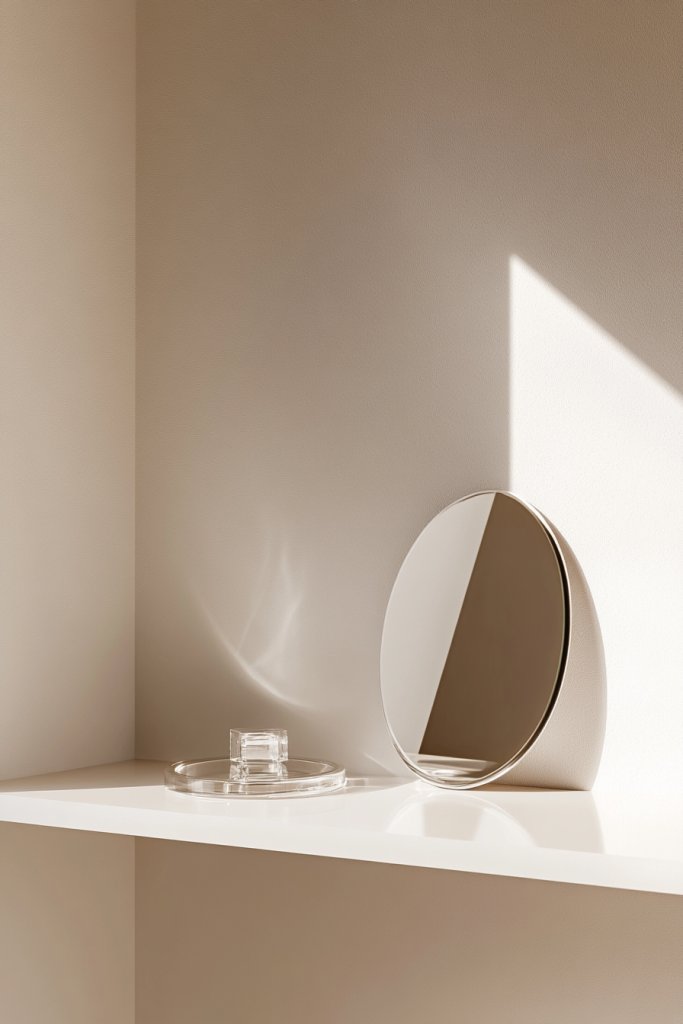
6. Minimalist Floating Nightstands and Side Tables
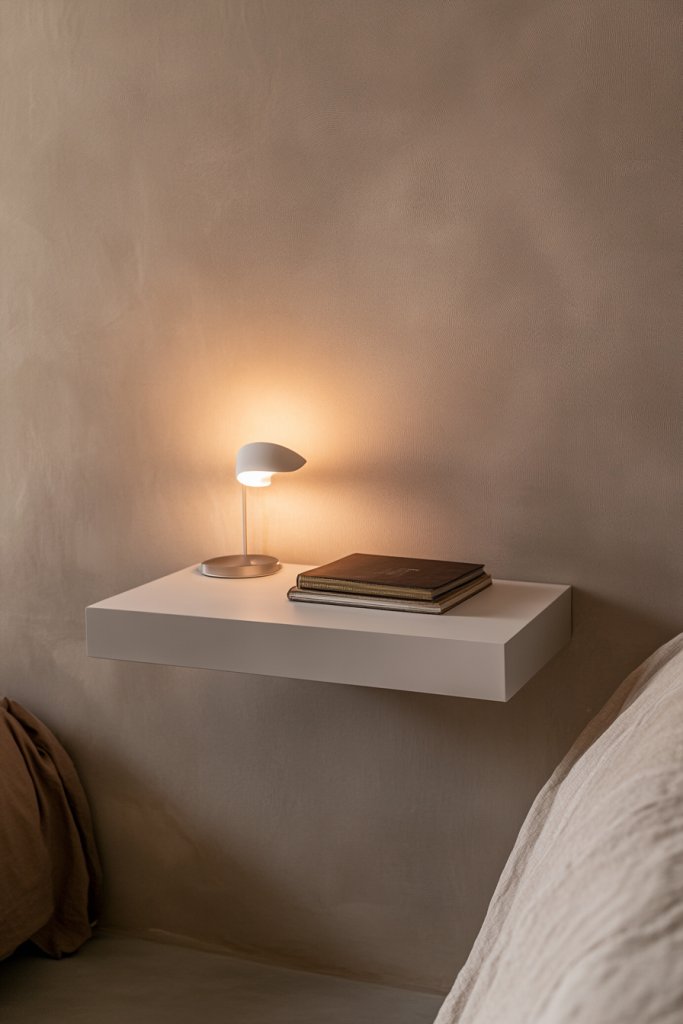
Tiny bedrooms or sleeping areas in studios often feel cluttered with bulky nightstands that take up precious space. You want a solution that offers surface area without overwhelming the room. Minimalist floating nightstands and side tables promise a sleek, space-saving alternative that keeps your essentials within reach. They’re perfect for creating a clean, airy vibe in even the smallest rooms.
Imagine a slim, wall-mounted shelf with a soft matte finish, floating just beside your bed. It holds a small, textured ceramic dish for jewelry or a soft cream throw blanket with chunky knit texture draped over the edge. The absence of legs creates a visual lightness, making the room appear bigger and more open. Subtle lighting from nearby sconces highlights the simple elegance of the design, adding warmth and sophistication.
Choose materials like wood veneer, matte metal, or acrylic for a modern look. For a more decorative touch, add a textured tray or a decorative bowl on top. Consider installing a small, integrated charging station or a hidden drawer for personal items. Seasonal updates might include swapping out a fabric cover or adding a decorative element like a small sculpture. The key is balancing function with visual simplicity.
Measure the space beside your bed to determine the appropriate width and height. Use a level and drill to securely mount the shelf at a comfortable reaching height. Ensure the wall anchors can support the weight of your items—think books, phones, or a small lamp. Keep the installation tidy with cable clips or adhesive cord organizers for a clutter-free surface. Select finishes that match or complement your bed frame and wall color for a cohesive look.
Personalize your floating table with decorative elements like textured trays, small sculptures, or favorite candles (without scent to avoid green or floral smells). Add a small, portable light or LED strip for soft lighting that can be turned on without cluttering the surface. Choose a color or material that contrasts subtly with your wall for visual interest. Keep it simple but meaningful—this piece should reflect your style and needs.
Floating nightstands prove that less can be more, especially in tiny bedrooms. They make your space feel bigger and more organized, boosting your confidence in minimalist design. Once installed, they provide a practical yet stylish spot for essentials that won’t clutter your room. This approach encourages you to embrace simplicity and enjoy your well-organized, stylish studio.
7. Over-the-Door Hooks and Racks for Additional Storage

Small studios often lack closet space or hooks for essentials like bags, jackets, or towels. Over-the-door hooks and racks are an easy, cost-effective solution to add vertical storage without drilling into walls or taking up floor space. They’re the secret weapon for maximizing every inch of your small home and keeping clutter off your furniture.
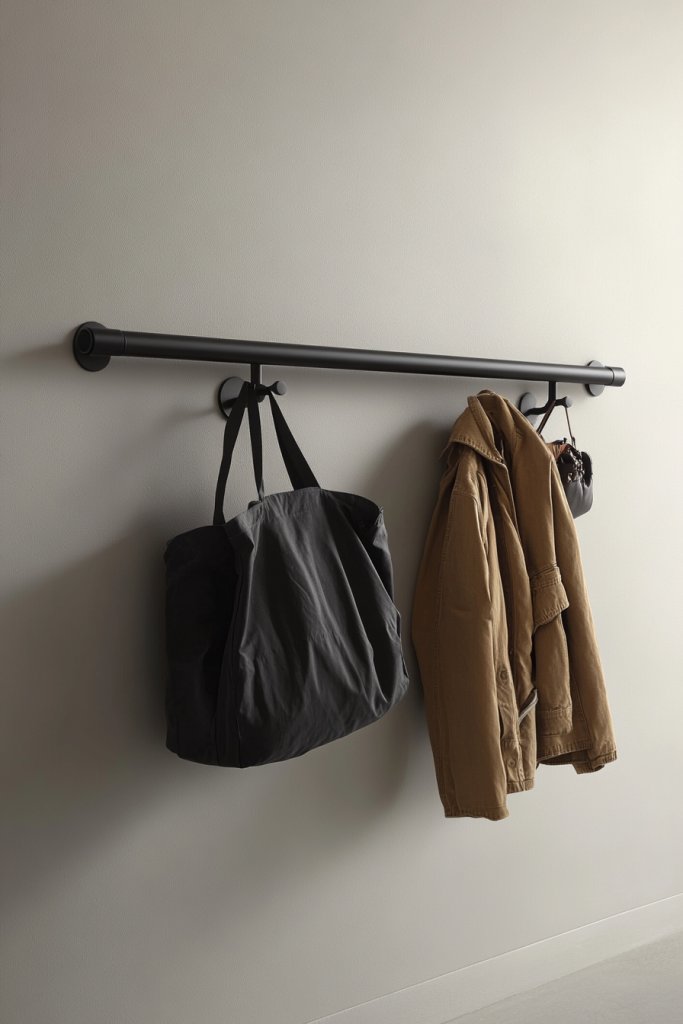
Picture a sleek metal rack hanging over your door, holding a collection of colorful tote bags, lightweight scarves, and cozy robes. The hooks are spaced evenly, creating an organized, accessible display. Imagine a fabric-lined rack that adds a soft touch to your entryway, with each hook holding a neatly hung item. The visual effect is tidy and inviting, with everything within arm’s reach.
Choose between metal, wood, or fabric-covered hooks depending on your aesthetic—industrial, boho, or minimalist. Use multiple hooks for different categories—bags, accessories, or cleaning tools—keeping everything sorted. Seasonal variations may include swapping out hooks for decorative options or adding small baskets for additional storage. Layering hooks in different heights creates visual interest while optimizing space.
Select hooks or racks designed to fit over standard doors, measuring thickness and width beforehand. Install hooks with minimal tools, usually just a screwdriver, or opt for adhesive hooks if you prefer no damage. Ensure the hooks are rated for the weight of your items—heavy bags or coats require sturdy options. Position the hooks at a comfortable height for quick access, and group similar items together for easy tidiness.
Decorate hooks with colorful or patterned fabric covers to match your decor. Add small decorative tags or labels to categorize items better. Incorporate seasonal accessories like a small decorative bow or a themed ribbon. Use matching or contrasting colors to make the hooks a subtle design element or a standout feature. Keep the setup consistent and functional to encourage daily use.
Over-the-door hooks turn neglected space into useful storage, making your studio more organized and less cluttered. They’re a simple upgrade that can dramatically improve your daily routine. Once you see how much extra storage they provide, you’ll feel more confident managing your space creatively. Small solutions like this empower you to take control and create a home that works for you.
8. Mirror Walls to Enhance Light and Perception of Space
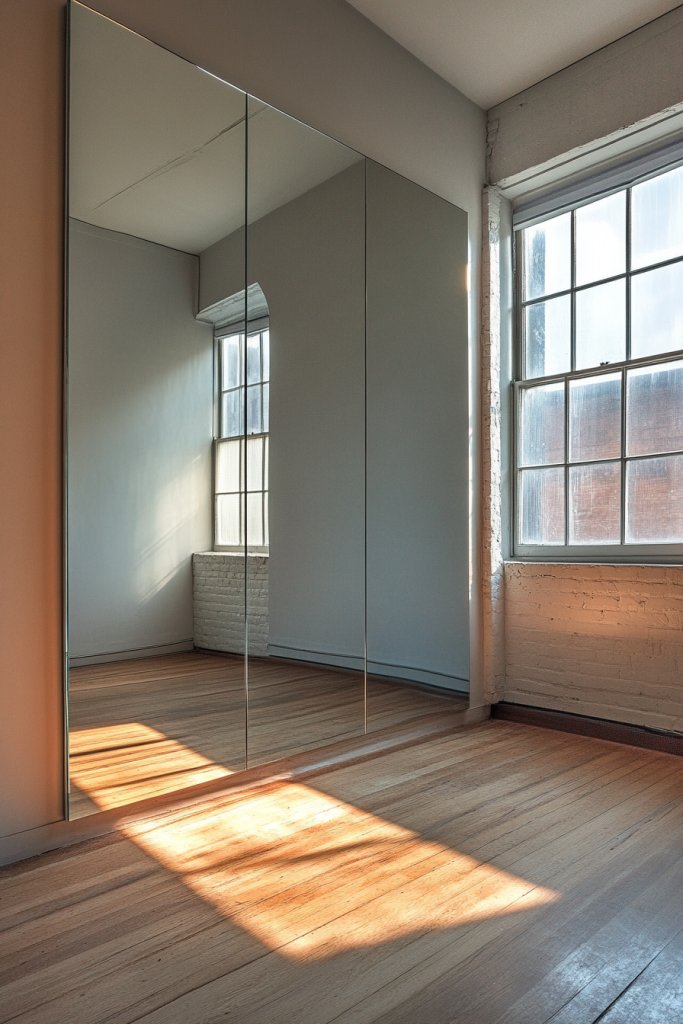
Small studios often feel dark and cramped, especially if natural light is limited. You crave a way to brighten your space and make it seem larger without adding square footage. Mirror walls are the ultimate hack—reflecting light and creating an illusion of depth that tricks the eye into perceiving more room. They’re the secret to making your studio feel twice as big.
Imagine a large, seamless mirror wall stretching across an entire side of your living area, bouncing sunlight from windows or lamps around the room. The mirror’s sleek frame blends into the wall, creating a cohesive look. Visualize reflections of your cozy seating, floating shelves, or decorative textiles, adding layers of visual interest. The effect is a bright, open space that feels inviting and expansive.
Choose frameless, beveled, or textured mirrors depending on your decor style—modern, rustic, or eclectic. You can create a full wall mirror or opt for multiple smaller panels arranged artistically. For seasonal flair, consider adding decorative film or decals that can be peeled off later. Incorporate lighting fixtures like sconces or LED strips to enhance the reflective glow.
Select a sturdy, wall-safe adhesive or mounting hardware suited for your wall type. Measure carefully to ensure symmetry and placement that maximizes light reflection. Install the mirror panels or large sheet securely, checking for level and stability. Clean the mirror surface regularly to maintain clarity and brightness. Consider safety precautions such as using shatterproof glass if you have children or pets.
Frame your mirrors with decorative trim or LED backlighting for a luxe look. Use the reflections to display your favorite textiles, artwork, or lighting accents—without cluttering your walls. Incorporate removable decals or patterns that align with seasonal themes, or add a small shelf below for personal items. Keep the mirror surface spotless for maximum impact.
Mirror walls transform a small, dim space into a light-filled, expansive haven. They boost your confidence in managing small spaces creatively and stylishly. Once installed, they become a focal point that elevates your entire decor. Reflect your personality while making your studio feel brighter and larger—what’s not to love?
9. Vertical Plant Wall or Herb Garden for Fresh Decor
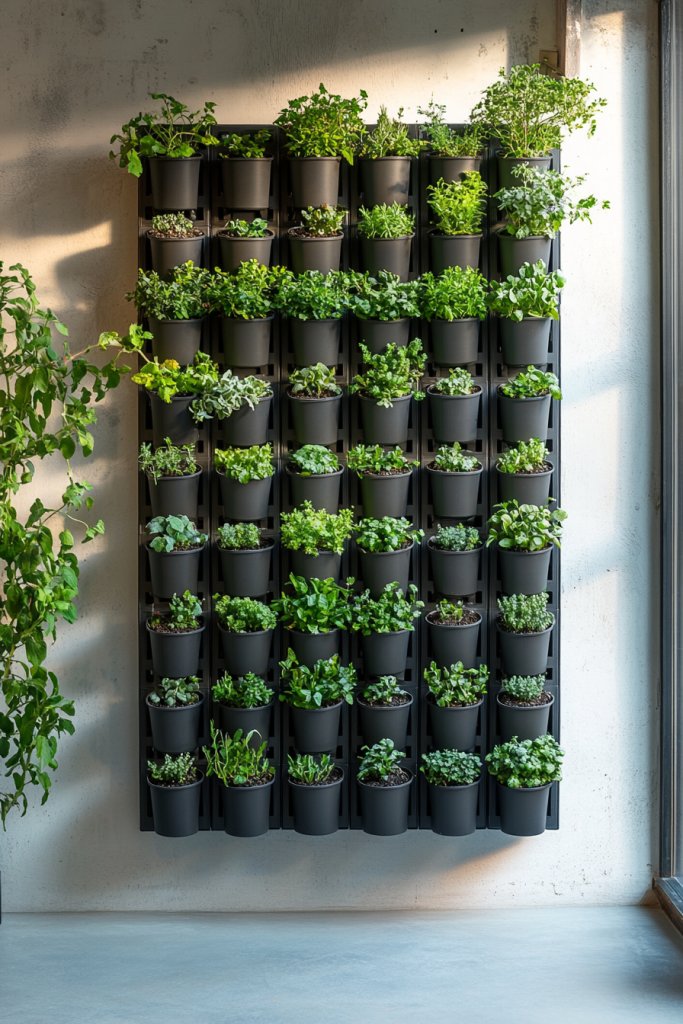
Adding greenery to a small studio can feel overwhelming and cluttered, especially if space is tight. You want a way to introduce nature that feels fresh, vibrant, and unobtrusive. Vertical plant walls or herb gardens offer a chic, space-efficient solution—bringing life and color without taking up valuable floor area. They’re perfect for green thumbs or anyone craving a touch of freshness.
Picture a wall-mounted system of wall pockets or modular planters filled with lush herbs or leafy greens. The arrangement is neat and lush, adding a natural splash of color to your decor. Imagine the scent of fresh basil or mint filling the air as you cook or relax. The textured leaves contrast beautifully with neutral walls, creating a lively, organic focal point that brightens the entire room.
Choose materials like metal, ceramic, or woven baskets to match your style—rustic, modern, or boho. Incorporate different plant types for varied textures and colors, or opt for succulents for low-maintenance greenery. Seasonal updates could include changing out plants or adding decorative stones and pebbles in the planters. Vertical gardens can also be used to grow flowers or small vegetables, adding utility and beauty.
Select a wall that gets adequate light, preferably near a window or with supplemental grow lights. Install wall-mounted planters with secure brackets, ensuring they can support the weight of soil and plants. Use waterproof materials or liners to prevent damage to your walls. Arrange the planters at different heights for visual interest and accessibility. Regular watering, pruning, and fertilizing keep the plants healthy and thriving.
Decorate the containers with paint, decals, or textured finishes for a personalized touch. Incorporate small decorative stones or shells for added visual appeal. Use labels or tags to identify herbs and plants, making gardening and cooking easier. Change plants seasonally or add decorative elements like fairy lights or small sculptures to enhance the display. This greenery becomes a lively, living part of your home.
A vertical plant wall or herb garden infuses your studio with vitality and freshness. It proves that small spaces can be lush, functional, and beautiful. Growing your own herbs or plants boosts your confidence in creating a green oasis, even in tight quarters. It’s a simple way to elevate your decor and enjoy the benefits of nature every day.
10. Foldable Wall Bed (Murphy Bed) for Double Duty
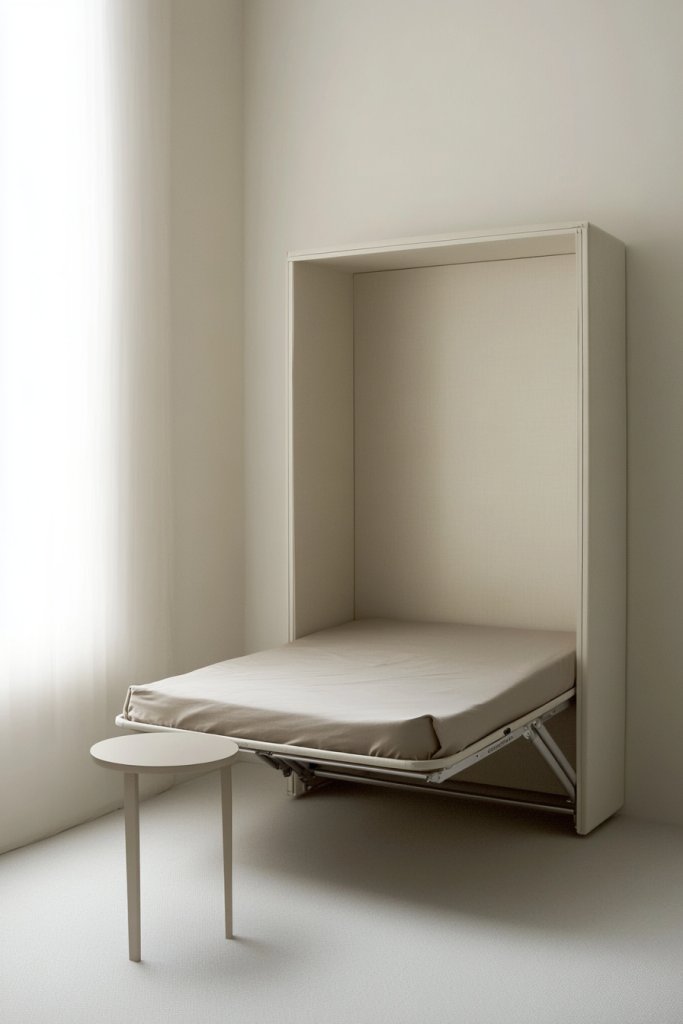
Sleeping in a tiny studio often means sacrificing living space for a bed. You want a solution that allows you to have your bed and your living room too—without feeling cramped. A foldable wall bed, aka Murphy bed, offers a clever way to hide your sleeping area during the day, transforming your room into a multi-purpose space. It’s the ultimate space-saving hack.
Imagine a sleek wall panel that folds down effortlessly, revealing a comfortable mattress nestled inside. When not in use, the bed tucks into the wall, leaving a clean, open space for lounging, working, or entertaining. Visualize decorative cabinetry or a custom panel that matches your wall color, making the bed nearly invisible when stowed away. Soft lighting or textured wall finishes complement the design, turning functionality into style.
Choose from various finishes—laminate, wood veneer, or painted panels—to match your decor. Integrate storage solutions like shelving or cabinets above or beside the bed for night-time essentials. Consider adding a fold-out desk or a small seating area nearby to maximize the room’s versatility. Seasonal decor can be added through throw pillows, blankets, or decorative panels that change with your style.
Measure your space carefully to select a Murphy bed system that fits your wall and room dimensions. Install the mounting bracket at a height that allows easy access and comfortable sleeping posture. Use high-quality hardware designed to support the weight of the mattress and user. Secure the bed frame properly, and test the mechanism multiple times to ensure smooth operation. Add safety features like wall locks or safety struts for peace of mind. Consider professional installation for complex setups.
Customize your Murphy bed with decorative panels, textured finishes, or even artwork that hides within the mechanism. Add cozy bedding and cushions that match your decorating style. Incorporate small, built-in nightstands or lighting options for convenience. Seasonal accessories like decorative throws or pillows can keep the look fresh and inviting. This bed becomes a statement piece that blends seamlessly into your home.
A Murphy bed turns your small studio into a multi-functional sanctuary, proving that clever design can maximize every inch. It encourages you to think creatively about space and comfort, boosting your confidence in small-space living. Once installed, it becomes a daily reminder that you can live stylishly and practically in any size space. It’s the perfect blend of form and function, transforming how you experience your home.
11. Clear Acrylic or Glass Partitions for Separation
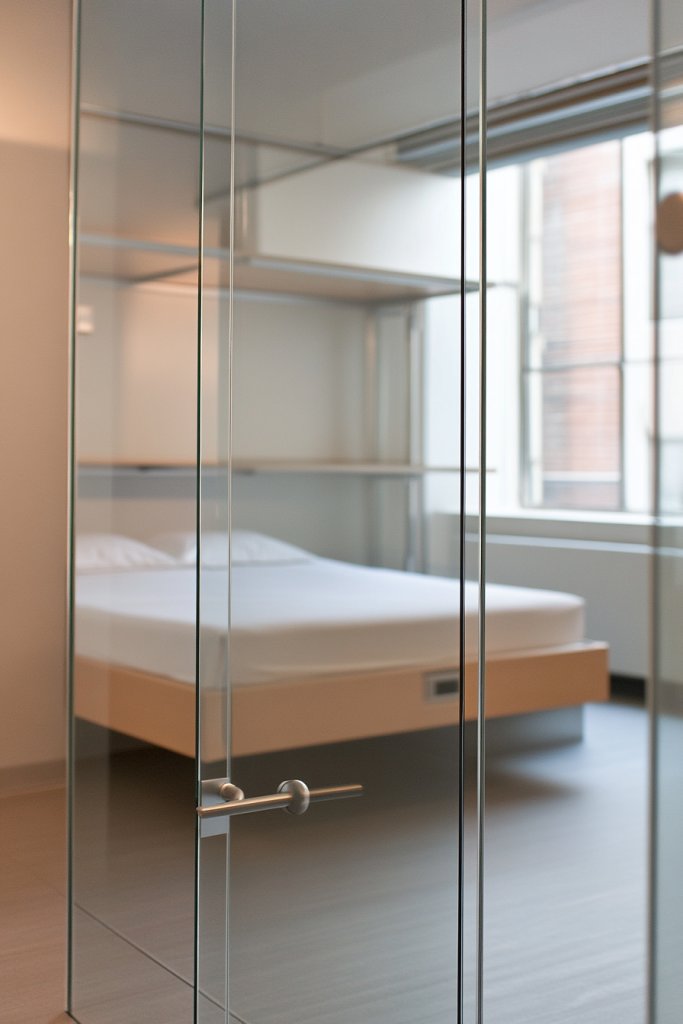
In a studio, defining separate zones without closing off space is a challenge—especially when you want an open, airy feel. Traditional room dividers can be bulky and visually heavy, making the space feel smaller. Clear acrylic or glass partitions offer a modern, unobtrusive way to create boundaries while maintaining openness. They’re the sleek solution for stylish, functional separation.
Visualize a transparent panel stretching across your living area, dividing your sleeping nook from the lounge without blocking light. The smooth surface reflects ambient light, creating a luminous boundary that feels almost invisible. Imagine a corner where a glass partition separates your workspace from your relaxation zone, with soft textures and minimal decor on either side. The result is a cohesive, open layout with clear visual cues.
Choose frameless panels for a minimalist look or opt for framed glass with decorative metal accents for an industrial touch. Use frosted or textured glass to add privacy without sacrificing brightness. For seasonal updates, consider removable vinyl decals or decorative films that can be applied and peeled off easily. Incorporate sleek hardware like clamps or track systems that blend into the design.
Measure the space carefully to select the appropriate panel size and thickness. Install sturdy mounting hardware into wall studs or ceiling supports for stability. Use professional tools or services for precise cuts and secure fittings. Ensure panels are level and securely anchored to avoid accidents. Consider the door or passage design—sliding, swinging, or fixed panels—to suit your layout. Regular cleaning keeps the glass clear and bright.
Decorate the glass with subtle etching or decorative films for added style. Add LED backlighting behind the panels to create a soft glow and accentuate the separation. Incorporate small, decorative handles or frames that match your overall decor theme. Use the space behind the glass for display or storage, keeping the front clear and sleek. Seasonal lighting or decals can make the partitions feel fresh and personalized.
Glass partitions elevate your studio’s aesthetic while cleverly defining separate zones. They boost your confidence by showing that functional design can be both beautiful and unobtrusive. Once you see how much more organized and spacious your home feels, you’ll be inspired to explore other innovative solutions. They prove that style and practicality can coexist in even the smallest spaces.
12. Compact, Stackable Kitchen Storage Solutions
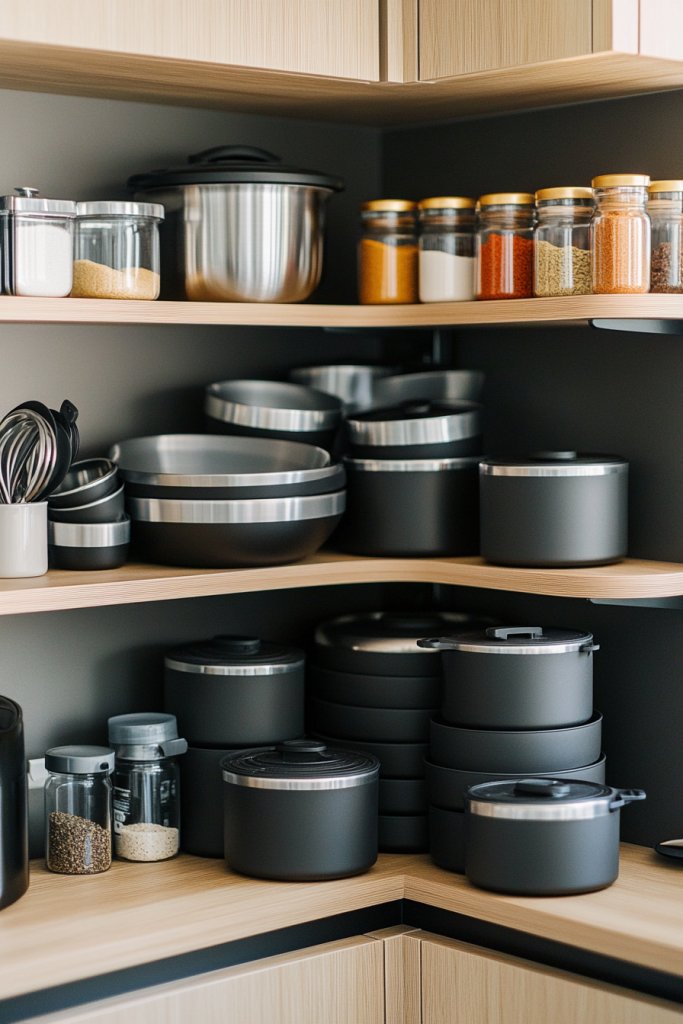
Kitchen storage in small studios often feels like a constant juggling act—pots, pans, spices, and utensils all vying for space. You want an organized, clutter-free kitchen that doesn’t eat up your precious counter or cabinet real estate. Compact, stackable storage solutions promise to make your kitchen more functional and less chaotic—without the need for a full remodel.
Imagine a set of sleek, stackable containers that neatly store dry goods or spices, with clear labels and airtight seals. Visualize hanging magnetic spice jars on the fridge or a compact stack of nested mixing bowls that save space when not in use. Think of a vertical pot rack that holds your cookware overhead, freeing up cabinet space for other essentials. These smart storage ideas turn clutter into organized beauty.
Choose containers in materials like glass, BPA-free plastic, or stainless steel to match your style—modern, rustic, or minimalist. Mix and match sizes for different needs, and add labels for quick identification. Incorporate modular racks or stacking shelves that fit inside cabinets or on countertops. Change out seasonal items or specialty tools to keep things fresh and functional.
Assess your available space and identify items that benefit most from vertical stacking. Use stackable bins or baskets with non-slip bases for stability. Install pegboards or magnetic strips on walls to hang utensils or tools efficiently. Use adjustable shelves or risers inside cabinets to create more levels of storage. Regularly declutter to keep your system effective, and prioritize easy access for daily use. Consider investing in high-quality, durable options for longevity.
Decorate your storage with themed labels or colorful containers that match your decor palette. Add small decorative touches like patterned liners or custom inserts to keep everything organized. Incorporate seasonal accessories, such as holiday-themed jars or limited-edition containers, for a fun update. Use uniform containers for a cohesive look, or mix textures and colors for a playful vibe. Every element should reflect your personality.
Stackable kitchen solutions prove that organization is achievable even in tiny spaces. They help you cook more efficiently and feel more in control of your environment. Seeing your kitchen neatly stacked and clutter-free sparks pride and motivation. Once you master these simple tricks, managing your studio’s kitchen becomes second nature—making cooking and cleaning a joy, not a chore.
13. Modular, Stackable Container Systems for Clutter Control
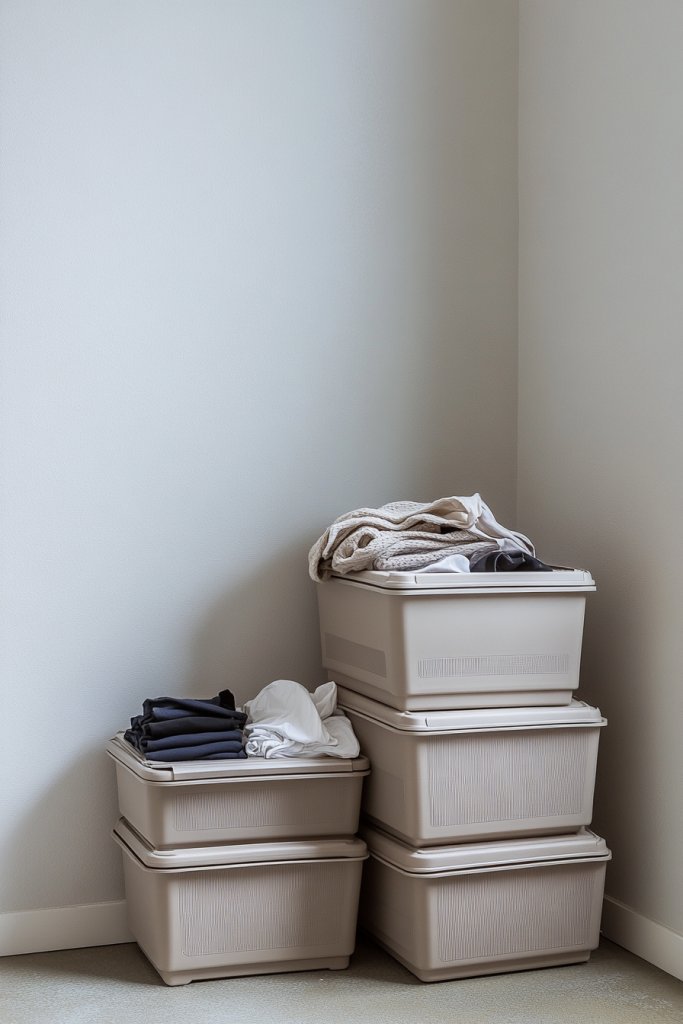
Clutter sneaks into every corner of a small studio, turning organized living into chaos in no time. You need a flexible, reliable way to keep everything tidy and accessible. Modular, stackable container systems offer an adaptable solution that can grow with your needs, helping you tame the mess without sacrificing style.
Picture uniform boxes or bins in muted tones or bold colors, neatly stacked on shelves or inside closets. Imagine labels like ‘accessories,’ ‘tech gadgets,’ or ‘craft supplies’ that make finding items effortless. Visualize a modular system that can be expanded or reconfigured as your collection of belongings evolves—like a puzzle that always fits. These containers turn clutter into an organized display of order.
Choose from materials like acrylic, fabric-lined boxes, or stackable plastic bins to match your style. Incorporate different sizes and shapes for versatility—small for jewelry, larger for bulkier items. Use removable labels or color-coding to streamline your organization. Adjust configurations seasonally or as your collection grows, ensuring your storage system remains functional and stylish.
Start by categorizing your belongings and selecting containers that fit your space and needs. Stack containers in closets, under beds, or on shelves, ensuring they’re easily accessible. Use risers or tiered trays inside larger containers to maximize vertical space. For added stability, secure stacks with clips or straps if needed. Regularly review and reorganize to prevent clutter from creeping back. Invest in high-quality, durable containers for longevity.
Decorate labels with handwritten tags, stickers, or printed labels for a personalized touch. Use decorative washi tape or fabric covers to add visual interest. Incorporate seasonal or themed containers to keep things fresh and engaging. Pair with matching storage accessories like clips, hooks, or small trays to keep everything orderly. Make organization a daily habit with a system that’s both practical and pretty.
Modular container systems turn chaos into calm, transforming your small space into a showcase of order. They give you confidence in managing your belongings and maintaining a clutter-free environment. Once you see how easily everything fits and stays organized, you’ll be motivated to keep improving. It’s a simple, effective way to make your studio feel more spacious, functional, and beautiful—every single day.
14. Overhead Ceiling Hooks for Hanging Items
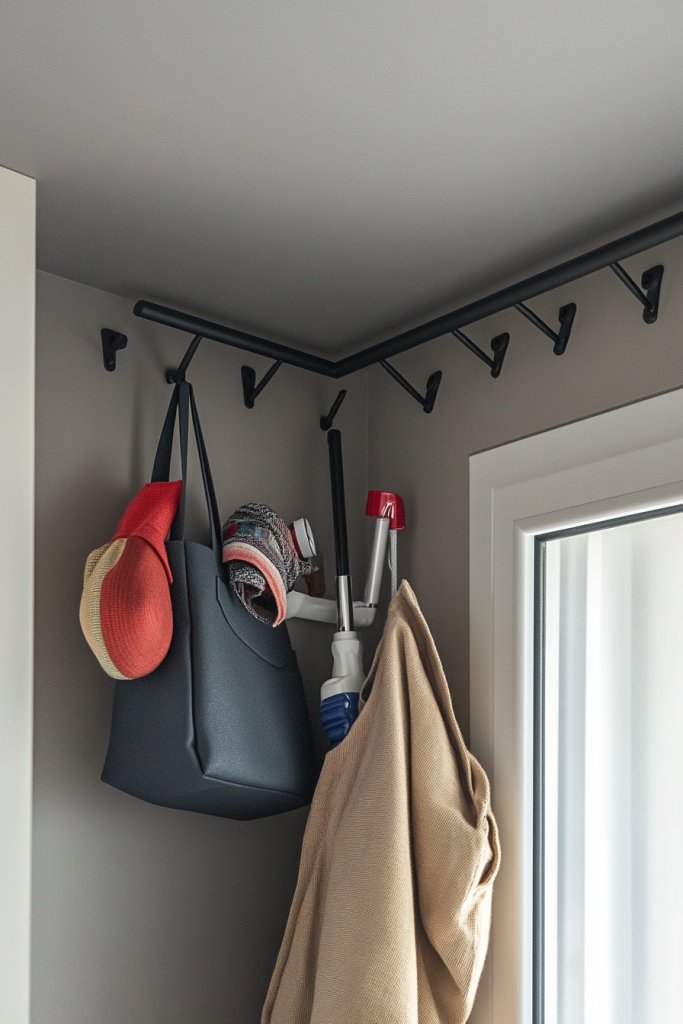
Ever find yourself running out of space to hang essential items like bags, hats, or even cleaning tools? In small studios, every inch counts, and clutter quickly becomes chaos. Overhead ceiling hooks offer a clever way to keep things tidy without sacrificing precious floor or wall space. They turn underused ceiling areas into functional storage zones, making your apartment feel more organized and open.
Imagine a ceiling dotted with sleek, sturdy hooks holding lightweight baskets filled with accessories or hanging decorative elements like scarves or umbrellas. Picture a corner where a few hooks support a hanging rack for keys and small tools, freeing up your entryway. The hooks blend seamlessly with your ceiling finish, whether it’s painted drywall, textured ceiling tiles, or exposed beams. They add a subtle industrial or modern touch that enhances your decor without overwhelming it.
Choose hooks with finishes matching your aesthetic—matte black for industrial, brushed nickel for contemporary, or colorful silicone for playful vibes. You can also cluster hooks for a more dynamic look or space them out for minimalism. In seasonal setups, swap out lightweight hanging items or add decorative elements like banners for special occasions. Adjust the height and quantity based on your ceiling height and the types of items you need to store.
Start by measuring your ceiling space and selecting hooks rated for the weight of your intended items. Use sturdy anchors if installing into drywall, or find ceiling joists for maximum support. Attach hooks using a drill and appropriate screws, ensuring they are level and secure. For a cleaner look, hide the mounting hardware with decorative caps or paint to match your ceiling. Hang lightweight baskets or hooks directly, and organize your items accordingly, making sure not to overload them.
Personalize your ceiling hooks with color-coordinated or themed hangers to match your decor. Incorporate hooks with built-in LED strips or fairy lights for ambient lighting. Use decorative ropes or textiles to create hanging loops or accents that add personality. You can also hang small, lightweight sculptures or ornaments for a touch of artistic flair. The goal is functional storage that also reflects your style.
Ceiling hooks are a game-changer for small space living, giving you extra storage without cluttering your surfaces. They help keep your apartment looking fresh and spacious, boosting your confidence in your organizational skills. With just a handful of hooks, you can transform your studio into a sleek, efficient home that feels larger and more inviting. Ready to hang your way to a more organized life?
15. Minimalist, Functional Wall Hooks and Rail Systems
Cluttered entryways and crowded walls can make even the most stylish studio feel cramped and chaotic. Wall hooks and rail systems offer a sleek, unobtrusive solution to keep everyday essentials within reach and off surfaces. They help you maintain a clean, minimalist aesthetic while maximizing storage potential in tight spaces. Who doesn’t want a tidy, clutter-free zone that actually works?
Envision a narrow wall with a streamlined rail running across it, from which hang leather straps, fabric pouches, or metal hooks holding coats, bags, or scarves. The rails are mounted flush against the wall, creating a modern, unobtrusive look. Hooks and accessories hang in an organized cascade, making items easy to grab. The system is finished with sleek hardware, blending perfectly with contemporary or Scandinavian decor, adding a functional art piece to your space.
Select rails in different finishes—matte black, brass, or matte white—to match your decor style. Use a combination of hooks, baskets, or small shelves on the rails for varied storage. Seasonal updates are simple: switch out hooks or add decorative elements like woven pouches or fabric loops. For a more industrial look, opt for metal pipe rails, while wooden or painted options suit softer aesthetics. Modular systems allow you to expand or reconfigure as needed.
Start by choosing a sturdy wall section with enough length for your rail system. Use a level and measuring tape to ensure perfect alignment. Drill into wall studs or use wall anchors for drywall, depending on weight requirements. Attach the rail with appropriate screws, then add hooks or accessories in desired positions. Organize daily items by frequency of use, keeping the most-used close to eye level for quick access. Regularly check and tighten hardware for safety.
Add personal touches by customizing hooks with different colors or finishes. Incorporate decorative elements like patterned fabric pouches, small baskets, or even hooks designed with playful shapes. Use labels or tags for quick identification of items in baskets or pouches. Layered textiles or small decorative accents can make the system more inviting and unique to your style. It’s all about functional flair that suits your personality.
Wall hooks and rail systems turn clutter into curated organization, making your space look thoughtfully designed. They prove that minimalism doesn’t mean sacrificing function. With simple installation and versatile options, you can create a chic, practical environment that boosts your confidence in managing your tiny home. Take control of your space and enjoy a clutter-free, stylish studio.
16. Compact, Multi-Purpose Kitchen Island or Cart
Limited kitchen space often means sacrificing prep areas or storage, turning cooking into a stressful game of Tetris. A compact, multi-purpose kitchen island or rolling cart solves this by bringing extra surface area and storage where you need it most. It transforms a tiny kitchen into a functional hub without crowding the room. Who says small can’t be mighty?
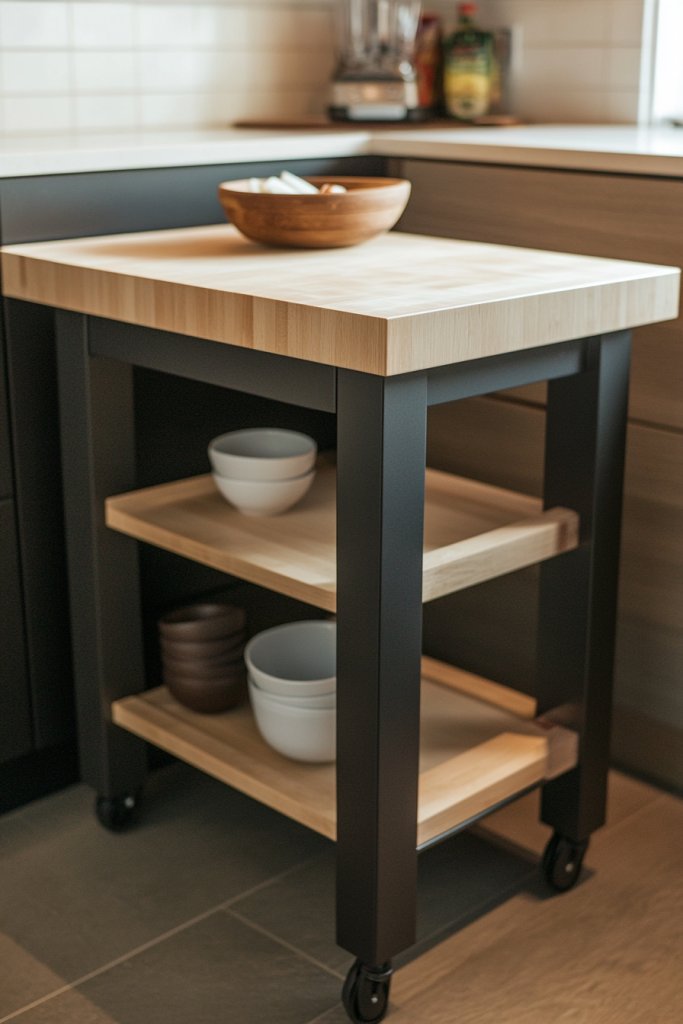
Picture a small, sleek rolling cart with a butcher block top, wheels that lock into place, and shelves underneath holding pots, pans, or utensils. When not in use, it can be tucked away or moved to create more open space. The cart’s surface is a warm wood tone, contrasting with your cool-colored cabinets, adding warmth and texture. Its compact size makes it feel like a natural extension of your kitchen, ready to serve or store at a moment’s notice.
Choose carts with different finishes—metal, wood, or a mix—to match your style. Select models with open shelves, drawers, or closed cabinets depending on your storage needs. For seasonal use, switch the top surface with a tray or decorative cloth to change the vibe. Some carts feature foldable or extendable surfaces, making them even more versatile. Use them as a food prep station, breakfast bar, or additional serving area.
Start by assessing your available space and choosing a cart with appropriate height and footprint. Look for durable wheels that can handle frequent movement and lock securely. Install or assemble the cart following manufacturer instructions, ensuring stability. Use the shelves or drawers to organize utensils, small appliances, or pantry items. Keep frequently used items within easy reach and leave the top clear for prep work or serving. Regularly clean and check wheels for smooth operation.
Personalize your cart with a colorful or patterned cover on the top, or add small decorative touches like a woven basket or a stylish tray. Use magnetic strips or hooks on the sides for knives or utensils, freeing up drawer space. Add a foldable cutting board or extendable surface for extra prep space. Incorporate color-coordinated containers or labels for quick organization. It’s your mini mobile kitchen station, so make it reflect your culinary style.
A multi-purpose kitchen island or cart makes your tiny kitchen infinitely more functional and stylish. It shows that smart solutions turn limitations into opportunities. With this addition, cooking becomes easier and more enjoyable, boosting your confidence as a home chef. Small space? Big impact—yes, please!
17. Use of Under-Window Nooks for Seating or Storage
Ever wish your small studio could have a cozy nook for relaxing or extra storage? Under-window spaces are often overlooked but hold huge potential. They can become charming seating areas, reading corners, or hidden storage compartments. Making use of this space can drastically improve your apartment’s functionality and ambiance. Who knew a little extra space could make such a difference?
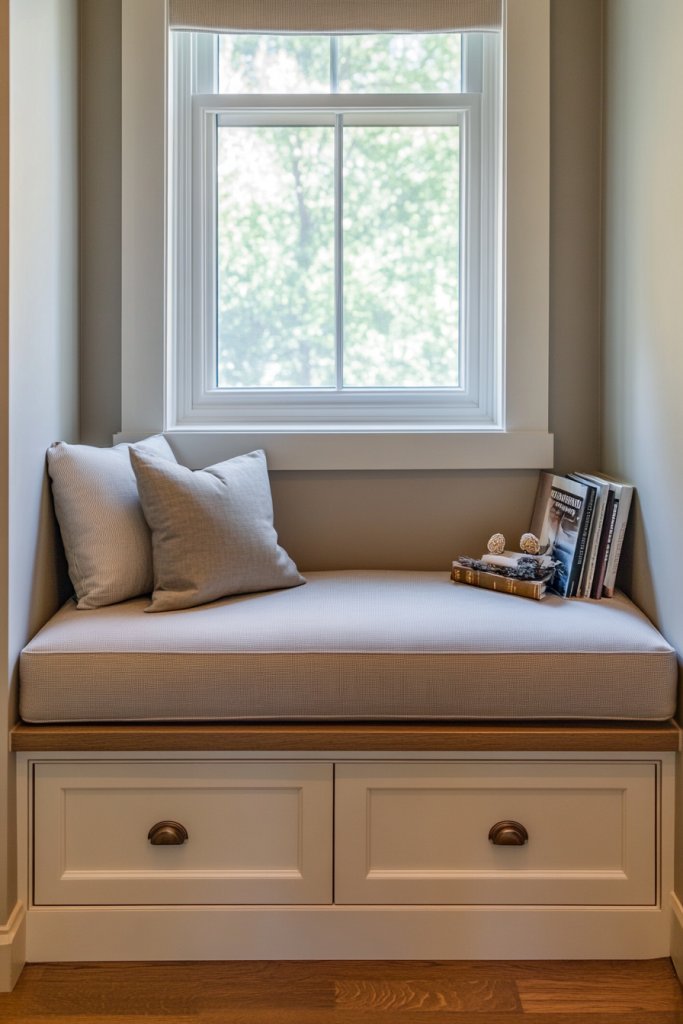
Imagine a built-in bench with a plush cushion in a soft, neutral fabric nestled beneath a large window. The bench is flanked by open shelves or hidden drawers for books, linens, or seasonal decor. Sunlight streams through the window, illuminating the cozy corner and creating a perfect spot to unwind. Decorative pillows and a soft throw blanket make it inviting. This setup turns an awkward space into a functional, stylish retreat.
Choose a bench style that matches your decor—sleek wood for modern, painted or distressed for cottage vibes. Use storage baskets or fabric bins for quick organization, or incorporate custom drawers for a cleaner look. Add cushions or throw blankets seasonally for comfort and style. For multi-purpose use, include a fold-out table or extendable surface that can serve as a workspace or dining spot. Adjust height and depth based on your window size and room layout.
Measure the space beneath your window carefully, considering height, width, and depth. Build or buy a bench with appropriate dimensions and sturdy construction. Install it into the wall if possible or secure it with brackets for safety. Incorporate storage options like hinged lids or drawers, and add cushions for comfort. Decorate with textiles that match your aesthetic—think cozy wool or sleek leather. Keep the area clean and organized to maximize its appeal.
Personalize your nook with decorative pillows in fun patterns or colors. Use seasonal accents like faux fur throws or lightweight quilts. Incorporate small decorative elements like lanterns or fairy lights (away from restricted items), to add ambiance. Use labels or color-coded storage bins for easy access. This space will become your go-to spot for reading, relaxing, or even working in a pinch.
Transforming an under-window nook into a cozy corner shows your knack for clever space use. It adds personality and comfort, making your studio feel more like home. With this simple upgrade, you create a functional and inviting retreat that boosts your confidence in tiny living. Your space, your rules—make it uniquely yours.
18. Stackable or Nesting Dining and Work Tables
Small studios often leave you juggling between dining, working, and relaxing spaces, which can get chaotic fast. Stackable or nesting tables offer a flexible solution, allowing you to adapt your layout depending on your needs. When not in use, they tuck away neatly, freeing up space for other activities. Who says multi-functionality can’t be stylish?
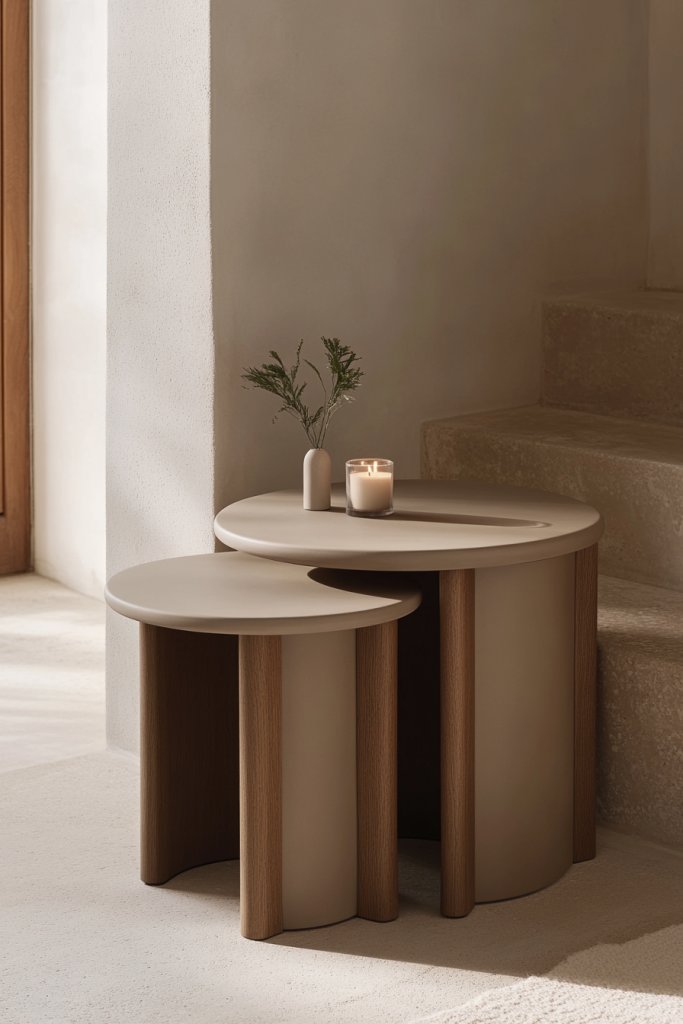
Picture a set of sleek, lightweight tables with foldable or nesting leaves. During the day, they form a compact workspace or dining area, with their surfaces perfectly aligned. When guests arrive or you need more space, simply stack or expand the tables to accommodate everyone. The surfaces are smooth, with rounded edges, and come in finishes that match your decor—minimal yet versatile. They fit seamlessly into a modern aesthetic, blending form and function.
Choose tables with different shapes—square, rectangular, or round—to suit your space. Consider models with adjustable heights or extendable leaves for maximum flexibility. Use colorful or textured tabletops to add visual interest. For seasonal or special occasions, swap out the surface for a decorative covering or placemats. These tables work well in open-concept spaces or tucked into corners when not in use.
Start by measuring your available space and selecting stackable or nesting tables that fit comfortably. Look for lightweight materials like aluminum or composite wood for easy movement. Assemble according to instructions, ensuring stability when stacked or extended. Use the tables for multiple purposes—dining, working, or crafting—and keep the surfaces clean for easy maintenance. Store extra leaves or stacking pieces in nearby cabinets or under beds for convenience.
Personalize your tables with decorative tablecloths, runners, or placemats. Use colorful or patterned tops that match your decor theme. Add small storage baskets underneath for utensils, chargers, or craft supplies. Incorporate stacking trays or portable carts for additional organization. This flexibility lets you refresh your space based on your mood or occasion, keeping things lively and functional.
Nesting and stackable tables demonstrate that small spaces can be adaptable and fun. They empower you to change your layout effortlessly, making your studio more versatile. This level of flexibility boosts your confidence in managing tiny spaces with style. Embrace the multipurpose magic and enjoy a dynamic, efficient home.
19. Light-Colored, Reflective Decor to Enhance Brightness
Feeling like your small studio is dark and cramped? Lack of natural light and dull decor can make even the biggest efforts feel gloomy. Light-colored and reflective surfaces bounce light around, instantly brightening your space. They create an airy, open feel that transforms your home into a cheerful sanctuary. Brightness isn’t just about aesthetics—it’s about your mood, too.
Visualize walls painted in soft whites or pastels, paired with glossy or matte finishes that reflect light. Think of a sleek, high-gloss kitchen backsplash or a set of mirrors strategically placed to multiply light sources. The furniture features light-colored upholstery, and textiles like curtains or throws in neutral shades add softness without absorbing too much light. These elements work together to create a crisp, luminous environment that feels larger and more inviting.
Mix and match different reflective surfaces—mirrored cabinets, glass tabletops, or metallic accents—to amplify brightness. Use light-colored fabrics, rugs, and accessories that reflect natural and artificial light alike. Seasonal updates can include swapping darker textiles for lighter ones and adding decorative mirrors for more bounce. Small touches like translucent or semi-sheer curtains further enhance the effect.
Start by choosing a light color palette for walls, furniture, and accessories. Incorporate mirrors in strategic locations—opposite windows or near light sources—to maximize reflection. Use glossy or semi-gloss paint finishes on walls and furniture for added sheen. Install large mirrors or reflective panels on key walls to visually expand the space. Regularly clean these surfaces to keep the light bouncing and your studio feeling bright and fresh.
Add decorative elements like metallic or glossy accent pieces—lamps, trays, or picture frames—that catch the light. Incorporate subtle textures in textiles that also reflect light, such as silky cushions or sateen curtains. Use transparent or light-colored storage containers to keep clutter out of sight without dulling the space. These small tweaks make a big difference in creating a lively, luminous atmosphere.
Bright, reflective decor proves that tiny spaces can feel open and vibrant. It inspires confidence in your ability to manipulate light and color for a larger feel. With a few simple updates, your studio becomes a bright, cheerful haven that lifts your spirits daily. Brighten your space, brighten your mood—simple as that.
20. Personalize with Small, Functional Decor Pieces
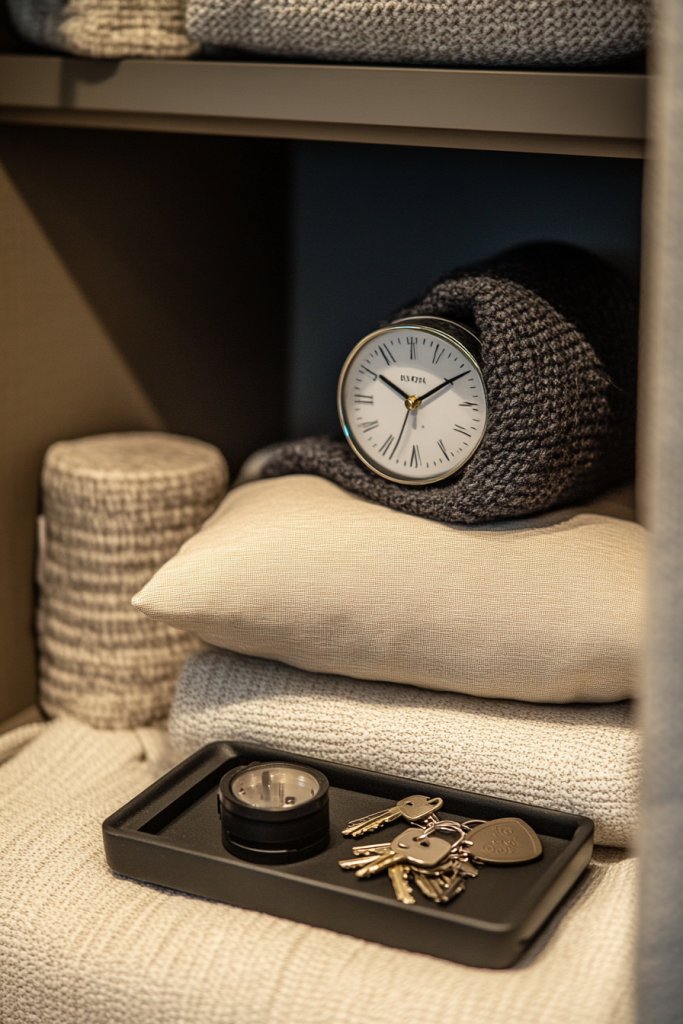
A small studio doesn’t have space for grand statement pieces, but that doesn’t mean it can’t be personalized. Small, functional decor pieces let you inject your personality without clutter or sacrificing utility. From stylish storage baskets to patterned cushions, these accents make your space uniquely yours. Who says tiny can’t be full of character?
Picture a corner with a woven basket holding magazines and a soft, patterned cushion on a compact seat or window ledge. Think of a sleek tray with a few decorative containers for keys, jewelry, or tech accessories. These items are both attractive and practical, adding layers of texture, color, and personality. They turn everyday essentials into curated decor elements that reflect your style.
Use decorative baskets, boxes, or trays in materials like wicker, ceramic, or metal to match your aesthetic. Mix patterns and textures—think a soft cream throw blanket with chunky knit texture alongside smooth ceramic containers. Seasonal variations include swapping in different textiles or decorative accents to keep things fresh. These small pieces are easy to update and maintain, adding a personal touch without much effort.
Identify key areas like entryways, shelves, or under beds where small decor pieces can make a big impact. Choose multi-functional items that also serve as storage—such as a stylish box for remotes or a decorative bowl for loose change. Incorporate labels or color schemes for easy organization. Keep surfaces clean and clutter-free, allowing these accents to stand out. Refresh the look seasonally by swapping out textiles or containers.
Customize your decor with initials, motifs, or color themes that resonate with you. Incorporate handcrafted or vintage pieces for added charm. Use decorative trays or baskets as a base for other items, tying your decor together. Keep the overall look cohesive with a consistent color palette or material mix. It’s all about making your space feel like you—functional, fun, and fabulous.
Personalized decor pieces turn your tiny studio into a warm, welcoming home. They boost your confidence in creating a space that truly reflects your personality. Small touches, thoughtfully chosen, can make a big impact on your daily vibe. Enjoy the process of curating a home that’s as unique as you are.
Conclusion
Exploring these diverse small studio apartment decor ideas shows how you can create a stylish, functional living space regardless of size. Whether you prefer minimalist elegance or vibrant, eclectic touches, these ideas can be tailored to suit your taste. Don’t hesitate to experiment and make your apartment uniquely yours—your perfect space is just a few creative steps away!