Have you ever looked at a room and thought, “This could be better”? Redecorating ugly home decor ideas is a popular way to breathe new life into your space without the need for a full overhaul. Whether it’s outdated furniture, mismatched colors, or quirky accents, transforming these elements can make a huge difference.
In this article, you’ll find a variety of creative tips to turn your less-than-ideal decor into a stylish, cohesive look. From simple paint tricks to clever furniture arrangements, these ideas are designed to inspire and empower you to refresh your home with confidence and flair.
1. Paint Over Outdated Wall Colors with Trendy Shades

Ever look at your walls and think, wow, this color just doesn’t cut it anymore? Maybe it’s that dull beige or an outdated hue that screams ‘early 2000s.’ A fresh coat of trendy paint can instantly lift the entire room and boost your mood. Who knew that a simple color change could make your home feel brand new?
Recommended Products to replicate this idea
| # | Preview | Product | |
|---|---|---|---|
| 1 |

|
Chroma Mural Paint, Assorted Primary Colors, Pints, Set of 6 | Buy on Amazon |
| # | Preview | Product | |
|---|---|---|---|
| 1 |

|
Bates - Paint Tray Set, Paint Rollers, Paint Brushes for Wall, Tray, Roller Brush, 11 Piece Home... | Buy on Amazon |
Picture a crisp, modern shade like soft blush or deep navy transforming a tired wall. The smooth texture of fresh paint reflects light differently, making the space feel brighter and more inviting. Imagine running your hand along a freshly painted wall that feels cool and silky, with no streaks or patches. The new color creates a clean canvas for your decor and personal style.
You can tailor your paint choices based on the room’s purpose, like calming blues for bedrooms or energizing yellows for kitchens. Seasonal updates, such as warm hues in fall or cool tones in summer, keep your decor fresh year-round. For small spaces, lighter shades open things up; bold colors add drama to larger rooms. Mixing matte, satin, or semi-gloss finishes also changes the vibe—matte for softness, gloss for vibrancy.
Start by choosing high-quality, low-VOC paints for healthier indoor air. Prep the walls by cleaning and patching holes or cracks. Use painter’s tape to protect trim and create clean edges. Apply primer if covering dark or bright colors, then roll or brush on two coats for even coverage. Consider using a paint sprayer for a flawless, professional look. Don’t forget to ventilate the room and let the paint dry thoroughly between coats.
Add subtle touches like an accent wall in a different shade or a textured finish using sponges or brushes. Incorporate patterns or stripes with painter’s tape for a modern edge. You can also experiment with metallic or chalkboard paint for unique effects. Personalize your space further with stencils or hand-painted designs that reflect your personality. The key is to choose colors that resonate with your vibe and style.
Updating your walls with trendy shades instantly boosts your home’s appeal and your confidence in your decorating skills. It’s a cost-effective way to refresh any room without major renovations. Plus, a fresh coat of paint can motivate you to tackle other home projects. Ready to give your walls a modern makeover and enjoy a space that feels truly yours?
2. Replace or Cover Old or Tired Furniture with Slipcovers or Paint
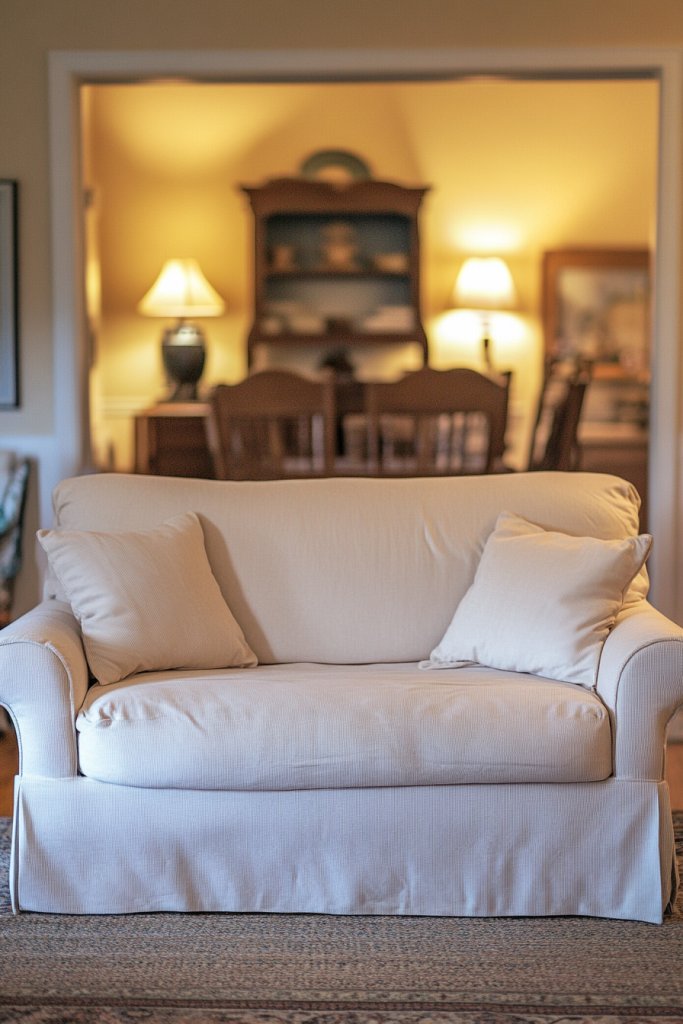
Stuck with furniture that’s seen better days? Maybe your sofa has more tears than fabric, or your wooden chairs look dull and uninspired. Instead of tossing everything out or splurging on new pieces, consider updating what you already own. A simple slipcover or fresh coat of paint can breathe new life into tired furniture.
Recommended Products to replicate this idea
| # | Preview | Product | |
|---|---|---|---|
| 1 |
|
Easy-Going Stretch Sofa Slipcover 1-Piece Sofa Cover Furniture Protector Couch Soft with Elastic... | Buy on Amazon |
| # | Preview | Product | |
|---|---|---|---|
| 1 |

|
Rust-Oleum Linen White Chalked All-in-One Ultra Matte Paint | One Coat Coverage | No Primer,... | Buy on Amazon |
Imagine slipping into a plush, patterned slipcover that instantly transforms your worn-out sofa into a statement piece. Or picture a wooden coffee table painted in a sleek matte black, giving it a modern edge. The textures of the slipcovers add softness, while painted furniture showcases bold, vibrant colors or subtle neutrals. These tweaks elevate your space without breaking the bank.
Slipcovers come in countless fabrics—from casual linen to luxe velvet—allowing you to match your decor style. Painting furniture works well for wooden pieces, especially when combined with new hardware or decorative knobs. Seasonal covers or paint colors keep your look fresh, whether you want cozy winter textures or breezy summer vibes. For small spaces, multi-functional furniture painted in bright shades can make a room pop.
Start by choosing durable slipcovers that are machine washable and fit your furniture shape. Measure carefully and select styles that are easy to remove for cleaning. When painting furniture, sand surfaces lightly for better adhesion, then prime before applying your chosen color. Use painter’s tape to protect edges and hardware, and apply thin coats for a smooth finish. Seal painted surfaces with a clear topcoat for durability. Both methods require minimal tools—just patience and some elbow grease.
Add decorative cushions or throws that complement your slipcover or painted furniture. Mix and match patterns or textures to create an eclectic vibe. Consider distressing or antiquing painted furniture for a shabby-chic look. Personal touches like stenciled designs or metallic accents can make your pieces uniquely yours. These updates not only refresh your space but also reflect your personality.
Revamping old furniture with slipcovers or paint is a satisfying way to express your creativity while saving money. It proves that you don’t need a complete overhaul to make a big impact. Plus, these projects give you confidence to experiment with colors and styles. Your friends will be amazed at how a little paint and fabric can completely change a room’s vibe.
3. Add New Hardware or Decorative Accents to Existing Furniture
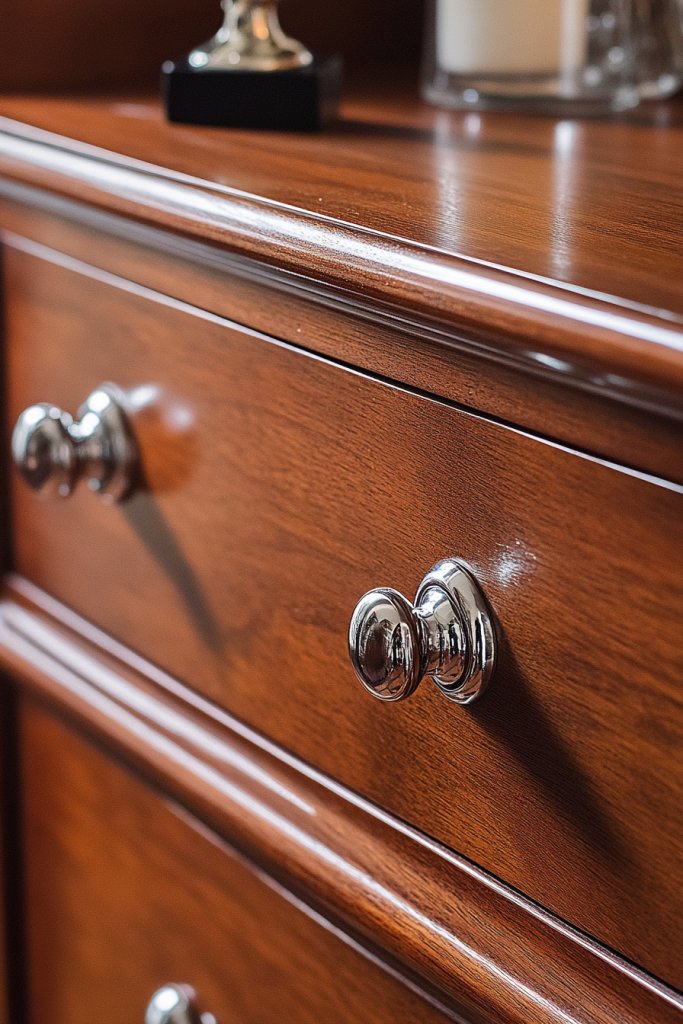
Is your furniture looking tired but still structurally sound? Sometimes, all it takes is swapping out old hardware to give a piece a fresh, modern look. Outdated knobs and pulls can drag down even the nicest furniture. Want to upgrade your decor without a full replacement? New hardware is your best friend.
Recommended Products to replicate this idea
| # | Preview | Product | |
|---|---|---|---|
| 1 |

|
Ravinte 30 Pack 5'' Cabinet Pulls Brushed Nickel Stainless Steel Kitchen Drawer Pulls Cabinet... | Buy on Amazon |
| # | Preview | Product | |
|---|---|---|---|
| 1 |
|
YourGift 12 Pack Drawer Knobs Diamond Shaped Crystal Glass 30mm Cabinet Knobs Pull Handles (Silver) | Buy on Amazon |
Picture sleek, matte black handles replacing shiny brass knobs on kitchen cabinets. Or imagine vintage-style ceramic pulls adding charm to a dresser. The new hardware catches the light and draws attention to details you might have overlooked. It’s like jewelry for your furniture—small but impactful.
Choose hardware finishes that match your overall decor—brushed nickel, matte black, antique bronze, or polished chrome. For a minimalist look, opt for simple, clean-lined handles; for more character, go for ornate or vintage-inspired pieces. Change hardware seasonally or for special occasions to keep things fresh. You can also mix different metals for an eclectic, curated vibe.
Remove the existing hardware carefully, keeping any screws or backplates if you want to reuse them. Measure the hole spacing to ensure new pieces fit perfectly. Drill new holes if necessary, and screw in the new handles or knobs tightly. For a more dramatic change, consider adding decorative accents like tassels, leather pulls, or even small sculptures. Always check that the new hardware functions smoothly and feels sturdy.
Create a theme by choosing hardware in similar styles or colors across different furniture pieces. Add personalized touches with monogrammed or custom-designed knobs. Use contrasting colors—like gold hardware on dark wood—to create visual interest. Consider combining hardware with decorative trim or moulding for a layered, sophisticated look.
Swapping hardware is an easy, inexpensive way to elevate your space and showcase your style. It’s a quick project that yields immediate gratification. Your furniture will look updated and polished, boosting your confidence in DIY decorating. Soon, you’ll be inspired to tackle bigger projects with the same enthusiasm.
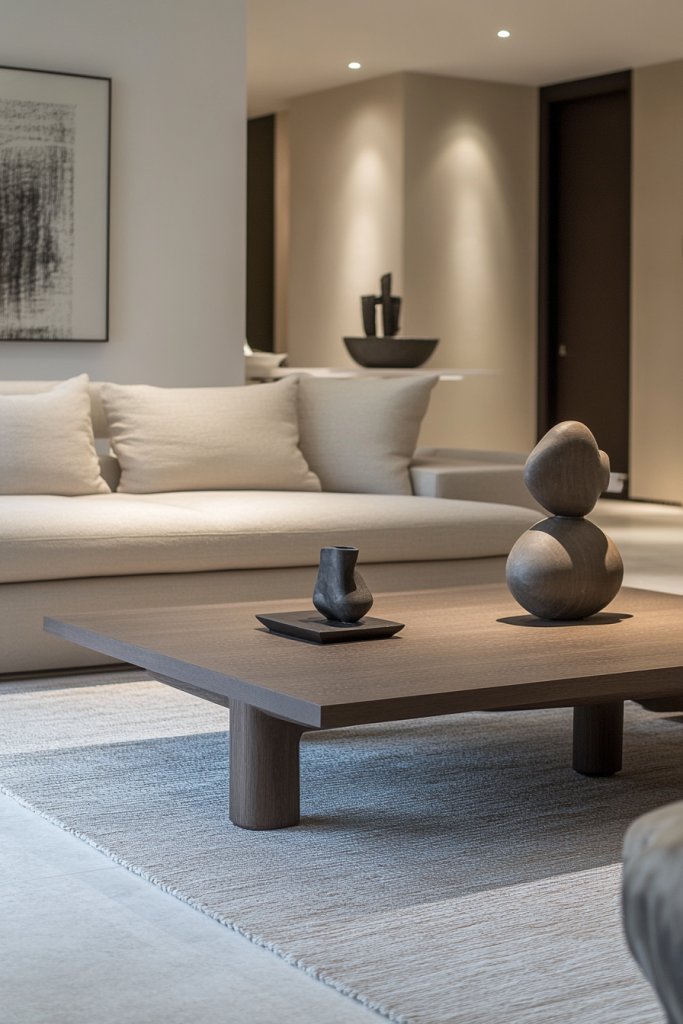
4. Incorporate Patterned or Textured Area Rugs to Anchor the Space
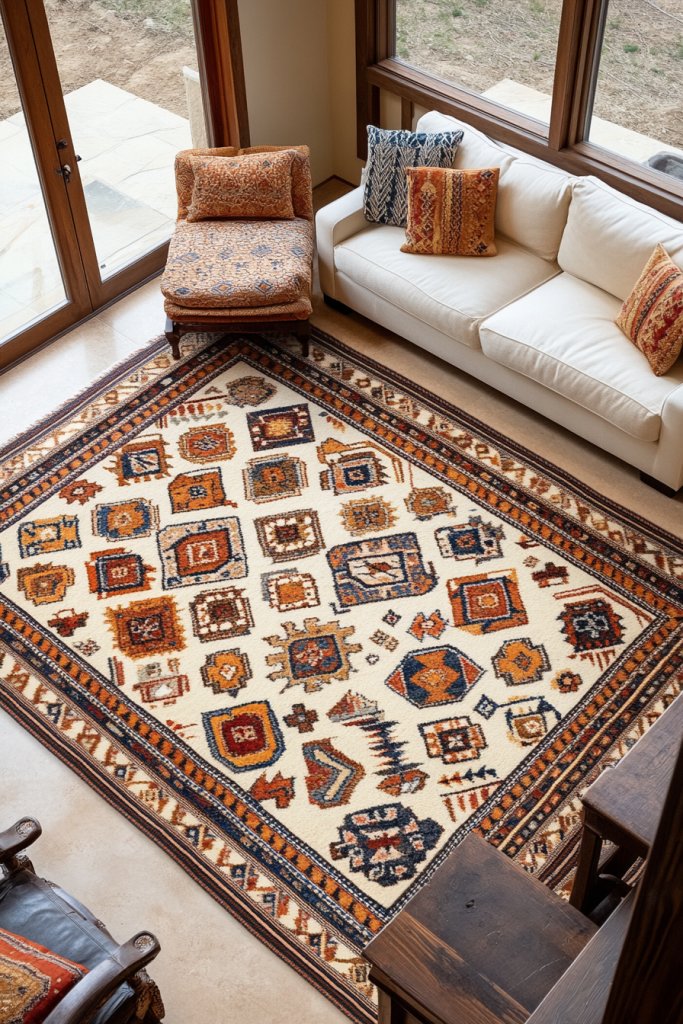
Feeling like your room lacks personality or feels off-balance? An area rug can be the perfect fix. It anchors your furniture and adds warmth, making your space inviting and cohesive. Plus, the right pattern or texture can hide flaws on the flooring or uneven surfaces.
Recommended Products to replicate this idea
| # | Preview | Product | |
|---|---|---|---|
| 1 |

|
Area Rug Living Room Rugs 8x10 - Large Soft Boho Geometric Rug, Non-Slip Foldable Washable Rugs Non... | Buy on Amazon |
| # | Preview | Product | |
|---|---|---|---|
| 1 |
|
Ophanie Area Rugs 9x12 Living Room, Large Ivory Bedroom Carpet, Big Shag Indoor Thick Soft Nursery... | Buy on Amazon |
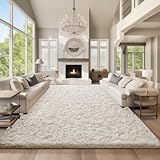
Imagine a bold geometric rug under a neutral sofa, creating a striking focal point. Or picture a plush, textured shag rug adding softness and comfort to a reading nook. The interplay of colors and patterns adds depth and dimension, transforming a plain room into a curated space. Textured fibers invite you to kick off your shoes and relax.
Choose rugs with patterns that complement your decor style—modern, boho, traditional, or eclectic. Seasonal options like jute or sisal rugs work well in summer, while shag or faux fur add coziness in winter. For small rooms, a large rug can make the space feel bigger; in larger rooms, multiple smaller rugs define zones. Layering rugs creates a layered, rich look.
Measure your space accurately to select the right rug size—aim for at least 18 inches of floor exposed around the edges. Choose durable, stain-resistant materials for high-traffic areas. Lay the rug flat and secure it with rug pads to prevent slipping. Position your furniture so that at least the front legs sit on the rug, creating visual unity. Maintaining clean carpets and rotating seasonal rugs keeps the look fresh.
Mix patterns and textures for an eclectic vibe—think a floral rug with a textured fringe or a striped runner with a shaggy finish. Use rugs to introduce pops of color that tie your room’s palette together. For added personality, consider custom-sized or handwoven pieces that reflect your taste. Layering small accent rugs over a larger base rug can add visual interest.
A well-chosen rug instantly elevates your decor and makes your home feel more polished. It’s a simple way to add personality without a full overhaul. Plus, it’s a versatile decorating tool that allows you to experiment with colors and patterns. You’ll feel more confident creating cozy, stylish spaces that invite everyone in.
5. Hang Large-Scale Mirrors to Create the Illusion of Space

Does your room feel cramped or dark? Mirrors are magic tricks for small or poorly lit spaces. They bounce light around and visually expand the area, making it feel more open and airy. Who doesn’t want a bigger, brighter room without knocking down walls?
Recommended Products to replicate this idea
| # | Preview | Product | |
|---|---|---|---|
| 1 |

|
Easly Oversized Full-Body Mirror, 76" x 34" Arched Full-Length Mirror, Black Metal Frame, Floor... | Buy on Amazon |
| # | Preview | Product | |
|---|---|---|---|
| 1 |

|
DUMOS Arched Full Length Mirror with Stand 64"x21" Floor Standing Aluminum Frame for Bedroom Body... | Buy on Amazon |
Imagine a large mirror hung across from a window, reflecting natural light and doubling the visual space. The sleek frame complements modern decor, while an ornate vintage mirror adds character. When you walk into the room, the mirror immediately draws your eye and creates a sense of depth. It’s like adding a window where there isn’t one.
Choose mirrors with simple, clean frames for minimalist spaces, or go for decorative, sculptural frames for a statement piece. Large, full-length mirrors work well in bedrooms and entryways, while oversized wall mirrors can be focal points in living rooms. Consider tilting or leaning mirrors for a casual, trendy look. Seasonal décor can include adding decorative film or colored tints for a playful touch.
Select a sturdy wall with enough space for the mirror’s size. Use a level to hang it perfectly straight, and anchor it into studs for safety. For a more dynamic look, lean a large mirror against the wall instead of hanging it, secured with non-slip pads. Clean the mirror regularly to keep reflections crisp. Experiment with placement—above a sofa, fireplace, or entryway—to maximize impact.
Frame your mirror with decorative molding, LED backlighting, or even faux plants (but no actual greenery, remember!). Create a gallery wall around it with photos or art to add personality. Use different shapes—round, oval, or geometric—to suit your style. Incorporate mirrors into your overall decor theme for a cohesive look.
A large mirror can transform your home into a more open and inviting space. It’s a simple project with big results, boosting both your confidence and your home’s style. Enjoy the feeling of more room and natural light, and be inspired to try other decorating tricks.
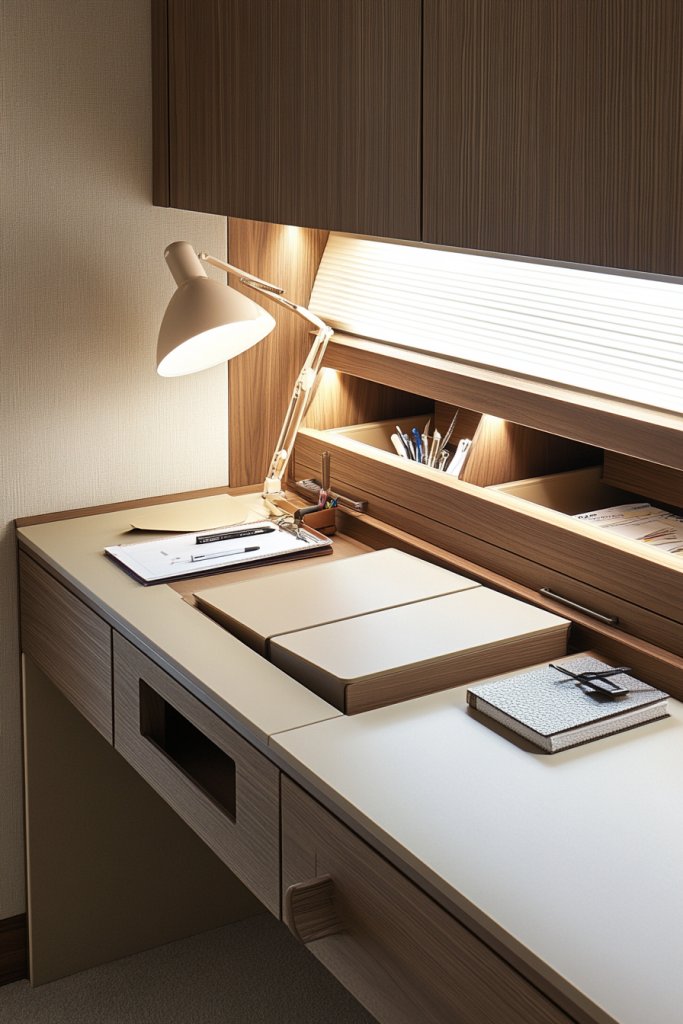
6. Install Modern Lighting Fixtures for a Fresh Atmosphere
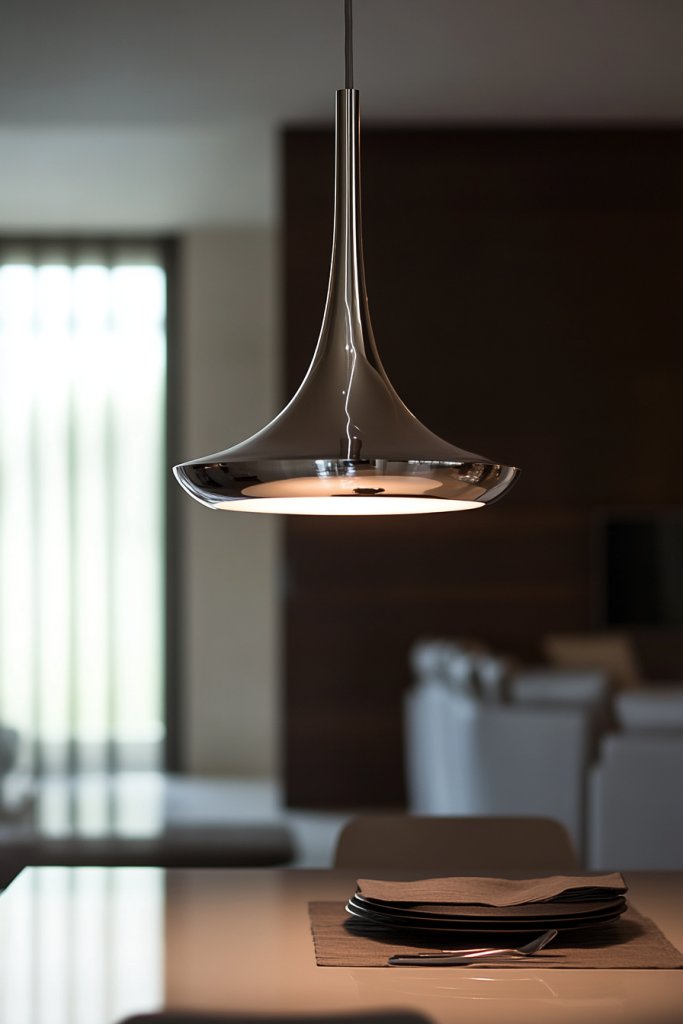
Is your home stuck in a lighting rut? Outdated fixtures can make even well-decorated rooms feel dull and lifeless. Upgrading to modern lighting can instantly energize your space, setting the mood and highlighting your decor. Plus, good lighting is a game-changer for functionality and ambiance.
Recommended Products to replicate this idea
| # | Preview | Product | |
|---|---|---|---|
| 1 |

|
Modern Led Pendant Light Fixture, 15W Chrome Spiral Led Chandelier Hanging Lamp, 4500K Daylight... | Buy on Amazon |
| # | Preview | Product | |
|---|---|---|---|
| 1 |
|
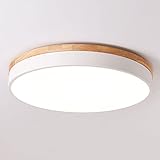
Yiisem Dimmable Wood LED Flush Mount Ceiling Light, 5CCT 2700K-6000K Modern Round Close to Ceiling... | Buy on Amazon |
Imagine sleek pendant lights hanging above a dining table, casting a warm glow. Or picture wall sconces with sculptural shapes adding a sculptural element to your living room. Layering different types of lighting creates a balanced, inviting environment. The right fixtures add style, whether they blend seamlessly or serve as focal points.
Choose fixtures that match your decor—industrial, boho, glam, or minimalist. For a cozy vibe, go for warm, dimmable LED lights; for a contemporary look, opt for geometric shapes and cool tones. In small spaces, compact fixtures save space, while larger chandeliers or statement pendants anchor big rooms. Switch up bulbs with different color temperatures for seasonal or mood changes.
Start by assessing your room’s needs: task lighting, accent, or general illumination. Turn off power before installing fixtures, and follow manufacturer instructions carefully. Use the right tools—drills, screwdrivers, and voltage testers—and ensure fixtures are securely mounted. For ceiling fixtures, consider adding dimmer switches for versatility. Hiring an electrician might be wise for complex wiring or high ceilings.
Add decorative elements like vintage bulbs, frosted glass covers, or colored shades. Incorporate smart lighting that you can control via apps for convenience. Use fixtures with adjustable arms or height options to customize your lighting angles. Complement fixtures with decorative switch plates or mounting hardware to tie the look together.
Upgrading your lighting instantly elevates your decor and lifestyle. It’s a straightforward project that pays off in both function and style. Good lighting enhances every activity and makes your home more welcoming. Now, you’re ready to turn on the charm and create a space you love.
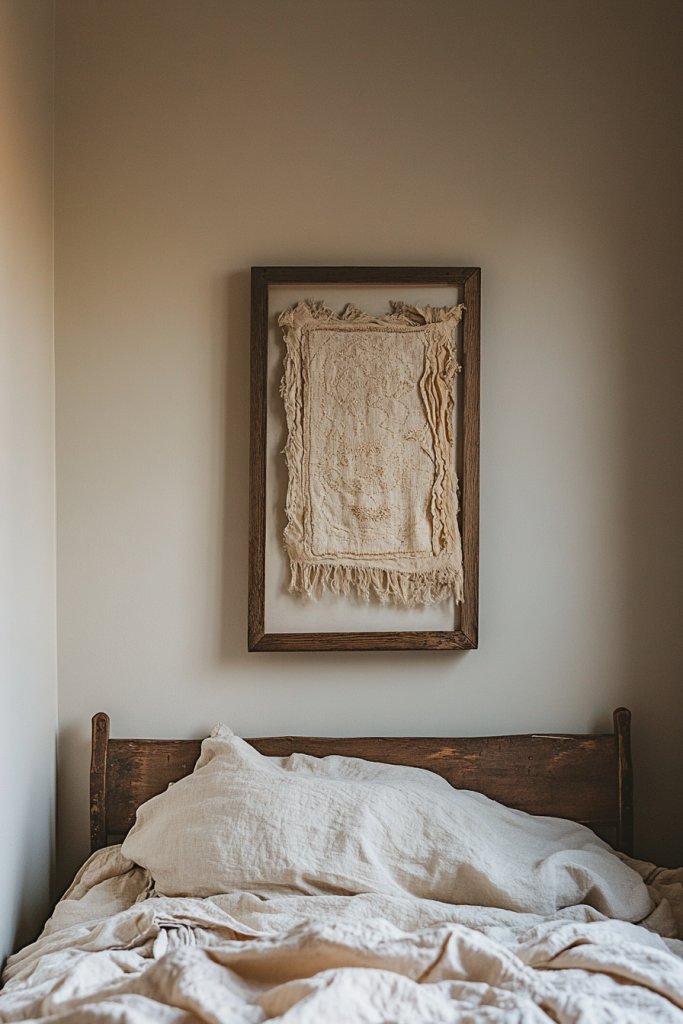
7. Reframe or Replace Framed Wall Art for a Cohesive Look
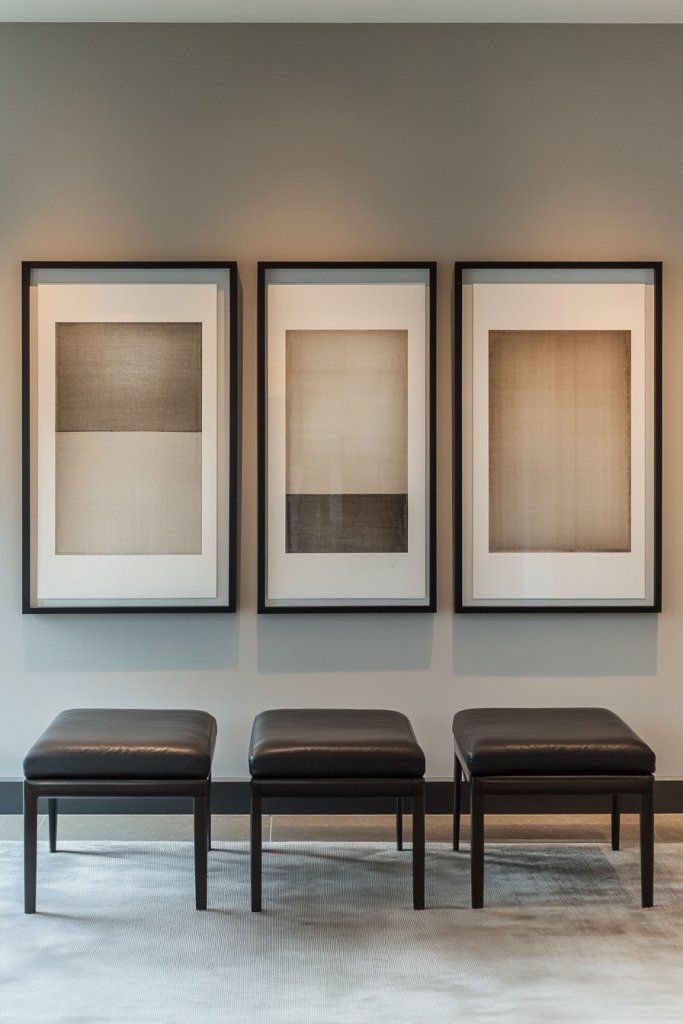
Fallen out of love with your wall art? Outdated or mismatched frames can make even the most beautiful art look cheap or cluttered. Refreshing or replacing frames can instantly elevate your walls and create a more cohesive, stylish look. Want to make your art pop and tie everything together?
Recommended Products to replicate this idea
| # | Preview | Product | |
|---|---|---|---|
| 1 |

|
eletecpro 12x12 Picture Frames Set of 9 with Mat for 8x8 Photos or without Mat for 12x12, Square... | Buy on Amazon |
| # | Preview | Product | |
|---|---|---|---|
| 1 |

|
upsimples 11x14 Picture Frame, Display Pictures 8x10 with Mat or 11x14 Without Mat, Wall Hanging... | Buy on Amazon |
Imagine swapping a tired gold frame for a sleek black or wood one, instantly modernizing the piece. Or picture rearranging eclectic prints in uniform frames for a gallery wall that feels curated, not chaotic. The new framing draws focus to the artwork while harmonizing with your decor palette. It’s like giving your walls a fashionable makeover.
Opt for minimalist frames for a clean, contemporary look, or ornate vintage styles for a romantic feel. Mix sizes and orientations for visual interest, or keep everything uniform for symmetry. Switch out artwork seasonally or for special occasions to keep your walls fresh. Consider using floating frames or mats to add depth and dimension.
Remove the existing art carefully, saving any hooks or mounting hardware. Measure and select frames that suit the artwork size and style. Use a level and appropriate anchors to hang framed pieces securely. If replacing art, choose prints or photos that resonate personally or match your color scheme. For DIY projects, try framing fabric, textiles, or even meaningful keepsakes.
Create a themed gallery with a consistent frame style or mix different styles for an eclectic vibe. Incorporate personal photos, travel souvenirs, or abstract prints to reflect your personality. Use mats or borders to highlight particular pieces or add visual contrast. Regularly update your gallery to keep your space feeling fresh.
Updating your wall art and frames can dramatically change the feel of a room. It’s a simple, impactful way to showcase your personality and taste. Enjoy curating your space and experimenting with different styles. Your walls will thank you for the fresh, polished look.
8. Use Decorative Storage Solutions to Hide Clutter
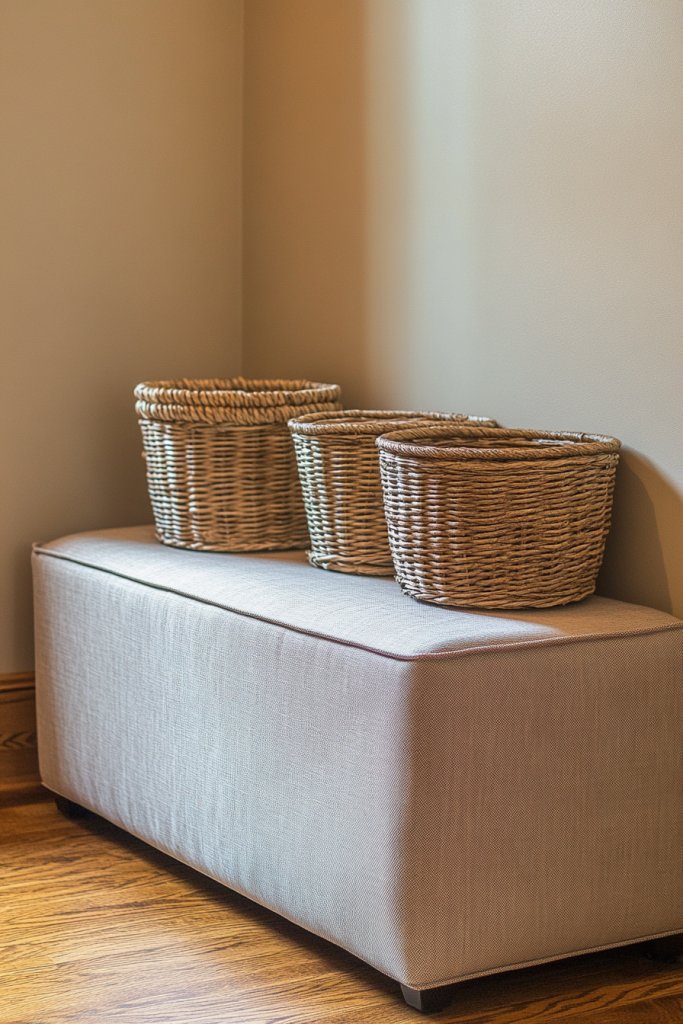
Clutter can turn a beautiful space into chaos in seconds. But storing everything out of sight doesn’t mean sacrificing style. Decorative storage solutions combine function and fashion, helping you keep your home tidy while adding visual interest. Ready to hide the mess without hiding your personality?
Recommended Products to replicate this idea
| # | Preview | Product | |
|---|---|---|---|
| 1 |

|
Posprica Woven Storage Baskets for Organizing 6 Pack, Large&Small Storage Cube Bins Set for... | Buy on Amazon |
| # | Preview | Product | |
|---|---|---|---|
| 1 |

|
DUMOS 30in Foldable Storage Ottoman Bench, Storage Chest, End of Bed Foot Rest Stool with Padded... | Buy on Amazon |
Imagine woven baskets with leather handles on open shelves, or sleek storage ottomans topped with plush throws. Floating shelves hold stylish boxes or decorative bins, keeping essentials accessible yet unobtrusive. The textures and colors of storage pieces add layers of design, making clutter a thing of the past. It’s about creating a clean, organized aesthetic you enjoy.
Choose storage that matches your decor style—rustic wood crates, minimalist metal bins, or colorful fabric baskets. Use matching sets for consistency or mix to create an eclectic look. Incorporate multi-functional furniture like storage beds or coffee tables with hidden compartments. Seasonal swaps and reorganization keep the storage fresh and practical.
Identify problem areas—living rooms, closets, or kitchens—and select storage options accordingly. Measure spaces to ensure proper fit. Install floating shelves or use decorative baskets on existing furniture. Label bins for easy access, and rotate seasonal items to keep clutter under control. Opt for washable fabrics or easy-to-clean surfaces for simplicity.
Add decorative touches like ribbons, labels, or tags to personalize storage. Use color-coordinated containers to match your color palette or add pops of contrast. Incorporate personal mementos or themed decor within storage units for a curated look. Create a system that’s both functional and visually pleasing.
Smart storage solutions make your home more livable and comfortable. They give you peace of mind knowing everything has a place. Plus, they inspire you to keep your space clean and organized long-term. Now, your home is both stylish and stress-free.
9. Incorporate DIY Wall Treatments like Wainscoting or Peel-and-Stick Panels
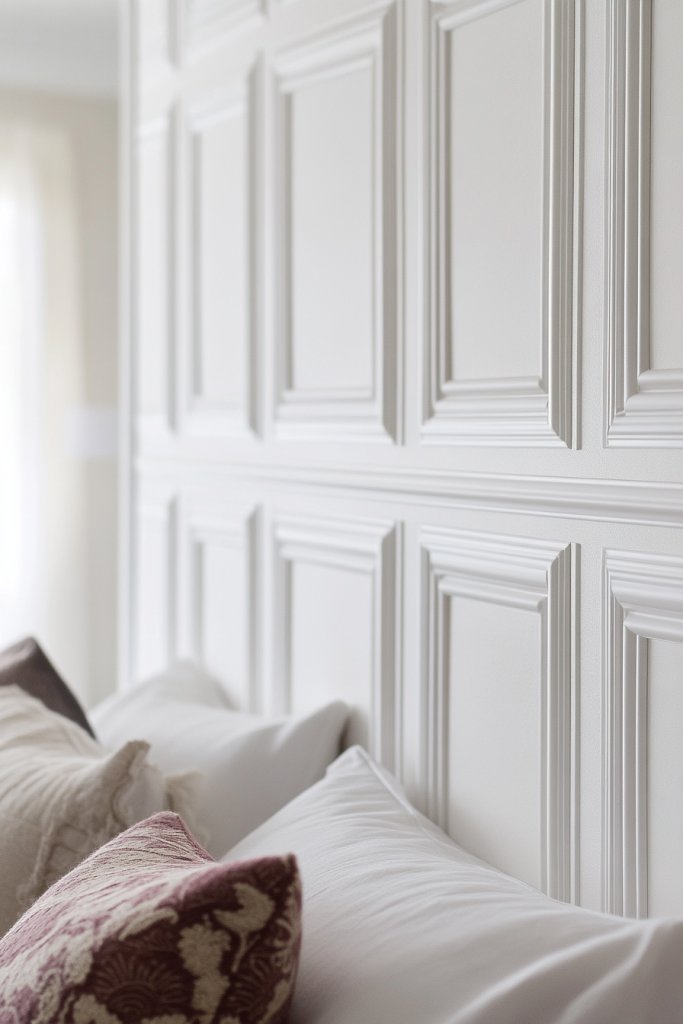
Plain, boring walls are a common decorating frustration. But installing traditional wainscoting or paneling can seem intimidating or expensive. DIY wall treatments offer a stylish, cost-effective way to add architectural interest and personality. Ready to give your walls a custom, upscale look?
Recommended Products to replicate this idea
| # | Preview | Product | |
|---|---|---|---|
| 1 |

|
Art3d 102-Piece Peel and Stick Wall Tile for Kitchen Backsplash, Bathroom, Fireplace, 3in. × 6in.... | Buy on Amazon |
| # | Preview | Product | |
|---|---|---|---|
| 1 |

|
Staycalis Home Precut Wall Molding Kit - Paintable Wainscoting Panels Ready-to-Assemble Accent Wall... | Buy on Amazon |
Imagine a half-wall of shiplap painted in a crisp white, adding charm and texture. Or picture peel-and-stick textured panels creating a statement feature wall without mess or fuss. The tactile surfaces catch light and cast shadows, bringing depth to your space. These treatments turn flat walls into eye-catching design elements.
Choose between paintable paneling, peel-and-stick wallpaper, or textured tiles based on your skill level and style. For a rustic look, opt for wood or faux wood panels; for modern minimalism, smooth paintable options work best. Seasonal updates are easy—swap panels or change paint colors to refresh the vibe. Use different textures or patterns for a layered, dynamic effect.
Start by cleaning and prepping your wall surface. Measure and cut panels or wallpaper to fit, then carefully apply following manufacturer instructions. Use leveling tools and adhesive or nails as needed. For peel-and-stick options, ensure a smooth, bubble-free application. Finish edges neatly with trim or caulk. No professional tools required—just patience and a steady hand.
Paint or stain wood panels to match your decor palette. Add decorative molding or trim for a polished finish. Mix different textures—shiplap with wallpaper or textured paint—to create a custom look. Incorporate metallic or matte finishes for added sophistication. The result is a stylish, personalized wall that elevates your entire room.
DIY wall treatments are a satisfying way to upgrade your decor without breaking the bank. They demonstrate your creativity and can be tailored to any style. Enjoy the transformation and the sense of accomplishment that comes with a personalized, architectural feature. Your home will look more finished and thoughtfully designed.
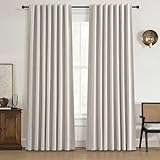
10. Upgrade Window Treatments with Modern Curtains or Blinds
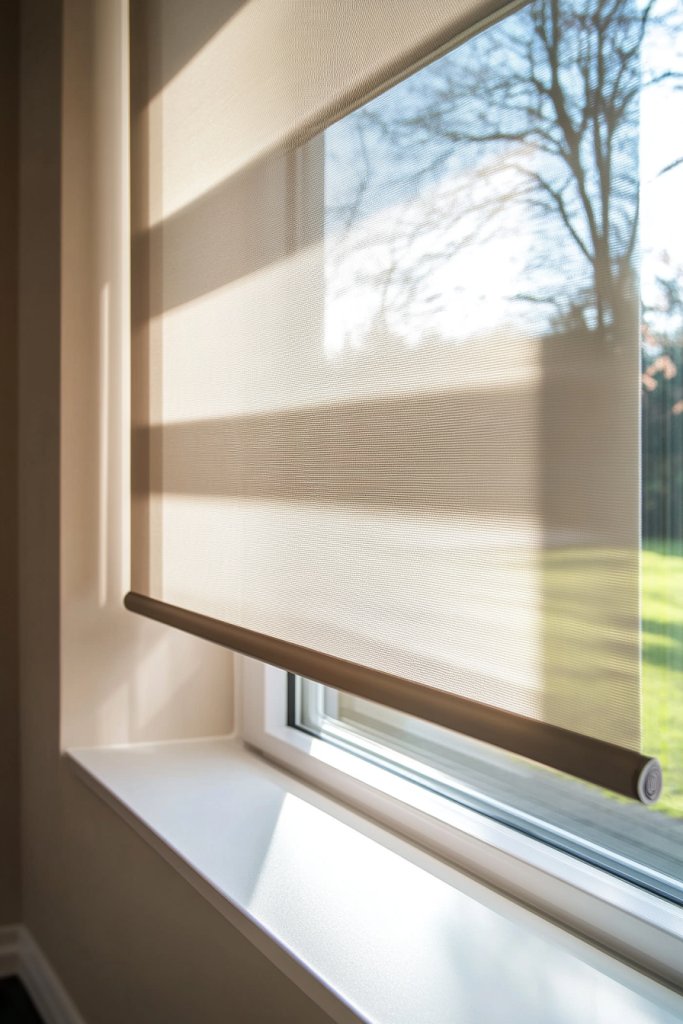
Old, sagging curtains or outdated blinds can drag down your room’s style and block natural light. Updating window treatments is an easy fix that instantly brightens and modernizes your space. Want a fresh look that also improves privacy and light control? This is your solution.
Recommended Products to replicate this idea
| # | Preview | Product | |
|---|---|---|---|
| 1 |
|
100% Blackout Curtains 84 Inch Length 2 Panels Set Farmhouse Style for Bedroom Windows/Living Room... | Buy on Amazon |
| # | Preview | Product | |
|---|---|---|---|
| 1 |

|
LazBlinds No Tools No Drill Cordless Cellular Shades, Light Filtering Honeycomb Shades for Home,... | Buy on Amazon |
Picture sleek, floor-to-ceiling curtains in a luxurious fabric framing your windows. Or imagine minimalist roller blinds in a neutral tone creating clean lines. The right window treatment adds softness or structure, depending on your style. It frames your view and becomes a focal point, enhancing your overall decor.
Choose lightweight sheer curtains for a breezy, airy feel, or heavy blackout drapes for privacy and insulation. Vertical blinds or wooden shutters add a classic touch, while roller shades offer a sleek, contemporary vibe. Seasonal swaps can include linen in summer and velvet in winter. Consider layering curtains and blinds for versatility.
Measure your windows precisely, accounting for desired length and fullness. Select hardware that complements your decor—rods, rings, or brackets—and install securely. Hang curtains with proper hooks or rings, ensuring even spacing. For blinds, follow manufacturer instructions for mounting brackets and operating mechanisms. Test for smooth operation and adjust accordingly.
Add decorative tiebacks or tassels for a charming touch. Use contrasting fabrics or colors to create visual interest. Try layering sheer and blackout panels for function and style. Incorporate decorative finials or custom hardware to match your decor theme. These updates make your windows a stylish feature rather than an afterthought.
Upgrading window treatments instantly elevates your decor and enhances your home’s comfort. It’s a straightforward project with a big impact, giving you confidence to experiment with textures and styles. Natural light and privacy are now at your fingertips, making your space more inviting and functional.
11. Refresh Upholstery with Slipcovers or Reupholstery
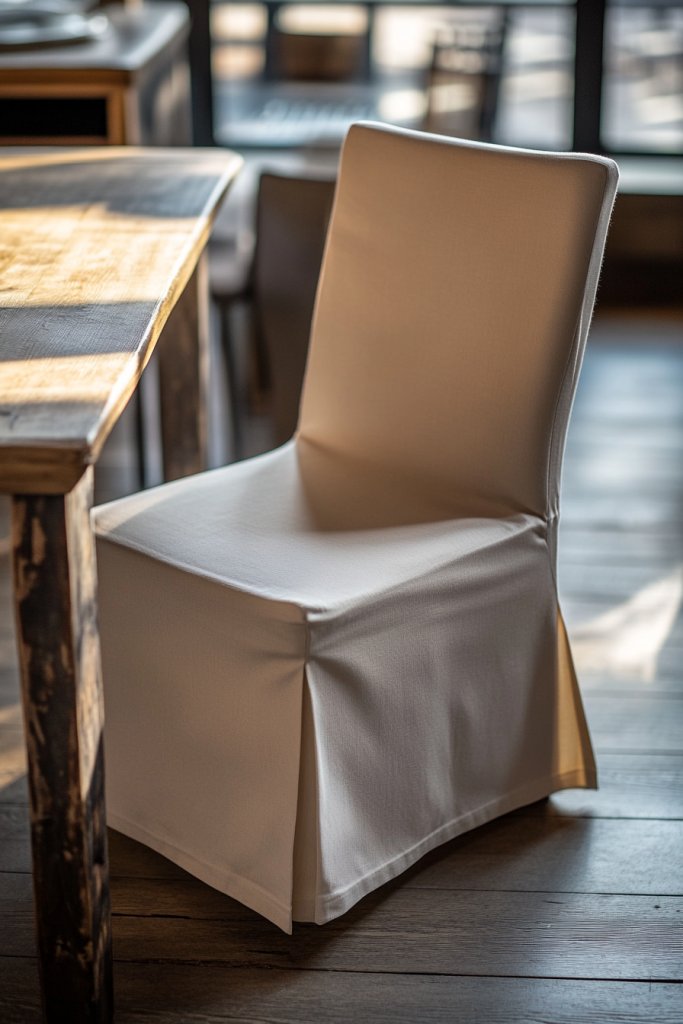
Sitting on torn or stained upholstery can be downright depressing. Replacing furniture isn’t always feasible, but refreshing the fabric or reupholstering can change everything. Want a quick fix that transforms your tired furniture into something stylish and new? You’re in the right place.
Recommended Products to replicate this idea
| # | Preview | Product | |
|---|---|---|---|
| 1 |
|
Easy-Going Stretch Sofa Slipcover 1-Piece Sofa Cover Furniture Protector Couch Soft with Elastic... | Buy on Amazon |
| # | Preview | Product | |
|---|---|---|---|
| 1 |

|
Upholstery Cambric Dust Cover Fabric 60 Inch x 3 Yard Replacement Bottom Replacement for Underside... | Buy on Amazon |
Imagine slipping a tailored slipcover over a sagging armchair, instantly giving it a polished look. Or see a vintage sofa reupholstered with a bold, contemporary fabric that makes a statement. The new fabric adds texture and color, elevating your entire room’s vibe. It’s like giving your furniture a facelift with minimal fuss.
Choose slipcovers in different fabrics—cotton, linen, velvet—based on your needs and style. For a more permanent solution, reupholstery allows for custom fabric choices and detailed sewing. Seasonal covers can be easily swapped out for a fresh look or to match your decor updates. Combining different textures and patterns creates a layered, personalized aesthetic.
Measure your furniture carefully, including arm width and cushion sizes. For slipcovers, select styles that fit snugly and are easy to put on or remove. When reupholstering, remove old fabric, repair padding if needed, and sew or staple new fabric securely. Use a staple gun for quick reupholstery or hire a professional for complex pieces. Ensure seams are tight and edges smooth.
Coordinate fabric choices with your decor palette; add decorative pillows for extra flair. Use contrasting piping or trims for a custom touch. Incorporate textured or patterned fabrics for visual interest. Regularly update your covers or reupholstery to keep your furniture looking fresh and aligned with your evolving style.
Refreshing upholstery is a rewarding project that dramatically alters your space. It shows that with a little effort, you can achieve a high-end look at a fraction of the cost. Enjoy the confidence that comes with personalizing your furniture and creating a home that reflects your taste.
12. Incorporate Colorful Throw Pillows and Blankets for Accent
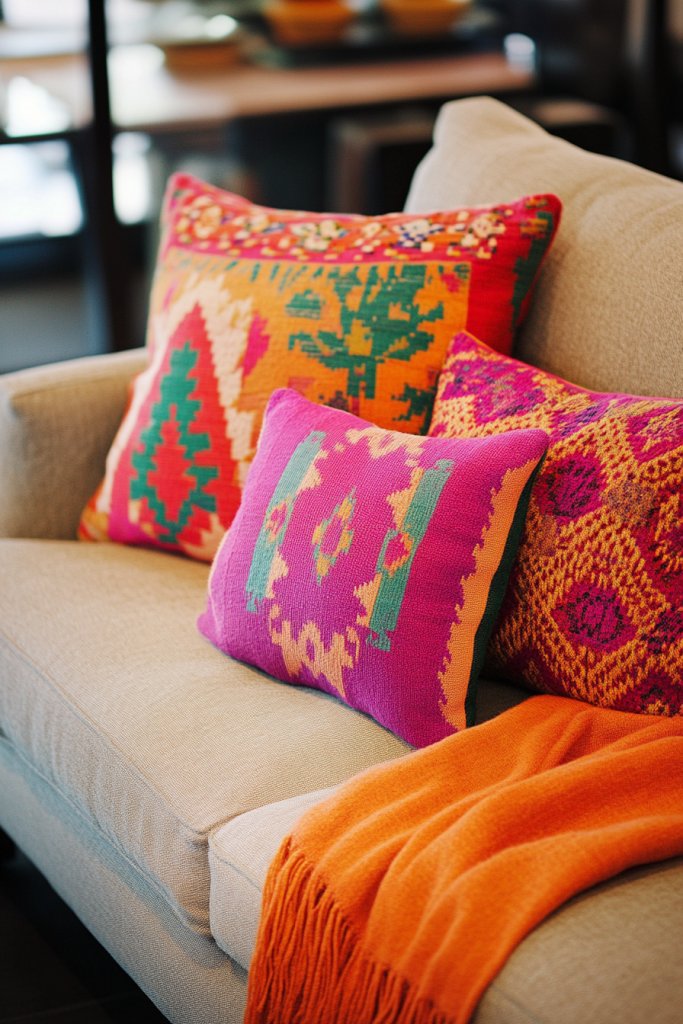
Ever looked around your sofa or bed and thought, wow, this needs a serious style upgrade? Sometimes, it’s the tiniest details that make the biggest difference. Throw pillows and blankets are like the wardrobe for your furniture—they frame your space and add personality. Yet, many overlook their power to totally transform a dull or outdated setup.
Recommended Products to replicate this idea
| # | Preview | Product | |
|---|---|---|---|
| 1 |

|
Topfinel Fall Burnt Orange Decorative Throw Pillows Covers 18x18 Inch Set of 4,Yellow Green Gradient... | Buy on Amazon |
| # | Preview | Product | |
|---|---|---|---|
| 1 |

|
GINAMUSE Multi-Color Green Cable Knitted Throw Blanket for Couch,50"X60" Boho Style Textured... | Buy on Amazon |
Imagine a cozy corner with a soft cream throw blanket draped over a textured, deep navy cushion. The pillows feature vibrant geometric patterns and plush textures that invite you to touch them. The mix of colors and textures creates a layered, inviting vibe that breathes new life into your living space. It’s like wrapping your furniture in a fashionable yet comfy hug.
Switch up your pillow covers seasonally—think bright florals for spring, warm earth tones for fall. Mix textures like velvet, silk, or chunky knits to add depth. For small spaces, go for smaller pillows to avoid clutter, while large sofas can handle oversized cushions. You can also coordinate colors with your wall tones or other decor for a cohesive look.
Start by selecting a handful of pillows and throws in colors or patterns that complement your existing decor. Use inserts that provide good support, avoiding overly flat or stiff options. Choose covers you can easily wash and replace, so your decor stays fresh. Layer different textures and sizes—this adds visual interest without cluttering the space. Place the pillows strategically—think corners or center—where they can serve both form and function.
Customize your textiles by adding embroidered initials or sewing on decorative patches. Use contrasting piping or trim to make pillows stand out more. You can even DIY your covers with fabric paint or tie-dye techniques for a one-of-a-kind look. Incorporate colors that reflect your personality or favorite hues for a personal touch.
Adding colorful pillows and blankets is a simple, cost-effective way to boost your room’s style instantly. It’s amazing how a few small tweaks can make your space feel fresh and inviting. Ready to give your furniture that extra pop of personality? Your cozy, stylish haven awaits!
13. Use Smart Storage Hacks to Maximize Space and Cleanliness
Clutter can turn even the most beautiful room into a chaotic mess. The secret to a calm, stylish home lies in smart storage solutions that hide the mess instead of highlighting it. Everyone wants a tidy space without sacrificing style, but few know the clever hacks to get there.
Recommended Products to replicate this idea
| # | Preview | Product | |
|---|---|---|---|
| 1 |

|
Budding Joy 90L Under Bed Storage Containers, Closet Organizers and Storage Bins, Foldable Underbed... | Buy on Amazon |
| # | Preview | Product | |
|---|---|---|---|
| 1 |

|
4-Tier Stackable Closet Organizers and Storage Basket, Foldable Closet Shelf Organizer System,... | Buy on Amazon |
Imagine sleek, hidden compartments inside a coffee table or a bed frame with built-in drawers. Picture floating shelves that hold baskets or decorative boxes, keeping essentials within reach but out of sight. The room remains open and airy, with everything in its place. These hidden storage spots turn everyday furniture into organizational heroes.
Use multi-purpose furniture like ottomans with storage or beds with underneath compartments. Incorporate decorative baskets and bins that match your decor for a cohesive look. For small spaces, vertical storage becomes essential—think tall, narrow cabinets or wall-mounted shelves. Seasonal storage bins can keep your off-season items neatly tucked away.
Start by decluttering and sorting your belongings. Choose furniture pieces with built-in storage or add under-bed containers. Use labels to keep everything organized and easy to find. Maximize vertical space with wall-mounted racks or pegboards for tools and accessories. Regularly declutter to prevent accumulation of unused items, keeping your space functional and beautiful.
Decorate storage units with paint or wallpaper to match your room’s theme. Use decorative baskets or colorful fabric liners inside bins for a personalized touch. Incorporate labels with stylish fonts for a polished look. Consider adding a small chalkboard or corkboard on storage units for quick notes or reminders.
Smart storage hacks are game-changers, making your home look effortlessly organized. They allow you to keep your space clean without sacrificing style. Once you see how clutter-free your home feels, you’ll wonder why you didn’t start sooner!
14. Incorporate Minimalist Decor to Achieve a Modern, Clean Aesthetic
Tired of cluttered, busy-looking rooms that give you anxiety? Minimalist decor is the antidote—clean lines, simple color palettes, and a focus on function. It’s about removing the unnecessary to highlight the beauty of the essentials. Plus, it makes cleaning a breeze.
Recommended Products to replicate this idea
| # | Preview | Product | |
|---|---|---|---|
| 1 |

|
Boswillon Floating Shelves Wall Mounted Set of 2, Modern Black Wall Shelves for Storage with Lip,... | Buy on Amazon |
| # | Preview | Product | |
|---|---|---|---|
| 1 |

|
DEZENE Striped Throw Pillow Covers 18x18 Set of 2 Beige Textured Boucle Chic Morden Boho Accent... | Buy on Amazon |
Visualize a space with crisp white walls, sleek furniture with slim profiles, and a few carefully chosen accessories. The room feels airy, open, and calm. Natural light floods the space, emphasizing the simplicity. Instead of overwhelming decor, each piece becomes a statement—every item has a purpose and space to breathe.
Opt for neutral tones like whites, grays, and beiges, then add pops of muted color through textiles or small accents. Limit your decor to a handful of high-quality pieces—think a sculptural vase or a modern clock. This style adapts well to small apartments, large open-plan living rooms, or even cozy bedrooms.
Start by decluttering and removing everything non-essential. Invest in furniture with clean shapes and avoid ornate details. Use storage solutions that hide away clutter, maintaining a sleek appearance. Keep surfaces clear—use trays or shallow bowls to contain small items. Limit decorative accessories, and stick to a consistent color scheme.
Introduce personal touches through meaningful objects—like a favorite book or a unique sculpture—kept intentionally minimal. Use textured textiles like linen throws or woven rugs to add warmth. Incorporate subtle patterns in cushions or curtains for visual interest without disrupting the minimalist vibe. Regularly review your decor to prevent accumulation of unnecessary items.
A minimalist space isn’t just trendy; it’s a lifestyle choice that promotes peace and clarity. It’s empowering to see how less truly is more. Start small, and let your space evolve naturally into a serene retreat.
15. Repaint or Replace Old Cabinets and Shelves for a Fresh Look
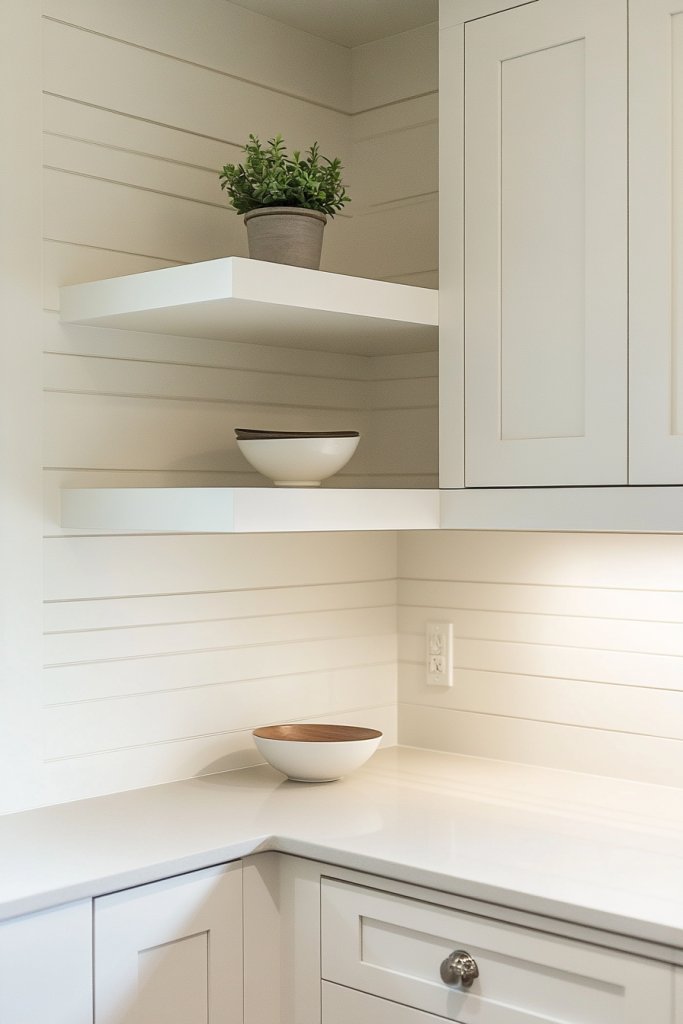
Old, worn-out cabinets can instantly drag down your room’s vibe, making everything look tired. A quick repaint or a modern shelf upgrade can revive your space without the cost of a full remodel. It’s a simple way to add a fresh, polished look and boost your confidence in DIY projects.
Recommended Products to replicate this idea
| # | Preview | Product | |
|---|---|---|---|
| 1 |

|
Nuvo Titanium Infusion Cabinet Makeover Kit - Easy DIY 7-Piece Set, Brilliant White, Long-Lasting... | Buy on Amazon |
| # | Preview | Product | |
|---|---|---|---|
| 1 |
|
BAYKA Floating Shelves for Wall, Wall Mounted Rustic Wood Shelves for Bathroom, Bedroom, Living... | Buy on Amazon |
Imagine sleek, matte black cabinets with new hardware, or bright white shelves with a smooth finish. The surfaces look brand new, and the updated hardware adds a contemporary touch. Clean lines and fresh paint make your kitchen or living area look vibrant and inviting. The transformation feels almost magical—like a new room, with minimal effort.
Choose bold colors for a statement or soft neutrals for a subtle upgrade. Floating shelves work well in small spaces or for showcasing functional items. Consider open shelving to display curated collections or decorative objects. Seasonal repainting can also refresh the vibe—go from warm tones in winter to cool shades in summer.
Start by removing doors or shelves and cleaning surfaces thoroughly. Sand rough edges if repainting, then apply a primer for better adhesion. Use high-quality paint designed for cabinetry or wood surfaces, and consider a semi-gloss or matte finish. Replace old hardware with modern pulls or handles for an instant upgrade. Reinstall the cabinets or shelves carefully, ensuring everything is level.
Add decorative touches like new knobs, decorative trim, or stickers to match your style. Use peel-and-stick wallpaper inside cabinets for a pop of pattern. Incorporate LED strip lighting under shelves for functional illumination. Regularly update accessories or small decor pieces to keep the look fresh and aligned with your evolving taste.
Refinishing cabinets or upgrading shelves proves that a small change can make a big difference. It’s empowering to see your own handiwork transform a space. Once completed, you’ll feel inspired to tackle more DIY projects—your home’s style is limited only by your imagination.
16. Personalize Spaces with DIY Decor Projects or Custom Details
Generic decor can make your home feel like everyone else’s—boring and uninspired. Personal touches turn a house into a home, reflecting your personality and style. DIY projects are a fun, budget-friendly way to add that unique flair and showcase your creativity.
Recommended Products to replicate this idea
| # | Preview | Product | |
|---|---|---|---|
| 1 |

|
Pagather 72 Colors Acrylic Paint Markers, Dual Tip with Fine Tip and Brush Tip Pens for Stone, Wood,... | Buy on Amazon |
| # | Preview | Product | |
|---|---|---|---|
| 1 |

|
14 Inch wood Letters for Wall Decor - Letter A for Hanging - Unique Blend of Rustic Vintage Western... | Buy on Amazon |
Picture a wall decorated with hand-painted signs featuring your favorite quotes or inside jokes. Think of a collection of handmade ceramic coasters or a painted canvas made from your own artwork. These personal details create a warm, inviting atmosphere that’s unmistakably yours. It’s a collection of stories and memories woven into your decor.
Use DIY projects to match your style—rustic, modern, boho, or eclectic. Incorporate personal photographs in handmade frames or create custom wall decals. Seasonal or themed projects can keep your decor fresh and relevant. Even small details like painted drawer knobs or customized planters can add personality.
Gather supplies like paints, brushes, stencils, and basic tools. Start with simple projects—such as painted jars or fabric-covered boxes—and gradually try more complex crafts. Follow tutorials online or experiment with your own designs. Dedicate a small space as your creative corner to work on projects regularly. Finish with sealing or protective coatings for durability.
Display your creations prominently, like hanging your painted signs or arranging handmade crafts in a dedicated nook. Mix DIY decor with store-bought pieces for a balanced look. Use your projects to tell your story—like a scrapbook wall or a gallery of personal memorabilia. Keep updating your DIY collection over time to reflect your evolving taste.
Personalized decor projects boost your confidence and make your spaces feel truly yours. They’re a reflection of your personality and effort. Every completed project is a win—so keep creating and customizing to craft a home that’s uniquely you.
Conclusion
With a mix of smart color choices, creative rearrangements, and DIY updates, these tips provide a comprehensive guide to transforming ugly decor into something beautiful. Don’t hesitate to try these ideas and make your space truly yours. Embrace the change and let your home reflect your unique style—your stunning makeover awaits!
Last update on 2026-02-13 / Affiliate links / Images from Amazon Product Advertising API