Imagine turning your favorite vinyl records into eye-catching wall art that instantly adds personality and charm to any space. Vinyl record wall art has surged in popularity because it combines nostalgia, creativity, and a touch of musical magic, making it a perfect choice for music lovers and interior decor enthusiasts alike.
In this article, you’ll find a diverse array of ideas to inspire your next decor project. From simple framed displays to intricate sculptures, each idea offers a unique way to showcase your love for music while elevating your home’s aesthetic. Get ready to transform your walls into a melodic masterpiece!
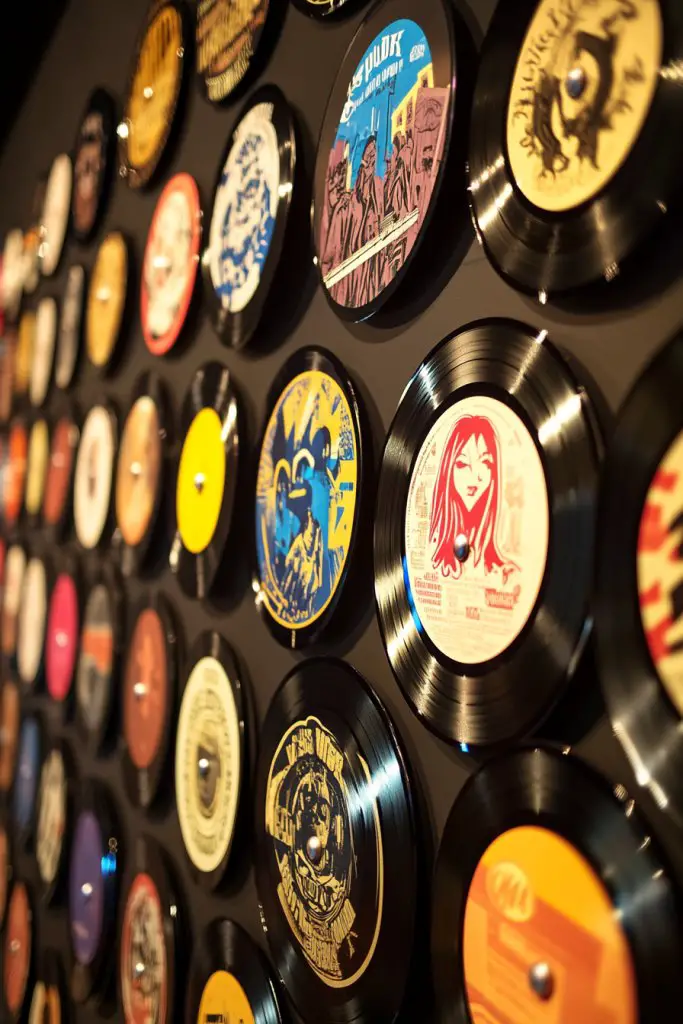
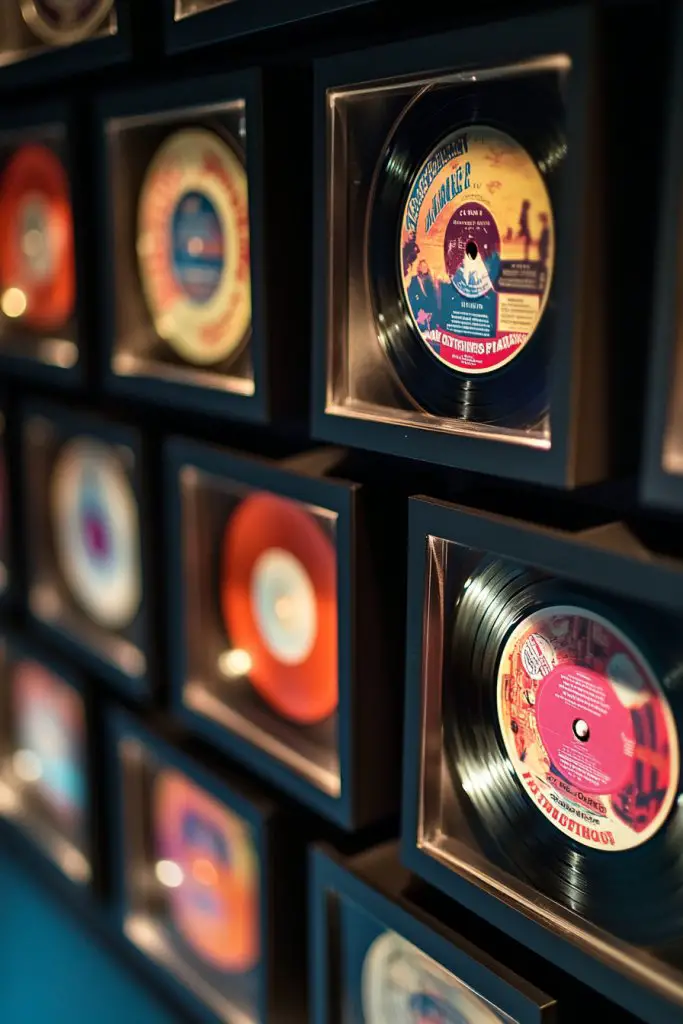
1. Vintage Record Frame Collage for a Retro Vibe
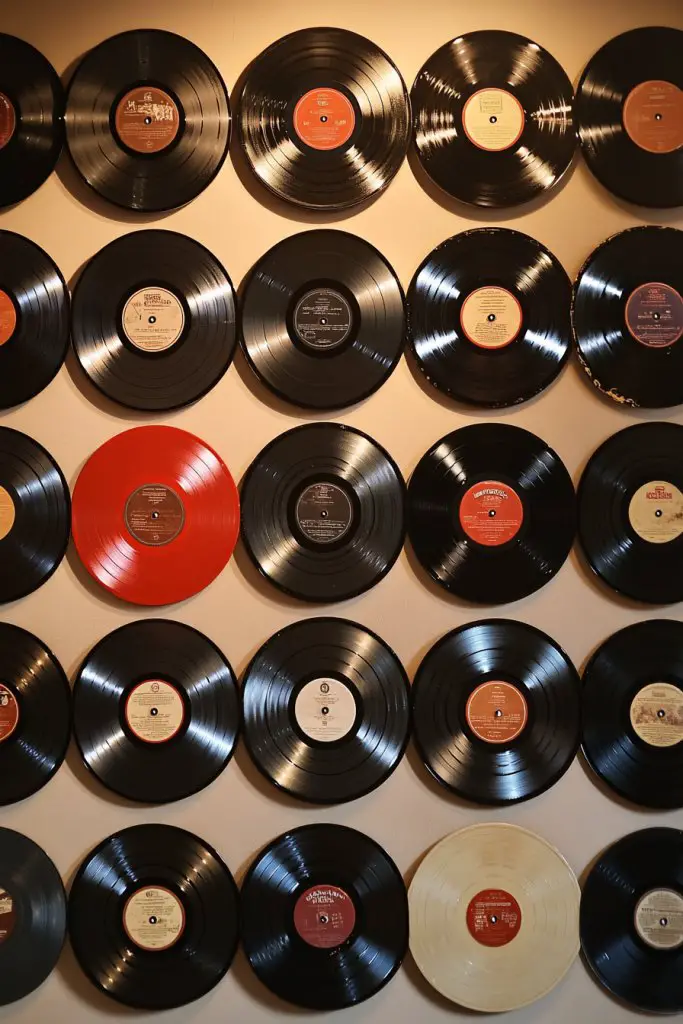
Ever feel like your wall is missing that nostalgic punch? Maybe you want to evoke the golden era of vinyl without cluttering your space with bulky furniture. Or perhaps you’re craving a stylish way to showcase your record collection that also doubles as eye-catching art. Whatever the reason, creating a vintage record frame collage can turn bland walls into a musical gallery.
Imagine a wall filled with an eclectic mix of records—some with bold, colorful album covers, others with classic black vinyl—framed in sleek, modern frames. The symmetrical arrangement balances nostalgia with contemporary style, giving your space a curated, yet relaxed vibe. The glossy surfaces and textured labels create visual interest from every angle, especially when light hits just right. It’s like a mini museum right in your living room.
You can customize the collage by choosing records that match your room’s color scheme or personal music taste. For a more eclectic look, mix and match different frame styles and sizes. Seasonal updates are easy—swap out records or change the arrangement for holidays or new collections. You could also arrange them in a grid, a spiral, or a freeform pattern, depending on your mood.
Start by gathering your favorite vintage records and matching frames. Measure your wall space to determine how many records fit comfortably without overcrowding. Use adhesive hooks or small nails to hang each frame securely. For a polished look, align the edges perfectly or stagger the frames for visual dynamism. Keep in mind, lighter frames are easier to hang and reposition. Use a level to ensure everything stays straight. Finish by adjusting the arrangement until it feels balanced.
Add personal touches like custom labels or handwritten notes on the back of each record. Incorporate small decorative elements like vintage concert tickets or photos in the frames with the records. You could also incorporate LED backlighting behind the collage for a subtle glow at night. For extra flair, paint the frames in colors that match your decor or add metallic accents for a luxe feel. This personalizes your collection and makes it uniquely yours.
This vintage record frame collage turns your wall into a tribute to music history while elevating your style. It’s a simple project that yields a high-impact visual statement. Plus, it’s a fun way to showcase your favorite albums and memories. Ready to give your walls a retro makeover? Your musical journey deserves a display that’s as stylish as your playlist!
2. Record Wall Clock with Artistic Centerpiece
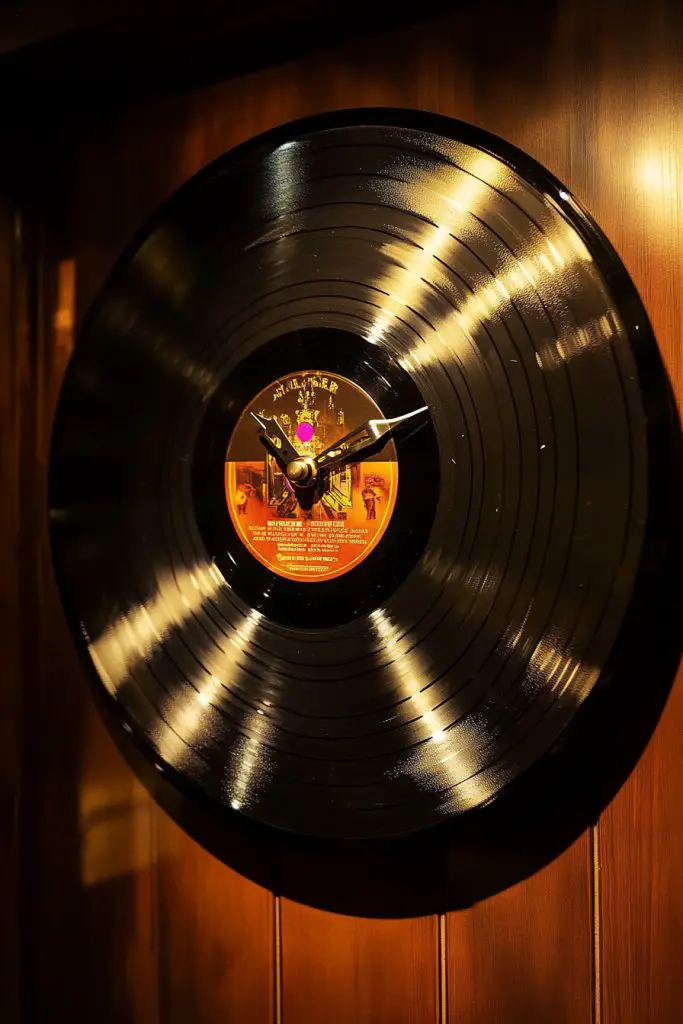
Tired of boring wall clocks that blend into the background? Want something functional yet artistic that also sparks conversation? Turning a vinyl record into a wall clock offers a perfect blend of music nostalgia and practical decor. It’s a clever way to make time-telling a focal point, without sacrificing style.
Picture a vintage record with bold, colorful labels at its center, transformed into a sleek wall clock. The clock hands glide smoothly over the iconic label, making it both a piece of art and a functional device. The minimalist mechanism keeps the focus on the record itself, creating a striking contrast between classic vinyl aesthetics and modern timekeeping. When illuminated, the clock casts subtle shadows, adding depth to your wall.
Choose records with eye-catching labels or interesting colors to match your decor style—be it retro, modern, or eclectic. For a more understated look, select black-and-white records and matte-finish clock hands. You can also add decorative elements like metallic accents or textured clock hands for a luxe touch. Consider different sizes—large records for statement pieces or smaller ones for subtle accents.
Start by selecting a favorite record with a visually appealing label. Obtain a clock kit with a silent quartz mechanism and compatible hands—these are widely available online. Drill a small hole in the center of the record, making sure not to crack the vinyl. Insert the clock mechanism, secure it tightly, and attach the hands following the instructions. Mount the finished clock on your wall using a sturdy hook or nail. Adjust the time and enjoy your artistic timepiece.
Personalize by adding a custom label or painting the edges of the record for a unique frame. Incorporate small decorative elements like metallic numerals or subtle LED lighting around the edges. You can also coordinate the clock color with your room’s color palette for a harmonious look. For a fun twist, use a record with a label from a favorite album or concert for extra personality.
A vinyl record wall clock showcases your love for music while serving a practical purpose. It’s an easy DIY project that elevates your decor and keeps you on time in style. Plus, it sparks nostalgia every time you glance at it. Ready to turn your favorite record into a functional piece of art? Time’s ticking, so get started!
3. Abstract Record Wall Art with Painted Accents
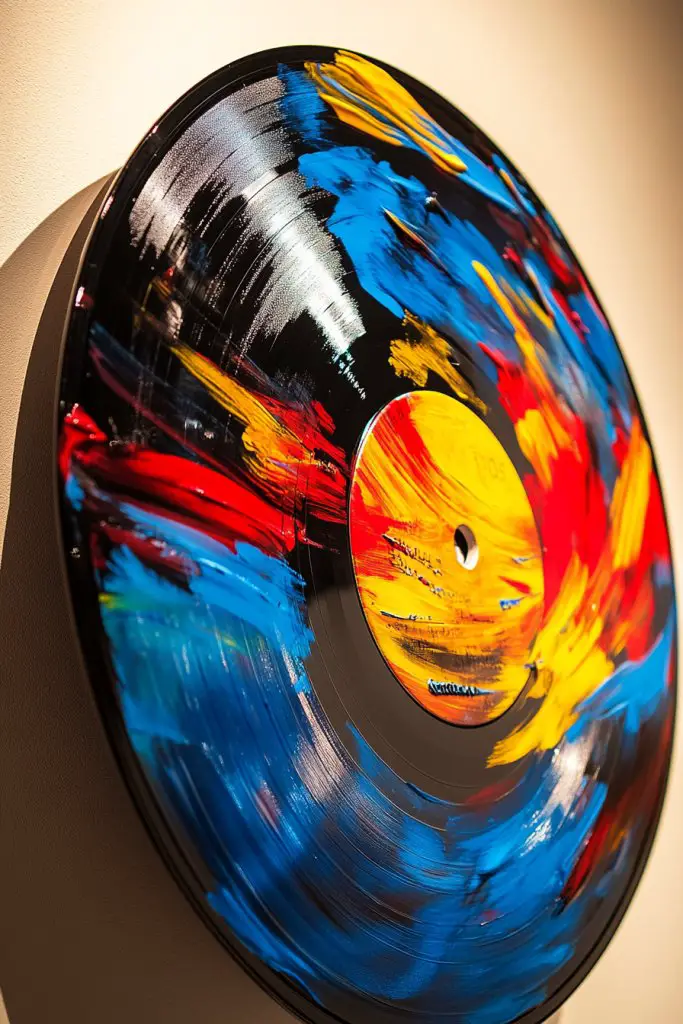
Feeling like your walls need a modern update? Want to add a splash of color and energy without overwhelming your space? Abstract record wall art offers a creative solution that combines music with contemporary art. It’s perfect for those who crave bold visuals and a personal touch in their decor.
Imagine a vinyl record transformed with vibrant, geometric shapes or sweeping brushstrokes directly onto the surface. Bright colors like electric blue, fiery red, or neon yellow pop against the dark vinyl background. The textured paint contrasts with the smooth surface of the record, creating a layered, dynamic look. When mounted, it looks like a piece of modern art with a musical twist, adding vibrancy to any room.
Experiment with different paint techniques—stencils, freehand brushwork, or splatters—to match your aesthetic. For a minimalist look, stick to monochrome tones and simple shapes. For a more energetic vibe, use multiple colors and asymmetrical designs. You can also combine several painted records into a gallery wall or keep it as a standalone statement piece. Seasonal themes can be incorporated by changing colors or motifs.
Start with clean, dry records. Use painter’s tape or stencils to outline your design, then fill in with acrylic or spray paints. Protect the surface with a clear matte or gloss finish to seal the paint and prevent chipping. For precision, use fine brushes for details and larger brushes for backgrounds. Let each layer dry thoroughly before adding new elements. Mount the painted record using a secure frame or adhesive, ensuring it stays flat against the wall.
Add metallic accents or glitter to give your abstract design extra sparkle. Incorporate your favorite colors or themes, such as musical notes or abstract representations of sound waves. For a more textured look, consider applying mixed media like fabric or textured paste before painting. Personalize further by signing your artwork or adding small embellishments that reflect your personality.
Abstract painted records infuse your space with bold artistic energy while honoring your love for music. They turn simple vinyl into unique, eye-catching focal points that showcase creativity. This project encourages experimentation and self-expression—no rules, just art. Ready to make your walls pop with color? Dive in and unleash your inner artist!
4. Record Wall Hanging with String Lights
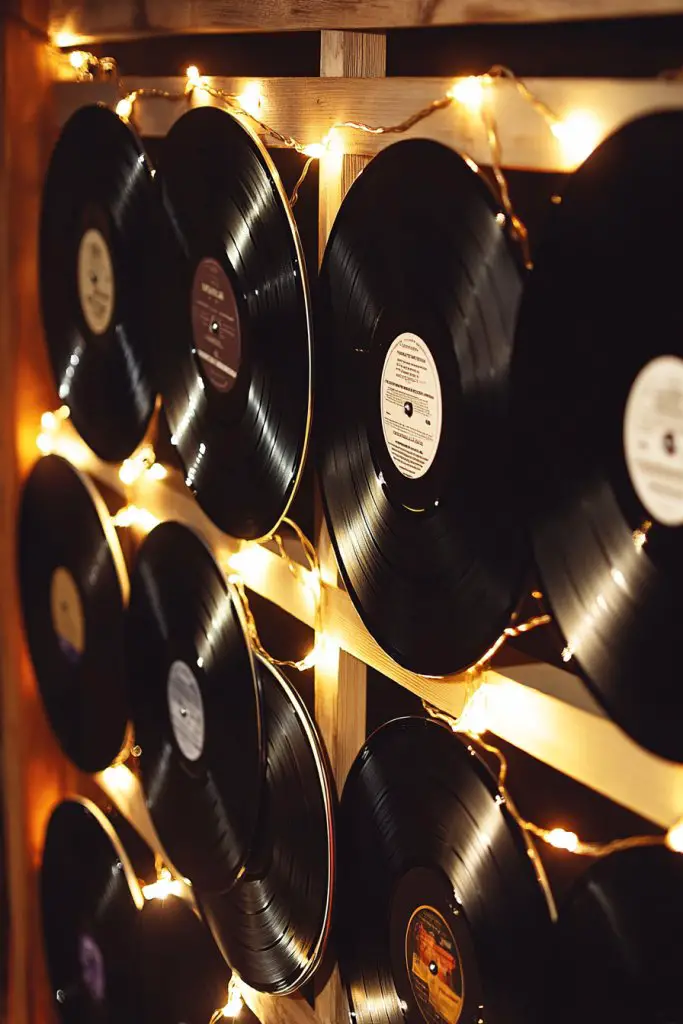
Want to create a cozy, inviting atmosphere that screams musical charm? Maybe your space feels a little flat and needs a warm, ambient glow. Combining vinyl records with string lights can instantly transform your wall into a magical focal point. Plus, it’s a simple, DIY way to add personality and warmth.
Picture records hung vertically or horizontally on a wooden or metal frame, softly illuminated by warm string lights. The gentle glow highlights the textured labels and glossy surfaces, creating a layered visual effect. The string lights weave through the records, casting flickering shadows that dance across the wall. It’s like having your own mini concert hall right in your living room, perfect for relaxing evenings.
Choose warm-toned fairy lights or Edison-style bulbs for a vintage vibe. Play with the arrangement—cluster records tightly for an intimate look or space them out for a more airy feel. You can also incorporate different sizes or shapes of records for visual interest. Seasonal variations include swapping out string lights with different colored bulbs or adding decorative elements like paper lanterns or fabric garlands.
Start by selecting a sturdy frame or creating a custom wooden backing. Attach the records securely with hooks, clips, or adhesive strips, ensuring they hang straight. Drape the string lights behind or around the records, securing the wires neatly along the frame or wall. Plug in and test the lighting for even coverage and desired warmth. Adjust the arrangement to get the perfect balance of light and music memorabilia. For safety, use LED lights that stay cool and are easy to install.
Incorporate decorative elements like small musical notes or miniature instruments attached to the frame. Use colored or vintage-style string lights for different moods—soft white for calm or multicolor for lively energy. Personalize by adding fabric or textured backdrops behind the records for added depth. You can also hang small decorative items like mini speakers or musical symbols for extra flair.
This wall hanging makes your space feel warm, welcoming, and uniquely yours. It’s a fantastic way to combine aesthetics with function, especially for music lovers. Plus, it’s super easy and budget-friendly—perfect for DIY enthusiasts. Ready to light up your walls with music and mood? Go ahead, get those string lights up and enjoy the glow!
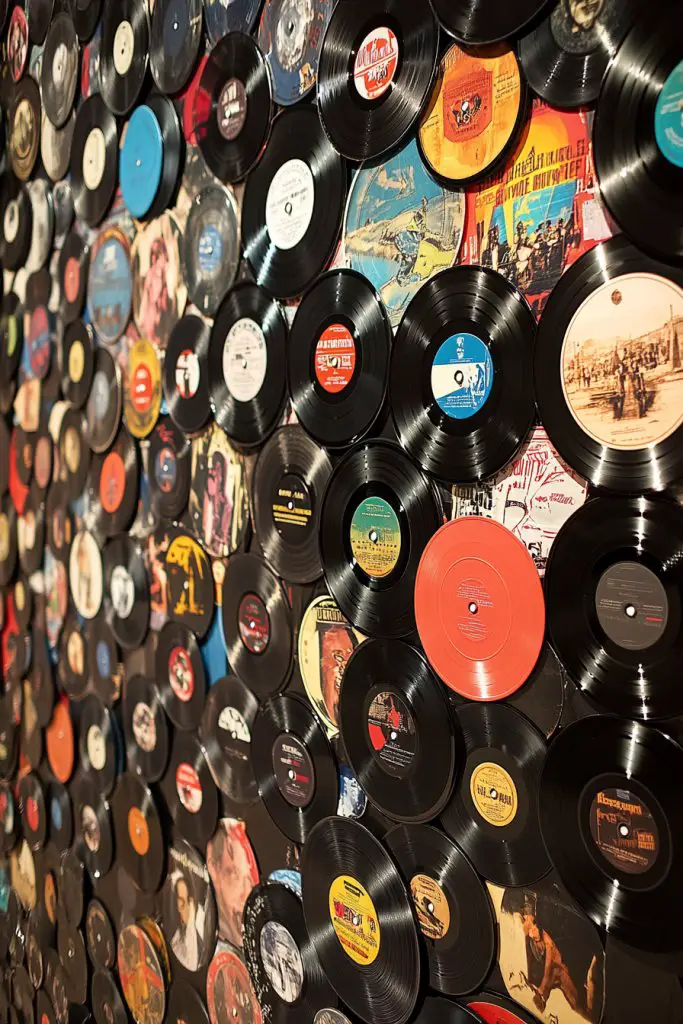
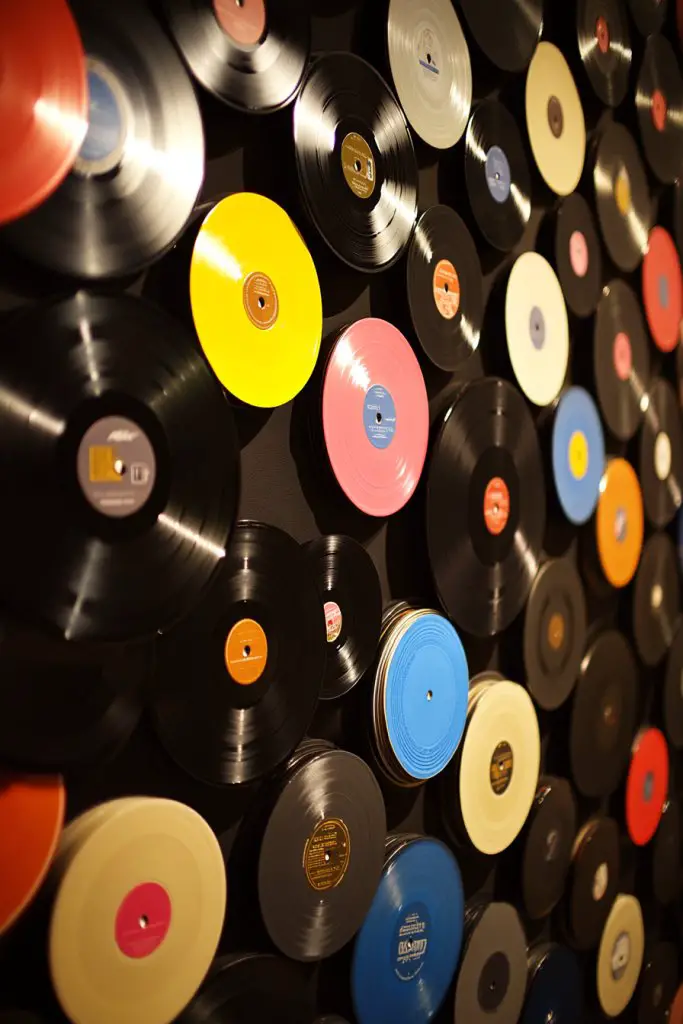
5. Customized Record Wall Mural for a Statement Wall
Looking to make a bold statement with your decor? Want a wall that’s more than just paint or wallpaper? A customized record wall mural can turn an ordinary space into a vibrant tribute to music history. It’s perfect for creating a focal point that captures attention and showcases your personality.
Visualize a large-scale collage of records spanning an entire wall, arranged in a dynamic pattern. Mix vintage album covers with plain black vinyls for contrast. The mural feels alive, with overlapping layers and varied sizes creating depth. When lit properly, it becomes a captivating backdrop for your daily life or entertaining guests. The colorful labels and iconic artwork draw the eye and spark conversations.
Arrange the records in a wave pattern, grid, or freeform layout for different visual effects. Incorporate different eras or genres to reflect your musical journey. You can also add decorative elements like LED strips or painted accents to enhance the mural’s vibrancy. For smaller spaces, focus on a cluster or a vertical strip; for larger walls, go big and bold.
Start by selecting a high-resolution image of your favorite records or album covers. Print or replicate them onto adhesive-backed paper or directly affix actual records for authenticity. Use a large backing board or wall-mounted grid system to keep everything aligned. Carefully arrange the records, starting from the center and working outward. Secure each piece with appropriate adhesive or mounting hardware. Finish by adding optional lighting or decorative borders.
Include personal touches like handwritten song lyrics or meaningful dates on some records. Layer in small decorative elements like vintage concert tickets or band stickers for extra personality. You can also paint or stencil additional motifs around the records—sound waves, musical notes, or abstract patterns. Personalization makes your mural truly one-of-a-kind.
A record mural turns your wall into a gallery that celebrates your musical taste and artistic flair. It’s a project that’s as rewarding as it is eye-catching, perfect for music fans and decor enthusiasts alike. With a little planning, you can create a stunning centerpiece that transforms your space and inspires everyone who enters. Ready to make a statement? Let your walls tell your story!
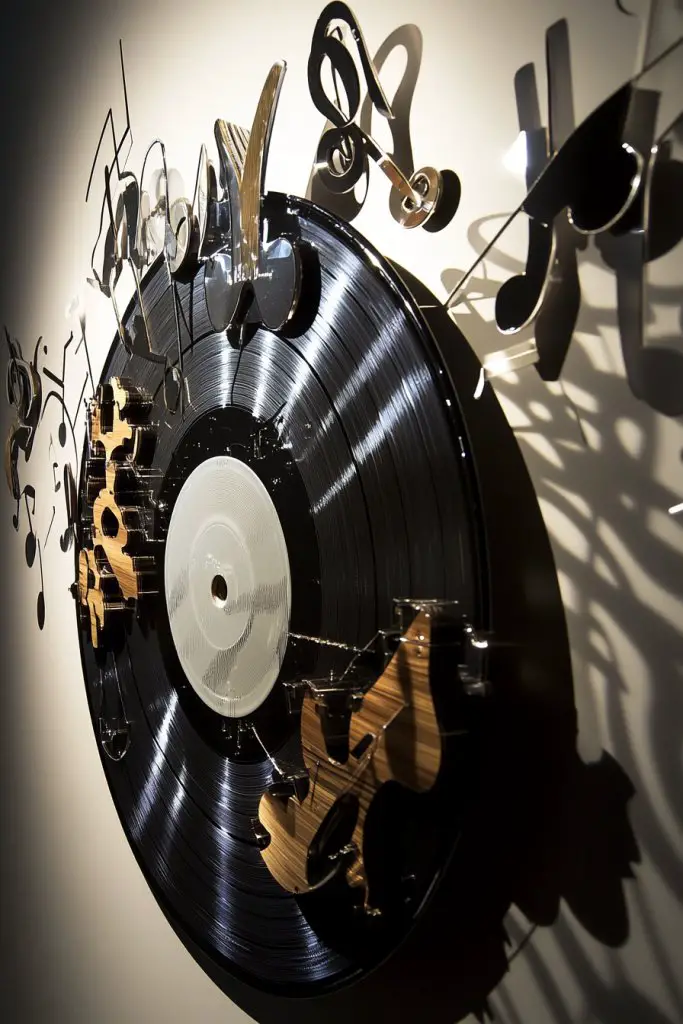
6. Record and Metal Cutout Combo Art

Want to give your walls a textured, layered look that’s full of character? Looking for a way to combine different materials for a more dynamic decor piece? A record paired with metal cutouts of musical symbols or instruments creates a striking visual contrast. It’s a modern take on musical memorabilia that adds depth and sophistication.
Visualize a vinyl record mounted on the wall, with sleek metal cutouts—like treble clefs, guitars, or musical notes—layered over or around it. The metallic sheen catches the light, creating a shimmering effect that contrasts beautifully with the matte finish of the vinyl. The combination adds a tactile dimension, inviting viewers to explore the textured layers. It’s like a piece of wearable art frozen in time.
Choose metal cutouts that match your preferred decor style—sleek and minimalist or bold and industrial. Position the cutouts in a way that complements the record’s design, perhaps framing it or creating a focal point. Incorporate different sizes and shapes for visual interest. For a seasonal or thematic update, swap out the cutouts or add new motifs.
Start by selecting a record with visual appeal. Cut or purchase metal shapes that represent your favorite music symbols, ensuring they are lightweight enough to mount securely. Use strong adhesive or small nails to attach the metal pieces to the wall, positioning them to create a balanced composition. For a cleaner look, use mounting brackets or spacers to add depth. Consider protective coatings on the metal for durability. Hang the record first, then add the cutouts for layered effect.
Personalize by customizing metal cutouts—engraving band names or song titles. Incorporate different finishes like matte, brushed, or polished metal for varied textures. Add small LED accent lights behind the cutouts or around the record for a subtle glow. You can also paint the metal for a pop of color or metallic contrast, matching your overall room palette.
This combo art stands out as a versatile, textured decor piece that celebrates music with a contemporary edge. It’s a creative way to mix materials and craft a personalized gallery wall. Plus, it’s an achievable DIY project that looks professional and polished. Ready to elevate your decor with layered textures and musical motifs? Go ahead and start layering!
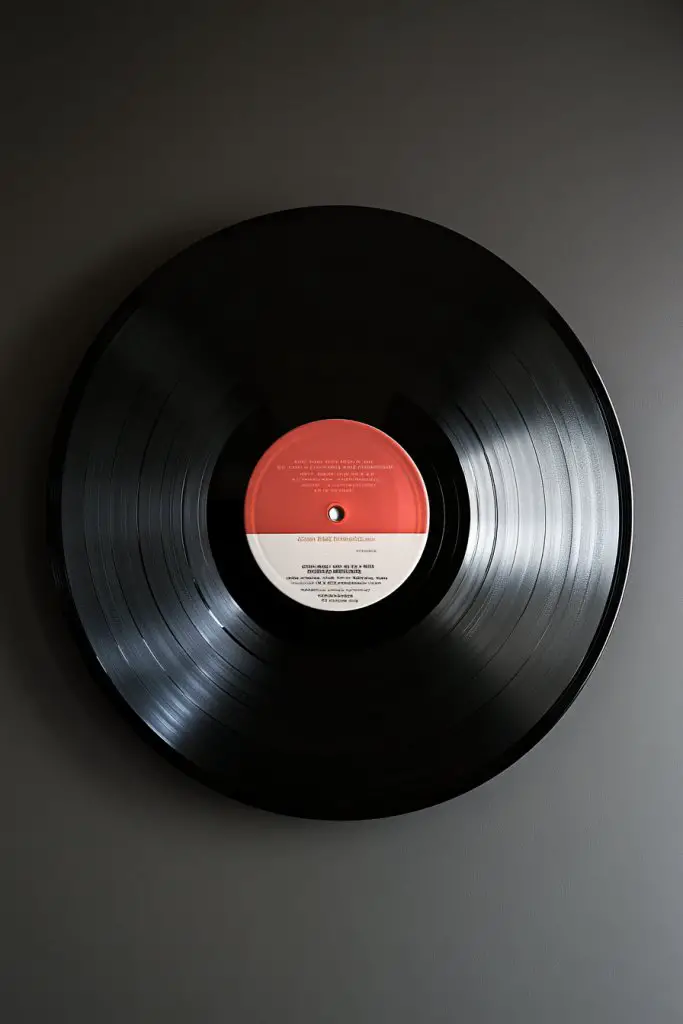
7. Minimalist Single Record Accent Piece
Sometimes less is more, especially when it comes to wall decor. Want a subtle yet impactful way to showcase your love of music without overwhelming your space? A single, carefully chosen record as an accent piece offers a minimalist solution that exudes style and sophistication. It’s perfect for small spaces or when you prefer a clean, uncluttered look.
Imagine a single record mounted in a simple frame or directly on the wall, with plenty of negative space around it. The focus is on the album cover or label, which can be a favorite artist or a vintage design. The matte or gloss finish of the vinyl creates a subtle sheen that catches the light, adding a touch of elegance. Its simplicity makes it a versatile piece that fits seamlessly into various decor styles.
Opt for a record with a striking label or cover art to serve as a focal point. Frame it in a sleek border for a gallery feel or mount it directly for a more raw look. Change the position or rotate it seasonally for variety. Pair it with other minimalist elements like monochrome artwork or architectural details for a cohesive aesthetic.
Select a record that resonates with you personally. Use a lightweight frame or mounting hardware designed for vinyl. If mounting directly, ensure you use appropriate anchors and screws to prevent damage. Position the record at eye level or slightly higher for maximum impact. Keep the surrounding wall free of clutter to maintain the minimalist effect. Adjust until the placement feels balanced and centered.
Customize the frame with a simple mat or border that complements your decor. Add a small plaque or engraved nameplate with a favorite quote or lyric. For a subtle touch, use a textured background behind the record, like a fabric or textured paper. Personal touches make this minimalist piece uniquely yours.
A single record accent creates a refined, understated vibe that elevates your space. It’s a perfect choice for those who love music but prefer a clean aesthetic. This simple yet meaningful decor piece can be easily swapped out to reflect different moods or collections. Ready to keep things sleek and stylish? Your minimalist wall awaits!
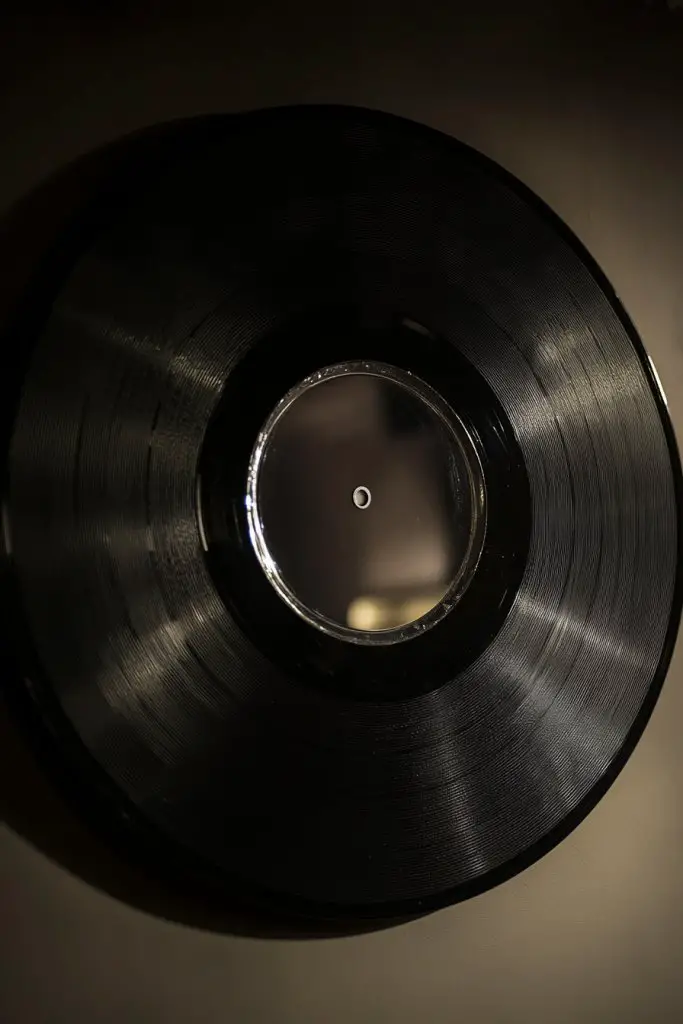
8. Record and Mirror Dual-Function Decor
Looking for decor that’s both functional and stylish? Want a mirror that doesn’t just reflect but also adds a touch of musical charm? Combining a vinyl record with a mirror creates a dual-purpose piece that brightens your space while showcasing your musical taste. It’s a clever way to save space and add personality.
Picture a vintage record mounted on your wall, with a mirror integrated into the center or attached to one side. The reflective surface amplifies light and makes your room feel larger, while the record adds a nostalgic or modern vibe. The contrast between the shiny mirror and the textured vinyl creates visual interest and depth. It’s a striking focal point that combines utility with art.
Choose records with bold labels or artwork to make the mirror pop. Opt for a round or oval mirror shape that complements the record’s size and style. Frame the mirror with a slim border or leave it frameless for a sleek look. You can also add decorative elements like LED strips around the mirror for extra glow.
Select a record with a sturdy label or surface. Use a mirror with a backing that allows for secure mounting—either adhesive or hardware. Carefully cut or drill into the center of the record to fit the mirror, ensuring not to crack the vinyl. Attach the mirror securely, then hang the entire piece on your wall using appropriate hooks or brackets. Position it at eye level for maximum impact.
Personalize by adding decorative framing around the mirror to match your decor, or keep it minimal for a modern look. Incorporate small LED backlights behind the mirror for a subtle glow. Use custom engravings or etchings on the vinyl or frame for a unique touch. This combination creates a functional art piece that’s also a conversation starter.
A record and mirror combo adds a playful yet elegant element to your decor. It’s perfect for music lovers who want style and practicality in one piece. Plus, it’s easy to update—just swap out records or change the mirror shape for a fresh look. Ready to reflect your love for music and style? Let’s go!
9. Record as a Backdrop for Musical Shelving
Ever wish your shelves could do more than hold books or trinkets? Want a backdrop that’s functional and adds a musical vibe? Using a vinyl record behind small shelves or holders creates a layered, textured display that’s both practical and stylish. It’s an easy way to add depth without cluttering your space.
Visualize a sleek shelf mounted in front of a large, vintage record. The record acts as a colorful or textured background—highlighting your favorite small items like jewelry, plants, or collectibles. The glossy surface of the vinyl contrasts with matte shelves, creating a dynamic visual. When illuminated, the record’s labels or artwork shine through, adding a pop of personality to your display.
Use records with bold album covers or labels to make the backdrop stand out. Position the shelves at different heights or angles for visual interest. Incorporate decorative ledges or brackets that complement the record’s style. For seasonal updates, switch out records or change the arrangement to reflect your mood or decor theme.
Select a sturdy record in good condition. Attach small brackets or floating shelves directly to the wall, making sure they align with the record’s edges. Secure the record with adhesive strips or hooks designed for vinyl, ensuring it stays flat and stable. Arrange your items on the shelves, adjusting height and spacing for balance. Consider using LED strip lights behind the record for a subtle glow. Regularly check the stability of the setup to prevent accidents.
Personalize by choosing records with special meaning—like a favorite band or album. Add decorative elements on the shelves that match the music theme. Incorporate small musical symbols or motifs in the shelf design itself. For a more layered look, add small framed photos or miniatures that complement the backdrop.
This layered approach creates a lively, personalized display that celebrates your musical taste. It’s simple yet impactful—perfect for music rooms or living areas. Plus, it’s adaptable to any space and easy to update with new records or items. Ready to add depth and personality to your shelves? Get started today!
10. 3D Record Wall Art with Layered Elements
Looking to add depth and dimension to your wall decor? Want something more than flat posters or canvases? 3D record wall art with layered elements creates a striking, textured display that captures attention and adds a sculptural feel. It’s perfect for adding a modern twist to your musical space.
Imagine a vinyl record mounted with raised or layered components like musical notes, instrument shapes, or sound wave patterns. These elements protrude from the wall, creating shadows and tactile interest. Combining different materials—metal, wood, or acrylic—enhances the layered effect. When lit from different angles, the shadows dance, making the piece come alive.
Use lightweight materials like foam or thin metal for easy mounting. Arrange layered components around or on top of the record to form a cohesive scene or abstract design. Incorporate multiple records at varying depths for a dynamic, multi-layered installation. Seasonal or thematic variations can include sound waves, lyrics, or band logos.
Start with a sturdy backing or wall-mounted grid. Attach the main record securely, then affix layered pieces using strong adhesive or mounting brackets. Use spacers or small risers to create varying depths for different elements. Align everything carefully to maintain a balanced composition. If using light, position LED strips or spotlights to enhance shadows and textures. Regularly check stability to prevent shifting or falling.
Personalize with your favorite band symbols, lyrics, or sound wave patterns. Add metallic or reflective accents for extra shine. Incorporate textured materials like fabric or textured paint to increase tactile appeal. Customize the arrangement to tell your musical story visually—mix abstract and realistic elements.
This layered, sculptural art elevates your decor and celebrates your musical passion. It’s a creative project that produces a high-impact visual centerpiece. Plus, it invites interaction—viewers can explore different layers and details. Ready to bring your wall to life in 3D? Let’s craft some layered magic!
11. Record with Artistic Vinyl Labels as Wall Decor
Want to highlight the unique designs of vintage vinyl labels? Looking for a simple, stylish way to add color and character to your walls? Focusing on artistic vinyl labels turns each record into a standalone piece of mini art. It’s a low-effort, high-impact decor idea that celebrates music’s visual side.
Imagine a wall filled with records, each showcasing a different label—some with bold logos, intricate designs, or vintage typography. Framed or mounted directly, these labels draw attention to their colorful and artistic details. The variety creates an eclectic, vibrant display that sparks curiosity and nostalgia. When grouped, they form a lively mosaic of musical history.
Arrange labels in a grid, random pattern, or themed collection based on genre or era. Use clear acrylic mounts or shadow boxes to frame each label for added sophistication. For a more uniform look, select labels with similar color schemes or styles. Seasonal updates might include swapping out labels or adding new discoveries.
Select records with visually appealing labels—labels with interesting graphics or vibrant colors work best. Mount them using small, discreet clips, adhesives, or shadow boxes for protection. Ensure labels are clean and dry before mounting. Consider grouping them by color or theme for visual harmony. Use lighting to enhance the colors and details of each label. Keep the display organized and accessible for easy updates.
Add small decorative tags or handwritten notes on the back of each label for extra personality. Incorporate labels from personal favorite albums or special editions. Use colored backgrounds or mats to make the labels pop even more. You could also create a timeline or story sequence with the labels for a curated look.
Highlighting vinyl labels elevates your collection into a colorful gallery. It’s an easy way to add visual interest without cluttering your space. Plus, it’s a perfect project for collectors and music enthusiasts alike. Ready to showcase the art behind the music? Start mounting those labels!
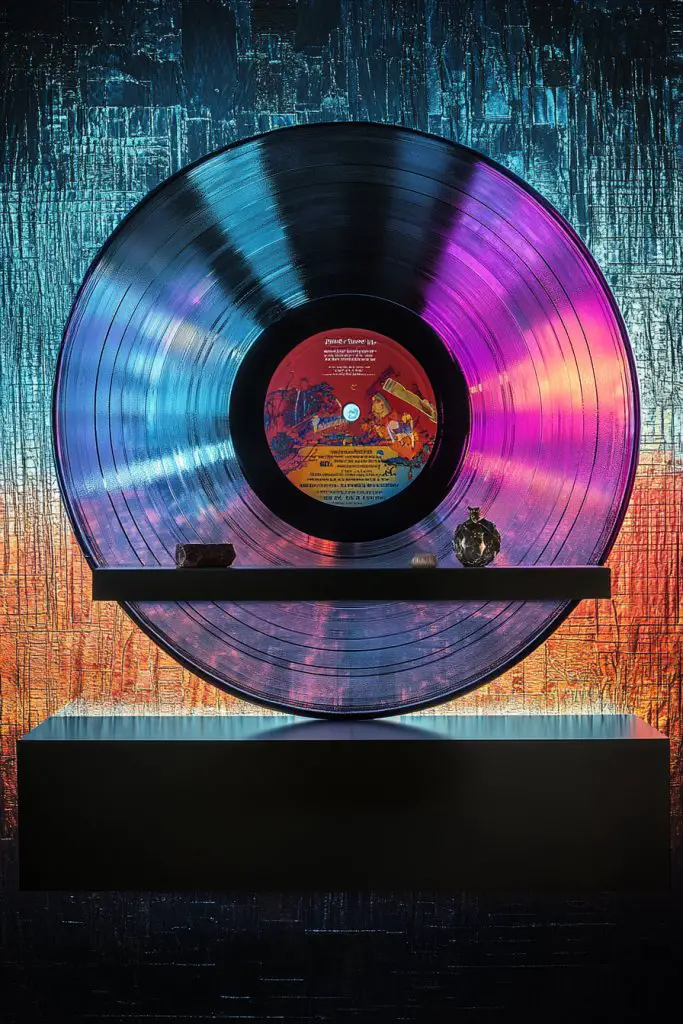
12. Record and LED Light Frame for a Glowing Effect
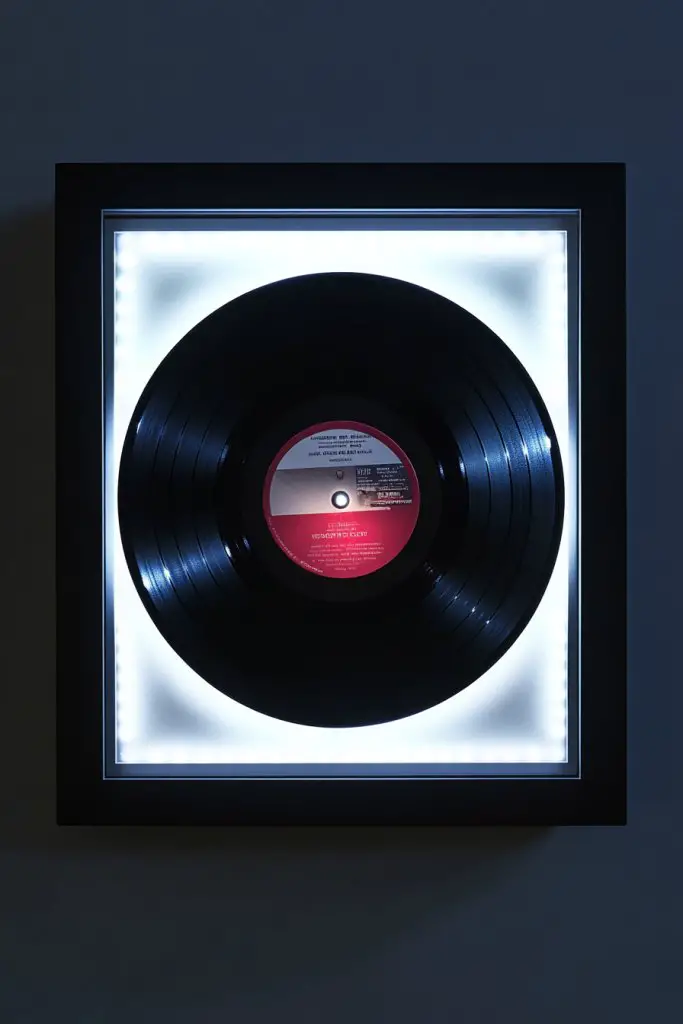
Want to make your musical decor truly stand out? Looking for a way to add a vibrant, glowing element to your walls? An LED-lit record frame combines the warmth of light with the charm of vinyl, creating an eye-catching centerpiece. It’s perfect for adding ambiance and a modern touch.
Imagine a vinyl record encased in a sleek frame with hidden LED strips behind or around it. When turned on, the LED glow softly illuminates the record, highlighting its labels and surface textures. The light subtly changes the room’s mood, casting gentle shadows and emphasizing the record’s shape. The overall effect is both artistic and functional, perfect for cozy nights or lively gatherings.
Choose LED strip colors to match your decor—warm white, cool white, or even color-changing options. Frame the record with a minimalist border or a decorative frame that complements your style. For a more dramatic look, position the LEDs to create a halo effect around the record. Consider mounting multiple records with backlit frames for a gallery wall.
Select a record with a strong visual label or artwork. Attach LED strips behind the frame or along the edges, securing the wires neatly for a clean look. Connect the LEDs to a power source and test the lighting effect before mounting. Use adhesive or mounting brackets to fix the frame securely to the wall. Adjust the brightness and color settings to achieve your desired ambiance.
Personalize by choosing LED colors that match your mood or theme—festive reds, calming blues, or vibrant multicolor. Add dimmer switches or remote controls for adjustable lighting. Incorporate decorative elements like metallic or painted accents on the frame. Use the lighting to highlight specific records or create dynamic displays for different occasions.
A glowing record frame elevates your decor with minimal effort and maximum impact. It’s a stylish way to combine lighting and music into a cohesive statement. Plus, it’s a versatile project that can be customized endlessly. Ready to light up your walls and mood? Make it happen!
13. Record as a Canvas for Mixed Media Art
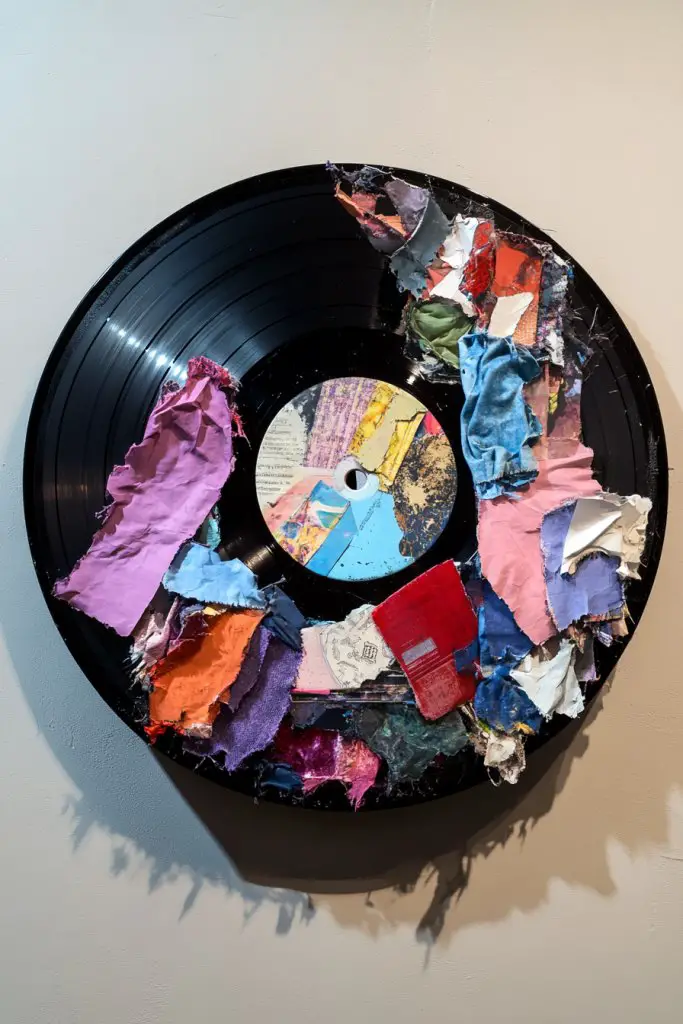
Craving a unique, textured art piece that combines your love for music and creativity? Want to turn a vinyl record into a mixed media masterpiece? Using records as canvases opens up endless possibilities for artistic expression. It’s the perfect blend of craft and passion, ready to elevate your decor.
Imagine a record covered in collage, paint, fabric, or textured materials—creating layers and depth. You might add torn paper, fabric swatches, or even small sculptural elements directly onto the surface. The result is a vibrant, tactile artwork that tells a story or evokes emotion. When hung, it becomes a captivating focal point that invites viewers to explore every detail.
Use bold colors, abstract designs, or thematic collages that reflect your personality. Mix different media—acrylics, pastels, fabric, or even small objects embedded into the surface. Keep it minimalist with subtle textures or go all out with chaotic layers. You can also combine multiple records into a larger installation for a gallery effect.
Start by cleaning and priming the record surface. Use glue, gel mediums, or adhesives suitable for mixed media to attach your elements. Layer paints, papers, and textures carefully, allowing each layer to dry before adding the next. Seal the entire piece with a protective varnish or resin. Mount it securely with brackets or hooks, ensuring it stays flat and intact. This process allows for a high degree of customization and artistic freedom.
Add personal touches like handwritten lyrics, small photos, or meaningful symbols. Incorporate metallic or glitter accents for extra visual interest. Use textured paints or 3D elements to add physical depth. This approach creates a one-of-a-kind artwork that’s loaded with personal significance.
Transforming records into mixed media art celebrates your creativity and musical taste simultaneously. It’s a bold decor statement that reflects your personality. Plus, it’s a rewarding project that results in a stunning, tactile piece of art. Ready to craft your layered masterpiece? Dive in and make it yours!
14. Record and Fabric Tapestry Hybrid Wall Hanging
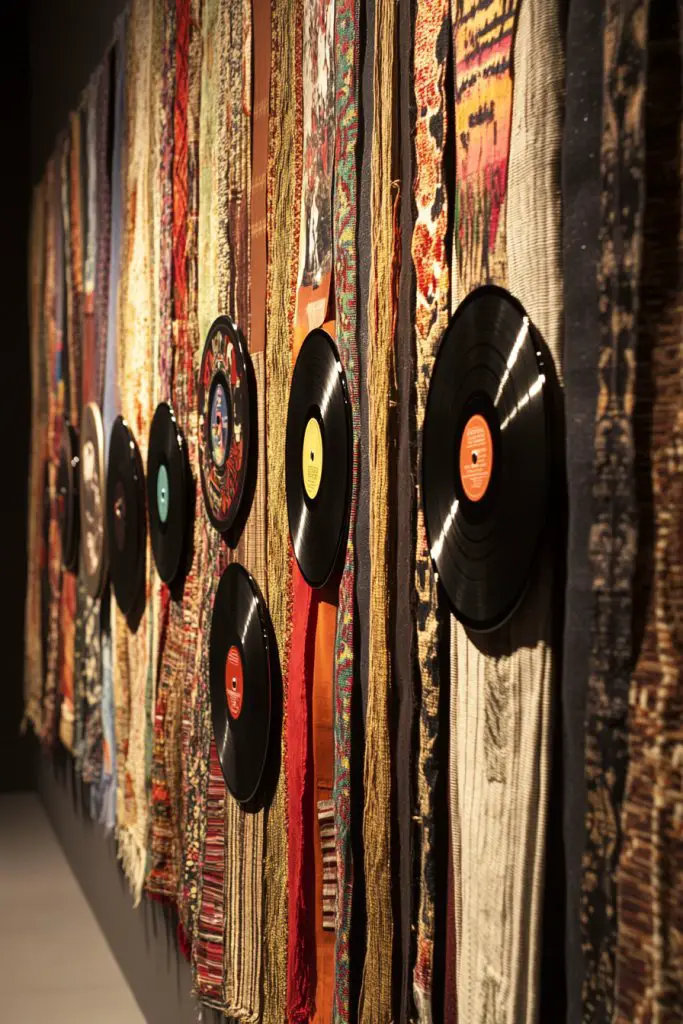
Want to add warmth and texture to your walls while showcasing your musical passions? Looking for a cozy, boho-inspired decor idea? Combining records with fabric elements creates a tapestry-like wall hanging that’s both artistic and inviting. It’s a perfect blend of music and textile design.
Imagine records hung as focal points, interwoven with woven textiles, scarves, or fabric strips. The tactile fabrics contrast beautifully with the glossy vinyl, adding softness and depth. Incorporate musical-themed textiles or patterns that echo your favorite genres. When illuminated gently, the fabric and vinyl create a layered, textured visual that feels warm and personal.
Use colorful woven textiles, macramé, or fabric strips for a layered look. Mix and match different textures, patterns, or colors to suit your decor style. For a boho vibe, include tassels or fringes; for a modern look, keep fabrics sleek and monochrome. You can also incorporate additional elements like small musical instruments or decorative beads.
Select records with appealing labels or covers. Attach fabric elements using strong, clear-drying adhesive, or sew them directly onto textile backings. Mount the records in frames or directly on the wall, arranging the fabric around or behind them for a tapestry effect. Use hooks or nails to secure everything firmly. Arrange the fabric in a flowing or geometric pattern, depending on your taste. Regularly check stability and adjust as needed.
Personalize by choosing textiles that reflect your personality or cultural heritage. Add decorative trims, embroidery, or embellishments to the fabric for extra flair. Incorporate your favorite colors or patterns to match your space. You can also add small fabric pockets or pouches for storage or display.
This hybrid wall hanging blends music with textiles, creating a cozy, artistic space that’s uniquely yours. It’s a simple project with a big visual impact, perfect for boho or eclectic decor lovers. Plus, it’s easy to customize and update as your tastes evolve. Ready to craft a warm, musical tapestry? Let’s get weaving!
15. Vintage Record Display with Artistic Frame Mounts
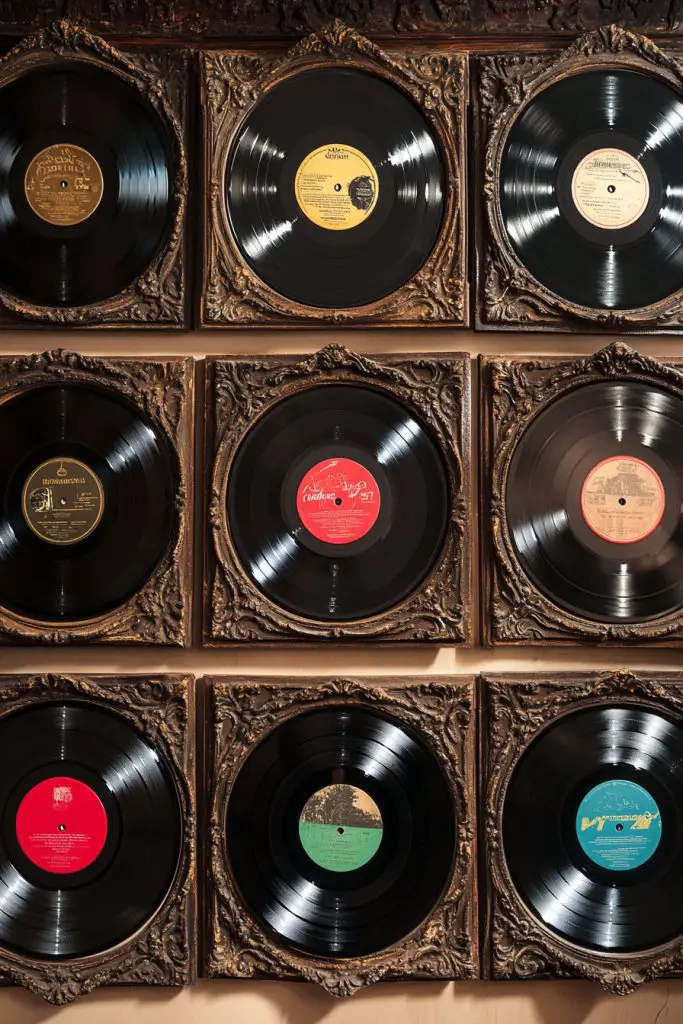
Looking for a way to showcase your vintage vinyl collection with style? Want to turn your records into a curated gallery that highlights their age and character? Vintage record displays with artistic frame mounts elevate your collection into a sophisticated, nostalgic decor statement. It’s perfect for collectors and music enthusiasts alike.
Visualize records mounted in ornate or rustic frames that emphasize their vintage charm. The frames can be antique-style or distressed for a shabby chic look, highlighting the history behind each album. Arranged in a gallery wall, these framed records create a visual journey through musical eras. The aged vinyl, with its unique labels and wear, adds authenticity and depth.
Mix different frame styles—ornate, minimalist, or distressed—to reflect your personal taste. Group records by era, genre, or artist for a curated effect. Incorporate labels or album cover art in the frames for visual variety. Seasonal updates can include swapping out records or changing the framing style for a fresh look.
Choose vintage records with intact labels and minimal damage. Select frames that complement the record’s character—wooden, metal, or ornate. Use appropriate mounting hardware to secure each record in the frame without damaging the vinyl. Hang the framed records at eye level, ensuring even spacing. For a cohesive look, align the frames carefully and keep the arrangement symmetrical or intentionally asymmetrical for artistic flair.
Add engraved plaques or decorative tags with song lyrics or personal notes. Use aged or distressed frames for extra vintage appeal. Incorporate small decorative elements like vintage concert tickets or memorabilia to enhance the theme. Personal touches make your display more meaningful and nostalgic.
A vintage record display with artistic framing transforms your collection into an elegant gallery. It celebrates the history and beauty of vinyl while elevating your decor style. Perfect for a music room, hallway, or living space, it’s a timeless way to honor your musical tastes. Ready to showcase your vintage treasures with style? Get framing!
16. Record with Artistic Cutouts and Silhouettes
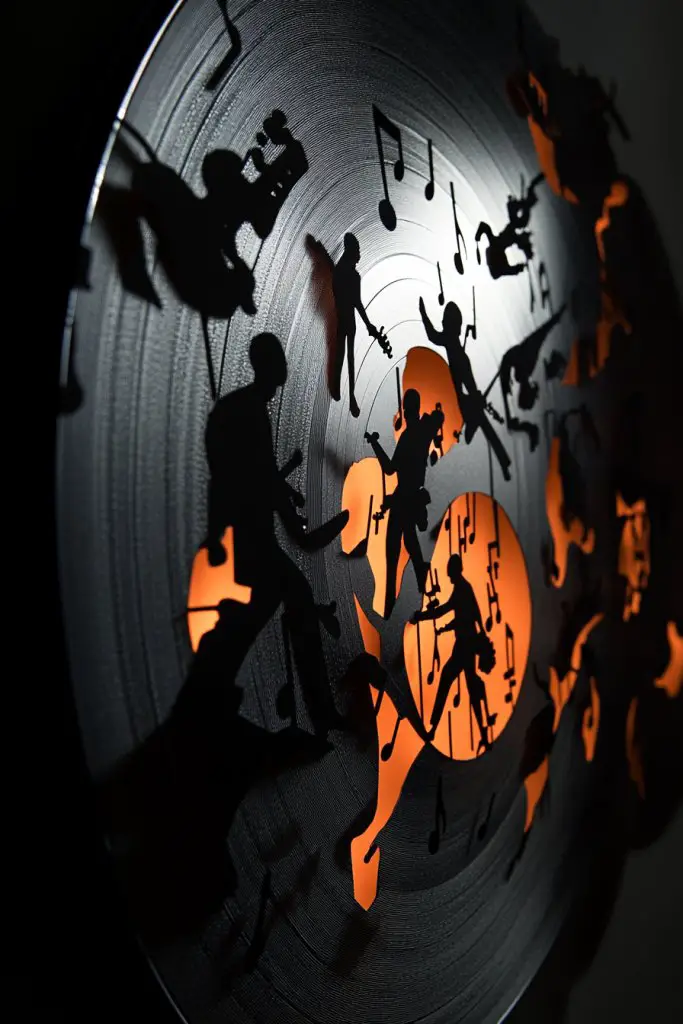
Want to create a minimalist yet impactful statement on your wall? Looking for a way to add subtle musical motifs without overwhelming your space? Artistic cutouts and silhouettes from records offer a sleek, modern approach to wall decor. It’s a creative way to celebrate music in a refined, understated manner.
Picture a record with cutouts of musical instruments, notes, or silhouettes of musicians, all carefully crafted from the vinyl. These cutouts can be integrated directly onto the surface or layered as separate pieces. The negative space creates a striking visual, emphasizing the shapes and themes. When backlit or illuminated, the silhouettes cast shadows, adding depth and intrigue.
Use precise laser-cut templates for intricate designs or simple hand-cut shapes for bold silhouettes. Arrange multiple cutouts on a single record or spread them across several for a thematic display. Keep the shapes monochrome for a sleek look or paint them in bright colors for a playful vibe. Incorporate musical symbols, lyrics, or abstract patterns.
Start by selecting a sturdy record with a smooth surface. Use a craft knife or laser cutter to create your designs, ensuring safety and precision. Attach the cutouts to the record using strong adhesive or mounting hardware. Consider mounting the record flat against the wall or creating a layered, three-dimensional effect with spacers. Illuminate the silhouettes with directional lighting or backlighting for added drama.
Personalize with custom shapes that reflect your favorite music styles or bands. Add metallic or contrasting colors to the cutouts to make them pop. Incorporate small LED spotlights to highlight the shapes. You might also engrave song lyrics or band names onto the vinyl for a personalized touch.
Artistic cutouts turn simple records into sleek, symbolic decor. They’re perfect for modern, minimalist spaces that want to hint at musical passions subtly. Plus, they’re a fun DIY project that results in a striking, personalized wall. Ready to silhouette your musical dreams? Start cutting and crafting!
17. Record as a Base for DIY 3D Musical Art
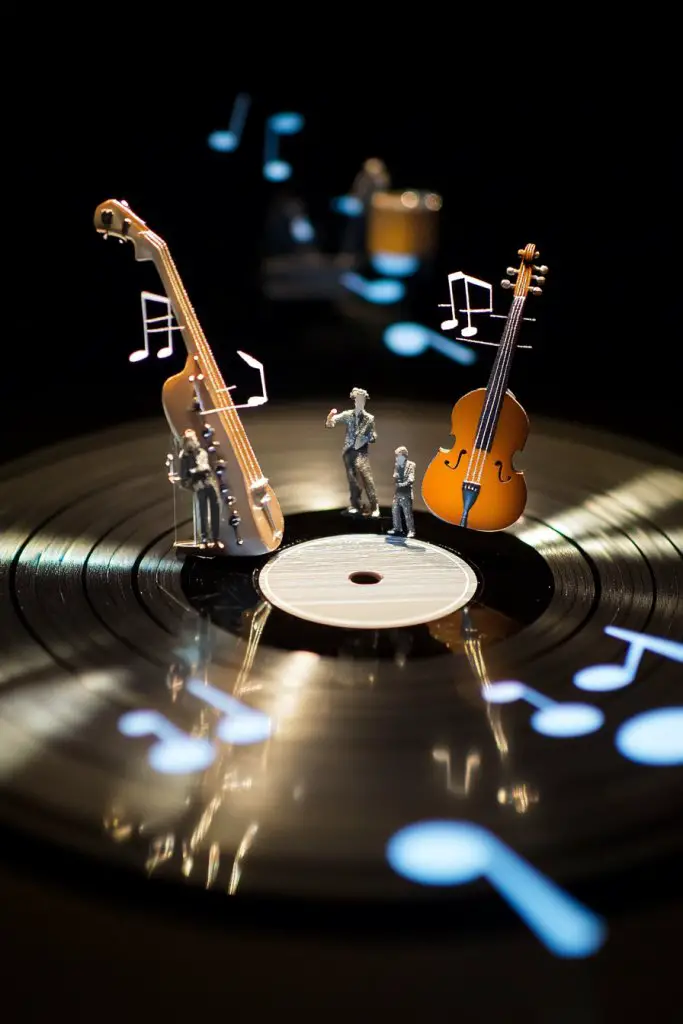
Looking to create playful, textured art that celebrates music? Want a project that’s fun, creative, and a little bit quirky? Using a vinyl record as a base for DIY 3D musical art allows you to craft a lively, tactile display. It’s a fantastic way to add personality and dimension to your wall.
Visualize small decorative elements—miniature instruments, musical notes, sound waves—attached to a record to form a lively scene or abstract design. These elements pop out from the surface, creating a layered, playful effect. The vinyl acts as a canvas that holds your creative additions, turning a simple record into a three-dimensional showcase. When viewed from different angles, the depth and shadows add visual interest.
Use lightweight materials like foam, polymer clay, or thin metal for your decorative elements. Arrange them in a pattern, scene, or freeform design, depending on your style. Incorporate different sizes and shapes for variety. You can also add small LED lights behind certain elements for a glow effect. Change the theme—celebrity portraits, sound waves, or abstract patterns—to suit your taste.
Start with a clean, dry record. Attach miniature elements using hot glue or strong adhesive, ensuring they are securely fixed. For a more dynamic look, use spacers or small brackets to elevate some elements. Make sure the entire piece remains stable and flat against the wall. Incorporate LED lighting behind or around the assembly to create depth and highlight details. Hang using sturdy hooks or brackets, ensuring even weight distribution.
Customize by painting or decorating the miniature elements. Incorporate personal memorabilia, tiny photos, or meaningful symbols. Use metallic paints or glitter for extra sparkle. Add a clear protective coating to preserve your work. This project is highly customizable, letting your creativity run wild.
Transforming a record into a playful, 3D musical art piece makes your decor lively and unique. It’s a rewarding DIY that results in a fun, conversation-starting display. Plus, it’s flexible—update or expand it anytime to keep your wall fresh. Ready to craft your musical playground? Let’s get started!
18. Collection of Miniature Records in Shadow Boxes
Want to showcase your favorite mini records in a classy, organized way? Looking for a display that’s both sophisticated and nostalgic? Shadow boxes filled with miniature vinyl records create a vintage-inspired gallery wall that’s easy to update and maintain. It’s perfect for collectors and music lovers who want a curated look.
Envision a series of shadow boxes, each housing a tiny record with its label and cover art visible through glass. The depth of the boxes adds a dimensional element, making each piece stand out. You can arrange them in a grid or staggered pattern for visual interest. When lit with soft lighting, the miniature records glow, emphasizing their details and creating a gallery-like ambiance.
Use different sized shadow boxes to create a dynamic layout. Incorporate labels, tags, or handwritten notes inside each box for added personality. Mix in other memorabilia like concert tickets or band stickers for a layered look. Seasonal themes can be achieved by swapping or rearranging the boxes. For a sleek modern vibe, use black frames; for vintage charm, opt for distressed or ornate frames.
Select miniature records in good condition, preferably with interesting labels or cover art. Mount each record securely inside the shadow box using appropriate adhesives or mounting hardware. Arrange the boxes on your wall with even spacing, using a level for precision. Secure each box with sturdy hooks or mounting brackets, ensuring they stay flat and aligned. Optional: add small LED spotlights inside or around the boxes for a subtle glow. Keep the display organized and easy to update.
Personalize by including handwritten lyrics or personal notes inside the shadow boxes. Use decorative backing papers or fabrics to enhance the aesthetic. Incorporate small memorabilia that relate to each record—like ticket stubs or photos. You can also paint or decorate the frames for extra flair. The goal is a curated, meaningful display that reflects your musical journey.
A collection of miniature records in shadow boxes offers a timeless, elegant way to celebrate your favorites. It’s a versatile display that can grow over time and adapt to your evolving collection. Plus, it’s a conversation starter for guests and a beautiful tribute to music’s history. Ready to create your own mini gallery? Let’s begin!
19. Artistic Record Installation with Alternating Colors and Textures
Want to turn your wall into a vibrant, dynamic piece of art? Looking for a way to combine colors, textures, and finishes for maximum visual impact? An artistic record installation with alternating hues and textures elevates your decor to a whole new level. It’s perfect for creating a lively, energetic focal point.
Picture a carefully planned layout of records, each with different colors—matte black, glossy brights, textured finishes, or painted accents. By alternating these elements, you create rhythm and movement across the wall. The textures catch light differently, adding depth and intrigue. The overall effect is a vibrant mosaic that embodies sound, color, and energy, transforming your space into a visual symphony.
Arrange records in a planned pattern—zigzag, radial, or checkerboard—for a bold statement. Incorporate different textures like matte, gloss, or embossed finishes to add variety. Use colored or painted edges to enhance the visual flow. Seasonal or thematic updates can include changing color schemes or adding metallic or glitter accents to the records.
Select records with diverse finishes and colors. Plan your layout on paper or digitally before mounting. Use spacers or risers to add depth and layering effects. Attach each record securely with strong adhesive or mounting hardware, ensuring a flat, even surface. Play with orientation—vertical, horizontal, or diagonal—for artistic flair. Light the installation with directional LEDs or spotlights to emphasize textures and colors.
Add metallic or reflective accents to some records for extra shine. Incorporate your favorite colors or themes—sound waves, abstract art, or musical symbols—through paint or decals. Personalize by including small plaques, engraved names, or lyrics. The goal is a lively, personalized display that energizes your space.
An alternating color and texture wall installation turns your space into a vibrant art gallery celebrating music and design. It’s an ambitious, creative project that yields a stunning visual impact. Plus, it showcases your bold style and artistic flair. Ready to craft a colorful, textured wall? Let’s go!
Conclusion
With a variety of vinyl record wall art ideas at your fingertips, you can easily find the perfect style to match your personality and space. Whether you prefer minimalist arrangements or bold, artistic installations, these ideas are sure to spark your creativity. Don’t hesitate to try out multiple approaches and make your walls a tribute to your musical passions—your dream decor is just an artful turn away!