Imagine transforming your cluttered workbench into an organized haven that boosts productivity and sparks creativity. Workbench shelving ideas have gained popularity because they turn messy spaces into efficient work areas, making tools and supplies easily accessible and visually appealing.
In this article, you’ll discover a variety of innovative shelving ideas that cater to different styles and needs. Whether you prefer simple solutions or more elaborate setups, these ideas will inspire you to customize your workspace for maximum functionality and style, all while keeping everything neat and within reach.
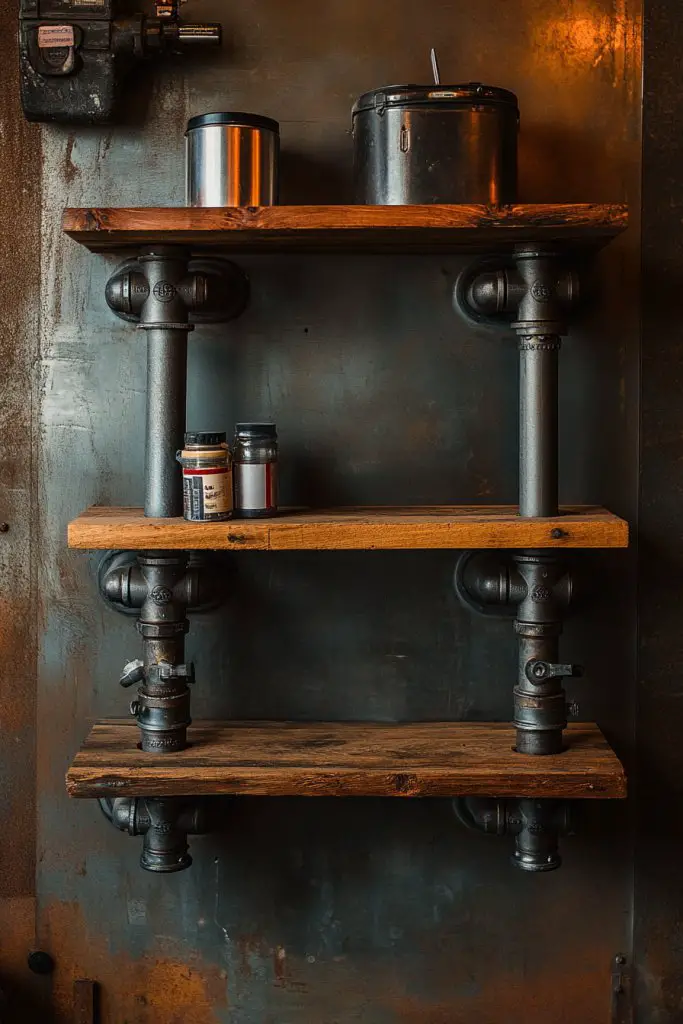
1. Industrial Pipe Shelving with Reclaimed Wood Planks

Ever feel like your workspace is more chaos than productivity? A cluttered workbench can make even the simplest tasks feel overwhelming. You want a solution that combines durability with style, without sacrificing functionality. The idea of rugged, industrial shelving might just be the aesthetic upgrade you need to finally tame the clutter.
Imagine thick black iron pipes mounted securely on the wall, supporting rustic, weathered wood planks. The contrast between shiny metal and warm, textured wood creates an eye-catching feature. Tools and supplies sit neatly organized, their colors popping against the dark pipes and natural grain. The overall look blends modern industrial with vintage charm, turning your workspace into a visually appealing zone.
You can customize the finish, choosing darker or lighter metal pipes or staining the wood for a different vibe. For a more refined look, opt for polished pipes paired with smooth, sanded wood. If space allows, add hooks underneath for hanging tools, or incorporate baskets for small parts. Seasonal accents like fabric wraps or painted brackets can further personalize your setup.
Start by measuring your wall space and selecting pipe diameters that match your load needs. Use flange mounts for secure attachment, and cut reclaimed wood to desired lengths. Assemble the piping framework first, then slide in the wooden planks, securing them with screws from underneath. Finish by adding hooks or brackets for extra storage options. Sand and seal the wood for durability, and you’re good to go. A power drill, level, and measuring tape are essential tools.
Add labels or engraved metal tags for a professional touch. Consider painting the pipes in your favorite color for a pop of personality. Incorporate decorative metal accents or vintage hardware to give it a unique character. You could also stain the wood with a dark walnut or light oak finish to match your overall decor. Small decorative touches make this shelving both functional and fun.
Industrial pipe shelving turns your workspace into a bold, stylish statement. It’s a durable setup that ages beautifully, gaining character over time. Plus, it’s a versatile look that complements many design themes, from rustic to modern. Once installed, you’ll feel proud every time you glance at your organized, chic work area.
2. Floating Open Shelves with Hidden Brackets
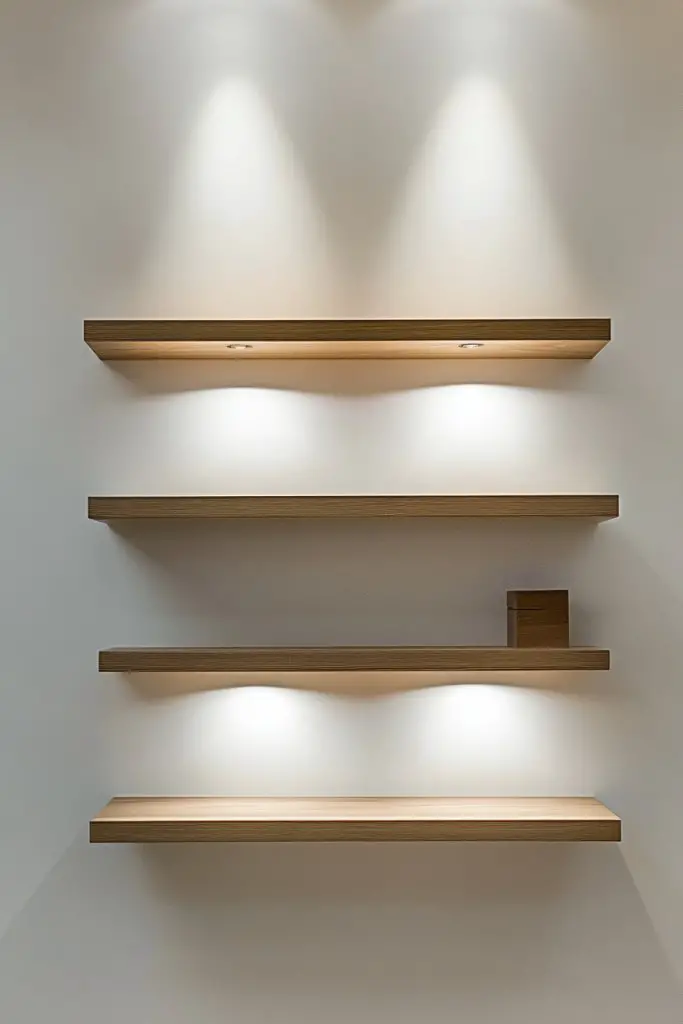
Ever wish your workspace looked sleeker and more clutter-free? Traditional shelves can feel bulky and interrupt clean lines. Floating open shelves are the perfect solution to maximize space and give your workbench a modern, minimalist vibe. Plus, they keep everything within easy reach, without the visual weight of bulky brackets.
Visualize sleek, narrow shelves mounted flush against the wall, with no visible brackets or supports. The finish could be matte black, natural wood, or painted in a bold hue to match your style. The open design allows light to flow freely around your tools and supplies, creating a sense of openness. Small objects, containers, or neatly stacked manuals rest on these shelves, adding function without clutter.
Choose from different materials—light pine for a Scandinavian look, or dark-stained oak for a rich, classic feel. Vary the length and thickness depending on your storage needs. For seasonal variation, swap out items or change the shelf color. To add a touch of elegance, pair open shelves with decorative lighting or subtle wall textures.
Start by determining the wall area and choosing brackets that are concealed inside the shelf or drilled into the wall. Measure carefully to ensure even spacing, then mark the wall with a level for precision. Attach the brackets securely using appropriate anchors, then slide the shelves onto the hidden supports. Seal or paint the shelves beforehand for a finished look. Regular dusting and inspecting the brackets will keep everything sturdy.
Decorate with small potted plants (careful, avoiding restricted content), or add personal items like vintage tools or framed notes on the shelves. Change the arrangement seasonally to keep the space fresh. You could also add LED strip lighting underneath for a glow effect at night. Labels or minimalist tags can organize your supplies without cluttering the look.
Floating shelves give your workspace a sleek, modern upgrade that feels effortless. They’re adaptable to any style, from industrial to contemporary. Once installed, they create a sense of openness and order, boosting your productivity and pride in your organized space. Small details like hidden brackets make a big visual impact.
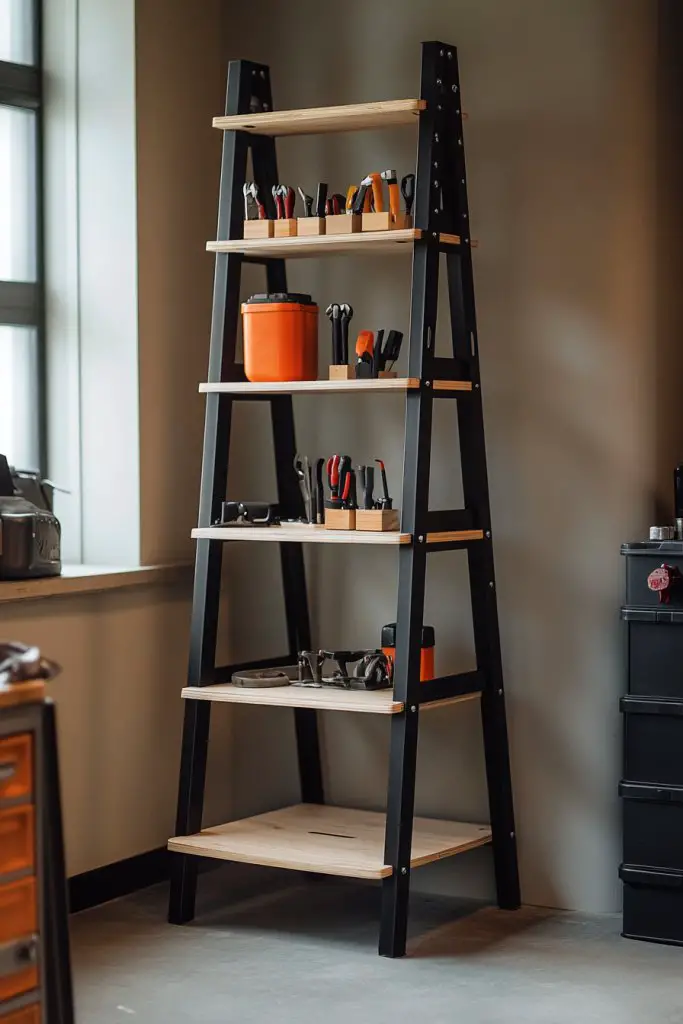
3. Ladder-Style Shelving for Vertical Storage
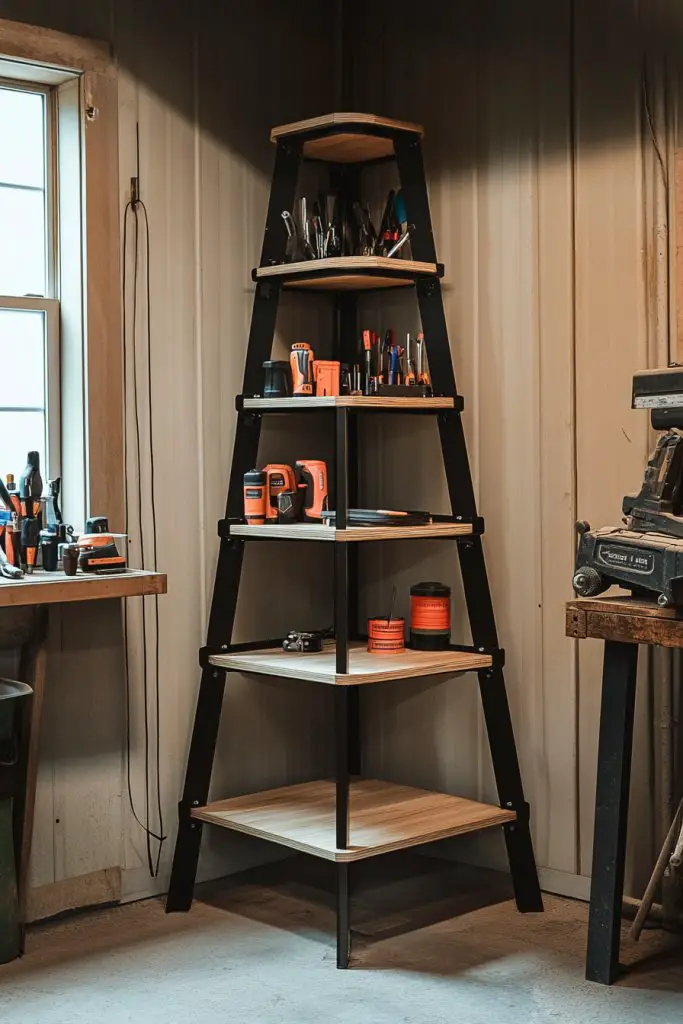
Struggling with limited horizontal space? Traditional shelving takes up valuable floor real estate. Ladder-style shelving offers a smart vertical storage solution that looks great and saves space. It adds visual interest and provides multiple tiers for tools, supplies, or accessories, all while keeping your work area tidy.
Picture a sturdy wooden or metal ladder leaning against the wall, with rungs serving as shelves. Each level can hold bins, jars, or small containers, easily accessible yet organized. The design evokes a casual, industrial vibe, with the ladder’s angle adding a dynamic element. The rungs can be stained or painted to match your decor, creating a bold focal point.
Adjust the height and number of rungs based on your storage needs. For a rustic look, choose reclaimed wood with visible grain. For a sleek modern feel, opt for metal with clean lines. You can also incorporate hooks or hanging rods underneath for additional storage or hanging tools. Seasonal tweaks include adding decorative textiles or changing the color finish.
Select a sturdy ladder made of wood, metal, or a combination. Position it at an angle against the wall, ensuring stability. Secure the top with wall brackets or hooks for extra safety. Use baskets or bins on the rungs for small parts, or attach hooks underneath for hanging tools. To prevent scratches or damage, add rubber caps or pads at the bottom. Keep the ladder leaning securely for safety.
Paint or stain the ladder in your favorite color for a customized look. Add decorative elements like woven baskets or fabric liners in the bins. Hang small tools or accessories from hooks attached to the rungs. You might also incorporate LED lighting along the ladder for a fun, illuminated display. Personal touches make it uniquely yours.
A ladder shelf turns vertical space into a functional art piece. Its flexible design adapts as your needs change, making it a long-term storage solution. It’s easy to add personal flair, creating a workspace that’s both practical and stylish. Once set up, you’ll wonder how you ever managed without it.
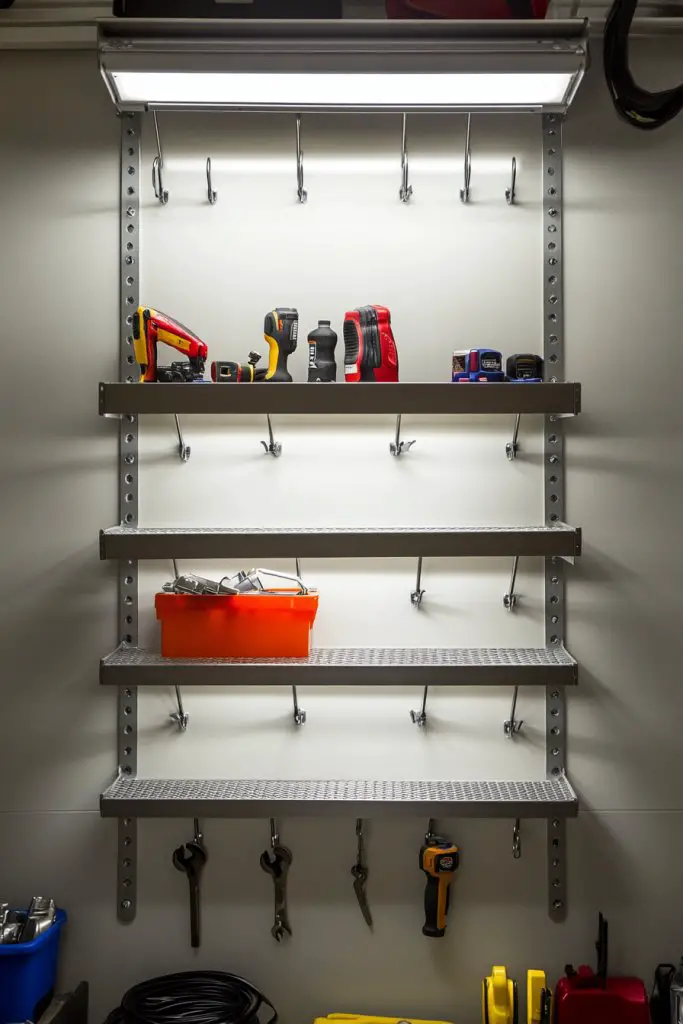
4. Adjustable Pegboard Shelving System
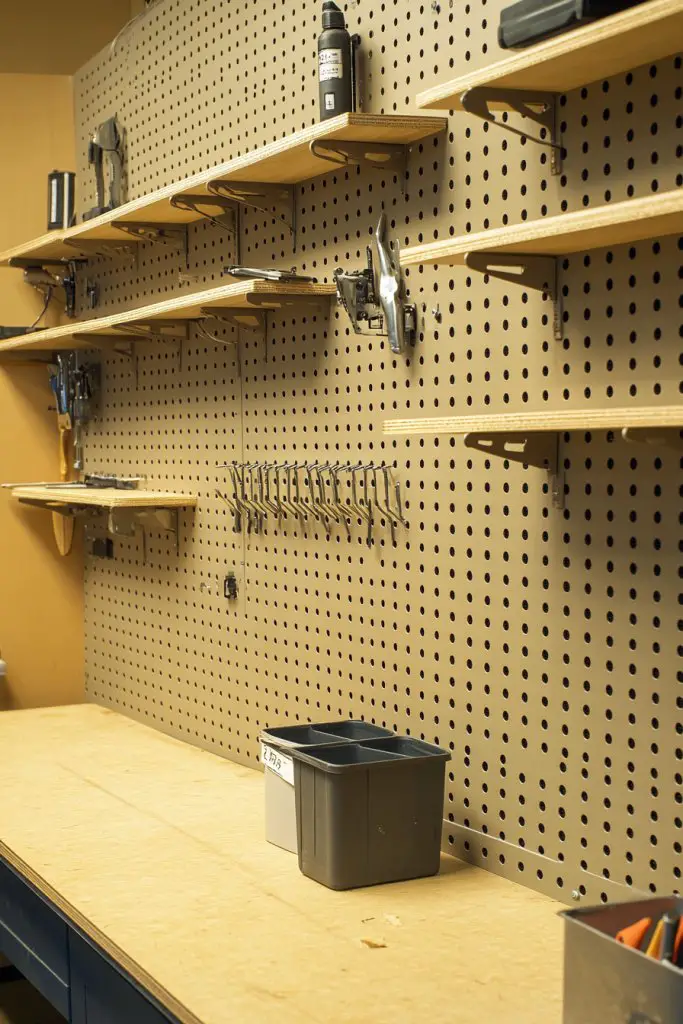
Ever find your storage needs change faster than your favorite playlist? Fixed shelving can become a hassle when you need to reorganize or access different tools. An adjustable pegboard system offers flexibility, letting you customize your setup on the fly. It keeps essentials within reach while adapting to your workflow.
Imagine a wall covered in a grid of evenly spaced holes, with hooks and shelves that can be repositioned anytime. Brightly colored pegs and bins add a playful touch, or go for sleek metal for a more industrial feel. Small tools hang neatly, while larger items sit on adjustable shelves. The entire setup allows for quick reconfiguration, making your workspace dynamic and efficient.
Choose from various pegboard materials—hardboard, metal, or plastic—depending on your environment. Incorporate shelves of different depths for versatile storage. Use color-coded hooks or bins to categorize items, and add accessories like small baskets for tiny hardware. Seasonal adjustments include swapping out hooks or adding decorative elements.
Start by choosing a sturdy pegboard size that fits your wall. Mount it securely using appropriate wall anchors and a level. Arrange hooks, shelves, and accessories in your preferred pattern, then load in your supplies. Add labels or color coding for easy identification. Regularly reconfigure by detaching and repositioning components based on your evolving needs. Keep tools and supplies organized and accessible.
Personalize your system with custom labels, or paint the pegboard in a color that complements your decor. Incorporate decorative elements like small containers or artistic hooks. Arrange items by frequency of use or color palette for aesthetic appeal. Use transparent bins for visibility or add a chalkboard section for notes and reminders. It’s a flexible, personalized system tailored to your style.
An adjustable pegboard system transforms your workspace into a highly functional, adaptable zone. It simplifies reorganizing and keeps everything visible, reducing clutter stress. With a little creativity, you can create a practical display that’s also visually appealing. It’s proof that organization can be both smart and stylish.
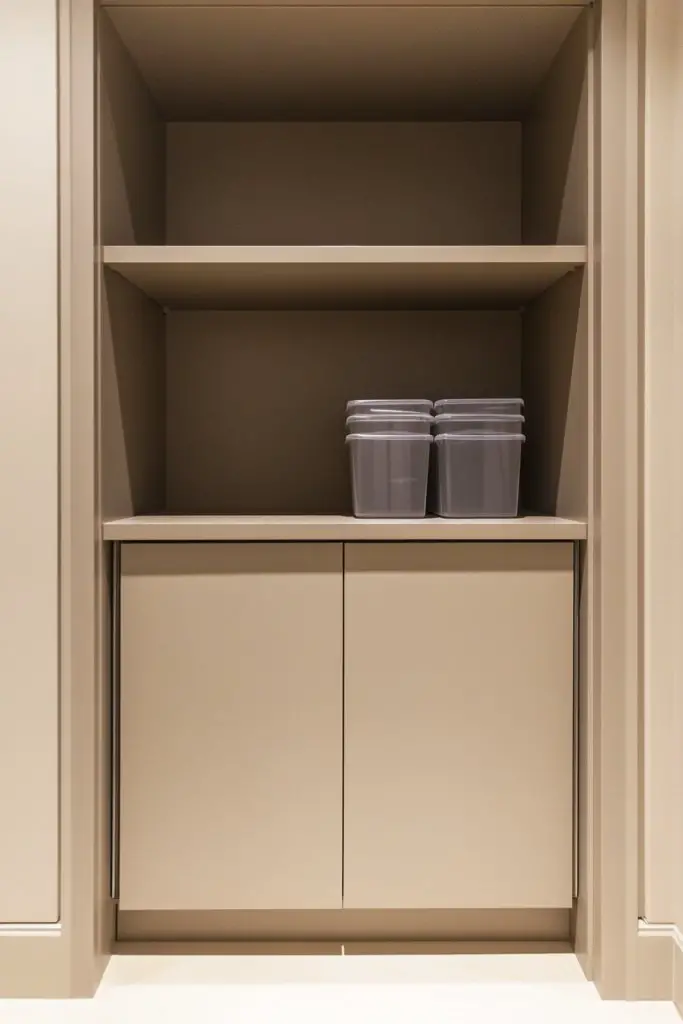
5. Corner Shelving Unit with Open and Closed Storage
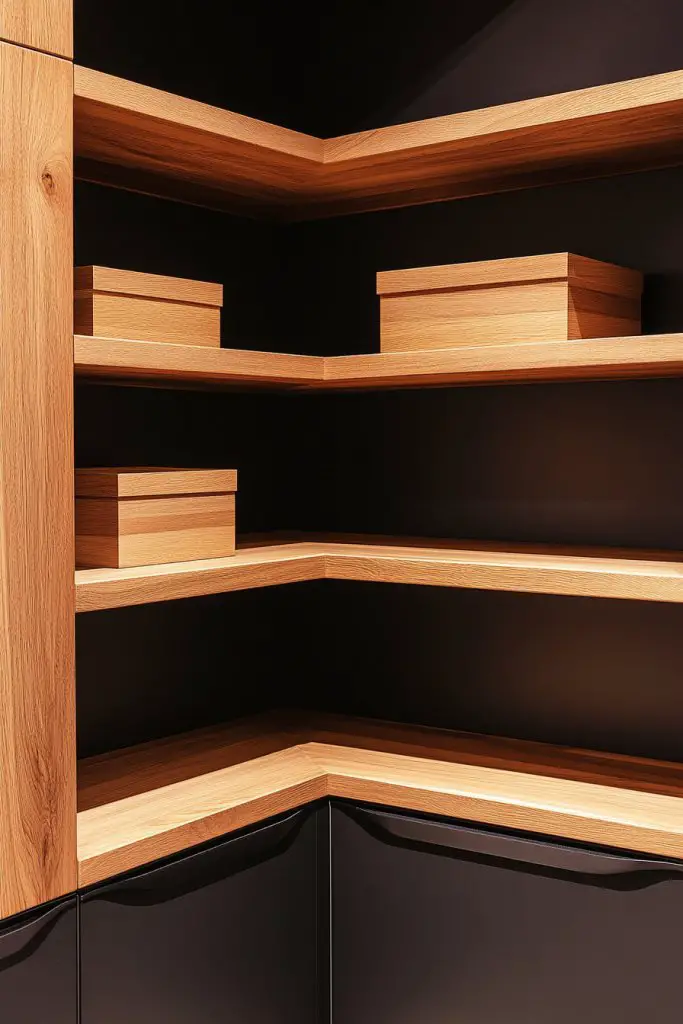
Corners are often wasted space that collect dust and clutter. You want a solution that maximizes every inch while maintaining a clean look. A corner shelving unit with a mix of open and closed compartments offers both accessibility and concealment. It transforms awkward corners into practical storage zones.
Visualize a multi-tiered unit fitting snugly into a corner, with open shelves displaying frequently used tools or supplies. Below, cabinets with doors hide less attractive or less frequently accessed items. The design combines functionality with clean lines, balancing openness and privacy. The finish could be sleek laminate, painted wood, or rustic reclaimed planks, depending on your style.
Adjust the number of shelves and cabinet sizes based on your specific space. Use glass doors for a display effect or solid doors for total concealment. Incorporate decorative hardware or paint the cabinets in bold colors for personality. Seasonal tweaks include changing door accessories or adding decorative trims.
Measure your corner space carefully and choose a shelving unit that fits. Secure the unit to the wall with brackets for safety. Arrange items in open shelves for quick access, reserving closed storage for bulky or less attractive items. Assemble the unit according to manufacturer instructions, then organize your supplies inside. Ensure stability and levelness, and add labels or dividers for better organization.
Customize with decorative hardware or paint for a cohesive look. Use baskets or bins inside open shelves for smaller items. Add seasonal labels or stickers to the cabinet doors for a fun touch. Incorporate LED strip lighting to highlight display items or improve visibility at night.
A corner shelving unit maximizes space and keeps your workspace tidy. It showcases your essentials while hiding clutter behind closed doors. Once in place, it adds a professional, organized vibe to your work area. Confidence in your organization skills will grow with every successful setup.
6. Reclaimed Pallet Shelves for a Rustic Charm
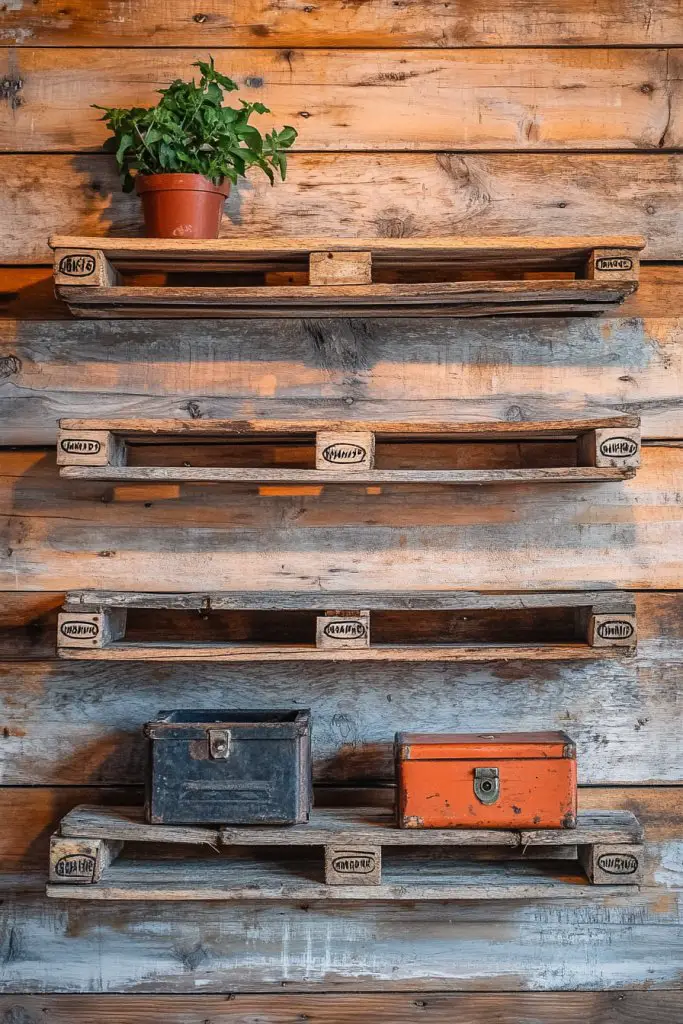
Looking for an eco-friendly way to add warmth to your workspace? Reclaimed pallets offer a budget-friendly, rustic storage solution that’s also good for the planet. They bring character and authenticity, transforming a plain wall into a feature wall of ingenuity.
Picture weathered wooden pallets mounted horizontally or vertically on your wall, with gaps filled with small hardware or tools. The rough texture and imperfect finish evoke a vintage industrial vibe. You can leave the wood natural or stain it darker for a richer look. The result is a cozy, inviting workspace full of history and charm.
Sand and seal the wood for a smoother finish or leave it rough for more rustic appeal. Combine pallets with metal brackets or chains for a more industrial look. Use different sizes and orientations to create a layered effect. Seasonal accents include adding small fabric or leather straps or repainting sections for contrast.
Start by sourcing pallets from local suppliers or your own yard. Clean and sand the wood thoroughly, removing splinters. Cut to size if necessary, then arrange on your wall with brackets or mounting strips. Secure each pallet with long screws, ensuring stability. Style with hooks or small containers attached directly to the wood for additional storage.
Personalize with painted patterns, stencil designs, or stenciled labels. Incorporate decorative hardware like vintage handles or reclaimed metal accents. For extra flair, add small LED fairy lights or fabric drapes. Keep the rustic charm by avoiding over-furnishing—less is more here.
Reclaimed pallet shelves add warmth and history to your workspace while staying eco-conscious. They’re easy to customize and maintain, with a timeless appeal. Once completed, you’ll appreciate the blend of sustainability and style, making your work area uniquely yours.
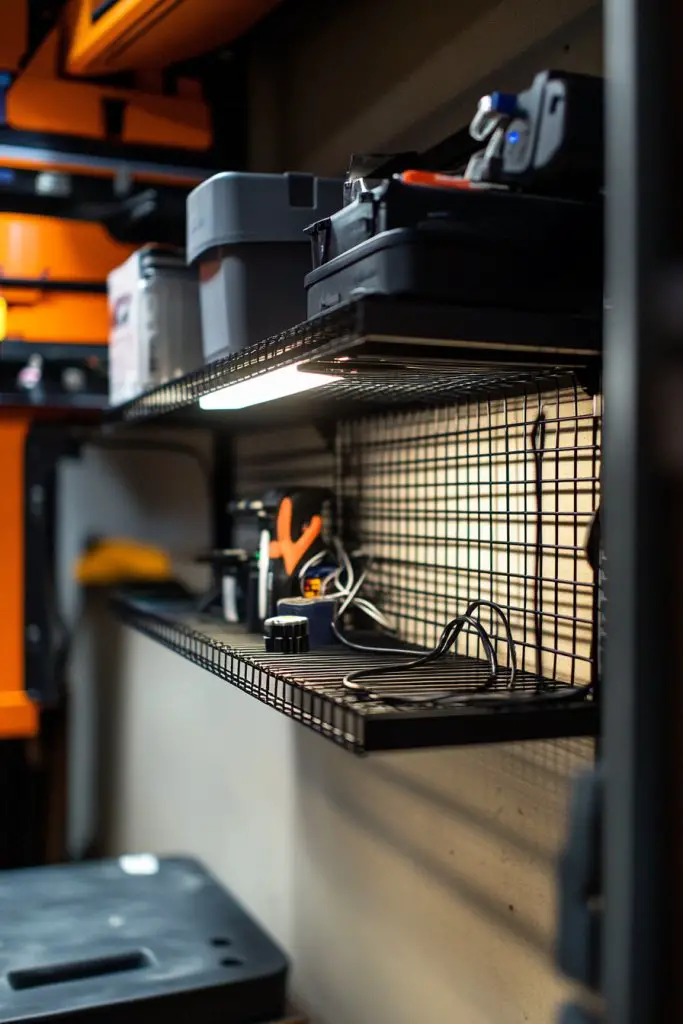
7. Wire Mesh Shelving for Airy, Industrial Style
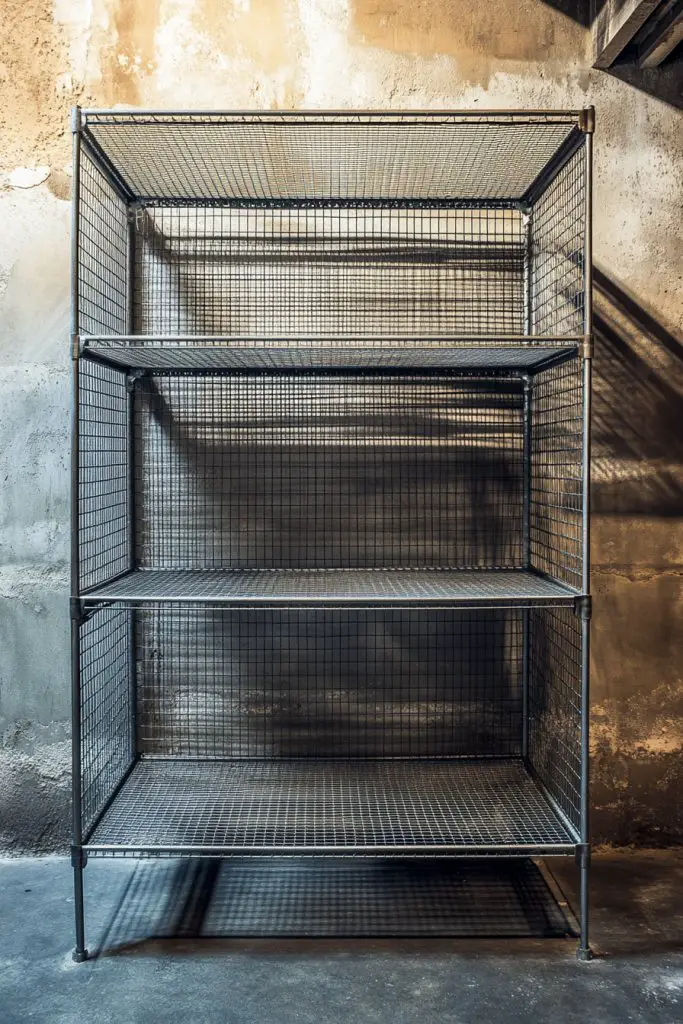
Does your workspace feel cramped or cluttered? Wire mesh shelving offers an airy, open look that keeps essential tools visible and accessible. It embodies industrial design while providing sturdy support for small parts and supplies. Plus, it’s a cool way to add texture to your workspace.
Imagine black metal wire mesh shelves mounted on a wall, allowing light and air to pass through. Items like small containers, jars, or neatly stacked towels sit comfortably on the grid. The open structure prevents dust buildup and makes everything easy to find. It’s a minimalist yet highly functional display, perfect for busy workshops.
Choose different sizes and configurations—single shelves, multiple tiers, or corner units. Paint or powder-coat the metal in colors matching your theme. Add hooks or baskets for organization, or incorporate LED lighting underneath for a modern touch. Seasonal updates can include swapping out small containers or adding decorative elements.
Select heavy-duty wire mesh panels and secure them to wall studs with brackets. Use appropriate anchors for durability. Attach shelves using metal clips or screws designed for wire grids. Arrange your supplies on the shelves, ensuring weight distribution is balanced. Regularly check for stability and tighten fasteners as needed. Use labels or color coding for easy identification.
Add small decorative items like vintage hardware or painted accents to the metal framework. Incorporate clear plastic or metal bins for organizing tiny hardware. Consider adding a chalkboard section on the wall for notes. For a softer look, layer textiles or add a few vintage-inspired accessories nearby.
Wire mesh shelving brings a sleek, industrial edge to your workspace. Its open design makes everything easy to see and access, boosting efficiency. With minimal maintenance, it remains a stylish yet practical choice. Once installed, it inspires pride in your organized, modern workspace.
8. Modular Cubic Shelving Units for Flexibility
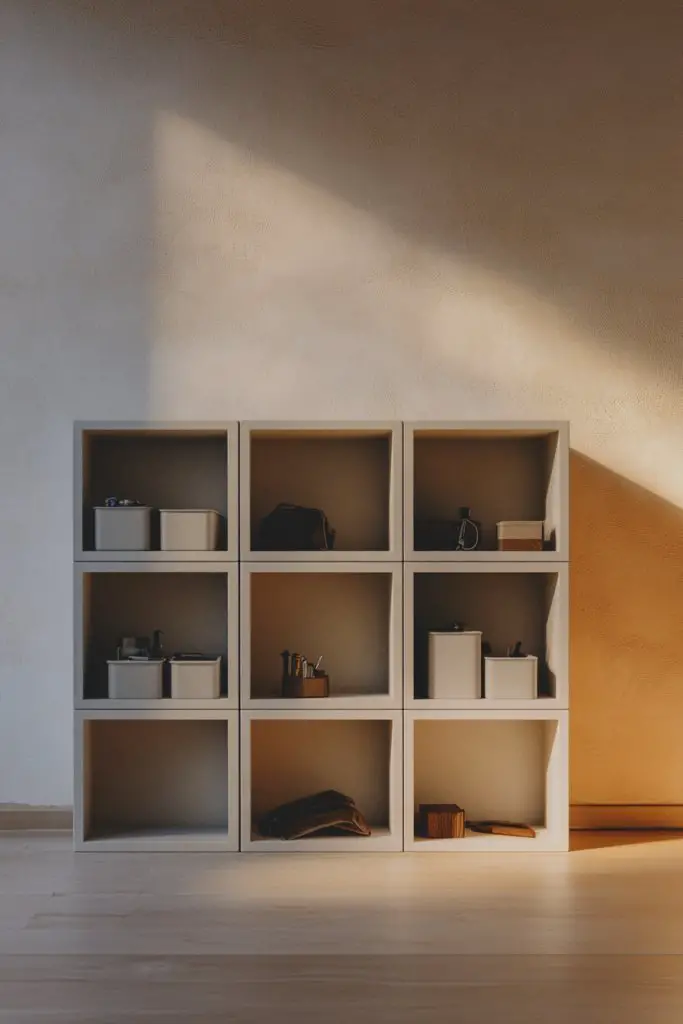
Are your storage needs constantly changing? Fixed shelves can feel limiting and frustrating. Modular cubic shelving offers a customizable solution that adapts to your evolving workspace. It allows you to stack, arrange, and reconfigure with ease, making organization effortless.
Picture cube-shaped units made of wood or metal, stacked in different configurations against the wall or on the floor. Open cubes can hold bins, tools, or decorative items, while closed ones hide clutter. The modular design allows for creative layouts—stack vertically, side-by-side, or even in a grid pattern. The clean geometric lines add a modern, playful vibe.
Select materials that match your decor, from sleek laminate to rustic reclaimed wood. Combine different sizes and colors for a vibrant look or stick to a monochrome palette for sophistication. Use removable shelves or baskets within the cubes for added versatility. Seasonal adjustments include swapping out accessories or rearranging modules for a fresh look.
Start by planning your layout and measuring available space. Assemble the cubes using screws or connectors, ensuring stability if stacking vertically. Place the units in your desired configuration, then add storage bins or decorative elements. Secure the entire setup to the wall for safety if stacking multiple units. Organize supplies by frequency of use or category, keeping everything accessible.
Paint or stain the cubes to match your color scheme. Add labels, decals, or stickers for easy identification. Incorporate decorative elements like string lights or fabric liners inside the cubes. Mix and match different materials or textures to create visual interest. Personal touches turn a simple modular system into a statement piece.
Modular cubic shelving unlocks endless possibilities for your workspace layout. It’s adaptable, scalable, and easy to update as your needs evolve. Once set up, it creates a balanced, organized environment that inspires productivity and pride. Flexibility is the key to a workspace that truly works for you.
9. Slatted Wooden Shelves with Metal Brackets
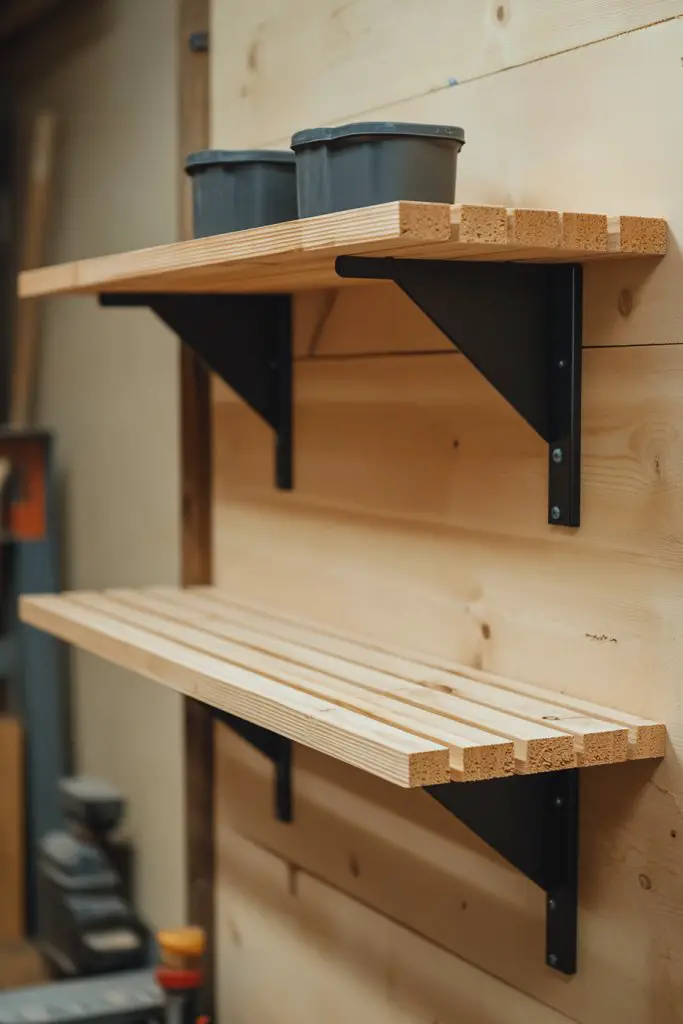
Tired of boring, heavy shelves that weigh down your workspace? Slatted wooden shelves with metal brackets combine a sleek, airy look with sturdy support. They add a touch of modern rustic charm while keeping your tools and supplies organized. Plus, they’re surprisingly easy to install.
Visualize long, narrow wooden planks with evenly spaced slats, mounted on industrial-style metal brackets. The slats let light pass through, preventing a bulky appearance. The combination of natural wood grain and matte black or galvanized brackets creates a balanced, contemporary aesthetic. Small containers or tools rest on the slats, with open spacing making everything easy to see.
Opt for different wood finishes—light oak for a Scandinavian vibe or dark walnut for richness. Adjust the length and number of slats to fit your space and storage needs. For a more industrial look, choose raw, unfinished wood paired with black metal brackets. Seasonal tweaks include changing the stain or adding decorative accents like painted patterns.
Measure the wall space and cut the wooden planks accordingly. Attach the metal brackets securely to wall studs or drywall anchors, ensuring they are level. Place the wooden shelves onto the brackets, then secure with screws if necessary. Style with small containers, or leave open for larger tools. Regularly inspect for stability and tighten fasteners when needed. Use a level and drill for precise installation.
Add custom labels or stencil patterns to the wood for a personalized touch. Incorporate decorative hardware or paint the brackets in contrasting colors. Use liners or small baskets on the slats for organizing tiny items. You can also stain or paint the wood to match seasonal themes or your overall decor.
Slatted wooden shelves with metal brackets marry function with style effortlessly. They elevate your workspace’s look while providing practical storage. Once installed, they encourage a sense of order and craftsmanship. The simple design offers timeless appeal that adapts to any aesthetic.
10. Under-Workbench Shelving with Clear Storage Bins
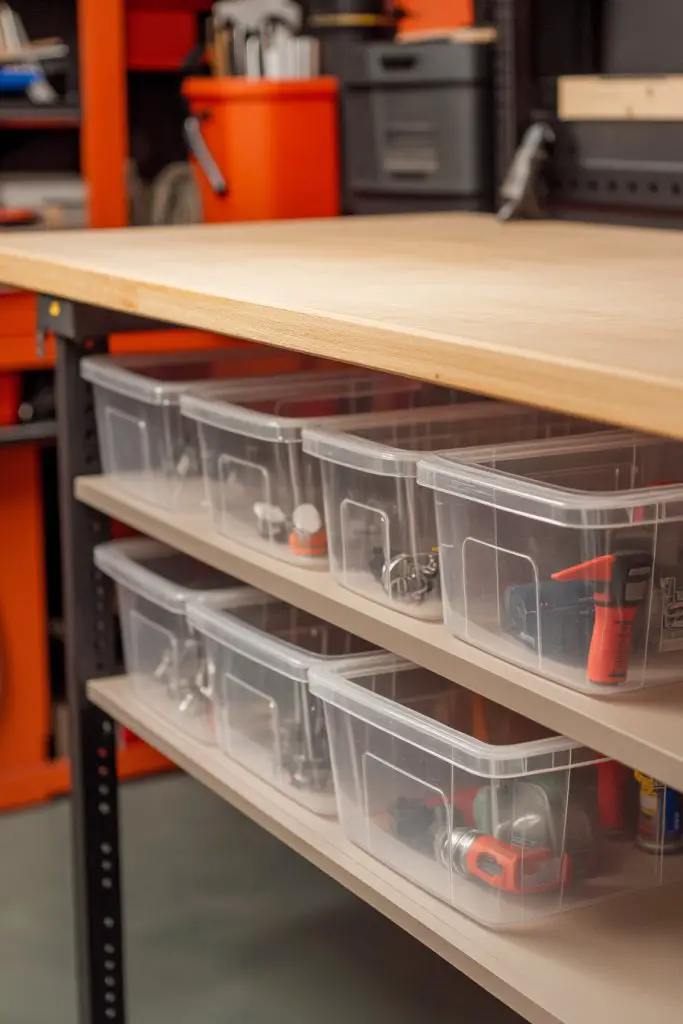
Does the space beneath your workbench feel like a black hole of clutter? Clear storage bins are the perfect way to organize and easily identify what’s inside. They keep your workspace tidy and make retrieval quick. Plus, they maximize every inch of space without sacrificing accessibility.
Picture a sturdy workbench with a series of transparent bins neatly stacked underneath. Each bin is labeled clearly, revealing contents at a glance. The uniform size and shape create a clean, organized appearance. When you open the bins, you see everything from screws and nails to small power tools, all within arm’s reach, making your workflow seamless.
Choose different sizes of bins depending on the items stored. Stackable, transparent containers work best for small parts, while larger or deeper bins suit bulkier items. Use color-coded labels for quick identification or add custom decals. Seasonal changes can involve swapping out labels or reorganizing contents for efficiency.
Install adjustable shelving brackets or a slat system beneath the workbench. Arrange the clear bins in a logical order, grouping similar items together. Label each bin with a marker or label maker for easy recognition. Regularly review and refresh the contents to maintain order. Periodically check for bin stability and replace any damaged containers.
Personalize with color-coded labels or decorative tags. Use different colored bins to categorize supplies by project or frequency of use. Add a small dry-erase board or chalkboard on the side for quick notes or inventory counts. Incorporate a small step stool or mat to make accessing the bins easier.
Under-workbench storage with clear bins transforms a cluttered mess into a well-oiled organization system. It boosts confidence by showing how simple tweaks can create order. Once everything has a designated place, your workspace becomes more inviting and efficient. It’s a small change with big results.
11. Recessed Shelf Niche in the Workbench Wall
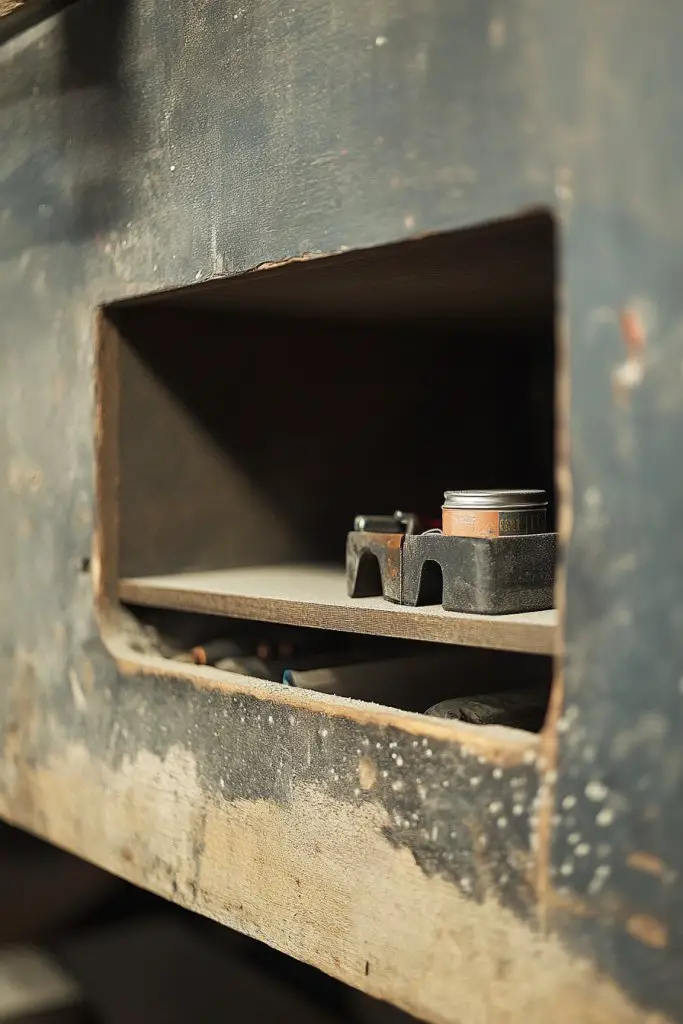
Ever wish small tools and accessories could be stored out of sight but still within easy reach? Recessed shelf niches are the perfect solution. They carve out a dedicated space in your workbench wall, keeping clutter hidden and your workspace sleek. A tidy workbench enhances focus and reduces frustration.
Imagine a neatly carved rectangular cavity within your workbench wall, finished with smooth edges. Inside, small tools, screwdrivers, or tape measures sit on a built-in shelf, easily accessible. The recessed design keeps items flush with the surface, avoiding protrusions that could snag or clutter the space. The overall look is clean and integrated, almost like a custom-built-in feature.
Choose the size and depth of the niche based on your most-used tools. Finish the inside with durable paint or sealant for easy cleaning. Use modular containers or small trays inside for better organization. It can be placed at varying heights to suit your reach and project needs. Seasonal or project-based variations include changing tray layouts or adding removable dividers.
Mark out the dimensions of the recess on your workbench wall, then carefully cut with a saw or router. Smooth the edges and seal the cut edges with paint or sealant to prevent splinters. Install a small shelf or ledge inside the niche for support. Organize your tools or accessories inside, using small containers if needed. Regularly inspect for stability and finish touch-ups.
Add labels or color-coded trays to quickly identify contents. Incorporate a small magnetic strip or hooks within the niche for additional storage. Decorate the face of the recess with paint or a stencil pattern to match your workspace theme. Seasonal changes can involve swapping trays or adjusting layout for new projects.
A recessed shelf niche creates a seamless, clutter-free work surface. It highlights your organizational skills and adds a custom touch to your workbench. Once functional, it becomes a reliable spot for your go-to tools, boosting efficiency and confidence. Small details like this elevate your entire workspace.
12. Sliding Shelving Units for Hidden Storage
Are your workbench drawers cluttered, making it hard to find what you need? Sliding shelving units behind cabinet doors offer a sleek, hidden storage solution. They keep your workspace tidy while concealing items that don’t need to be on display. This setup enhances both organization and aesthetics.
Envision a set of smooth-gliding shelves tucked behind a closed cabinet door. When opened, the shelves slide out like drawers, revealing neatly arranged tools and supplies. The design keeps everything out of sight but easily accessible. The clean lines and concealed storage make your workspace look contemporary and uncluttered.
Choose from various materials—wood, metal, or laminate—based on your style. Use adjustable or fixed shelves depending on your storage needs. Incorporate soft-close mechanisms for smooth operation. You can also add labels or color coding for quick identification. Seasonal updates might include reorganizing the stored items or swapping out shelf liners.
Install sturdy sliding tracks or rails inside your workbench cabinet. Attach shelves securely to the slides, ensuring smooth operation. Organize tools or parts on the sliding shelves, grouping similar items for efficiency. Test the mechanism for smoothness and safety, then load the shelves with your supplies. Regular maintenance includes cleaning the tracks and checking for wear.
Add labels or small tags to identify contents at a glance. Incorporate decorative handles or custom finishes for a personalized touch. Use foam inserts or liners inside the shelves for delicate or small items. Seasonal reconfigurations include changing shelf arrangements or adding new organizational accessories.
Sliding shelving units maximize hidden storage while maintaining a sleek appearance. They boost confidence in your ability to hide clutter and keep your workspace looking professional. Once installed, they make retrieving supplies effortless and efficient. It’s a smart upgrade for any serious DIYer or professional.
13. Slender Wall-Mounted Wire Shelves for Light Items
Is your workspace feeling overcrowded with lightweight tools and cords? Slim wall-mounted wire shelves are a perfect way to add extra storage without bulk. They keep your essentials accessible and organized, reducing clutter and improving workflow. Plus, their minimalist look complements modern workspaces.
Visualize narrow, metal wire shelves mounted in a row along your wall, holding light items like tapes, cords, or small containers. The open grid design prevents dust buildup and allows visibility of all stored items. Light reflects through the wire, giving the space an airy, uncluttered feel. Items rest securely on the wire, with hooks for hanging accessories.
Choose from various lengths and depths to fit your space and needs. Powder-coated or painted finishes add color or match your existing decor. Install multiple rows at different heights for layered storage. Seasonal adjustments include swapping out small containers or adding decorative touches like colored zip ties or tags.
Secure the brackets to wall studs or anchors, ensuring stability for light loads. Attach the wire shelves to the brackets, then organize lightweight items like tapes, cords, or small hardware containers. Regularly dust and check the fasteners for tightness. Use labels or color coding to streamline your workflow. Keep frequently used items within easy reach.
Decorate with custom labels or color-coded tags. Add small hooks or clips for hanging tools or cords. Incorporate decorative paint or coating on the brackets for a personalized look. Use transparent or colored bins to organize small items, keeping the space visually appealing. Seasonal reorganization keeps the setup fresh.
Wall-mounted wire shelves are a practical, stylish way to store light essentials. They make your workspace look organized and modern while remaining unobtrusive. Easy to install and maintain, they help you feel more in control of your clutter. It’s a small upgrade with a big impact on your productivity.
14. Multi-Tiered Hanging Shelves with Hooks
Too many small tools and accessories clutter your work surface? Multi-tiered hanging shelves with hooks are the perfect way to keep everything off your workbench and within arm’s reach. They add vertical storage, freeing up valuable space while keeping your essentials organized. It’s an easy fix for a more efficient workspace.
Visualize a sturdy board mounted beneath your workbench, with multiple tiers of small shelves and hooks hanging from it. The shelves hold containers or small boxes, while hooks display tools, cords, or spatulas in a tidy fashion. The setup creates a layered, organized look, making use of vertical space without crowding the work surface. Brightly colored hooks or shelves add a pop of personality.
Choose different materials—wood, metal, or plastic—based on your aesthetic. Adjust the number of tiers and hook lengths depending on your needs. Incorporate decorative elements like painted or stained shelves. Seasonal changes include swapping out containers or changing hook positions to accommodate different tools or projects.
Mount a sturdy horizontal board securely to wall studs using appropriate anchors. Attach multiple tiers of small shelves or platforms with brackets or cleats. Install hooks underneath or on the sides for hanging tools or cords. Organize items by size and frequency of use, keeping the most-used tools within quick reach. Regularly check for stability and reconfigure as needed.
Personalize with labels, stickers, or painted accents on the shelves. Add decorative hooks or knobs to match your style. Incorporate small containers or baskets for tiny hardware. Seasonal reorganization might involve adding new hooks or swapping out containers for different projects. Make it uniquely yours.
Multi-tiered hanging shelves turn vertical space into a practical storage zone. They keep your tools visible and accessible, boosting your efficiency. The setup is versatile and easy to update, encouraging ongoing organization. Once in place, you’ll enjoy a workspace that looks good and functions even better.
15. Mason Jar Shelves for Small Part Storage
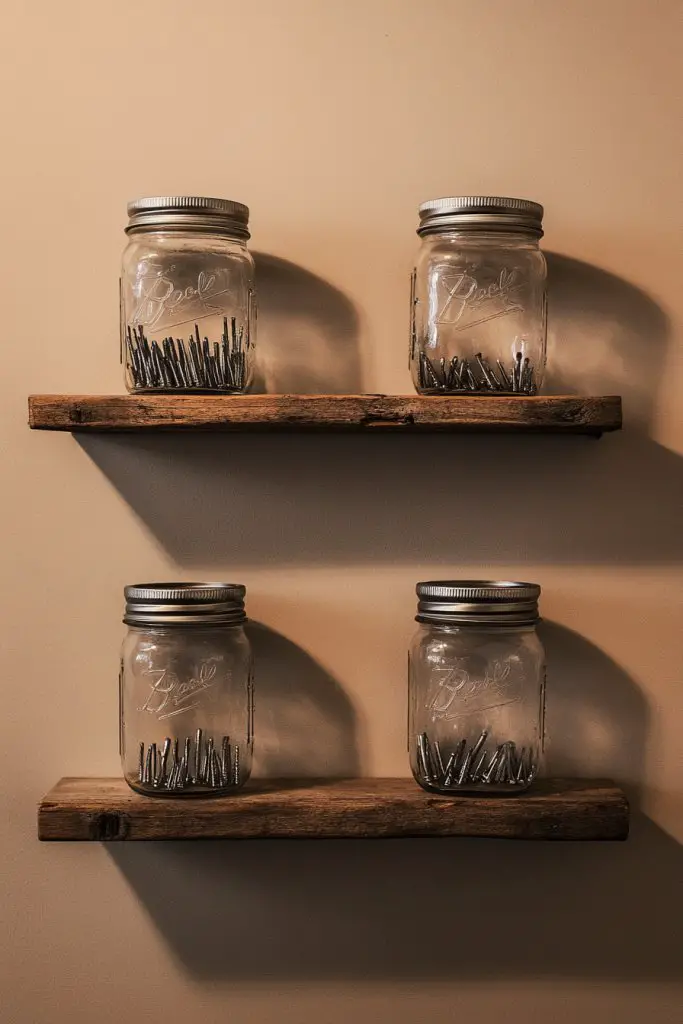
Struggling to keep tiny hardware organized? Mason jar shelves offer a charming and functional way to store nails, screws, and other small bits. They bring a vintage touch to your workspace while making everything easy to see and access. It’s a simple, cost-effective upgrade that keeps clutter at bay.
Picture a sturdy wooden or metal shelf mounted on your wall, with evenly spaced hooks or brackets holding several glass mason jars. Each jar is filled with specific hardware—brads, washers, or tiny nuts—labeled clearly. The transparent containers showcase their contents, reducing search time. The rustic look adds warmth and personality to your work area.
Choose clear or tinted mason jars for different visual effects. Use different sizes to accommodate various hardware types. Attach jars with metal rings or mount them on a wooden board for extra stability. Decorate the lids or jars with painted patterns or labels. Seasonal updates include changing labels or re-filling jars with new hardware.
Install a wooden or metal strip on the wall, then attach mason jars with metal rings or custom mounts. Ensure each jar is secure and accessible. Label each jar with a marker or printable label for quick identification. Keep frequently used hardware at the front for convenience. Periodically clean and refill jars to maintain organization.
Decorate the jars with painted lids or personalized labels. Add small decorative elements like fabric covers or stickers. Incorporate matching labels or color schemes to organize by project or hardware type. Keep the setup clean by periodically removing dust or residue. Seasonal changes might include swapping out hardware or labels.
Mason jar shelving turns a small hardware corner into a charming, organized display. It’s both practical and decorative, inspiring pride in your craft space. It simplifies finding tiny parts, saving you time and frustration. Once set up, it’s a delightful reminder that organization can be both cute and functional.
16. Reclaimed Metal Pipe Shelves with Wooden Tops
Want a stylish, eco-friendly way to display your supplies? Reclaimed metal pipes paired with wooden tops create a sturdy, sustainable shelving option. They add an industrial charm and highlight your commitment to repurposing. Plus, they’re incredibly versatile for any workspace.
Imagine thick black metal pipes supporting rough-hewn wooden planks, creating open shelves with a raw, authentic vibe. The combination of aged metal and reclaimed wood exudes character, making your workspace stand out. Items like tools or small hardware sit comfortably on these sturdy surfaces, adding texture and depth. The finish could be natural or stained for a richer look.
Choose different pipe diameters for a bold or subtle statement. Stain or seal the wood to match your decor, from rustic to modern. Use pipe fittings creatively—curved, straight, or with decorative flanges—to customize the look. Seasonal modifications include changing the wood stain or adding decorative metal accents.
Source reclaimed pipes and wood, then sand the wood for smoothness. Cut the wood to desired lengths, and assemble the pipe supports securely to the wall using flange fittings. Place the wooden tops onto the pipes, fastening with screws or brackets for extra stability. Style with labeled containers or small baskets. Regularly check fittings for tightness and stability.
Add decorative touches like engraved or painted details on the wood. Incorporate different finishes—light or dark stains—to suit your aesthetic. Use vintage hardware or custom fittings for a unique look. Seasonal updates could involve changing the stain or adding decorative metal accents like tags or plaques.
Reclaimed metal pipe shelving combines sustainability with style, creating a workspace with attitude. It’s durable, customizable, and ages beautifully, gaining character over time. Once installed, it boosts confidence that your space reflects your personality and values. A true statement piece that’s as practical as it is beautiful.
17. Ladder Shelf with Multiple Adjustable Levels
Need versatile storage that adapts as your projects evolve? A ladder shelf with adjustable rungs offers flexible organization for tools, supplies, or equipment. It’s a dynamic solution that grows with your needs while adding visual interest. Who says functional storage can’t be stylish?
Picture a leaning wooden ladder with rungs that can be moved or swapped out easily. Each level holds containers, tools, or decorative elements, with the ladder’s angle adding a casual charm. The adjustable design means you can change the heights or add new rungs as needed. It’s a practical yet eye-catching feature that transforms your workspace.
Use different wood finishes—natural, stained, or painted—to match your decor. Metal rungs can be adjustable or fixed, depending on your preference. Incorporate hooks or clips underneath for hanging tools. Seasonal tweaks include changing the arrangement or adding decorative fabrics or labels. The ladder’s height can also be customized for space constraints.
Select a sturdy leaning ladder, ensuring it’s stable and secure. Attach or slide adjustable rungs or shelves onto the ladder, securing with screws or brackets. Position the ladder at a comfortable angle against the wall, and anchor it if necessary. Organize your tools and supplies on each level, grouping similar items. Regularly inspect for stability and adjust as your collection grows.
Paint or stain the ladder to match your style. Add decorative tags or labels to organize items visually. Incorporate small baskets or containers to hold tiny parts or accessories. Seasonal decorations, like fabric wraps or fairy lights, can also personalize the look. It’s a flexible setup that invites creativity.
A ladder shelf with adjustable levels offers a customizable, charming workspace. It encourages ongoing reorganization as you acquire new tools or supplies. Its adaptable nature makes it a long-term, stylish storage solution. Once in place, it fosters confidence in your ability to create a functional, attractive environment.
18. Floating Box Shelves with Drop-Front Doors
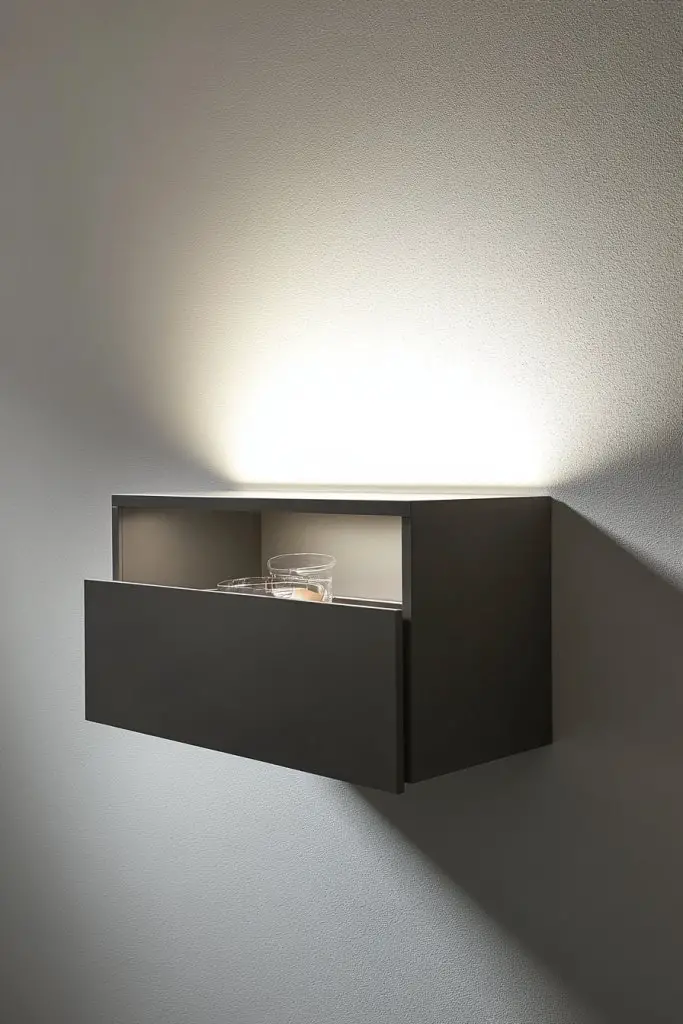
Are you tired of visual clutter but need to store sensitive or delicate items? Floating box shelves with drop-front doors combine sleek design with hidden storage. They protect your supplies from dust and damage while maintaining a minimalist aesthetic. It’s the perfect way to keep your workspace looking tidy and professional.
Imagine a series of rectangular, box-shaped shelves mounted flush against the wall, with hinged doors that drop down when opened. Inside, neatly organized tools or hardware are out of sight when closed. The clean lines and concealed compartments create a modern, uncluttered look, making your workspace appear sleek and sophisticated. The finish can be painted, stained, or left raw for a rustic touch.
Choose different sizes and depths for the boxes based on your storage needs. Use contrasting colors or finishes for visual interest. Incorporate soft-close hinges for smooth operation. Add labels or custom decals to the doors for easy identification. Seasonal updates include swapping out hardware or changing the door color.
Measure your wall space and install sturdy mounting brackets or cleats. Attach the boxes securely, ensuring they’re level and stable. Inside, organize items using small containers or dividers. When opening, drop the doors gently and access your supplies. Regularly inspect hinges and fasteners for wear. Keep the system clean and well-maintained for longevity.
Decorate the doors with personalized decals, paint, or stencils. Add labels or tags to inside compartments for efficiency. Incorporate decorative hardware or handles that match your style. Seasonal accents like fabric liners or themed paint can refresh the look. Personal touches make it uniquely yours.
Floating box shelves with drop-front doors elevate your workspace’s style while hiding clutter. They foster a sense of order and professionalism. Once installed, they simplify organization and access, boosting your confidence. It’s a smart, stylish upgrade for any workspace.
19. Colorful Painted Shelves for Visual Pop
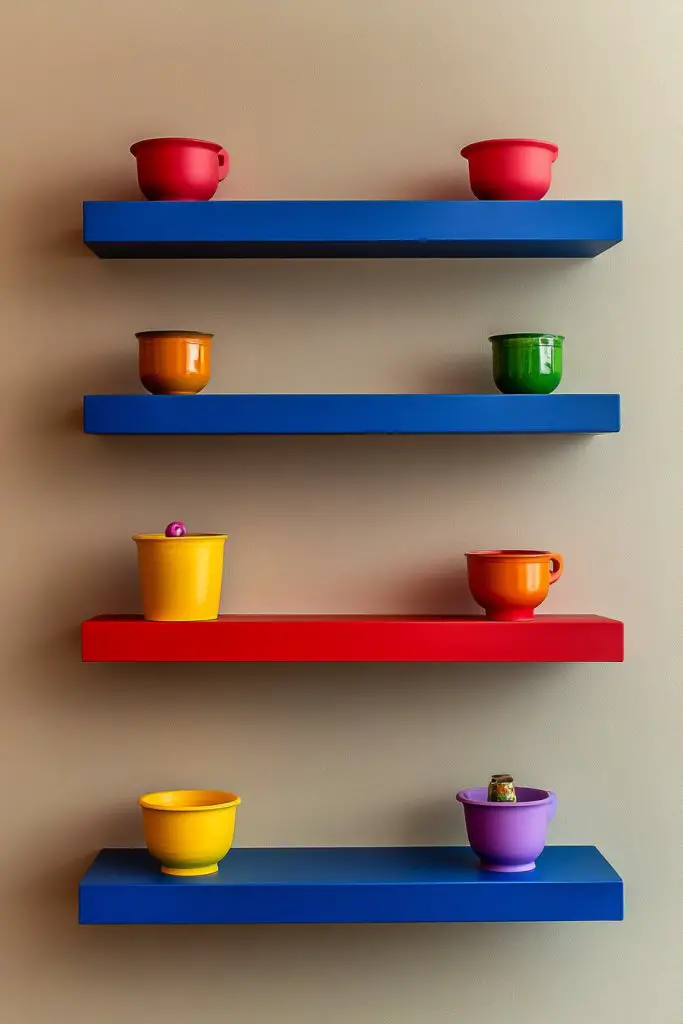
Feeling your workspace lacks personality? Colorful painted shelves instantly add vibrancy and character, making your work area more inviting. Bright hues can energize your mood and inspire creativity. It’s an easy, impactful way to turn a plain space into a lively hub of productivity.
Picture shelves painted in bold reds, cheerful yellows, or calming pastels, mounted against a neutral wall. The colors pop and draw attention to your organized supplies. Items like jars, boxes, and tools sit neatly on these painted surfaces, creating a cheerful, cohesive look. The vivid colors transform the workspace into a personal statement piece.
Use different colors for each shelf or stick to a monochrome palette for sophistication. Incorporate patterns or gradients for a more artistic effect. Seasonal updates can include changing colors or adding decorative decals. Pair with complementary wall colors or neutral tones for balance. The key is to choose hues that motivate and suit your style.
Sand and prime the shelves before painting to ensure a smooth finish. Use quality paint suitable for your material—latex, chalk paint, or spray paint. Apply multiple coats for vibrant, even coverage. Mount the shelves securely, and consider sealing the paint with a clear protective coat. Style with colorful containers or accessories to match your palette. Regular touch-ups keep them fresh.
Add decorative decals, stenciled patterns, or painted labels for extra flair. Incorporate themed color schemes for holidays or special projects. Use painted or contrasting brackets for added visual interest. Personalize with stickers or hand-drawn designs that reflect your personality. Seasonal refreshes can keep your workspace lively and inspiring.
Colorful shelves make your workspace a reflection of your personality, boosting your mood and motivation. They turn organization into an art form, showing that functionality can be fun. Once in place, these vibrant touches can transform your entire workspace environment, making it a place you love to be. Brighten your day with a splash of color!
Conclusion
From sleek wall-mounted racks to multi-tiered storage solutions, these workbench shelving ideas cover a wide range of styles and functions. Incorporate one or more into your workspace and experience the difference organized space can make. Don’t hesitate—try these ideas and turn your work area into a functional, inspiring environment. Your perfect workspace is just an idea away!